Transcripts
1. Introduction: Social media has become an important place for
creatives to show their work. But we've all
experienced how tricky it can be to make
people stop scrolling. So what is it that turns a quick glance into
real interest? The answer is simple. Motion.
Whenever something moves, our brain pays attention. That's why social
media has shifted from static imagery
to short form videos, but that does not mean you
suddenly have to start creating complex
animations or full videos. With procreate dreams, we can add simple eye
catching movement to our artwork that fits our personal style
and stays manageable. And that's exactly what
this class is about. Hi. I'm Jutta, an artist and
educator based in Germany. I have been teaching creative
classes since many years, and I've worked with thousands of students around the world. In this class, we'll focus on
enhancing static photos or illustration with small intentional animations
using procreate dreams. From wriggly lines and moving elements to simple transitions, I'll show you
practical techniques you can easily apply
to your own artwork. There's no animation experience
required to follow along. Just grab your iPad, your Apple pencil, and
open Procreate Dreams. And then I'll see you in class.
2. About This Class: This class is structured
in three parts. First, we'll build
a solid foundation by getting familiar with the Procreate Dreams interface and the basics of animation. You'll learn what
animation actually is and how the three animation
methods frame by frame, keyframing and perform
work in Procreate Dreams. In the second part, we'll get hands on and start animating. We'll take a static photo and add small playful movements to make it more engaging without turning it into a complex
animation project. In the final part of this class, we'll look at transitions. You'll learn different
ways to connect illustrations or
photos using masks, motion and opacity
and how to reuse these transitions as simple templates for
future projects. I'll also show you a few
examples from my own work just to give you some ideas of what's possible in
Procreate Dreams. By the end of this class, you'll have a short
animated clip and a clear understanding of how you can use Procreate Dreams to add motion to your
social media content. So are you ready? Then
let's get started.
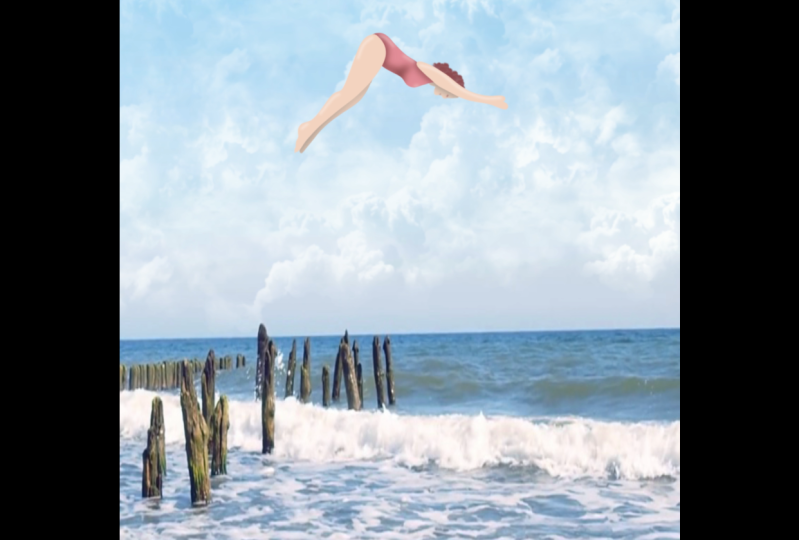
3. Class Project: For the class project, we'll take a single image. This can be a photo,
an illustration, or even a very simple
sketch and turn it into a short animated clip that
works well for social media. I am using a photo of myself, which I lifted from
the background in the photo app and
saved as a new photo. Can do the same or pick
any other item you like. The goal here is not to create a complex animation
or a full scene. Instead, we'll focus on adding small intentional movements
that make an image feel more alive and
interesting for your audience. We'll work step by step, starting with the background, then adding a few simple
animated elements, and finally finishing everything
off with some movements. Your project can be as simple
or as playful as you like. A small wiggle, a
gentle movement, or a color change can already
make a big difference. By the end of this class, you'll have a short
animated clip or gift that you can upload as your class project and
easily share on social media. Don't worry about getting
everything perfect. This project is
about experimenting, getting comfortable
with Procreate dreams, and seeing how a few simple
animation techniques can elevate your work. So let's get started and build this together
in the next lessons.
4. Procreate Dreams Interface 101: Welcome back. So in this video, I'll give you a
guided walk through of the Procreate
Dreams interface. I'll show you the most
important sections and what the main buttons do. I strongly believe that we learn best by actually working along. So this lesson is not about
memorizing everything. It's simply meant
to help you feel familiar with the different
areas of the app. We'll explore all
the features in much more detail once we
start working on our project. Let's open Procreate Dreams. Once you've opened it
for the first time, you will be taken to the
Procreate Dreams Theater, which is basically the same
as the Procreate gallery. Here you find all your video
clips, all your projects. You can drag things around. You can rename duplicate
share from here. You see your basic information about the version
you're working in. Here we have two more buttons, similar to Procreate gallery. It's the selection.
Here you can also select and then turn
them into a new folder, delete or duplicate them. The plus button enables you
to just start a new movie. Here we can flip through
different sizes, presets. We just pick any of those,
and then we can see, do we want to start with
a flipbook right away, or do we start with
an empty project? Here, with the three dots, we can also set the frame rate and the
duration for our video. In this case, it's
set to 12 frames by second with a duration
of 4 seconds. So let's open an
empty project here. This is the interface when
you've opened a movie. Up here, we have the stage. All around, we have
the backstage, and down here we have
the timeline area. Here you can zoom in and out, which also increases
the increments of your ruler up here. This is the play button. Here we can go back
to the theater. Here we have the
settings button. Here we can set our
movie settings. We can share, we can
change the preferences. We can change the timeline
and the movie settings, the stage, what
background color? If we want to have a transparent
background, onion skins, all of these things, and also we can make some
changes about our project. Here we could change the frame rate and
also the duration, but also the resolution, which is really handy. Timestamp in the
new version from Procreate Dreams doesn't
have any function anymore. It doesn't work as
a button anymore. Here we have the marking button, which doesn't make
anything right now because we still
don't have a track added. So let's do that first. We can add a track
by simply tapping the plus button and here we
have a few different options. You can either
upload a photo from your camera roll or a video or a file
from your files app. But you can also add tracks
right away like a flipbook, a drawing, a text, or just an empty track. Right now, we just want to start by adding a drawing track, which brings us into the
drawing paint mode right away. And as you can see, right now, it looks way more familiar to Procreate because we have
more buttons up here. The settings here is new, where we can set
the onion skins, where we can change
our preferences, where we can make
changes to our camera, we can crop and resize. And we can insert a photo or
a file from here as well. We could set adjustment filters, similar to Procreate as well. And now and this is something
I'm really excited about, we now have the Lasso
or selection tool. So we can select free hand. We can do a rectangle selection. We can do an ellipse
shape selection, and we can remove
invert copy paste, colorfll clear Procreate
Dreams as well, which is really wonderful. We also have the transform tool, which doesn't do anything right now because our layer is empty. So let's get going
and draw something. I'm just going to
draw a squiggle here, and when I tap the
transform button, I can just move it around. I can resize it. I have different
settings down here, free form, distort
of course, warp. If you're familiar
with Procreate, you already know all of this. Over here is the brush library. Now let me show
you not only have the classic library with all
the brushes we already know. But right now, we also have a vast amount of
animation brushes. I think it's about
180 new brushes, and they're all so cool. All right, we have
this smudge tool and eraser, similar to Procreate. We also have the Layers panel. We can add new layers. We can drag them around. We can apply masks,
clipping masks. Not all the features of Procreate are now in
Procreate Dreams, too, but a lot are already implemented,
which is fantastic. The color panel is exactly
the same as we already know with classic harmony
value and palettes. By the way, this stage in drawing mode is a
regular canvas, and we call it canvas. And if you want to go
back to the stage, you just tap the drawing button
and say finished drawing, which brings you back
to timeline mode. And now we can see our drawing was added and filled
the entire track. We can make adjustments
pretty easily. Similar to any other
video editing software you might know
from social media, for example, you can just drag the ends of your
track, move it around. The duration handles are really a great addition to
Procreate Dreams. This is our playhead. We can also move it around. We can make adjustment here. Let's just imagine the content wouldn't fill the entire track. We could just tap
it, and for example, we could say fill duration, and now it's going
to expand until it fills the entire
duration of our video. There's a whole lot of other options we
can copy and paste, we can rename, highlight
whatever you want. We can even apply
masks here or split. Everything is
possible here by just tapping and holding this
panels going to open. Can also just go back to drawing mode if we
hit it drawing. Now I can show you
the gesture here. Pinching and zooming in, this is something
we already know, but the three finger
swipe up and down will just increase the
height of your timeline. What also is important to know the playhead
is only going to play what's visible here
in our timeline area. Imagine you would have just
zoomed in pretty much. Then it would only show this
area that's visible here. Nothing is broken when you
don't see your entire video. It's just you need to
zoom out a little bit, everything is being visible here down in the
timeline. All right. We can also add a flipbook. A flipbook is very important for
frame-by-frame animation. Let's do that now. I'm just going to
tap the plus button, and now I'm going to pick the Flipbook it brings us back in drawing
mode right away. Although it's called
Flipbook mode because we have the
Flipbook panel down here. Similar to the animation
assist in Procreate. As we can see, we're
here with 12 slots. Those slots are going
to be my frames. Right now, they're empty, and I noticed, let me just quickly exit the Flipbook mode. I noticed whenever you
add a new flipbook, it's going to give you a
flipbook for just 1 second. And since the frame rate for our video was set to
12 frames by second, we are being left
with 12 slots here. If I would have set the
frame rate to, let's say, 20 or 30, it would have given
me 30 empty slots here. Since I'm here in timeline mode, I can make sure that my flipbook is where
I want it to be. I can just move it
along the timeline, wherever I want it to be, I can tap and pull
the duration handles, and if I fill the
entire timeline, which I could also
do by tapping and holding and say fill duration, then it gives me more slots
in Flipbook. Let me show you. It Flipbook brings
me back in here. And now I have a whole lot of
more frame slots here, 48, which is super logical because my video is 4 seconds
long and each second contains of 12
frames so that gives me 48 possible frames in total, and this is what I can work
on here in my Flipbook. Procreate Dreams offers not
only the Flipbook animation, but also two more, which I'm going to show you now. So let's exit the Flipbook mode. And down here, we
see more buttons. We see compose,
perform, and keyframe. Let's move over to keyframe. You can see right away the
playhead is going to change. It's going to be turned
into a clapboard, and by tapping that, we can add keyframes. In our next lesson, I will talk about keyframe in
much more detail. Right now, I'm
just going to show you by tapping the clapboard, it's going to open
the action panel, and here we can decide what keyframes we would like to set. It can be a move and scale or it can be a filter keyframe. But again, we're going to talk more about that later in class. Then we also have
the perform mode, which is dragging around
an object over the canvas, which is going to be recorded
in Procreate Dreams, and then you can play it. Let me show you. Let's go to Edit Drawing and let's
just draw a circle here. We can finish drawing. And now let's move to perform. And now I can drag
my ball around. And you can see here with
the red.in the corner, Procreate Dreams
is ready to record the movement I do with my Apple pencil and
the object onstage. And you will also see once
I start the playhead, it's going to move along the timeline and record all
the movements I've done. Let me show you.
And here we are. I I play now, it's going to
show exactly what I did. That's super handy
and very exciting. One last thing I
wanted to show you, which I'm also very
excited about. I Procreate Dreams now, you can share your work
as an animated gif. This is such a boost because
now we don't need to go any detours to upload our
project to Skillshare, for example, we can just
turn it into a gift, and a gift is being handled like an image and you can upload it to places where you usually
cannot upload a video. So this is super handy. And if we go to Advanced Export, there you also have the option to change
the format, of course, you can go to GIF, for example, but you can also export with
a transparent background. Oh, my God, I was so hoping for this feature
to being added, and we got it now. So now you could just
easily create some gifts, some video overlays
and just export them with a transparent
background and then use them in whatever else
social media content. This is going to help your
brand and your style. To evolve even further. Let's just enable a
transparent background and then it gives me
the preview button. Let's tab that you can see that the
background was removed. And this is what we're
going to export it as now, you just see this green ball, no white in the background, and you could put that over a photo or over an
existing video. There, you could
really play around nicely and create fun stuff. You have a general
overview now of the Procreate Dreams
to interface. Don't worry, if not
everything makes sense yet, that's
completely normal. So let's move on now where we'll talk about what animation actually is and which options we have in Procreate Dreams, and things will get
much clearer then. I promise. I'll see you there.
5. Animation 101: In this video, we're
going to talk about the different ways you can
animate Procreate Dreams. Animation simply means mimicking motion on a two D screen. Motion happens when an object or character is shown in one
state at a certain moment. And then a few moments later, one or more of its
attributes have changed. Maybe it's bigger in a different position or
it has changed its shape. Your brain interprets
this transition from state A to state B as movement, and that's exactly how we'll animate our
illustrations, photos, or shapes by just adding the steps from
point A to point B. Procreate Dreams offers three
different ways to animate. Let's start with number one, the frame-by-frame animation. Let's just start a new movie. And I think I want
to go with a social one and then I tap Empty just
to show you what we can do. All right, in a
frame-by-frame animation, you simply draw all the
different stages of your movement from the
beginning to the end state. If you've animated
and Procreate before, this will feel familiar. Procreate Dreams offers a similar Flipbook
function for this. Let's just enter it by tapping the plus button and
then choose Flipbook. So here we find the same kind of flipbook we might already
know from Procreate. These are the slots,
as mentioned before, for your Flipbook pages, and we can add more by
tapping the plus button. Once it's white, it's going
to be filled with a frame. The black ones are
just empty slots. Since the last update, we can also add new tracks here by just
tapping this button. And we can add as
many as we want. And this is really,
really handy if you plan on making
more complex designs. Let's just undo for now. We are fine with just one track. As I said before already, what I've noticed is Procreate Dreams will always start with a flipbook that has the duration of 1 second and uses the frame rate you set
when starting a new project. In my case, that was
12 frames per second. So this is what I see here. 12 slots are ready to be filled. We can leave the flipbook again by tapping
here, finish drawing. And then we can see
the flipbook is just containing 1
second in our timeline. And if we want it to fill, we just drag the handle
here to the very end. And now we have the
snapping in place. Did you see the
little red line here? You can see it snaps into place, and then we know we reached
the end of our timeline. And now we will have like
4 seconds by 12 frames, which gives me 48 frames again. So this is the position where
I want my flipbook for now. We can start our actual
frame-by-frame animation. So now we just tap
edit Flipbook again, which brings us back to the
canvas and I Flipbook mode. What I want to do is draw a simple wave moving
across the canvas. We can pick our brush here. Let's just go with
molluskin right now, and I want to just draw a
wave here over the canvas. Now, you can see we can draw beyond our actual canvas here, but it won't be visible. And I can show you by using
the fore fingertap now we see the entire visible
stage or canvas area, and you can see the leftover
stroke is not there. By tapping with
four fingers again, we come back to
the drawing mode. So that's stage number
one. Let's move on. And as you can see, our line now turned into purple. This is what's called
an onion skin. The onion skin show you
what's in your frame before, and if so, in your next frame, the frame that's coming next. Since we didn't draw
anything on frame three yet, we don't see the
second onion skin, but we see the one before, which is really handy because
I want the wave here, this hill of our wave I want it to move across the canvas. It's really handy that I can see where the initial start was. Let's draw a wave like this. Now let's add another frame, and our actual wave is
going to move across here. Let's add another frame. And maybe another one. And now you see there's
multiple purple lines, and they all have a
different opacity. So the lighter they get, the further away they are. And we can change that. If this is too
distracting for you, we can just go to
settings and to onions. Here, we can make
our adjustments. We could turn down the
number of onion skins. Now I can only see two
frames from before. And now I can only see
the one previous frame. We could play with
the opacity and we also could play with the
color, whatever we want. Maybe we want to
add just one more. And now let's play and
see what we've got. So we can see our wave
is moving on stage. And since it's pretty fast, it looks like really, really
hectic. But that's fine. We could make more
adjustments, for example, by just tapping the frame, and then I could set a
different frame duration. Maybe we just keep
it for two frames, then it's not going
to be so hectic. I can also make some adjustments here with opacity or blend mode. I could insert a new frame. I can copy, paste, duplicate everything
that you wish for. So now let's just change the frame duration from
each of our frame to two. As you can see, it
fills two slots now. That just means we don't
need to duplicate it. We just tell Procreate Dreams. It needs to show us the
frame a little longer. And now when we play it, it's way slower and looks
really nice like this. Perfect. I just wanted to show you another
way of animating. This is the wiggly
line animation. This is something that's really, really common and
also super helpful. So what I just did is
I added another track. I unchecked this box here so that our green line
here disappears. If I start here, I'm just going to draw three
lines from top to bottom. I add a new frame and I just
draw over these lines again. So this is a very,
very simple way to add movement to attic
photo or illustration. Maybe we do one more,
and then I show you. And it's going to look like
our lines would be dancing. And that's a really nifty
and quick and easy way to add some visual interest to any content you
want to upload. We're going to make more
of that later on in class. So frame-by-frame animation
is really fun and simple, although it can be a bit tedious depending on what
you want to animate. So that brings us to our next possibility of
animation in Procreate Dreams, which is the keyframing. Let's just now add a new drawing track by tapping
the plus and tap drawing. So let's go back, though. I just don't want to see
our green stuff here, so we make it invisible by just tapping this
little check mark here, which turns it on and off. And then I also want
my drawing to be visible the entire
duration of our clip. Now I want to draw something, so I tap added drawing. Let me just quickly draw
a very simple flower pot. As you can see, I'm
just adding layers intuitively as I would
do in Procreate as well. And now I want to
create a clip where the flower pot fall maybe
from a window sill, a few stories above me, and I just see
through my window. So I want it to fall
from top to bottom. I just feel it's a
little bit too big now. So what I want to do is I want to just group all
the layers together, mark the group, go to
my transform tool, say uniform, and then I make
it a little bit smaller. All right. Let's exit drawing mode and go
back to our timeline. Keyframes define the
extreme positions or states of an object. Unlike the flip book, where I would have to draw
all the different stages, Procreate Dreams now calculates all the steps in between two
keyframes automatically, which is super handy. So we're here now
back in timeline, and we want to switch
to keyframe mode, which is this button down here. These diamond shapes here
might be familiar for you. In all the video
editing softwares, a keyframe is shown
with this diamond. Icon. All right. And now we have the
clapbok here again. I move the playhead to the
beginning of the track. Then I tap the clapboard, which opens the action
panel and I choose move, and then move and scale. You can see now a small
additional track with an icon, and this is the
keyframe that saves the object's position at
this moment in the clip. I can now position my object
where I want it to be, and I want my
flower pot to start backstage here above my stage. I can still see it.
I hope so can you. That's also really handy that
you see the backstage area, even though it's not going
to be shown in the video. Now I want to define the end
state of our flower pot. I'm going to move this playhead
around to the very end. Then you can see now
it's without color, but as soon as I tap it, it's going to turn white, which means I've
set a keyframe here and now I can change the
flower pots position. Now I just want to drag it down to the bottom of the stage. Let's play and see
where we're at. So it looks like my flower
pot takes an elevator down. So this is, for sure, not what I want it to look like. So I want it to fall naturally. First of all, let's
check the easing. Easing is something that's
built in and Procreate. We can find it by just
tapping the keyframe track. And here we see set all easings. So we could just choose
here in between. Usually, I like linear the best. That means it falls at the same time from the
beginning to the end. Let's check and see
how that looks. It's still way too slow. So I think the reason is because my flower pot takes 4 seconds to fall
alongside my window, which is not natural. So let's just move our keyframe. We just move it closer to the beginning and
then it falls faster. Let's see if that's enough. Ah, that looks much
better already. That looks more natural, so we can drag the keyframe even further and play it again. Yes, this is how a flower pot would look like when it falls. We can increase
that it's faster. Let's do the fore finger tap. Yes, this is how a flower
pot falls out of the window. So now if I would want to my flower pot to change
color, for example, I would have to move
up the playhead here that it turns into
the clapboard again. Then I can tap it and
I can say filter. So let's check how about
we go to change the color. So we will set it to Ages B, which means hue
saturation brightness. So that sends a new
keyframe underneath. So, right, let's move that. Let's move it here. I set a keyframe here, and
then I change the color. I just drag this one around. Then let's move it further, set another keyframe and
turn it into this direction. Then in the end, how about
we're going to move it there? All right. Let's try
and see what we've got. Now, we've gotten a flower pot that even changes the color. That's really handy. There's a lot of things
you can do with keyframes. And now let me show you the last animation method you can use in Procreate Dreams. So let's exit the keyframe
mode and move over to perform. Now, perform is really the method where
animators get really excited about because it makes animation
incredibly intuitive. Let's hide our previous
track and start new. We're going to add a
new one. We're going to make it a drawing track, and I just want to
draw another flower. The problem is, when
you're in perform mode, everything you do
will be recorded. So let's undo that
what we've did before. Let's start over, but we
want to go to compose first. Alright. So let's go to compose. Let's add a new drawing. And then I want to
draw another flower. And in my next step,
let's finish drawing. I noticed that my flower
doesn't fill the entire canvas, so I'm just going
to drag the handle. So this is my flower, and I want it to
be in the center. All right. And in my next step, I want to add a bee. So let's add another
drawing track on top. I would want this bee to
fly into the picture, sit down on the flower, and then fly away. And this is super easy
to create with perform. Let's finish drawing
and make sure our bee fills the entire
duration of our timeline. And I wanted to show you
something very handy as well. So if you would think you would want to move
the wings, for example, you could just
convert the layers, the different layers you've
added in drawing mode. You could just convert
them into tracks. Tap and hold the track, and then you say convert
drawing layers into tracks. And now you see it has changed into a group
which I can open. And here I can see all the different layers
I've drawn earlier. So for now, I'm happy
to move the entire B. I'm gonna just place it
outside of the canvas, and then I'm going to move
over to perform mode. I make sure my playhead
is at the very beginning. So now I'm just gonna drag. You can see it's
ready to record. Now I'm just gonna drag my B. Drag it into the image
and then out again. So let's see how it looks like. It comes in, it sits down, and then it flies away. The keyframes are
added automatically in Procreate Dreams due
to the perform mode. You can see there's a
whole lot of key frames, and it just does
everything on its own. So that's super exciting
and really, really handy. Alright. Now you know the three animation approaches available in Procreate Dreams. So with these methods, you can animate illustrations, add playful motions to images or even create your own
cartoons or short films. So let's move on in class, and now we're going to start our project where we'll create a visually interesting
clip out of a photo to post on social
media. I'll see you there.
6. Project Background: Alright. Let's get started with the background of
our class project. We're gonna open
Procreate Dreams. And we tap the plus icon
to create a new movie. Now we're going to
scroll until we reach social because we're planning to upload our project
to social media. Here with the three dots, we can pick the duration
and the frames per second. And that's exactly what we need. The seconds is perfectly fine, and 12 frames is also absolutely sufficient
for our purposes. Of course, you can go
as long as you want. And then we tap empty
which creates our project. So here we are with our stage, our backstage, and
our timeline area. So first of all, we want to create an image in
the background. For that, we just need to tap the plus icon and
add a new drawing. And here we are in drawing mode. I want to draw like a
very textured background. So I'm going to pick one of those new wonderful brushes
here from the paint set, and I'm going to go with
the stone fly brush. And as of the color, I want
to go with my pink you. And then I'm just gonna
roughly fill the canvas, try not to do too
much to keep some of the lovely texture.
And that's enough. I just want to add a
little bit of orange, as well, just to
create more interest. So I pick my orange, and then I just make some
random orange marks. So that's enough of texture
for our background, so we can finish
the drawing mode by just tap drawing and finish. And as we can see, the
drawing duration is exactly over the entire 3 seconds
in our timeline. All right. In our next step, we want to have a little scribble that builds
gradually in the background. And we are going to create
that in flipbook mode. Let's tap the plus icon
and add a new Flipbook. We set our frame rate
to 12 frames by second, and that's why it
gives us 12 slots. What we could do now if we
would want to have more, we could exit the flipbook mode and we could just drag the
duration handles here. And to fill the entire
background with scribble, we need a lot of frames. So I've just pulled the
duration handle from 12 where it was before over to
fill the entire timeline. Alright. And to work
on our flipbook, we just tap edit Flipbook, and it brings us back into
this stage in drawing mode with a whole lot of frames
here on the bottom. So I want a yellow
squiggle line starting in the top right corner and
building up across the screen. Let me show you. Just go to pick my yellow. And this time, let's see, I'm going to go with
a vanilla lily brush from the bristle set. So let me draw what I mean. And that's it. Now, this is what I wanted to
look at the very end, but I want to have it starting gradually and building up
over the course of our movie. So how can we achieve that? Well, we could, of course, start with tiny little
increments frame by frame, adding onto it and make it larger and bigger until it
covers the entire screen. The problem is, however, since I'm using a very
texturized brush, this is pretty difficult
to achieve seamlessly. You would probably
see where I've ended in this frame and
started for the next frame. That's not going
to work so well. Instead, we are going
to work in reverse. So we start with our
end result and just erasing gradually pieces off of it until we are at
the very beginning. And to do that, that's very simple here down there
in the flip book. We can just tap this frame, and we can say duplicate. This is going to
be our end frame. This is what we're going to
have at the very latest, the full stroke
across the canvas. So we need to move one frame before this is the one
on spot number one, and then we're going to
erase part of the stroke. To do that seamlessly, we're going to use the
eraser with the same brush. So I am on vanilla lily, and by tapping the
eraser and holding it, we can erase with
a current brush. Let's just check tada, it's vanilla lily in
the bristle section. And now I only need to
erase part of the stroke. However, I want my stroke to stay a little longer
at the very end. So I'm going to set the duration of this
frame, our end frame. I'm going to set it to, let's say, three frames. This fills, as we can see, this fills one, two, three frames lots already. So now we go onto this one. And we're going to
start with the erasing. Let's duplicate
this frame again, move to number one
and erase more of it. And you can see it erases
nicely textured, as well. When we watch it in reverse, it really looks like the
stroke is building up. Let's move to frame number one. Say duplicate, move to the first one again
and erase even more. And this is how we're
going to proceed now until we've erased
all of the stroke. Okay. And now we see a mistake. You can see the onion skin
here starts to be purple, and that's because
there's a frame before where the stroke
is still visible, and that's not what we want. So we made a mistake. We didn't move to
frame number one, so we need to undo the
erasing on frame number two and move to frame number
one and erase here instead. So that's very
handy in case you, like me, forget to move
to frame number one. You can see me checking in
between where we're at, how many frames we've left, and I think we're doing well. So now I've erased everything. Let's see how many
frames we've left. We have two more left, so I can set the
duration of this one. Let's say 25. Awesome. And now drum roll. Let's see what we've got. We move it in the center
that we can see it in its full glory and to play. Yay. The stroke is building up and
staying for a little while. That's amazing. I
love that effect. Of course, you can add as many lines or
effects as you wish. You could just add another
track here and go really wild. But I will move on
to the next lesson just to keep the class
at a reasonable length. And in the next lesson, we will add the main motif and give it some fancy effects. I'll see you there. Is
7. Main Motif: All right. Now it's time
to add our main motif. So let's leave the flipbook. Here we are back
in our timeline, and by tapping the plus, we are getting the option
to add a new photo. So you tap that. All right, here we are. Of course, it's way too big. So let's decrease the
size of my main motif. Then we can also drag the duration handle to
the very beginning. First of all, I
think there's not enough contrast between the main motif and
the background. I can also see the edges need
a little bit of cleanup. That's what I'm
just going to do. It says, edit drawing anyway, so I'm going to tap that. Then I will pick one
of the air brushes, maybe maybe the soft
airbrush like this. And this is what I'm
going to use as eraser, and I'm just going to
clean up the edges here. Wow. And you can see it totally works like
Procreate, very intuitive. You just go ahead
and do what you'd normally do when you
paint in Procreate. All right. That's enough. So what I would like to add is a white outline around
the main motif, and this is supposed
to be a wiggiy line. And to do that, we need
to exit the drawing mode. And here we're back
in our timeline. So since I want the stroke
to be behind myself, I need to add a track
underneath the main motif. So it's similar to Procreate. You just tap the layer. In our case, it's a track. We tap plus, and then
we said add a new flip. As we already know, Rigali
lines need a few frames. So let's go with one, two, three, four frames, maybe. We just add them, and
the rest we won't need, we will just duplicate
these four frames. However, we need
to make sure that our flip books goes over the
entire duration of our clip, which it does not right now. So let's move it to the
beginning and then just pull the handle until the very end of our
timeline. All right. Now we can go back
to dit Flipbook, start with our first frame, pick a nice fun
brush. Let's see. This time we're going to go
with maybe let's go with Tewksbury in in the mono line set and we decrease the
brush size a little bit. We pick white, and then
we're just going to go ahead and draw an outline
around the main motif. However accurate, I
leave that up to you. If you know me, you know,
I'm a messy drawer, so I'm just gonna do
it in a messy way. All right. And let's repeat the same
step on frame number two. On frame number three. And then on the last frame, Alright, so let's
see what we've got now. That looks fantastic. I just think if we play it, it's too hectic for my taste. So I guess I want to give each frame like the duration
of two frames, maybe. By tapping and holding, frame duration, set
it to two. Same here. Alright, let's check
how it looks now. Oh, yeah, that's much better. It just wriggles nicely
and not too hectic. So that's perfect. Of course, we not only want this white outline in
the first eight frames. No, we want to have it
over the whole duration. So we need to fill
all these slots, but we don't need to
draw it all over again. We can just mark it.
This is our marking. Icon. So I'm going to just mark all the four frames which are technically
eight right now. And then I tap and hold again, and I say, duplicate. Tada, here they are. And we repeat the same step, duplicate duplicate, and
let's see how many art books. And let's see how many
are left over now. Two are leftover. So let's mark these two and duplicate them again and Tada. So let's play and
see what we've got. Yes, that looks amazing with
a stroke in the background. Now we can clearly tell apart the main motif from the
background that looks fantastic. Okay, in our next step, I want to cover the blouse.
It looks so boring. I think it needs to have
some really fancy pattern. So to do that, we're going
to exit the Flipbook mode. And we're going to add a
new drawing track on top of the main motif by
just tapping the plus, and say, add a new drawing. And here we're back
in drawing mode. And another new
feature that's really wonderful is the selection
tool or Lasso tool. It enables us to just select a certain area and just
manipulate this one. So this is what I'm
going to do now. I'm going to select
the blouse now. I go by just drawing
all around the edges. Now, you can see the stripe, similar to Procreate,
where the stripes are. This is what I
cannot manipulate. And here the entire blouse
area is without stripes. So here I can do
my manipulations. And I want to add some just
some colorful stripes here. Let's see which
brush am I using. How about we go with
the spike rush brush? Decrease the size a little bit. Let's pick yellow again. I'm just going to draw
whatever lines here. Alright. Cool. And then I
will add another layer. And I will do that with
a different color. How about we go with orange this time in
a different direction? Okay, and how about we go to go with Let's go with green now. And again, we change
the direction. And add another layer, and let's go with blue. Maybe in this direction now. We can go as wild as we want. Of course, you could
also add patterns like flowers or dots or
whatever you find interesting. You just go with
what you like best. Alright, here we go. And I don't want these
stripes to appear at the same time,
but alternating. And to do that, we can manipulate the layers
in our timeline. So let's exit drawing mode. And here we have our
drawing and now it looks like they're all
on top of each other, but we can change that. We can just tap and
hold the track and then we can say convert
drawing layers to tracks, and that's what
we're going to do. Now it is changed
here into a group. I hope you can see that.
Here's the word group. I I open that, I see the four layers
we drew earlier. Now I want them to
appear in increments. We can just set the
duration of this one. We just turn it down and have this one
starting afterwards. This maybe. And then
we have the green one. And in the end, we have the blue one. And it's very nice.
They as you can see, they snap into
place really handy, and now they should appear one after another. Let's check. Yes, this is exactly what
I want. This is so cool. Great. And in our final step, to give this main motif a
little bit more interest, I would also give the
sunglasses some fancy effects. So let's add another
track on top of our group here with the
blouse embellishment, and we make it a drawing track. Tada. Here we go. On layer one. I want to give my
sunglasses a nice color. How about we make it white? The outline of our
sunglasses, let's see, I think I want to use
the looper brush here, one without jagged edges here. Oops, that's too big. And then I'm just gonna go around the outline of
my sunglasses here. Here we go. Yes. Yes, but I
think it should be green. Yes, I like that a lot. And then we also need
some colored sunglasses, like the lenses themselves. So we're going to
add a new layer and we drag it underneath
the frame of our glasses. And then I'm just
going to pick pink. And in the course of our video, I wanted to change the color. Okay, let's exit
the drawing mode and go back to our timeline. And here we see Oh, sunglasses has been
added into the group. Okay, that's no problem. We just pull it out there
and pull it on top. And, of course, we want it
to fill the entire duration. We just tap fill duration. And we just drag the handle
to where we need it to be. All right. Now the sunglasses are there for the entire time. But as I said, I want the glasses themselves
change the colors. And we can do that
in keyframe mode. So let's move over to
keyframe mode here. So we want to set a key frame
here at the very beginning. Let me increase the height
that you can see it better. So by tapping the clap box here, we can choose between
move or filter. And what I want to add now is a filter keyframe and one
with saturation brightness. So I'm going to tap that. Alright. We want to keep
the color here with pink. We move forward now,
add another keyframe, and now we're going to
just draw the slider here. How about this
color? Looks great. And then I'm going
to move the playhead forward and the
slider here to blue. Alright, so let's check
and see what we have. And as you can see, the glasses are changing their
colors automatically. Yeah, that looks amazing. And super colorful already. The entire clip is just a little bit too
static for my taste. I think it could
use some movement, and that's what
we're going to do in our next video, and I
will see you there.
8. Adding Motion: Alright, welcome back. So now let's add some
movement to our main motif, because it just stands there, and that's a little bit
too static, too boring. And now we've added a lot of embellishment
to our main motif, but we want to have it all move at the same time together. So we need to make
them all belong together so we can apply the effects to the
entire main motif with all the embellishments. And for that, we can just simply group all the layers
belonging to the main motif, the white outline,
the main character, all these four layers
and the sunglasses too. And then we tap and
hold and we say group, Tata now it looks like
it's just one track, but in fact, it's the group
with all of our tracks. So it's easier to
manipulate right now by just adding
keyframes to the group. What I want my
clip to start with is with the main motif not
being in the picture yet. So I want it to boom, pop up. Let's do that by adding
a move keyframe. So I'm going to tap this
here and tap move and scale. Then I move the
playhead a little bit further and tap again. At the very beginning
of our timeline, I want the main motif
to be out of the frame. Let's add a keyframe here and move the main
motif downwards, drag it and move it down. If you play now,
you see it pops up. It could even be a
little bit faster, so I'm going to drag
the second keyframe a little bit closer. Let's see. Yes, it jumps up. Maybe a little bit. How about this? Now,
then we can't see it. Okay. Let's keep it
where it is here. It jumps up now. Okay.
And once it is up, I want it to kind of
bob a little bit. We can do that very
easily in perform mode. So we gonna switch to perform. And I'm just gonna
move the motif around until we have this point here. Let's
see how it looks. All right. And in our next step, I want
to start the process where the main motif disappears
out of the image again. I wanted to go out this way, but this is nothing I can do in perform mode because we're shortly at the end of our clip. So let's go over to keyframe mode and just add
the keyframes manually. So I'm going to move
over the playhead to here and I'm going to drag my motif a little
bit to the left first. And then I'm going to
move it over here, tap it again, and
then I'm going to move it out of the
picture like this. Now let's see what
we've achieved. It looks super fun. By doing the fore finger tap, we see it in all its glory. Yes, I really like it. I really think this
adds a lot of interest. It's super colorful. Of course, you can go with
your own gut or what suits your own style and add as
much or as little of effects. But you know now how you can add those fancy little
embellishments and make your photo so
much more interesting. Alright, then let's move on to the next lesson where I
will show you how you can export your artwork that you
can actually upload it both to the project gallery but also to social media. I
will see you there.
9. Export Artwork: All right. Now I want to show you how we can
export our artwork. We need to exit the full
screen mode by just either tapping back or do
another four finger tap. To export our artwork, we just need to hit
this slider button, and here we have
all the settings, and we're just going to
tap the share button. Here we see we can share it
as animated gift as video, frames as images, whatever. What we're going to go for
now is an animated gift. Just tapping it,
it's going to save it right away to
your camera roll. However, we don't know
about the quality. So let's do that again because we need the
advanced settings. Let's tap the slider again, go to Advanced Export. We want to set the
format to a gift. Then we need to make sure we decrease the
amount of colors. Let's go with 256 and
let's see where we're at. By tapping the share button, it's going to render it for us and we can just check
and see how it looks. And I think the quality is okay. Let's try and share and
see where we're at. Let's go find it in our camera role and
see how it looks like. And I think it's
absolutely fantastic. So you go ahead now and create your project and upload this
to the Project Gallery. Now, we're going to move on, and I will show you some more tricks you can do
with Procreate Dreams by adding transitions
to your artwork or your photos. I
will see you there.
10. Transition "Brush Reveal": Welcome to this part
of the class in which we have a closer
look at transitions. But before we jump
into the technique, let's quickly talk about why transitions are useful
in the first place. Transitions help guide
the viewers' eyes and make changes
feel intentional. Instead of a hard cut, they give the
audience a moment to understand something is changing and where to look at next. Especially for social media, transitions can turn a static
image into something more engaging without turning it into a full blown
animation project. And just as important, transitions don't have
to be loud or dramatic. Sometimes a very subtle
transition is enough to support storytelling and create a smoother, more
professional flow. I want to show you
how you can use it from an illustrator's
perspective, but the same works
for photos, too. So let's get started with
this lessons transition, which is called Brush reveal. It's a very typic, a very classic
transition method, and you even see it
filmed top down where an illustrator uses
their Apple pencil over Procreate to reveal
their illustration. You can also see that in
old Gib animes or cartoons, where a literal brush is transitioning from one
scene to the next. We can do that without having a real brush or hand
moving over the screen. So let's first start a new
movie by tapping the plus, and then we just pick
whatever's screen, and we go with empty. In this one, I want
to transition from one illustration to another one. And I know my
illustrations are in the size 2000 by 2,500 pixels. So I'm going to change
the settings of my stage by just tapping our
little slider button here. Go to Project and
change the resolution. So I'm going to type in
2000 by 2,500 pixels. This is going to change the
size of my stage right away. My video has the duration of 4 seconds with a frame rate
of 12 frames per second, which is absolutely
fine for now. In the next stage, I want
to import my illustration. I tap the plus icon, I tap photo, and then I pick the two illustrations
I would like to add. Tap add and here we are. Alright, here we have
two cute little acorns. One is just picking a flower. And if we move along, here we having the
boy handing over the flower he just
picked to the girl. So there's a little
storytelling going on between the two
illustrations. And without a transition, it would just make a harsh
cut from here to there. Since we are working
with masks here to create the brush reveal, we need to make sure that the illustration
we want to show at the very end is on
top of our timeline. So that's what we got to do. We're just going to move
this track, one track above. Now since our video
is 4 seconds long, both illustration just
fill half of our timeline, and we can just change
that by tap and hold, and by tapping, fill duration. Now let's do that with the other illustration
as well, fill duration. Now, both illustrations
are on top of each other and fill
the entire timeline. But we see the wrong
one in the first place. This is the end illustration
we just want to see at the very end of our little
movie, and to achieve that, we want to mask this illustration
and we can do that by tapping the plus button and
tap add a new flipbook. Here we go. But now we need
to make sure that it is in the right position and has the right length
for our purpose. So let's exit the
flipbook mode once more. And here we can see it
doesn't really start from the very beginning.
Let's do that now. We just pushed it
over, and then we just tap and hold and say
again, fill duration. We said we are going to apply a mask for this illustration, and it's equally simple. We just tap and hold
the flipbook track and here we have the option to add
a mask. So let's tap that. We don't need a clipping
mask right now. What we want to do is we
want to apply an Alpha mask. That's going to make
this illustration invisible right
away. Let's tap it. And here we go. We see
the starting point where the little boy acorn here is picking his
flower. All right. And if I turn it
off the mask here, you can see the second
illustration is still here. It's just invisible, and that's exactly what
we need right now. Now we want to work a
little bit on our flipbook. So let's tap Added Flipbook. Both in procreate but
also Procreate Dreams, layer or track mask
work similarly. It sounds a little bit
confusing in the beginning, but bear with me. Technically, the layer mask works by covering up
what's underneath, but by using the white color, you can reveal
what's underneath. Let's just go and pick a brush. How How about we pick
Emu River brush. When I'm just using the
brush here over the image, it reveals what's underneath. If I draw more, you can see it totally reveals the
illustration underneath. And that's exactly the beauty of this transition technique. So let's undo that. This is where we started at. The first half of our clip now, I want this illustration
to be visible. And in the second
half of our clip, I want the other
illustration to be visible. And to move over from
Illustration A to Illustration B, I want a stroke. Kind of drawing across the screen and revealing
what's underneath. We have 48 frames in total, since our clip is
4 seconds long and each second contains
of 12 frames. So that means, let's say, the first 18 frames I want to use for our starting
illustration for Illustration A. So let's add one frame here. Tap and hold and set the
duration to 18. All right. We can see now this frame has blocked the
first 18 slots here. In our next step, let's add a new frame here. And now from frame 19 onwards, we want to start with
the brush reveal. You have a lot of
options in regards to where your stroke comes
from and what it's doing. Since my main illustration
part is only in the center, I'm just going to go diagonally. You go with whatever
you like best. So I want to make
sure my brush is at the whitest white we have.
Let's check and see. I think the Emu River is okay. We can maybe increase the
brush size a little bit, and now I'm going to
make my first stroke. Similar to what we did in our background of our
class project exercise, I'm going to do the same
now here on this image. I've added one stroke. I'm going to
duplicate this frame. So we have the same
situation here, and now I can reveal more. And we go on now like this. We just duplicate our frames, and we reveal more and more of the illustration
underneath. Duplicate and draw using white, revealing more and more
from what's underneath. You can take as much
time as you want. We have a lot of frames left. Now we reveal the entire
illustration from underneath. Let's just see where we're at. Can you see it? Here
it works. Very nice. We just have the problem here that from our reveal
to the next frame, we go back to the
beginning illustration, and that's, of course,
not what we want. So what can we do?
We just need to fill this canvas with
white completely. Now it's gone. This is something
you can really memorize. Black hides and white reveals. It's super simple once you've
understood the concept, Black hides, white reveals. You don't need much more. Alright. So now we want
to keep the white until the very end because we
want this illustration to be visible until the
very end of the clip. So let's see how many
frames we've left. Okay, we have 18. So let's just tap and
say frame duration, 18. And now we can see this
goes until the very end. Let's play it again now. Here's the beginning,
and here's the reveal. Oh, this is so cute. Let's just watch
it in full screen. Yes, this is super nice. I think it works
really, really well. Let's do our four fingertap
to go back to Flipbook mode. So now we've created
not a huge dramatic, but a very subtle
change that really underlined our storytelling from one illustration to the next. Again, by changing up
the stroke direction, you can create
different effects. Something I really
wanted to mention here, you can use this
one as a template. Let's go back to our timeline. You could just go
ahead and use this as a template and just exchange the two
illustrations underneath. Then you could just
use it over and over again without creating the
transition nearly every time. If you want a more dramatic
kind of transition, I've exchanged my
bottom illustration. I've started out
with the sketch. This is something you
see fairly often. I start out with my sketch, and then it reveals into
the finished illustration. This time, I've used a circular
brush reveal technique. I was just starting in the center and getting
bigger and bigger and bigger and bigger until the illustration
was fully revealed. Let me show you Here you can see the circular reveal
from the center outwards. So as you can see, you have all the possibilities
in the world. You just go and play
around and find something that suits your
style or your brand. Now let's move on to
the next lesson where I show you even more
transition methods. I will see you there.
11. More Transitions: Okay. All right. Now, let me show you some more examples
for cool transition. And this time, we'll use
keyframes to create them. So as usual, let's start
with a new canvas. Just pick any, say empty. And since I know I want to add some of my
illustrations again, and I know their resolution, I'm going to change
them right away. My preferred size usually
is 2000 by 2,500. Just because I know
that the ratio where Instagram is
really happy with the duration is still set to 4 seconds with a frame rate
of 12 frames per second, and that's totally fine. In this one, I want to create three different transitions
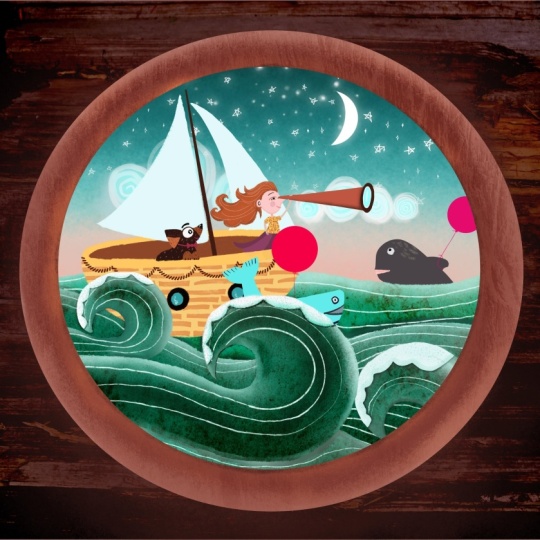
between some artwork of mine. So let me add the artwork first. Let's go to the plus. Let's go to photo and then I'm going to pick these
four images here. These were artworks I've made for the mindful
tober drawing challenge, which is a drawing
challenge in October, I host with three other
skilled chaptp teachers. And to be able to show
the four of them, I wanted to create
a little clip. So Procreate Dreams is
really helpful with that. So now we can see I've added the four illustrations
here to this timeline. The only thing is when transitioning from one
illustration to the next, there needs to be a little
bit of overlapping. So by having them all in one track, that's
not going to work. So let's move them a
little bit around. So let's move this,
drag it up a track, and a new track will
be added right away. Alright, let's go on here. To not have the harsh cut
moving from this to that, I want to show you the
first transition method which is called push
and pull transition. In this case, I want the
second image that's coming in, basically pushing the first
image out of the screen. And this is really simple. Let's just increase our
timeline a little bit. And here it is where we have
to have the overlapping. So let's just pull the duration handle of this illustration and
move it to frames, and then on this illustration and move it to frames as well. Let's just turn up
the visibility of the top one because we
won't be able to see what happens if we don't I move the playhead to kind
of this position. And here I will set
my first keyframe. Now, I cannot do that. I compose, I need to switch
to keyframe mode. Here we go. So I'm going to tap
that little clapboard. And I want to say move
and move and scale. Alright. And now I want
to move it over here. And tap again to add
another keyframe. And now I want to
change the position of my image when the playhead
arrives at this keyframe. So we just tap the illustration, and then we just move
it out of the image. But we keep our finger on
screen that it stays snapped. And here we go. Now we
cannot see it anymore. It's moved off stage. And now let's go up to this illustration,
turn it on again. Tap it, tap the clapboard, tap, move, move and scale, to add a keyframe here and to
add another keyframe here. So at this moment in time, the other illustration
is moved out, and this is moved in,
so perfectly visible. But at this position
here, we cannot see. We should not be able to
see this illustration. We need to move it out of
this side of our stage. Let's tap it. Let's move
it right out of stage. And that's what it
is. Now, let's check and see what we have now. So here we are with our first illustration
and by moving forward, it's been pushed out of the image and the second
illustration appears. That's really fun. Let's see. Chip. And there it happened. Okay, that's
transition number one. Now we need transition
number two. And here we don't really
need an overlapping. What I want Illustration
Number two, towards the end is getting
really big, like zooming in. So we want to do another
keyframe situation. So I'm kind of here maybe
maybe here. I don't know. Let's try how it looks
when we go here, and we need to change
back to keyframe mode. And then at this position, we want to set another keyframe, another move and
scale keyframe here. So this is the moment where the illustration starts to grow. So we move the playhead
to the very end here. And this is where
I want it to be, like, really, really big. So I'm going to set a keyframe, and I'm gonna scale it, let's say, let's type in. How about 15? And here as well. Alright. Now it's really big. And I want to be in some
sort of colored area. So let's tap the image
and move to a color here. Now, we're in turquoise. Alright, and you can see we'll be able to see why
that's important. So let's see how it looks. Let's go back to compose. And now we see it's growing
and getting really big. We want to change
the easing though, because it all of a sudden
jumps to being very big. So let's set all the easings. And we can do that by
just tapping here on the keyframe track
and set all easings. And then we just want
to have it linear. Let's see now. It should
be grow wing linear. Great. All right. So now we can go to
this illustration. And here in the beginning, we also want to start with 15. So let's tap the clapboard. Let's move and scale. And then we make it really
big by tapping here 15 and here 15 as well. All right, which
makes it really big. But now I want to find a spot
that's turquoise as well. We just need to move it
down a tiny little bit. So here's turquoise. And then we move the
playhead a little bit further, set another keyframe. And here we want
the illustration to be in their original size again. So we just tap one here
and one there. All right. And then we move it into its
position by one and one. And here we have it
in the center again. So now let's check and
see what we've got. Go back to perform. So here we are. It goes
bigger and bigger and bigger. And then it zooms out, and it shows another illustration.
That's really nifty. So cool. All right. And for our next, I
want to use, like, a dissolving transition,
which is really nice too. But again, here we
need a little bit of overlap between
our illustrations. So let's make this two frames
wider to this direction. And this one also two frames wider in the other
direction. Okay. And then for now, let's turn the visibility
of the last one off. And move the playhead over here. And then again, we want
to add a keyframe here. Let's go back into
keyframe mode. Make sure this
illustration is marked, and we tap keyframe again. But this time, we want to
set a filter keyframe. So let's tap that. And here we have a few
different options. Right now, I want
to go with opacity. So let's tap opacity. And at this moment in time, I still want this illustration
to be fully visible. That means the
opacity is with 100%. All right. But at the very end, I want the image to dissolve
to not be visible anymore, so that means I need to
set the opacity to zero. Tada. Of, it is. And now we do the opposite
on our last illustration. So let's move the
play head over here. We need to turn it on, though. At this moment in time,
this illustration should not be visible. So we tap the
clapboard, tap filter, opacity and turn the
opacity down to zero. Alright. So now we moved
the clapboard over there. And here we set
the next keyframe. And here we want it
to be fully visible. Tara. Alright. Now let's go back and compose and try to
see where we're at. So one starts to dissolve
and the other starts to appear. This is amazing. Alright, so let's check
and see what we've got. Remember to rescale
your timeline because it's going to be playing
only in the visible areas. If you don't see everything
in your timeline, it won't play the four video. So Alright, now we see all the four illustrations and we can just
have a look at it. Cool. Let's watch in full
length, in full size. Awesome. I really like them. And again, this sky
is the limit here. You can just go ahead and create so much fun things with the transitions in
Procreate Dreams. So I hope you also play
around with transitions. And don't forget to
show us whatever you've created in
the project gallery. We're really curious to
see what you come up with. So let's move on to the next
lesson where I show you some more example I've done in Procreate Dreams. I
will see you there.
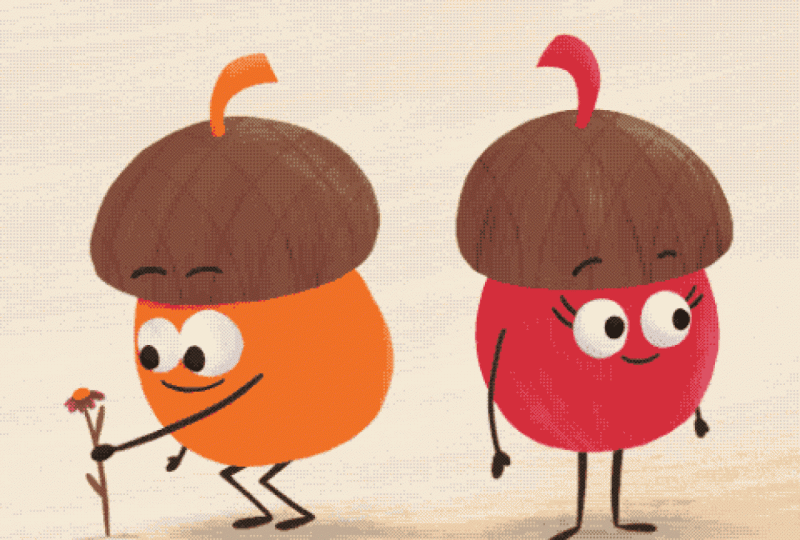
12. "Oh, the places you'll go!": And welcome back. I've
promised you that I'm going to show you a few more examples
I did in Procreate Dreams. So let's start with this one. So here you can see me on a travel in the
mountains, in New York. Well, I'm on a boat, on a sea and in Japan
watching Mount Fuji. So how did I do that? Well, that was fairly
simple, to be honest. First of all, I've created
the illustrations. I've created the
background, the foreground. I just drew them in Procreate. Then I imported them here
in Procreate Dreams. This is my little motif. I just placed it in
between the tracks here. And then I just moved the foreground and the
background layer to the left. So it leaves the impression
I'm moving forward. And then I created a
little transition. Since I'm an illustrator, I wanted it to be visible. Here I'm just creating something like just strokes
filling up this screen. It's similar to a brush reveal. It's just not with a mask, but it's just filling
the canvas with color. Then the same here, I created the background
and the taxi. The taxi was just a
photo I found on, I think Pixa Bay. I just cut out the
windows and put myself behind so it looks like
I'm sitting in the taxi. Then again, the taxi and I, we are still and the
background is just moving. And here we have
another transition with colors towards the boat. Here we have me in the boat, and in the foreground
there the waves. And in the background, there's the island and the palm tree, and they're just
moving across Tata Oh, and here I also created
with perform mode, I created a little
bobbing of the ship so that you can think it
would move along the waves. And here we have
another transition, and here the same basically. In the background, it's
Mount Fuji and some temple. If we go along,
there's a temple. And in the foreground, of course, the cherry trees. And I put myself into
Ericsha, which was, again, a photo I found on Pixar Bay, where I just erased all the people sitting in
there and put myself on top. What else I did for this one, I added some soundtracks. Let me show you. I
added some audio. I also found on Pixar Bay, they not only have
videos and photos, but they also have
little sound effects. So I have the swoosh sound. That's the whoosh sound. And then I've added some wind, some Asian flute music. And this is just what you
can hear in the background. Let's play it once more. Bird like some traffic sounds, the water and wind and the
mount Fuji and the flute. And to have it seamlessly playing, let me
show you once more. I've added a transition at the end and at the
beginning of the clip. So it starts here
and goes over there. That creates this infinite loop. I've also created this fun little clip here.
Let me show you. Where we have a little candy
moving across the scene. It's just a photo I took from
this licorice role here, and then I drew a little
face in Flipbook mode. Let me ungroup. Here I drew
the eyes and in the course, the eyes are even blinking. Here they're closed, and
here they're open again. It makes it really lively. I also applied some
keyframes to this one, it's the rolling one. That's why it's rolling across the board, the licorice roll. It's basically three
times the same clip. It's just in different position
and in different sizes. Here it's very small
and in the very back, and then here it's a little bit closer and a little bit bigger. Even bigger, it seems like it comes closer every time it
rolls across the canvas. Then you hear this sound, I just found this creaking
noise really fun, I don't know, a rusty
wheel or something. That's why I just added this
sound. Let's play it again. Here, I filmed my coffee
pot next to my workstation. Let me just play. Got it. So this is a little story.
I just wanted to tell. My coffee cup is complaining
because I keep forgetting, drinking it before it gets cold. You maybe know the situation. I gave my coffee cup a little face in Flipbook
mode, of course. And I had the
pupils move around. I added a little bit
of sound and writing. And here we have a,
something is happening. So those little lines
appear to the outside, then the cup is being picked up. This was a little bit
difficult because I had to move the eyes frame by frame
that they stay on the cup. Now nothing is here. Here the cup and the
face are coming back. So here we are back. And then, yeah, she keeps forgetting that's what
she does with her coffee. So one last example, and you'll probably find
that I really like to animate unanimate objects
like this one here. So here, I've just basically
filmed my finger going up and down and just turned it
into a little character. So what I did here is
also super simple. I just gave it to arms. And then frame by frame, I just added the
position to the finger. I just drew on top and
on top and on top. And I went on frame by frame and drew wherever it
should have been. And I also found, like a little kids
laughter sound. So I just added that as well. So let's look at it once more. I hope you like my examples. There's just so much you can do with animation over videos, and it's gotten so intuitive now with all these changes
for Procreate Dreams, too. So I'm really looking forward to see what
you guys come up with. And then let's move on to the last video where
we'll wrap up the class. I will see you there.
13. Wrap Up: Congratulations. You made it
to the end of this class. By now, you know the basics
of Procreate Dreams and the different ways
you can add motion to your work using simple
frame-by-frame animation, keyframing, perform
mode and transitions. You're now well
prepared to create eye catching short form videos that help your
content stand out. Now it's time for you to
upload your project to the project gallery so we
all can admire your work. And if you share
your art online, make sure to tag me
that I can find it. If you found this class helpful, leaving a review really helps other students
discover this class, and it also supports
us teachers. And if you'd like
to stay up to date, follow me here and on social media to see what
I'm working on next. Thank you so much
for learning with me and happy animating. Bye.
 Jutta Schneider, Artist | Educator