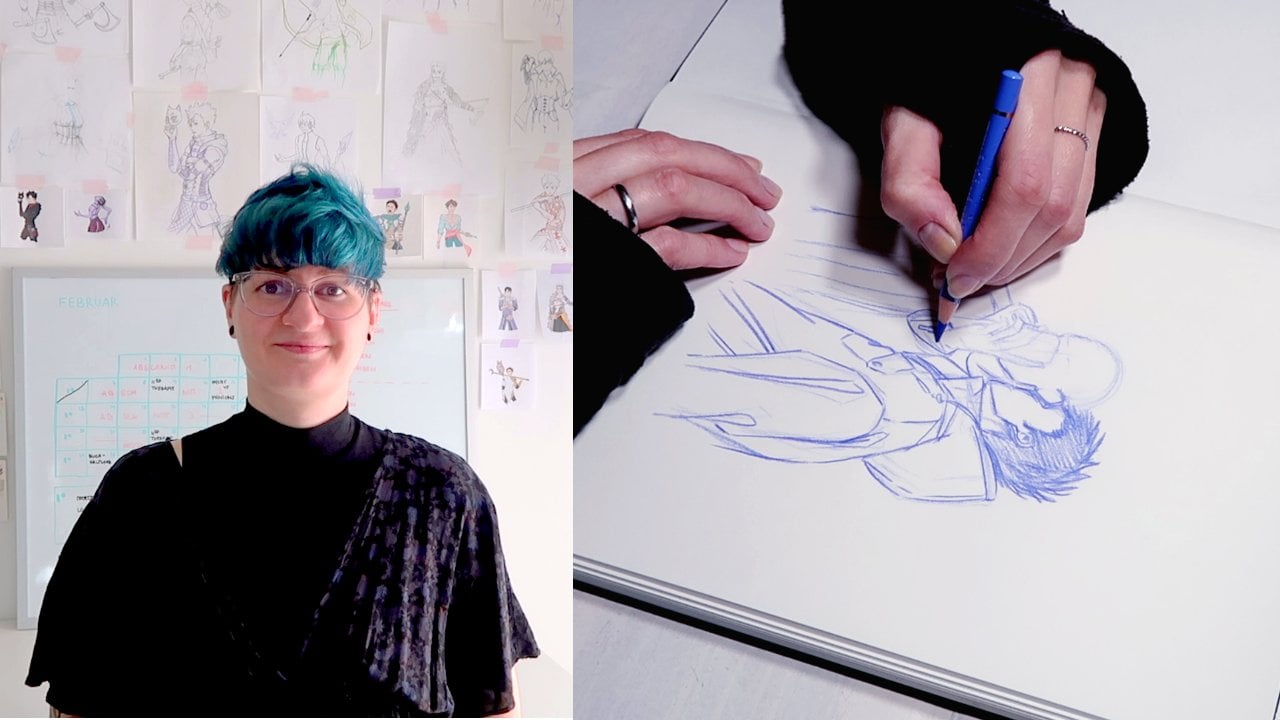
Transcripts
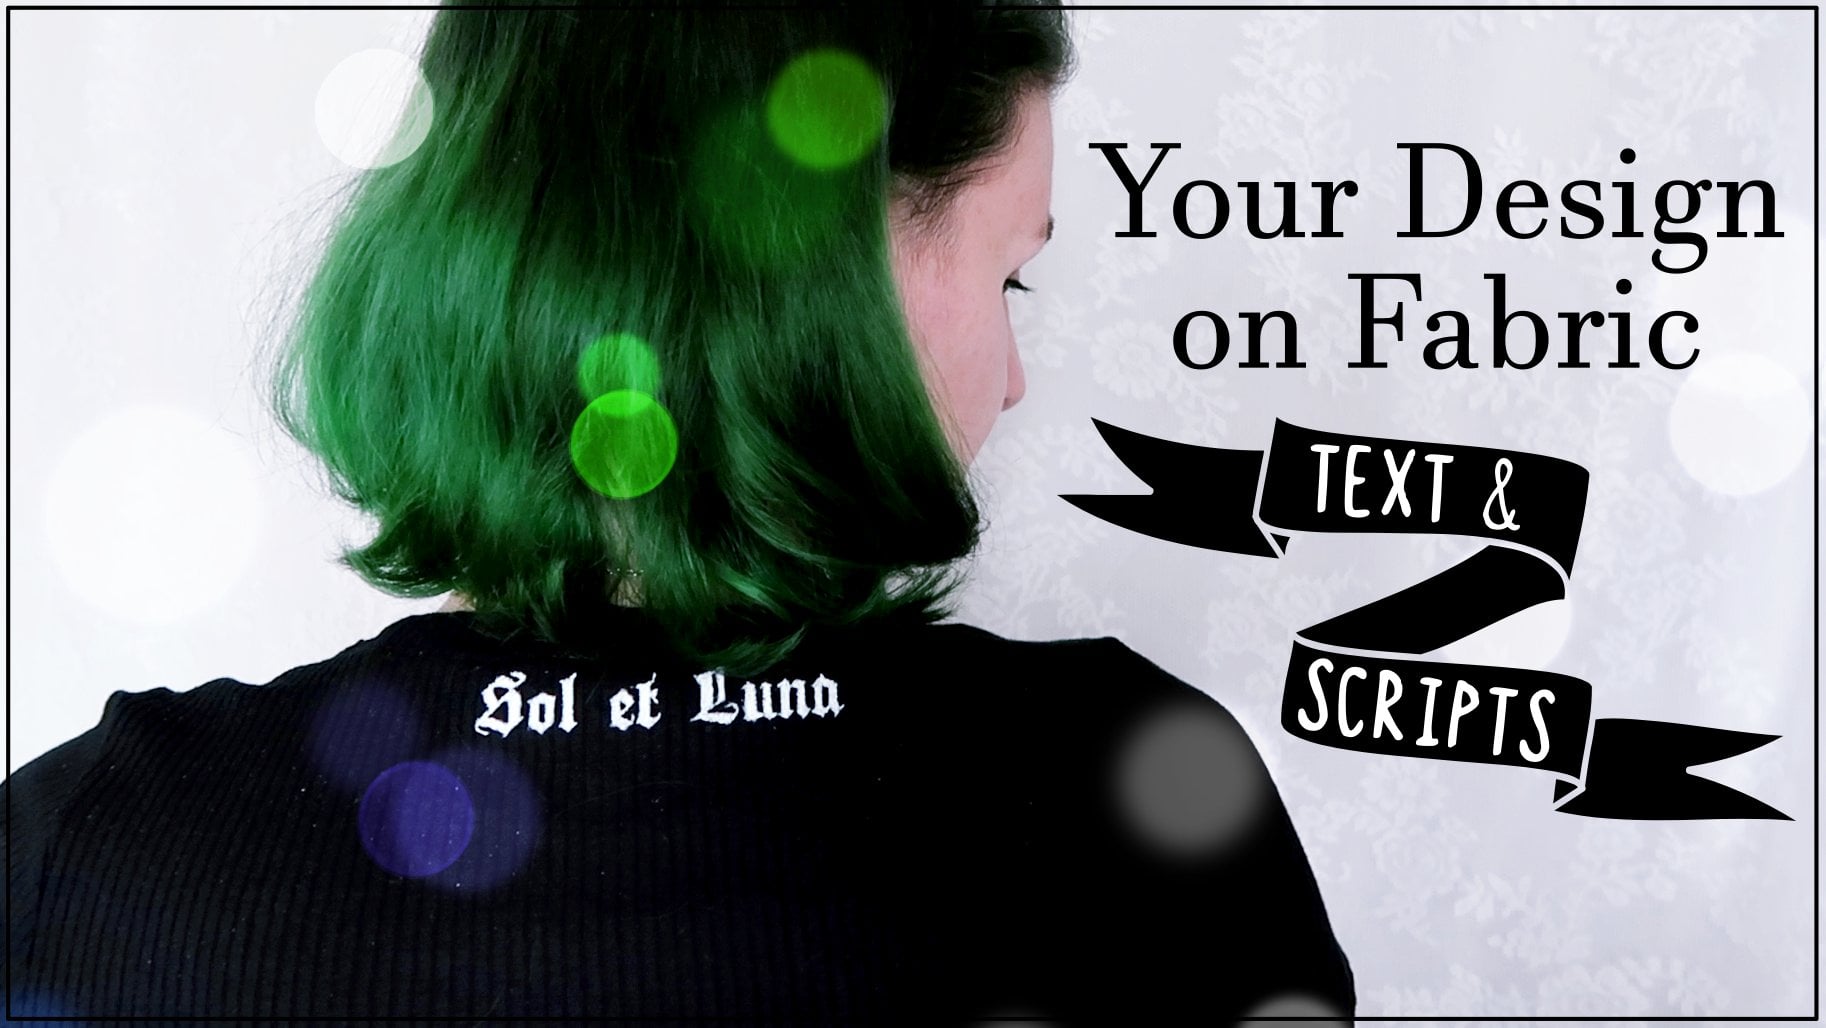
1. Introduction: Hello everyone and welcome to part two of my fabric printing class using craft store materials only for all of you who haven't watched part one. Hi, I'm Aliyah fovea, Illustrator art which and treasure hunters from the Baltic Sea. Whenever I was 13, I started printing and painting on my own clothes. Now I'm here to teach you all my tips and tricks on fabric printing. In part one, I talked about the crucial basics like printing positive and negative spaces, central cutting and bringing the paint onto the fabric, demonstrating the techniques on rather simple script. Now in part two, I'll show you how to put these basics to use on a more elaborate design than just text. You're going to learn how to alter a design to be an easy to cut out stencil tips and tricks on getting an even an opaque result, as well as how to paint free handedly without hesitation. So without further ado, let's start with a list of materials.
2. Materials: This fabric printing technique doesn't require many materials and most of them are the same as in part one. Nevertheless, I'm going to list them here in order of their appearance. Paper. You need some kind of paper to cut your stencil out of. I'm quite advanced at this, so I have no problems using thin printer paper. But if you are afraid that it would rip too easily, you can totally use something thicker than that, like cardboard or mixed media paper. It is a little more difficult to cut back. This tensor will be waste dirtier. A printer. A printer has practical if your design is digital. I needed because I have to make some changes to my physically existing design digitally. But if you're sketching on paper and cut it out later, a printer isn't necessary. A light box or tracing paper. As I mentioned, I'm going to make some adjustment to my design to trace the final version, lightbox or shackled paper could become handy. Again, not necessary though. The tracing at the window trick totally works too, if you have to trace anything at all. Hence, I think it's self-explanatory, isn't it would be good to have different colors so you can differentiate between certain lines later, a cutting mat. When cutting the stem cell, you have to make sure to protect your desk or the table you're working on. You can use a cutting mat like mine here or just put down a thick piece of cardboard. It's definitely going to be easier when the surface you're cutting on is a little softer. This makes the blade glide easier. A box cutter or a crafting knife to cut out the stencil precisely. I use a crafting life. These are the best for small details, but a box cutter with a fixated blade works just fine. Fabric paint. As for part one, you will need just one fabric paint of your choice. If you're intending to print on DACA fabrics, make sure that your paint is suited for those. Since I mostly wear black, I'm going to print my design and white. My favorite fabric paint is this Giovanna one by coil, a shirt. The star of the show, the shirt you are printing on. Cotton fabrics work best. But this totally depends on the paint you've got. Mine even says it on the label. For lighten, dark color textiles made of cotton and blends with maximum 20 percent synthetic fiber content. I'm going to print on this cute chop. The gathered sleeves will make it a little more difficult, but it's not impossible. Just consider your skill level when choosing your garment brushes. To bring the paint on the fabric, you'll obviously need some brushes. I always use those two kinds of brushes when painting on fabric. Some broad square ones for the first layer and then some delicate ones for details. I also cut the broad brushes short so that they're really stiff. This prevents the bristles from slipping under the stances and ruining the sharp outline is surface to print on. When printing on an item that has more than one layer, you'll need something to put in between those layers to prevent paint bleedings. I use my cutting board for this since it is nice and big and stretches the fabric a little bit, which makes it easier to print on. But as for the cutting surface, a thick piece of cardboard will work as well. And iron and additional. Most fabric paints don't need fixation or special aftercare. But if you'd like to make the design extra secure, you'll need an iron and the dish towel.
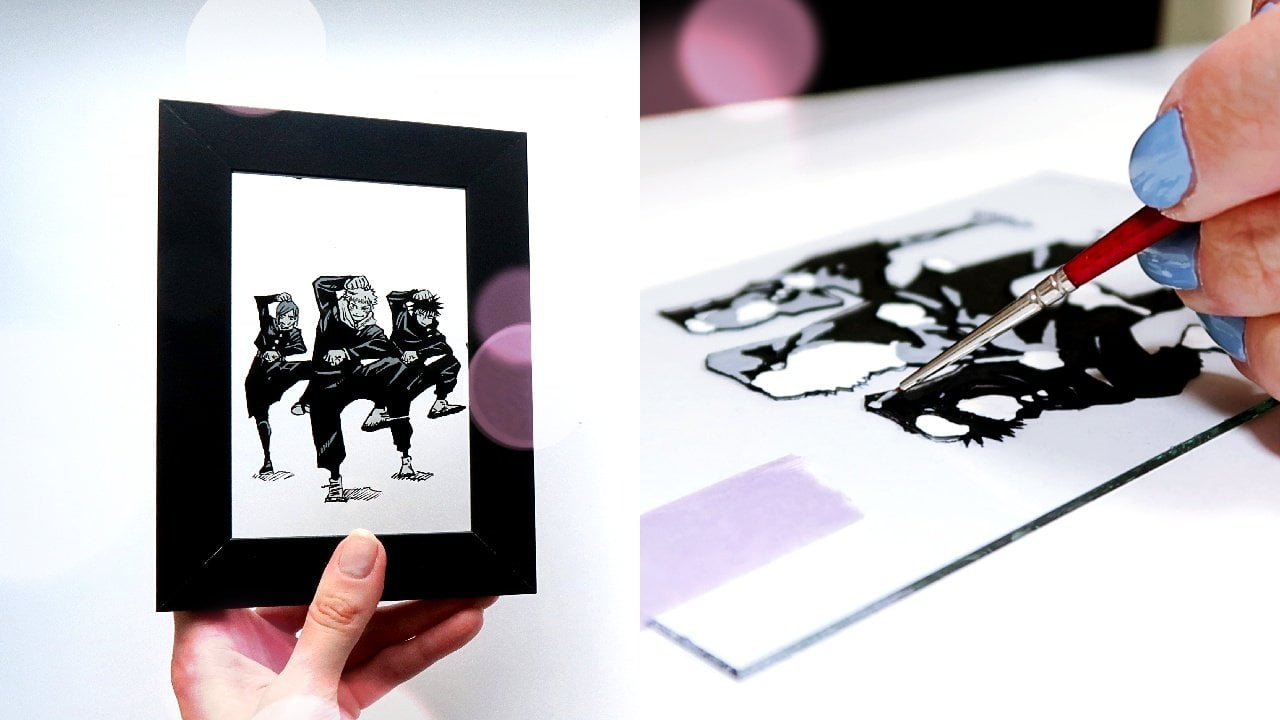
3. The Design: In part one, you learned how to prepare a stencil for simple script. Now in part 2 of this class, it gets a little more advanced. But don't be afraid the steps are basically the same. The design is just a little more elaborate. First, some general stuff about choosing a design. It's always the best to draw or paint your design yourself. Be a digitally or traditionally, it's not only the coolest thing to show off something that you created entirely yourself, but also avoids issues of copyright and art theft. But I'm sure not all of you feel totally confident to create a design from scratch. And that's okay. Not everyone is an all round the artist. I copied many AdWords and printed them on my clothes when I was starting out. That is fine as long as you are going to do it just for yourself. Just let me tell you this. If you're going to post a picture of your printed garment online on Instagram, Facebook, and the project gallery here on Skillshare. You have to credit the artist of the design properly so that people who see your work can find the artist easily. You are not allowed. And I stress that thoroughly to monetize anything that you aren't the creator of or haven't purchased any rights for. And with that, back to the design itself for the demonstration in this class, I chose this painting I did in ink, the sun and moon illustrations where inspired by the medieval artists algebraic doula and make a perfect one color design for fabric printing. You're probably thinking, wow, no way. How am I supposed to cut out a stanza with that many lines and details? Yeah, I thought that too. But don't worry, before cutting anything, we're going to simplify the design a little bit. As you can see here, my illustrations are way too big for this particular word. So the first thing to do is scanning the images clean and lighten them up a little and resize them, then print them individually. Could be it for preparation. And if you are an advanced paper cutter, go ahead and start making your stencil. But for all who are intimidated by all the lines, I have good news for you. The first layer of paint you are printing has the salon purpose of getting down a rough idea of the final design. That means that we're going to break down this detailed piece into the most important lines first, they will function as an orientation for slate there when we're painting the details freehand, glee, free handedly. What yes, you heard, right? But don't worry, don't worry. It's totally up to you how much you simplify your design. I mean, there are basically two options. You could obviously leave the design as it is. Pros of that method are you have an almost finished result of the first print. Hence, less things you have to pain-free handedly. But it's very elaborate to cat and it requires many, many connection lines and these lead to more mistakes. The stencil will be very fragile. And yeah, In conclusion, you spent more time on working on the stencil, although it might break, which leads to more frustration with cutting and printing. The second option is you break down the design to the essential lines and paint in the details later, it's way easier to cut the census. It's more fun and you get to practice painting for handedly the cons for that. It won't come out exactly as the paper design. But whatever, right. I decided for the second method. So I took a signal and color and mark the most important lines first. After that, the light box or the charcoal paper appear on the scene. And part 1 of this class, I made an entire lecture about positive and negative printing. So I assume that you all know these two different forms of printing. If not, revisit this class first. So you know what I mean by saying that I'm going to print the positive space. Therefore, I have to cut out everything that will end up on the shirt later, in this case, the lines so that the negative space around them is kept intact. One last thing before making the first cut is making sure that there won't be any pieces falling out after cutting. A good way to do that is taking a pencil and draw a line into every negative space, starting from the outside of the design. If you can reach every part without removing the pencil from the paper, everything is fine. But if you hit a wall, you have to draw a connection line like a little bridge. These prevent the parts to fall out and keep them in place while pounding and brush over them. And now, after putting in all the necessary connection lines, we can finally start to cut our stencil.
4. Cutting the Stencil: Here are some general safety caves. Make sure that the knife you're using a sharp, a bland one is more likely to first rip your paper part and destroy your work. And second, slip and hurt your fingers, hands, arms, or whatever. Use a cutting proof surface like a cutting board or a thick piece of cardboard to protect the desk. And lastly, take it slow. Rushing just leads to accidents. When cutting the sensor work your way from the middle to the outer parts of your design. Doing it the other way around would be harder to cut since the outer parts become less stable and could tear much more easily. To prevent anything from grouping, I place my finger next to the blade where I'm about to cut and press down any loose pieces to create a kind of counter-force to the blade. Pro tip, cut out small bits at the time instead of getting the piece out. And one, this helps to prevent mistakes, is easier on your hand and wrist and to keep track of where you already cut and where you still need to be careful when you're taking out the bits because they often coming to one not so cleanly cut corner. For cutting curves, I advice you to rather stick and poke the nice tip around it rather than trying to slide the plate. And lastly, mistakes happen. If so, don't throw away your work. It's easily fixable with clear cape. You can find a detailed demonstration of fixing cutting mistakes in part 1 of this class. Cutting the stencil is by far the most difficult part of this whole endeavor. So now that we're done with it, It's not long until you've got your new graphic t-shirt.
5. Printing & Painting: Now that you've finished your stencil, it's finally time to put some paint onto fabric. But before you start, you just need to do some preparation. The placing of the stencil is totally up to you. But here are some tips for the best outcome. Put on the shirt or garment you are going to print on and try placing the stencil in front of a mirror. Be careful not to rip your stencil apart though. When you found the right spot, take some chalk or graphite pencil and mark the outlines of this denser roughly on the fabric. Placing the stencil by wearing the garment helps to see where the image will curve on your body. Think back to the first part of this class. It is absolutely necessary to put something between the layers of fabric to avoid color bleeding. I always use my cutting board for this, since it has the perfect size to repetition, rounded. Now place the stencil where you marked it and tape it down so it won't move during the print. You can also fix it, the short run, the divider so the fabric won't move, but don't stretch it too much. Otherwise your print will compress after removing the tension. The process is exactly the same as with the script. You'll need your square short bristle brushes for the base layer. Dip your brush into the paint, tap it on some scrap paper to get some excess off. Then start petting over your stencil. Move the brush in the direction where you come from the paper onto the fabric. Just like I did while cutting, I press down loose bits of this tensile to keep them in place. If you're printing with a light color onto darker fabric, this first layer will barely be seen. Don't worry about that. As long as there's enough paint down to see the outlines, it doesn't matter if it's not opaque right away. To actually get it opaque, we need some more layers. After you've finished petting your brush all over your stencil, you got the most challenging part down. Now, you've got the perfect base for finishing your graphic shirt. At this point, remove the stencil carefully. Then before painting ahead, the first thing to do is filling in all the connection lines that were necessary to keep the stencil M Tech. After that, take out your initial design and add all the small details that you left out to simplify the stencil. This might seem intimidating, but trust yourself, you've got the reference image and the base outlines that'll guide you. Besides, you don't have to copy the original Exactly. I, for example, the only edit those lines which I figured were necessary for the moon's facial features. Same with the framing race. You're going to wear the shirt. So keep in mind that people can't see the tiniest details anyways, unless they get really close, which they don't usually do on a shirt. And for a design like this, less is more. And from here on, it's just putting paint on top until you're satisfied with the saturation. Simple, right? Yeah. But be aware that this can be the most time-consuming part. It took me four hours to complete the second layer. This will, of course, depend on your design. Depending on your specific brand of paint. It can take more or less layers. Black paint on light fabrics usually just needs one to two. While light colors on DAG fabrics can require up to four or five layers. One huge disadvantage painting on fabric has, is that the more layers you put on, the more detailed gets lost since the paint thickens up. It is also possible that the paint will crack when you put too much on your shirt. I stopped after the second layer since my paint is well covering and my design very line heavy. Another pro tip after you finished printing and painting. And there are some small mistakes like here where the brush slipped under the stencil or way you've got a not so clean line. You can actually go in and correct these. Unfortunately, this only applies if your shirt is darker than the design and you've got another fabric paint that matches your shirts color. In my case, it is easy since my shortest black and I got some black fabric paint. However, what you see me correcting here are and really mistakes. It wouldn't be noticeable. And anyway, but I know that there are some perfectionists out there, including myself. So I cleaned up a little here and there.
6. Aftercare: Congratulations, you've successfully printed your own individual graphic t-shirt. And I bet it looks awesome. But before you put it on and show it to everyone, I have some aftercare and tips for you. Fabric paint needs some time to settle. I usually leave it alone for at least a week before I put it in the washing machine for the first time. Another thing I do is fixing the paint by ironing it. As I said on the part about the materials, not all fabric paints require this kind of fixation. But I do it anyways, just to be extra secure. Don't forget to put the dish towel over your design when doing it though.
7. Class Project: This kind of fabric printing is a great way to upcycled your wardrobe, makes great gifts, and is the perfect opportunity to express yourself. For this class is project. Share your process with us. I can't wait to see your designs, stencils, and finished garments. Tell us what went well and where you struggled eventually. One last thing before you go ahead. If you liked this class, please give it a good review. It not only helps me as a creator, but also other people to find it more easily, even. Thank you for the class in the comments section will totally make my day. Thank you for watching and see you in the project gallery. Bye.
 Ellia Fabia, Artist, Illustrator & Content Creator