Transcripts
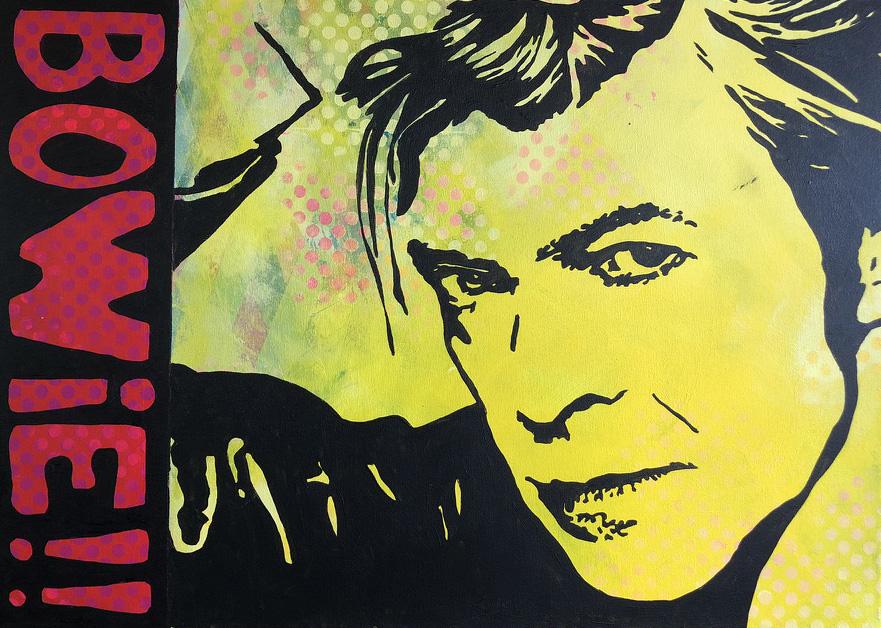
1. Intro david til skillshare: Hello there and welcome. Let's paint David Bowie. In this video, I'm
going to teach you how to paint this awesome
painting of David Bowie. All you need is some kitchens, bunches, stencils,
and I2 projector, acrylic paint, a Canvas, some brushes, the Posca
pen, and a ruler. That's all we need to paint
this awesome painting. Now, let's get started. See you in Lesson one.
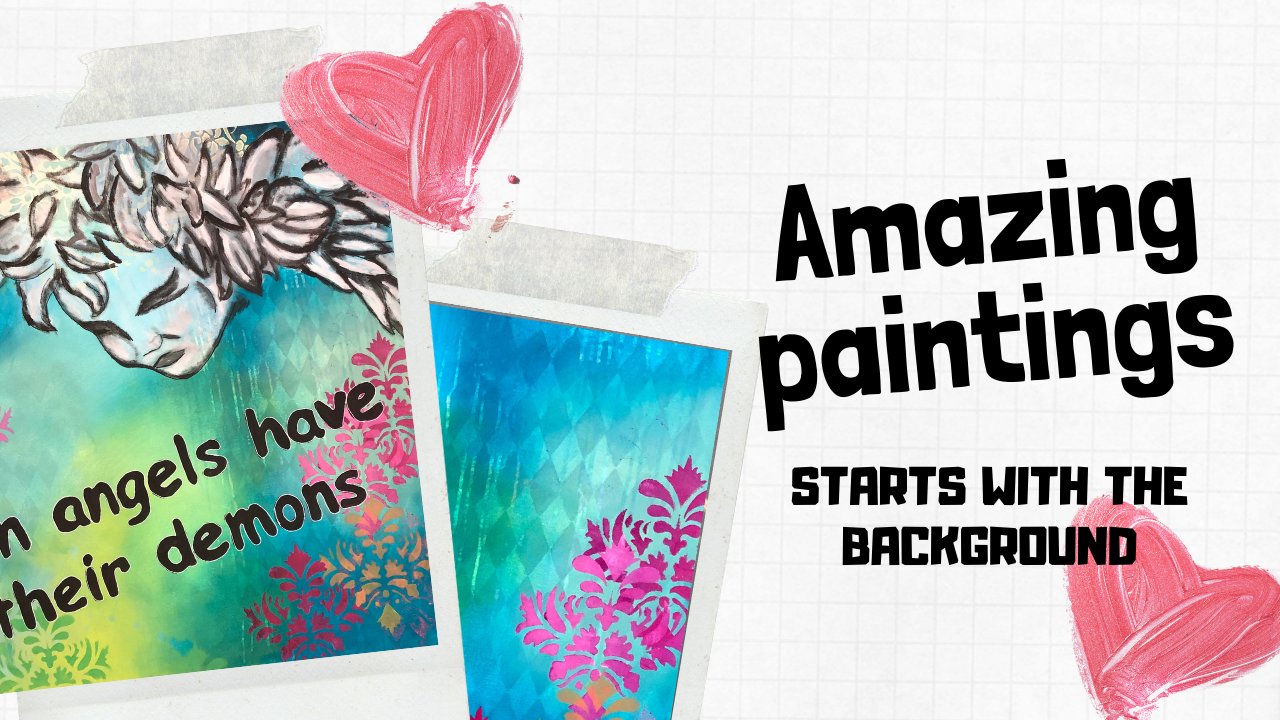
2. Starting up the background: Here I have taken the colors
I would like to work with. I only lay small blobs
of paint around on my canvas that I can work into each other with
my kitchen sponges. The colors can be mixed
without turning brown, as they all consist of the same primary colors,
blue and yellow. Now I just used my
kitchen sponges to work the colors into each
other in small circles. In the transition
between the colors, I use a clean sponge to make the colors faith nicely
into each other. When my first coat
of paint is dry, I gave it one more time
to saturate the colors. That makes them more
vibrant and intense. I dilute my paint a bit by spraying some water
on my sponge. This will make the
color more transparent and easier to apply
in a thin layer, the colleges needs to be
slightly saturated, not opaque. Now I want to make some Harlequins squares
in my background. My Halloween squares
should only be visible in the background
when my painting is finished. For that, you can
use this density. If you have one. Here, I will show you how to
make them by hand. Here I use an overflow list. You can use a ruler or
whatever you have on hand, as long as the
width of it is not more than two to
four centimeters, you need to be able to draw on both sides so that your
Harlequins squares would be the same
size all the way through the area you've
been making the effect on. You can make your
dice more or less pointed by adjusting
on your ruler, by laying it further down, you get a flatter dies by
straightening it more, you get a more pointed dice. If you want to assess what
you guys will look like, you can draw a line on
your ruler so you can see the entire desk before you decide if you took the
ruler a little bit more, you can easily assess whether it should be more
or less pointed. I always paint
them over the edge so that they don't hang
and float in the air. To not worry about the half
square towards the center of the painting as it
will be covered in paint later in the process.
3. Making the cool harlequin effekt in the background: Okay, so now I'm ready
to paint my dice is, and since they will be more or less covered in paint later on, I do not make too much of it. It does not matter too
much that they are painted perfectly to the edge as you won't be able to see it anyway. I have chosen a lot of colors
that I think harmonize. And therein also a complimentary
color, the pink one. Now I just paint
all my dieses in different colors and they always love it when I get
to this point, because then it's
time to sit back, relax a little bit with a
nice cup of tea or coffee. It's almost meditation for me, just as it's meditative. Later when I'm going
to paint David, I really enjoy this
part of the process because you can be allowed to immerse yourself a little bit. So sit back and enjoy
the quiet moment. In a little while, it goes crazy again when we're going to paint them are diocese into the background and
make it more rustic.
4. Projecting and drawing David to the canvas: As you probably have wondered, you can see I have marked
with tape in one of the sites as I want to make an area where
I can write Bowlby, some fun effects need to be made and then the name
needs to be painted. I use a nice clear red color, which contracts with
the other colors. As you can see, the color is not opaque and therefore I'm
mixing a little widen, otherwise the color would
not be vibrant, but no Matt. Later on in the process, I will give it a second
coat of the red color. Now I want to start getting
my Halloween chiggers rustic, and get them more into the background by layering
some color over them. For this, I use my
sponge along the way, a scratch a little
bit in the paint, as well as web some of it
off again with a damp cloth. Finally, I take a metal spatula where I use only the backdrop, apply some paint in a
slightly thicker layer, no need to scrape it on. It should be applied with the entire underside
of the spreadsheet. Finally, I'd just drop
it a little bit with my sponge to get some
slightly softer transitions. So now I want to color the
other side of the canvas. Right now, it does not
look particularly good, but it's getting better. It's about at the present time, having confidence in depresses. Again, I use my sponge and my metal spatula to
apply the paint. If you find that your paint is a little heavy to pull out, you can just put a little
water on this branch. As you can see, I ended up applying yellow
and white paint on the blue color as I did not like the restored her Ray for
wide, That's my motto. Because when you
make something that did not turn out as expected, you can fortunately always
painted over again. You should not be
afraid of that. To not be afraid to experiment. Maybe it'll be good, maybe not. But if not hurray for white. Now you can hardly see my
Heineken cubes anymore. You can adjust on it by applying more or
less paint on top. Here is the plan
that you could only just sends them in
the background. They should not be dominant. There's not expression
called kill your darlings. It can be very difficult
for some people. Now I'm painting with the
red for the second time. See how nice and clear
the color is now compared to when I painted it on without the white coloring. It would never become
the red beautiful color. Even if you gave it many layers. The wide serve as a pure
background for your color.
5. Painting David: Now I make some effects with
a stencil with polka dots. I do a little here
and a little there. Can also be used as possibly camouflaged for AKI transitions. If there are some areas
you're not happy with. Now, I'm projected my
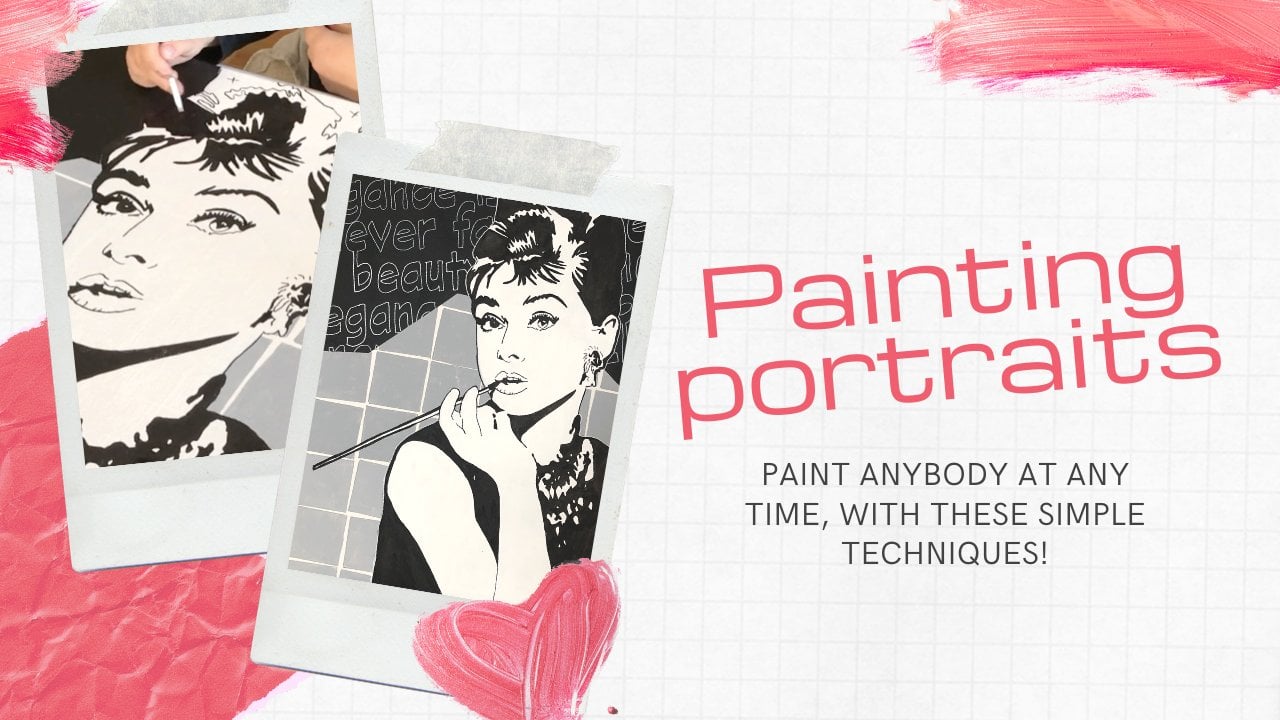
portrait of David Bowie. Now, I want to draw the outline
of David onto my canvas. I do this with a
black Posca pen. I'm always very detailed when
I draw the eyes, the nose, and the mouth, as it is his personality that is
to be expressed here. You cannot start free styling when drawing details
from a face. You can do this when
you draw the hair, the clothes, and the body, but never when you draw the
face of the personality, because then you will not be able to recognize the person. The computer is very smart
in selecting the details. We're not smarter than that. Unfortunately, no, I just
draw the rest, david. Where the edges are
a little indistinct. I just draw straight line
that defines an area. I do this because
we do not have to draw all the noise.
That's an osteon. So it's not a real stencil
because we cannot cut it out. We can only draw afterward. When editing our photos, there's often a bit of noise from the shadows in the photo. If we had to draw every
single little dot, We wouldn't never finished
and I would get very tired. So make it easy for yourself
by defining the areas, but always be as precise as possible when making
the eyes, the nose, and the mouth, all
the other areas you do not need to
be so detailed with. It'll still be a
super cool result.
6. The last finish and making the name: Now I want to make some
fun out here on the side. It could have been a
quote he had said, or a name on an album, his date of birth, or anything else relevant
to David Bowie. Here I have just
chosen his name. I have chosen a polka dots
Denzel to make my effect with, but it can be any
tension you have. And like flowers, stripes or
a cool pattern stencil you already have at that with a base color that does not
create a lot of contrast. But you can easily
make your effect more visible with a naughtier
color than I do here. The black were paint around
afterwards. We'll deem it. I put a little pink on afterwards to spice it
up a little bit more. When it's dry. I take my masking tape off and then I draw his name by hand. I draw it by hand because
I want a naive expression. If you're not comfortable
drawing it by hand, you can use a stencil or you can design it in a cool
font you like. Once I have drawn the
name with my posca pen, I start painting
everything that is outside the name,
the background. Remember, you do not
have to paint black. You can paint it
any color you want. Now I just have to make the
last little bit of finished. Remember, you can paint
any one you like. Do you want to paint
your favorite actor? I didn't want to
paint your children, your girlfriend, your
husband, or something else. The sky is the limit. Thank you for watching. I hope to see you in one of my other videos.
Thank you for now. Bye.
 MilleMajArt, Danish artist teaching modern art :-)