Transcripts
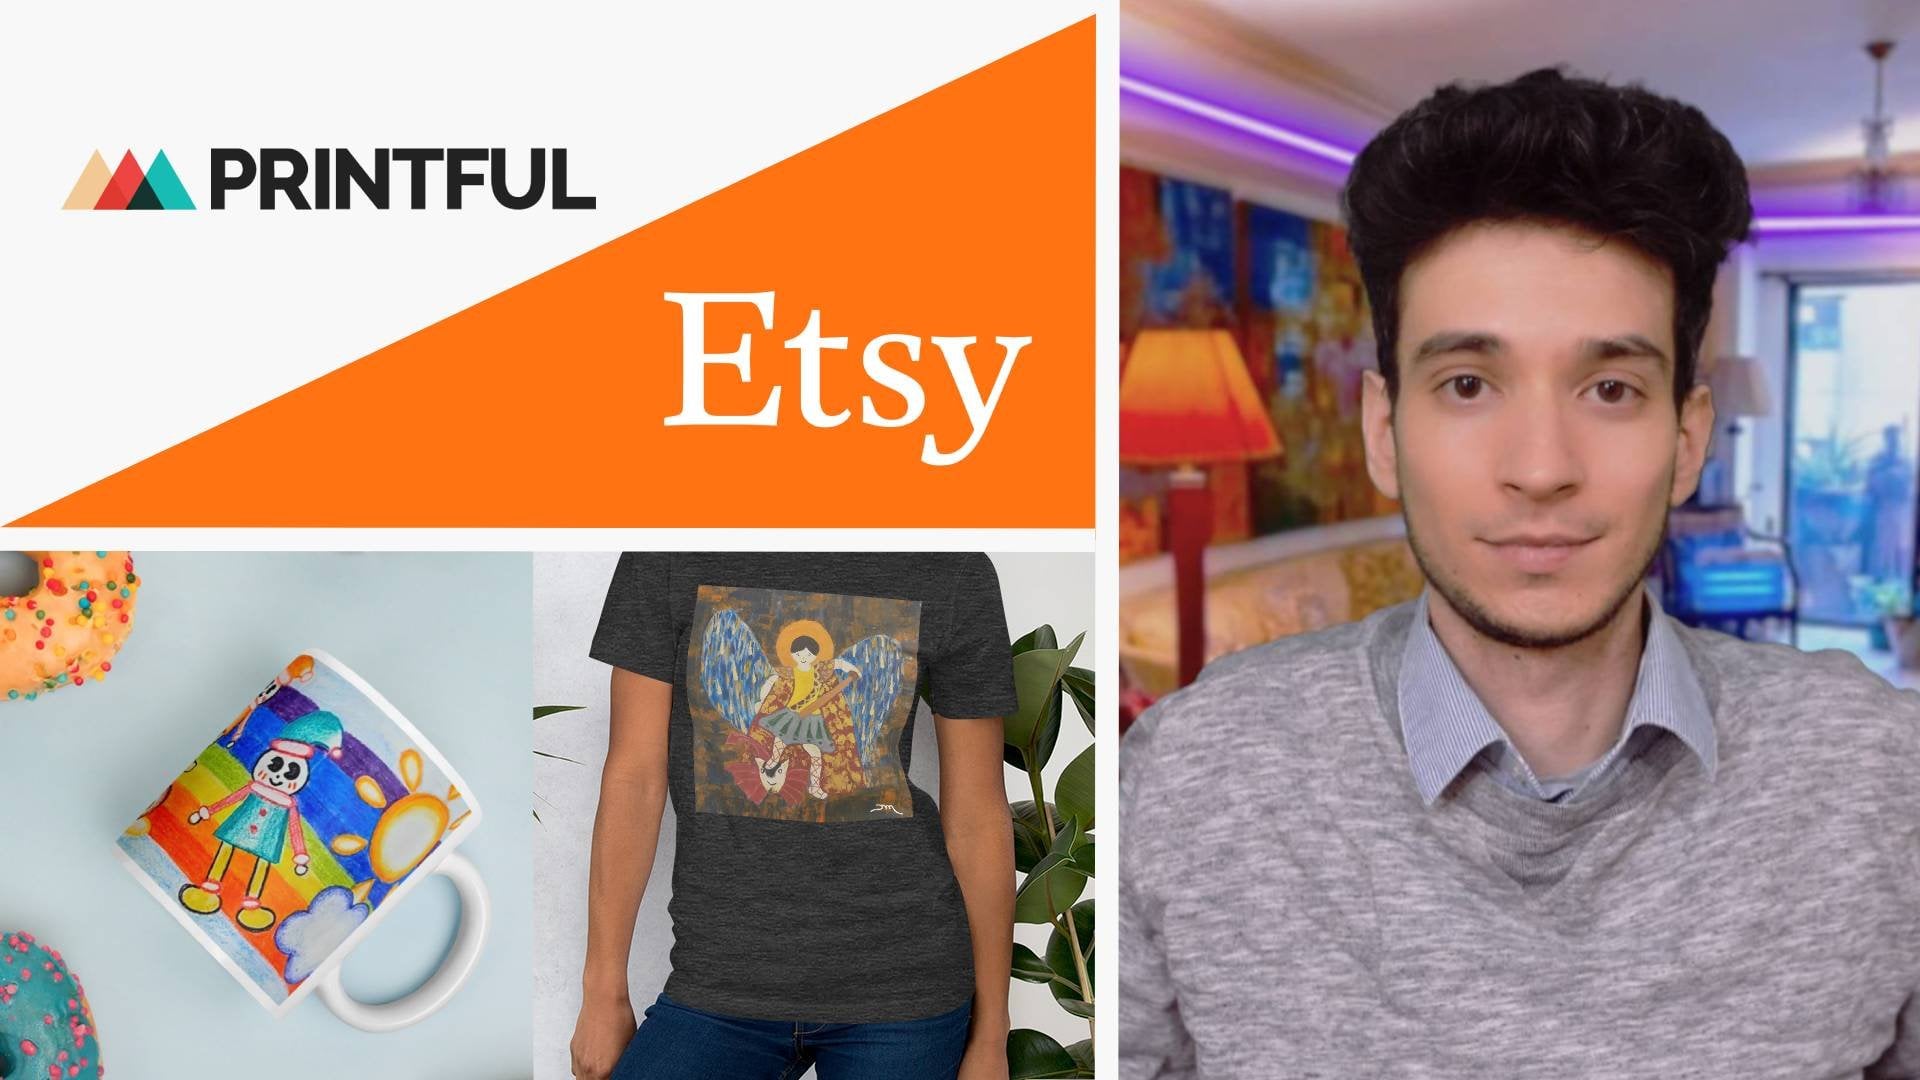
1. Welcome to the Class: Welcome to the class. Print on demand for artists. Turn your designs into real products and sell
them without the hassle. In this class, you'll learn why print-on-demand is the right
business model for you. If you want to
sell real product, but do the hands off just as if you'd sell
digital products. And we have met yet, my name is Maria. I'm an artistic graphic
designer and a teacher, and I love to create
digital products, but I do get it. Anyone wants to sell
digital products, but have real products
to be proud of. If you also love to design. But once you create real
products from your designs such as stroke pillows,
max, or t-shirts. Just to name a few hundreds. You cannot tell your customers to download the design
and print it on a specific sheet to finally get a t-shirt, Mac, or pillow. Maybe. I say maybe
because whether you know, your customer is most appropriate
a professional printer. And here comes our POD
provider into play. They can easily fulfil
your customer's order and even ship it to them
for you without the hassle of printing
and packaging and for your customers with
a certainty that they will receive a
high-quality product. Because after all, the
POD provider knows what he does when he makes the audit product
with the OT side. While you take care of the
thing you love most designing. In this class, I show
you how you can set up your business with
the best of both worlds. Designing and selling
real products, but hands up No creating
a packaging required, no handling of free fonts. It all happens hence off, with the help of
your POD partner. You want to learn more about the POD business model and
also about creating and setting up your own
landing pages for your products in a way that you can do advertising
once and forever. You are at the right place. Join me now.
2. What is Print on Demand?: Let's first talk about what
print on demand actually is. For print on demand, we have several options. There is, on the one hand, there are a lot of
different sites online which allow you
to upload your images. And then they printed on product they offer and
send it to your customer. Or there are other
sites online which allows you to connect your
store to their website. And then when you
make an order over your store or someone
orders over your store, they are going ahead and print whatever it
has been purchased. So the question you have
to ask yourself is, what do you like best? So you'd like the one
version or the other. I'm going to show you
both on the computer and then I tell you which
one I like more. So we are now on the
computer and I have open society six because this is one of the platforms I
like personally most. They don't look that cheap. And on the other hand, I'm out. Its mean to say sheep, but some platforms are
really looking like a big loud place where
people buy or right, not for very sheep. And that means that
you as an artist, also get a lot of or maybe get some very sheep orders and you make $1 or two per purchase. So that's not what
we actually want. We want to value our work. So that's why I have
picked now Society six. There are many others
which are pretty good. This is just one example. So let's say you want
to sell on society six. And you can see
here are a lot of categories with a
lot of products. This is a great thing
for you as an artist. You should limit
yourself to just, let's say a few products. Maybe you have 345. You can always take on more once you have
built your audience. But you just limit your self to specific
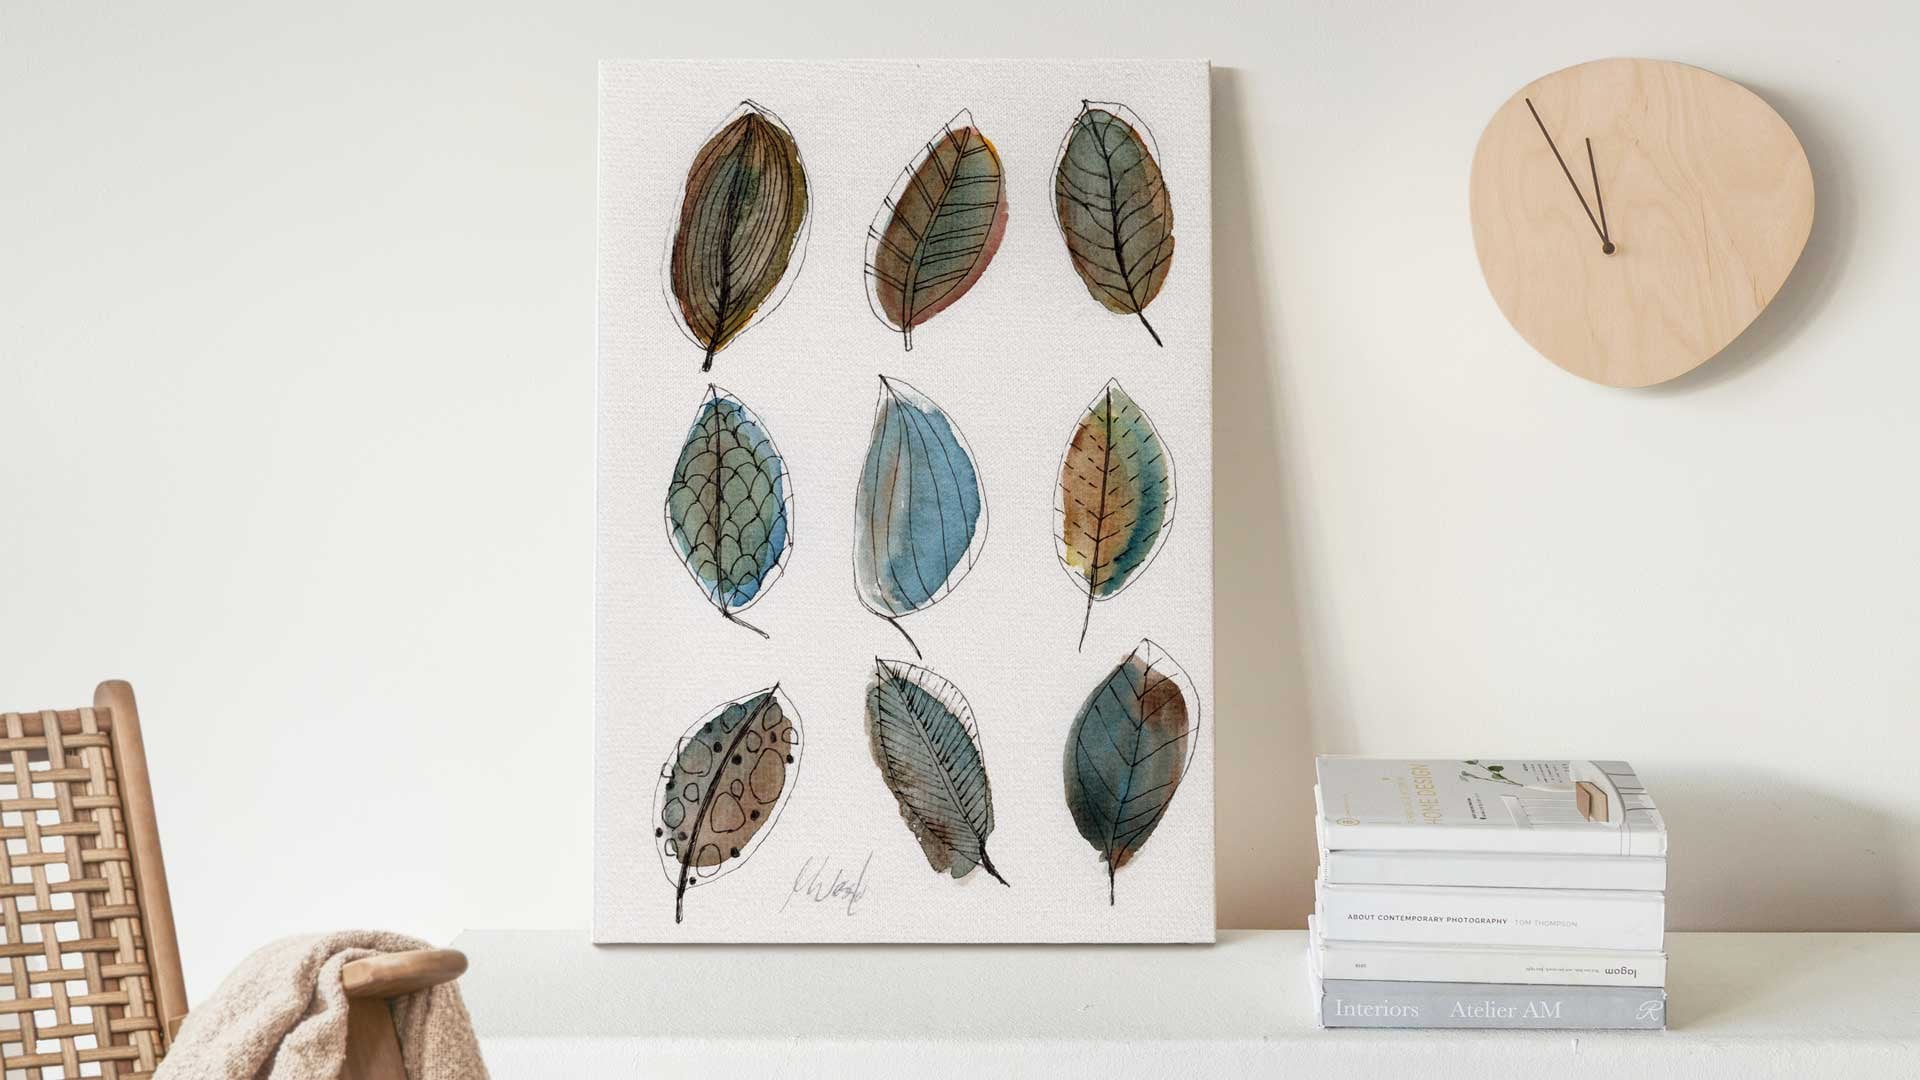
amount of products. So let's say we want to create some home decor and make
floor pillows, e.g. or here you have wall
clocks and one morals. Okay, Let's say one more word. Here, go here. Assembler products, which allow you to
print your project on a huge all moral and then
sell that on your website. It looks pretty artists j, so that might be your choice, but I'm more looking for
Canvas or something like that. So let's put that in here. Canva prints, you see there are so many different
products that is not very hard to find whatever
you want to sell here. So the point now is, when I have these projects, I just click on one, whatever. And I can now choose
what size I want. Or in this case
there's just one size, but often I can choose
between different sizes. And then I can purchase
it here on society six. So here are just a
few preview images and just one main image. Is that good? Yes, of course,
Society six has done a pretty good job and they
do a lot of marketing. So it's not bad to be
connected to set such as side. It's more what is that? Is that you are
just in the pond. You're just one of
many, many people. And that might mean
that you are not seen. So you need to do a lot of marketing yourself
to be seen actually. But on the other hand, if you have your own shop, you also have to
do your marketing. So that's not the main point. The main point I look at here is that it all looks similar. I cannot stand out
because I have the same preview
image as anyone else. So when I am on the other hand, on a site like printing PHI, which offers drop shipping
and that means you upload your product there
or your image there. And applied to a product. Then you push the entire
sync to your own store, whichever that is, it can be. It can be it will converge
on your own web site. It can be Shopify,
whatever you decide, then you can upload
your own preview image. I like the best. But on the other
end, you of course, have to take care of a lot of more things like
shipping and such. You have to get that
right and set it upright, but it's well-worth to
just figure it out. And that is what we are
going to do in this class. I'm going to show you how
to figure these things up. So you are not one
fish in a big pond, but you are much more
unique when we look at your own store and upload your own
preview images there, you see that there are really canvas where
you can print on. There are also posters
way which you can sell. We will pick up
posters and example. The reason is easy because
Canada is of course, much more beautiful,
but on the other hand, is also very expensive. So you might have
a much harder time to sell something like that. And that's why I'm going
to show you how to upload your own wall art here. And then we're going to apply it to a poster and then
push it to our own star. And then we are also adding our own preview images and of course shipping
profiles and such. We don't get around
these things. But the reason I
want you to think about not being on society
six and such sites, but on your own, is because you can make your product
much more unit. In the end. That's why people buy something. They decide whether it's
something unique or it's not. If it's not unique, they most probably go somewhere.
3. Why Print on Demand is a great Business Modell for Artists: So let's talk about
the question why print on-demand is a great
business model for artists. We have seen in the last lesson that print on-demand has
definitely its advantages. One is that you don't have
to store products at home. If you want to sell
t-shirts, e.g. you can't just have one
t-shirt or two at home, but you need them in different sizes and maybe
even in different colors. It's not suitable if you
just have one of them. So if you have 1m1l1
Excel to less, so you have to have several teachers at home to
even start your business. Then you need a machine
to start printing, and then you need paper
where you can print on. That is what way
you need a printer for to actually
create your teachers. Of course, it's
possible if you have a big home, you can do that. But it's much more suitable
if you take care of just creating art because you are an artist or
a graphic designer. You don't to actually spend your time producing the
things, but creating. So that's why print
on-demand is so great. If you have a great partner which offers great
quality products. And that's a main point. You really need to
figure if you have a partner which has
great quality products. So if I decide to
sell t-shirts, e.g. I'm going to order one of
these t-shirts I want to sell. Of course I can wear
it then, no problem. But I want, I want to see if I can really
be proud to sell it. So that's why I usually order the project I
want to sell, right? On the other hand,
I don't need to care about storing
all that stuff. I have one piece of
that and nothing else. I don't have to have tons of products in my in my wardrobe. And from there, I can just
totally take care of creating. So I would say usually I could
create one t-shirt per day or one design per day and can apply to whatever
predict a one. And then I can start
selling right away. Of course, there's
the marketing part. We're going to talk
about that as well. But first, we need
to figure out if this business model
right for you. You have now heard about the biggest advantage you have selling print
on-demand projects. Because not having to
store anything and not having to spend a lot of money upfront before
you even know if your products are selling
are a huge advantage. But the main thing
is as a designer, you want to design, you don't want to
ship and produce, you want design, right? So that's why I highly suggest that you
use print on-demand, but please have a look at the product you sell
first and order. One yourself.
4. Two Options to run a POD Business: When you want to sell
print on-demand, you basically have two options. On the end, you have to create something,
to sell something. If you want to design
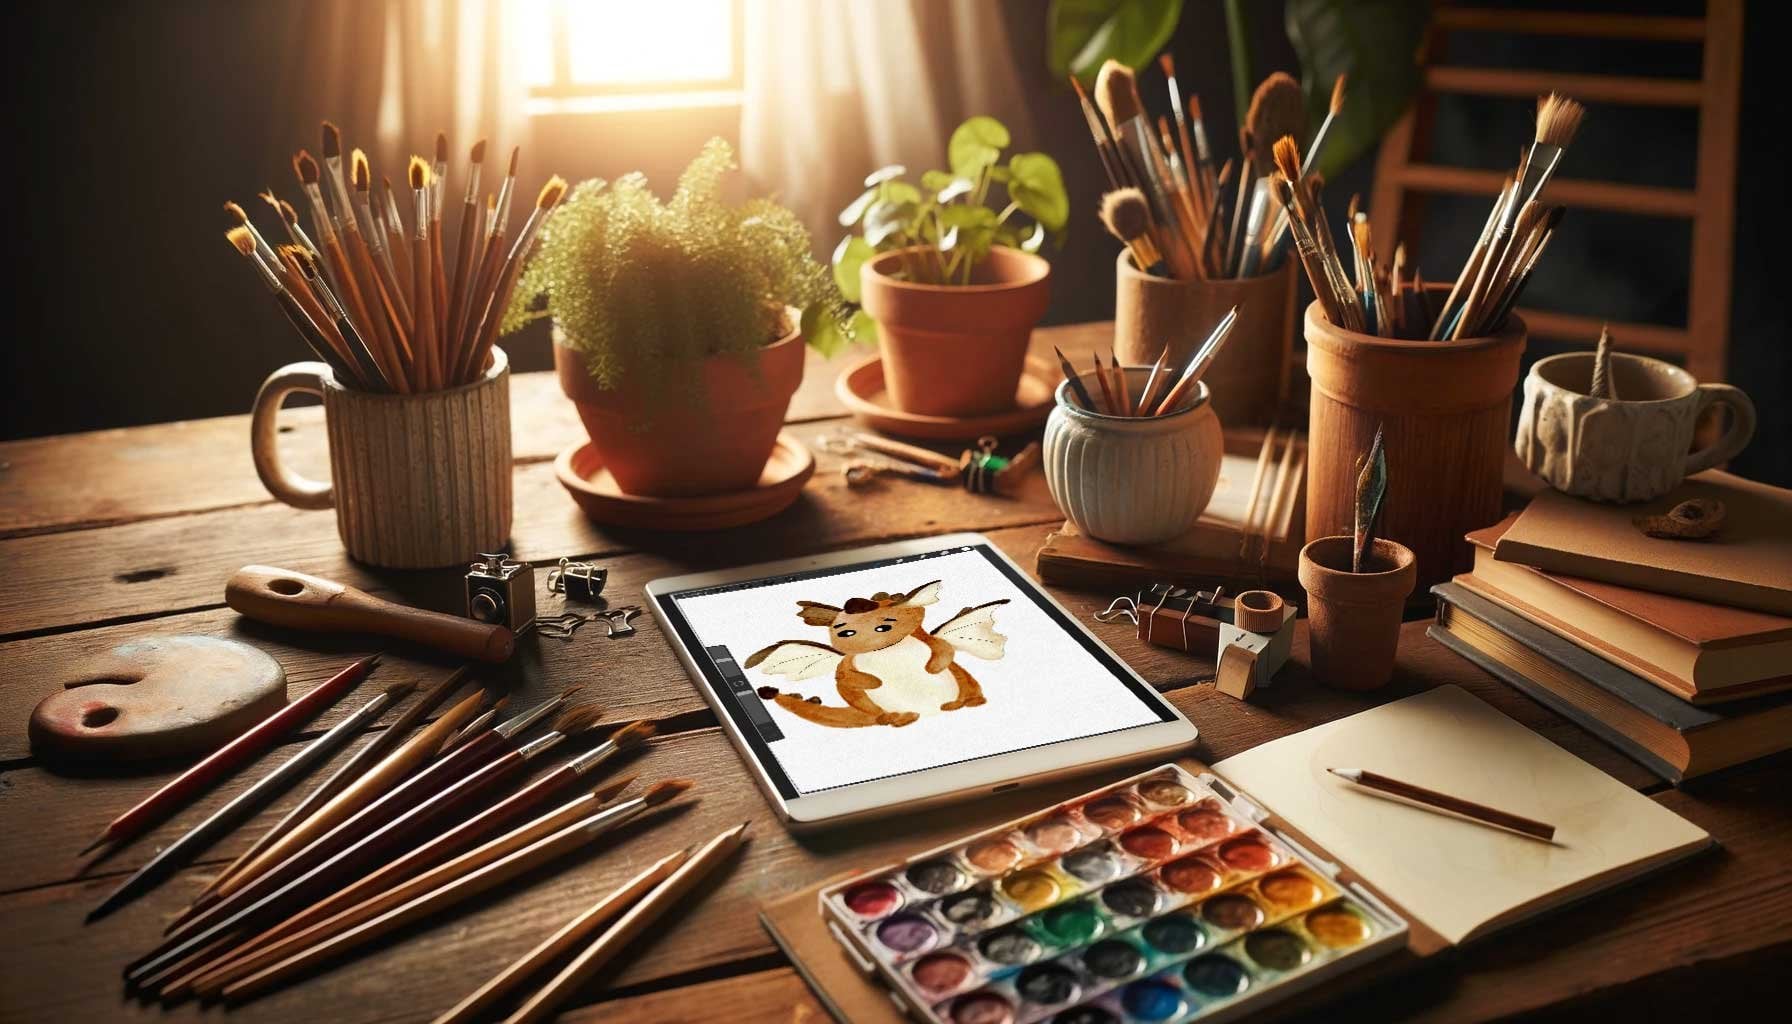
your own products, or you have two options. Whether you draw everything
yourself, totally possible. Pick your iPad, pick a
pen, and start drawings. Totally okay. But you can also go
ahead and purchase commercial use items from
several different stores. There's so many online where comparative commercial
use graphics and create your very own
graphics from those. Then apply those to
print on-demand. So that's totally up to you. But if you are an artist, if you are a designer, you most probably want to
create your very own designs. Or if you are just beginning, you may be not so sure yet you may have not developed
your own style. And then the option to buy commercial use
products and use those for your designs is
definitely an option. We're going to check
out the computer now because I want to show
you a few stores, which cell, these kinds
of graphics where you can get inspired to create something for your
very own products. Unlike computer, you can see now F open several tabs here, and each of them
has another store. So let's start with this
one says design curves, which is one of my
favorite stores where I purchased items. Sometimes, mostly I draw them myself and the one we're going
to use in the next lesson, I have drawn myself on the iPad. But you can totally use these items to create
your own designs. But always please make sure that you create something
new for yourself. Don't just pick the graphics. You get here, put them
somewhere and say that's mine because it's not it's just something
you put together. You just picked an item and dragged and dropped
it to your Canvas. And then you say this is not actually this form
another designer, and that's something another
designer has created. It's not from yourself that
you can modify things. And then of course you can have you here and design cards. They often have a bundle. So just clicking here. This is one of the things I
like a lot because it totally inspires me to just
go over this bundle. This one is just with fonts. But there are most, more often than not, there are bundled with
lots of graphics. And they are always, often from very famous
designers in this area. And for me that's really inspiring to just
goes through their packages and check what's in it
and see if I can use it for mine or if I can create something of
myself from that. So that's why I like to buy
or look at these bundles. So this just why don't I
go back to the homepage. And you can see here, there are many different
things you can use, e.g. here are some brushes for Procreate or a character
drawing tool kits. So let me show you that. So here you have the shape. You actually use the
shapes from the set. And then you create your
very own figure of that. So that's something you
can totally do if you feel still not sure
about your own style. Unsafe. So that's something
you can totally do. Let's go PhD design bundles, the same thing here. You have huge bundles with
lots and lots of graphics, which allow you to build
something on your own. So let me just click
on whatever bundle here you see there are
tons of graphics inside. Sometimes. Sometimes it's for you, sometimes it's not someone who doesn't like much to do
for Valentine's Day or specific holidays
because I like to sell my things the entire year and
not just over the holidays. That's why I usually don't do
something holiday specific, but try to do something
which can be sold. The anti here. Let's go here to Creative
Market is one of the best-selling
marketplaces in my eyes. And here they don't
have bundles anymore, which is very sad I believe. But they have great
designers which have a lot of great bundles
here where you can, again, create your
very own programs. One, I newly found
that it's hungry jpeg, maybe a strange name, yes. But they also have bundles, which again, are a source
of inspiration for me. So when I scroll down here and I see all these bundles
or here the fonts. I usually can think
of something. If I have that form, I can think of okay, maybe I create a t-shirt
with a nice quote from that, or maybe I just use a font here. I would maybe make a quote and then use a graphic
which suits the quote. I put that behind. So I have a mix of
different thanks. I use in my designs so it
makes them really my own. So please don't
make the mistake to just put something together
from other designers. You might be allowed to do that, but that's not what we're going for because we
want you to create your very own products
because you need to be unique to stand
out from the crowd. And you can just
send out on print on demand site if you decide first this
height is six, e.g. if you have something unique and if you have your very own store, there are also people
come to you because they want to purchase
something unique. What about a pillow
anyone else has? Does matter. I don't buy it. Right. So I want you to design something unique for
me, for my home. And then I'm very
happy to purchase it, even if it costs a bit more than it would
usually cost if I buy something cheap
on target, e.g. four. So you see there's a huge amount of things
you can create here. Make sure you pick your sinks. What do you enjoy? What you would use yourself? That's always very
important that you can use these things
yourself and that you like you're saying, and would also use them
for your own home. Because that is what
makes your style. When you are at home, you have one style or maybe two things you
enjoy using e.g. after I figured that I
looked at my home and said, I have always had this bow
hole looks somehow in my home, and I never even
realized that until I really looked
for my own style. Then I figured, yes, I have a lot of bot items here. And that is what I
would enjoy creating. I want to have this
bubble style stuff and one-and-a-half that. Yes. I can then use it
also for my own home.
5. Set up your Printify Store: So now we finally
want to start doing. But I know there was a
little bit of theory we had to go through
and you must know where you get your products from if you want to
create something and you also must knowledge
is of course better if you draw everything yourself,
there's no question. You can draw with a pen
and pencil and brush, and draw something on paper, scan it to your computer, extracted, and then
use your items. But you can also use your iPad, draw something on your iPad, and use that for
print-on-demand sites. That is what I want to
show you what I have done. I have drawn or desert, or at least a
scenery over desert. And it's, it's a whole
story behind that picture. But I don't want to tell
you the story right now. I just wanted to say, I have
drawn it from several items. I have on my iPad
exported to the computer, and then I put it together. So now we go to the computer and I show you what
I came up with. Okay, so here is my picture. I came up with its scenery from the dirt and I pretty much
like it because of the colors. As I said, I have the bulk sale somewhere everywhere and I could even hang that one into my living room and I
think it would look nice. I haven't done it yet
because I don't know why. I just haven't done it yet, but I guess I should. And I would use both of these images
because it's a depletion. It's twice at two images
next to each other. You can hang beside each other. And that is what I did
and what I created. And I have done that on my iPad. I've drawn the single
elements and then I exported everything
to the computer and put it together
in Photoshop. You can totally use
Affinity Designer. You can totally use any
other program which lets you work with JPG and PNG images and then just
put something together. You can even do it in Canva
online if you want to. It's totally up to you. The main thing is in the end
that you have something in the right side and the
right size is pretty important because we
need a high resolution, because we want it
printed in a big size. It's not just a small image. It has to be printed
in a large size. So let me go with you
to the browser here. And to identify. And we now have to
start with setting up our site on printed five. So an area actually. Then we can connect that area to our store and start
loading our design there. From there we can push
them to the store. So let's get started with that. I click here on sign up. You can just follow along
with me if you want to. I put in my e-mail
address here from the side and confirm. And then I click here, sign up, and then I most probably have to confirm my email address, but for now, I just press here, confirm and it's going to start asking me several questions
to set up my store. What describes you best? It doesn't really matter
what you put here, but we tried to be
pretty harnessed. I have my own e-commerce store. Yes, I do. What is your main objective? Grow my current business. What products for myself? Yeah, Sure. As I said, I want to order
them for myself as well, but I also want to grow
my business because my business actually is
creating online courses. But then of course, what I create, I can also sell. So it's a good thing to have this connection between
both and grow my business. What brings you to print if phi, just exploring
product selection, yes, I really like the
product's collection. I also like the prices here
and even this premium prices. But so I just pick
better prices. Monthly sales. Or if we say we just started, we might just have a timer, tracery, thousand dollars,
something like that. So how do you currently fulfill your custom printed
products and merchandise? I don't just getting started. So let's go here. How did you find out
about printing PHI? You see, there are
a lot of questions we don't really have to answer. I have no clue how I found them. So thanks for your time. What would you like to do now? Connect your store
to identify or a sample or design
your custom product. Actually we need to
connect to print to file, and then we want to
start designing. So let's do that. Now I can hit click on
Connect and you see there are several options of stores you can connect this
choppy flights, ETC. It's even Walmart. So Squarespace, eBay, weeks, the WooCommerce be commerce, press the sharp
and even your own API so we can totally
use it in our own, but it's all much
too complicated. We just use Etsy because Etsy really does
everything we need here. So now we need to sign in
and connect as a story, just a few clicks. I won't do that
right now because I don't want my Etsy
store connected here. I just wanted to show
you it's not hard. You just you just put it
in your credentials here and then you just click
connect and so on. Once you have done that, you can start
designing for that. And that's the main part
of this lesson here, I go here to catalog
and click on that. Okay, You see, it asked
me to go ahead here. So I click here, design
your first product. So new store, it's not
connected yet as we just said, but I can start designing. Now. I want to design a poster. So I go here to home and
living and click on posters. And then I just click
here on bestseller. And what I do now, I can immediately
start designing, but usually before I do that, I go here to more detail
because it's pretty important. First of all, you
don't want to have your customer's pain
Too much for shipping. Nobody will actually purchase
from you if they have to pay $50 for shipping and
that has happened here. So I was really a bit
confused about that. But when you e.g. here, this post of thing, it is not that high
depending on the size. It might be up to 14, $15. That, That's totally
doable, right? So U2's here, the size, and then you see how
much shipping is. And you can also
click here shipping. It shifts from
several counters are two separate contracts
because each product has its own people or its own stores where you can order a
huge connection printing, a huge connection of
stores all over the world, of printer, all over the world where you
can connect with. And actually you
don't even notice it that then they ship from there, let's say somehow from the US
to orders from your story, it makes totally
sense if them if you offer something
from Germany, e.g. that they shipped from US to Germany the other way around. So it totally makes sense
that you just see first if they are shipping everywhere
and how much shipping is. So that's a pretty
important you can adjust. If I pay 629 for
shipping, that's okay. If something comes from
the United States to me. But if I have to
pay, let's say $50, if someone sends me a poster, No, I guess I won't
go with that. So I think that's okay. It's comes from
the United States. So of course it's better to
ship to the United States. In this case, we have to go
with what area they offer, so there are no more people or stores to offer that it
just from the United States. So I click start designing. And here you go. I'm going to hide these tips, but I grabbed from my device
now one of the images, I use a pretty big one
and just pick upload. It starts uploading
my design here. Now and every radiant uploaded, you re going to see it here. That's it. Now, I can click
here on preview. And you see it has been
applied to several mock ups, which most probably
have been seen hundreds and thousands and
millions of times everywhere. So if I now use this mock-up in which
is really looking nice, yeah, Most probably people won't realize it's
my unique design. And especially the surrounding here maybe doesn't
fit to my design. So if I say this is
a bot whole print, I want to have a Bogle
surrounding down dy. So maybe that's not
where I would go for. So let's say I have this
one is same problem here. It's a grade for it
doesn't really fit. So I don't do my project something good if
I go with that. That's why printed file. So great. Because even if that pushes
me now the image is to Etsy. I can delete them
and upload my own. And I can also upload
my own to my own story. And that is what
I'm going to show you in the next lesson. Here is my design
applied to the poster. And I can now click
Save product. You say it's 24 by 36 " here. And now it has been created. And now I can push
it to my store, whichever my store is from here. I can also pick what
image previews, previews I'm going to use here. As I said, I just pick that one and maybe that's also nice. The title image, okay, that's it, my title image. You can see here
that the description has all ready been made for you so it won't get any easier. Perfect. Size table to description. We can do that so people see what size the product
has and what length. It's just more information
which is always good. Now here you can add is
something important here it says Edit price at a
profit and profit margin. So in this case
it's 40 per cent. So Richard Price is 24.90
and pretty fired once. 14, $94 from that plus shipping, it's always plus
shipping, of course. But my profit for selling
this item is 996, which is about $10,
which pretty fun. I have created an image, I uploaded it there
and now let's go. And it can just be selling $10 for just creating the design and having
them do the rest. Yes, I'm, I'm happy with it. So here you can
even change that. Let's say you want a higher
margin or less margin. You can totally edit that here. And let's say I just want
to share 2%, so it's $6.40. I don't know why
I should do that, but if I wanted to, that would be too expensive. I most probably would do that. But in this case, I believe that selling this
item for $25, it's okay. I can totally edit that
here and wants them. I am done with my design here. So here's store details that
would add details from Etsy. Etsy wants me to do. And now I can save it and I
can save it as a draft now. And if I would have
my store connected, I could just now push it to Etsy or tomorrow commerce
store to even eBay S UFC, and then start selling my item. Or at least nearly that's
why we want to go for, because we want to make
the item more unique. And that's why
we're going to add other mockups there
and I'm going to show you how you do that. But first of all, you need to understand how
easy it is to just upload your design there and then
connect it to the store. And then we go from there.
6. Set up Products on Etsy: In this lesson, we
want to connect our Etsy store and
pretty fine now finally, at some store details, we also want to add a
production partner to Etsy so we can actually
start selling our products. And for that, we go to the computer and I show
you how that works. Okay, so I have
opened pretty fine. I've locked in and you can
see here on the top right, it still says my new store
because we haven't connected the store yet because I want to just set up
printing five first. Now here's the list. What I need to do,
I first need to add my personal details so I can
click here and just do that. So let me quickly at that name. Of course. Emails already in. I'm not sure if I want
to put my phone number. I pick the country and region. What we are here. Oops. The other way round, what
I did was the German way. So I usually put
first a zip code and men as a city and here
at the other way round. So I just add gouache up
here and click Submit. Okay, changes saved. Let's get going here
at a store name, okay? He design resort of course. Then I click Save here. And last but not least, we need to connect the store. So nothing easier than that because you just connect
it, click Connect. Then you click here on Etsy. And then it asked you
for the daughter, an application would like to add a connection to
my store and yes, I'm going to grant access. And basically that's good. So I'm going back to
quantify from there first. And now I'm going to
push the product over. That's why we created it first. And then we have to add the production partner
to start selling. So here's a product and it
has a description already. We're going to modify
that a little later, but for now, it's just fine. It says unpublished here
and we want to publish it, so we need to put it over
and see how it goes. And I just click here on the three dots and
click here, publish. And you see something's
happening here. And usually it will say
publish in just a second, or click command R. So just takes a second and then it is
published in my store. And then I can usually
check it from here. You see published, and now
I can see how it looks. Let's go to the store
and see how it looks. See in store here. And you see, here
you go, It's there. Now we need to modify a little of the things we have
talked about, e.g. that we want to have
our own images. We need to production
part and all that. This is what we are going
to do in the next lessons. So first of all, I click here on Edit. I'm in the back-end
of the store. And here you can see all
the pictures I didn't want. So let me delete them. I just go ahead and
delete whatever. I think it's not good and
does not suit my products. So I just keep these two and set these as a primary
because it's the first one. And then we're going to add the production partners
so we are safe here. It just says here somewhere
production partner. And that is where
we're going to edit. Scroll over it maybe. First, you need to click
here above this listing. I did it, yes, I did the design, but I'm not going to
do the production. So another company or person, they make the finished product
and they made to order. So now I need to find the
production partner here, and I need to add their details. So here it is already
a production partner, which is my name, but I'm
going to add a new one. So this production
partner is printed file. You see how easy it is. I just put in here print DeFi
and they are from the US. I think they have
been in Maryland. But we can check that later on. So it doesn't really matter. I've worked here at here, but just to give your customers a basic understanding of
your production partner. And then you tell it a little bit more about
the partnership. Yes, I don't have the
technical ability. So I'm going to ask for
help here in this case. What is your role in
the design business? I design ever seen myself? What is this partner's role
in the process progression? They make a component
of my product. They create a finished product. And then I alter customer. They create a finished product, then I add branding. They do everything for
me. That's really nice. So I click Save
now and that's it. I just can click here 25. And basically that's it. You have energy
production partner you've connected to the store. You are good to
go now and do you have your first
product published? And now we're going to
modify that product.
7. Modify Products on Printify: In this lesson, we
talked about, yeah, once again printed phi and z and the connection
between both. Because when we go
to the computer, you can see that Etsy highly
suggest that we lower the shipping price
because US bias should pay under
$35 in the stock. So how can we do that? It's quick and easy fix
because you can easily modify all your products on
printed file and then just republish the changes to Etsy. So that is what we are
going to do in this lesson. So as you can see here on Etsy, it says, you're charging
too much for shipping. Us buyers should spend
under $35 in my store. So what I can do now
I can just ignore it. One thing I can do, definitely, I guess I would do that because
that's a price actually. So that's what you
want to earn and that is what you need to
charge to cover costs. So actually, it's how it is. But if we want to modify, we can lower our permission. Of course, we can do that. You have two options here, whether you can
click here on Edit, then you edit your design. So here you go and you can re-upload and
preview and whatever, and then click, Save it. Something else here. Maybe you need another
resolution or whatever. Then you can do that. Or you can click on the name of the product in this grand
premium matte vertical posters, then you can edit anything at. So here we go. And when we scroll down
now, here's a description. You can edit that as well, but I'm usually
editing that on Etsy. So that's much easier for me. Here. You can change
the profit margin. So you can say, Okay, here the shipping
cost is 40, 14, 94. So yes, it's about $40 here. Yeah, it's a bit high, but maybe we can lower that. So let's say we have
fixed costs of 15, but then we can just charge $5. Okay, let's do that for now. I'm not a fan of that. Really. Not because
I think as an artist we need to value what
we are working on. So $5, it's really
not a lot of margin. Okay, let's do it for now. Then we have 25, and now we have 2014, 95. So it's nearly a
little bit under $35. And now when I click here
published, I have here. It says again, republish more
publishing in this case. As you know, it, it turns in a second into something green and
says unpublished. Then we know that has been
changed on Etsy as well. I believe that's a quick fix. It's great that I can edit all my products here and
that sinks are linked here. So it's much easier if you
are modifying something here that it's also modified
on your Etsy store.
8. Create your own Product Images: As I said in a previous lesson, you need some unique images to make your product
look unique. So if you use to
identify mock ups, then you look like anyone else. Just your design is a
little bit different, but you are not standing
out of the cracks. So I highly recommend to create your own mockups or your own preview images
however they look like. Of course, you can have
your product printed, letters ship home, you put it on your wall and you
take some pictures. It's totally possible. Will not say you
shouldn't do that, but there is an easier way. I'm going to show you
that easier way now on the computer because
we are using mockups. You can find anywhere
on the Internet. Here's see that to a mockups, I have front printed phi and I really liked them because
this one is pretty neutral. It just shows the image,
the poster itself. And then here it shows the
packaging which I also like and which we might not
get so easily somewhere else. But now we're going to
create our very own mockups. And how that I'm using. Mockups are from URI. Uri as a designer from, I guess Design Cuts
Creative Market, all these kind of stores. And he sells his mockups there. And I will leave. He does a really
good job because he has a lot of variation
to this mock-up. Second, even modify
the mock app so like the wall color or whatever, it can even add something
personal there as well. So let me show you
what I mean here. Are we pick this image
because it has three images. And I want to add both of
my images to this mock-up. So let me open that in Photoshop you can
see it's a PSD file, and he is also a JPEG file. So in case you don't
have Photoshop, you might not be able to
use these smart objects. You can download a free 30
days trial or Photoshop. Or you can use Affinity
Designer and the wrap tool, but it's a little bit harder. So I won't show you
that right now. You can totally do
that, no problem. But I show you how it
works in Photoshop. Let's open the PSD file. And here you go. I have now three of these
and I just need to, so I'm going to close one. Let me get pulled out this layer because he added some
shadows and all such. You see, I need to lock these so I'm not
moving them around. So we need to figure out
what else I'm moving here. So let's go back. Wall color also
has to be locked. Then I can just turn
off that one frame. You see everything I mark now. I just turn that off. That's what I don't
need right now anymore. I need these two and I'm going to move those into the center. So we mark them again, top-left to bottom-right,
hold the left mouse key. And then all the
layers are marked. I need for this, and I'm going to move
them into the center. So it looks nice. And now it gets pretty easy. So let me drag that
a little bit down so I don't have this open tabs, which I personally
don't like that much. And now I'm getting the
images here from my desktop. So it's a small one. So I guess I can easily
use a smaller print here. I can always make it smaller. So it's not a big deal, but let me just
pull that in 2030. Okay, see now it's
again in tabs here. I need to pull that out. And now I just click here
on your design here. And I'm going to need to find the one which
says double-click here. It's just something to edit. I double-click here and
do that again as a tab. So we really need
to turn that off. Now, I just hold the Shift
key and drag that over. Now I press Command
T to see if it fits. It fits perfectly so I can close that and save it in
the smart object file, click just save, and
we see what happens. It just gets on my wall. Let's do that again for
the second one here. Okay. 20 way certainty
is the right size. So my guess was good. Record in here as well. Down inside here,
this tab thing. Okay, let's get
out and do again. Click on that here. It goes here to
shadow in this case, but what I need is
here, double-click. So I just double-click
on that one and drag and drop that in with
the Shift key pressed. So let me close that again. Pull that out. So you see it's now in
this mock-up PSB file, and here is the
other file under it. So it looks good. I could
with Gaumont t modify it and just make it smaller or
larger, whatever I need. But I don't need to right now. So I can just click on the
red button here and say Save. It's going into my frame and it looks really
nice, I believe. Now for Etsy, you could
just use that picture. That's no problem. But I believe
it's always good to have a square format here
because then it all looks similar and
it's actually nice. So let's cut that
into square format. So for that you go
here to your cutting. Then you press here
and choose one-to-one. You see what happens. It cuts off the
edges of the sulfur. So we need to now choose
what we want here. We want to have
it in the center, or can we live with that? It's not such a good thing, but for now, I like
the mockup really. So I will do it like that. So I need to cut it. Now. I export the entire file
for web, Save for Web. And then I make it here
in two cells and by 2000, because that should be enough. And also, don't forget to
choose the right format here. I need a JPEG now. And we don't need the
highest resolution and medium is just high because then it has about
219 kb and megabytes. You can handle that, but
maybe your customer cannot. So it's always good
to reduce the size. So I click save, and I
save it on the desktop. Desktop. And then I just name
it preview one. And say that's 2001. Because what I want, I want to save it in
800 pixel as well, because I want to create the lending page for my
product in my store. And that's why I'm also
saving it now in 800, 800. So again, File,
export, Save for Web. The settings can all stay, all remain same and
I just say 800 now. And click Save. And it offers you, and I just like to see that
because now I can click on it and can easily modify
the title 800 and say, Yeah, Basically now
you can go ahead and create many more
of these mockups. So why not? You should not stop
with just one mock. It's better to have
four or 56 images. You don't know, maybe
from different packages. You don't have to use urea. Of course, there are so many more power Apps
you can pick from on Etsy, but always make
sure you purchase a PSD file and not a JPEG file. As I said, it's a little bit harder to add your picture it. But in case you just have a
fake designer or something, of course you can work
with that as well. So now I have my one image. Actually, you should
have now 345. How many you ever want. And you go to Etsy and you
can just upload the image. I go to my desktop here and then use it to cells and
one and click Upload. And now I just track
it in the front. So I like that much more. I'm going to show you
now how that works. Of course it asked me now to have to pay for it and
whatever, but doesn't matter. See how it looks now and
it looks really nice. So you can see just the image on the wall and you can see
the packaging as well. But that image stands out from all the
other images on Etsy. That's pretty important
because if you add a keyword here in your Etsy, on Etsy, and you are looking for wall art or abstract
wall art or bot, wall art, something like that. And this comes up, you move up, you are much more likely
to click on that. Then on one you have
seen hundreds of times. So now we want to modify
our texts on Etsy. That is something I'm
just go over quickly. Of course, I believe that depends on the product you have, but you should really take your time to fill all that out. If you have a video in case, you can just put all the images together and have a little
video that's also fine. Then you can upload that
here like a real maybe. I'll just go here. But again, use a square format. Here, I would add my keyword. So let's say here I would
say abstract wall art. Desert because I named the desert finished
product than we have here, the category photography or
maybe printing printmaking, you're printing
something like that. Then you can have primary
colors, space and green. It's a bit of green as well. And you cannot width and height. I don't have it in
my head right now, so I would have to go
and search for it here. How big it is. But of course you can do that. It should be 24 by 36 inch. So 24, 36 inch. You really shouldn't do it and fill out whatever
you can hear it. There are reasons
why they put that. So you definitely should
put whatever you can hear. Pattern, type,
abstract, format, role. Yeah, just crazy. So occasionally there is no good occasion for
that or holiday. So do I want to renew the pork
manually or automatically? I guess manual is fine. Physical products
not digital file. So I click on physical and then I have all
the information here which has been given to
me by by printing file. And here, you definitely should add one
sentence with your keyword, in this case, abstract wall
art or something like that. Because Etsy favorite that. You might add a sentence
or two here yourself. Now, brush up your home with this abstract art desert. You can of course, write
whatever you want. It's just a suggestion. Okay. I guess I want the width
and height on the bottom, so I could have checked
that here as well. I can, of course, use whatever it says here. That's fine. But here it's not correct. Art perfect me to
print out on premium, not vertical post
those matrices. New Zealand, great papers, posters, translate and so on. Okay, shopping carts summary, that's for a European
customers because it's for German customers
actually only because of they want us to do
that so we can do it. You get 175 GSM fine art paper. I just copied that. And 36 by 24 inch production partner is printed five, we have that. And now it's pretty important. So let's add some texts. I thought so it's
abstract wall art. Abstract art, abstract art. Poster. Abstract poster. Maybe. I would need to research which the
texts are the best, but for now that's pretty fine. So here I can also
add my section. I will do that. Name it. Abstract art poster. You see what I'm doing here. I'm trying to add the
keyword here as well, which is abstract art, abstract art poster
abstract at wall art. Whatever. I'm adding that we have the price and quantity
is as many as we can. So the SKU number from pre-define what we
can leave it as it is. And if you want to
have variations, you can add them
here if you turn on personalizations also fine. We talked about shipping
and should lower the costs, but it's pretty hard. So after all that, we can add our simple policy. We do that. So the policy, and
then we click Publish, of course, it wants
to charge me $0.20. And once done, I have
my poster ready on, but I'm wondering right
now, like the title. As I change that here, it says abstract art, so it should be abstract. Walmart has no title
anymore at all. So let's go back. Say publish. Abstract wall desert. Okay, here we go. So
we have published now our first product with the
help of printing five, but with our own
preview images on Etsy.
9. A unique Landing Page for your Products: Now I want to talk with
you about landing pages. The thing is, when
you're advertising your product and you always
link to your Etsy store, you do a little bit of
advertising for Etsy. If you ever change your store recourse
for whatever reason, then you have a problem because all your advertising
is no longer valid because the URL
no longer exists. So how do we do about that? Because we want to do
advertising which lasts forever. And I'm going to show you
that in the next lesson. But for now we need to
set it up in a way that you can actually see to start
advertising for eternity. So we go to the
computer now and I show you how I have
set it up in my store. It's all pretty new, so you won't see a lot
of sales and such, but you definitely can see what I mean and
how it goes there. You can see now my store on my website, design resort.com. And when you scroll down here, it pretty much looks like
a store and it is a story. It's a WooCommerce store, but you can definitely just use a blank page if you want to. Let me click on
whatever product here. And when I do that, it still looks like a store. I tell you in a second
why and how that works. For now here you
can see the images. I've added, the different
images actually. So you can see I have more than one and
the description and also what the person
who purchases gaps. And when they click now
here on shop, on Etsy, they are for water
to Etsy and do not purchase over my store. So why? The reason
are the Texas, the European Union
has decided to ask the vendor to put the texts of the customers resident
on the product. So that's pretty hard
for us because yeah, we can definitely handle that. The Texas applied. But then we collect
the tax and we have to give it to
the specific country. That gets a little bit hard. I decided that I want
to do that hence off. So I have at CSM
help for me here. When I click now here
on shop on Etsy, lending page on Etsy is opened. And then you can see the images I have also
added to my store. And you can see completely
the same description and all. But you can also
see the amount I purchase I charge plus the vet included
based on my country. So in this case, if Germany, so here's 19% vet
included Narcan. If I would want to
purchase that item, the vet would be
centered Germany, 19%. So that's pretty easy and handled all that for
me for the 27th, I give them to
publish my products. So I think that's a
pretty good solution. So I decided that I would want, let me close it to have that in my stories where I don't want them to check out on my website, so I have to handle the Texas. I want to do that for me. It's as easy as it is. But what I want is this
custom URL here on top. So how to go about that? I have added two
programs to my site. This is Dr. themes. This is the theme which
is caused by themes. And then I have also
added strive architect, which is something like Gutenberg and something
like in a mentor, there are different plugins. You can also totally go with just a blank landing page
and create from there. So this doesn't really matter, but I show you how
to do that as well, just in case you want to have
the same setup like I have. So now I go here and you can see are the different
products that my store. And when I create
now a new product, I click here on add new. Of course. Then I can copy and paste
every scene for my Etsy store. It should be completely the same because I don't want
to confuse customers. It's already a bad thing, bad thing, but they have to go from one side to the other. But for me it's really helpful. So I just go here
to my Etsy store. Let me close that as well. Copy. Well the title from
there up to my store. Then here is something
like product description as well as some here, the short product description. And I set it up like that. And I've added in Swift
architecture that they did not show up the
Shopping Cart button. I show you that how
it works in a second. So let's quickly put
everything we have there. Go here to description. Maybe. Yeah, here's a shoe. I just copy everything
I have here. Add a short description here. Then I usually just
use what they get, width and height and
just copy all that. For the other section. Go back up. One just added. There. You see now we have
the text here. It could use a focus keyword, which isn't this
case as wall art. But you can totally do that. How you ever feel. I delete that and then I
would put a meta-description. I add here something from my from my categories and
it's for the living room. So that's why I add that here. And I also completely
at all the prices and such from here
is outlet of course. So I click Edit and
pick the price here. So I have it completely a sink here from one
store to the other. So 24, 90 is a price. That's what I'm
going to add here. It's not worth chose not
downloadable and then venturi, So it's the SKU number
is a pretty long one. So I just copy that. Was Coleman see
quoted over there. I could link products. Now, as I said, I highly recommend to add
more than one image here. So for now, I just
add the image. I have just created 800
pixels because the websites shouldn't handle
images which have 2000 pigs there for a
few hundred kilobytes. So I have just step one which is small enough but also nice
enough to check it out. Product image, and then I
can publish my product here. So just click Publish. Of course you can modify, you can add a meta description, you can optimize your SEO, but that is not what we're
looking for right now. I just want you to see why it's handy to have
that lending page. So here's my product. Here's a shot of Scripture and he has
a longer description. And I have no shopping
cart button here. That's what I turned off and
I show you quickly how I did when I click now here on it
seems template in thread, architect, simple product page. I can easily do that and it's pretty cool
about strife architect. But as I said, you can
totally do that on your own. Click here on content. And you can have
here edit designs. And not edit designs. You have here already the sliders and you
can say Add to Cart. So you have that Add to
Cart button on again. I want that off. Of course. You would have that
on all pages you have. I don't want that. You can also publish
the price here, which I don't want because you never know if you
change something on Etsy, you have to do it
on your website. Otherwise it's not
St. of course, that's all I have here. And then I would
click Save work and it's just a little
IQ scores here. Because we want to link
our product to Etsy. For that, I'm going to
grab the URL from store. So let's do that here
and grab that link here. I just mark it on
press Command B, copy. Then I go back to my product. I click Launch swipe up effect. Now I am in the editor mode, and I can just click here on the Plus and grab a
button from there. When you have a lending page, you can just put an image
if you want to link that. It's totally doable even
without sweat architect on. I just type in here, shop on Etsy and mark them. To link it here. I usually say open in
new tab, and that's it. So I click now at
the Hoover here. If you like, it's a
little bit more stylish. So you can totally do
that wrong columnar. But you get the idea. I can do here whatever I want at the topography here and one in black and go back to normal. Again, that's nothing
you really have to do. Here. It's black as well. On the button that okay, so let's do it like that. And then change the
typography color to something brighter. Then we just click
apply and safe. Basically that's it. Now I go to my store
and I click Store, bandages and
resort.com and I'm on my store page and you see that
published product is here. So clicking on that now means I have that shop on Etsy button
and then I click here, I am lending on Etsy and
people can purchase it. So when I'm going to
advertise my product now, I just go here and
grab this link. As I said before, it's
advertising for eternity. This is what we want
to do in a last lesson of this class before we
jump into the project.
10. Advertising for Eternity: I promised you
advertising for eternity. And that is what I want to fulfill right now
in this lesson, in this last lesson. Because of course, if
you have a product, you have it in store and you
want to do that hands-off, and that means the
product is ready. You don't want to touch
it anymore. It's done. But what it's not done is
the advertising because people need to know about your
product to make yourself. After all, we need to have some advertising which
lasts forever, right? If you always have to advertise every day and each are
each and every day, then you might get
frustrated one more time. Then it's much better if
you have something in place which makes your
advertise forever. So I show you now
on the computer, of course, our lending
page we have created. And then we need to
create some graphics to post them on Pinterest
and Instagram. I believe that
both platforms are good for long-lasting
advertising. Instagram is not that good
for something like that, but it helps to
connect with people. And Pinterest, on
the other hand, is really good for
long-term advertising because your pin just sits
there and it's there forever. It forever links
to your product. So that's pretty handy. And two, we want
to advertise that. Maybe we don't do that Once. I do it now, once with you, but please, when you
advertise your product, don't create just one pin
and one Instagram post. Maybe do five of each. So I know it sounds pretty
hard, but once them, you can totally go ahead and
create your next product. And after a few months, you can go back and maybe
create another set of five pins and Instagram posts for the
product if you want to, if you're not, maybe it's the best seller,
you don't have to. That's fine, of course. But just in case you don't have to touch it every
day and you don't have to advertise all
the time because you have something in place
which lasts forever. Once again, I'm here on our landing page with
the abstract art. And now I show you what I
did because I'm pretty lazy. I should have done it on my own, but I really liked
these templates. I purchased them. Those social media templates are for Instagram and Pinterest. So as thought, why
not being lazy? So I could easily use
them over and over again. And they all have this
nice bubble style, so I pretty much like them and can easily use them for
all kinds of posts. So what you get here
on Etsy is a PDF. When you click on
the link in the PDF, it opens in Canva. And then you get a copy. And here is my copy with
all the pins included. You see when I scroll down, there are tons of pins here. And I can modify everything. I can even modify the
setup or the colors, but I want to have
less work more, so I just mostly use them
FAR and go from there. So let's start by creating
a pin for Pinterest. And here I put the
Instagram posts. We can do that again as well. Okay, so now let's upload. Go to the year two,
the upload section. If you have never used
Canva, don't vary, you sign up for free and you can use a complete free account. You see here it
says try Canva pro. I have no Pro either. So you can just use
it as your image editing program or you
can use a PSD files, which are also included. And to do that in Photoshop, but I just thought
it's much easier so I don't have to handle all
the files on my computer. So I can just use it on Canvas. I click Upload file,
upload my image. Now I can use it
to solve imaged. You never know how
big you need it. So I use a bigger one. It uploads there, and then
I just drag it over here. And that's basically that's it. So now I give it another title. Modify here, whatever I want to write
on it and export it. So let's do that. I just say abstract,
abstract art, desert. What I do is I changed
the color of the course. I know you can hardly
see it right now, so let's change the color here. Another handy thing
is when I click here, they pick all the
colors for my document. It says document colors, so it's pretty easy to stay in the same colors palette here. And I can just
easily modify that. I just say something like
hair brush up your home. And then again, I pick another
color, maybe that one. Let's see how it looks. Looks nice. Okay, so learn more at digitally sign
resorted comma k would take up the Learn thing. You see, I have used them
over and over again. So I, I believe that's
really valuable, these kind of templates. So you get them once and
that's it. Okay, that's it. I know. Export my file. I click here on top
right arm, chair. And then I save, download. I need to know which page it is. It says page three here. And then I can download, I use the JPEG file. And then I can just turn them all off and
turn on page three. Click Done, click, download it, download the file for me. So now I have my pin ready. You see how fast it was? Maybe 2 min, 3 min. You can do that
five times, right? It's not a big deal. Okay, allow download. That's fine. And now you can go to
Pinterest and post-its. They won't show you that
because it's as easy as that. You just go there, click Upload, uploaded there, and
then you put the link. This is the link
you've put in there to have advertising for eternity. We always use that link to
advertise our products. Now, we do the
same on Instagram. So pick another template. Whatever template
you choose is fine. Maybe that one here. I go to upload recruits,
yes, my image. I can now drag and drop it. When I double-click, I
can pull it down a bit. Maybe it looks nice sphere. Well, I guess I want that. I move that to the bottom. You see you can completely
make that your own as well. We don't need that right now. Put it somewhere. Okay. So let's make it a bit smaller. So one can see the so-forth. Maybe we move that
to the bottom. We don't need that much space. Here. I can again say, I don't think that I can sake. Abstract. Art. Brush up your whole, maybe some eggs that are here. On. Use another text element. Here, maybe a sub-heading,
maybe even smaller. I use that form and put it here. And just say brush up your home. Okay, basically, yeah. Go again, click on Share. And they are both included in the package so you don't
have to spend a lot of money. It says page ten. So again, I'm going to download. And then I turn
everything off JPG, air and pick page ten
and click Download. And that's it. So I have both my images are ready to post on social media. You see it's not that hard. And the thing about
Instagram is of course, you need to, you
need to optimize. So when we go to Instagram
at me quickly go there. So you can see now here I
am on my Instagram page. And what I did here
is I put a link. When I go on that one, it opens in a new tab, and then it has
several links here. We can see the people
to my classes, to my store, and so on. Of course, I can put
other links here as well. But if I say to my store, and if I write here
something about the store, then people can easily find
my product in the store. So I, of course, also I cannot access
it right now, but of course need to
optimize my image here. Maybe write something
about your image, give it the right tax
is always the same. You need to tell the search
engines, in this case, it's Instagram, how they should categorize your
image and what it is about. So they can easily send
you the right people. But that just for
your advertising, the best thing you
can do to advertise your product is always SEO. I deeply believe in search engine
optimization because that's another thing
which lasts forever. But again, no matter if you use Pinterest and
Instagram or something else, it always the same. Maybe Instagram is
a bit less good because it usually goes to the bottom and
you can hardly see. But I see myself often when I find a new designer or
someone I'm interested in it, I scroll through the profile, See if I check out different
images and then yes, I click on older ones as well. The same happens on
Pinterest of course as well. You go there, you type
something in and you never realize when
it has been posted, maybe a day ago, a year ago. It doesn't matter. That is advertising
which lasts forever. And that is what
you should go for. Go for SEO on your website. So optimize your page with the right keywords
with a vertex, give as many information
as possible. Maybe write something
about your product, and then also go ahead and
advertise it the same way. Maybe give it 51020 links. No matter as much as
you can if you want to, then in five weeks go back and to give it
another five links, It's totally up to
you. You can do that. You see you can easily
advertise your products. You can easily create
a product and you can push it from EC2,
your own website. It's a circle. You need to do that again
and again and again. But you can totally
do that, I'm sure. So if you have any questions,
please let me know. As always, I'm here to help.
11. Your Projekt: You did it. Congratulations, you have
mass at this entire class. It's not such a long lives, but there is a lot
you have to learn. So congratulations you did it. I really hope you have
by now a lot of ideas which products you can add to identify and then sell on Etsy, and that is your task. Now, you should go ahead and create a design
most rope you have already your designs ready applied to a product
on printed phi, create your account there
and then publish it to Etsy. And I would really love to
see what you've come up with. I would love to
see your products, so please don't forget
to post it here in the section here
and this class. So looking forward to see what you've come up with and if
you have any questions, I'll be here for you just posted a question where
error under the View, there's always an option to post a question and I'll
be here to help. So looking for a
watch to talk to you soon and see your progress.
 Monja Wessel, Graphic Designer and Teacher