Transcripts
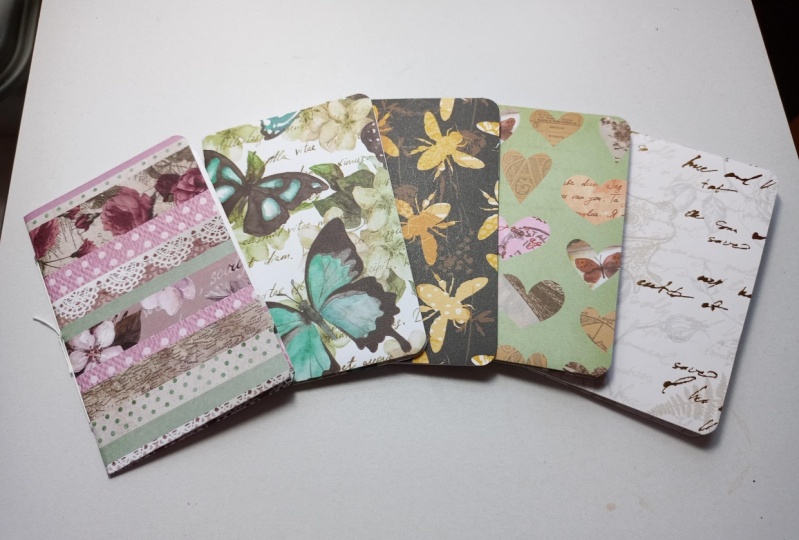
1. Pocket Sized Creativity!: Hi friends, it's Tammy prayer, and thank you for
joining me today. Today's class should
be your go-to gift for any occasion
or happy male, or even use it as a
business calling card. I'm talking about
Hockett notebooks. I have the easiest
formula for making these many notebooks that
you will be able to make. Four of these in just a few minutes with
only five supplies. You will feel instant success
with how great these look. This class is great for
beginner paper crafters who want to have instant
success in their DIY gift, as well as seasoned paper
crafters who are looking for quick ideas for using
up their paper stash. After learning the formula, your imagination can take over, alter these notebooks with embellishments or
alternate papers. I even show you how to change
the size of this notebook. Bring your 12 by 12 sheet
of scrapbook paper, a page of copy paper, a stapler, scissors, and
equality glue stick. If you want more than just
this simple pocket notebook. I'll share several
ideas on how to expand on this simple
skill of paper folding. Now, I'm an artist on
Instagram and I enjoy showing simple crafting
projects that anyone can do. I teach crafting and
I really believe that the work of creating
is an act of love. My deepest desire is to share what I make with
friends and family. And more recently, male swaps. Your class project then is
to make a pocket notebook. Now please share
this project and the resource project
section of this class. And you can find that on your laptop or your
desktop computer. Now, I can't wait
for you to join me. So let's get started.
2. Project Ideas: I encourage you to work
along with me and make your own three by six
inch pocket notebook. Completing a basic notebook
will instantly bring to mind all the
variations of design. Fill it with plain
paper lined or mixed pages for
the book signature and staple them
inside the cover. Well, the mini book
be used for nodes, list making or doodling? Or will your project be for starting an art journal
or collage book? Will your project be used for business promotion
or a place for your children to stay engaged
during times of waiting. Explore the various
opportunities of using the mini book and then share it with me in the class project and
resource section. I'd love to encourage you and for others to be
inspired by your work. You remember the work of
creating as an act of love. So take care of
yourself and create
3. Supplies: To make the most basic notebook, you just need some
scrapbook paper and copy paper and
Staples and scissors, a paper trimmer to trim
your paper to size. If you have a twelv
by 12 piece of paper, you can make for notebooks. You just need a six-by-six piece and you're on your
way for your cover. Copy paper. It can be very inexpensive
or super bright white, That's up to you. One page will give you four small page inserts to make mixed pages for the
inside of your notebook. Find a collection of papers, calendars, altered
paper, book pages. Foreign languages are nice. Pages that have extra blank
spaces for journaling. Or ones with cute, funny pictures on them
would make a great addition to your mixed pages. If you want to make
an embellished cover. If you've taken my
clusters class, you may remember this. Clusters work
really well on top. Do you have any
ribbons are lace or die cuts in a netting? Here I have a few more
dye cuts, found words. Anything you could collage with, make a little cluster and the
coroner would look great. If you want to alter your book, you might want a
corner rounder as well for gluing down
your flap inside. Depending on your paper, you might choose
a liquid glue for heavier card stock paper
or for just regular paper. You might like a glue stick
to lay down this side. After you cut your
six-by-six paper. We want a fold here, and I'll fold down here
for the bottom flap, I find a scoring
plate really helpful and a stylus to make
your score marks
4. Practice the Basics: So to make our pocket size notebook with our
little insert flap. This is your basic, basic, basic piece of scrapbook paper. It's not card
stock, it is paper. And I'm looking to make a
six-by-six size for my cover. So here we are at 8 ". I want to take off 2 ". Okay, so here is my crease. I'm going to give that a fold. I'm going to have my six-by-six. You have a metal ruler. These things are
really nice to have. This is practice. So get some paper you're
not truly in love with. This is copy paper,
eight-and-a-half by 11. It is nothing, nothing,
nothing special. And these dimensions work
really well together. It is fantastic how they
work well together. So we want our
eight-and-a-half by 11 for our signature and we're going to cut that in half and
then half again. So I'm going to take my ruler. You could just use
a pair of scissors. That's totally legitimate. But I'm figuring out
these dimensions. I wanted to show you how
this all comes together. We're practicing. And maybe you like a
rough edge notebook. I know. I do. I
think that's fine. And then once they're
all folded and torn, and you have four same
size pieces of paper. This is now the signature, the grouping of papers
inside your notebook. Fold it in half along
that long side. And that is your paper insert. Now take if you have
directional paper, you might want to
pay attention which side you want a direction to be. This is rather non-directional. Let's fold this in half. Like I said, remember
your directional paper, this would be important. This is the cover part of
your book that your pages, we'll go inside and we're going to come up an
inch and a half. Now we have our papers ready. We could use that as a guide. I think I will. I want something to have a bit of edge around and
look how this fits. Right in here. I have this nice border. So I want a border here
at the bottom as well. Look at that. Just my little fingernail
mark is going to give me a starting point. Just fold this up at that
inch and a half mark. Did I really do an
inch and-a-half? Good. We did it. We want to have a
little bit of space. Now you could just cut this
up and have this separated. I do want to have a
bit of a gap there. Does it just helps. It may get less bulky. I'm cutting straight
up to that fold line. When I open this up. Being bought a boom. Because this is paper, a glue stick is all
you need to do. This outer edge. And there you go. I'm gluing down those
two outer sides. My warm hand press. Make sure is that glue sets. Here's your, here's your
notebook, right here. Boom. I have a bit of an
edge on all the sides. I like that. I'm
happy with that. And that's that's the
basic basic notebook. We're going to use
a stapler and Gosh, out an inch down. I don't even measure this. This is practice
we're experimenting. Let's large for our
stapler punches. And there is your
practice basic notebook. You have your dimensions, you have the size for
your inner pages. Let's see what else
we can make with this
5. The 12x12 Set Up: If you have a 12 by 12, you'll be able to make four
of these pocket notebooks. I love that. So we're taking our 12 by 12 and we're cutting it into fourths, six by six pages. First. And our next 1.5 having
a six-by-six cover. And while we're at it,
let's cut the inserts. A single piece of copy paper. We'll cut it into fourths also. So our fourth will
be five-and-a-half. Since this is very,
very lightweight. Copy paper. I'm going to cut
them together for an a corridor a quarter inch. And I have my four-page
for my insert. The next is to score our paper. We're going to score
this because it's six. We're going to fold R
booklet right in half, so that number is
easy to remember. 3 ". And our little pocket, let's give it an
inch and a half. So you have to score marks. You could just fold it by hand. The first thing we'll
do is folded at the three inch mark and look for the point right where
the two intersect. I want you to cut a bit of a triangle just to
that corner Mark. What we're looking for is
this little flap mark. So grab your scissors. I like to turn my paper so
I'm cutting away from me and coming in about
fingertips width. You could even curve
it if you'd like. And that way, you know, you're just going right to
where that fold line was. And up those flaps come. Little pockets are great. You could talk a business card, a gift card in there. Next, we're going to glue
these outside edges. I want to use my liquid
glue bit stronger than my stick glue. Remember we're just
doing the outside. I got a brand new bottle. It flows so nicely except my cap is stiff
because it's new. Carefully. Fold that over. And FCA, I got a little
bit of glue coming out. I should have used some
paper underneath it. But just hold it as
long as the glue needs to set so that the paper doesn't lift too soon and
not adhere really well. I think we're good. Now, this is a trick
I like to use. Measuring is not I don't know if it's not super
simple numbers to remember. I have a hard time with it. You want your papers
exactly in the middle, but they're smaller
than your notebook. We'll call it, gives it a
cute little edge around that. And the exact middle of a
page that's not straight exactly to that to
that score Mark. Hey, I just found this easier. I fold my paper to meet
the opposite edge. Might just seem to
be straighter than just me trying to
do it on my own. Got all four neatly folded. And we can just put them
one inside the other We're making a little signature. That's what you call the book. The book inserts of Allen. Look, I didn't even
cut that correctly. It's okay. It's all good. Totally fine. Now you can start your
embellishing early. One is do you want
a straight edge? Would you like a curved corner? I'm going to go for
the curved corner. This time. I have my three-sided punch. And while my pages aren't
all exactly the same, I'm just gonna go for it. Yeah. I should've taken off part. There we go. There we go. And now back, putting
them all together again. Now this look where I can
see the underside page is actually one we're going to use when we use different
types of paper. Now, it's going to sit
right inside there. If you don't trust yourself as to getting it perfectly neatly, cleanly right in there. You could paperclip at clamp it. I do not have that worry. And instead of stapling
from the inside, I want that bar of the staple inside and the
teeth would be on the inside. Here's a hint, you need
to know your stapler. Look how that really well
on that on that fold line. No, your stapler,
Where will it punch? And that is your
basic notebook pages. And guys, you see something. Okay, how to fix this? My fold line is not good. And Ramsey screaming, so
I will go attend to him. So don't give up. Don't give up. We're just going to take these staples out. May need a staple remover
added to my supply list. I'm going to make me a new one. Take two. Now, remember when I
said know your stapler. Boom, got it right in there. So as you can see, I've folded that caught
guide, took them out, read some papers, and a little redo and
it came out just fine.
6. Explore Mixed Papers: I have a sample of a notebook I made with
some mixed papers. This could be really fun, inspiring to help you
doodle or journal, or maybe even make collages
in its own little booklet. So here's how we're
going to do that. Let's set up our cover, 5.5 and four and a corridor. So this paper is just under, or it's just at five. And I'm going to measure it at four and a
corridor right in here. Now we could tear. And I think I might like that. I think I do want to
leave this rough edge. I'm looking for papers
that will give me some room to doodle, room to journal width. And so this Asian paper, I'm not, this was given to me. I'm not even sure language this is Let's just give it a quick fold best we can. These types of papers, they're going to have some unique characteristics to them. And we're going to use
that to our advantage of making a very artistic
looking notebook. This one, it's also at five, fact it's even smaller. It's at under five. And do you want your
paper to look like this? Or do you want it
to look like this? So this is something
to consider. Do you want this grid space? Or do you want the words? I think I actually do
want this grid space. So at 5.5 and I'm using my very small stylus to
let me tear that off. And then foreign a
corridor right in here. You can use your paper cutter if you want some
really clean edges. Great. I just have an affinity
for torn paper. That's something I like. And I'm okay with this. I like this. I might just put it in
this way and let's find that center and get
a little crease. What part of the
paper would I like? This has a lot of blank space. On the opposite side, doesn't this has
more blank space. I think I'm going
to use the top. So this is the straighter edge. I'm going to call it
a five-and-a-half. I don't even need the
whole thing right. And can leave this intact. And then this two for an
a corridor, get there. That saved me some of my paper. Go ahead and end. Johanna bass birds,
doodling calendar, not like you saw. 2021. Really fun pages. Oh, I like this.
Let's do the flowers. And the opposite side. Then. Doodle lines. I like that. Now I will trim that fuzzy job unless you
want that to show fact. I think I do. Okay. So let's bring this back. I just want when we
say five-and-a-half, I'm gonna do it
five and a quarter. And I'm going to show you why. There's something about
papers of different sizes. That'll be great for collage. That are really fun when
they're different sizes. Now. Foreign, a quarter,
right corner corridor. Get that folded up, find its center or not. In fact, I think I'm going
to leave that out a smudge and remember we cut it a little small so we could
afford to do that. See how this comes. It shows the paper behind it. That is a really cool looking in a junk journal format.
So here's another one. It's smaller. And now I can see three papers. That one is hidden. I want it hidden. Or showing. How about that? That's, I
think that's really cool. I love that. Look. Now let's just double
check my measurements. We're still within. We have some space on
the top side and bottom. So that's good. I'm going to find that center. Turn it over, and I'm going
to staple on that fold line. So our second notebook does
not have corner rounding, something you could add. But because our
pages are different, I'm not going to mess with that. I'm gonna leave this pointed
top and look at that. Isn't this great? If you had this in
your purse and you needed space to
doodle or to think, or to practice drawing, writing. Or these would make really
great collage pages in here. A nice base to start with, that just came out wonderful. Your artist's friends
would love to receive one of these and they're
happy male. Don't you think?
7. Double Sided Cover: Now let's discuss
paper for your cover. What if you have a
two-sided paper that you're really drawn to, like, I like this numbers and I can imagine this being on the cover of my little
pocket notebook. And then the inside
looks like this. How cool would that be? Alright, I'm going to
give myself a cut. We're going to make the six. And I don't need
this rough edge. And I don't necessarily
want the July part, so I will cut it this way six. And then let's score it. Scored on the inside. One-and-a-half. My bottom flap went
off the rails. There. There we go.
That are better. Yeah, look at that two-sided papers are
going to look amazing. Let's give this a trim. The inside isn't that fantastic? Fantastic. Now this is lighter paper. I think I'm going to give
my glue stick or workout. I really like this. Elmore's craft bond
for paperweight. Not my card stock,
not heavyweight. And that warm hand press. Just really kinda
help set the glue. Isn't that fun? Opening up your notebook? And while I'm looking
at this corner, nope, it isn't their baby. Much better. Now, I think this needs some
altered pages inside here. Isn't that rows cute? That's wonderful. So I do want to save that. Let's see how wide it is under five-and-a-half if I want
to keep this rough edge. So I just need four and a
corridor of this paper. More Joanna Bedford,
not frilly edge. We really liked that, didn't we? That could be my foreign. A corridor five and a quarter, taking that edge
off and we'll keep our frilly edge peeking out of a frilly
edge peeking out. Here we go. How about
this typing paper? So let's call this my
five-and-a-half floor and a corridor. And not all your
papers have to be. I planned on using some pre-cut
plain white copy paper. Alright, who's big? If you're big, you're
going on the inside. If you're small, you're
going on the outside. That's really small. And this phosphorus
paper there we go. Look at that. Give you a spot and look. I trimmed that, but my papers
don't even reach that. So I am not worried about
them not being rounded. They looked just fine. Looks great.
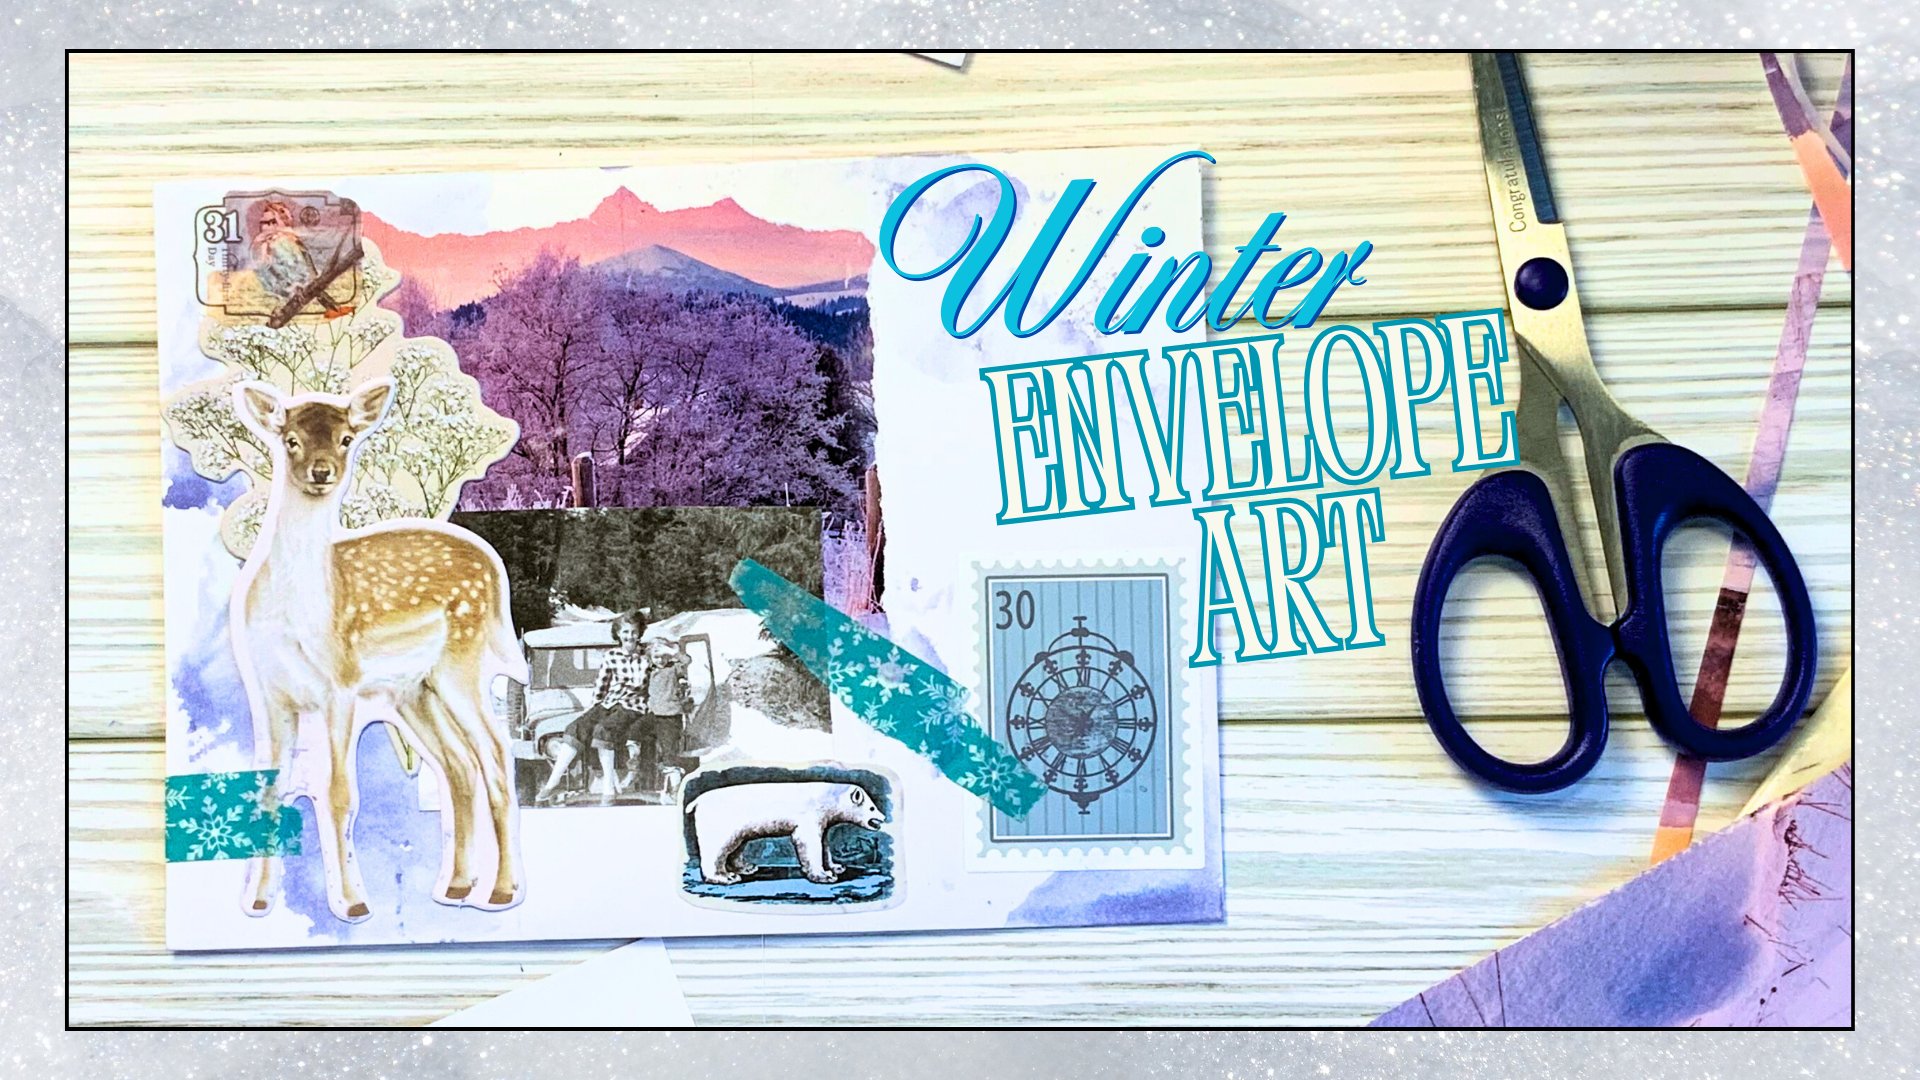
8. Cover Embellishing: Here are the two
notebooks we made with the mixed papers on the inside. And I really would like
to embellish the front. I've collected a few
focal point pieces. I have some words. I have a dimensional item. I have a die cut. And thinking about, well, what I like to see on the cover, if anything, what works well, what are some colors, combinations that would enhance
and look great together? I am really drawn to
this Rosetta I found. And maybe a snippet of
this netting behind it. Maybe a bit more ribbon, although really do
love well together. So cut some of that. And maybe some
paper, paper should. Compliments. Actually liking this. I think it's because
of the gray and the white working well together. I'm going I'm going to put in that netting over
that really softens that up. I do like that, but I think it might
need some words. So let me get some found words. Kinda thinking black. So let's look at the black part. The authentic, I think
I might go with that. Alright. And that was it. We've
made a cluster that is back to one of my
previous classes of picking just a few
elements that work together and laying them out just quickly, almost
without thinking. Maybe a bit more
for that Rosetta. Wow, isn't that cute? You would make a
great sound element. Sewing that down, sewing
that on the page itself. That would look great. But this glue will just
give it a second to set and get my be authentic. I sometimes do add
a bit more glue. When I'm working with
textured elements. The glue on the back, the stickers may not
be enough to hold and we'll just give that half
a second. My messy hands. I don't want to get
that everywhere. I think we did it was the fastest collage I
think I've come up with. What do you think?
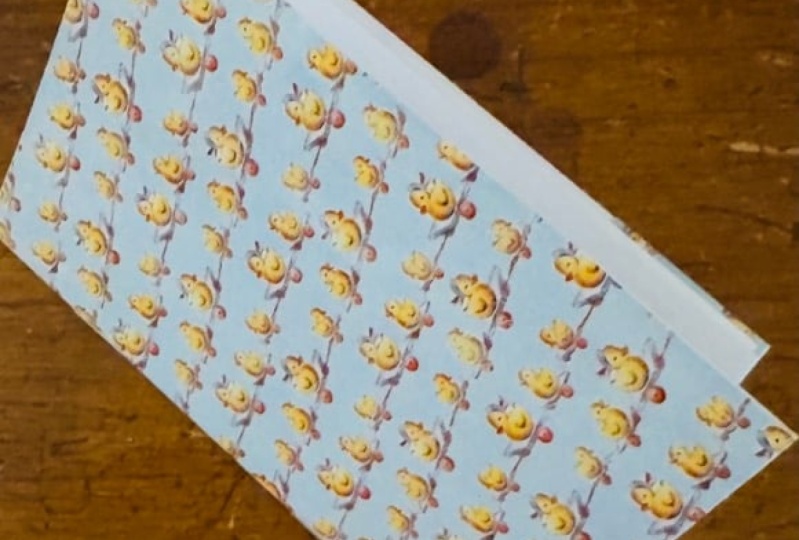
9. Big Ideas: In this video, I want
to highlight how adaptable these many
notebooks can be. I had a situation where I wanted to send out
some happy male. And I picked up an envelope and realized that what I wanted
to send was very small. When you mail something, you want something that
really fits your envelope. Well, what I did was I grabbed some paper
and I decided I want to make on notebook
to fit this envelope. And so I can insert
the things that we're going to be
just small snippets. So this is what I
ended up doing. As I looked at how much paper I needed for my envelope
and decided I needed to trim off about 2 " from
my 12 by 12 paper. I'm going to measure my
envelope real quick. And it's seven. So I want to make
sure that this paper, now I've forgotten which way. So it's short, but I
only need 7 " across and it'll fill my fill
my envelope nicely. Measurements, correct? Yep, that looks great. That looks great. So I took my paper immediately
and folded it in half. This is a well, it's more than paper, but it's not exactly
a heavy card stock, but it's textured. And I thought, well, that would
make a really nice cover. And can you tell
what I did already? I did not make a pocket. Oh, well, I thought to myself, that's what it's going to be. And I found a paper
and immediately I folded it in
half and realized, wow, that's kind of small. That's not a problem. We can work with this,
that'll be great. Here's something that's larger. But if I fold it, oh, it's even smaller
than the one I had. Well, this will work.
This will be great. I'm going to use some
papers that will not match and it
will look just fine. So I took my paper to see. Okay, I need to trim
it off about there. Right. I'm just
eyeballing everything. And I go to insert it. And I said I want to
make that show. Okay. So far so good. I'm okay. I'm okay. I saw this on my desk and said, Okay, I'm notebook
paper's going to be fine. Do I want frilly edge? I decided no frilly edge. So I took that off. I thought, Well, okay, how much do I need? Oh, look, it's nice and wide. So I went ahead and
folded it that way. And it's extra long. I decided I'm going
to trim it up, but I want to be able to
see the red, that red line. Let's see how I'm doing. It's about the same height. I do want to trim off
that circles part. That's great. So now where are we at? Oh, yes, it's extra wide. So that's too much. I'm going to have it
just picked out a smudge and that's fine, right? Everything's fine, life is fine. And I fold my last
paper and notice, well that's a really short. Well, All good. I think trying to figure out
where I want to place it. Should I have
folded it this way? Smoke. I'm good. I'm going to leave
it like this. Right? I can see all my
papers peeking out. And in the moment of truth, I take my stapler, I'm ready to make
my little notebook. I decide, okay, here's
all my throw lined up. They look great, but okay? And I can't reach
the center line. I am not there. Okay. Okay, gang, What
am I gonna do now? So I measure how
far can I reach? About a half an inch. Okay. So if I take off and half
an inch of my cover, I haven't even reached
the papers inside yet. So I said that's all I need. Give me about a half inch. Might even go a smidgen more. And took that off one side. I found my papers, I put them back inside and
they still don't show. I'm good. I was so all of this to say, I love these little notebooks. They are so versatile, absolutely versatile.
And look at that. Now my stapler can reach
my notebook, can fold. It will fit in my envelope. Now we could decorate
this any way you need
10. Wrap Up: Well, how did you do? I can't wait to see. Please take a photo of
your finished project. I've put it in the
project section for me to see my students to
be inspired by. I would love to cheer
you on and hear how you used your
many pocket notebook. Did you use a collage
on the front? Did you embellish in any way? I hope you found the project fun and that you're using them. I hope you enjoyed
making the project and I really need your feedback. Would you please rate
this class for me? I need to know what you loved and maybe what you
need to see improved. Please share that with me
by reviewing my class. I'd love to hear from you. Thank you for crafting
with me. Have a great day.
 Tammy Prara, Making Matters