Transcripts
1. Welcome to Class!: Hello, I'm Stephanie. I welcome you to this class. In this class, we're going
to have fun painting these wonderful color wheels to get to know our watercolors
and play with colors. When we play with colors, we can do very abstract works. When you practice with
watercolor wheels, you get to learn the
different palettes that you can have and
you can use them in more abstract pieces or in more realistic
pieces afterwards. So during this class, we're going to paint together a little color wheel with
some pattern on the side. We're going to
choose our colors. We're going to warm up together, and all of the class is
filmed in real time. So you can paint
together with me and do the exercises
at the same time. You don't have to pause, speedy videos
throughout the class, I will give you tips on how
to make the color wheels, how to test the patterns. I'll encourage you
to explore and try to come up with your
own design for your page. I'll show you
different examples. And all in all, I think
we're going to have last with playing
with our colors, and that's the main goal here. This little exploration will be a side quit that we do after we're done with
our color wheel. I'll see you in
the first lesson.
2. Class Project: Color wheels are something
very fun to play with. You can put them on paper sheets and put them in different
areas of your paper. You can put a bunch
of them on one page and have beautiful
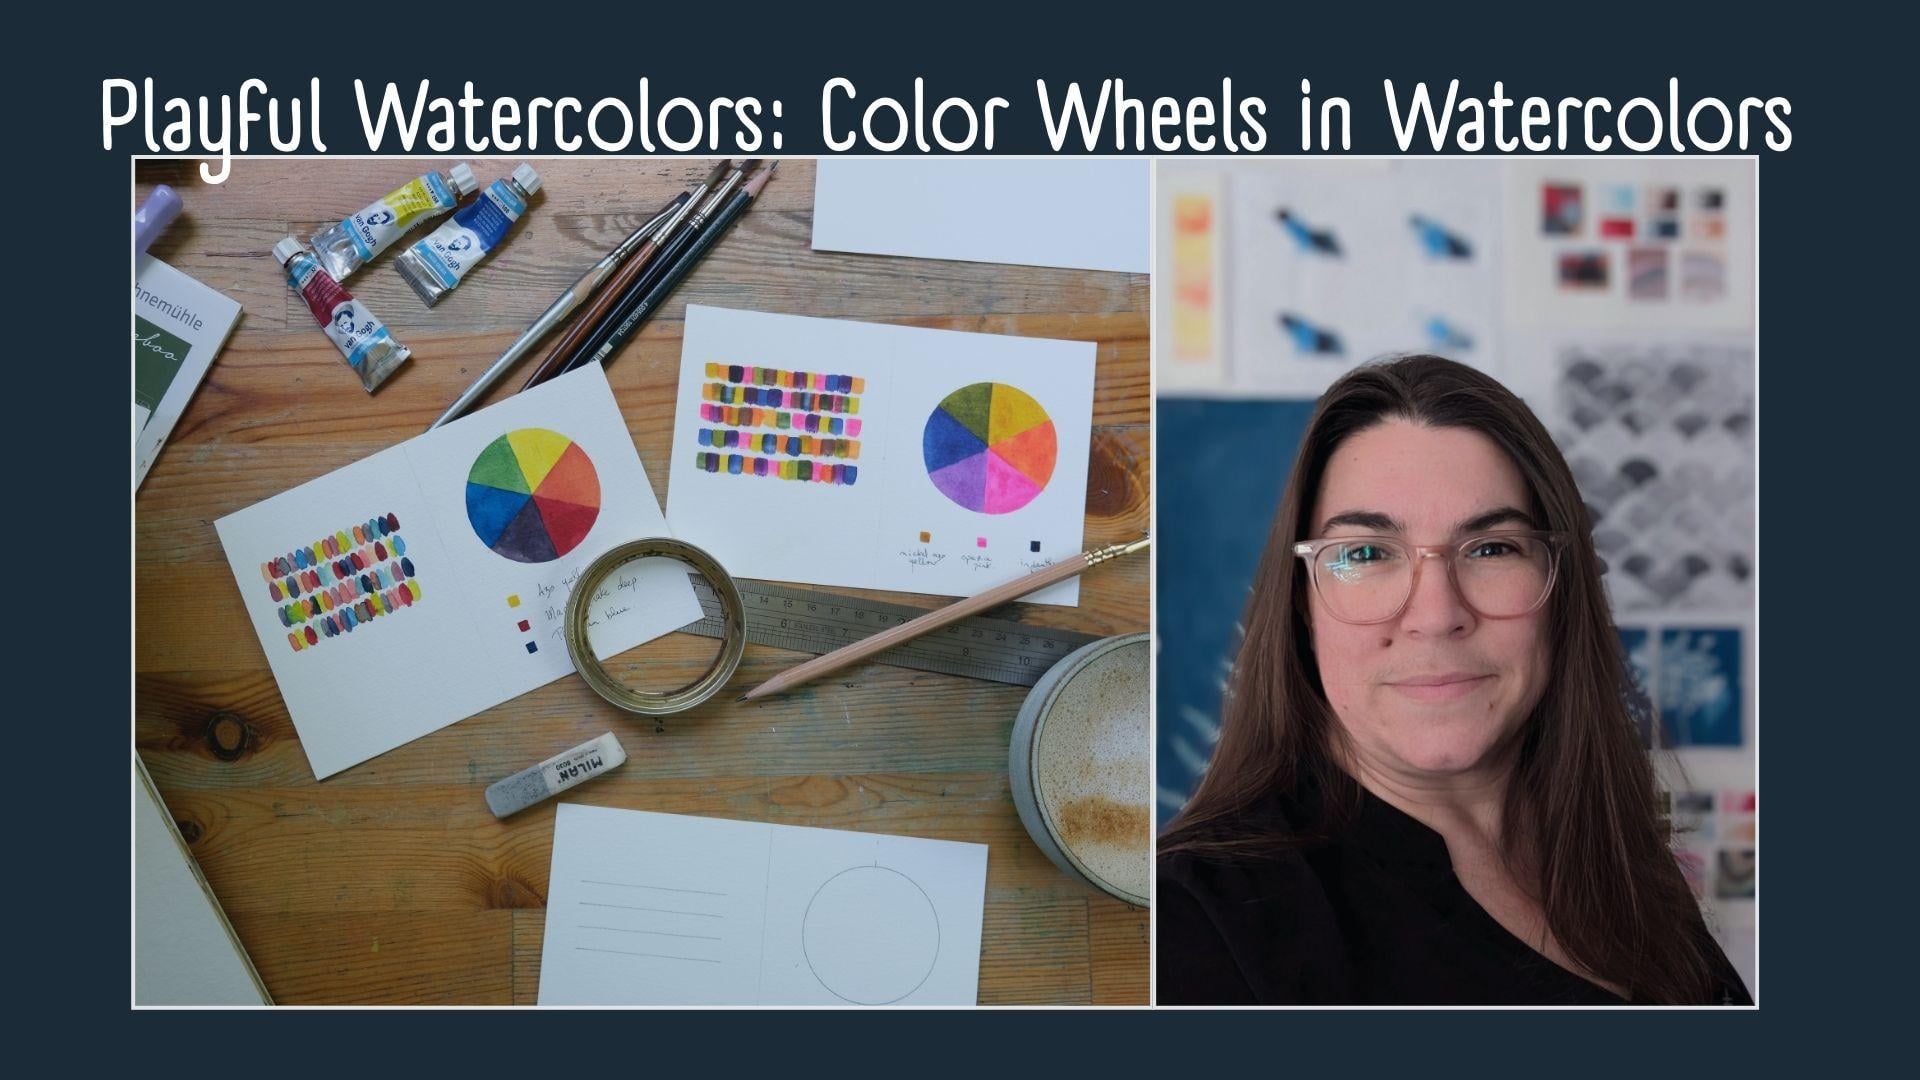
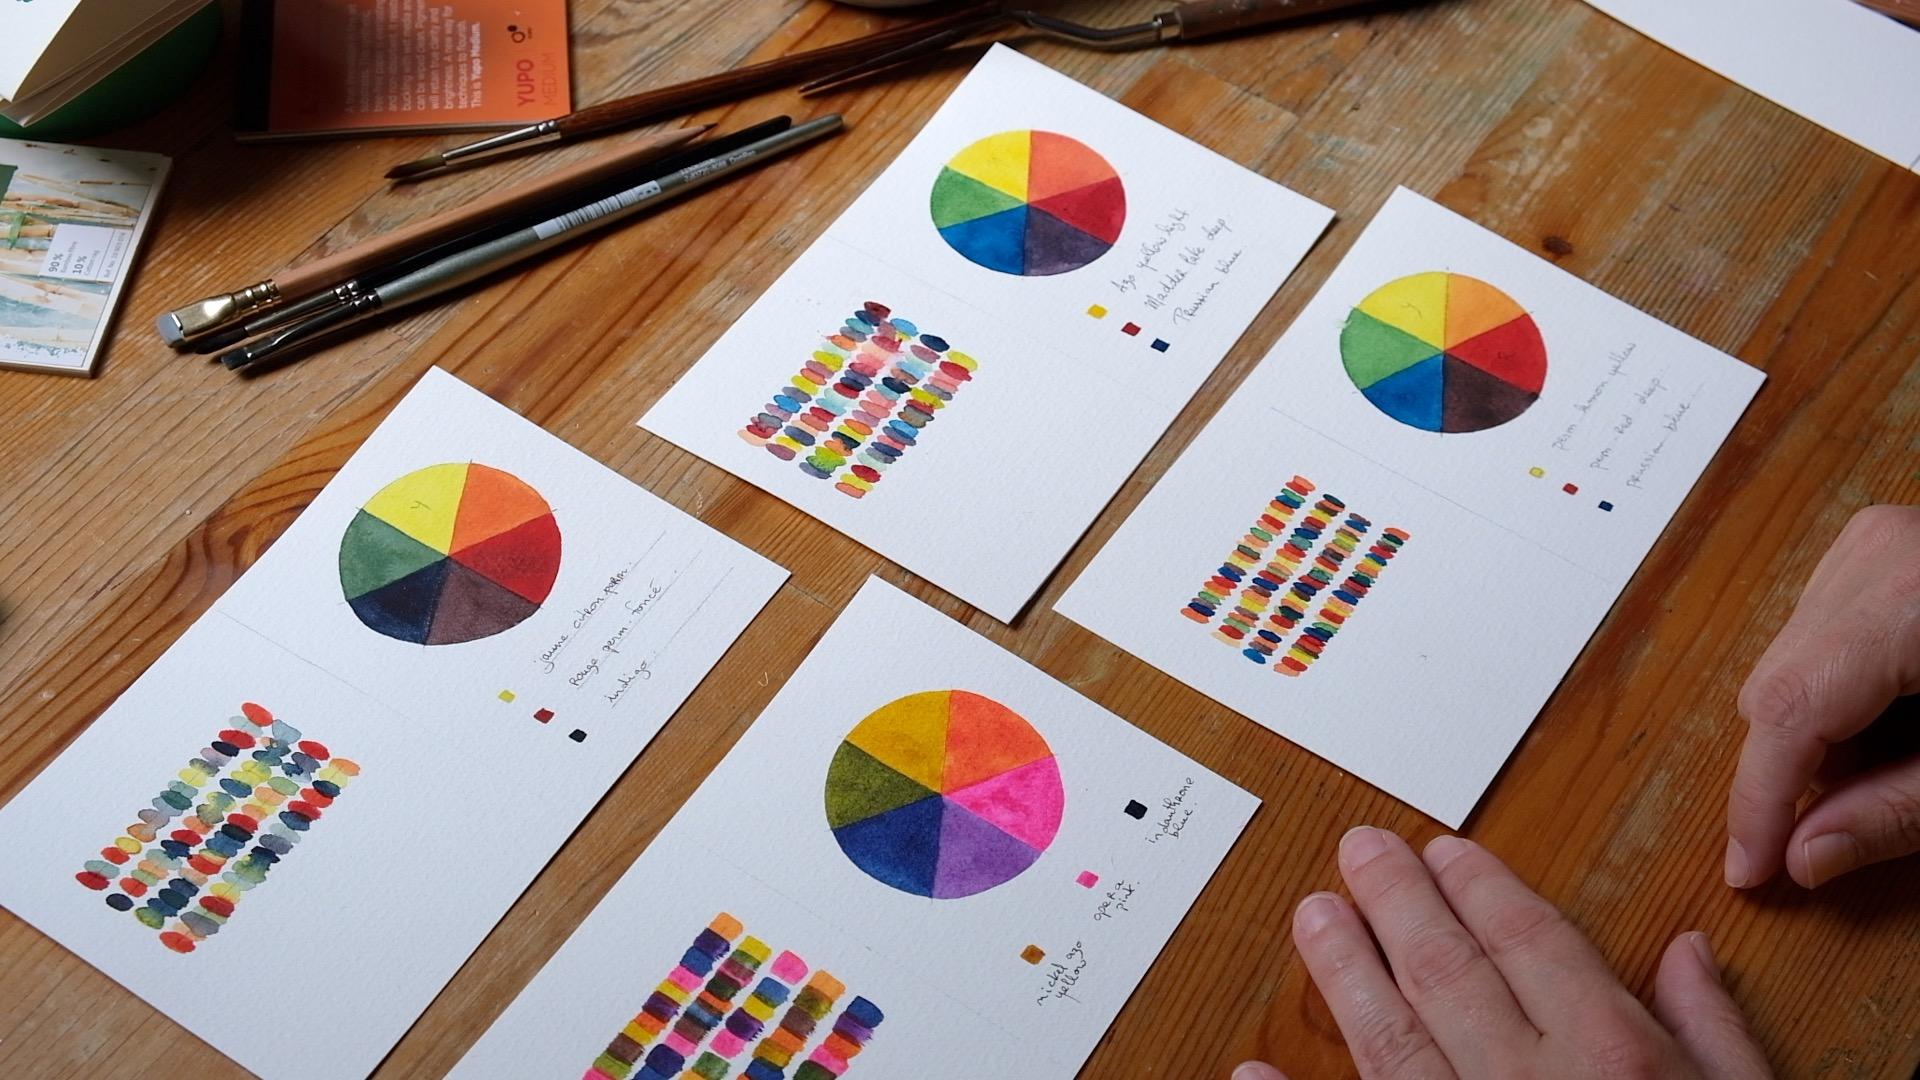
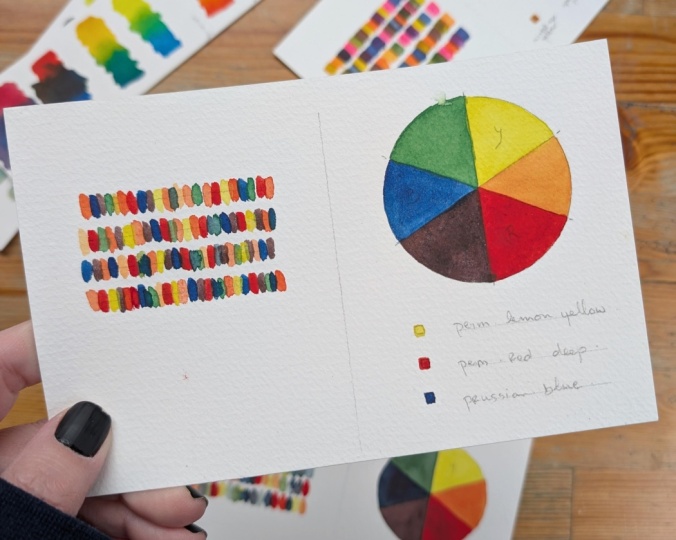
color palettes to choose from in this class. We're going to make these
tiny sheets where you have the color wheel on one side and a nice fun
pattern on the other. The pattern can change
depending on the brush, depending on the
brush you're using. So these ones have a
similar round brush, and this one was done
with a planter brush. You could also, as
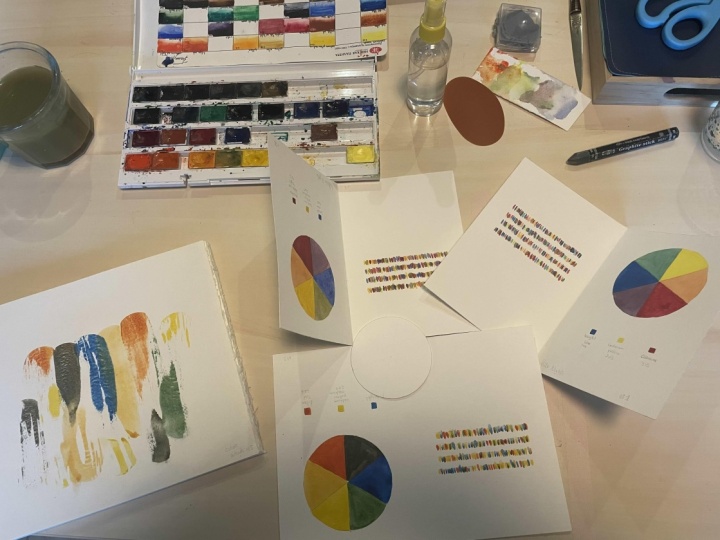
in this example, make a tiny tiny sketchbook that will be filled
with color wheels. Of different palette. In this class, this is going
to be our final project. We're going to paint one
together in real time, so you have the time to put all your colors,
make all the mixes. I'll guide you
through all of this, and you can repeat them
as much as you want, end up with many different color wheels
and color palette. The reason I like
to do this is one not waste the paint that I'm using while making the mixes, reuse them on the side. But also whereas the
color wheel section give you more academic, if you want, or theoretical
view of the colors. This one is a bit more organic, there are more mixes,
the colors touch, and I find they give
you better feel of how the color palette
works as a whole. These are different ways
to showcase the colors. You're done, I would love
to see the colors you chose for your
color exploration. They can be primaries, they can be a little
bit different. Please share them in
the project section. Ask away any question
that you want as well. I do look at every project
that is shared with me and with everybody
else taking the class, it would be lovely to see
your take on this pattern. Yeah, that's it. I'll see
you in the next lesson.
3. How to Uplaod a Project: To share a project
with other students, you can see below the class, below the videos,
below project section. You can click here. You can
also find the resources, so the templates I
shared with you, click on Creative proroject, add a project description. Color full watercolor swatches. You can add a
project description. And I'll I'll make the
description a bit better later. You can upload a cover image. We'll put this one
as the cover image. Make sure it's under
eight Mags. Here you go. Submit. And you can add images. And I'd love to see all of your swatches so
you can drop them, drop them in and click Publish. The class will be launched in this section in
the project section, you will be able
to see the project of your fellow students
and comment on them. I will personally go look into each project and leave
you a little feedback. So I'll ask your questions away, and I'm really excited to
see your projects coming.
4. Materials Needed in Class: For this class, we're going
to make these little cars with a pattern on the side and a color wheel
on the right side. We're going to paint
them with watercolor. What do you need to
make this project? You need some watercolor
paper, 300 grams/square meter. Or 140 pounds. These are standard weights
for good watercolor paper, so it doesn't bend easily. It takes quite a bit of water. These color wheels were
made on this paper, which is pretty fun
because it's twice as wide as it is high. You can fold them into half
pretty easily like this. I want to make a tiny watercolor
sketchbook with these. For these, I cut out larger sheets of fan piano
artistico cold press, which is a pretty fun paper, and this is what I'm going
to use in the class. In the resources
section down below, I did put a template, if you want to simply
trace this out. Or during the class
in one lesson, I'm going to show you
how to make your own. You might need something
round to trace out the color wheel.
I like these a lot. They are mason jar
tops because in one, you have two sizes. It gets pretty handy and I'll
show you how to use this. I use them to make
little templates for the color wheels so you don't have to guess every
time you make one. You're of course going to
need some watercolors, either in pans, like
these ones or in tubes. We're going to use probably
both during the class. You're going to need something
to mix the colors in. It can be the top
of your palette. It could be some Put paper which I really enjoy using
because we can make very easily
fun side projects with our palettes afterwards. Brushes, of course. You can do the whole class
with only one brush. I will be using a couple of
brushes during this class. First off, this is a
synthetic sable brush, which I prefer because
they are easier to make straight lines with
for these patterns here. You can use the
same brush that you use to make the color
wheel or you can use different brushes to have different shapes in the patterns we're going
to make on the side. Finally, to trace
out our pattern, we're going to need a couple of pencils and eraser
is always fun. Permanent pen or some
fountain pen with ink, whichever you prefer to write out the names
for reference. Of course, a cloth or some paper towels
to dry your brush. We are also going to need a ruler for tracing out
some lines in the pattern, and if you're going to cut
some more color paper, metal rulers are easier if you use an exacto or you could also use scissors if
that's easier for you. And finally, don't forget. A water jar to
rinse your brushes. When you paint with watercolor, a lot of people will suggest
you have two water jars, especially when you're working
with this type of thing where you want to document colors and are using
very pale colors. However, on my part, I always confused
a clean water jar. And the dirty water. I only use one and I will
change the water if needed, but up to you, if
you're good with the two water jar
systems, please go ahead. If you're like me and
you tend to confuse the dirty water and
the clean water jar, only one water jar is enough and you will make pretty
paintings nonetheless. I'll see you in the next lesson.
5. Tracing the template: In this lesson, I'm
going to show you how I prep my page
for one of these. We're going to keep
our examples right here and this one is
one I already did. What I will do is take another one to use for
alignment purposes. You put the one where you
already painted or the one your other traced ones and
you make a tiny mark to show approximately where the center of your color wheel
is on the other page. You mark the middle. And you mark the lines
on which we will paint. Same thing on the horizontal space or
you're going to make a little mark where the
top of the color wheel is in the lines for the colors. Now you can see in this one that the lines show you
can see, right? Now you can see
that on this one, the lines will still
show underneath. I don't mind these
lines personally, especially on works
such as these, which are meant to be
references for colors. Also, for the sake of the
camera during this class, I'm going to use
pencils that will show up on the screen here, which were quite dark. If the lines bother you
in the finished works, I suggest that you use a
three H or two H pencil, the lighter the better and that you erase the lines a little
bit before painting on them. But if this doesn't
matter to you, you can just use any
pencil you have on hand. I draw the middle line. If you don't have one that's
already ready for you, you could just
measure the paper, make a line in the middle. And when I make these lines, I try and by all means, do whatever you feel
looks best for your page, but I like to have margins that are roughly the
same on each side. Here I'm about 2
centimeters each way. I'll just let me trace
these lines course, you can do the same
thing as before. You can measure where the
side of your lines stop on your previous patterns and
I'll show you in a sack. Here are the four lines. You could simply use these as references as well and I
made these little short. You could decide that you
want to have them a larger, similar to the other ones. You can draw the
lines with ruler. You can also free
hand them And I totally encourage you to
make this paternur now, next, we're going to
draw the color wheel. This is why I like
these a lot as artists. Another to we often have
on hand is tape rolls. You could use those as well. They come in different sizes. But the main thing is
you can see through. So when you make these lines, they will help you make the
marks in the right place. We try to align the center, and of course, this is not doesn't have to
be super precise, you try to align the
middle of jarlid here, and this was my
mark for the top. I want to go down like
this. You make the circle. Now we're going to make color
wheels with six sections. This is something that's a
bit annoying for me to draw. I made myself a little template
in a very easy fashion. You take some other piece of
paper, you make a circle, you cut it out,
and then you take the time to draw the lines. Once that's done, and
you can please refer to the templates and you can
print them out if you want. Once this is done, you
can just put the circle here and you make little marks. Here. And then you know where
to draw your lines. So just in case you want to draw the vertical
one as a first line, make sure that it is straight and parallel to the
side of your paper or not, once again, make it yours. Then you draw then you
draw the second line. Finally, once you
make your final line, this is just a simple
thing to pay attention. Make sure that once you
make that third line, that it intersects with where the two previous
lines intersected. There we have it at
six part color wheel. Finally, last thing we want to do is draw the lines for
the name of the colors. You can also free hand
them once you're done. I like to have the
colors aligned with the exterior of the wheel, but I do this very quickly
in terms of plcing. I also made a few other things where I put the
colors at the bottom. You can try to put them on the side on the top,
whichever works for you. Once again, I encourage you to experiment and see
which one you like best. Finally, before we finish, I always, although I
made so many of these, I always forget in which
order I like to put my colors and I love to have them side by side and see
which mixes I can get. I enjoy having the yellows, the reds, and the blues
in the same order. But when I start a new one, I always forget which
color I put first. I always write them down. Here when I make
my first pattern, whether I make them in this fashion in these
or in standalones. I always use the same order. This is something you can do. You can do it
somewhere in order, in some other fashion. Once again, make
the pattern years. In the next lesson,
we will choose the colors that we will
use in our color wheels.
6. Choosing your Colors: In this lesson, we're going
to choose some colors. Throughout the class,
we're going to use primary colors,
different primaries. But you can make color wheels with any color that you wish. Please explore, either document your different primaries or go wild and choose something
that's totally out there. For this first color wheel, I'm going to choose
three bright primaries, permanent red, deep,
permanent yellow, lemon, and Prussian blue.
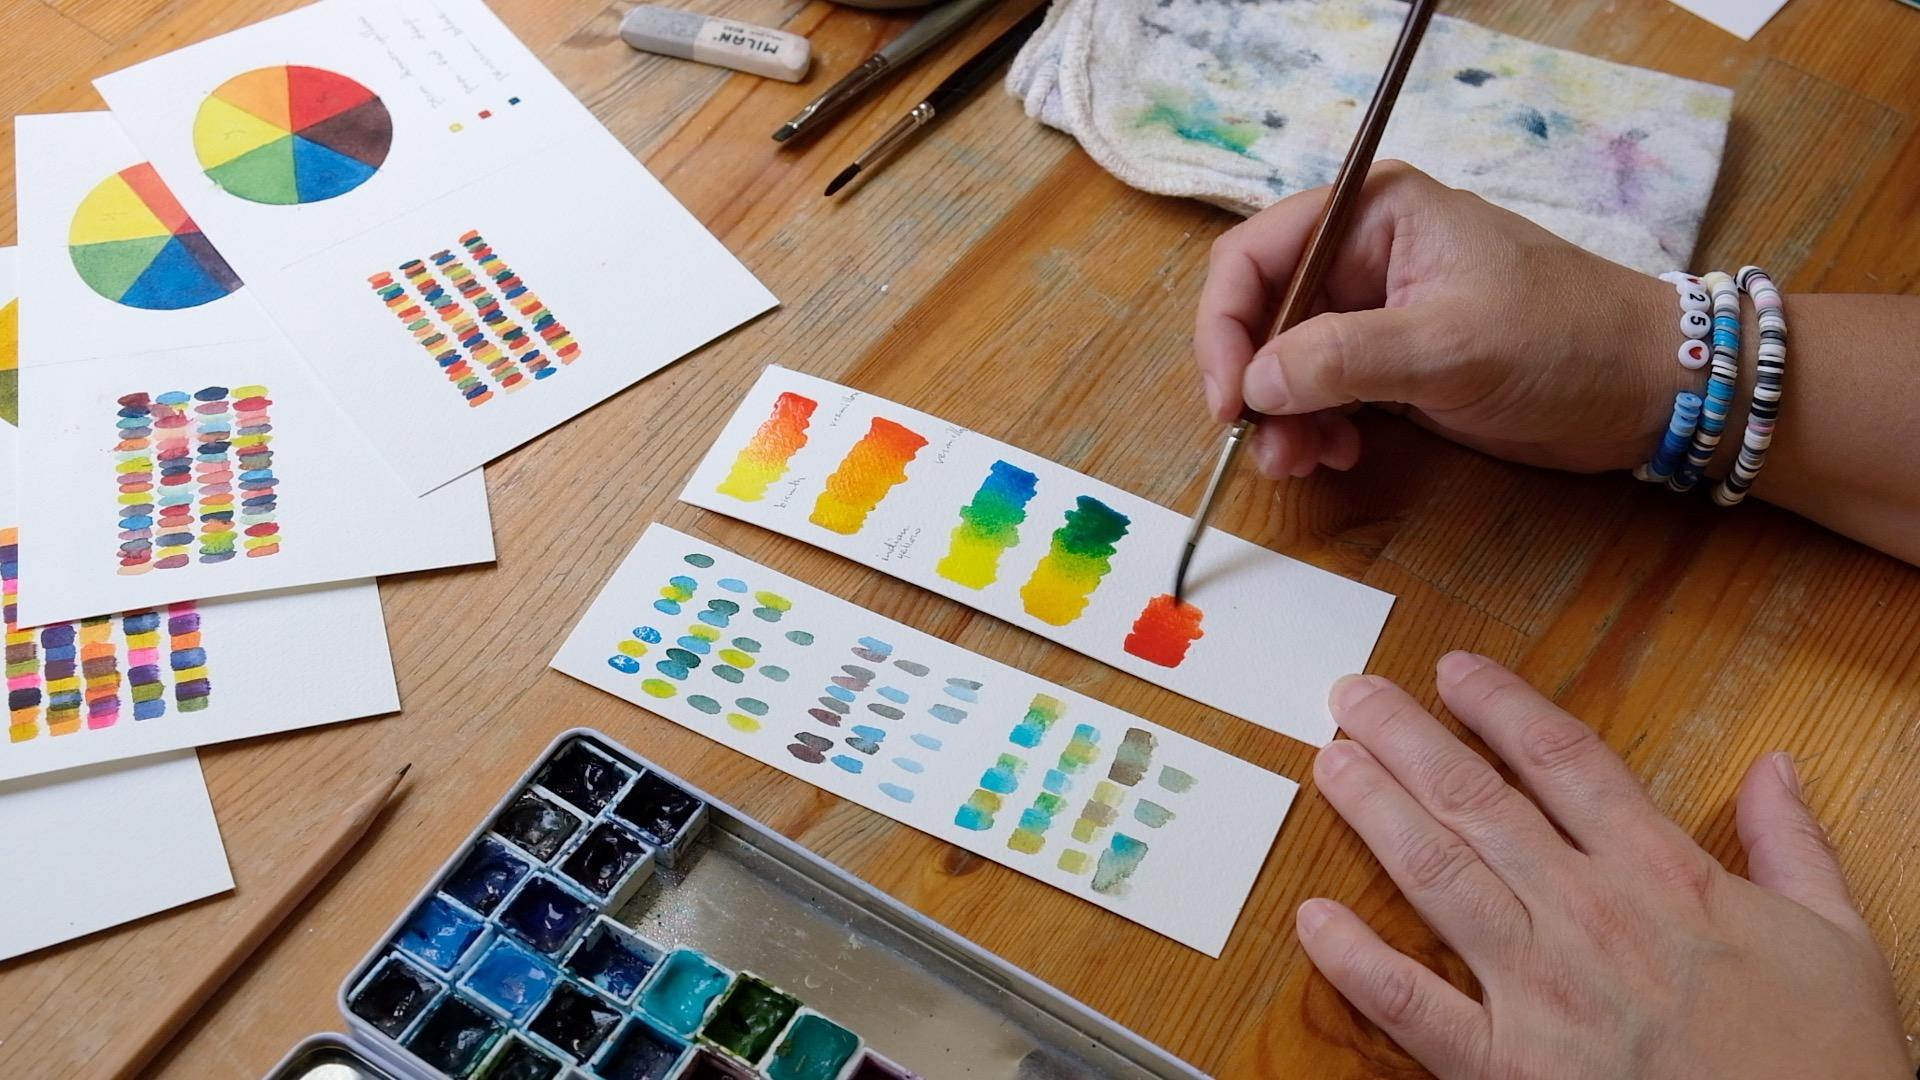
7. Warm-up and exercises: In this lesson, we're going to have a little warm up session. We're going to play
with different brushes to see which pattern we prefer, and we're going to
test out a few colors. You don't have to do this. It's always a good
idea to warm up. You can listen to this
lesson while you're setting up if you don't feel
like warming up and diving, you prefer to dive
right into it. But let's get to. These are the three brushes that were used to do these
three patterns. So as you can see, so these three patterns
have a different feel, a different look, but they
were equally fun to make. For painting the color wheels, as I said, I usually
use this one. I prefer this one
for the pattern. This was interesting,
as was the other one. So we're off. If you have palette of colors
that are dry like this, you might enjoy using
this give when it works. There you go. You give tiny mist to activate all your colors and we're going to start
saying with them. Which colors you use for
this is totally up to you. You can go at random and
what you'll want to do is make Tiny shapes just like this with the paint
slightly touching the paper. I didn't mention, but
take any paper you want. Those were little piece
that were left out when I cut the paper
for my templates. When you add colon is
next to the first ones, you can have them slightly touch or you can put them
a little further apart. And wait for them to dry a tiny bit before
adding another color. This part is truly to see what marks you can have with
your different brushes. You can see this brush is quite round If we try this one, it has a bit let's just
use some color here. A bit of a pointier shape, which is difficult to
say pointier shape. Less rounded and um leaner, so not as thick of a mark. Of course, this is going to be different with brushes you have. And Even if I tell you which
number size my brush is, from brand to brand, I say, from brand to brand, the size will be different. So it doesn't matter as much. Just try your different brushes
to see how they behave, which marks you prefer. And more importantly, perhaps which marks you
enjoy most making. This third brush,
as you can see, holds much less water. It's a little bit different
to paint with it. It's not a watercolor brush. At best it's some mixed media
brush or acrylics brush. I don't even know. I think I got it on
special or something. But it makes wear
interesting shapes. This is just to show you that
maybe your favorite mark is hidden in a brush you don't even think can be used
for watercolors. So I encourage you to have fun in this first
section and try out. Whoops. Se too much water here. To have fun experiment with different brushes and truly find one you enjoy playing with. The second warm up
you might want to do is to try different colors
that you have on your palette and
see how they mix. For example, if I
put this yellow on the page and add this red, what color will I get? Will it be a beautiful orange or will it be a
more muddy color? Now, when you do this, please write the colors because
you will forget. I think. Now I'm going
off memory for this, but if you have many colors, please take a moment to check and you can
see that if you take another yellow with
that same red, you might get what you should, if the car is not the same, you will get different results. Understanding all
of these subtleties This is Indian yellow. I didn't touch too
much water here. No, I just simply
pick it up with a brush that is a little
dried up. There you go. So you can try these
and warm up a bit, or you can make them directly. Or you can make them directly
in your color wheels. Totally up to you. As you can see, each color
behaves a little differently. Depending on how
much water you have, what pigment is in there? Here, that yellow totally
overpowered the blue. Same thing with the
reds and blues. If we put the reds here. You can see this is
a very orangy red. It starts. If we take
the warmish blue, we will have a very dark
purple in the middle. Too much blue here.
I have a very dark, almost black color if we try very a much cooler red. She's almost purply. We had that same blue. That blue is very strong. I still dark, but I'll add some water just to
show better the color. But I'm more purply colors, whereas here, we have
a very muddy color. There you go. You've warmed up a bit playing with the
colors, you've warmed up, finding the brush you
prefer to use in the class, and we're going to go right into making our class project. I'll see you in the next lesson.
8. Let's Paint our Project: Let's paint our
first color wheel. I'm going to use this
little UPO sheet as a palette and
we're going to do something fun with
it once it's done. I tend to put the colors
in the same order as the color wheel because
if not, what happens, it's so easy to put
the wrong color in the wrong place or
the right color in the wrong place to put
colors in the wrong place. Quick tip if you have a
tube that you can't open, put it in some water
for a little while. Let the water do its magic. I will dissolve the color. I over this and it will
end up opening. Crack. You want to put enough, especially of the
lightest color. You want to put enough
that you have to play so that you don't
have to reopen your tubes. Well, making the color, I already forget Blue goes left. You want to put enough color that you don't have to go back to your tube though
they're not far. This one dry down So the blue, you need a little less of
it because as we'll see, it takes very little
blue to add to yellow to make green red is similar. The reason I say not to put too much is because in this case, I want to reuse what's left on the palette to do
something fun with it. But if ever you have too
much, they are watercolors, so they'll dry and you can reuse them in some
other projects, so it's not too bad. It's not like it
will go to waste. We're going to
start with a yellow because as our water
is clean right now, it's probably the best
time to put yellow. It won't be contaminated
with another color. A drop of water on each
color while we start. Now the process is
pretty straightforward. You will first off,
add colored here. I'm not going to tell
you a lot of not a lot, but sometimes teacher will
tell you not to rotate your page that you're
going to have to be comfortable with painting
every which way. I mean, we're just
having fun making color wheels and seeing
how colors interact, by all means, turn paper
as much as you want. I'm going to try to not turn it too much because of the cameras, but let me see, I already failed
at this right now. Now once we're done
with the yellow, you could directly go
for the orange or you can let your color
dry a little bit. What happens is if you
make the orange right now and you touch and
when you put the orange, it touches on the yellow. We'll make it right
now. I'll show you. You can paint along with
me because we can try so many ways and then you should try so many ways and then you can decide
which one you prefer. When you're going to
make your orange, you don't want to put too much
red in a put way too much. It takes not much
red to make orange. It takes not much blue
and yellow to make green. What we'll do since we have a color that I find is too red, we'll start with our pattern. Depending on the brush you have, the marks will be different, which is what makes
it interesting. For this one, I will
use the same brush. You could depending on
the effect you have, this one was done with
a small flat brush. These ones were made with
a more rounded brush. You see that each brush will
make its own beautiful mark. I like these today, so I'll keep going
with this one. Now, once I don't have
much paint on it, I can rinse out my brush and
make lighter marks as well. In this type of pattern,
the fun thing is, it doesn't matter which way you make them
and which order, the only goal is to
use what's left on your brush to have
fun mixing the colors and seeing the color
palette that comes out of mixing the primaries or
the three colors you chose. Now we're going to put
some more yellow in there. You can see that this
is a more muted yellow. I'm not going to go into deep in the color theory in this class, I might make another
one later on. In this one we're just going to observe and have fun with
our colors mixing them. What I was saying a
couple of minutes back is if your colors are still wet and you put
them side by side, you might see some
reaction between the colors I enjoy these little reactions
and mixings on the page. These mixes on the page or the mixing on the
page. Very much. If this is something
that you do not and please be careful not to put your hand in
your new paint, right? Yeah. As I was saying, you can see here where
the colors touched. You can see they touched and the yellow went into the orange. I traveled quite far. If it bothers you, you can just pick it up, put some more orange on it. It's a side note, if you're
going to correct it, if you want the color to be not straight but
flat and uniform, you're going to want to go over the whole section with
a little bit of water. Just to make sure that just to make sure that it all has the same level of water in it. But you could definitely leave the colors touching in there. I find that beautiful, just wanted to show
you the option.
9. Let's Paint our Project - Part 2: You can pick up the
orange right now, though I forgot and I wash
my brush which is fine. You can pick up the
orange right now and make more little marks
on your pattern. It's quite dry right now, but you can come back
to it afterwards. Next up, we're going to
go with blue because it's opposite opposite of the
yellow and the orange, it'll leave a little bit
of time for those to dry. I tend to forget to put
the colors right here. We're going to do
this right now. You can do them afterwards. If you don't want to end up with paint on your
hands like I just did, we're going to try
to remember we just painted this yellow bit. B for blue. This is where it seems
silly to pencil it in. But when you're
with your colors, you can just forget
that part of it and just look for the spot you mark blue on
your page and go for it. Once again, make it yours, try it different ways. See which is more comfortable. Which color we you had
more fun painting. Nos. I went over the but that's okay. We're not making a masterpiece. We're having fun
with the colors. We're seeing what happens. Now I'm going to
something I'm going to do here dry this color to not have to dip or rinse
off the blue too many times. I'll put a dash of blue here
to go with a yellow later. I'll put some blue over here to go with the red afterwards. We're going to use what's left of the blue to put
a bit in our pattern. Make sure to not water down too much your colors
because once you rinse off your brush and
add the other color, one of the risks is having too much water in the mixes
and having very light washes, once again, which are
beautiful on their own. But for wheels for color wheels, I enjoy having very
saturated mixes. Once again, if you're
making a color wheel or color study for a
project that has light colors, not to have. See, I put my finger
and then blue again. I usually don't do
this as much when I'm alone painting and
not talking about it. If this is something
you tend to do like me, maybe paint stuff in an
order that will make it so you won't run the risk of putting your
fingers in wet paint. She is off fine. I will all
go away once I'm done and I wash my hands. This is quick. I think we're done
with the blue. If you're new to watercolors, even if the water is a bit dirty and my cloth is very well loved, once you into your brush, just make sure that there is no color left in it
as you can see here, and then you know
your brush is clean. Let's go with red now. So once again, I'm
going to turn my page. The way I like to make the
paint these high slices. These slices is to
go on the edges. I'll tell you when
I do the next one. But basically, I mean, I'll show you as I
do the next one, but basically is drop the a good bit of color in the middle and then
make the edges, and then you can fill
in the rest afterwards. Once again, you're
playing with watercolors. The goal is to keep this section with the
same level of wetness, if you will, the
color dries evenly. We'll see I always forget. I have these
references next to it. I can see red is the
second one I usually put, we'll color this one in. Okay. There you go. You can make if you red
additions to our little pattern, and having these on the
side of the wheel where we want to color in the lines
and this pattern is a bit more freeing because
there's no right order. You could just drop
color wherever you want. You can leave white spaces if you want, you can
fill the whole thing. You can paint over another
color if you want. Even things out for
me because making only color wheels can
seem a bit tedious, but here we have
a perfect bounce. We're going to have
to remember we did not put some
yellow in there. We're going to come
back to it afterwards. Instead of rinsing my brush, I could have just simply picked up the red and put
it in the blue, which was the original plan. And I invite you to take notice of what you
have in front of you. You probably did not choose the exact same
colors that I did. You might have something
very different on your page. I have a very muddy purple in front of me and
this is due to the blue I picked and
the red I picked. So for now, just take notice
if you make different ones, you're going to have
different results, and this is going to
be very interesting. I said I would explain how I do. I drop a bit of color
in the middle then when there's a bit less
water on my paintbrush, I make the edges with the
round one straight edges. Hoops, the touch
that's okay. There. Have the lines.
Once they're done, you can just even things
out in the middle. It's a beautiful day here. When I'm filming this, it's a little bit hot things and there's some coming
out of my window. There was not when I started, so the paint tends to dry bit
quicker on my page today. So it's all right. It just means I have to work
faster than I usually do. And you can see
on my palette you try something you going to
pick up a bit more water. We're going to add a lot of
yellow to a tiny bit of blue. You can see how quickly
we get a green color. Once again, half of the
code in the middle. Paint the edges. Take your time. Paint edges. Put the yellow but
I forgot earlier. And when you finish the pattern, you can just pick up
whichever color you have left and create Umixes We
10. Let's Paint our Project - Part 3: Swear inches Color please. As I said earlier, you
can just go over and add cards on top to see how things later and truly just
have fun with it. Sometimes you'll
discover. Very fun. It's like this very blue
very turquoise color here. And there you have it. If you went over and want
to correct some things, I mean, there's
still watercolors, but you can always try. So corner here. Before you move on,
write the name of the colors because you
will not remember them. I spare you the number
of times I said, I will remember the colors
and knew I did not. Red deep and crushing blue. And there you have it.
Your first color wheel.
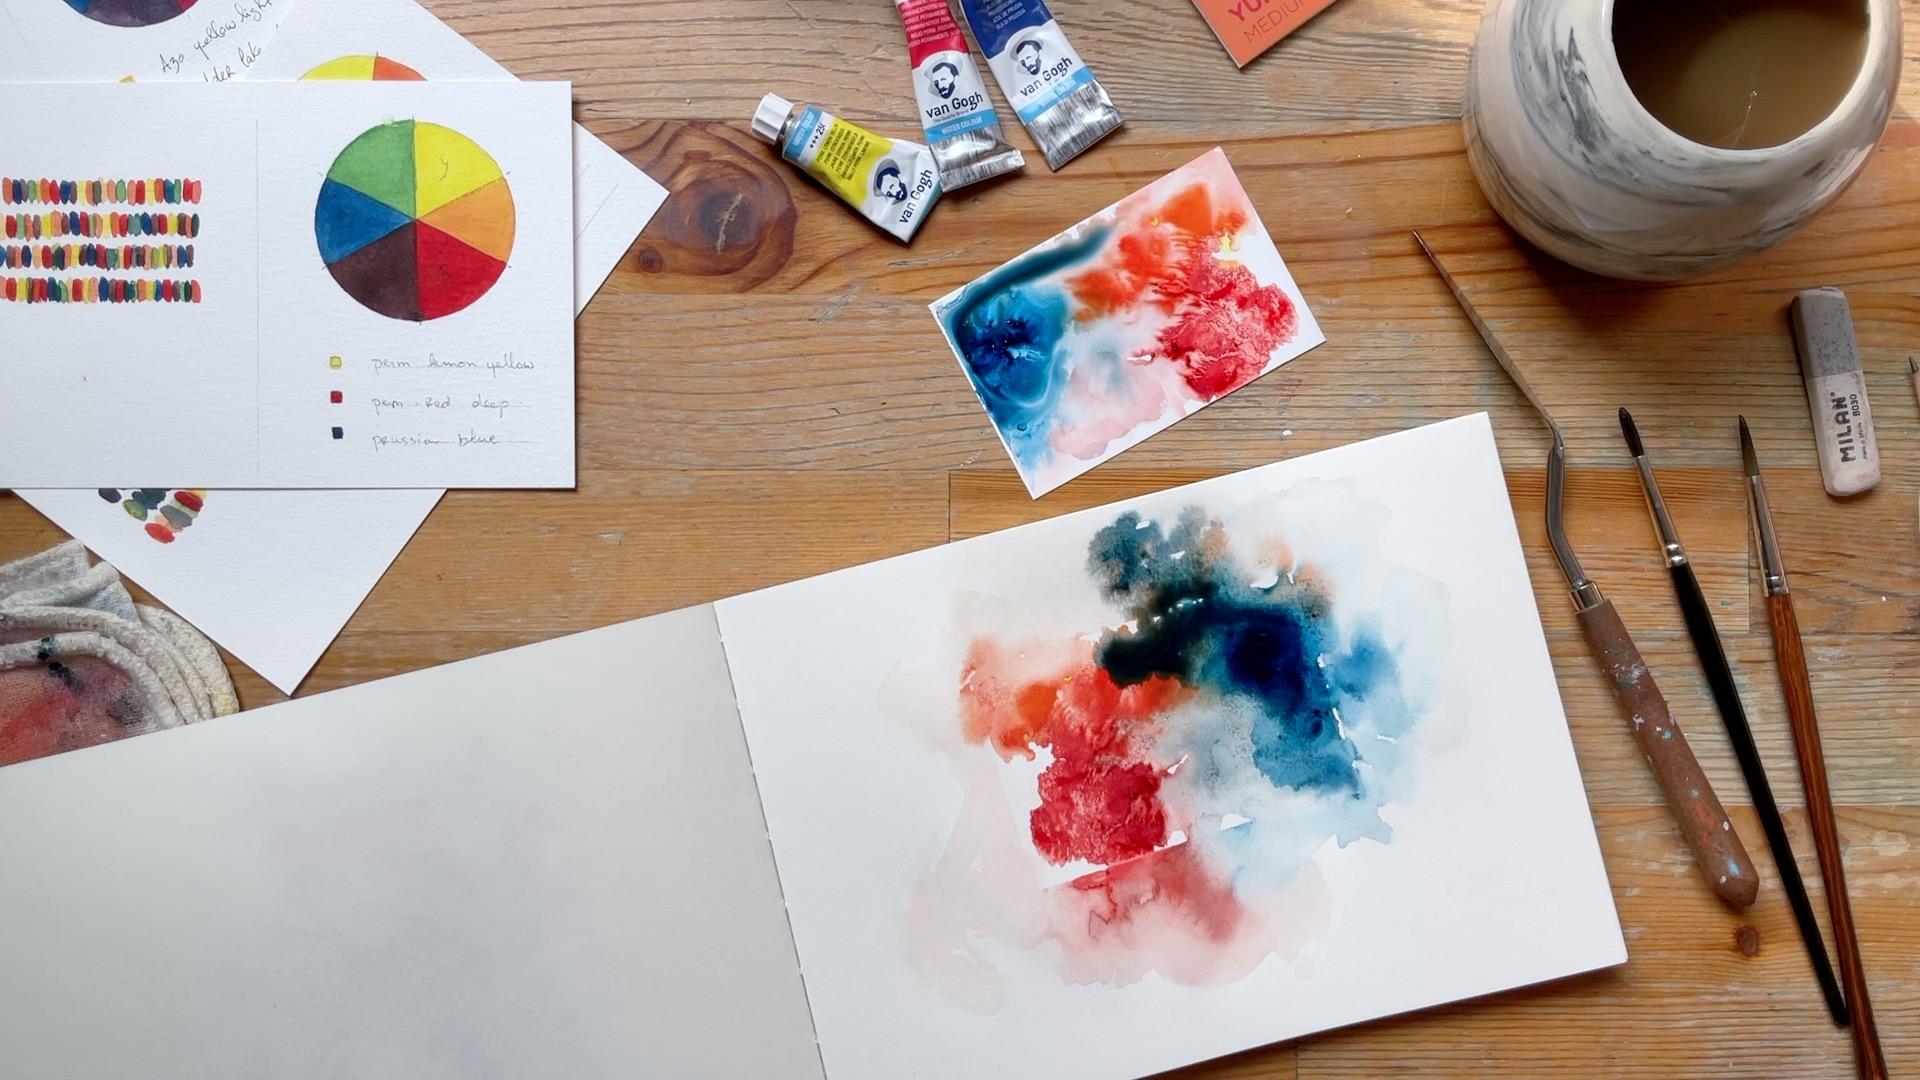
11. Bonus Lesson: An Abstract Art Piece: The fun things I do with these little palettes
once I'm done with them. So here we're going
to make a tiny bit more orange because it's fun to have these
different colors. And for it to work, I'm going to add some water because parts of
them have dried. This is a sketchbook
that I love a lot, which is very smooth. We're going to simply take the yupo page, flip it on there, press and you'll see depending on the quantity of water that you
have on top of it, you're going to have lip. You're going to see some
water coming out of it. You could just leave it like
that or you can add water to make the pigment travel
out from under there. If you put water
all over the area, it will travel around
the page, see. Then you can catch it. It's fun because one of the things you have no idea what's going
on underneath the page, maybe you'll end up with a big muddy thing or you'll end up with
something very fun. But it's fun for me anyway, it's fun to play with the
pigments on their own. Without worrying too
much about the result. Once it's done, you can
simply let me say simply, sometimes it's not as easy as it should be, it's really stuck. Always have a talent
knife not too far. You just use it to pick up the talent and it's under there. There was lots of blue. You can play with it. A bit more water with your brush to direct
the color a bit. I could play with water
and pigment for hours. This is a bonus exercise, exercise, a bonus
creative endeavor. After the color wheel. Now these little yupo sheets you
can wash them off. You can print them
again if you want, or I have a few in
the sketchbook, which I left here. Sometimes you get very
interesting textures. In this one, I had a very nice
dendril pattern appeared. I kept this. But you could definitely use
them over and over, just wash them down or print a few more times and
don't forget to date and add the date of the things you
did and if you want, as a reference, you
could write somewhere, the colors you use, and this is another way to
document your color palette.
12. Before you leave...: Oh Hello. It's Stephanie again. You've been listening to me
for a little while if you've been doing the lessons
or just watching along. I hope you had fun during this class, playing
with your colors, trying new mixes, making that little abstract at
the end with your palette. If you didn't do it because you didn't play with yupo
just try it with some plastic wrapper or packaging and stuff that
you could use for that. I really hope you share your project in the
project section. It's always fun to
see what people make. I'd love to hear how you made it your own,
what works for you, what doesn't if you
have any questions, never hesitate to put
them in your project. I will go and check them out. You can share your project
here in the project section. You can always reach
me on Instagram. You can tag me at D
Migdt over there, and I'll go see your project. It's always fun to see on either platform
here or over there. I hope you enjoy playing with your colors and you'll have
some more fun with them. So keep playing. See you soon.
 Stephanie Rault, Abstract artist, favorite medium: color