Transcripts
1. Intro: Hey, welcome back to
another installment of plasticity for
complete beginners. We're on a journey
to learn how to use plasticity to model three
D printable objects. If you took the last class, you now know how to model
basic flower vases. In this class, I'm
going to show you how to model a more complex, pumpkin like and
curvy flower vase, which requires you to apply all the skills you learned
in the last class. This is going to be a bit more challenging than what
we did last week, but that's part of the journey. Remember, the goal of all these classes is to
teach you plasticity. I want to show you how to model manufacturable
hardware products. I chose to teach you
how to model flower vases in this series
because they are simple, but they require you
to use the tools you will use to model
other future products. This is going to be a
hands on experience, and by the time you
finish the class, you will have understood how to work with curves to create intricate curvy surfaces when you're working on your
hard surface products. If you're new here, I recommend first watching the
previous class we did to get up to speed on
the basics of plasticity. Once you've done that, you
can come and continue here. If you've already taken that
class and you're excited to get started and you're excited to move your
skills to the next level, I can't wait to get started. Let's have a look at
the class project. I'll see you shortly.
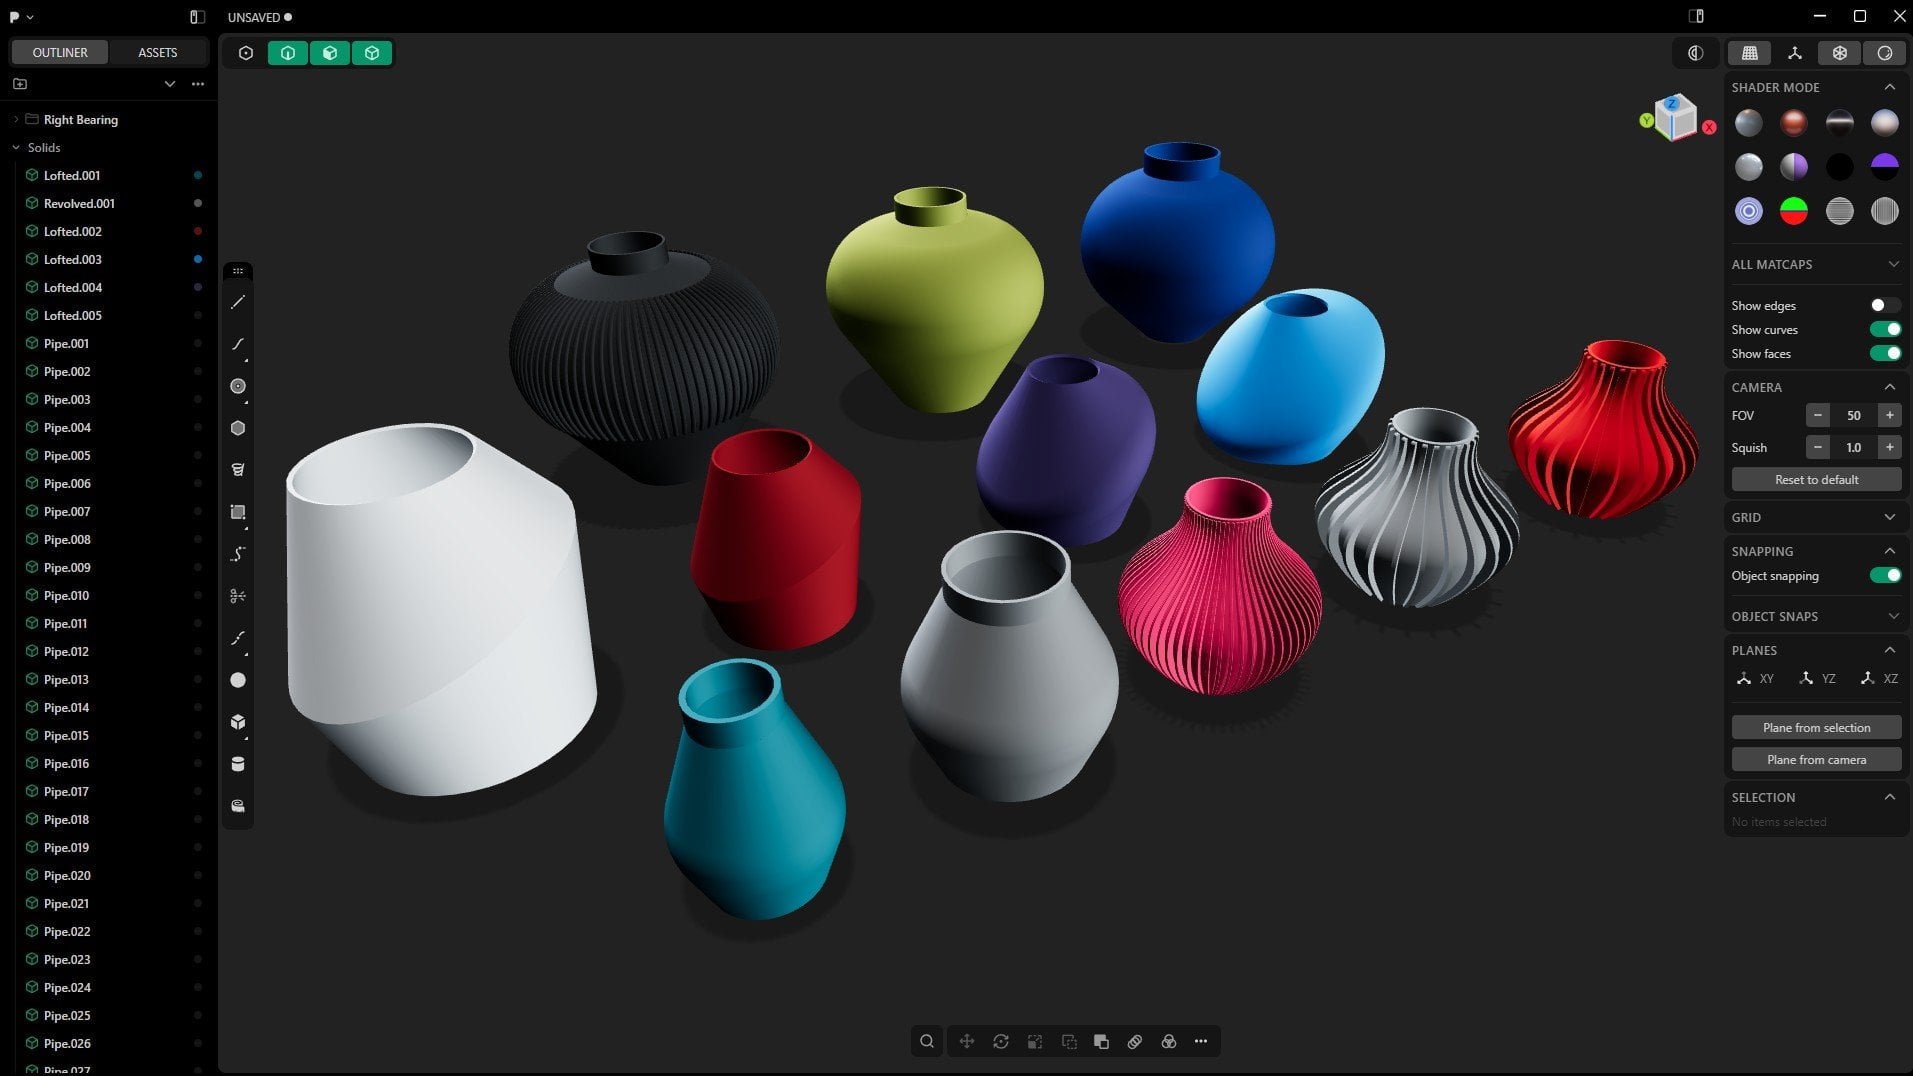
2. Class Project: This is the flower
vase, we're going to be creating
throughout the class. These are just different
variations of the same design. I just used different colors. As you can see, inside, the pattern is
looking very nice. I love these wavy curves inside the brim,
looking very nice. If we look at the bottom, we have that nice
rounded bottom. These are the original
ones I had created, and then I created this
one later with this base, and you're going to
see how to do that. So, yeah, by the time
we finish this class, you will not just
have flower vases, but the skills to create other similar or even more
advanced flower vases. So let's go on to
the next lesson and start modeling.
I'll see you shortly.
3. Sketching The Profile: A, welcome back. This
is a continuation of the introduction to plasticity
for complete beginners. And, of course, to
understand how to use various tools and
commands in plasticity, we've been working
on flower vases, and this is the flower
vase number six. So we want to create
this in this lesson. Now, I had hidden my grid. Let me just unhide
it with Alt Shift Z. There we go. And as
always as the routine, let's just grab
that and put it on the side because we want to
use the center of the world. And let me change to let
me change the units. Let me collapse that. Yep. Let's change
to centimeters. There we go. So now I want
to switch to the front. And like we did in
the last lesson, I want to use a curve
to create this profile, and then we're going
to do a radio array. So let's go ahead and
create this profile. Let me just grab this
and bring it closer. So let's go ahead and
pick the line two, and let's draw the brim. Going to select that
and say 4 centimeters. That means the diameter
will be 8 centimeters. This is the radius. Enter.
Now we have the brim. Let's draw this curve. So there's spline curve, too. And I'll select that maybe somewhere there,
somewhere there. And finally, maybe we don't have to be accurate
right now, right there. All right. So now with this, I want to subdivide it. I want to add more
anchor points. So I'm going to hit
Shift S to subdivide it. And now we have a
new anchor point. I'm going to select
that and G, push it up. Then I'll select this, G, push it down, select
this, push it outwards. Let's say maybe up to somewhere
there, up to that spot. G, let's push this
inwards a little bit. Click outside, right,
click outside. Then let's shift select this G, Z. Alright, I think we have a rough
shape that we can work with. We don't need to be
we don't need to make it identical to this,
you know, the drill. Now that snaps
there and up there. So now we have a
complete profile. There we go. So now we
have this and this. But I want to use this
to create these details. And so I'm going to shift D, and I'm going to push this
inwards just a little bit, maybe up to that point. Shift S to bring up the anchor
points or control points. And I want to select this anchor point
of the inner curve, together with this
other one here. No, I have selected that, so I'll hit Control Z
to undo that selection. Then I'll hold down
Shift and select that G, X to constrain it to the X axis, and then I'll pull it
up to somewhere there. In fact, let me just
go with one at a time. So I'll select this double G for free movement
of the grab tool, and then I'll hold down
Control to snap to that vertex or vertices. I'll select this as well, GG Snap to that. All right. I think we have
something good here. So now I'll select
this the inner line. If I go to the front, the
inner line, go to the top. And while it's still selected, I'm going to hit R
for rotate because we want to rotate
it to this degree. As you can see, we have
this straight line and then we have this 45 degree angle. So we want to rotate
this inner curve. So we've hit R, so R no, let me escape. R. And now we want to rotate
from a specific point. We can choose a point to
use as our pivot point. So I'll hit V to choose
the pivot point. And that's the
pivot point I want. So now I'm going to rotate this holding down shift to
move in small increments. And let's say maybe somewhere, I think that's a good
angle, just like that. Now, if I rotate it, it's suspended somewhere in the air, but don't
worry about that. Let's go back to the top, Alt X to reflect it or mirror it to the other
side in the Y axis. And now we have that.
4. Curves to Sheets: So now what we want to do is
select this curve together with this and this and
let's hit L to loft it. That will create a sheet
connecting the three curves. So I'm going to go ahead
and let me try G one, G two, G zero. Alright, let me not play
around with these for now because I don't really want
to make any changes here. Now, I want to select the
curves and hit H to hide them. So now they're hidden. And what we're left
with is this shape. I want to select this G, and move it in X
to create space. And with this selected, of course, you've
already guessed it. We're going to radio array. But let me go to the
top view radio array. And as you can see, I have 14 and they're
combined. Let me see. What about 13? So
they're overlapping. We need to reduce the
number drastically, so we can have that space. Ten, the value is ten here. If I go to 11, they
start overlapping. So I want to go to ten for you, it might be a different number, and so this space
might be different, but I hope you understand. So with that, I think we have
a rough shape to go with. When to select this edge. To select the edge, you can select the solid and then aim at the edge
and then select it. Or if you want to
directly select the edge, just go to the edge
mode and select that. In fact, I want to be in
edge mode. And select that. Now, something I
want to show you, let me switch to shader mode because that's actually where I'm supposed to be working from. Once we're done
with the modeling, that's when we switch
to random mode. But I keep forgetting. Let's go back to shader mode. So now, with this, I can hit L again to loft it. See that? And now with the loft, we can play around with
G with a continuity. If we say G zero, let's switch to the top view. As you can see, this is flat. If we say G one, it gives it a slight curve. G two just increases
the curvature further. You can also play around
with the tension, but I don't mess around with
these in most projects. So with that, I want
to give it G one. That's what I'm looking for, and I think we're good to go. And now looking at
it, I think it's a very beautiful seam. Now, it's still a single sheet. So if I switch to all of them, this is a single sheet. Every one of these is
an individual sheet. So I'm going to repeat the
same process all round, and I'm going to fast
forward this part, so see you shortly. So I'll switch to two here, select that and that left, G one, right click outside. Edge, edge. And finally, L G one. There we go. I love it. Now, of course, because
every one of these is a sheet, if we zoom in, you will notice some
artifacts like here, as you can see, there seems
to be some artifacts. So to solve that now we
need to join everything. So going to hit Tab to activate
all these, select that. And we're only activating
all of them to avoid selecting an
edge or a face. We just want to select
them as sheets. So if we're in this
mode and do this, we'll just select the edges. Or this, we'll just
select vertices, but we don't have vertices because we don't
have curves here. So when we want to select
a sheet or a solid, we can have them all on or we can be in this mode
sheet and solid mode. So if I select all
of them and hit J, now they become one object and now no more artifact.
So let's go. Now, of course, because
we've done a radio array, we have to cover the bottom. And in fact, I
can't see my edges. So let me just enable edges. Sorry about that. And let
me switch to number two. That's Edge select.
Select that and, of course, shift J. And now, this is continuing This is not continuing as flat. Let's say planar. It's failing to do a
planar patch hole. I don't know why. To
loft on tolerance. Whoa, what's wrong?
Uh, what about L? No, we can't use L. Shift J. This is continuing like that. I don't know why it hasn't
worked for me this time. When I was doing this,
it worked immediately. I just came flat. Let me try to debug this, and I'll be back shortly. Alright, now, it's
failing to patch, but it doesn't mean
we can't solve it. So that's one of the
reasons I love elasticity. Now with this edge selected, I can just shift D, and that will create a curve. So now, as you can see, if I hit the dot or full stop on my keyboard to hide everything
except the selected item, you will see I'm left
with this curve. So what I can do now with that
curve is now hit Shift J. No, undo. With that, let me just hit the
dot once again. Shift J. This is weird. I've never seen this
before. Anyway, no problem. I'm not going to dwell here because what we can
do is go to the top. And let's choose the circle tool because I want to
create another circle. So I'm going to snap
that to the center, and I'm going to make sure it's the same exact size
as this other one. All right, while
it's still selected, I'm going to hit to hide it because I want to
select these others. Let me select, make
sure these are active. Select this, delete. Then th to unhide the new
circle we just drill. I'm going to select the
curve itself, then shift J. And now we've patched that hole. Let me just hide the curve. I'll select the
curve and hide it. Now we're left with a face. I'll hit the dot to unhide the other
things we had hidden, and now we have
that bottom part. But remember, it's not joined. This is joined, but
this is not joined. So with that selected, I'll select this, and I'll say J. I don't know
if it's going to work. No coincident edges
could be found. Alright, let's try
something else because I don't know why
this has behaved like this, but you can always find an alternative way to accomplish your goal.
So I'll select that. And I want to say F
thicken et's go outwards. Maybe let's give
it 4 millimeters. So four M. There we go.
5. Refining The Solid: I I want to say F, then redundant topology to see if we can get rid of
some of that topology. It's still there,
but no problem. I'll select this sheet
we had at the bottom. Remember, it's still a sheet. This has been thickened,
but this has not. Let's thicken it outwards. As you can see, there is an indent awaiting
the thickening. Control seven to
go to the bottom. Now it's upside down. We still have this selected. I want to no, let
me switch to one. Hit out Z to make
it see through. Then with the face selected, I had selected it already. So one G Z, and I will hold down Control
to snap to this line. That will bring this out. And I want to control seven on the num pad to
turn it upside down, and then SS to expand
it, hold down shift. Alright, maybe I'll extend it outwards a little
bit, like that. Then now we can while
it's still selected, F, then let me thicken it upward,
downward, for millimeters. Negative, Enter. A Z to make it opaque. Select the face, push it inward. So now we've given it a base. So with its base, let
me go to the front. Let me just say GZ. Maybe I'll put up to
somewhere there and select that with shift and
left mouse click, then que Que again
to combine them, right click to commit. There we go. Now, I can hide the edges just to
see how it looks. Let's also hide the curves. I like the base. I don't know why I feel like
I want to select this edge and just chant for it. Bevel it like that to give it that slightly rounded
edge. I think that's it. And now we can switch
to random mode. We can give this a
different color. Let's say, 0.90 0.3, 1.3. Let's say 25, 25, 25. In fact, it's starting
to grow on me. Even with that base, it's starting to I'm starting to feel like it
looks cool, actually. So, M, once again, let's see a different color. Alright. Yeah, let's go with that green. Yeah, let's go with teal. Yeah, what do you think
about this base, by the way? I love it. Somehow, a curse
has turned into a blessing. Looks like like it's by design. This is accidental,
but I like it. If you sell this to
someone, they will bite. Someone who loves flowers and flower vases.
They will bite. So anyway, that's how to make
this type of flower vase. Of course, you've
also watched me hit roadblocks and try to
troubleshoot and find a solution. You're going to hit several
of those, but it's okay. It's all part of the
learning process. Now, this is where we're
going to end this lesson. I hope you learned
something new, something you can turn into
money or a gift for someone. So I'll see you in the next.
6. Final Thoughts: So this marks the
end of this class. I just want to say a
big congratulations and thank you for sticking with me from the beginning
to the end. Now you've ended up with not just a flower vase you can showcase to your friends
and share online, but also the skills to model something unique
inside plasticity. And remember, as I mentioned, this is just the beginning of your journey in
plasticity modeling. My goal is to show
you how to model three D printable and
manufacturable hardware products. And I believe with every
new class I publish, we're getting closer
to that goal. If you love this class and think it can
help someone else, I would really appreciate
it if you can take less than a minute
and go down to the reviews tab right
below this video player. And let me know what
you thought about it. Leave your rating, share
what you thought about it. What did you like about it? What do you think
could be improved. Drop your feedback
there and help other prospective students
who might be interested in plasticity know if this class will help them
achieve their goals. And as I keep mentioning, more plasticity
classes are underway I plan on publishing at
least one class every week, if not every two weeks. But I want to make sure I prepare the best classes for you to take you from beginner
to advanced levels. So we started out with
the flower vases, but soon we're going to start working on gadgets like phones, maybe even e bikes and cars. And as always, we love sharing
our class projects here on skill share to
get feedback from fellow students and teachers. So remember to upload a screenshot or image
of your three D model, your flower vase, and let me see what you
were able to create. Preferably, if you're able
to create something unique, something we did not
work on in class, but using the same skills, it would be super awesome. Let me see what you are able to create with the skills
you've gained so far. Now, with that said, this
is the end of this class, and I just want to
say thank you for staying with me from the
beginning to the end, and I'll see you in
the next one. Success.
 Ken Mbesa, Web Designer | 3D Artist