Transcripts
1. Introduction: Yeah. Have you ever wanted to model a three
D printable object but didn't know where to start? If you have, today is your lucky day because
I'm here to show you how to model three D
printable objects in plasticity. Now, plasticity is a relatively new but powerful
card software for artists. So if you're coming from a polygon based software like Blender or Maya or three DS MAX, this plasticity for
Complete beginners series, I'm going to show you
step by step how to use the various powerful tools
and commands provided by the software to build
amazing three D objects that you can three
D print or sent out to manufacturers
to make for you. My name is Ken, and for
the last 6.5 months, I have been using plasticity almost daily refining
my skills and workflow, as well as working
on personal projects and printing them out
here in my studio. When I was making this class, I was thinking about
someone who uses blender but wants to learn
how to model in card. So I want to introduce
anyone who already knows how to use
blender to plasticity. The second person
who I'm thinking of is anyone who wants to
get into product design. You want to design
hardware, gadgets, and then three D print them or send them out to a manufacturer or fabricator in China or
somewhere in your neighborhood. I'll show you how to design products that
can be manufactured. Another person I'm
thinking of is a hobbyist. You just want to
learn how to model three D objects in a card software like
plastici as a hobby. You are the perfect
fit for this class. Now, you don't need
any prior experience in any card software or blender. But of course, if you
already have some knowledge, it's going to allow you
to learn much quicker. We're going to
start from scratch, and I'm going to
show you everything you need to learn step by step. Now, to kick things off, we're going to start small. So we'll start with a
very simple flower vase. Move on to a more
complex flower vase and on and on and on. And that way, you're
going to learn how to use the most commonly used tools and commands that plasticity
has to offer. My goal is to help you get
up to speed very quickly on plasticity and start modeling things that you
can three D print. Now, in the next lesson, I'm going to show
you the final flower vases you're going
to end up with. And then from there, we're
going to move on to modeling. So if you feel as
excited as I am, let's look at the class project.
2. Class Project: And welcome. So here we
are inside plasticity, and I just want to show you the projects we're going to be working on throughout
this class. In the first modeling lesson, we're going to work
on flower vase one, and these are the three flower vases we're
going to work on. They're just different
variations of a similar shape, so we're going to
see how to do that. After that, we're
going to work on this. This is going to be
the second project. As you can see,
these are actually good quality flower
vases that can be sold. I mean, I would buy
these for my flowers. We'll see how to achieve that. Next, we're going to see how to model this more complex shape, and we're going to use the
skills we've gained from the previous two lessons to
see how to put this together. And, of course, as you
can see, these are three variations
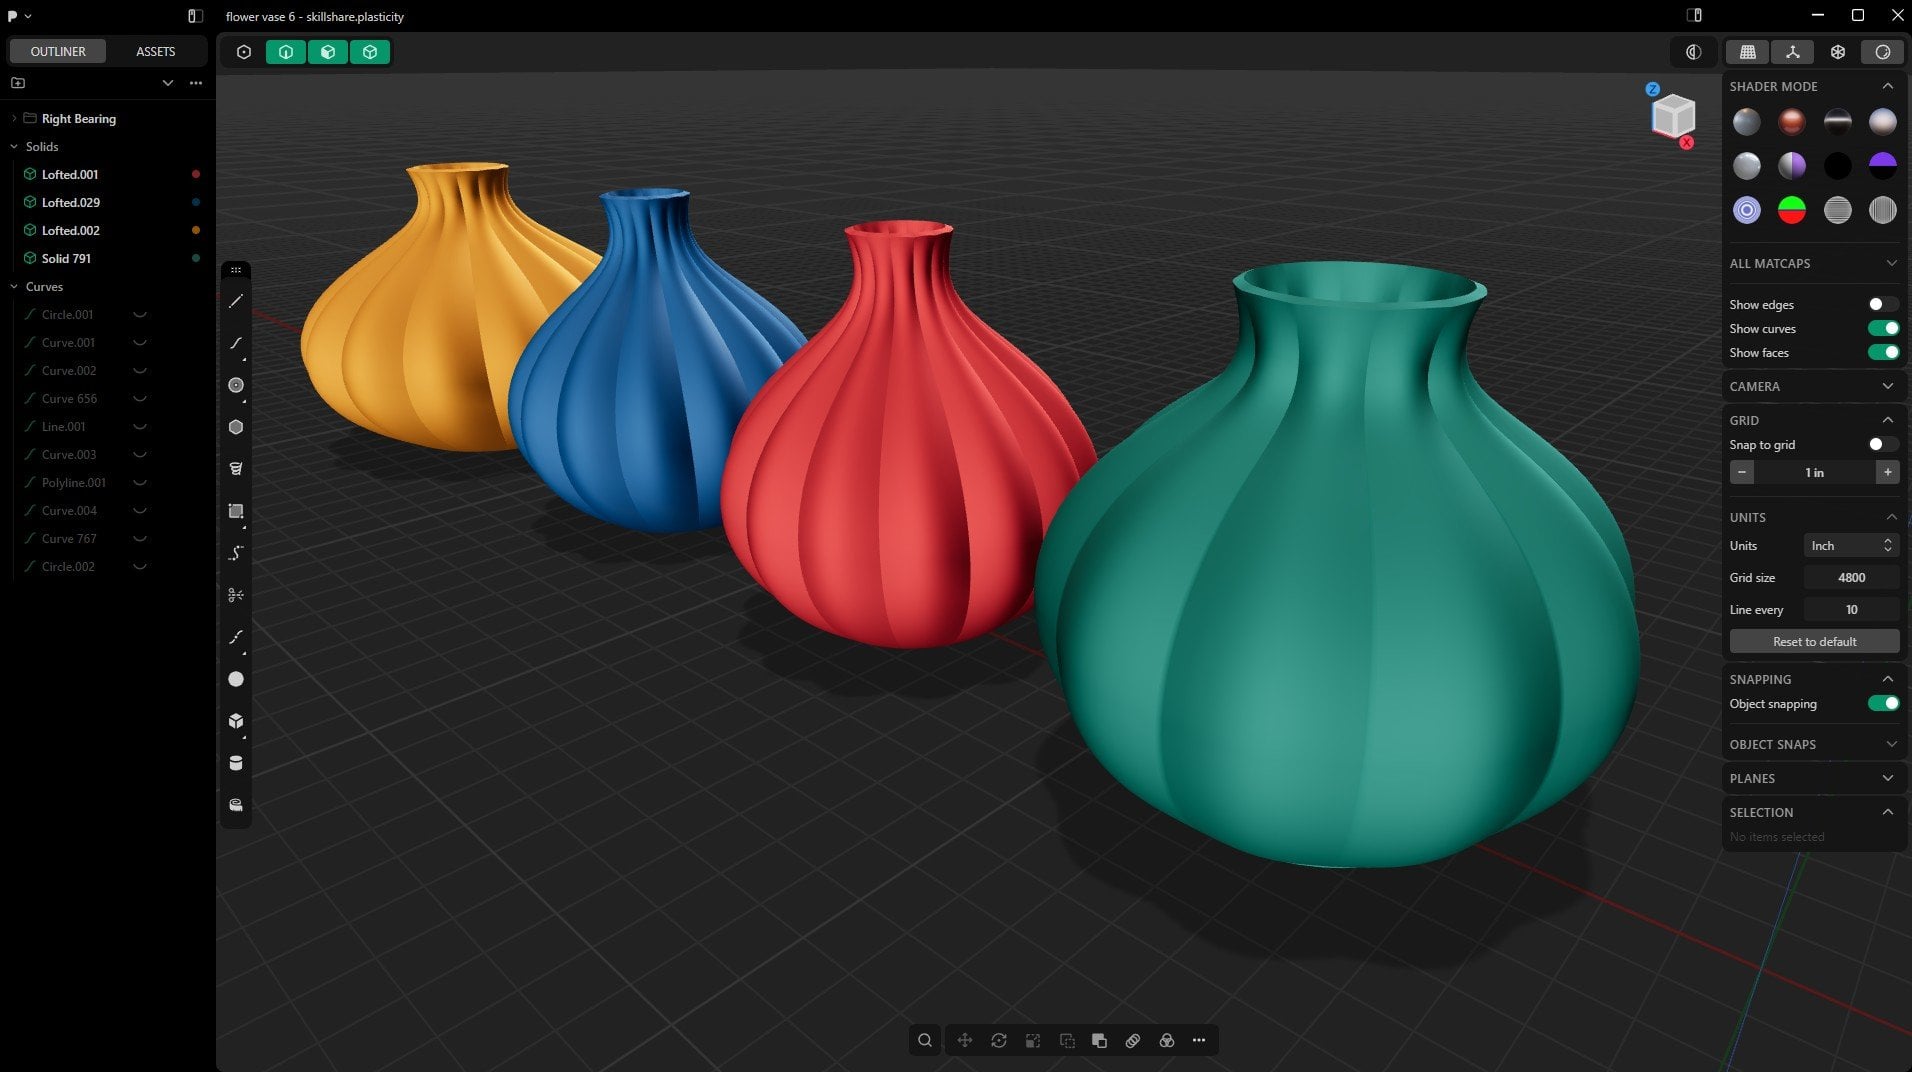
of the same shape. We'll see how to do that. Then for the final modeling
lesson, in this class, we're going to see how to model
these three flower vases. As you can see, these are three variations of the
same sort of shape. It's just a question
of how many of these fins we have
on each one of them. So we'll see how to work on this and produce
similar results. By the time we finish, you will have the skills to
do this yourself and create other more complex flower vases or other types of objects
inside plasticity. And, of course, as I mentioned, this is just the beginning of a long series of plasticity
classes I have lined up. So rest assured, we're going to work on more complex projects, electronics, maybe even
e bikes. You never know. So let's see how far we
can go with plasticity. Now, with that, I hope
you're eager to get started. And, of course, the
best place to start is understanding
the user interface. So let's look at
the user interface in the next lesson.
I'll see you shortly.
3. User Interface: Because this class
is for beginners, we have to start
by understanding what's in the user interface, because right now
you don't know how to navigate in the software. So let's start with the
P menu on the top left. I think some of these are self
explanatory like New file. That means you're
opening up a new file. And if I say new, say, you will notice I
have this bearing here, but this is a scene I
saved as my startup scene, so that anytime I say
I need a new scene, a new project, this
will be loaded, but as you can see, just
it's an unsaved file. And you can save your
startup scene by going to P, save as startup scene. So let's say I don't want
this to be in the scene. I want only these to be in the scene when I open up
a new file every time. So now that we have this, I can go here and say save
as startup scene. Yes. And now, if I come
here and say new file, First of all, let me close this. Let me just push it up there. Now, let me say New file. Yes. So now, as you can
see, this is a new file, I can just go ahead and delete that and start
working on something. Now, the second thing
here is New Window. I've clicked New Window, but it's opened up
in my second window, but you can open up several
instances of plasticity. That means I can be working
on one project here. And another project here. And I can even copy
files from here. I'll just select the
files or maybe one, hold down Shift, two
control C to copy. If I go here,
Control V to paste. I will paste it in place in the same coordinates
within the three D world. So as you can see, if I come and copy this
and this copy go here. They will be added
exactly where they were in the previous file. So if I say Control V to paste, as you can see, it's
continuing that circle. So it's pasted in
place if you copy. Next, of course, this
is to open a new file. This is importing or appending three D
files like OBJ files, STL files, step files, files you've modeled in
another software like Blender or Solid
Works or Fusion 360. If you want to import
them into your work, that's what you use. Import or append. Save and save as are obvious if you've been
using any computer. Export. This is what you use
once your artwork is ready and you want to send it out to manufacturers or you want
to three D print it. You export it in whatever
format you want. And I will show you how to
export your flower vases in the best way for three D printing and
manufacturing. So don't worry. Quicksave version.
Basically, this is to save a version of
your current file. So if I have this cylinder here. Don't worry. We'll
talk about all those. If I have this cylinder here, I can save this
file in my desktop. Let me just go to the desktop. Save it as one. Save that. Now, if I come here and
say Quicksave version, it's saved another
version right next to where this original
Wando plasticity is. And if you want to confirm, control all to open. And as you can see, we have one, but it's also given the
date and time it was saved. Next, let's talk about
the preferences. So when we go to preferences, this is where you will
find the main settings of the entire software. Now, going back to
manage licenses, if you click that, of course, let me drag this into
the second window. This is where your licenses are located to show if you
have a valid license, you can also log out of your
connection to plasticity. Here you'll be notified anytime
there is a new version, and this is your
current version, the one that's graded out. So that's the P menu. Here we have the
outliner and assets. Anytime you add something to your three D world or
to your three D viewport, it will be listed
under the outline and it will be put into
its respective category. So this is a solid, that's why it's
listed under solids, and I can collapse solids. Let me delete this.
That was from the old startup file
that had the bearing. So now we have solids.
I can collapse that. If I add maybe a corner
box, and a sphere. As I add them, they're
also added here. If I duplicate this, shift D and push it to the
other side and right link. Oh, no, I didn't shift D.
Sorry. So select this. Shift D to duplicate. As you can see, we have
sphere number two, and now the original
is sphere number one. So as long as you have an
object in the three D scene, rest assured it will
be listed here. Now, if I add a curve, you will notice we have
a curve category here. This is a spline, so a
spline is also a curve. So as you see, this is a curve. Another thing you can add here to your scene is a
reference image. So let me just open up
my Windows Explorer, and I can just put this here. If I go to the download and see if I have any images, yes, I have a microphone image, so I can drag and drop this
there, and as you can see, now that image,
let me just double S. To increase its size, it's listed under images. So whatever you select here is also selected in the
list in the outliner. Select the image,
just like that. Next, if we move to the assets, if you add assets
such as materials, if I select this and apply
a material by pressing M, the letter M for money
on the keyboard, let's make this red. Oh, we need to let
me escape first. Let me switch to random mode. Now we've switched
to random mode, if I select this
and hit for money, and maybe let's make this red. Right to commit.
Now, as you can see, the material has been
added to the assets list. So this is where your
materials will be listed. I don't know what else
is listed here because I haven't seen anything
else listed here as I work. Only materials seem
to be listed here, but maybe there's
something else. Next, we have four
different modes, just like in a
software like Blender, which is where I came from before I started
using plasticity. In order for you to edit your objects in
the three D scene, you have to be in
different scenes because you might
want to edit an edge, or you might want
to move the object, or you might want
to edit the face. And so if you want
to edit edges, you must be in edge mode. In order to select edges and perform booleans
and other things. If you want to select faces, you have to be in face mode. That means you can
select any face or multiple pass by
holding down shift. And if you want to
move an object, you can't move it if you're in face edge or Control point mode. Because if you select, you're only selecting a face or an edge depending on
the mode you're in. So if you want to move
this entire object, you have to be in
sheet and solid mode. Or oh, let me click aside. When we're in sheet
or solid mode, now we can select
the entire object. And if I hit G twice,
I can move it around. G twice, move it around. Or if we're in all
modes, like that. When all modes are activated, you can also select
whatever object you want and you'll
be good to go. And the way to change
and shift from one mode to another is
by using the number one, two, three, and four keys on your keyboard right
before your F one, F two, F three keys. You can also toggle between whatever mode you're
in by hitting tab. So now we're in
Control Point mode. If I hit tab, it will
activate all of them. If I'm in edge mode, hit tab, it will activate all
of them and allow me to carry any
one of these two. So that's how to switch
from mode to mode. And now, you haven't seen me
use this Control Point mode, and that's because
it's used for curves because they are the ones
that have control points. For example, if I
select the polyline, And put those there.
As you can see, we have control points. They're called CVs
in plasticity. So if I select the
Control Point mode, now I can select
individual control points, and I'm just hitting
GG to grab it. Now with this selected, I
can also hold down Shift and select multiple control points. And if I hit GG, I
can move those three. Same case applies to splines. Now, splines also have these extra control points that allow you to affect
the curvature. You can select them when
you're in this mode as well. So GG, just like that. So that's changing from
mode to mode to edit. Next, let's talk
about the tool menu, which you can drag
to the left if you want or leave it where it is. This provides you with the
various tools you will need to sketch because
almost all your work will start with a sketch. I said almost because you can also start with
these three primitives. So let me just delete these. Let me switch to as you can see, here's a good example
of changing your mode. I can't select anything because I'm in
Control Point mode, but if I hit tab, I can select
all of them and delete. Now, in the next lesson, we're going to be
working on sketching. We're going to do some
sketching practice. But right now if you know the thing you're
building is cylindrical, you can just quickly start with a cylinder instead of
starting with a sketch. So a cylinder, just like that. Once again, let me delete
it. Select the cylinder. Draw, click, pull up. Undo. You can input whatever diameter you
want before you click. Just when you're dragging,
you can hit tab, and now enter the diameter you want, maybe 20 millimeters. Enter, then pull upward. And you can regulate this height manually or you can come
here and say specifically, I want it to be 25
millimeters high. Click anywhere in the
Dalog box to apply that, and then right l to commit. Now you have a cylinder and
you can start working on it. You can also start with
this rectangle tool. Just like that. Now,
let me delete these. Now, as you can
see, we have these pre made templates
we can start with, but we can also create a cylindrical object
starting with a sketch. So I'll select the
center circle, drag, tab, 20 diameter, and click. Now, that's a sketch. With a sketch draw,
I can come in here and select the inside. And once you see this,
you can pull upwards, and you can manually enter whatever value you
want to put here. So like 25 was our
chosen height. You click somewhere there,
now it has a height of 25 MM right click to
commit. So there you go. So as you can see,
you can start with primitives or start
by sketching. Most of the time I
start with sketching. I rarely use these
because sketching for me is way more fun and gives
me much more flexibility. So here we have the
measure distance tool, and this is important
when you want to maybe measure distances or measure
lengths of different parts. Next, we're going to talk
about this, as you can see, we have shortcuts to commands to different commands
like the radio array, rectangular array,
Boolean, all these. Now, to see a list of all
the rest of the commands, you can click this to search. And this will give you a
list of all the commands, including these shortcuts
that were placed here. They're also included
here because they are part of all the
commands you can use. Another way to access this menu is by pressing
F on your keyboard, and it will appear wherever
your mouse cursor is. So that's the command menu. Now, another thing you will notice here is this menu here, and this is what we call
the context aware menu. These are just commands you will find in here in this list because this list all the
commands plasticity provides. So this object aware or
content aware menu just gives you the various commands
you can apply to the currently
selected object type. So when you select a curve, there are things you
can do to a curve. That you can't do using
some of the commands, and those commands
are grade out, the ones you can't use when
you've selected a curve. Now, if you select a
solid and go here, you will notice we
have a few commands available to apply to a solid. These others cannot apply to
this solid in this context. Now, to access this menu, you can hit Shift F
on your keyboard. And make sure you have something selected because
it's context aware. It needs to know what you've selected first to know
what to show you. So Shift F, and it'll show you commands you can apply
to the objects selected. Remember, this other one is F, and this other one
is Shift F. Next, let's talk about this left menu here or these
collapsible panels. Let me just collapse them all. Now, here we have what
we call the rando mode. Let me first of
all, switch to Yes, so we have to when you're
working inside plasticity, it's advisable to
work in shader mode. You can choose any
of these shaders. I like working in this mode. And once I'm ready, now, when you're in this shader
mode, any of these modes, and you try to
apply any material, it won't work because
you're in shader mode. But once you're satisfied with the way your three D object
looks in terms of shape, and you want to render it, now you can switch
to render mode, and this will allow you
to apply your materials. So if I hit M while
this is selected, I can come here and say
I want the roughness to be 0.9 because
this is a plastic. I want the metalness to be 0.2, because the more plastic it is, the less metal it is. The more metal it is, the less plastic it is. Plastics are more
rough than metals. That's why we increase the roughness and
decrease the tal ness. Now, we're not going
to spend time talking about the materials
in this lesson. This is just an
overview of the UI. So rightly apply. And now, let me just delete
this curve with you. And now with this, I can come
and say export and I can export it as all these
files. These formats. So those are the random modes. Next, you can make changes
to your camera and the way the camera just shows
or displays your objects. Next, we can talk
about the grid. You can choose to snap to grid. And that means when
you're moving items, they will snap to different
parts of the grid. You can also choose
to change the units. Like right now, if I add
anything like a circle, as you can see, the
units are millimeters. We can change that
to centimeters. You will notice even
the grid changes to allow for larger units. And if I draw, the units
are in centimeters, so you can switch to inches. That's why I love this software
because it allows you to be very precise with your
measurements. Collapse that. Snapping, in addition to
snapping to the grid, you also have other
snapping options to snap to control points, edges, curves,
faces, and all that. I love to leave them all active, so don't deactivate them. But I don't like this
snapping to the grid. Let me just collapse
that. Snap to Grid. I don't like leaving it on Object snapping is
activated. That's okay. Selection. So when you
select anything here, you will get all the data about that selected object.
Collapse there. Now, up here, you can choose to view this as an orthographic
view or perspective view. Orthographic looks like that. Let me just switch. Looks like this flat Sort of view. I don't know how to describe it, but
you can see it. And to switch between orthographic
and perspective view, you can hit the numpad
five on your keyboard. So if I hit five perspective, five again, orthographic,
or you can togo using this. You can also show overlays. You can hide the
grid and everything just to leave that like that. You can also, yeah, so hide or unhide. Here you have X ray mode. That's to make your
object see through. So if I'm here and I want to
maybe if I have a rectangle, let me just draw
a rectangle here. If I'm selecting edges, if I switch to edge,
select this edge, and I want to select the
other edge on the other end, I can rotate and select it. Or I can select this, then hit out Z to
make it transparent, and that allows me to see even the abstracted
edges like that. Next, let's talk about
section analysis. If I have, for example, a sphere, let's say that sphere. And let me just GG twice to grab it and move it freely to place
it inside the rectangle. Right lei now it's inside. We can view a cross
section of what we have in the scene right
now by selecting a pace, maybe that pace and going
to section analysis. And if I drag this,
as you can see, it shows us a cross sectional
analysis of the object, including whatever
is inside of it. And this has so many uses
when you're creating complex objects that have other objects inside of
them like a bearing. So if I say Control N, do we still have that bearing? So let's assume we want to
view this from the top, I can select this phase. And if I switch to section view, I can have a quick view of what this object
looks like inside. And I think that's a
very powerful tool. It's found in many other
card software to help engineers and designers really
hone in on internal part. So I think we've covered
just about everything you need to know while you're
starting out in plasticity. If you want to navigate
inside this area, all you have to do is hold down the middle mouse button
and you'll be able to orbit. If you want to zoom in and out, you can use your mouse wheel. If you want to pan
from side to side, you can hold down Shift and
the middle mouse button. And by the way, I'm following blender
navigation settings. With plasticity, you're able to choose the navigation
style you want to use. Because I'm familiar
with blender, I can choose to have a navigation style that matches the blender
navigation style. That allows me to quickly get
up to speed on the software because I'm already used to the keyboard shortcut
navigation commands. So if you've been using May or three dS Max or Fusion 360, you can choose to have a navigation style that feels like you're
using Fusion 360. In fact, you don't
even need to change these settings except just choosing the
navigation you want. These others can be left
exactly the way they are. As we speak, those are the
settings I'm using right here. So with that said,
I hope you now have a better understanding of the user interface
provided by plasticity. In the next lesson, let's now get started with
sketching practice. I'll see you shortly.
4. Sketching Practice: Welcome back. So now it's
time to learn how to sketch. We're just going to
look at the basics. So let me just get rid
of everything here. Now, to draw a sketch is
select a curve from here. So I'm going to select
the corner rectangle. Let's say, for example,
I want to draw a bus. I want to model a bus. So I'm going to select
the corner rectangle. I just want to aim at the middle of the world because that's where
I like to start from. Then I'll click.
And as you can see, we're dragging it in this
quarter of the world. We have these three
other quarters here. If we want it to
occupy all of them, just hit C. And now we're sizing it in
all four quadrants. Now, that's a rough
shape of a bass. Now I can select the inside
and then of course, extrude. So that's a simple
way to sketch. We can also draw the same thing using this line too if I go up, or if I go to the top view, clicking seven, I can
come here, draw that. And if I want to be specific about the length of that line, I can hit tab to say
maybe two, click there. Hit tab to change
that, maybe two. And in fact, if I escape
and undo Control Z, go up here, tab, once again, tab two. Now, that's the
measurement no matter how far I go up because
we've said two. If I click, now I can
switch to any direction. If I hit tab, I can hit tab
twice to switch two degrees, and I can say, maybe I want
this to be one, 20 degrees. 120 degrees. And now it's
constrained to the 120 degrees. If I can't continue
going up there, all I have to do
right now is hold down shift middle mouse button, and drag, and I can
continue in this direction. Click there. I can hit tab if I want to put this
measurement or hit tab, if I don't or escape. Then click. And as you can
see, it's pretty simple. And to close it, you have to make sure it
snaps to that final vertex. And now the inside
is filled with blue. If it's not filled with blue, then you have an open space. There is a space
you've not covered. Here's an example.
Rightly. So now, that's not covered.
Let me close that. So you don't have a blue inside, so you can't select
it to extrude, but here you can
select to extrude. So even if sometimes you find problems that
you don't understand, you've drawn a sketch and
it's not blue inside, and you're wondering why. So let's say, for
example, I draw that and that, and
that, and that, then I'm very far off, but I come and put this
maybe somewhere there. If I'm far, I would be wondering why
it's not blue inside, but if I zoom in very closely by holding
down the mouse wheel, I will realize there
is a gap here, so I can select that. Double click GG to grab, hold down Control to snap to
the nearest vertex or edge. And I want to come
here and snap to that. And if I click outside, now it's blue inside because
there is no open gap. Now, this is pretty
similar to the circle. Can select this drag. If you want to
increase the number of corners before you commit, you can hit the up arrow on your keyboard and you can
increase the number of sides. And then right click to Commit. Now, we're going to look at all these tools as we
continue building. I don't want us to spend
too much time learning this because this class is geared
towards complete beginners, and I'm only showing you
the tools we will use in this class that
involves flower vases. When we move on to
more complex objects, we're going to learn more of the tools
we've not mentioned. Now, I'll just remember
that I need to mention a few more things
which are crucial. So like I mentioned, you can switch
between these using the numbers on your keyboard,
so I'll just hit two. And now, when you
select an edge, immediately a gizmo appears, this Gizmo allows you to
apply fillets or chamfers. So this is a chamfer,
and this is a filllet. In blender, we call
this beveling. This is a very important
tool that you will use many, many times when working on
three D modeling projects. Next thing we need
to look at is, remember we drew this
incomplete spline what is it? Polyline. And let me just escape from this selection
here by hitting Escape. Now, I'll switch. I'm still in edge mode. I want to switch to
Control Point mode. As you can see, these
are not attached. So we can bridge these two
using the bridge curve tool. If I select that and select this control point
and then select this other control point
or anywhere on that line, I can bridge that curve. And I can change this
to G, g2g3, G zero. Now, all those gg1g2 G three, those are what we
call continuity, and you will learn that as
you get used to plasticity. Now, if I want to
commit this, of course, I write leak outside, and as you can see, it's filled. Now, you can also trim. You can also do the
opposite of bridging. You can also remove parts
of a curve or a polyline. So just hit and now
whatever line or edge you aim at and
select will be deleted. So just hit T for trim.
That's the trim tool. Select that. And as long
as it's the active tool, whatever edge I select,
it gets deleted. So that's very handy when you're sketching
because you might draw a sketch that has curves that go beyond
where you want them to be, and you just want to
trim off one side. So, for example, this, you can trim off that side and that, and now you're left with
this 120 degree angle. Yeah. So I just wanted to
mention that because I felt it's important to
mention it at this point. So now, without
wasting any more time, let's get started with the actual modeling
of the flower vases. And so we're
starting with a very simple basic flower vase, and in successive lessons, we'll work on increasingly
more complex flower vases. So I'll see you shortly.
5. Flower Vase 1: Mentioned that this class
is for complete beginners. So the flower vases
we're going to create today are not very complex. We're going to start
with a simple model in this flower vase one. And as we go to flower
vase, two, three, four, five, we're going to introduce
some more complexity. I'll just hit one
to go to the front, and as you can see,
this is its profile. It has this slanted
feature right here. And we want to see how
we can create that. So I can open up a new
instance of plasticity, so we don't close this or
we can work from here. So let me just select it. Hit G for grab to move it. So G to grab it, then I'll select the X axis arrow to drag it
to the side like that. Now, I want us to use
the world origin, the center of the world. Let's switch to the top view by hitting seven on the
numpad on your keyboard. Now we're viewing
it from the top, and I want to create a circle. So I'll just select
a circle here. Let me just drag this
to this other side. I like it on this side. I'll select the center circle, and I'll go to the center. And because I have
snapping enabled, and you should not confuse
snap to grid with snapping, let me collapse that
and collapse grid. And so when we hover over
the center of the world, we'll be able to snap there, and I'll just draw a circle,
maybe up to that point. We're not trying to be accurate
in terms of dimensions. So I'll switch to the front
view by hitting number one. And as you can see, that's
the curve for the bottom. Now, I'll hit Shift D while
this is still selected, Shift D to duplicate it, and I'll drag it
upwards like that. And as you can see,
the top circle or the opening has a smaller
diameter than the base. So let me switch to the front. I just want to make
sure this is selected. Select the curve and then S
twice to scale it freestyle. So let me say maybe that point. Alright, I'll shift D once again and put it
somewhere there, and I'll scale it up S twice to scale it maybe
up to that point. And I'll hit R twice to
rotate just like that. And now we have our profile. So if I rotate it like that, as you can see, that's
the basic shape. If I select this, then the center one
and the bottom, I can hit L for loft and it'll produce that
weird but nice shape. That's one way to
do it. In fact, I had thought of doing it
that way, and I love this. We've used loft L for loft, so I'll just right click
to commit or accept that. And now, because I like
this new shape and I want to keep it because I might
want to three D print it, I'm going to select
it like that, shift D, and slide
it to the side. So now we're left with this. In fact, let me just delete
that I wanted us to use a different method to
achieve the goal, this goal. We've used loft after
selecting these three, we've used L for loft, but let me undo. And now to achieve
this angular shape, these angular edges and
not have them curvy, what we need to do is
avoid selecting the three of them at once because that's
what will produce that. We can select the first
one and the second one, hit L, and now that will
combine the first two, then select this curve
and the bottom one, L once again, and now
you have your shape. If I go to the front end,
that's what we have. Let me just delete
all these sketches or I can just hide them.
I've selected them. Now I can hit H on the
keyboard to hide them. Remember, these are
two separate sheets because we've created
them separately. There is this, GG,
and there is this. So we need to select
both of them and hit J to combine them
into one object. Now if I select it
GG, it's one object. Now, right now we're
in random mode. I want us to switch to shade or mold for a second
and just have a look at it. Oh, we did not create
the bottom base. You do not create the base, so I'll select the edge. Now, if you select it and
it selects just half, hold down out and shift, then hover over the edge, and it will select
the entire edge. And now I can hit Shift
J to patch the hole. If you want to seal a
hole, use patch hole. So I'll just go ahead and right click and I think I like it. Let me just also patch this. Select that and that
Shift J. There we go. But now, because
you're designing this for three D printing, we need to thicken it because right now
it's just a sheet. So as you can see, this
one here is a solid. This is a sheet. So how
do we make it a solid? Simple, select it. Hit F on the keyboard. That will bring up
the command menu and you can type thicken. Oto suggest will
bring the thicken. And now this gizmo will appear, and you can drag it
inwards to thicken it inwards or outwards
to thicken it outwards. I want it to go inward. Maybe five let's say 4
millimeters because we don't want to make it
too thick. There we go. So now the entire
thing is a solid, and I can do the same for this. F thicen. And then I'll select
that 0.5 m. No, wait. I should have said five m No, four M. There we go. Now, I think we can
add some beauty here. I'll select that edge and
the inner edge because there is an inner and outer edge because remember,
we've thickened this. So now it has a curve
inside and outside. So that's selected, I'll hold down and shift select
the inner one. And now with that,
let me switch to the front with one
on the num pad. And I'll grabbing this
Gizmo, I'll drag. And let me drag in
the other side. Yeah. Maybe that
way. There we go. Alright, before we finish this, I want to switch the front end, and we want to add materials. So I'll switch to random mode. Select this. I'll hit M on
the keyboard for material. And I'll change because
this is plastic. We're going to three D print it. Let's give it a
plastic material. So a plastic is not metal, so the lower this
number, the better. So 0.2 for metalness, it's less metal, and that takes away the reflectiveness
because metals are reflective. Let's increase the roughness because plastics
have more roughness on their surface at a
microscopic level than metals. So the higher this
number, the better. So 0.9 just like that. And then IOR. Let's give it 1.3. I like using 1.3. Now, let's switch this color. I'll select the color and you can change it to
any color you want. Let's say you want,
let's say a green color. No, let's say blue. Or,
let's say pink or purple. Dark purple. Let me also
select this M for material. I can change the material before changing these other aspects. Maybe let's give it 25, 25, 25, for a black color. But remember, we want it to
be plastic point maybe 0.8. This is maybe 0.2, and 1.3. There we go. We have
three D printable flower vases that you can sell. I think these look beautiful. And of course, these are just lines created by the software to show us
where we did something. Here we added a fillet. Here we don't have that because we did not manually add that. But you can hide these lines, these edges by going here to this section and
check show edges. Now, as you can see, we have three beautiful flower vases. So that's just a quick
intro to plasticity. Like I said, this class was
meant for complete beginners, and I chose a flower vase
because it's not complex. It doesn't have several
complex surfaces that need to be modeled. It's just a simple container, but people are making money with flower vases and other
three D printed products. And I want to introduce
you to that world. So now we have our flour vases. What next? How do you print it? How do you export it or
prepare it for print? So that's very simple. Just go here, export. And I want to choose step. Step is one of the best, if not the best
formats to export, anything you want to three
D print or manufacture. So we're going to
use step format, and I'm going to Enter. Now, as you can see in this
small dialog box here, the step format can be exported
in three different ways. We can have AP two oh
three, 214 or 242. Now, AP two oh three is
the oldest step format, and AP 242 is the
latest step format. Now the main difference
in the three is how much data each provides to the person who
opens the step file. So when we export these
in AP two oh three, they will provide less data to the software that
will be used by the manufacturers
to manufacture it. In this case, three D printing, we will use a slicer, and the slicer will read the step file we
will have exported. And this AP if we will have exported it in
AP two oh three, it will have less
data for the slicer to read about what's
contained inside. AP 242 will have more data, which will mean more
accuracy in manufacturing. So let's just choose that, and I'll also convert
analytics to nerves, and I'll choose
Okay. There we go. So now if I go to the P menu and say import
or append, as you can see, we have flower vase one dot STP, a dot SEP. You can share this
file with manufacturers, three D printers,
whoever is going to build this flower vase. So basically, that's how
to export the flour vase. Now you're ready and you have something you
can manufacture. Now, one thing I've
remembered to mention is, if you're using the
30 day free trial, you'll not be able
to export in format. So as you can see,
you can import steps, but you cannot export, but you can export in OBJ
and SDL in low resolution. If you want to be able to
export in high resolution, step OBJ SDL and these
are the formats, have to have the Indie license, which is a one off fee
or the studio license, which is what I'm
using and I'm able to export in all these formats. So if I switch back to our workspace here
and go to Export, as you can see, I have all
these formats available to me. And, of course, all these
serve different purposes. You can export in SDL. SDL is also a good
format to export in, but SEP is superior to STL. As you can see, you can
also export in OBJ. So you will need
a studio license, but the good thing
about plasticity is that you own your software. I bought this software, and now I will have it
forever. It's mine. It will not stop working
after one year or lock me out because I need
to renew my subscription. Yeah, and that's it.
6. Flower Vase 2: And welcome back. So this is the second flower vase
we're creating or modeling in this introduction to plasticity for
complete beginners. And remember, last time we
used a technique of adding circles all over Shift D, and we created our flower vase. We can also create this
flower vase in that same way, but I want to show you a
different way to do it. So I'll select this G and
push it to the side as usual, because I want to
use the center. Alright. So as you can see, let me just switch to the front. We have this profile here that runs vertically in a
straight line like that, and then it slants, curves here. Let's see how we
can create that. So we're going to use
something called revolve. So remember, almost everything
starts with a sketch, so I'll just pick the line
two and start sketching. And now, if I switch to the top, I want to sketch just one side and then revolve it around. So we want to start
with the radius, not the diameter, the
radius. So I'll select that. And as long as this
pink line appears, it means I'm moving
in a straight line. I'll just move it and hit tab to manually enter
the number I want there. So, you can just
hit 5 centimeters, and now that's the radius. I'm going to select
the line tool again. Give it the neck. Then
I'm going to take maybe this pot or just eyeballing
it up to that joint, and then maybe up to that spot. Then finally there. Now, these are two lines because
we do this first, so I'll just select
the two of them. Hit J to join them. Now it's one line. And I'll create another line
here to join now, like that. And let me just hit J. Now we have this thing.
I'll select the inside, and I'll choose Revolve. Yes, here we go. And
I'll choose the axis. When I hover over any axis, it gets highlighted by using
the middle mouse wheel, let me just orbit here. Let me just zoom
in. Remember, we already selected revolve
and that's the active tool. That's why it has
that small circle. And if I select that
axis once and twice, it will go in that direction. If I select the X
axis, let me hit X, go here while this is still
selected, go here, revolve. If I select this axis, twice. I will rotate it in that axis, and that's not what we want do. So I'll select it once
again, go here, revolve, and we want to rotate it along
the Z axis. There we go. Now, one thing you will notice
is if I hide this curve, the entire curve,
when we revolve, the place where the sketch
was is going to leave a mark. To get rid of that, select it, hit F on the keyboard, then type redundant or RED. That will bring up delete
redundant topology. I'll select that,
and now there we go. Another thing I want to
do is select this edge. And bevel it or fill it it. Right click to commit,
and there we go. Now, I'll just select this
top edge like that and shift X to get rid of it
to leave a hollow hole, but the base exists. Then I'll select
this, and of course, let's give it some
thickness, F thicken. And then I'll give it
maybe 4 millimeters. I found 4 millimeters
to be a good size, a good thickness for three
D printable flour vases. But it also depends on the size. If the flower vase is humongous, it also needs a huge wall. So there we go. Now,
we're in shade of mode. I want to switch to random
mode to give this some color, some material, select it, hit M. Let's start by
making it rough 0.8, less metal, 0.3,
then let's say 1.3. I'll change this to maybe blue. Now, if you want to
apply this material to the second model
in your scene, select the material to the object with the
material you want to copy, then select the object
you want to copy the material to. Then hit M. That will copy the
material to it. So that's method or technique number two on how
to create a flower vase. And, of course,
remember, you can hide the edges to see
the final results. That's how your
flower vases look. M.
7. Flower Vase 3: Now, here we have a slightly
more complex flower base, not that complex, but
it's slightly more complex than the other two
we've already created. So how do we create this? So as usual, I'll
select that then G and X, put it right there. And now we have
this space up here. Let me just switch
to front view one. Let me just select this alone. I hadn't combined it
with this pattern, so dot all right. So I'll just go here. I'll select my tool here. And because we're
three D printing it, we need to know the dimensions. So I'm going to use six tab six for my radius so
that the diameter is 12. And once I've typed six in there and this line is is pink, I'll click outside, but the tool is still active so I can continue drawing
what I'm drawing. So I'll scroll and
zoom in slightly while it's still active tab
to make these 3 centimeters. Then I'll click as long as that pink line is appearing because we've already
constrained it to three, it can't get longer,
even if you move down. So that the tool
is still active. Yeah, let's put that
maybe somewhere there. And yeah, let's put
that somewhere there. I want the base to be
wider than the brim. So as you can see, this is
where the brim reaches. So I want it to be
somewhere there. I mean, I can also
just leave that there, rightly can let it go. And if I want to be specific about the base, I can come here, select that tab, and say maybe 8 centimeters for or
16 centimeter diameter. Now, let's say five
as the radius because I want the diameter
to be 10 centimeters. I'll click outside
along the pink line. Click outside, right
click to get rid of that. Now, if I select this vertex, G and hold down Control, it will snap to that
other vertex right there. And we can let me also
draw that line there, hold down Control to snap. No, just snap there. I want to snap that vertex. So now I want to select
all of them, J to join. And for this, I want to
B for Fillet or Chafer. I want to pull that that way. Now, as you can see, this is
wide while this is narrow. So can we move this outward? B, I think it's much better now. Yeah, let's go with that. And of course, because we have that now we can
select the inside and revolve along the Z axis. Now, they don't look identical. This edge is too
low and this is up, but basically the shape is still we're still getting
roughly the same shape. And I think I remember
what happened. We're going to do
that. So let me actually go to the front. We're going to finish this up. Let me just hit tab to make
sure all these are active. Then select this, then G and drag it in that
direction. All right. So now let's see if we can get something that's more
closely resembles this. So I'll just go with tab. Let's say five radius. Then I'll just click there. And I think last time I put this vertex very close to
the top than the bottom. And then I dragged it downwards. I can put that right there. There we go. Now, if I take
this B, let's push it down. Now let's B. Let's
pull it much more than B. GX B, GZ, B for bevo. And I think we're now
starting to get a shape closely resembling
our shape there. So now, if I choose rotate, I revolve, one, two, I think it resembles this more. Of course, the brim, the neck
here is smaller than this. But the point here is for you to understand how
to use these tools. So now, like we did last time, I want to select this phase. That's the edge phase. No, we want to switch to face. Select that phase and
that shift X to delete. I'll also collapse solids,
select all curves. I can delete them. I don't
need them. Select these two. No, I want to make sure
all these are active. So tab, then select them. F, thicken. Then I can say, no, let's go in north.
4 millimeters. No, we should have gone
the other direction. F, thicken Negative,
not positive, negative 4 millimeters to
go inwards, just like that. And right click, select
both of them again. F, redundant topology, get
rid of it. Select this. These are actually three slight variations of the same vase, and I think you can print
them out as a set, actually. So we're in random mode already, so let me just hit
M. Let's change this to maybe, sort of green. And now you can
leave it metallic like that if you want to make
it a glass or something, but I want it to be
three D printable. Remember, 0.2, 1.3 and 0.9. Now, let's change this. Yeah, that lime green. I like it. We can
leave this as a shiny. No, let's make it
just a white plastic. So point This is roughness, 0.8, 0.3 and 1.3. Let's make it gray instead
of white, dark gray, which is better than very
bright white, like that. And now we can
disable the edges, and those are our flower vases. So as you can see, plasticity gives you tools to
very quickly put together products that you can three D print and
sell to customers. That's all for now. I'll
see you in the next one.
8. Flower Vase 4: Wanted us to work
on it together. If we switch to the
top, as you can see, we have these sort of
fins that look awesome, add some aesthetic value
to the flower vase. So how do we create this? Let me just select that. And as you can see, in fact, we have some circles inside, which means I use
the circle method, but you can also use
the revolve method. So now, what I'm going
to do is select that, switch the front end, G, and move it to the side, just like that as usual. Okay, let's give it a
diameter of 10 centimeters. Let's be more specific. Switch the front, Shift D. Let's put this right
here and let's expand it. I'm going to shift D again
here, scale downwards. In fact, G, Z to bring
it down slightly. Shift D and let's
put that there. The reason I've added
this here is because of this inward curve. So if I select the three of
them and L, as you can see, there is that curve, and
that's what we want. Now, of course, it's
not identical to this, as you can see, and that's because of the placement
of the circles. And I don't think we should struggle to put those
where they are, because the goal
here is to show you how I got a shape like this. And as you can see, you can achieve it just
by using the circles. Let me select the curves. I'm done with them, so
I'll just delete them. Sometimes you don't want
to delete your curves if you might want to reuse them. I'll select this and
shift X to delete. Now, let's also give
it some thickness. Select that F TikN and
this is negative four MM. Just like that. Now,
let me switch to this. Let's work in that mode, and let's also enable the edges. Looks nice, by the way. If you print this, I've
never three D printed this. I might three D print it and
put it on my online shop. In fact, I even like this
one just the way it looks, so I'm going to shift D
and put it on the side. Then I'll say, No, let's go to the front because we want
to create this shape. Now, this is where we use
the spline curve, too, because we want to draw a
curve that runs along this. And in fact, I'm going to put the vertices inside the solid. So let me while
it's still active, I can hit Alt Z to see
through Alt Z again. That means I can't see through. Alt Z, I can see through again. So let me just put that there. There. Don't worry
about being accurate. We're going to move the vertices around to get this accurate. So I'll put that
there. Let me just tap there there and there. So before we do anything else, let's go and select
this vertex, G. Let's push it down
slightly, just like that. It doesn't have to be
parallel following this curve exactly or precisely because it's going
to be embedded inside. That's why we have
the line inside. I'll also select this G. Let
me push it upwards a bit. Yeah, right click. In fact, let me push this G
up to that point. G Z, G, holding down shift, I can push all these inside. In fact, I want to push this
upwards just a little bit. Alright. And this as well. Let me G twice. Let me
put it right there. So now, there we have. We have a rough outline of the
profile of the flower vase. So I want to select the edge. So I'll select it, Shift D to duplicate it, and I'll put that right there. I'll come here and
maybe move these two. First of all, let me
switch to control points, then select these
two control points. G, I want to bring them closer. To the edge like that. G, let
me put that closer there. Let's do the same here, G. Holding down Shift, Escape, holding down shift to make sure both are selected. G. There we go. So now zooming in here, yeah. Line two, right lik
Holding down shift, select right, select these. No, wait. We have to switch to edge mode or just make
sure all are selected. Now, select those two. Hold down shift, select this. J to join them. Now it's one line. It's one curve. Now,
if I come here, let's do the same. There we go. Then select those J. So now, right, let me select that vertex holding
down Shift and that B to bevo We don't want to over bevel. Otherwise, it's going
to throw that arrow. Blending can't be done. So let me go down. Hold down shift to move in smaller increments and
maybe up to that point. And now, this is fiileting. This is chamfering
instead of filleting. So let's go in the opposite
direction. Let's get closer. Yeah. Instead of it
being in this manner, let's put it let's give
it a curve like that. Alright. So now, with that, I'm going to hide this with H, and I'm going to select here, the inside, then
switch to three, which is the side view. And I might choose to
I'm going to extrude, and I want to make this
maybe 5 millimeters each. Or let's yeah, 5
millimeters each. Don't worry, that's
my three D printer. It's just completed the project. So I'm going to put 5
millimeters in there and hit tab to reflect it to the other side,
just like that. Now, this 5 centimeters
represents just this side, and this other negative 0.5 centimeters represents
the reflected side. So let's make it
2.5 millimeters. Each. So 2.5 plus 2.5
makes it 5 millimeters. So this thing is 5
millimeters thick. So now let me select
this curve and maybe hide it because I might want
to regenerate that curve. But with this, remember, it was embedded inside this
solid, as you can see. So now if I select this, we can radio array it. With it selected, I'll switch the top view, then radio array. And when you get to the center, it'll automatically
snap just like that. Click. And now you can
increase the number. Let's see how it looks
before we go too far. I like it. But let's just
continue adding more. Now, you can obviously see that we can increase the
number to get this result, but I think I'm going
to leave it looking like that because it's
just beautiful like that. So those are 24. You can play around with
these other settings, but I don't usually
play around with them unless I'm working on a
very complex project. I'll right click that,
and there we go. Now, the reason we had the curve embedded inside the solid was to make sure these patterns are in touch
with this because with that, let me just select this and
shift D to duplicate it. This is what I'll keep. Now, if we select
we can now select individual those
individual features, but if I select all
of them and hit Q and go to Union
or hit Q twice. Now we've combined it
into one flower vase. You can't select one of these features because
now it's one solid, G. And this is how to prepare it for export to
three D printing. You can't export it
as separate parts like this and expect to
print it as one object. Let's switch to random mode, and I'm going to select that. Hit for materials.
It's still plastic. So roughness 0.9
point maybe 0.3, 1.3. And let's give it maybe what
color shall we give it? This purplish, bluish color. But now, those are nother colors for a flower vase.
Just look at that. I like that. And now if
we disable the edges, that's how flower vases look. I don't like this green, so I'll select that M, Uh, let's say somewhere there. And there you have it. So that's how to
create that type of pattern on your flower vase. I hope you like this lesson. I'll see you in the next
lesson. Don't go anywhere.
9. Final Thoughts: And that's a wrap. You finally made it to the
very end of this class. I want to say a huge
congratulations for that. That's a
huge achievement. Now, learning to model in plasticity is a very
valuable 21st century skill, and now you have a
solid foundation on how to model your own
three de pritable objects. Of course, we're
not stopping here. The best way to really hold on to these skills
is by practicing. So I'd really like to see what you've
been able to create. Maybe you've created your
own unique flower vases based on the skills
you've gained so far, or maybe you've just
followed along and finished modeling the
flower vases we've made. Here at Skillshare,
we like sharing our class projects to get feedback from teachers
and fellow students. So I encourage you to
click the projects and resources tab right
below this video player. And look for the
submit project button. It'll take you probably one or 2 minutes and share your project
with the community, get feedback from me, get feedback from your
fellow students. Let's see what you've
been able to create. Also, if you like this class, it would really mean a lot. If you could share
your feedback with me. Let me know what you liked
about the class and help other prospective students know what to expect from this class. So I would really appreciate you taking less than a minute, go to the reviewtab right
below this video player and drop your rating
and feedback. I would really appreciate. And as I mentioned, this
is going to be a series, so it's not ending here. This is just the beginning. I plan on publishing a brand new plasticity
class every single week. So make sure you follow me to be alerted every time I
publish a brand new class. And with that, I want to say, thank you for hanging out with
me as we learn plasticity, and I can't wait to see
what you've been able to create and can't wait to
see you in the next class.
 Ken Mbesa, Web Designer | 3D Artist