Transcripts
1. Introduction: Take a look around. Nature is awesome. It's great for
inspiring patterns, textures, illustrations, artwork, but we don't always have access to
nature all the time. Maybe you live in a big city and green spaces are
harder to come by. Or maybe you live in
upstate New York like me, and there is a very long winter dormant
period for plants. Or if you just don't have enough space to grow
big lush garden. So what can we do? Well, we can plan to
container garden. Container gardening
brings the garden to us. It allows us to create a micro-climate where
we can take something fresh and beautiful and
plant it in a limited space. We can swap them out
seasonally and we can take inspiration from our container
gardens all season long. I'm so in, in this class, I'll guide you through the
container gardening process so you can source inspiration
directly from your planter. Hi, I'm Lauren Weber, artist, designer and horticulturalists
from upstate New York. I studied landscape
architecture and Plant Sciences at
Cornell University. After graduating, I interned at Disney with their amazing
horticulture team. Talk about a magical experience. And I spent eight years growing plants,
caring for plants, and do a floral design work
at a local mom and pop shop closer to home before I started my own business,
garden girls studio. And now I get to share my plant and design
knowledge with you. If you're new to container gardening
and you're looking for a way to grow some
fresh inspiration, then this class is for you whether you're
sourcing a color palette, fresh inspiration
for your artwork, or just looking for a
fresh space to work. Container gardening can set the stage for artistic
and creative success. For your class project,
you will plant a container garden to keep
you inspired all season long, you will learn how to
choose the right plants for your environment so that we can set your container
up for success. I will walk you through
the planning process and break it down into
easy to follow steps. And we will touch on
watering and maintenance techniques to help you keep your container
thriving as it grows. This class is for
all skill levels, master gardeners status
is not required. But certainly master gardeners are welcome to join
in on the fun. Artists, creatives,
plant lovers. Now is your chance to create your own
fresh working space. If you've ever wanted to house your own ornamental
container garden, then this class
is right for you. By the end of this
class, you'll not only have new planting skills, you'll also have a
growing resource for your creative projects. The techniques you've
learned in this class, we'll get you on your
way to expanding your plant knowledge and
sourcing your creativity. Now is your opportunity
to get growing. So if you're ready to get
started, let's dig in.
2. Class Project: Let's get started.
In this lesson, we're going to talk about
your class project. For your class project, you are going to create a container garden
that will keep you inspired all season long. You're going to
choose your plants, create the environment
for your container. Use our thriller
filler spiller theory to create your container garden. And you're going to use our
planting guide checklist to make sure that you've set up your container for success. Last but certainly not least, you are going to watch your
creativity bloom so that you have something to be
inspired by all season long. When you're done
with your project, you are going to go ahead
and upload a picture of your project and a short
description to the class. Project gallery.
Be sure to share your favorite parts of your project and the moments that you had
challenges with. That way we can
all grow and learn together as you're
working on your project. I can't wait to see
what you come up with. So if you're ready
to explore how plants can help
you stay inspired. I'll meet you in
the next lesson.
3. Sourcing Inspiration: Container Gardening for Creativity: I'm so excited to get started. In this lesson, we're going
to talk about how you can find inspiration from
your container garden. So I want you to take
a moment and think about what inspires
your artwork. Many plants and flowers
aren't really your thing. I challenge you
that you can still find inspiration from
a container garden. You can look closely
at different leaf feigning or pedals leaning to get good geometric
and textual patterns, needs some color palette
inspiration from a simple photo of this
container garden. I can create a whole palette
for my next illustration. Even if it's not flower related. And by the flexible nature
of container gardens, we have the option to recreate our container
gardens seasonally, giving us an opportunity for fresh inspiration every season. Even if you don't want to gather inspiration directly from
your container garden, you can totally use your container garden to
liven up your workspace. I find that fresh plants make my work environment
feel more cheerful. So don't underestimate
the power of a fresh workspace to help
boost your mood to create. How do you get inspired?
Well, you can grab your camera if you've taken
any of my classes before, I'm going to encourage you
to notice the details. So I want you to get close. I want you to look at the
veining on your leaves. I want you to look
at the coloring on your pedals and check out all the little
nuances and details. It's one thing to
look at a plant from far away and notice, hey, this caliber Cola
has a trumpet shape. But when you get closer, you're going to see
so many more details that you might not have noticed. If you had just taken
a picture from far away, you can sketch it out. So grab your sketchbook,
pen or pencil, whatever tools you
have in front of you, sketch your container garden. You can sketch the plants
that you have themselves. Knows the different leaf shapes. Are they round? Are they jagged? Or they multi leaves? Are they different colors? Let's start noticing
all those little details and sketch them out. One of my favorite
tricks is to bring samples from a container
garden right up to my desk. So if I flowers that can
be cut or brought in, I'll make a little vase or bring them right up on my desk. I'll sketch them there.
Also, if you make a little vase of
flowers or leaves, sometimes you can have it
for a few days and you can enjoy a little
bit longer inside. And if you're recomposing inside a vase, again, more inspiration. Another way to find inspiration. You can just do your artwork outside
your container garden. Sometimes just a little
extra fresh air and a new environment where you
have some fresh green growth. Something is in bloom, might just get you in the mood to create something
new and different. Even if you're doing an
illustration of a cupcake or an a band playing
in a parade. Sometimes just getting away from your desk, getting outside, getting near your garden
me space will give you a little extra
mood boost to help you feel inspired to create
your next piece of artwork. I'm going to encourage you to create a container
garden that is going to help you keep
your creative juices flowing all season long. Whether you're choosing a color
palette that strikes you, or you're choosing a
beam that strikes you, or you just fall in love
with the plants that you see and the details
that you found in them. And take some time
to take some photos, some sketches, and be with your plants so that you can
create some amazing artwork. So now that we know how
a container garden can help a source inspiration
for our artwork. It's time to talk
about setting up our container
garden for success. So let's dive in. In the next lesson,
we're going to talk about some plant basics. So if you're ready to get
started, I'll see you there.
4. Plant Basics: Key Concepts and Terms: Welcome back. In this
lesson we're going to cover some basic planting terms and concepts that should be useful as we proceed
with this class. There are so many
different ways that plants crop up in our
day-to-day lives. But in this class we
are primarily going to be focusing on
container gardening. So I'd like to cover a few
basics before we get started. Plants need a few
essentials to thrive. They need light, water, nutrients and a structure for their roots
to feel grounded. In our case, this structure
is going to be soil. Plants may need different
quantities of these resources. But these basic resources are
essential for plant health. These factors will be super
important for creating an ideal environment for
our container garden. A few terms you may hear me
talk about here in there. Let's talk about
annuals and perennials. Annuals refer to plants
that only make it through one growing season and they do not come
back the following year. They just aren't hard enough. The weather conditions in that environment are going to be too harsh for them to come
back the following year. So perennials refer
to plants that are able to come back
year after year. They are able to withstand
environmental conditions like cold snow and they're hardy enough to come
back year after year. Keep in mind that what's
an annual for me, like most of these plants
in front of me are annuals. They aren't likely to
come back year after year here in New York. But that doesn't mean that
they won't come back and live all year long
in your environment, there are different
regional growing zones that will indicate
plant hardiness. For me, we have harsh
winters here in New York, so not all plants come
back year after year. This is why for me, container gardening
is kind of special. Every season I can swap out new plants and enjoy these
blooms while they last, this is some of the best
color I will see this season. But for you, these plants may survive all season long
and into next year. So you gotta know your
growing zone and know that what works for me may be
slightly different for you. Let's talk about bulbs. A bulbous, technically in anatomical storage structure
that some plants have. The group of plants that have the storage structure can be
referred to as bulb plants, in short as bulbs, tulips, daffodils,
highest sense. A lot of times these are
really early spring blooms are some of the first color that you'll see in the season, at least here in
upstate New York. And it's possible to create a container
garden from bulbs. Okay, So let's talk woody
versus herbaceous plants. Woody plants have a sturdy, rigid structure that
is not easily pliable. Think of trees and shrubs that have Barker woody branches. Woody plants do not fade back to the ground at the end
of the growing season, a skeleton of their
branches will remain above the ground even during
dormant winter periods. We likely won't be
talking about them very much here with our
container gardening. Some house plants might
have a woody structure. But for the most
part, I'm going to be working with herbaceous plants. Herbaceous plants
are more vegetative. They often fade
back to the ground during their dormant season and re-emerge again in the
spring if they are perennials or if they're
like these and their annual, they'll only last
the growing season. You won't find what
on these plants, but they have vegetative growth, especially along the
shoots and their stems. I wouldn't even say
green. It might be purple or blue or
different color. Again, most of what we're going
to cover in this class is herbaceousness in Upstate
New York, that's my region. Be sure to do some
research and find the plant hardiness zone
in your region so that you can container garden in your space to determine
your plant hardiness zone, I'm going to recommend that you google your country's name plus plant hardiness
zone or zone map, and look for a.gov website or a reputable educational
websites that you can determine what hardiness
zone you are in. If you're ready to get started. In the next lesson,
we're going to talk about plant selection. So if you're ready to
choose your plants, Let's jump into the next
lesson. I'll see you there.
5. Plant Selection: Welcome back. In this lesson, we're going to talk about
plant selection and how to choose your plans
for your container garden. So if you're going to your local garden center
or your local plants sale, I want you to think about
a few different factors. One of the first things
you should think about is plant care. To the plants that you're
choosing preferred son. Do they prefer shade? Do they have high water needs, but they want a ton
and ton of water, or do they have low water needs? Is it a succulent
garden where they don't quite so much water, sometimes mixing these
types of plants together, it doesn't create a
good environment. It may help to
choose plants that have similar light
and water needs. If you want to mix and match different plants
together that have different needs
because they're super cool and super
inspirational for you. Consider putting them into separate containers and
grouping them together. That way your succulents
don't get over watered. And your petunia is in
high water plants all get the nutrients and the
resources that they need. I'd like you to also consider not choosing all
blooming plants. Look at foliage plants. A lot of times they've
really cool colors, textures, designs,
patterns, shapes, forms. It's really easy to get drawn toward the pretty,
pretty flowers. Trust me, I do it all the time. But let me tell you there are some really awesome
foliage plants out there that are so worth looking at and can inspire
your next project. The next thing I want you to consider is heightened spacing. Now, in the next lesson we're
going to talk about reading a care tag and that's
going to help you determine your light conditions, the water conditions, and all of those resources that your
plants are going to need. But the other thing that your character is going
to mention to you is how big your plant
is going to get. So even if you look here, this lush cascading plant did
not start out this large, likely this planter contains
two or three smaller plans. But even so, those
smaller plants did not start out large enough to cascade over the
edge of this pot. It started small. But when you're shopping
in a garden center, you're not always going
to see full-sized plants. These plants are going to grow. You're going to want to
check into your care tag, see how big and tall your
plant is going to get in. Make sure that
you're putting it in the correct planter size. For example, if you buy a giant shrub and you plant
it in a small container, it's probably not gonna be happy and it's probably
not gonna thrive. Same thing if you
buy a small petunia and you don't realize
it's a landscape petunia. That petunia, It's
kinda get huge. It's not going to be sized
appropriately in a small pot. And if you've mixed it
in with other flowers and plants in they take over those plants and the other plants in that
container may not thrive. So I want you to pay
attention a little bit to what end size your flowers
and plants are going to be, so that you can make sure that you're putting them in
an appropriate container and you're mixing
them and spacing them with your other
plants appropriately. And the last and most important thing I
want you to keep in mind, choose plants that are
going to inspire you. Now, maybe those plants have a certain color palette,
a certain texture. Maybe you just see
that plant from across the room and you're
like, I have to have it. I want to draw this plant. I love the leaf painting. It's going to create a
great background for my illustration of cupcakes,
whatever you choose. The most important thing is that these plants spark
your creativity. So just lines that excite you. Plants that get you
feeling inspired and energized to get outside
and create and explore. So decided to choose compatible plants is
all well and good. But how do we know a plant
water enlightened needs? How do we know how
big a plant will get or how it should be used? Well, luckily, if
you're shopping for plants at your local
grower or garden center, most plants come
with a care tag. In this care tag will give you a ton of information to help you decide if a plant is right for you and your
container garden. So in the next lesson, we're going to cover some
of the information that you may come across while
reading a care tag. So if you're ready to get
started and to learn more about care tags and how you can
choose the right plants. I'll see you in the next lesson.
6. Care Tag Guide: Plant Features and Needs: So let's chat about care tax. When you go shopping
at the garden center or at a plant cell, a lot of times
you're going to see plant tags or stickers that are going to tell you a little
bit about your plants, ideal environmental
conditions, and basic needs. Let's review a care tag
so that you can get a good idea of the types of
things that you may see. First up, light exposure. Light exposure refers to whether your plant would prefer
to be in sun or shade. While light is one of the most important
resources for plants, it doesn't mean that every plant wants the same amount of light. Some plants prefer more
light and some more shade. You may see phrases
on the care tag that say full sun or full shade. But what does that mean? Let's break it down. A good marker to determine
if you should get some loving plants or shade loving plants
is the six-hour rule. If your environment or your
space where you're gonna keep your container garden gets at least six hours of sunlight, then I would aim for
some loving plants. If your space is going to get six hours or less
of direct sunlight, then you are going
to want to aim for shade loving plants. Now this is not a
hard and fast rule, but it should give
you a good guideline for where to start with
your container garden. Now, what is direct sunlight? Direct sunlight
means in the sun, no curtains, no
shade, no filter. It's going to be
in the sunlight, just like we are right now. Now. Shade, even in the shade, plants are still getting light. Unless a plant is closed in a windowless closet somewhere, they're still getting
some amount of sunlight and that can be
filtered light through a window or under an
overhanging roof on your porch. Even in that shaded space, your plans are getting
some amount of sunlight. It's just they're not gonna
be in the harsh direct sun, like you're sudden
loving plants would be. The next thing you
may see on your care tag is a hardiness zone. In the United States, we have
the US da hardiness zones. A plant's hardiness
generally refers to if it can withstand the coldest temperatures
in that region. So here in New
York, we get very, very cold temperatures
in my region, I'm in a zone five plants here. You need to be able to
withstand negative 20 degrees Fahrenheit and the
winter in order to be considered hardy for my zone. And a lot of these annuals can't withstand those
cold temperatures. But I can enjoy them
for my summer season. But if you are in
a different zone where these plants
are going to be harder than you may be able to keep these plants all year long. So be sure to check
what zone you are in. If you aren't in
the United States, be sure to see if your country or region has hardiness zones. This will help you determine whether or not your plants
are going to be hardy for just the season or if they will be able to
live all year long. Another really important
factor that you're going to see on the care tag is size. That care tag
should tell you how tall And how wide your
plant is going to get. You want to remember that
the plants that you're purchasing probably aren't
at their full size. So make sure that you
choose a planter that can accommodate all of
the plants that you choose as they grow. You want to make sure
there's enough room for your plants to breathe, get some sunlight
and they're not being shaded or overcrowded, which leads us into spacing. A lot of times on your care tag, you will see dimensions
for spacing. This tells you how far
apart to plant your plants. A lot of times this is
really important for landscape planting or when
you planting outdoors. And it's something
good to keep in mind when your
container gardening, I tend to plant a little bit tighter than the
dimensions on my care tag. I'm not going to
plant them so densely that they're going to
overcrowd each other. But I do want to make sure
that they're lush and fall. This planter, for example, is not one plant. This plant are probably has at least three
plants inside of it. If you were to read the care instructions
for this planter, this amount of plants in this container would
probably be too many. But in general, each of these
plants has enough space to get light and air into
spill out of its pot. Now there are a couple of times when planting your
plants close together, maybe an ideal solution
or short-term solution. For example, I tend to break the spacing
rules on a care tag. If I've got a big
event coming up, I need to make containers
for a wedding or a party, and I want that planters to
look lush and full quickly. Then I am going to go ahead and over plant those
planters just a little bit, knowing that after the event, I can transplant those
plans into a better, more optimal space
where they have room to breathe, airflow, get the light and
the water that they need without competing
for resources. The other time when I
don't follow all of the spacing rules is when
there's a short growing season, I have maybe three
or four months when these plants are
gonna be at their prime. So I plant my plants just a little bit closer than it
might say on the care tag. Not a lot. I still want them
to get their light, their space, and I don't want
them compete in for water. But in general, it is
a good idea to follow the care instructions on your care tag for
optimum results. Blooming time, that all
plants blue, all season long. Now, luckily with these annuals, their optimum blooming period is going to be during
my growing season. The garden centers
have forced them to bloom so that I can enjoy
them all summer long. But keep in mind that if you're planning a landscape plant or if you are doing some
other kind of gardening, you want to see what your
optimal bloom times r. You want to think
about how you can have seasonal color for an
extended period of time. So maybe all of
your plants aren't blooming at the same
time and they're alternating because of how
you designed your garden. If you know that you
have a plant that's going to bloom at the
beginning of June, maybe the plant
that's next to it is gonna bloom at the end of June. That way you can have
color all Qianlong. Another factor you may
see is basic maintenance. You may see pruning instructions or dead heading instructions. A lot of times even
these plants and blooms are going to have spent
flowers throughout the season. And you may need to prune or deadhead your plants to keep
them at their most robust. The next section you might
see on your care tag, water and drainage needs. If you have plants like
these annuals here, it may tell you that
your plant wants a moist but well-drained soil. Garden centers also
sell pawn plants and if you're struck by a pond
point across the way, you're going to want
to know that that pond plant is going to thrive in an environment where its roots
are wet almost constantly. Same thing with your succulents. Your second ones are going
to want a well-drained soil that isn't perpetually
moist or damp. So reading your
care instructions, It's going to help you
determine the type of soil and water needs
for your plant. The caretaker may also describe the plant's
habit or form. Is it a vine amounting plant? Knowing how your plant grows and the shape it develops
will help you in the next lesson
as we talk about planting composition
and aesthetics. Some care tags will also give
you usage recommendations. This is super helpful
for container gardening. Remember that landscape petunia
that I mentioned to you? Well, it's going to mention
that that landscape petunia, It's probably ideal for
a Landscape Planting. Now it's going to look
like any other petunia on the table when
you purchase it. But once you get it out and growing and a little bit
further on in the season, you're going to see
that it is vigorous in its growth and it's
not going to grow like the other petunia that you
saw, that garden center. Whereas a standard petunia is gonna do really well
in a container garden. So the usage recommendations are gonna give you indications like this plant will be really helpful for
container gardens. Or it's really great
for landscape planting, or maybe it's a
good border plant. So as you're going through
the garden center, be sure to look at
your care tags. It's fun to choose all
the pretty plants, but if they won't all thrive
in the same environment, your plants may struggle
through the season. So in addition to
making sure that you have plants that are
going to inspire you, make sure that you're
setting them up to succeed. Choose plants that are going to thrive well in the same
environmental conditions, Primarily, similar
light conditions, similar soil and
water conditions. And if you chosen plants that really need different
environments, consider planting them
in different containers. Now, pro tip, once you've chosen your plants and
you've brought them home and you're ready to garden, makes sure you don't throw out those care tags, hold onto them. They are great for taking
notes throughout the season, remembering what kinds of
plants you chose and the variety names in case
there's something you love or something that
just really didn't work. Save them, put them in a
little notebook and take notes throughout the season,
at the end of the season. That way you can determine if there's a plant that
you want to try again next season because
he loved it so much. Or if there's one
that just really didn't work and
didn't thrive well. That way you can avoid it
again next growing season. So next thing I wanted
to talk about is planting aesthetics
and composition. How to create a really beautifully composed
container garden. So if you're ready to talk
about planting composition, I'll see you in the next lesson.
7. Planting Composition: Form, Balance and Perspective: Hey everyone. So in this
lesson we're going to talk about planting composition. How can we make a dynamic
plant composition? Let's talk about plant rules
and container gardening. Well, for starters, plants have different growth
habits and form. Again, refer back to
your care tag to see what your plants
have been formed. Will be, keep in mind, some plants grow tall. Some plants go wide. In some plants are
vines and will spill over the edges of your
pods and containers. How can we mix all of
these habits together to create one finally,
compose planter. I'm going to recommend that
we use the thrillers spiller filler technique for creating
our plantar composition. The key is to have a mix of plant forms to create
a dynamic composition. Using the thrillers
spiller filler model, we can see how a plants
have it plays a role in creating our
planting composition. I think of thriller
plants in two ways. Often thriller plants or the show is to
plant designation, but also may include the tallest plants
in your selection. You want to create a mix of heights and forms and
your container garden. If you have a tall container, tall thriller plants can
help visually balanced the height of your pot and
the height of your plants. Thriller plants can also be particularly showy flowering
or foliage plants. Often I will use showy
grasses, foliage plants, dahlias are my favorite
flowering plants to be the star of the show. Spiller plants are
you're trailing cascading or vine plants. While thriller plants
draw the eye up, spiller plants draw
the eye down by spilling out over the
edge of your container. Spiller plants are dynamic, exciting and create flow. If you have a simple container, they add interest as they grow down over the edge of your pot. One of my favorite art
techniques is to extend my work outside of the
standard canvas or frame. So spiller plants help extend your work outside of the pot
and create a natural flow. Filler plants are mounting
or rounded plants. They fill the gaps
between your thriller and spiller plans to create
fullness and your planter. They create a central base for your planting
composition and add visual support to anchor your thriller and spill
or plant dynamics. Plants can also play
more than one role. Depending on your project. One plant could be a
thriller or a filler. Another could be a
filler or a spiller. Designating a plant's role can depend on the size of the
container you choose, as well as the combination
of plants you've selected. The key is to choose
a mix of plants with varying heights and forms. The benefit of creating a dynamic planting
composition is bio-diversity. With bio-diversity, we have all of these
different platforms, textures, varieties,
colors, all in one space. This diversity can help fuel
our creativity and give us a rich supply of inspiration
for our artwork. So to give you some
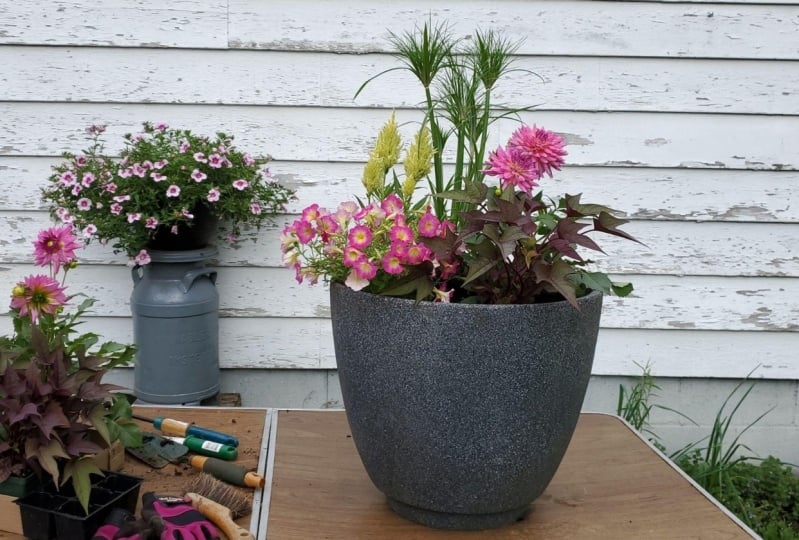
ideas of how you can use these plants in a container. I've provided some plants are planning ideas in
your class resources. So be sure to go into
your class resorts and download those documents. So you can see some different
ways that you can compose your container garden using the Thriller spiller
filler model. I also want you to
consider before you're planting how your plantar
is going to be viewed. Are you going to be looking
at it from the front or will this planter be viewable
all the way around? Thinking about how
your planter will be viewed is going to help you determine how you should
plant your plantar. If your plantar is going to
be viewed from the front, you're gonna wanna put
your tallest plants at the back of your planter. And you're going to want to
put your shortest plants toward the front so that
all of them are seeing. If your planter can be
viewed all the way around, you're going to put
your tallest plants in the center of your container. And you're going to want to work your other plants around it
in an even balanced way. You want someone to be able to view the container all the way around without feeling like they've missed out on something. So as you're shopping
in the garden center, consider the spiller
filler thriller strategy as you're browsing for plants. Now again, this is not
a hard and fast rule, but it's something to think
about as you're choosing your plants to make sure that your plants aren't
all the same height. And your plantar is gonna be a little bit more
dynamic as it grows. So now that we've talked about
compositional strategies, I want to take us
into the next step, what we're going to
talk about soil and building the foundation
for our planting. So if you're ready
to talk about soil in containers selection, meet me in the next lesson so
that we can start prepping our soil and our container for making our container garden.
8. Soil and Container Selection: Building the Foundation: Welcome back. Let's talk about soil structure and creating the
proper environment for our container
gardens by choosing the proper soil for our
plants and container. So when we're planting plants in the ground and we're doing
traditional landscaping, there are a number of
pre-existing conditions and factors in the soil that will determine how the
plants are going to grow. We're talking soil structure, whether it's sandy or
loamy or clay soil. You also have to deal
with factors like pH, soil compaction, drainage. All of these different
factors that will impact how our
plants grow and thrive. Now, luckily, we're
container gardening, which means that we can create that soil environment that
is ideal for these plants. We have the power
and the control, which is pretty awesome, right? We can create the
factors that they need. So if you can't remember what type of soil
your plants need, Let's go back to the care tag. You're going to want
to look to see if your plant needs
well-drained soil. Maybe if it's a succulent
and might want sandy soil, check and see if there's any requirements on the
care tag or if there's any notes or clues to what type of soil
your plants may want. And to be honest, for
most annuals like these, a standard potting mix is probably going to
work just fine. Most standard potting mixes
come with fertilizers, aka nutrients already built in the majority
of garden center, plants will likely be happy with this mix and you should be
good to go for your planting. Now if you wanted to make
your own gardening mix, that is also totally an option. A lot of times you can
pick up Pete, gardening, vermiculite gardening,
pearlite, compost, manure. There are all sorts of tools out there for you to
create a unique blend. It's not something that
we're going to dive in deep in this particular class. I'm going to recommend that
we keep it simple and we use a general potting mix. Next thing I want you to
think about is drainage. So the container you choose, does it have holes or a
blocker in order to let water reached the bottom of the
pot so your roots are not sitting in soaked water. Most of the plants that
you see here are going to want well drained soil, which means they don't want
to be sitting in water. They don't want wet
feet or wet roots. If your pot doesn't have
a hole in the bottom, if it's plastic or a recycled material that
you can drill through, I'm going to recommend
that you put a few drilling holes in it, especially if it's
an outdoor planter, to make sure that it
gets its drainage. If you're putting holes
into an indoor plants are obviously you're gonna
wanna use a saucer or some sort of retention
container at the base of your planter to make sure that the water isn't spill
out onto your table. Now, if your planter
doesn't have holes and there's no way to put
holes and without breaking it, like if your plantar
is ceramic or pottery or something really
fancy, then that's okay. I'll hope is not lost. You can take a
couple of avenues. If you're planters small, you can use gravel or small rocks and you can
put them at the base of your container before you
add in your potting soil. This will leave a little bit
of basin at the bottom of your planter for the water to sit without it fully
drenching your soil. Your other option if you
have a larger container, I don't necessarily
recommend using a ton of rocks or gravel at the
bottom of a large container, especially if it's ceramic
and heavy already. I'm going to recommend my
special trick that you use recyclable,
reusable containers. One of my favorite
things to use, our milk jugs or a soda bottles, things I'm going to be
recycling or reusing anyway. I put them at the
bottom of my container. They are empty, lightweight, and the water can filter down. And this is also good
factor in that you don't want those big giant
containers to be full of soil. Wet soil is very, very, very heavy and it makes it much easier for me
to move them around. They look super big
and heavy, but they'd be even heavier if those were entirely
filled with soil. And of course, at the
end of the season, to not throw those containers out in the compost if
you're recycling your soil, Be sure to dispose
of them properly. We do not want to pollute
beautiful Earth that we have other considerations
for drainage. If you have a good potting
mix, you should be okay. A lot of times those
potting mixes come with perlite, vermiculite,
all built-in. So your planters will have
good drainage, perlite, vermiculite aid water retention and water movement
aspects in your planter. They help water move
through your space. If you're thinking
about soil, soil is made up of a
bunch of particles. These particles tend to be
different sizes, right? So clay particles are super, super, super, super small. And those super small particles, water is harder to move through. That's why clay soil
doesn't drain so well, whereas sandy soil
drains super-duper. Well, the particles
are super big. So those big particles, water can move through much
faster and much more quickly. And that's why some potting
mixes you run into. We'll have drainage
enhancing particles built into their composition
so that water moves efficiently through
your soil so that your plants aren't
sitting again with wet feet are wet roots
which can lead to rot and other issues
that we just don't want. The next thing you'll
want to consider is the size of your container. You don't want a teeny tiny
plant in a huge container. It's just not going
to be ideal for your plant in that environment. Now if you've got a whole bunch of plants and you will need a larger space to support all of the plants that you selected for your
container garden. Now if you have a
giant shrub and you're placing it
in a small planter, that also won't work. So make sure that you're
choosing a planter that is conducive. The plants that you
are selecting and the number of plants in
your container garden. Again, refer back
to your care tag. See about the size that your
plantar is going to get. One of the things
I like to do is lay out all of my plants. And I space them on my table. And I make sure that
they're going to look good or fit well
inside my container. Before I start
putting it together. That way I make sure I have
an appropriate size container and that they are
all going to be happy in the space that I've chosen in their new micro-environment
that we are creating. Other considerations, set the mood with your
container garden. He doesn't just have to
be parts of a plant. Put it in plop. Think about the kind of mood that you want to
create with your artwork. You want to create
something earthy. Do you want to create something
upscale and lifted up? Think about the kind of mood that you want to
create with your artwork when you're thinking
about how you want to compose your
container garden. So if you have your soil
and you're already, and if you have your
container all selected, we're going to move on
to the next lesson. It is finally time, we're going to start
planting our container. So in the next
lesson, I'm going to cover planting
basics and I'll show you some techniques for planting your container.
I'll see you there.
9. Planting Guide: Digging Into Container Gardening: Welcome back everyone. It's time to get planting. In this lesson, we're going to go through a technical guide for how to plant your container
garden to get started, you may want a few
supplies on hand. You may want gloves or an
apron to minimize your mess. You may also want a trowel, a watering can, a bowl
for mixing your soil. And of course you're gonna need your soil, your container, and the plants
that you chose for your container garden,
for your watering can. Of course you don't have to use a traditional watering can. You can use a cup of water hose, whatever you have at your
disposal that'll work for you. As I mentioned in
the previous lesson, if you have a large container, consider filling the bottom with light plastic
bottles or something light in nature
so that you don't have to fill the entire
container with soil. The root systems on your smaller annual
plants likely won't reach the bottom of
your container anyway. So adding in a layer or two of plastic soda
bottles, recycled bottles, anything that you have that is lightweight and can fill up some space will help with the
drainage of your container. So you're gonna take
your potting soil, whether it's your own mix
or mix that you purchased, already mixed from
the garden center and you are going to put it
into a larger container. Now this can be directly into the pot that you're going to use for your
container garden. Or it can be a separate
mixing container. I tend to use a larger
container because I like to premixed
my soil with water before I put it into my planter. This will help make sure that the soil is evenly
mixed with water. And our plants are off to a
good start as we're planting. Now you don't want
to over saturate it. You want just enough water
in the soil that you could theoretically
make a ball with it and throw it against the wall
and it would stick there. But not so much that you
could fully wring it out. Now get your soil nice
and mixed and loose. This will help make sure
that there's places for the roots to grow and it's
not overly compacted. Sometimes when you buy
a bail or bag of soil, they've been sitting
on a palette for a long time and the
soil can get compacted. So loosening up the soil beforehand is going to help
make sure that your roots will be able to grow between the spaces in between the
particles in your soil. So I'll put my mixed soil into the planter that I'm
going to be planting in. I won't fill it all the way to the brim going to
leave a little bit of gap because as we
add our plants, they already have some soil. That soil space is going to take up some volume and our
container leaving space, the edge of your planter
will also give you room when you go to water
your plants or later on, so that the water doesn't
spill over the rim of your planter as
you're watering it. So don't fill your pot all the
way to the brim with soil, you'll wind up having
to take a little bit out that fill up
most of the way. Again, you can gently
set your plants around the container just
to make sure they're going to fit and look nice before you do your
final planting. Next we're going
to start planting. So take your plants one by one. You're going to take a
whole 1.5 to two times the size of the root ball of the first plant that
you're going to plan. You're going to remove
the container that the plant was
originally planted in, and you're going to
set it into the soil. Make sure that you keep the soil level of the root ball of your plant flush with the soil level in
the new container. If you plant too high, your plants are likely
going to be drying out because your roots are
gonna be exposed to the air. If you plant too low, your plants will likely rot
because the stem is going to be oversaturated with wet soil and it's going to rot through. Your plant is at
the correct height. Make sure you fill
in those little gaps between the container
and the root ball. You're gonna want
to pack the soil, just a smidge, but you
don't want to over pack it. Remember, we don't
want compaction. We want to make sure that
our roots have places to grow and they shouldn't have to work too hard to get
through that soil. Continue adding your plants until you're happy
with your container, making sure to fill in those
gaps between the plants so that you have a nice
even cellular level throughout your plantar. If you find that there
are high points and low points in your soil,
make some adjustments, even if you have to
pull out a few plants and restock them into the soil so they're a little bit deeper or add a
little bit of soil, so they're a little
bit higher to make sure that the soil
level is slashed. If there are high points
and low points in the soil, your water as you're
watering it will pool, will sink so that the water throughout the container
will be spread irregularly. This will favor certain plants
over others and may lead to issues later down the road where some
plants are getting more water than others, which your plants
may not thrive. And so you wanna make sure that your planters going to have a nice smooth surface
for the soil so that the water will
spread evenly. So when you're all set, dust off your planter, clean
it up a little bit. I'm sure it got a
little bit messy. I know I get a little
bit messy when I work. So there it is. We've covered the
basic planting steps. How to mix soil, add it to your container, dig a big enough hole. How to tuck your
plants into the soil, and how to keep that
soil of a flush To continue this process
until you're happy with your container
and you're all done. We're going to talk about
some watering basics. Some of the most common issues I came across when
I was working in my garden center positions and
my growing positions were, how much water does this need? How do I water this plant? So I know may not be
the most fun topic, but it's going to help keep
your plant or going for a long time so that we can maximize the inspiration
for our artwork. Because if we take care
of our plants well, we can have our inspiration
sources even longer so we can create more
projects and more art work. So if you're ready to
learn a little bit more about watering practices, Amishi in the next lesson.
10. Watering for Container Gardens: Welcome back. In this lesson, we're going
to talk about watering strategies and water management with our container garden. One of the most common questions that I would hear
when I was working in the garden center and the
growing positions that I worked in is how much
water does this mean? Well, it's a very simple
and common question, but the answer is
it really depends. So I want to talk you through some different scenarios
and dynamics so that we can talk about how much
water your plants may need, the amount of water
that your plant needs. Not only depends on the
type of plant you have, but also it's
environmental conditions, the light conditions, the
temperature conditions, and the air conditions of
your containers environment. So let's unpack that. If your plant is in a full
sun high heat environment, it will likely need more water
than a plant that is going to be in full shade and
in cooler temperatures. If I have a 120 degree
Fahrenheit summer day, my plants may need
water not only once, but maybe twice that day. On a cooler day,
water transpires more slowly and plant systems
tend to slow down. So these are all factors. When you're thinking
about how much water your plant is going to be using. If your plant is indoors, it's going to be
similar factors. If your plant isn't a bright
sunny window and may use more water than a
plant that isn't a really shady location
within your home. Or if your plant is kept
in a really cold room, it's probably going to
drink a lot less than the plant that's kept in
a really hot, warm room. Other things to think about
are your air conditions. So wind, air vents, any sort of blowing
system is going to dry out your plants faster, meaning they're going
to need more water. And even with all of
these factors in mind, some plants are just simply
thirsty or than others. Some plants just
need more water. So how do we deal with
all of these variables? The truth is, it's gonna take a little bit of work, not a lot. Just a little bit in the first few weeks that
you have your plants, I'm going to recommend that you check on your plants once, maybe even twice a day, depending on how much heat and how much light your
plants are getting. How do you check on your plants? Well, let's talk about
a couple of soil tests. You're gonna look at the
color of the soil and you're going to feel the soil
to see if it feels wet. The color of the soil
changes as it dries out. Take a look at these pods. Do you see how the
soil changes based on saturation in the pot all the way to the left can see this soil doesn't have
an ounce of water. It's soil structure is vastly different than the pot
all the way to the right. In effect, its color is
vastly different to, you can see this
pot all the way to the left that doesn't
have an ounce of water in it is not only gray are in
color, it's desaturated. The soils even separating
from the edge of the pot. You can see it's just, you're now that is the max dry level that
this soil can be at. Now in the pot all
the way to the right. The soil is rich in color. It is saturated. Particles aren't dusty. They are looking glossy,
almost oversaturated. So you'll notice the rich, rich, rich black color. This may be even a
little bit too damp. So you're going to want to
choose soil that is just damp. And you can use a visual to see that you want your soil color to be
a little bit richer. And throughout the
week you can see the soil is going to
start to lighten a color. So if you see that your
soil starting to be a light color or if it's
separating from the pi, It's definitely
time for a drink. So you can use the color and
the structure of the soil as indicators for when it's
time to water your plant. The other factor is
feeling the soil. Does it feel damp? I know
it seems messy and muddy, but I will just feel
the soil in the pot to see how saturated it is if the soil is still damp,
I'm probably okay. I don't need to
water right away. I'll check it again either
later or the following day. The other thing to look at
is how does your plant look? You'll start to develop what I would like to
call it plant eyes. As you start getting
your plant eyes, you'll actually start to see how your plants themselves
respond to water. You can look at the
color of the leaves. And you'll notice that some
leaves start out gray, but leaves that are naturally
as saturated, deep green, when they're dry, they're going
to start turning a little less saturated and there'll
be a little bit more gray. It's subtle, but it's a good indication that your
plant may need some water. I've seen plans come to
me that are too wet, that are also drooping
and they are wilting. Will is not always an
indication of not enough water. It can also indicate
too much water. It's definitely an
indication that there's probably a water or
temperature issue, but it's sometimes hard to determine what that will
it's being caused by. So as you check on your
plants once or twice a day, you'll start to notice how
much water they're using. Once you know how much
water your plant is using, you can back off on
check-ins a little bit, but I want you to keep in
mind if a variable changes, you should go back
to checking on your plant or your
container regularly. So if the temperature
starts to drop, or if you have a
heat wave coming, or if there's a
really windy day, make sure you go
check on your plants to see if they need water, because there's a
chance that they used more or less
depending on the day. Or maybe you had a
giant rainstorm and your plants are
overly saturated, you may need to pull them out of the rain for a little
while just so that they can desaturate so they
don't start to rot. So make sure if you're weather conditions,
light, temperature, air conditions
change, that you are adapting to make
sure that you're meeting the needs
of your plants. Okay, so cool. We've determined that
our plants need water. Now what, how do we
water them, right? We just soak them with water. Well, let me give you a few
recommendations that you can keep your plants and blooms in tip-top shape as your watering. So most of these plants that
we're working with here. They want water at their base. Now, if you water
them from the top, sometimes that can damage
the blooms on your plants. So water can create
damage on plants, either start rotting
puddles or you can have a bit of burn
from the sun or heat. I'm going to recommend
that you try to water below your blooms when possible. So you can take either
you're watering can or your hose
or a cup of water. And even if you've
to tuck your blooms to the side or snuggle the nozzle of your hose or you're watering can
enter the edge or into, deeper into your
pot so that you're not impacting the
blooms from the top. The other bonus to watering
below the leaves and flowers, there's gonna be less sun damage and less, less blossom damage. So you're going to have
better looking blooms. So you can have
sharper inspiration for your illustrations
and projects and artwork. Now, how much water, while in general with
these types of plants, you're going to want
to saturate the soil. Again, we've created
our containers so that they will drain well. So you don't have
to worry too much about your plants
sitting in water. Again, if there's a
torrential rainstorm, you may want to move them. But in general, we've created
ways for our soil to drain. So make sure that you're giving
your plants a good drink. Now, what is a good drink? Look at the root wall
basically on your plants. How much water would it
take to saturate that soil? Now again, you don't
want to over water, but especially on a hot day, the soil is going to drain and you want to make sure that
your plants get a good drink. If I just give a really
quick drink to these plants, if the water is
not going to soak into the deepest depths of the roots and the plant is not going to
have enough water. So visually, try to see
if you have a container, how much water would it take
to fill that container? Knowing that you want to make sure that
all of the roots get enough water so that your plant has enough
resources to grow and thrive. Again, there will
always be exceptions. Obviously, cacti and succulents aren't gonna need water as
frequently or as often, but they do occasionally
still need a drink. And any flowers that are in blooms are probably
gonna be using a few more resources
and will need water including cacti and succulents. They will need a smidge
more water than normal. So keep an eye on your plants. Make sure you're
doing your tests and checking on them to
make sure they have adequate resources so they
can continue blooming, Thriving all season long. Now how do you tell if something may be wrong with your watering? Well, I like to do the
mushy crunchy test and I'll just touch
on this quickly. But if you notice that your
plants are starting to drop leaves or there may be an issue
or if you're facing wilt, I want you to check to see if those wilting leaves or those Falling Leaves
are crunchy or mushy. If they're crunchy, likely
your plant is either in too much sun has too much heat or it does not
have enough water. If those leaves are mushy, likely your plant either
has not enough sun, isn't too cold temperatures, or as facing too much water. So these are factors to
kind of start working with as you're trying to figure out what may be wrong
with your plans. Again, there could
be a ton of reasons why your plant is
starting to turn, but it's usually one of
these three conditions, temperature, light, or water
that your plant is facing. So it's a good place
to start and make your small adjustments before your plant or takes a real turn. So now that we've
covered watering basics, I want to touch on just a
little bit more maintenance for your container just
so we can make sure it's looking at optimum
as we are grabbing our sketchbooks and
our cameras and starting to create our artwork. So if you're ready to
learn a little bit about container maintenance, meet me in the next
lesson and we'll review just a couple of easy techniques that you can use to keep your
containers looking fresh. I'll see you there.
11. Plant Maintenance: Hi everyone. In this lesson we're
going to talk about container gardening maintenance. In general, your container
might need a little bit of light pruning or dead heading. So if you have leaves that are decaying or at the
bottom of your plant, you're going to want to pick
those out and clean out the base of your plan
can help prevent rotting and fungi from developing and creating issues from your plant down the road. A lot of times when leaves fall into the base of your pot, they are in a dark place. They're not getting
a lot of sunlight. And this is a fresh greeting
brown for mold to develop. If your mold is
starting to develop, it may write out your plants
so you don't want that. So I'm gonna recommend you
take a little bit of time even if it's once a week or once
every couple of weeks, just to clean up the base of
your pots from any plant, from any plant material
that might have died or fallen off. And this is typical standard
leaves falling off is not necessarily an indication that there's anything
wrong with your plant. It's pretty typical for leaves, especially on the inside of a really large container to fall off because they just don't have enough circulation
and that's okay. But you want to make
sure that you clean it out a little bit here and there just to prevent mould and fungi from growing
on your plants. The next technique I'm
going to recommend is a little bit of dead heading. Dead heading is simply the
removal of spent flower heads. So if you remove
the spent blooms, it's going to encourage your
plant to continue blooming. Why? Because the seed pods for your plant are not going to be able to develop once seed pods develop your
plant and innately knows, yes, I've done my job. I've tried to reproduce
for next year, I've created seeds
and my job is done. And likely the bloom rate is going to lower
on your plants. They're going be like, I
don't need so many flowers now because now I have all these seed pods and
I've done my job for you, remove the spent flowers before they can
develop seed pods. It's going to help keep your plant blooming
because it's not going to register that any seed pods were created because they weren't. So it's going to help keep your plant blooming
all season long. Now it may seem tedious, but generally it's worth it. A lot of times I get
busy and my summer and I don't always get to all of my dead heading the way I should, but I try to make an
effort when I can to snip off spent blooms and you can just use
a little micro snips, or sometimes you can even
just pinch them right off and they will be good. Now, you want to
be careful not to pinch plant too far back because that could delay blooms if you've pinched off buds. So make sure you're
just pinching off your spent flower heads. So I'm going to recommend
that you look over your planters once a week, maybe twice a week, just to stay on top of
this maintenance. It's going to feel
like a much more manageable project
and it won't get so overwhelming and don't forget in terms of maintenance to
keep an eye on the weather. Again, harsh weather
conditions can damage your plants in your
containers if they're outside. So be sure to keep an
eye on the weather. If you see harsh
conditions coming through that your plants may not
be able to tolerate, be sure to bring them in or
pull them into a safer space so that once that whether
passes or clears, you'll be able to
enjoy your plants. So now that we've covered
light maintenance, I want to talk a
little bit about seasonal container
gardening just to give you some
ideas throughout the year that you may be able to use to source inspiration
for your container gardens. So if you're ready to talk about some seasonal inspiration, I'll meet you in
the next lesson.
12. Seasonal Container Gardening Ideas: Hey, welcome back. You needed a little bit more inspiration for your containers. I wanted to give you some
seasonal ideas are that you can use to enjoy your container
garden all year long. So whether you are
experiencing spring, summer, fall, or winter, there are ways to take
your containers and use them to source
inspiration for your projects all year long. Now, thinking about
your environment will play an important role
in your container gardening. For me, I live in
upstate New York about half of the year. We have a lot of snow. We have a lot of weather
changes seasonally. So often I have to swap out my container gardens
season by season, I might have
something different, summer, spring, winter, fall. But if you can have your
container all season long, I say go for it. That is awesome. If you're like me and
you have to swap out seasonally due to
environmental conditions. That's not necessarily
a bad thing. You can swap out
seasonal inspiration. You can change your
color palettes. You can see new textures
fall, for example, It's one of my favorite seasons to get textural inspiration, winter, I start to appreciate
evergreens and berries, sticks and twigs and all of the lines so that they create. So think about each season being a new inspirational
boost for your projects. So in the spring
here in New York, one of my favorite ways to use a container garden is
through bald planting. Bulbs are some of
the first color that we see here in the spring. And We are usually
ready for bulbs. And it's a little bit of
color by then because we've seen so many months
of snow in winter. And what's nice about
bulb gardening is generally those blooms
don't last a long time, but when I'm done, I can
plant them in the ground. And if the squirrels and
chipmunks don't steal, don't steal them, they will
come back the following year. So a great option for bulbs is actually
container groupings. So you can keep each
type of bulb plant in its own separate
container and group them together to make
a bigger composition. That way, when the
balloons are all spent, I can have my highest since
in one place in my garden. I can have my tulips
in another place and my daffodils in a third
place within my garden. And I know exactly which bulbs or in which containers and
they're not all mixed up. Now, it can be fun to
mix and match them. And if you're okay with
just mixed spring bulbs, which is a great time, then go ahead and plant them
all on the same space. Generally, they like shallower soil bed so you
don't need a deep, deep, deep plantar for bulbs. Something shallow
will do just fine. Of course, you can
see right here, right now, I'm sourcing
summary inspiration. I have all of my annuals here, New York, this is the
most vibrant color that we will get, or C, all season long, all year long, really high jumping
from my begonias, my geraniums, my caliber
CO, is my coleus. All of the different
types of plants that I wanted to see soak in. And a lot of times I'll
even take extra pictures, extra sketches of
this time of year. And these animals really
are a breath of fresh air. They're great seasonal color. They want less than
two the winter, but that's okay because we
have some fall ideas as well. Fall is one of my
favorite times for container gardening
because of all of the textures at my
disposal for fall, a lot of these annuals, it's a little bit
too cold for them, but we do have mumps and moms come in a
variety of colors. We also have awesome
produce like kale, apples, pumpkins, all things that can be worked
into a container garden. How cool is that, right? And you can mix some of
these things in place, your mini pumpkins
and gourds into a container to give it a
little bit of extra character. I'm fortunate in that I have a number of planting
beds around my house that I can use and source
seed pods and grasses. Fall is the perfect time
of year for fun foliage, seed pods, grasses, all of
these amazing textures. And I love trimming these grasses and
seed pods and things. I will bundle them and put
them on my front porch. I will take branches. You can cut them, tuck them into the back of your container. You can really do some cool
fun things this time of year. So don't underestimate fall. Things aren't all like
going into dormancy. There are some really
awesome sources for inspiration and your
art work this time of year and winter is a brilliant
time for evergreens. I never appreciated evergreens until I took an intensive
plant in class in college. We spent a couple of months learning just about
evergreens and all the different
types and I'm still not perfect at naming them all. But let me tell you, there are pints first, spruces, cedars, I can
go on and on and on. And these evergreens all
have different needles. They have all different berries, and they have all
different qualities and characteristics
that you can use. And they may not
be the prettiest or they're not big blooms. But there are some
really cool textures and patterns that you can find With those plants. Now the other
things that you can find in winter are
often berries. So non-edible barriers
don't eat them, but you can find holly
berries or snow berries, different barriers that
the blooms are done. Now you can find all
the fruit, the berries, the seed pods that were left behind for birds and critters and for the plants to continue flourishing
and following season. So it's a good time
to start appreciating those extra characteristics that are not the standard blooms that you'd see on say, annuals. The other thing that you
can source this time of year are branches and twigs. Dog widths, for example, have the most stunning yellow,
red, burgundy branches. You wouldn't see when
those plants are covered and foliage for
the rest of the year. Now what does this mean? These aren't plants, right?
How do we containerize these? Well, what I like to do in
the winter is I will take my planters that I've had
from the summer and the fall, and I keep using that soil and I will prune a few
of my evergreens, or I'll go to my
local garden center. A lot of times they will
have extra bows, evergreens, and you can purchase
those vows to use and planters so you can
tuck them into the planters, the same planters
that you used all summer long for your
container garden. And you can create these beautiful
evergreen planters using different types of evergreens, the long needle pines
and the full balsam fir, and all of these
different cool things. You can add in your
dog with branches or whatever you happen
to find holly leaves. And you can create who really
stunning porch planters or patio planters or whatever
kind of planters you have for your outdoor
gardening space. A lot of times I'll
even add little bows or ribbons just to make them
a little bit more festive. So all in all, you can
take these containers and use them for inspiration
all year long. So I'd love to see
the different ways that you have found inspiration, whether it's summer or winter, spring, fall, and share. In the project panel, I want to see what
containers you've made and if you're
switching out seasonally, keep adding to your project. I want to see how
your container garden is adapting season to season. So don't forget to share and I can't wait to see what
you come up with. So if you're ready, I've
just got a few extra notes in the next lesson and
we'll wrap things up. I can't wait to see
what you come up with.
13. Conclusion: Way to grow. Now that you have your
container garden and the resources and tools you
need to help it thrive. You can enjoy it. Whether your plantar
is going to brighten your space or bring you down
a fun path to creativity. I hope you find so much joy
watching your plants grow, and I hope you learned
something new and had some fun. Be sure to upload a picture of your final project
to the project gallery. And if you change your container
gardens out seasonally, keep adding to your project. I'd love to see how your container gardens adapt and change from
season to season. Share your favorite parts of the project and the parts
that you found challenging. And if you found any
tips or tools that you think are going
to be helpful for our community, share those too. The more that we all share, the more that we all
can grow and learn. Thank you all so, so much
for following along. I cannot wait to
see what you grow.