Transcripts
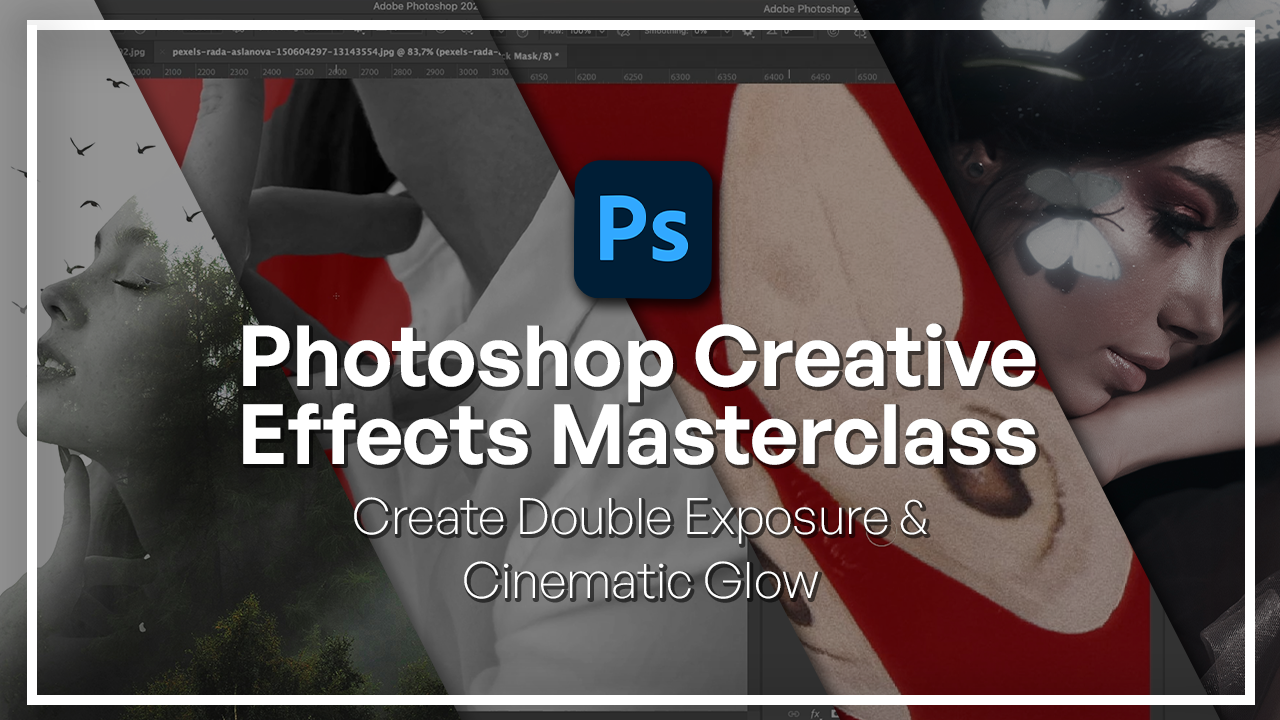
1. Welcome to the Photoshop Creative Effects Masterclass: Welcome to the Photoshop
Creative Effects class. Photoshop isn't just
about editing images, but more about
transforming them. In this class, we're
going to take a look at two powerful and
versatile techniques, which are the dabble exposure
effect and the glow effect. Both are beginner
friendly effects. But when done properly,
they can look incredibly cinematic, powerful,
and impactful. Hi, I'm Hosta Kachii a freelance graphic designer
and creative instructor. Over the years, I've worked
with various clients on digital art,
campaigns and branding, and Photoshop has always been
my top I have taught over 200,000 students with
over 15 online courses, where I tell creatives on how they could use
practical skills to better express their work and apply them to their
different disciplines. We'll begin with the
Dapple exposure effect where you'll learn how
to isolate your subject, blend imagery naturally, and create atmospheric
transitions. Then we'll move on to
the glow effect where we'll learn how to apply
the cinematic glow look to any object or subject and turn it
into something really magical and impact do not need any advanced Photoshop skills to follow along
with these lessons. I'll go over each one step by step so that you're
able to follow. And by the end of the class, you'll have something that you could reuse in your own work. So you'll not only understand
how these effects work, but how you can
actually apply it to your own use case. So
let's get started.
2. Double-Exposure Effect Foundation: Subject Isolation and Initial Blending: Let's begin by
selecting our subject by going to select subject, then hitting Command or Control J to make
a new duplicate. Delete the bottom layer and you should have your subject
isolated like this. Let's rename this to model. Then using the crop tool, we're going to expand the canvas so that it
looks more natural. Next, let's go ahead and remove all the colors so that it could blend in better with
our second image. Going to need a background here, so let's grab a solid
color from this menu, choose a color white, bring it below your model, and now we can go ahead and
bring in our first image. I have this photo because I
want to add the birds in and this photo for the high contrast between the tree and the sky. We also have this fog which is going to make things
a lot more dramatic. Commander control C
to copy the image, Commander Control V
to paste it here. Commander Control T, hold down alter option to change
the size from the center. Click the checkmark. Let's lower the opacity and position the image where
you want it to be. Bring it back, and we're going
to make a mask right here. First, let's change the
blend mode to screen, and then we're going
to make a mask. With the color black
and your brush, remove it from the edge
of your subject's face, and in this case,
her hand as well. To the image itself, we can use curves adjustment to make the trees darker
and the sky brighter. Commander control T to
move it along even more, maybe something like
that. There we go. Now let's duplicate the model, hold down alter option, click and drag it above
the forest layer, which is what we
should name it too. Grab your model copy and change the blend
mode to lighten. Now we're going to duplicate
the force layer above the model and change
this to darker color. Let's delete the
layer mask here. Hold down Alter option, click layer mask, and then we're going to hold Commander Control. Click one on Model, so we can get the outline like this using our white brush, going to hit X to
switch the colors, low flow, soft round. I Hit Commander control D to deselect that selection. Then using the same brush, we're going to introduce
the forest to this area. It looks like the forest is
continuing out from one end. There we go. Now
for the model copy, I'm going to make another
layer using the color black. We're just going to remove
same thing down here. We're going to remove the
top area of her head. We can also make the
sky a little brighter.
3. Double-Exposure Effect Technique: Advanced Layering and Atmospheric Transitions: Once we're done working with the adjustment for
the forest layers, we should be left with
something like this. If you're not a fan
of this effect, we can simply restrict the
forest layer from her nose. So go over the mask with
the color black and just bring back the
vital parts of her face. If you saw that we
have this problem, you can bring back
the original image and mask it underneath. Desaturated, and I'm just gonna hide everything
for a minute. Make sure that I have a
proper selection here. So let's grab our cloud tool. Then hit Q on our keyboard, and this is where
I couldn't tell the difference between the
highlights and the shadows. Once we're done, hit Q
and then make your layer. Now, if I bring everything back, we should have a
much cleaner nose. One final touch is to add
the birds that we mentioned. Let's go to our second image. Grab the Lasso tool and just
select all of the birds. Commander Control
C, go to our image, Commander Control V.
It's called a birds, bring it above,
Commander Control T to place it and resize
it as you need. Something like that. Enter,
go to blending options, bring the right side, the whites of the image down. Hold down alter option, click on the triangle
to split it. And that will give us a
cleaner and softer look. We basically remove the whites from this image completely. Now, I do want to scatter
the birds around a bit more. So let's go on that same
layer with the lasso tool, grab a couple of the birds, maybe these guys, Hold
down Commander Control, click and drag it
anywhere else you want. I'll put some like this, Commander Control D, and actually let's make
a new layer with that. Commander Control J, let's
call this birds two. Command or control
on this same layer, go to the bottom layer
and hit backspace. Position the birds to
wherever you want. I just scatter the birds as you see fit with
the same method. Now I'm just adding
a color lookup for one final color grading.
There we have it.
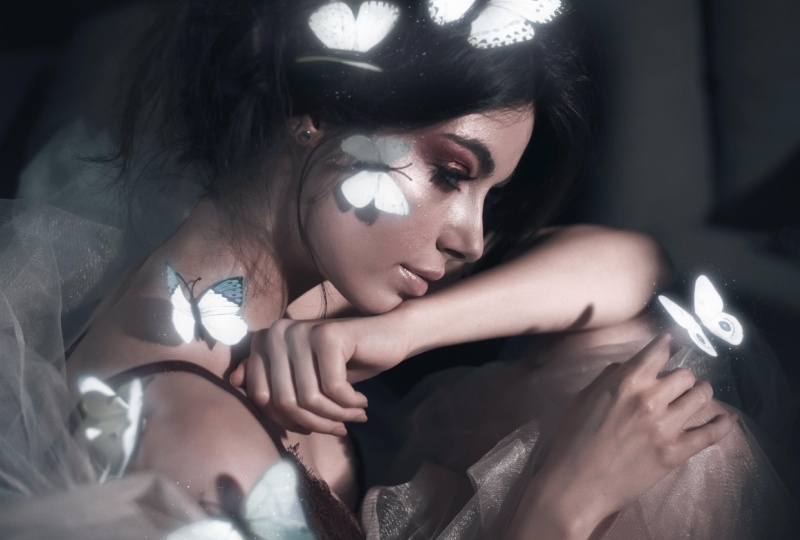
4. Glow Effect Foundation: Selecting Subjects and Building the Core Glow : Download this image
from the resource pack, and the first thing
we're going to do is select all of
the butterflies. You can do this with
any method you prefer, but what I'm going to do is grab the Object Selection tool, click and drag the
first butterfly, and we just have our selection. Hold down shift to add
to your selections. We want all the butterflies in one layer and repeat
with all the other ones. Now, if you see that
your selection tool cannot detect some
of the butterflies, you can simply change
to another tool. Again, holding down shift, add to your selection. Once we have that done, we can now zoom
in and try to get the finer details
from each butterfly. As you can see, I got a bit of her hair to remove
from a selection, we just hold down alter option and just go over that
particular area. And Once we're done with our selection tools, we can hit Q on our keyboard. Using the white brush, bring some of the areas back, and using the black brush we're going to remove
from our selection. So right click, get a rather soft brush,
adjust your size, and using the white color, I'm just going to
bring in these spots that Photoshop couldn't detect. You can easily switch between the colors by hitting
X on your keyboard. That way you can make the
process a lot faster. So I have everything
selected now. One thing to keep in
mind is that we only want the areas that we
want the glow effect on. So in my case, I
excluded the body of the butterfly and only kept their wings because you don't want the body
to be shining. You can also use the pen tool or any other
selection method you prefer. I just find that
going in and cleaning things up with your brush
gives you a better result. Once you're done, hit Q on
your keyboard again and hit Command or Control
J to make a duplicate. Let's call this butterflies. What we're going to do is
change the blend mode of this into linear Dodge add, and you can see immediately
it makes everything brighter. This is what we got right now, and then we're just
going to lower the fill just so we
have a brighter base, nothing too intense
at the moment. Duplicate the same layer
with Commander Control J. Turn this to soft light,
bring the fill back, and we're going to start
adding on some blur effects. Before I do that, I'm going to switch this to a smart object, go to filter, blur,
gaussian blur. Start with a small number, nothing too intense.
Something like five. Click Okay, duplicate the layer, then doable click
on Gaussian blur to increase this to say 20 or so, duplicate it one more time. Maybe 50. And one last time. Maybe around 90 or so. Gradually, we went 5-90. Now, I'm going to change
the blend mode so that we get more of a glow,
so lighter color. You can see how that adds
a little softness to it. So slowly, you can
see that forming. If you turn this
to lighter color and so that it's
way too intense, you can always go
ahead and lower the fill or change it
back to soft light. It's really something you
got to play around with.
5. Glow Effect Realistic Interaction and Environmental Lighting : Once we have all our glow, we're going to hit hold down Shift and grab all
the butterfly layers, Command or Control
G to make a group. So before or after. Now
we're going to add some coloring to this to make things a little
bit more magical. Go to your adjustment layer, hue and saturation,
clip it to this group. Using the first slider, we can add any
color that we want. So I want to go for
a bluish color. I think I'll keep it here. And now we can go ahead and add some sort of glow to the
skin of the subject. So the butterflies
are now glowy, they're all nice, but we
want it to look realistic. So before I do that, I'm
going to go on this one and bring back go to Linear Dodge
instead and lower the fill. This looks better for me. Okay. So underneath your
butterfly layers, your group, make a new layer
by clicking that button. Grab your brush, soft
round hardness to zero, adjust your size,
and better yet, I think we can do a duplicate of our original image
called this glow. Once we have our smart object, go to image adjustments,
saturation. Just track this until you have a similar blue color underneath
and choose colorize. This right now is purple, I want something of that sort. Click Okay, and then
we're going to add another effect that's just going to brighten up everything. Go for brightness and contrast, increase the brightness, and
then lower the contrast. It looks a bit weird right now, but we're going to use this to shade underneath
the butterflies. Hold down, alter option and
then click on the mask. You can see everything
is black here, we're going to slowly introduce the glow using our brush or hitting be increase the size
lower the flow up here, make sure that it's
soft round with zero hardness and just begin introducing those
colors underneath where the butterfly
is supposed to be with the color
white, of course. So you can see it
looks like that. If you saw that the
colors don't match, which doesn't in our case, we made this into a smart
object so we can table click on human saturation and try to change it until we
get a nicer color. H. That looks better. Let's go into anywhere
else that needs to glow. If you're at a spot where
the glow should be less, you can use a lower flow to
just go over the fingers. So the more you click, the more you're
going to introduce, use that to just
color in the finger. And then I'm just going
to change the blend mode of that into screen. Later on, I'll come to
adjust the opacity. But for now, this is good. Same thing here. Just repeat. Use lesser clicks if you
want something subtle and then one click or so to
get a lighter effect. Try to focus on the
areas where you see the highlights of
the original picture. So her knuckle there needs more highlights compared
to the darker areas. Then, of course,
we have the face, try to follow her
highlighter in a sense, and then go underneath
the butterfly. The bigger your brushes, the more natural that
glow is going to be. So just adjust the
size of your brush and continue heading
on to that glow. So now that I have
my glow effect, I'm just going to
switch my color to black by hitting X and then slowly removing the areas where I perhaps
added too much glow. This creates a softer
removal process rather than just going in
and erasing everything. Once we have our glow, you can go ahead
and change the fill there we have it. This is what we had before, this is after.
6. Glow Effect Global Refinement and Atmospheric Details: Now, to make the glow
stand out even more, we're going to have to
work with the base image. Once again, I'm going to convert this into
a smart object. Then using the effects here, try to make the image
darker and more vibrant. Start with the vibrancy,
then the curves. And you can see
how by doing this, the glow is popping
up even more. One last effect is color lookup, which is going to add an overall filter to
the entire image. There are the
adjustments that I made. If you want to make one subtle, just go on this
icon on the right, double click and you're able to lower the opacity or
change the blend mode. I will lower this to around 43%. Same thing with the curves. And there we have it.
So we have the glow. We have the image changed. One last thing that
I do want to add is some dust particles around the butterflies to add on
to that magical effect. Download this from
your resource pack and put it right above
everything else. You could use an
image like this, dust particles, actual
glitter, anything that works, the whole point is to have
little white dots so that we can use it to add some sort
of magical dust effect. We're going to do first is make a copy of the
top part only. We don't want the
mountains or better yet, only the areas where we
have a darker background. So we can't really
use this bit Command or Control J after you
made your selection, and I will grab another
part like this. Once you're done, delete that original image and
you should be left with two boxes that we can duplicate and manipulate
for our butterflies. Let's hide that layer and work
with the first butterfly. So all you really
have to do is change the blend mode by using
blending options, then removing the black. And just like that, we just have these little white dots
around our butterfly. Now, to make it a little
bit more appealing, we can change the
blend mode to screen. This will get rid of the
little black areas that we weren't able to remove and leaves us with the whites only. Now, we can't really have the stars to be
perfectly in focus. So what we're going to do
is blur it just a tiny bit, maybe around two
pixels. Click Okay. As we date with the butterflies, we're going to make a duplicate, change the blend
mode to linear Dodge and keep adding to the
gaussian blur until we're happy with the
glue. We got four. Then finally, I'm just
going to use one more. I will add around 20 ish. Once we're done, we can go
ahead and mess around with the blending modes until
we get something we like. I will turn one of
them into soft light. Once we're done,
we're going to grab all three layer twos. Let's call it particle one. Then we're going to
hold down alter option, click on the layer
mask, low to 100. We're going to introduce
little parts from our layer. Just like that. Now, you can
either copy the particle one and place it here or use some manipulations to make
it a little different. To show you what I
mean, I think I'll just use one of the
particles for now. Duplicate your particles
command or control team, move it onto another
butterfly, let's say this one. And just to make things
a little different, we're going to hit
Commander Control T again. Then we can use
something like distort, flip it the other way, anything that works really.
That's what it looks like. We can go ahead and
close that layer. And just add on more particles. Duplicate, move it to the areas. Since we have masking
around each one, we can use it to change the
placement of the particles. If it's too many particles
for one butterfly, we can mess around with that. They put one in between,
make it bigger. Then one last one there
are the particles. I'll make one more group just
to make things a little bit organized and just bring
this below y butterflies, leaving us with
something like this. I'm just going back and
messing around with the blur, especially the areas that
are closer to the camera, those need to be blurred
out a little bit more than the ones closer
to the subject's face. I To finish this off, I will add one last color lookup on top of everything
to bring it all together. And we're done.
7. Class Project: Create Your Own Cinematic Photoshop Effect: Now it's your turn.
For the class project, you're going to be creating your own image using
double exposure effect, blow effect, or a
combination of both. Choose a subject that
you're excited about. This could be a portrait, a silhouette, or
something conceptual. Your goal here is to
isolate the subject, apply the effects that you
learned in the lessons, and then refine everything with proper lighting
and blending. Once you're done, you can upload your work to the class
project gallery. If you'd like, you
can also put in a little description about what made you want
to make this image, how you applied your effects, and if there's anything
you did differently, you can point it out there too. Be reviewing the
project from time to time and we'll provide
you with some feedback. At the same time, you can see how other students
did their work and how they applied
the techniques to something they're
passionate about. Can't wait to see
what you guys create.
8. Congratulations! What’s Next?: You have now learned two very important
Photoshop effects, the dabble exposure effect
and the global effect. But more importantly,
you learned how to blend things
in Photoshop, adjust lighting, and create
cinematic atmospheres. These techniques aren't
just single use tricks. You can use them for
album covers, posters, social media graphics, or even your own
personal projects. Next step here is to experiment. You can do that by trying different subjects, trying
different techniques, maybe combining a few
of the things that we learned about and see what
you can come up with. And if you haven't already, make sure to upload your project to the class project gallery so that I could see
what you've made. Thank you for taking this class, and I hope to see you
guys in the next one.
 Skillademia Academy, Creative Skills for the Future