Transcripts
1. Introduction: It's not hard to come across
skilled photographers capable of producing
technically proficient images. However, only a select
few photographers truly excel in the art
of visual storytelling. These individuals
can lead viewers through an entrailing
visual narrative, keeping them engaged and evoking lasting
emotional responses. If there is any possibility for a photographer to achieve
this level of mastery, it's hinges on their
proficiency. Photo editing. Photo editing encompasses the thoughtful process
of selecting, adjusting, enhancing, and arranging
your photographs to communicate a unified
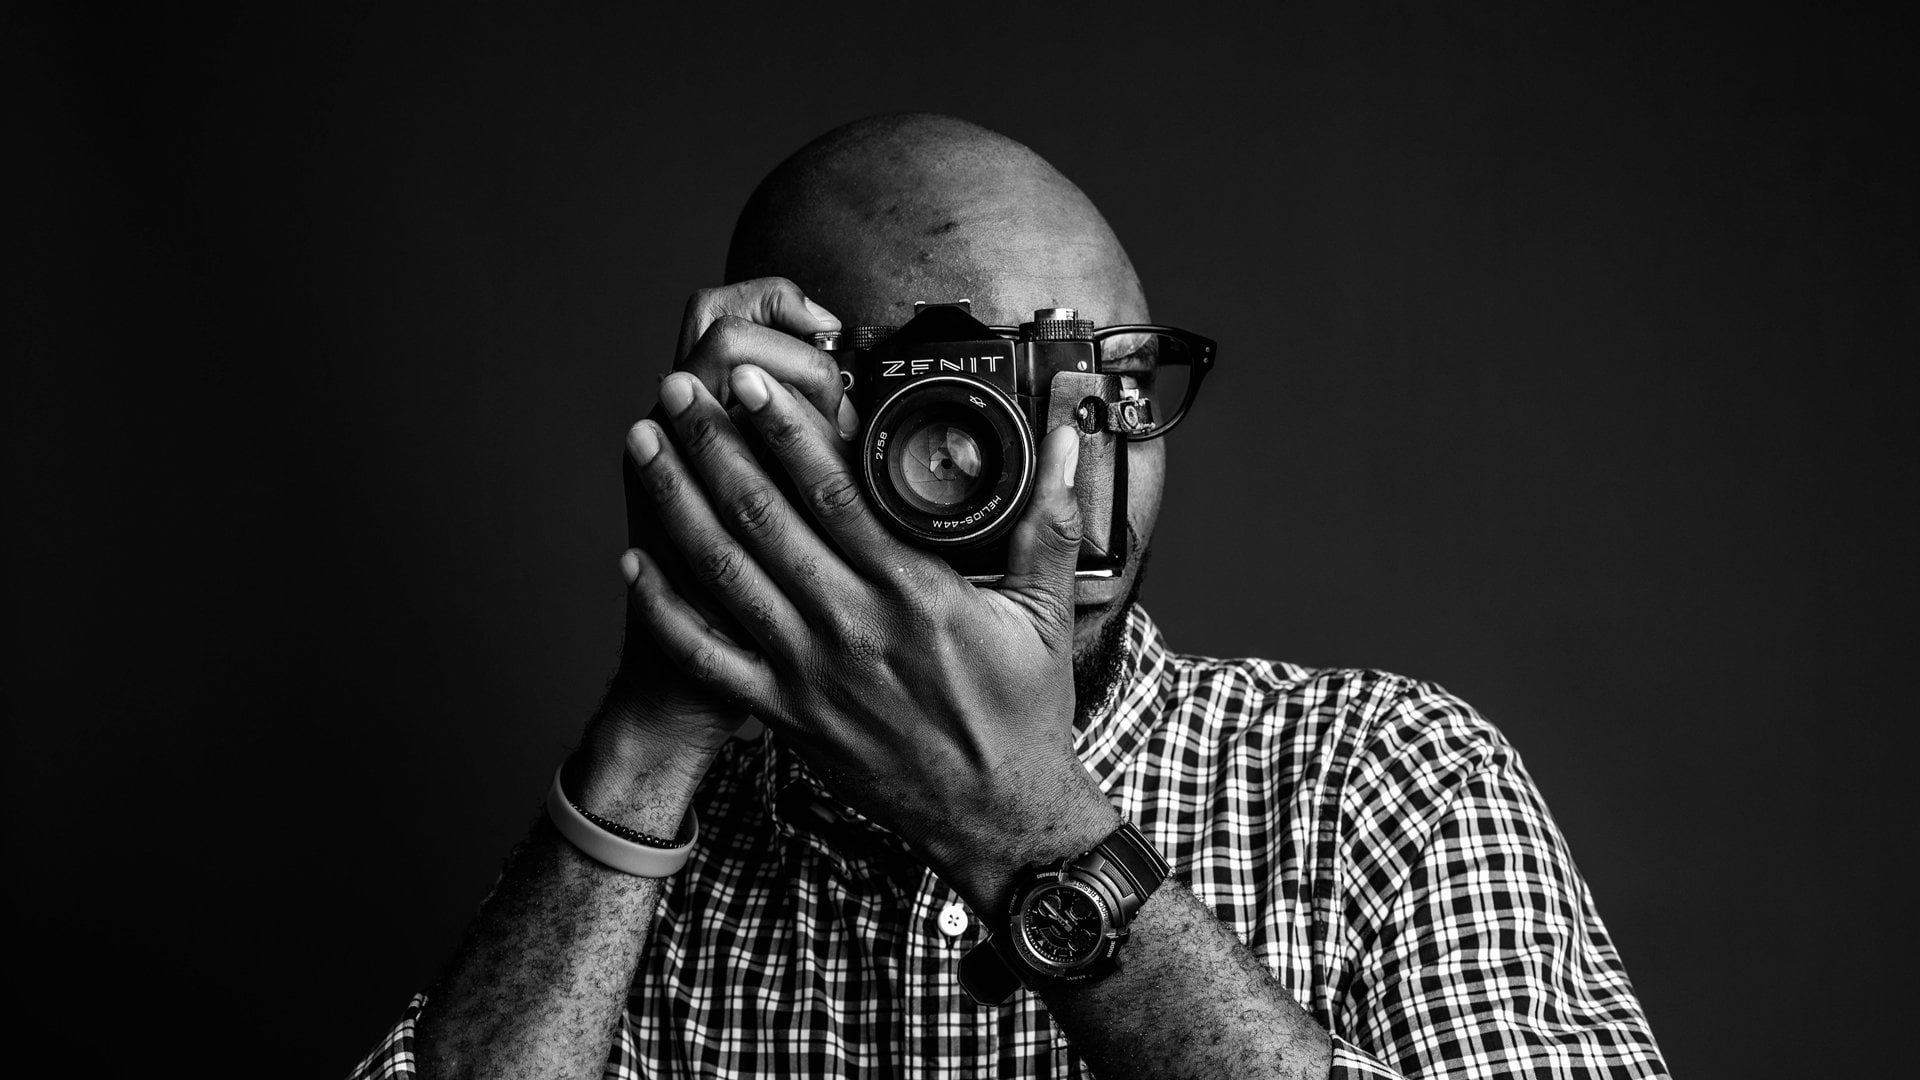
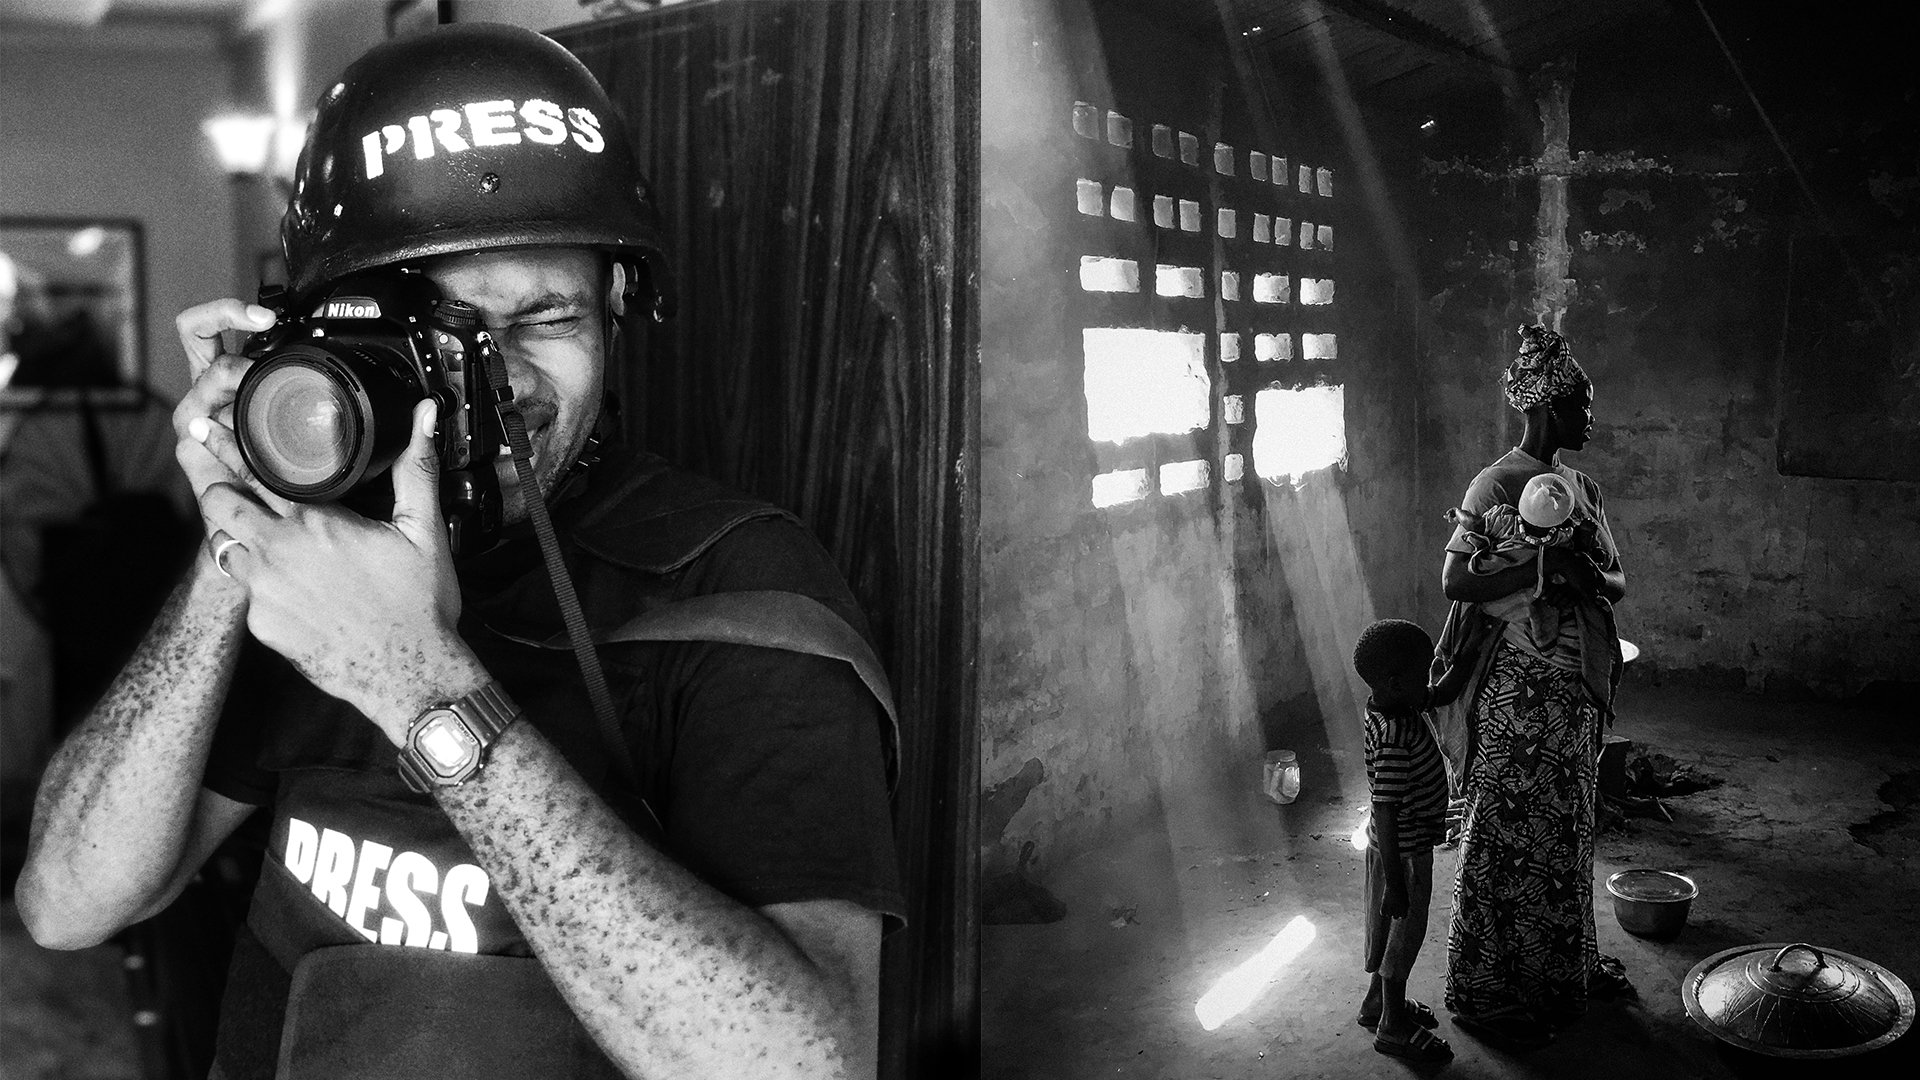
visual narrative. My name is Casey A Call. I'm a documentary
photographer and producer. My work focuses on humanizing
real socioeconomic, health and
environmental issues in Africa and the African diaspora. My work has been featured in numerous international
publications, like the New York Times, Financial Times, and Business Week, just
to mention a few. Throughout my career, I
have collaborated closely with renowned photo editors to various stories
with the world. Since 2020, I have co produced a print and online
photography magazine called Noahala Magazine, which publishes inspiring
African stories through the lens of
African photographers. If you've ever sifted through hundreds of photographs
to choose and sequence just ten images that
tell the complete story, you know that it's
not an easy I'm here to lead you through the photo editing
process in a relatable, practical, and functional way. You will have a
deeper understanding of what photo editing entails and elements that make up a compelling
visual narrative. Also, learn how to
analyze photographs. Make the best
selection creatively crop photos to enhance
their composition. And how to sequence your photos for
maximum visual impact. My goal for the class
is to equip you with the creative skills
that can transform your photographs into
storytelling masterpieces. I'm thrilled to be
teaching this topic because I understand the
benefits of photo editing. Photographers and everyone involved in
visual storytelling. If you're ready to
delve into the heart of the conversation just
as I am, let's begin.
2. Project: I'm excited that you've
made it to this point. I highly recommend
participating in the class project to get the
best value from this class. Engaging in a project will
solidify your learning, as it provides an opportunity
to share your work and receive valuable feedback from me and your fellow students. Remember, improvement
comes through practice. I strongly urge you to
participate in the class project. The project is to upload five carefully edited
and sequenced images that tell a cohesive
visual story or narrative. You can take photos
in your backyard, inside your home or your neighborhood featuring
your friend or your pet. You can even use images
from your archive, or the ones that I've provided
in the result session. It doesn't have to be an
award winning series. It's simply an opportunity to
apply what you've learned. So don't worry too much about perfection and
enjoy the process. To showcase the concepts
taught in this class, I will edit photographs from a traditional boxing event in Northern Nigeria known as Dab. These photos were taken
by me many years ago. Throughout the project,
I plan to apply all the photo editing techniques
covered in this class. Additionally, I have
provided a variety of unedited low resolution
photographs from the Dambe project in the
resource section of this class. And you're welcome to
download and use them while working through this
class as part of your project. Note that these images
are copyrighted. Refrain from using them outside
the scope of this class. To take your own photographs, you will need a camera
such as a DSLR, a point and hot,
or a smartphone. Pretty much anything that
you have that is capable of capturing descent images,
That's perfectly fine. You also need a photo editing
software like Adobe Bridge, which is some what I will
be using in this class. Photo Mechanic, A light room on your laptop or Snapseed and light room mobile
on your smartphone. Having a notebook and pen
nearby is also very useful. Us. You can use it to write
down and jot down notes. With all the
preparations in place, I guess it's safe to say that
we are ready to dive right in into the class. Come
on, let's do this.
3. Photo Editing: Photo editing has been around almost as long as
photography itself. In the days of
analog photography, editors would spend long hours laboring to achieve
the desired results. They would paint over, use magnifying
glasses to zoom in, and use air brushes and erasers to bring
their photos to life. To be successful in this field, a steady hand or an eye
for detail and patients were absolutely essential thanks to modern technology
and software. We can now accomplish this task and more with just a
click of a button. It's crucial to differentiate photo editing from photo
manipulation or retouching. The latter involves removing blemishes, smoothing skin tones, removing objects and other
similar manipulations that can be done using software
like Adobe Foot Share. While there is nothing absolutely wrong with
these practices, they do not align with the type of photography that I practice, which is photo journalism
and documentary photography. My emphasis is on capturing real and authentic moments rather than pursuing
a perfect image. It's important to note that retouched or
manipulator photographs can mislead the public, misrepresent the
photograph subject. In my practice, this would
raise many ethical concerns. Photo editing is the
skillful selection, adjustment, enhancement, and sequencing of
multiple photographs to tell a cohesive story. It is the process of
treading multiple photos together to achieve
maximum visual impact. It is an integral part of
visual storytelling process. As such, it is essential for anyone
who takes or works with photographs to grasp some of its basic principles
and procedures. In documentary photography
and photo journalism, multiple photographs are often
used to narrate a story. The essence of photo editing is the ability to piece together a story using the right selection
and sequence of photos. Think about a newspaper or
a magazine feature story. Someone deliberately
chose the opening shot that visually
introduces the story, the subsequent photos
that followed, and what concluded
the narrative. These choices are made with great intentionality
and requires significant creative
time in the newsroom. For a story featuring
ten photographs, the order in which these
images are arranged, what photo comes first in
the middle or at the end, can make or break the story. Through photo editing, you can guide the viewer's attention and emphasize important details
and invoke specific emotions. The photo editing process can be divided into five
distinctive stages. First is the selection stage. It entails carefully setting and choosing photographs
from what has been shot. The second stage is cropping. It entails creatively
cropping photographs to enhance their composition
and visual appeal. The next stage would be
the enhancing stage, which is making non
destructive adjustments, improve the overall quality and aesthetics of
your photographs. Then we have sizing and scaling, which is resizing and re, scaling your photographs to suit their intended propose
or display platform. The last stage is sequencing. It entails arranging the
selected photographs in a compelling and coherent order to effectively convey
the stories message. We will discuss these stages in detail in our
subsequent lessons. In this lesson, we explored
the concept of photo editing, its history and its significance
in visual storytelling. We learned that photo editing
involves five core aspects, which is selection, cropping, enhancing sizing,
scaling and sequencing. And our understanding
and applying good photo editing skills can be the difference between
a visual story that Mrs. or hits its mark. For this lesson, the task
is for you to choose a story idea that is accessible
and easy to work on, which can be effectively conveyed using five
cohesive photographs. If you haven't
already downloaded the photographs in the resource
section of this class, this is a good time to do so. Think of a story
you can make from the photographs that I have
made available to you.
4. Visual Narrative: Storytelling is an essential
part of being a human being. It's our primary
tool for learning, communication, and understanding
the world around us. Stories have been
passed down through generations and will continue
to be told in the future. For example, in this class, I have woven
together a series of stories to convey the
ideas about photo editing. I carefully decided what
to say in the beginning, what would say in the
middle and the end, whether you realize it or not. We are all storytellers. Although some people are more skilled at this than others, to create a captivating
visual narrative, it is important to understand the fundamental
elements of a story. One popular concept is known
as the hero's journey. In a nutshell, it consists
of two spheres of existence, the known and unknown. In the known segment,
a story begins with a character who receives
a call to adventure, driven by a desire to achieve something or fulfill
their destiny. The character leaves
their comfort zone and enters the Unknown, facing self doubt
and overcoming it. To embark on their journey. Along the way, they
encounter a mentor or a helper who guides
and encourages them. The road to the destiny
is challenging, filled with resistance and conflict presented by
another character, which could be a
person or just nature. They unsuccessfully attempt
to overcome some of these obstacles and get to the verge of giving
up, but they don't. They go through a period of soul searching and self discovery, which gives them reasons
to fight harder. Then they go through a
phase of death and rebirth, emerging wiser and stronger and more determined to
face their destiny. This transformative
process equips them with the
relevant skills and abilities that helps them to ultimately fulfill
their purpose. Does this plot sound familiar? It may resemble
your own life story or your favorite movie. Stories are constructed
by slightly tweaking the positions of
these occurrences within the hero's journey to
create intrigue and thrill that captures and
holds viewers attention. The same process applies
in photographic stories, regardless of the medium. Every story needs a subject
location, time period, and a catalyst subject
character answers the question of who
or what it can be. A person, an object,
a community, a concept, anything
central to the story, and it should be evident
to your viewers. The next is location, which answers the
question of where the location is in
which a story is set, provides context and nuance pertaining to the subject
and their journey. The time period answers
the question of when it further contextualizes the subjects living
conditions and experiences within a
specific time frame. Then you have the catalyst which answers the question of why and how of your story provides the rationale
behind the story. This is where the plot is carefully crafted to
captivate viewers. It showcases the
challenges, the resistance, the temptations
that the character must face and overcome to
achieve their destiny. In photography, a well
crafted visual narrative requires a thoughtful
combination of white shirts, close up shots, portraits
and action shots. It has to align with
the story structure. These shots are placed
strategically into the story arc, serving as opening or
establishing shots. Rising action or conflict,
climax, falling action. And Norman, I'll provide more details when we get to the sequencing
stage of the class. Why shots are used to show the environment
and the landscape. It helps to set the
scene of the story. For example, if you've
watched the movie and you saw drone shots of high
rise buildings or Statue of Liberty the, in New York, you know that
the movie is set in New York. Another type of pictures
are the close ups, which are used to draw
the viewer's attention to crucial details that
advance the narrative. They can focus on objects
or specific body parts. Portraits also play a role
introducing the subject, the main subject of your story. They are often featured during
the rising action as he allows people to identify the central character
of the story, Alien. You also need action
shots to capture subjects or other characters engaging in actions that are
relevant to the story. These shots are
usually reserved for climate and the norment
segments of the narrative are, represent the highlights of the story and should be dynamic. Often carrying
significant emotional way that evokes feelings
in your viewers. Such as feelings
of happiness when the subject achieves
their destiny, or sadness when they fail. An in depth discussion
on sequencing will provide additional
insights into how these shots can be
strategically placed in the narrative to create a
compelling visual story. By incorporating
these components, you will establish
a solid foundation for creating a
captivating visual story. Selecting the right photographs effectively captures the who, what, where, how, and
when of your story. Arranging them in sequence that follows the hero's journey will help you craft a more compelling and
engaging visual story. In this lesson, we explored the concept of the
hero's journey, which outlines the
various stages and steps a character must navigate to fulfill their
hypothetical destiny. We also discovered
that every story must address essential questions
like who or what. Which is the character
subject, where, which is the location, when, the time period, why and how, which is the catalyst. Furthermore, we explore
the visual narrative at which involves the
deliberate placement of wide, close up portraits and action shots within specific
stages of the narrative. These stages include
the establishing shot, rising action or conflict, climax, falling
action, and denomment. I want you to evaluate
the photos you've taken or downloaded to ensure a well rounded representation of wide close ups portraits
and action shots.
5. Selection: When it comes to
selecting photographs, photo editors consider
various factors. But without strict guidelines, two major factors influencing their decision making
are capturing and holding viewer attention and the photographs potential
for visual storytelling. Here are some standard features
or qualities to consider. The first is drama. Photographs that tell
the story and have a high dramatic quality are
often chosen for publication. These are the pictures
where readers can clearly understand
what is happening, sometimes with multiple events
occurring simultaneously. Second is emotion. Pictures with emotional
qualities often tell the story. They may not necessarily be the highly dramatic or
narrative driven, but they evoke
emotions in viewers. These are the kind
of pictures that make readers feel something. Another quality to
consider is action. Pictures with action or movement
tend to attract people. Images that suggest any form of movement are more likely to be seen and observed than
still live pictures. Although a photograph
cannot move if its content
indicates movement, it effective attention
grabbing device for editors, Artistic or technical quality, which is also a factor. Well, executive photographs
with shaft focus, Clare framing, and unusual
pleasing composition will often make the car. Another factor is
bizarre unusual subjects because they are also a
standard feature pictures. Showcasing something
unusual, rarely seen by viewers on everyday lives may make good candidates
for publication. Another quality
that a photo editor considers is prominence. Just as the news
value of prominence, editors often consider
the prominence of people in the pictures. Photographs of
famous individuals are always likely
to be published, even if they don't possess
the aforementioned qualities. Readers are drawn
to the pictures of well known figures
and editors take advantage of this to effectively choose the best photographs from a large group. You must develop a strong
visual vocabulary and train your eyes to analyze the basic elements that
make a good photograph. A good photograph is one that has a class subject or theme, and its visual components
work together in synergy to guide
the viewer's gaze towards the main subject. A good photograph
is also harmonious, where every element within the frame contributes
to advancing the story. In photo journalism, we often capture real life
situations and cannot control the elements present as we would in maybe
a studio setting. Our goal, however,
is to piece together visually interesting
photographs based on what is available to us. In my practice, I select
photos in three tiers. In tier one selection, I loosely selected well composed and
technically sound images that covers all the scenes
that are photographed. I limit similar shots
to two to three copies. If necessary, I may delete photographs that don't
meet these criteria or temporarily store them in a separate drive for future
deletion to save space. Dube is a form of martial art or combat sport of the Aus
people in Northern Nigeria. The tradition was
originally dominated by fishermen and
butcher case groups. But it evolved to
become some part of a local harvest festival
entertainment ritual. I shut this project in 2018. I shut it for a day. These are all the
pictures that I captured whilst I was
out there in the field. I'm using this project to
help us to know how to select pictures regardless
of how many files that you've captured during when you are out
there in the field. In this case, I
have 731 pictures. Pictures, they are quite
repetitive for various shots, things are happening and they are captured
more than once. The idea in selection
is to be able to select the pictures that
are relevant based on the ones that
the composition is. Right. The one that has
some drama or emotion. The one that has action and just technically
sound images. We're starting off with
tier one selection. In tier one selection, we're going to just restrict duplicates of
pictures to maybe like two. Um, it's better to have fewer pictures than to have too many and you become
too confused. In this case, just
looking at this P, this one I would say, I go a bit closer to the shop. Yeah, there isn't much
happening in this picture, but it's a relevant picture because it of sets the
scene and just shows what the environment looks
like before people arrive amongst the few pictures. Which one should I select? I'm looking at selecting
one or two pictures. Composition wise, I think. Yeah, composition
wise, I think this one works like these other ones. This one is also good, but this one there is cropped, and I think the tree gives more information
about the environment. This is also good, but there seems to be
like a lot of space here. But yeah, this is also good. Yeah, this one, the house
is a bit cropped out. I wouldn't spend so much time in selecting this one because
at the end of the day, I just need a picture that tells the story of
the environment. I think this one works. I'll select this, I'll use
the number one to star. You can see the star here. Remember we're just
selecting two. Pair location or pair scenery. I would select that one
and maybe this one. This one is a bit straight. Yeah, I typed the number one. I have two pictures from that. Then we move over to this one is similar
to the other one, just the seats, very similar. Maybe I can just add this one as one picture because it's a
similar but it's different. Then we move to this one. This is the actual space
where the fire happens. These are not like
best pictures, but it just sets the
scene and anyone that sees it can understand what that environment looks like before
people actually attend. For this one, this
gets a bit too close, it's not very clear what it is. I'll select this
11 for tier one. I'm using one, the number
one to start it as one star. I think this is a more
interesting picture I just on the leading lines, how it just leads to the tree. It's a good picture that
shows the environment. Now people are arriving. I need a picture of people
checking out the match roster. Who are the people that
are going to fight. Yeah, those are the
pictures I have. I have to select one or two
pictures from the ones. I like this one because it's it's pointing as
someone you can see. Get information on the poster. I will select this one just
because it's pointing. And then find one more, which would be this
one because it shows a group of people
in as much as this is point is a good picture but I like this one shows
more crowd, four people. I'm selecting one more. Remember we only select two
pictures per duplicate. At the tier one selection, we're getting rid of pictures that we probably wouldn't need. All these pictures
are repetitive, we don't necessarily
need this one. Yeah. Then people are now
sitting down, settling in. People are taking their seat. Nothing is happening
in these pictures. These are some of the fighters. They are warming up. This
is a good detail shot. Their hands are painted and you can see the
injuries on the hand. I have to select one
or two from this one. I would say this. There is more interaction
in this picture. I would select the
hands are coming, interacting as
opposed to this one. That is a bit not very
clear what's going on, so I'll select that 11 star. Maybe I can include this one. No, maybe not. Now we get to the detail shots over
exposed is out of focus. I will leave those ones. Yeah. This looks a bit more
interesting just showing how they tied and fasten their hands before
the boxing starts. Let me see how many
of these shots are here. Think without going. I can just increase
the zoom to show me at least three pictures
so that I can just quickly make my selection as opposed to viewing it
in high resolution. I know this picture
is interesting. Yeah, I'll make this
picture one star. Look for one more
E. One is showing his face, his blood out. I can just make a selection for this 11 star. Make it one star. Yeah. Then we keep going. This is the face. Yeah. There isn't anything happening. This is another person
tying up the hand. Because I've seen first of all, my selection as well would
ball down to the story. I'm trying to tell you not to. In the boxes. Yeah, This is I can include
one picture from crowd. In this case, I need to enlarge the picture so that I
can see what's going on. Maybe I can select
this 11 store. Then we go, these are the
kids fighting or boxing. This is a good it's
not the best picture, but yeah, I like
the point of view. I would include this
picture one store. I can include this as well. I can include this for
the crowd reaction. Yeah, these are nice pictures, but these are young
folks that are boxing and I don't want to
include their pictures. Then I see this guy grown. I might include this
portrait, you know, just shows the
details, You know, some of the charms,
scars on their body. You know that the
warriors have one. Okay, I have a bit
more portrait of him, so I'll have a look
at all of them. I make a decision on which
ones I would include. I think they are very similar, but I would include this, this. Because of this pace
in the background, it doesn't stand out as much. This would have
been nice as well. But his hand is a bit towards the lower part of the frame. Yeah, the face in the
background is a bit. This is a bit at
the end of the day. This is still the best
portrait we have. You see how we are
making these decisions based on what is available. This is a nice picture. I can include this as
part of his own set up and look at the pictures. Yeah, he's getting set. The angle is not that great. It's not working as much as it should is showing the
hand when it's tying. But also I'm trying
to get the face. Maybe this works for that. Yeah, we can use cap improve
the quality of this picture. Maybe we can select that the rest is not
showing his face. I like this picture
like the expressions cutting off from his head. We can select this
picture for now. Yeah, then the young lad. Then, yeah, it looks like I'm getting better angle
of him getting set, but then he's covering his face. It's one thing to get
a bit of his face while he's tying his hand. Which one would work? Maybe this one works. We just select this one. This is his hand. One is completely tight.
We can select that. This is our tier one selection. Then this is the crowd,
again from another angle. This picture, the only
difference between this picture is this
person hawking stuff. I just like that. This
one is a bit neater. I'll just select this 11 star. Another opportunity to
get a portrait of him. We have something
similar to this, so we can just select this one. This is a nice portrait,
boys under age. I'm not including his pictures. Yeah, he's still
adjusting his hand, he has tied, so maybe
I can include this. Yeah, This documentary.
At the end of the day, you can't change every
single thing happening. He just picking the best
out of what you have. Yeah. It's like this person
is getting in on self, ready a bunch of boys together, but I can see some young lads and I don't want
to include that. Then we have this
guys getting set. A bit of his face, the expressions are different. I don't know where
I would need it, but I would just semel this one. Remember to keep your
duplicates to two. Now he's taking
some weed, I guess. Yeah, some of them. Do that to increase
Yeah, morale. I guess. I'll select this
one shows his face. I'll select this one as well. This old body shows here and you can see
it's getting set. I don't like. This one looks
like he's posing for me, but this one just
doing his thing. It's not like actively
looking at the picture. This is a bit of a close of the stuff that they
wrap around their hand. If you look at this
three pictures, you can see that this
is still the best. Why? Because there
isn't enough space. This one, there
isn't enough space, like the hand is stepping
out of the frame, but this is relatively better than the other. I
select that one, I think I show this project
on a 35 millimeter lens. I go to lens is 28
millimeter just because I know I want it a bit wider
to include a bit more. This is really an
interesting picture. The details of his
hand is not showing, but I like the expression. It shows that some of them have fans, they
have supporters. And you can see that
expression here. It's a bit of drama. I'm selecting this
picture just because of the drama inside this one. And this one is similar, but his eye, the action
is dropping already. Here. Here is like
at the peak moment, that's why I'm
selecting that one. Then I can also select, this one is not
the best picture, I like the activity happening. That's how I keep
selecting the pictures in my tier two selection. I would narrow down the
selection phot from tier one. I would get rid of
similar photos and only include unique images that
are relevant to the story. We're done with our tier
one selection and we have around 121 pictures from
the initial 733 pictures. M, this is our tier one. We're going to select only
that tier one pictures. Now we have 127 pictures
in this selection. We are going to just get rid of duplicates and
select the pictures that we think will
make the story. The next tier, which
is tier three, would be the actual pictures
that we will be picking from when we are actually
sequencing our pictures. The aim here is to have
as minimal as possible, getting rid of all
the duplicates, and making sure that our
pictures has like a mix of wide close up portraits and action shots also is
critical as well. Because looking at the
pictures I've created, my focus is going to be the
main character of my story because I'm able to get
like a story out of his own appearance
and interaction. In the set of pictures
I have is Abdullah, who have decided
to name Abdullah. From a selection
of his pictures, more of my tier three
pictures would be centered on him and other
aspects of the story, or denby boxing or the activity
that is connected to him. Because I'm going to build
my story around him. I remember there is a, I have to include only five pictures at the
end of the selection. It's very important that at this stage that you know
what your story is about. What you're trying to
tell with your story. Which is something that
you should have had in your mind before you set out to take the pictures
in this case. I knew I wanted to document
this dambe boxing at the same time I had to gamble on who could
be my main character. And I photographed a couple
of boxes and Abdullah, in this case, his
first fight, he lost. And then he happened to
go again and he won. That's more like the type
of story I want to tell. That's the thing you can
tell, all the stories. You can tell like a full story
per se in five pictures. Because now I will not
be able to show where he lost because it's hard to
show that in five pictures. I'm going to do like
a simplistic curve of the hero's journey which just
highlights how he sets up, goes into the ring fights
and gets victorious with the selection of
pictures of provided there are so many stories that
can be made out of it. You can make your story
be about the referee. You can make the story be
about another dam, be boxer. It could be about the
fight in general, or the type of like whatever you want to tell
the story around. It's entirely your choice. But the most important
thing is that you tell a coherent story
using five pictures. As I've already said, I'm going to select my
tier three pictures, this is clearly an
important picture. I'm going to tap two
now to give it to Star, which is my tier two. Both are similar. I'll
just keep it simple. We have our tier two pictures and we have to take
it to tier three. Then we get to tier three, which is the final
selection from which I would choose the final
sequence of images. For a five pictures photo story, I would have a maximum
of 15 in the tier three. For three pictures we
are looking at taking out pictures that
wouldn't make the cut. We are making sure that
we have a mixture of wide close up portraits and action shots that we're going to use
to build a story. In the sequencing phase, I'm going to select the ones I think would be in the three. This is definitely the only core portrait of
him that I have. I would have loved to
get a picture of him, a portrait of him without
necessarily smoking and stuff like that,
but that's what I have. Then This one is him
getting set that. This is Edit that. There's a good moment
right here. Select that. Him getting said, Select that. This is not him, the referee. I don't see how I would
use the referees picture. The crowd. This is a
good picture of him. Select that, the crowd. I like the moments
of celebration. This is also can select that as well.
This is a good shot. I use three to select a. Yeah. In this lesson, we
covered the process of selecting photographs into
different functional tiers, considering the
specific requirements at each stage of
the narrative art. Additionally, we
explored techniques for analyzing photos to determine the most
suitable choice when faced with a plethora
of similar shots. For this lesson, I
want you to perform the selection process to obtain your tier
three photographs.
6. Sequencing: Sequencing involves
arranging photos in a way that follows the
narrative arc of your story. Every story should have a
beginning, middle, and end. The scale lies in carefully
selecting images that fit into these different
stages of the narrative arc. A visual story can be
effectively told in five phases, which is known as
the narrative arc. The first is opening
or establishing shot. This photo sets the scene
and introduces the story. This photo will
determine whether people will be interested
in the story or not. Make sure that the photo is both striking and informative. The second photo is rising
action or conflict. This is the photo
that introduce is the action of what's
happening or the character, what the story is about. A powerful portrait of the main character
will come handy here. Then after that, the next
phase is known as the climax. It is the highest action or intensity point of your story. This is the most dramatic
aspect of your story. It is typically captured
in a photo with the most drama and energy that
pushes the story forward. Then we progress to the
falling action phase. This is the photo
that appeals to emotions and may
be less dramatic, but it still holds a
significant emotional impact. Then close up shots can
come handy here because it draws you in into the
details of the story. The last phase of the narrative
arc is called The Norman. This is the closing
shot that captures the resolution or
outcome of the story. You should leave your viewers
with emotional resonance. The two most
important photographs are the opening and
the closing shot. The first determines whether
people will view the story, and the latter determines whether people will
remember the story. You have to really, really
pay attention to that. Carefully selected our
tier three pictures, it is time to arrange
them in a sequence. Our decision making
process will be guided primarily by
our understanding of the narrative arc. For this project,
we are looking at selecting five pictures
that tells a story. Photo, one would
be the opening or establishing shot and it holds
a significant importance, should be one of your
strongest photos, essentially capturing the
essence of your entire story. Think of it as the
poster photo that will either draw viewers in
or make them walk away. It serves as the hook. So we need to select
an image that is both informative and powerful enough
to pique viewer interest. Ideally, a captivating
white shot would work here, although an action shot may be more appropriate
in certain cases. Then you head over to photo two, which represents the
rising action or conflict. This picture should create
a sense of suspense, briefly introducing
the main subject or building some form of
anticipation for upcoming action. It sets the stage for the
conflict in the story. Depending on the narrative, a compelling close up or portrait could be
a good fit Here, photo three marks the
climax of the story. It is usually a highlight of your story and it's portrayed
through action shots. Then the next one for
photo four would be a picture that represents
the following action. It's often complements
photo three while preparing viewers for
the story's resolution. While it may have less action, it should carry more
emotional weight. Action shots can still be used here to evoke
feelings in viewers. And close ups or portraits
may also be utilized. Photo five says, as the
Norman it closes the story. Similar to photo one, it should leave viewers
stunned and curious. Emotive action shots are often utilized to
illustrate this part. Utilizing striking photos
in the closing aspect of the sequence is strongly advised because it leaves
a lasting impression. It is important to note that the sequencing of
the photographs should not always be based on the chronological
order of events, but rather on an arrangement that is visually
trailing and memorable. I mean, also it
has to make sense. As much as this process
is entirely subjective, the principles guiding decision making often stay the same. Understand the
process and execute them based on your
personal vision and style. The first two pictures
that you want to look up for is your opening shot
and your closing shot. The closing shot is
also the Norment. And in this case, when I look at this selection of pictures, always remember that you
can also go back to tier two to make selection if there are pictures that
you want to bring up. But I've looked at this I think would be enough for me
to tell a very simple story of this young guy that is
part of this Dab boxing. First, I start with
the establishing shot. Look through all these pictures. Let me increase it a little bit. We can see better. Yeah, this makes sense when I look at the pictures and
I'm wondering which picture would be good to set the scene to introduce what the
project is about. This would have been nice, but it's not very clear what's happening
in the background. It's not just about M
fights about this very guy. This looks like a good
shot to start with. This is not very clear. I can start with this
since it's five pictures. Honestly, I do not have
the time to play around. The viewers just need
to look at the story and you get an idea
of what it's about. I will go with this one first. I'll just drag it
up a little bit. Drag it up, yeah. Let me reduce the size a little bit so I can see what I'm doing. I probably will start
with this picture. When I look through
this selection, which picture should I end with? Is a picture of celebration
or just closing the shot. This might be a good
closing shot also. Yeah, I think it is
a good closing shot. This could also be a
good closing shot. This could also be a
good closing shot. Maybe I can choose this. This is really a nice moment. But it can also be a part
of the main, main story. I would start with when
you look at this picture, you know it's about Dabi boxing. There is a re, there is
a crowd of people ching. Then the second picture
should be the picture that draws you into who
the subject is, their personality
and stuff like that. It's usually for
your rising action is usually good to
use like portraits. In my case, I prefer
environmental portrait. This can also be a good picture, but it doesn't really
introduce us fully. This could be that portrait, but it looks posed. It looks like he posed
for the picture. And it's definitely something
I don't want to go for. This is also good, is a moment there,
but it's a bit posed. Yeah, this would work. It's not the best composition. There is a lot of
people in the frame. His hand is a bit cropped here, but it shows this person
the activity is doing, how he's getting
set for his boxing, gives us a bit more information
as to how they prepare their hands before the
actual boxing happens. It's not the best technically, but it serves the purpose. This would also be
a good detail shot, but we just have to
include five pictures. It's a bit hard to include only this one.
Maybe I'll go with this. This is because it
shows his face. You can see his face. Then you can see some of the
activity that is happening. He's getting set. That might be a
good rising action. Then we look at the actual, when the fight begins, we drop right into
the main action. I would look at
the two pictures, or not the best
composition there, bit more space in the sky area. I would have used that space
to include their legs. But we can probably improve
this picture using cropping. Well, yeah, there isn't
good use of space here. But it looks like
that's the main action. There is good action
here as well, but the climax is like when the main thing happens,
you get what I mean? It seems like this is that
moment where he dropped him. In terms of
composition, this is N, this is nice, but it doesn't really capture
that key moment. In that case, I will
just probably go with either this or this. Um, I will go with this one instead
because it shows Yeah, I like the facial expression. I like that the hand is right on the cheek at that moment, like I said, the issue
with this picture is that there is too
much space here. And this space here
should have been used to include
their legs properly. If I'm taking this
picture today, I'll definitely have
a better composition. I like the activity
happening here, and this is a key moment. Maybe I can do something
about it in post production. In editing, I would
include that. Here we have four pictures
we need the fifth. When he punches him, he drops. Clearly, this can
be our last shot because it's like the
sequence after this one. This happens for this picture, I would probably crop it
in a way that it goes into the action so that we
can use this one as the next one that shows a bit wide action of
what's happening. Then for the closing shot, I've changed my mind now. This won't be my closing shot, but the closing shot, I'm thinking about this one. This one, the picture
is a bit poetic. It's more like what next? Then it's a bit
poetic, but honestly, it doesn't have the
feeling I would expect of or anything. This is really a nice shot. I like the blank sky. This is one place that the sky
works a little bit because it makes you focus
on him and there is, his hand is Clare inside,
if I'm to choose. I think that's the best picture, in my opinion, for
the closing shot. It can be this or this. Let's, maybe I would just
use this, I drag it. It's a lot easier to
just see the sequence. When you look at the
pictures together, it starts making
a bit more sense. Remember that we can
still improve some of these pictures in post
production, especially this shot. I think we can go in that this one will be the white shot that
shows people celebrating. I selected this picture as well. Now we're selecting any picture of anyone celebrating here. That is because we
already have people celebrating here
with this action. Because you're selecting
only five pictures, we don't have a lot of
options to choose from. It makes more sense to use
1 stone to kill two birds. And that is selecting
this picture where he has hit down the specenderfrees,
helping the guy. And then there are people
celebrating in the background, which is a really good picture. Also, if you look at the
picture, it's not in focus, but honestly doesn't
matter at this point. The moment is very critical
and that's all that matters. Again, if I'm taking
the picture today, it would be in focus and the technical quality
would be a lot better. I'm also thinking about using this picture as a closing shot, but it kills the mood.
It doesn't work. I think this is a
good closing shot. Just find a way to crop it, straighten it a little bit more, create the idea
that he's on top of the world with all the crowd of people way below
him and the sky. I think that works,
in my opinion. We have our five pictures. It's not a one size fits all. You have to know what
your story is about. That would really inform how you select your
pictures and sequence them. In this case, I think this
five pictures does the trick. I'm happy with
this, to be honest. That's what I'm going to go for. 23 years later. I might look at this
pictures and I'm like, oh, I would prefer this one to come first or that one to come first. If I have a wider edit, like ten pictures, my selection
will be a bit different. But because we
have five pictures and we want to tell the story, we want people to look at the pictures and just understand what the story is
about without me having to even tell you
anything about the story. I think the five pictures
really does that. Let's see, we start with this, you see the environment, There is, the story is about
fighting, it's about boxing. Um, this is the referee, this is the stage or the ring, and they are just spectators
looking at the whole stuff. Then you move to
the next picture. Oh, it's about this guy here. There are two guys, but now I draw you a bit
closer, you know. Oh, it's about this guy. He's getting ready, tying up his arm for the ring to get ready before
it starts to fight. Sometimes the smoke to increase their energy and their
ginger, as we would call it. Like I said, it's not
the best composition, but it does the work. It tells the story.
Then you jump right in. Oh, back to that person he
was fighting initially with. Now he has given him a blow. The fight must have
gone on for a while. And now he lands a blow. Boom, the guy falls
to the ground. People celebrate, then he
walks out of the stage. This is very simplistic but powerful story
telling that tells the story obviously
with the pictures or the select pictures that I've provided for
you to work with. I'm sure there are
different types of stories that you
can make out of them. This is the most simplistic one that I can find
because I like to have a main character
in my story to tie the story together from
the pictures I've taken. This is the guy that his
story wounds up somehow. Feel free to explore and choose pictures the way you
think. That works for you. The most important thing
is that your story has a character and you follow
the whole opening shot. Rising action, climax, falling
action, and the nomen. In this case, this
is my opening shot. It does everything an opening
shot can do can be better. But we have five pictures to work with and I
think it's okay. This is my rise in action. You can see the temper rising. There is some hype people
in the background. There is a bit of smoking, there's tying of the arm. Things are getting heated up. Then the next thing you get
into the climax the job. The punch gets it, then you go to the
fallen action, falls to the ground,
people celebrate. Then you go to, he's on top of the world and he's
stepping out of the ring, which is the Nomen. This is a fantastic
five picture story. I'm looking forward to
seeing what you would produce given the variety of pictures that
you've been given. There are numerous types
of stories that can be told based on the pictures
that I've provided. But remember,
include this type of pictures and this could
serve also as the portrait. It's not the best portrait, but it gives us some
information about his face. He also can serve as the detail a bit because we can see a
bit of the stuff going on. But not the best. But yeah, these are the type of pictures
that you can work with. In this lesson, we learned how to sequence images effectively. We also learned that a well
constructed visual narrative should include key elements such as the opening or
establishing shot, the rising action or conflict, climax, the falling
action, and the denomment. The final tax is to select
your five photos and sequence them in a way that
it tells a compelling story.
7. Enhancement: Photographs often require
slight adjustments or enhancements to come to live photo editing software lets photographers
alter exposure. White balance enhanced colors
increase sharpness and the likes Photo editors often approach these adjustments with certain principles in mind. It is preferable to make subtle adjustments rather
than overdoing them. Now, we've imported the pictures from our tier three selection, the ones that we
selected and sequenced. We've now imported
it into light room. This is where I'm
going to do like the adjustments and
the color grading and stuff like that still
based on the sequence we have. This is the first picture, this is the second, this is the third, this
is the fourth. And this is the fifth picture
by light room has arranged it here based on the time
that the pictures were taken. When you're sequencing pictures, what is most
important is that you have a flow of
pictures that tells a story that is interesting
to look out and not necessarily based on the order in which the
pictures were taken. This is to say that
in as much as I took these two pictures
before this ones, but for the story perspective
and for visual interest, it makes more sense to put
this ones before them. Always remember that you
are at liberty to do that. So far it tells a good story and it is
visually interesting. Let's dive right into
the adjustment phase. Personal story I would like
to tell in black and white. Because I feel I want
my viewers to focus on the story as opposed to all the other distraction that is happening
in the picture. Because for most of the
pictures that I have here, there are quite a bit
of things happening in the background that might be
a bit distracting for me. I want people to zoom in on
this character, Abdullah. I want people to look at him and connect the story and understand
what the stuff is about. I'll go to, I'll quickly
changes to black and white just by clicking the black
and white tab on Light Room, which gives you
like basic black. And a good space to start
working from not looking bad. But I can improve the black and white to have the aesthetic
I wanted to have here. I would just reduce the
exposure by half Stop, which is 0.50 I have
just a bit more detail in the sky because
it's black and white. I would want to increase
the contrast a little bit, so maybe 20 then highlights. I want to reduce the light
in the high light area. Then for the
shadows, definitely, I need to add a little bit
more light in the shadow area. I want to darken the
whites a little bit, then the black, I want to
brighten it up a little bit. Maybe I can duck in
the blocks as well to give me that nice
contrast that I want. Then for the texture, I want to increase the
texture just a little bit. I want the picture to
retain the originality, but I want to
enhance the picture. I would want to add
a bit of clarity because this is a
combat activity. A bit more clarity can bring
all the details to life. Leaving there at 25. I don't touch the haze. The adjust the
colors in as much as black and white
colors still play a role in how the
pictures turn out. The red, I like the reds
to be a bit the orange, which is the skin tone. I can just add a little
bit more light there. Then the yellows, I
can make a bit darker. Just ye a little bit. Then the green, I
make it a bit darker. Those are pretty much the colors that I care about
in this regard. Yeah, I don't play around
with much of this. I also try not to do
the sharpening at all. Then I don't want to add
vignette in the picture. Maybe we can add just
a tiny little bit as to bring in the, the focus into the middle. Yeah, that makes sense. Let me be sure. The vignettes on the side makes it darker, the other side
makes it brighter. Okay, I'll just add very little. This is too much messes of the picture and
photographers that do this, unless it's really your style and it represents what
you're trying to achieve. Please try to keep
your vignette minimal. I'll leave it at minus
ten if you want. You can also adjust roundness
and stuff like that, but I try not to
engage with that. Then for the story, I would want it to have this grain fill. I can add a bit of grain to the picture because I
like how grain feels. It works. And I'll
leave it at 20. Yeah, I'll leave all
this adjustment. I think the said is
nice, thin the picture. There is a bit of drama in the picture now and I think
the picture is a live. Rather than doing this
in all the pictures, I will just copy. I'll either save
this as a preset. Maybe I can say create a new preset and
give it a name here. I'll call Skillshare,
black and white. Then you choose the
group that goes. Then you take all the aspects
that you've worked on, which it does by default. Then you say Create. Once you click Create, yeah, it becomes a preset here and you can use it in future if you want to retain that consistency that you want to your pictures. In that case to work
on this other one. There isn't much
I can do in terms of like cropping from
the other picture. We go to the next picture, we apply these, Just
apply it directly. And once we apply it like the only things
that we can work on now is just make
any minor adjustments, which I can already
see from this one, that it needs a bit more light. It looks a bit too dark. Yeah, it looks a bit too dark. I would want to
remove this exposure and just let the light work the way it's the
picture was shot. One thing I will do
in this picture is top and straighten the
picture because I can see the crowd is a bit
tilted to one side. I don't like the
edge of this house. Remember, if you're showing
something, show it properly. If you're not, get rid of it
in a way that is acceptable, I would straighten
this a little bit. I can still see here, and I'm also careful so that
I don't crop off his hand. Straighten it a little bit
more without crop in the hand. From here you can see it's
just a tiny little bit, then I can crop it in a
little bit more if I want. Remember to leave
your aspect ratio on locked so that when you're
adjusting sizes of things, it doesn't affect the overall
arrangement of the picture. In this case, I think
this looks good. I like the feel he has
conquered the world. He's stepping on the world. There is just a bit of
space on top of the frame. I don't like this, but there's nothing I can do about that. He has just won
his fight and he's stepping out and
stepping out powerful, which for me I think is
a good closing shot. Yeah. That's pretty much what
I would do in this picture. I think the space. Yeah. For some reasons
I think it works. Then we'll go to this
one, same thing. The picture is well composed, the edges are looking nice. Everything is working. We just select a precept
and wait for it to. I know I need to increase the
brightness a little bit because the exposure is perfect. Any reduction in the exposure
would affect the outcome of the pictures gets loaded
in into the picture. I know that I need to bring back the original
exposure of the shot because it works as it was. Yeah, this is looking nice. It's a very sunny day, so there isn't much to do about like the shadows
and stuff like that. Let's see if we increase the brightness a bit
more, if it will work. Let's see, maybe for
this picture we can just reduce the shadows
just a little bit more so that we can see the details of their
face a little bit more. In this lesson, we discuss the various adjustments that you can make to your photographs
to enhance its quality. While enhancements can be made, the fundamental content or subject of the pictures
should remain unaltered. Editing should not modify the essential elements
captured by the photographer. Remember not to overdo
these by just doing what is necessary and be
consistent across board. For this lesson, the
tax is to enhance the images in your
tier three selection.
8. Cropping: Cropping involves
removing parts of a picture primarily
for two purposes. Which is eliminating
unnecessary elements and emphasizing specific
parts of the picture. Some elements in a picture
may be relevant to the subject and the
purpose of the photograph, As such should be cropped. Often these parts not
only waste space, but also distract viewers. Efficient use of
space is crucial for photo editors and proper
cropping helps achieve this. Cropping of pictures
is as important as editing text to eliminate unnecessary elements
from the story. A single photograph can contain multiple
pictures within it. A skilled picture
editor can identify these smaller
pictures and choose the one that best serves
the intended purpose. Cropping allows editors to
highlight the desired part. Directing reader's attention. A seemingly ordinary picture can become a
dramatic one through effective cropping
while capturing the right photograph
in the field is always the best advice. Sometimes life chose
unexpected situations and you may not get
the perfect shot. In such cases, you
may still be able to salvage a photograph
through creative cropping. It's important to note
that in photojournalism, there are ethical
boundaries to consider, especially when it
comes to cropping. Excessive cropping can distort the original image and misrepresent the people
that you photographed. Which leads to misrepresenting and misleading the viewers. Working as a photographer, journalists for publications
try not to alter images in a way that it distorts the material
truths of the photograph. On the other hand, for personal projects or
documentary photography, there is more flexibility
with cropping. Nevertheless, it's crucial to remain as truthful as possible. Consider whether
removing elements alters the story's outcome or
misleads the viewer. Strive to maintain
the story's integrity even while using cropping
as a creative tool. And always be mindful of
its ethical implications. In addition to cropping, I straighten my
photos to achieve a more polished and
professional appearance. Straightening an image is
another factor that can elevate an amateur photograph to a professional looking one, unless a slanted angle is intentionally part of the
aesthetic aiming for. Which is a picture
that we've decided that we're going to get a
bit closer to the action. Let's select the
black and white. The problem with this
picture is that it was cropped in a place that shouldn't be cropped
in the first place. This is because
there is space up here when we need
to crop their legs, which pretty much this
is a schoolboy mistake, a mature mistake that I
made earlier in my career. I just like to use this
type of stories to teach because it shows you that everyone makes
all that mistake. I will adjust the exposure to the original one because
the exposure is right here. I would this picture, I think all the action is happening right in the
face of the two warriors. I would crop it down to show that moment in the
purest form possible. So it's one logic that utilize
in when I make pictures. If you want to go it
to crop the picture, crop the picture right, but don't be in the middle. Don't confuse your viewers here. I think this might be
working a little bit, but there is too much space here and there is
nothing happening there. So I might want to explore this a little bit and just see, um, crop it a little bit more. With this type of cropping, at least you know that you
are seeing the action right. As opposed to
cropping, needlessly, cropping off people's body parts and cropping the picture
in the wrong place. I can use Rule of third as well. This is all the action
I want you to notice, This is most of the action. I can use rule of third to bring all that
action to this place. You can see the line, um, let's see what it looks like. Yeah, this is an interesting picture
now, don't you think? I think it is better
than when it was wide. Brings people into the action. The detail in the
body, In the face. You can pretty much see as
the punch lands on his face. I think this works better. The background is looking good. I think I can straighten
it up a little bit. It feels a bit slanted to this side and let's see if we can straighten
it up a little bit. Yeah, Yeah, this looks better. Yeah, this is a moment. You can see the eyes just a
little bit above the knee. Above the knee, it's, it doesn't look very
aesthetically pleasing. Doesn't look very
nice when you crop people from their crop photos
of people from their joint. So that's why I tried to
move it up a little bit. Do I think this works? Now? Don't you think
this is how cropping can definitely improve the
quality of your picture? In this lesson, we explored how cropping can enhance
the quality and composition of your
photographs while ensuring that you do not
mislead your viewers. Additionally, I demonstrated
how straightening a photo can make the difference between amateur looking and
professional looking images. Review your tier three collection
of photos and identify any images that would benefit from cropping or
straightening adjustment.
9. Resizing & Scaling: Scaling involves adjusting
the size of a picture area by either enlarging or reducing it while maintaining the
original proportion. After an editor has
selected and cropped a photograph for
use in publication, it is likely that
the picture will not match the required size exactly. Enlargement or reduction
will be necessary to fit the standard column
weights of the publication. In addition, the editor
may need to modify the resolution of DPI dots
per inch of the picture, particularly if it will
be used on a website. The recommended DPI for
web pictures is 72 DPI. Those are like the main things I do before I export the picture. Once I'm done, I select all
my pictures and export. That is shift command E. I have the folder
where I'm expecting. If you want to rename the file, you can give it a name, but I want to retain the
names because that's what I'm relying on for my sequencing. I don't have to think about
which one comes first, which one comes second. Then the image format, I leave it in Peg, the color space,
I leave it in GB. Then the quality, I
live at 100 here. You can limit the size of
your pictures as well. If you want, you can say, I don't want this pictures to be more than 1,000 kilobytes, That's one MB, approximately. You can make all these
adjustments how you please. In this case, I would
say I don't want the pictures to be
more than three MB. I would say 3,000 kilobytes, let's say five, because
it's black and white. There's a bit more
detail in there. Then here you can resize images to
feed the long edge, short edge, all
that kind of stuff. If you want, you can
enlarge the pictures. If you choose
something larger than the original sizing which
the picture was shot in, it would need to enlarge. What this does is add small
pixels to the picture. I don't do this. The only thing I adjust is the resolution. If you're putting this
picture on the web, 72 DPI pixel per inch works. Or you leave it at 300
if you are printing or it just boils
down to you here. You can also sharpen
the pictures for screen if you're printing
all that stuff here. If you want to include
your meta data, you can choose to
remove personal info. Remove location info, right? Key words as light
room hierarchy. You have all these options then for people to add
watermark to their pictures. You can do that.
Then the next part, you tell you the program
what to do after exports. That's pretty much
how I keep it. I just adjust to 5,000
Leave my resolution at 300. If you want to keep it
optimized for viewing online, then 72 DPI is okay. But I just like to
leave it at 300. Then you export. Now our
pictures are exported. Boom. Once we're done with the pictures, we're good to go. Another thing that would help is after you have edited
your pictures, after you've processed it
and made your adjustments, you have to take
our time to look at the picture just to be
sure that it looks like, you know, what you thought you
saw when you were editing. Because sometimes
the programs render the pictures in a way that it's just enough
for you to work on them, but it's actually when you spot your pictures that you actually
see what it looks like. And if there are any, anything that you
need to work on, then it might be a
good time to go back and make those adjustments
and export again. In this lesson, we've
learned how to size and scale your photos
proportionally to suit their intended use while avoiding any distortion or
stretching of the content. For this task, I want you
to adjust the size and scale of your chosen photos according to your
personal preference.
10. Conclusion: It's amazing to see you
get to the finish line. I'm super proud of you
and I hope that it has been an amazing journey for
you as it has been for me. Before we sign off,
let's go through some of the key things we've
discussed in this class. We define photo editing as the skillful
selection, sequencing, and presentation
of photographs in a coherent manner to
achieve greatest impact. And its core aspects
are selection, cropping, enhancing sizing
and scaling and sequencing. After that, we delve deeper into the components of
visual storytelling. Including the narrative arc
and the hero's journey, which provide a strong framework for effective visual
storytelling. We also learned how to use
crapping techniques to enhance the composition and how to sequence selected images
for maximum impact. Just like with a good movie, carefully sequenced images
can draw your viewers in, hold their attention
all the way to the end. To continuously
improve your craft, you need to keep practicing. I encourage you to participate
in the class project, which is to upload images that have been
carefully edited and sequenced to tell a cohesive
visual story or narrative. You can use your own
images or use the ones that are provided in the
resource section of this class. The most important
thing is that you practice the photo
editor skills. I look forward to
seeing what you applaud and will happily
provide feedback. Please remember to
drop a review as it helps other students make a
decision about this class. Do well to hit the photo
button here on skill share so that you can be notified
when I launch a new class. You can also follow
me on Instagram at KC Wacalo to follow
my photography work. Feel free to check out my
other classes to continue learning and improving your
craft until we see again, stay safe and creative.
 KC Nwakalor, Documentary Photographer & Producer