Transcripts
1. Welcome: Hey, design trends, it's likely you've found
this class because you're really
struggling with using the Pen Tool in
Adobe Illustrator. I understand drawing
with vectors can be a little bit frustrating and it can be technically
challenging. I mean, it took me
a few years to get down drawing with vectors and using the Pen Tool in
Adobe Illustrator. It is annoying. It is frustrating, especially if you don't
even know how it works. Most people think it
draws like a pin and you start to use it that
way and it's like lips. What's happening here? But that's not the case. There's a specific way to use the Pen tool when drawing
in Adobe Illustrator. And I'm going to show
you the best practices. Animus show you some tips
and tricks that I've picked up over my 35 years and Design. If you don't know me
by now, I'm Chico, I'm a Surface Pattern
Designer and design educator. You can find other courses
of myelin Skillshare. And here's a little peek
at some of my work. You can check out
more of my work on my website at City of chico.com. You can follow me on Instagram
at Studio duct Chico. In addition to teaching
on Skillshare, I also teach on my
own design platform and have a membership where I teach Creative entreprenuers how to level up there design skills. But for today, we're gonna get into the using the Pen tool. And it's one of the most
powerful tools that you can have in your tool belt if you're working in
Adobe Illustrator. I want to make sure
that everybody who's in Illustrator or designer really understands the best way and most efficient way
to use the Pen tool. So get ready because
after this course, you're gonna be using
the Pen tool like a pro
2. Project: Have, you know, by
now, the Pen tool can be very
challenging to learn. And so in order to take some
of that burden off of you, I'm gonna make
this project easy. I'm going to provide
you some demo sketches. And you're gonna be
able to trace and work from those demo sketches. And you're gonna be able
to produce a Poster, or a greeting card, or an invitation,
or a logo design. You see the skills that
I'm teaching you through these demos can be
applied to anything. I might teach you how to draw the number two is the shape, but you can take
those skills and draw any shape you want. That can be the
foundation for you learning how to start letters, to design a font, or to design a logo. You can also use these techniques
as foundations to build and create bigger illustrations
in Adobe Illustrator, I'm going to teach
you a technique on how to design a script. Really easy by Tracy in
a script with a path. But we'll take it
to another level. And you'll be able to change and rearrange these things
to make your own Poster. Now you don't have to use any of the sketches that
I am providing. You can make your own words
up and sketches of your own so you can deliver your own
message about ice cream. Maybe it's a greeting
card about summer love. Maybe it's a Poster advertising than new ice cream flavor. So there's all
different ways that you can interpret this project
to make it your own. But don't forget this projects just to guide you through
so you can really focus on the technical skills
that you need to achieve in order to become an expert using the Pen Tool in
Adobe Illustrator. After you've done this course
and then this demo lesson, I guarantee you're going to
be able to have the skills to take them and use them on
any of your own projects. Immediately. You're gonna be able to really
make your projects shine and make them look
the best that they can look when you're
drawing with vectors
5. Vectors 2: So let's take a
closer look at how pads are drawn in
Adobe Illustrator. When you draw with vectors, you can draw with a
line, a simple path. The line could be straight
or it can be curved. You can also draw
with closed shapes. Whenever you want to fill
a shape with a color, the shape needs to be closed. So you can see here
I have a square at all the points on all the n's connect
and I have a circle. This circle we're
going to have to use the direct selection tool to see the anchor points that are
used to draw this circle. But we have for anchor, this circle is only
drawn with four-point. If I click on any
of these shapes, you can see that there
are the anchor point. And then whenever we have
curves, we have handles. Handles describe about
one-third of a curve. Also see that all the agar
points are strategically placed at the apex
is of the curd, whether it on the top or the bottom or the
outermost point. So these are two important
factors when you're drawing with the Pen Tool
in Adobe Illustrator is to remember the rule of Thirds and keeping your
points at the apex. I'll go over some of
these techniques in the next lesson to show you
how I use these tips to draw, I'll see you want to
remember when manipulating your vectors in
Adobe Illustrator, the difference between
the selection tool and the direct selection tool. The selection tool will that you select a path or a shape, and it will let you move
that path or shape around. It will let you rotate it. It will let you control
the object as a whole. The direct selection
tool, on the other hand, will let you select an element directly as a part of a vectors. So you can select the handle
and control the handle. You can select an anchor point and control the anchor point. You can select directly on in line segment and drag
the line segment. You can also click and drag and select more
than one anchor point. Let me zoom in so you can see that when anchor
point is selected, it's filled in blue. And when it's not selected, it's hollow and white. And don't forget that
all of these elements, the colors and everything
that you're seeing here, that's the visual part of Adobe Illustrator
rendering and effect. When we go to View
Outline mode command Y, we're just going to see the outline vectors
of our Shapes. Command Y once
again will take us back to the preview
mode and it will be able to see the preview of
what are vectors look like?
6. Rule of Thirds: A really good rule to
remember when drawing in Adobe Illustrator
with the Pen tool is the rule of thirds. The rule of thirds applies whenever you're drawing a curve. So let's take a look at
this circle, for example. You can see the
circle only uses for points to plot the
entire circle. Let's take a look at one
segment of this circle, this curve, this one segment between these two anchor points. If we look at this,
we can see that this one curve is described by this handle and this handle that extend
from the anchor points. Each of these handles
describe about one-third of this curve from here
to here is about a third. And from here to here
is about a third. And then the middle third
is left to description by what's happening with
these two edge handles. So let me trim on this layer
to show you a little better. You can see that if I divide
this up in a pie shape, that this is about one-third, this is about one-third, and this is about one-third. And you can see that's where
our handles extended to. If I start drawing outside of this shape and pulling
beyond the third, I start to get more
of a square shape. And I start to get a
not so beautiful curve. So that's a really
good starting point for getting your curves. Now, like I said,
it's not a rule, but it's a really
good place to start. You can see even on
this curve here, that from this point
to this handle here is about one-third of this curve between
these two points. And from this point
to this handle is about one-third of the curve. Let's turn on this
guidance, see here. So you can see that's about
one-third of the curve. Another good rule to
remember when Drawing is that these points are all
plotted at the apex is. And also you notice that the handles are all
horizontal or vertical. This also keeps, Here's
curves looking really beautiful and smooth when you start to learn to
draw it this way. So keep these in mind
and in the next lessons, we'll get into drawing
with your points. On the apex is
7. Precision Drawing Vector Shapes: Okay, let's jump into
Adobe Illustrator and I'm going to show you how we can draw with the
Pen tool using a few of the techniques that
we have learned so far. So let's go to File New. And a window is going to pop up. And you can go to Print and you can select letter for now. And I'm going to change
my color profile to RGB. It's macro for color profile. And I'm going to change this to 72 DPI for now and go create. Okay, So over here you can
see we have our layers. If you don't see your layers, you can go up to window and
go and add your layers. You can see here we
have one artboard, so we're going to start working
with one artboard first. And I went to go to File, Place, overhears
the key command, Shift Command P, and find your demo assets
and import demo too. So you can see here I have
a little icon of my image, and I have this
little arrow up in the corner and that's
where the corner of my image is going to play. So I'm just going to click
it here on the page. And we've got it
about right here in the center, which is great. And you can see this is
gonna be my sketch layer. I'm going to double-click that. I'm going to call the sketch. And I'm going to
add a new layer. Before I lock this layer, I'm gonna double-click
it and I'm gonna go dim images to 50%. This is going to act like a piece of tracing
paper in a way. So I could see a
dimmer version of my image and I'm able to draw on top of it
on the other layer. So I'm going to lock
this layer now. Firstly, I'm going
to create a layer called plotting points. So when I'm drawing,
as I'm drawing, I'm actually going through looking ahead at
each curve that's coming ahead and then figuring out where I'm
gonna put my points. So to illustrate that for you, let me just show you really quick where I would plot points. Remember I said we want to put our points apex of each curve. So I'm going to
start at the corner. And I'm going to
plot one point here, probably, probably
here, probably here. Here at this corner. Down here, we might put one in the center of this curve here. I'm going to put one at
this corner for sure, for sure at the top of the
apex, I'm following my way. I'm going to use the yellow. Draw this number
to go around here. Let's would be the
next apex out, the furthest must
out. Go down here. Now maybe on the way
down to this point, I might need anchor
point in here. And when I have anchor points, at most like a 30
to 45 degree angle like this or like this. Those handles aren't
going to be vertical. They're gonna be
usually following the shape of the curve
like that direction. Okay? So we continue going down. We put it anchor point here. You might need to anchor
point in the middle of this curve because
it's a funky curve. One up here, one at this corner, this corner, this corner, this corner following
up this curve here, around this curve at the
apex here, and this corner. And then we're going
back across the joint and close it here. So you can see that there's
very minimal points. We're going to need
to actually put on this number to plot our
number two with vectors. You want to use minimal
points whenever you're drawing with vectors as possible
to describe your shapes. So let's go over here to our
pin tool and start drawing. Now remember when
you're drawing, you're always drawing
in the same direction. And whenever you have a
corner or in straight line, all you have to do
is click and click. So what I mean by that is if
I'm drawing a straight line, is I'm gonna click, click, click, click,
click, click. Now. Now you can see that I can just keep making
corners anywhere that I want and make any kind
of shape that I want. So here's just a funky
little man, really quick. But if I want to keep these straight lines always at 90 degree angles or
45-degree angles. I'm going to hold my Shift. As I click. You can
see the shift keeps everything at a 90-degree
angle or a 45-degree angle. No matter where my Pen Tool is, it will either be
dragged on accident. It will either be a 45
or a 90 degree angle. Whenever you want
to draw a curve, the trick to that is to click, hold, hold Shift, and drag. Now you only have to hold
Shift if you're trying to keep your handles vertical
or horizontal. And that is actually
the preferred method I use to draw shapes. Sometimes you have a
handle that is off of that because of the shape that you have and
it's necessary. But a good starting point
is to have your handles be At the, your points
be at the apex is in your handles go
vertical and horizontal. So always remember to drag
and draw the direction. And even if you get a wonky shape like this
little corner over here, you can always go back and use your direct selection
tool and drag. You can drag the anchor point, you can drag the handle and you can manipulate
that shape. So don't get too worried about getting it
perfect the first time. Somebody just drag over and select all of those
and delete them. And let's go in and start
drawing our number two. So I'm going to
select my Pen Tool. And let me zoom in just
a little bit more. Actually, let me go here
and I'm going to make a new layer called
drawing layer. In them the lock my
pin, plotting points. Now in drawing layer
I'm gonna make black. For our stroke. I have my Pen Tool selected and I'm going to start
on this quarter. Actually, I'm going to
start here because I want this to go straight across. So it's best if I
start here and go this direction and I know that this line will be
straight across. If I hold Shift,
I'm going to start here. I'm going to hold Shift. I'm gonna go up to
about where this is. I'm going to click hold Shift. I'm holding down
and didn't let go with my Pen tool and dragging. Now I'm gonna go this direction. Click. Now you can see that curves perfectly locked in
there pretty much. I'm gonna go hold Shift
so it straight across that line, perfectly horizontal. I'm going to add one
click and hold and drag. Click, go up, click and hold and drag till it's about
meeting this curve. And then I'm going to click
here and hold and drag. And I'm watching the
upper handle as I'm dragging so that I can
lock in that curve, keeping in mind the
rule of thirds. Now I'm going to click on
this one and hold and drag, draw, go in the direction
that I'm drawing. I'm going to click
this corner point. I'm going to click here and hold and drag the
direction I'm drawing. I'm going to click up here. Now in this case I'm gonna
do something different. I want a vertical handle here so that I can
control the curve. So I'm holding Shift and
I'm going to let go. Now, you can see I have a handle that extends
above this line. If I click over here right now, it's going to make a curve
that goes up and comes down toward this direction because that's the way
the handle is extended. Watch see how the curve goes up and comes
back this direction. I don't want that. I want to perfect corner here. So the way I can make a perfect corner is I can just click here once again and you can see
that handled disappears. Now I can hold Shift
and go straight across. I can hold Shift and
go straight down. Hold shift and watch. I'm gonna be way off of this point just to show
you what shift does. And when I click,
the handle goes straight across to that point. And hold Shift. Now here I'm gonna
go up to this curve. But if I do that without
putting the handle here, I'm going to have to make
a really long stretch. So what I'm gonna do here
is I'm going to click here. And I'm just going to drag
the direction I'm drawing it, put another anchor point
in and I'm looking at the idea of the rule of thirds of where I'm going
to drop this handle. I don't wanna go too far. I want to watch
that bottom curve, the handle on the bottom
and look at the handle on the top as it applies
to this curve. You can see I left to
add about one-third. And I know I'm probably gonna go have to readjust this curve. But I'm gonna just keep drawing clicking and holding Shift. Clicking and holding Shift. You can see this is too far out. That's because this
handle comes up too far. I'm going to keep drawing and I'll come back to
that and fix it. And then I'm going to click here and I'm going to hold
Shift and drag it up. Okay, Now let's make this a little bit thicker
so we can see it. There's our shape we just drew. You can see it's a stroked, but because we closed it, let me go back and show
you one thing here is when you're drawing a shape, you can see that when I put
my pin tool over this point, the last point, then it gets a little circle
in the corner. Let me hide this layer
to show you better. It gets a little circle. See, when I roll
over this point, that little circle that pops up. That means I'm
making a connection. I'm closing the shapes. So I'm gonna click
and I'm going to hold Shift and drag up. So now I'm going to go back and look at the shapes.
Here's our shape. Make it thicker so you
can see or stroke. I can go and toggle this now and go to make it fill. If I want. You can see there's
a fill there. And you can see here that
there's some hiccups In some of the curves. So we want to go
back and look at these curves and find out
where those hiccups are. I'm gonna hide this plot point. And I'm just going
to zoom into my to. One thing I can see here is we have a bump right
where this point is. So rather than having this bump, let me change these green guides so I can show you better. When I double-click
on this and go from creams, it's easier
to see anything. Maybe not send it. I'm gonna go to magenta. So now you can see the
magenta line is our path. And I have a point here. And I have a point
here with handles, and then I have a point here. What I wanna do is drag a handle out so I can control
this side of the curve. And I want to drag
the handle out here so I can control this
side of the curve. And then I'm probably going
to delete this point. So how I'm going to start doing that is I'm gonna go over here. And I'm going to
click and hold down and go to the anchor point tool. I'm just going to click here. You can see that
when I drag out, it changes it from a point
to occur with a handle, I'm going to hold Shift, so I keep that locked
over here horizontally. Now I want this handle
to move independently. So I'm going to
hold option when I click and click and hold. And now I can move this
handle independently. If I don't click and hold and I just hold Option and click it, it will delete that handle. So we're gonna go
back and I'm going to hold Option and click and hold, and I'm going to drag my
handle where I want it. I mean did the same
thing over here. I'm going to click
my anchor point. And I'm watching that top curve here because I already have that locked in place pretty
much so I don't want to get too far away from
what I've done here. Now I'm going to hold option
and click and hold and drag my curves about
where I want it. Now I'm going to
delete this curve. So I'm gonna go over
here, click and hold, go delete anchor point,
and delete that curve. And now using my
Direct Selection Tool, I'm able to go over here and controlled
this curve from both sides. And now I don't have
that bump here. That's one way you can still move that one of those bumps. Over here. You can see that there's
a hiccup in here. And I just want this to
feel a little smoother. I'm breaking the rule of thirds. So I'm gonna go back here, pull that a little
bit further back. Maybe pull this down. And you just need a
little bit of tweaking back-and-forth to get those
curves looking beautiful. Up here. This looks a little
bit flat, right here. You can see the curves should
be a little bit smoother. And that's because this is kinda breaking the rule of thirds.
I'm going to bring this in. Sometimes you need to move your anchor points a little bit. It takes a little
bit of adjusting between the handles
and the anchor points. As you start to work
your curves out, you can see it's a little
flat here now I went too far. Now I might need to
bring this backup. So you're just going to
work those points little by little until you get
those nice smooth curves. So now we have our number two. And that's how you would
start drawing a numeral or a logo using the Pen Tool?
8. Precision Drawing Vector Lines: Okay, We have our number
two down and we learned how to draw a shape
and close the shape. So let's learn how to draw a open-ended path and see how we could use the Pen tool to
do something like a script. I'm gonna go over here and
let's go to our artboards. I'm just gonna go over
here on Add Art board. And we're gonna do
the same thing. We're gonna go over to. Actually, let's
make sure we're on our sketch layer first. I'm going to turn on
that layer, unlock it. And let's go to File Place and find your demo
that says scoops. We have our scoops.
It's already dimed on the setting and I'm
just going to lock it. And we're gonna go back
to our drawing layer. You could make a
separate drawing layer, so you can call
this Drawing Two. Let's do that. And then I'm going to
go call this scoops. Let's say we needed to create
some script lettering. This is how you could do
it using the Pen tool. So we're gonna go
back to our Pen tool and using the
techniques we learned, we're going to look at
where we're plotting. Now, I have a tiny curve here. So I'm going to really
zoom in because I have to manipulate these
tiny little curves. So I'm going to click
here on the point. This is my apex, that's
right here already. I'm going to click. And I'm going to click
and drag not too far because my next
apex is right here. So I'm just clicking
and dragging. I'm gonna go around
and click and drag. Now you can see I'm probably
going to need to point here to make that work. And you can also see that
I'm working with a fill. So we want to go and
turn that to a stroke. So let's just go here
and swap that out. And let's make our
struggle a little thicker so we can see it
and we're drawing. I'm just gonna keep drawing
and keep in mind that I probably need to put a point
back here when I go back. But keeping that in mind, I now knowing need to
probably put a point here. I'm just going to keep that
at the angle of the curve. I'm going to go back
to my apex here. I'm gonna put a point here
at the angle of my curve. Go back to my apex
here I'm always looking at the rule of
Thirds as I'm drawing. I'm going to actually
pull this out. So I have a handle here
at the end to work with. Alright, so that is first
pass at the Drawing Tool. Now we're gonna
go back here with our Direct Selection Tool and we're gonna go
make some adjustments. So immediately now
I need to pull this up to probably need to pull this down a little
bit further into here and just make that curve. And I don't have to be
totally true to my sketch. It's just a sketch, but it gets us in place to understanding where
we're going to be plotting our points and
making those curves. You can see that was
pulled out too far. And I immediately,
when I pull it in and start to look at
that rule of Thirds, that immediately
comes really nice. Alright, so now we
know that we have, this is flat up here. And we're gonna go
back to our Pen Tool and we're going to
go at anchor plate. Just plop it right there at
already put some handles, go to our Direct Selection Tool and just pull that guy up. For my own liking. I'd probably
like to pull this out a little bit further
and pull this in. And going back to
the rule of Thirds, maker, are curves
really smooth in there? All right, so that's
the first pass. Now we're gonna go
and we're going to trace all of these letters. The great thing about
making the sketches, you can make mistakes like after I did this and it
felt really fluid. This see feels like
it's too compressed. It's kind of stretched
horizontally compared to the round
shapes I have here. So I want to go back and
use one of these other Cs. So I'm going to skip
drawing this one when I do my drawing and I'm going to
start with one of these. Probably. This one feels pretty good. So I'm gonna go over here and let's start
drawing with my see. Go back to my Pen tool. Click here. Now this one might
be a tricky path because it comes
up so vertically. So I am going to add one here just so I can pull a little
bit away from that point. Click and drag. I think I'm going to
put one on this point. This apex, you can see where
it starts to get flat. That's where your apex is. Where this starts to
get flat right here. That's from apex is I'm
going to click here. I'm going to drag out Okay, then I can start
to go back here and manipulate my curves and really get them
looking beautiful. Now, for example, I put this one here and it might actually be causing me
a little bit of a 60k. It might look better
if I get rid of it and just work between
these two paths. So I'm gonna go over here
and go delete anchor point. Just going to drag this out. You can see that
start to working out a little bit smoother there. So you're just going
to go through and do a pass and complete
these letter forms. Starting with the OH. Now I'm going to draw
all these letter forms separately so that
I can connect them. And that will give me a
little bit more control over the logo as a designer. So don't be afraid
to move your anchor points to adjust your handles, to do whatever you
need to do to get those Shapes looking
really nice. There we go. So that
looks really beautiful. Swooping. This little curve might need
a little bit of work here. I think this point is a
little bit. There we go. And I probably just going
to copy this AUX command, select it all command C, command V to paste. And it will just pop
it right in here. That saves us some work. And then all I have
to do is adjust this point with the Direct Selection Tool
where it meets the P. And this will make it look
a little bit more natural, but it feels the same, but then it's connected to
a different points. So the sweep moves a
little differently, which is nice to have when
you're doing handwriting. I'm going to connect this
0 to this P at this point. So I'm just going to click on that point that exist
with my Pen tool. I'm not going to
hold Shift because I want it to feel more
like handwriting, so it's okay if it's
a little loose. And what I'm going
to do down here is this one little bit tricky. I'm gonna put a
point right here. And I'm gonna kinda break
my rule, make this happen. And I'm going to put
a point about here, following my line up, and then I'm gonna go
back to my apex rule. Sometimes when you get
those tricky things, you have to break the rule. But you can see I'm
not worried about getting it perfect
as I'm going around. I'm just getting it out. I'm going to go back to
my Direct Selection Tool, work with that rule of Thirds and pull everything into
really nice shape here. Now, when I zoom out, I can see where this
one's giving me some trouble here. Right? Now I have this point
that's probably don't want, so I'm gonna go over
here to my caps. And let's look at the
corner. There we go. We'll just put
that corner on it. And let's do our last S here. Click here, click and drag, click and drag, click and drag. I'm going a couple a
little bit further down. In, in-between these two points. I can drag, drag, drag, go out probably
about this far. Out to the end here. Okay? Go back with direct
selection tool to work out those curves
a little bit more. If you want more control,
you can always zoom in. And that gives you more
control of your placemat. Can see here I have a
little bit of a kink and that's because this
is coming down so far. Down. Pull that curve out so
it doesn't have a kink. Still see there's a cube here, which means this probably
just needs to come out a little bit further. Maybe This actually needs to
move a little bit morally. There we go. A
little bit better. It's coming out too far here. This needs to come up. Pull this out. Like I say, it's a little bit
of nuancing back-and-forth, but you get it down. Now another thing you can do is let's take our C
and put it up here. And I can scale this now. It feels like it's
a little too small, so I can scale it up. I can go and make this connect. So let's go back to our Pen tool or just going to
connect it here and keep going up and
make that scoop. Bring this down. Now you can see I accidentally
put a corner in there, so I need to go back to my anchor point tool and click and drag and make
that a beautiful curve again. There we go. Now we have our words scoops. Let's hide our sketch. And then another thing we can do is let's get
these rounded tips. So you go to the cap, you see that made it
really nice and smooth. But a FUN thing that I love. Love this curve right here, this out a little
bit. That's better. Fun thing that I love is the width tool when you're working with strokes like this. So if you want to make a logo or some script that has a little bit
more depth to it. You can go over here to
the width tool Shift W. And you can click at any
point on this stroke. And you can make it wider. See how it's getting wider
from tip to tip there. So you can go and give your typography a
little bit of volume. Now, I want to make
this a little skinnier here on the cross stroke. And I want to make it a little skinny on this cross stroke. And I want to make it
wider on this side. So we give it a little
bit of curvy this to make this wider. This Part a little bit Wagner, but let's make this cross stroke up here a little bit thinner. So you can see, can do
some really cool things by manipulating the text with the width tool and get more dimension
to your typography. This feels a little flat here. Oops. So that's one way
that you can create more dimension your typography. Using the path tool. You just keep playing with
it until you get it right. Once you make some
adjustments to get your typography figured out, you can highlight your
script and go to, well, let's take a
look at this up-close first so we can see
what's happening. If I click Command Y
back to outline mode, you can see that I'm
just using one line, one path to describe
these letter forms. But when I click
Command Y again, for preview mode, I
have some beef to them. There's some weight on these. So I want to keep that intact as a shape
rather than a path. Let me zoom in so you
can watch what happens. See my path there in the center. I'm gonna go to Object,
Expand Appearance. You can see that that path moved to the outside
of the shape. Now if I click Command Y, you can see that I actually have shapes instead of a path. So these are all
now closed shapes. Now, I have released
the option to go back and manipulate that path once I expand my appearance. So let me go back to the
parents version again. Undo it. I have my, my line shape here. When I do this sort of stuff, I always want to be able
to come back and work on my shape if there was an error or the client wanted to change. So what I'm gonna do is I'm
going to make a copy of it. Let's make a new artboard first. Let's go to Artboards
and just go plus, you have a new artboard here. Let me go back here, make
sure everything's selected. Command C for copy. Go over here,
command V for paste. And I'm going to set
it here in the center. Now I'm gonna go up to
Object, Expand Appearance. And now I have a copy
that's outlined shape. These are individual shapes. Let's look at Command Y again. These are individual shapes. I want them to all
be one solid shape, so I don't want them to
be manipulated anymore. So I'm gonna go over
to my Pathfinder tool. And I'm going to go unite
and watch what happens, especially here where
there's overlap. You're gonna see that
these all merged together and become
one shape, unite. And there we go. Now I
have one shape that I can color and Command Y to
see my preview mode. I'm going to color
it with a fill now instead of a stroke. So now you can bring your, I'm going to hold
Option to make a copy. You can bring your text over. So now we could make a logo
or we can make a Poster. So let's make a new document, and we'll take these
elements over to the new document and
start a new lesson.
9. Vector Drawing Illustration: Okay, Before we start and make a Poster and a new document, Let's actually make
it Illustration to go along with our Poster. So go to Artboards and you're going to
create a new artboard. And you're gonna go file place. And you're going to find
your to scoop ice cream. Good place. And now you can click. Now you can see this is
a huge Illustration. When it gets placed in here, what you can do is you can click this upper corner and hold Shift to constrain the
proportions when you scale it. And you can drag it up into
the image, onto the artboard. Other thing you can do is let's delete it and import it again. Place, ice cream place. And now instead of clicking, I'm going to click and drag. And that will actually
occupied the place that I want it to
on my artboard. Now what we're gonna do is
trace this illustration. So let's go back to our layers. And we want to put this
on the sketch layer. So we have it in here already. So I'm just going to
copy it and delete it because now it's
on my clipboard. I'm to turn on my
sketches so I can see them and then
unlock my sketches. I'm going to lock the
layer that it was on. Go to Sketch and go
Command V to paste. Actually I'm going
to do command F. Command F also pastes, but it paste directly in front. So now you can see I have everything faded
out because I have a 50% the amine on
my place images. I'm going to lock my
sketch layer again, just like we did
with our others. And let's make a new
layer called ice cream. Let's make a new layer
called ice cream. Double-click in there and
you can change the name. I'm going to zoom in. I'm clicking my spacebar and command and just dragging across the area that
I want to zoom into. And let's start with the cherry. So I'm going to go
over to my Pen Tool. I'm going to start in the corner because it's
the easiest place, which is going to be this
little pit here in the corner. And click once. And I'm gonna go around this direction using
my rule of Thirds. And I'm clicking and
dragging a little bit lower. Going down to this apex,
clicking and dragging. And then closing it, you can see the
circle at the corner. I'm going to color this red. And we can go in here. You some quick to
just smooth out these corners and get these curves nice and smooth. So let's say that's our
first script lesson thing I taught you in
the script lesson. So to make the stem,
we're gonna do the same thing I taught
you in the script lesson. And we're just going to start
with one line. Really easy. Okay? Switch it from fill the stroke. Now we can see our stroke here. And I'm just going to
use the Width Tool. And I'm just gonna go to this
end and make it lighter. See what happens. We
put around cap on. There we go. That looks a little better. And now I'm going to expand
the appearance of that. Now I have a shape. Now I have my charity shape,
and I have my cherry. Okay? So now we have a lot of
curves to go on here. If you expand this later, you can turn off the
cherry if you want. Or you can just imagine where this curve is at the
top, which I'm gonna do. I'm going to start there at the top and I'm going to click. And I'm going to go around
and just keep up clicking and dragging changes out so I
can see just the stroke. Don't care about the
color too much right now. Now when I click on here, because it's handled
comes out so far, I know it's going to
do something wonky. See how did that? I don't care. I'm gonna keep
going to click here again. So I have a corner,
click and drag, go down to this bottom apex, click and drag a little bit. Because I'm gonna go readjust
this click into the corner. Click again, so it
stays a corner. Click and drag, go
into the corner. I'm imagining where it is. Click again, so it
stays a corner. Click and drag. Go up the corner. Click again, click and drag. Click again. Click and drag. Click, click. Now here I'm going to
probably put on the side, at the bottom, the
bond at the side. I'm gonna make this
round so it feels a little bit more fluid
like it's dripping Now here I'm going to put one on the inner part of
this curve that comes in and then the outer part of the curve
where it comes out. The bottom of the curve, outer part of the curve, the inner part of the curve. And then here I'm just
going to put an extra one. Click for a point. And the apex click and drag. Find the apex click and drag. Click, click. Find the apex click and drag. And I'm almost done. Click and drag. Tips. It does that sometime.
There we go. So now we have our main shape. I can flip flop it out
and we can go to change the color to whatever
flavor we want it to be. Let's make it orange
server, somewhere in there. And this still
feels funny to me. So I'm going to take my direct
selection tool and just pull that angle of pull
this out a little further. Pull this one up a little
further, and this one N. Such as doing some little
nuance into my forms here. You can see here, I might want this
to pull in more, to have more of this drip fill. So I could go over here
and go add anchor point. And as I put it in
there, gives me handles, kinda can just drag this and zoom in for more
control over the shape. And still working with
that rule of Thirds there. So it's a little bit
of back-and-forth. So we can actually
copy this scoop of we wanted to cheat
and make it easy. But we're gonna go around and do this exercise one more
time with this next group. So go over to our Pen Tool. And I'm going to go and imagine
where this is starting. And let's see right here, I'm going to draw out over
to the side click and drag, click, click, click and
drag, click and drag. Click, click. Actually undo that and go back in here and look
a little bit closer. Let's make that so it's wavy. So I'm going to click and
drag, click and drag. And all of these. I'm going to have to go
back in and readjust. And I know that now I haven't
filled so I can't see. So I'm gonna go flop this. We go back to the stroke. Click, click, click, click, click and drag, click click. You can see working
with these apex is really will get you drawing smooth curves really fast and really easy in
Adobe Illustrator. Up here to the top and drag out. Just come back and fix this. I can fix this. Six this guy. Okay, let's flop out the fill. Let's make this kind of
a pinkish color. Maybe. I'm going to go Shift command, left bracket, and that
sends it to the back. So now we can see objects
on top than that. I'm going to click
the cherry and go Shift Command right bracket, and that brings it to the front. You can, can also
control that over here, if you expand your layers, you can see each
individual vector shape has its own layer. So you can draw, drag them
in order if I want to put this cherry stem on
top, I can do that. So there's different ways
to order your layers. And this is where you can
manage that manually. So next thing we're gonna do
is draw this ice cream cone. Now this is a little challenging because we have a lot of waves. So it's going to take a lot
of clicking and dragging. So I'm going to start here on this wave and click and drag. And you basically just
have to click and drag. And it's now holding Shift
on this one because we're at an angle and it
can feel a little bit organic because
it's a handmade cone. But you can see kinda just
keep clicking and dragging. I have a fill, I should
change that to a stroke so I can watch that
a little bit easier. The perfect. I'm just going to work my way around
the bottom of this cone. Kinda struck the same process. Now when I'm dragging with the hand tool and
holding the spacebar, and it lets me drag down the Illustration so that
I can see my whole scene. We've got a little
too close with that. So I'm gonna go back here. And then up. Now I need to close
the shape and I don't really want to care what it
looks like behind the scoop. So I'm just gonna go up here. I'm just going to draw it. So I have enough
cone, click and drag. And we're going to
flop it to a fill. We're going to find
a nice cone color, maybe a little warmer,
something like that. And I'm gonna go Shift
Command left bracket, send it to the back. Right. Now we're starting to
build our ice cream cone. So now we're gonna get it some texture and we're
just going to put a few cross hatches on here for some hash marks to make it
look more like a waffle cone. First thing I'm
going to do is just draw from point-to-point. And I'm going to flop
it from Phil to stroke. And I'm gonna get a
deeper color here. So I'm just gonna go, Let's get a deeper brown. Something like that. There we go. And you can click P and it will release it so that you
can start a new path. If I can see, if I
keep clicking up here, if I want to make
one more diagonal, watch, it keeps it connected. Command Z to undo. If I click P, it will
start the Pen tool again. Okay? So I'm just going to go
and click P to release it. I'm going to just make some Z P. Now, I'm gonna make these
go behind there in the end. But the reason why I'm
putting them up here is because it's gonna
give me some depth. When this, these images start
to overlap these textures. And if you do Command zero, it will take you to a
full view of your image. So now we have an ice cream cone and we're going to want to, you can see now each of these
strokes has its own layer. So a way to avoid that and
clean up this file would be, I'm going to drag
over everything. So everything is selected. You can see that the things that are selected have
the pink boundary. I'm going to hold Shift and I'm going to unselect the scoop. And I'm gonna hold shift
and unselect the cone now. And now all that's selected are these hash, hashes,
these textures. So now what I'm gonna do is
command G to group those. Now they're all
grouped together. And if I expand this, you can see here's a
group that says hashtags. Hashes. They're
all on one layer. Now, I can grab that group and drag them right above
the cone layer. And you can see now
they're behind the scoop
10. Create a Poster Design: Okay, So we've made
a few elements, we've made our
typographic numeral, we've made some script, and we designed a little ice
cream cone Illustration. Let's take these and
start to compose them. Let's say you wanted
to make a menu or advertisement, a Poster. Let's go into File and go New. We're going to do the
same size of print. So we're gonna go to print,
we're going to do letter. And I'm gonna go to RGB color. And I'm just going
to work in 72 DPI. Go create. Okay, So let's go over to our
original document. And I'm going to copy. I'm going to use
my selection arrow and I'm going to click
and drag over everything. Command C to copy. I'm going to move
over to this document now and Command V to paste. So I have all my elements here. So I think when I'm
gonna do just to have a little bit more control over my design and layout and working with my elements is going
to make some layers. So I'm gonna make a layer first, and let's double-click in there
and call that background. I'm going to drag
that to the bottom. And let's just go and
put a square in there. Let's switch it from
stroke to fill. Let's come back though
to make it cleaner. Like a puppy blue, something like that. Okay. And that's gonna
be our background. So now let's go to
our selection tool and we're going to select number two and hold Shift
and select on scoops. And if you click
and drag on that, you can see these are
both selected now. So I'm going to copy
Command C and delete them. And I'm gonna go new layer. And I'm gonna go
Command V to paste. And they're pasting it
on my new layer here. And I'm going to call
that two scoops. Okay? So those live here and let's just hold shift
to shrink them, scale them down and put them
up in the corner for now. Then let's take our
Illustration and that's on its own layer already
because we've deleted everything and we're going
to call this ice cream. Okay, so let's go and give
this color that we think will. Let's make scoops from wait. Let's get this to kind of
like a nice orange like that. Just kinda overlay it just like change the
angle a little bit. Now, I'm going to lock this background
layer so it doesn't move. And I'm going to drag over everything and move my
ice cream over here. And let's try to make these colors a little
bit more appealing. Flavors. Now I need to pay attention to the
contrast of the cone, as well as the background color. Let's make this kind of more of a background color is not working for us. Making a light blue. Unlock it. And let's make it
more like this lady blue like this, that's better. That's better. And then this needs
to be a brighter red. So we're going to slick both of those in command
G to group them. Make them brighter red. Let's make this more
of a blue, pink. See. Now we've made a
Poster pretty quickly. It could be a menu, it could be an
advertisement, a flyer. But you can see how
quickly you can draw with the Pen Tool and create Graphic Elements and
graphic illustrations and bring them together to do something really
cool with them. And because this is
Adobe Illustrator, remember everything is
infinitely scalable. So I can click this
and I can scale it way up and I'll
never lose quality. So you can see how this could be the beginning of
something really cool. You could go in and
you can add some. Let's get the rounded
rectangle tool. Make some little sprinkles. Start one will keep them. Eyedropper tool, and
we'll keep them in our color palette
that we have here. The option just
clicking color white. And then once I
have a few copied, turn them around,
they can breach. I'm keeping my charity
shape to the front. See I have it on
the layer above. I'm going to copy
all of these command C. And that'll walk two scoops, ever put them on ice
cream layer where they belong command F
to their in place. Now I can move this to the front Shift Command, right bracket. And that's the sprinkles on top. We've got some beautiful
color going on. There. You have it. You have a cute little Poster to use for advertising
for your business. You can print it out. You can use it on Instagram. You can use it as a menu. There's all sorts of
things you can do with it. Once you're done, you're
going to go to File, Export, Export As Use Artboards. Select JPEG. You're gonna give it a
title, ice cream Poster. And you're going to export it. When you export it,
you want to export it at whatever resolution
you desire. I'm gonna do 72. And
I'm going to make sure our optimize is
selected and go. Okay. Now let's take a look at our
file that we just export it. And here's a look at
the file that's Export. And then we have open
here in Photoshop. You can now put this in your
images and upload it to your Instagram or
whatever you want to do.
11. Wrapping up & Thanks!: Hey, you, I told you that
you'd be proud of by now. I know it's probably a little tricky and you're still
getting used to it. But keep using this tool and you are going to be
drawing like a breeze. Now you have completed this
little Poster Design and I would love you to upload
your interpretation. If you take the ice cream and
make it different flavors, you make it 30 scoops tall. You put some sprinkles on it, some fudge on it, more whatever you want. I would love to see
your interpretation of this ice cream cone and how you incorporate typography or
other graphic elements into it to make it your own. Don't forget, you can make
this to be a greeting card, a Poster, a motif to use in
a Surface Pattern Design. There's all sorts
of different things that you can do with
this simple graphic. But don't forget, it's not
really about this project. It's really about going
through this exercise and learning those technical skills that you're gonna
be able to provide. And they're going to level up your design skills
into the future. I can't wait for you to upload your projects and see
what you came up with. I hope I made the
experience of using this technically challenging
tool a little bit more FUN, and I hope you feel a
lot more confident. You can see more of my work
at Studio dash chico.com. You can follow me on Instagram
at studio dot Chico. And you can learn more
about my membership at multicolored minds.com. If you want to
learn more from me, makes sure to check out my
other Skillshare classes. For example, this class is a perfect stepping
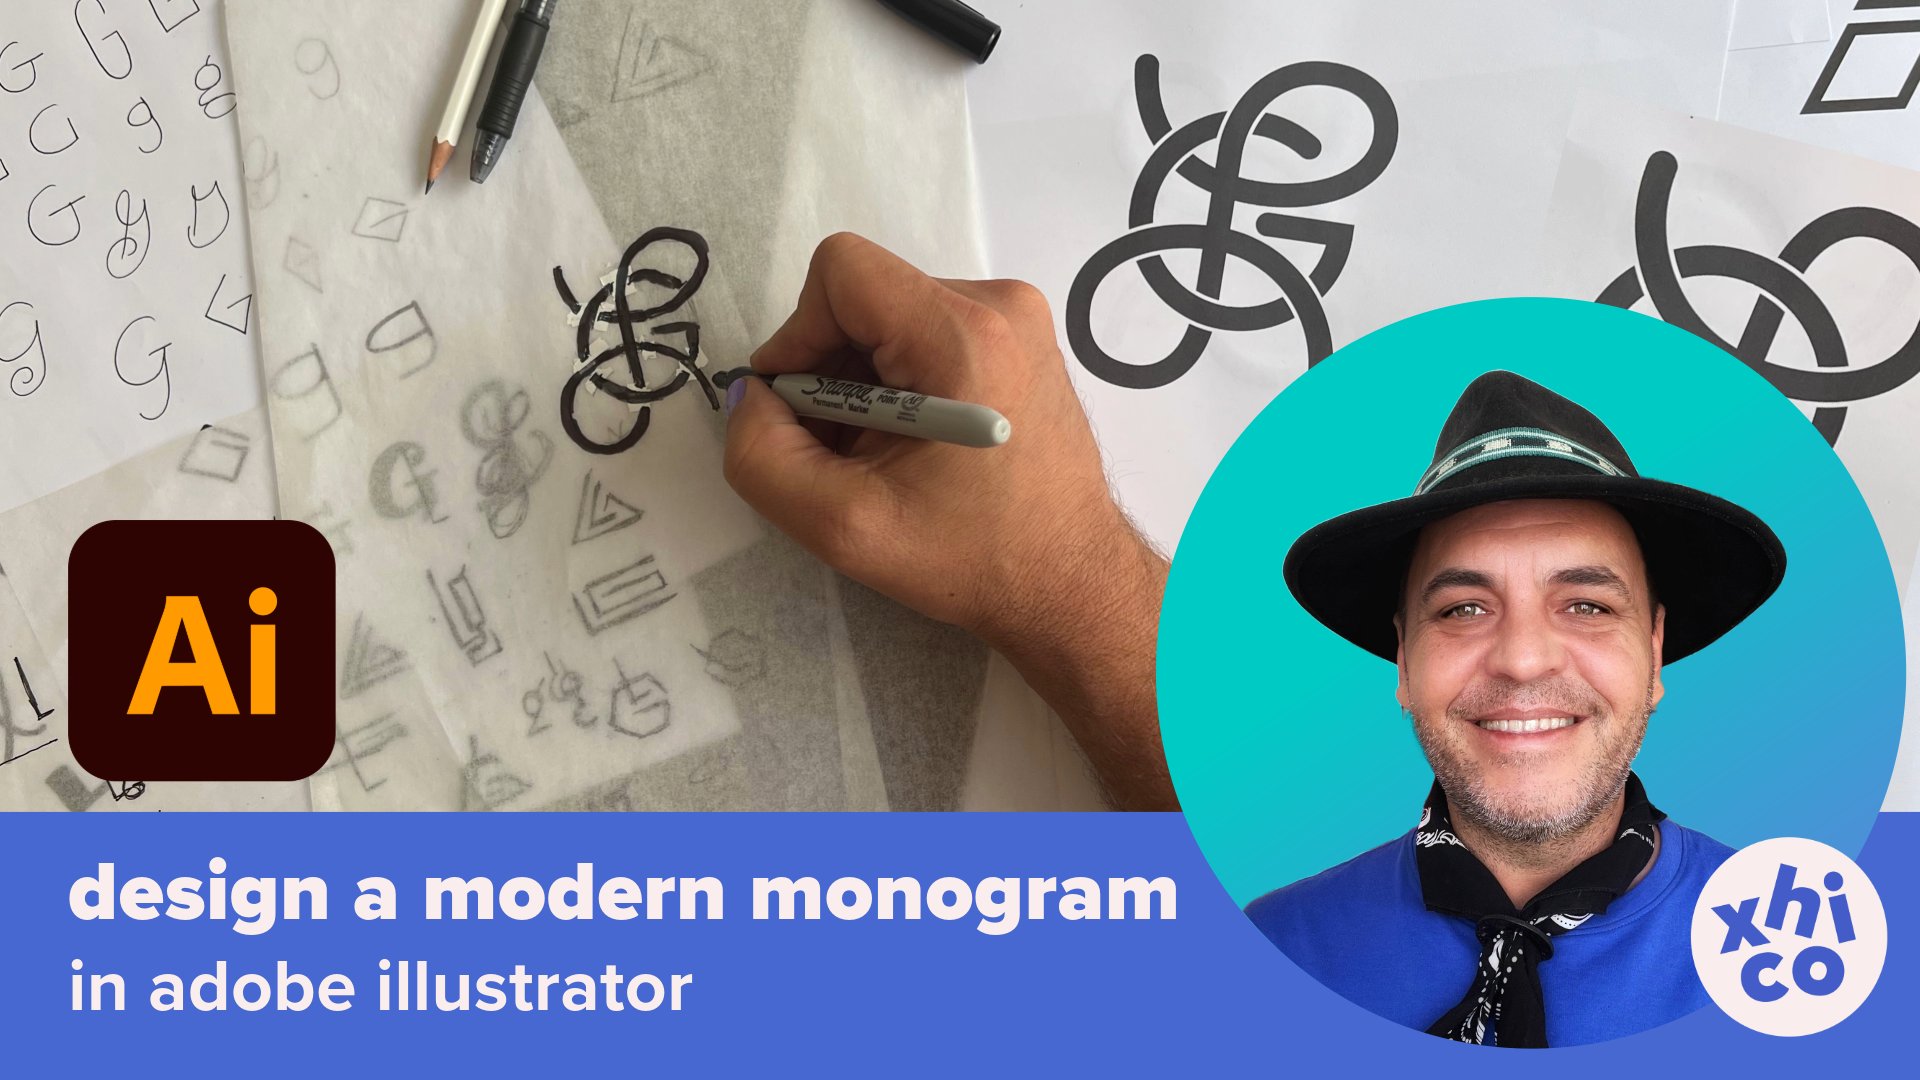
stone into getting into designing a modern monogram in my other Skillshare class. So I hope to see you there. Thanks again everybody and let your creativity
shine bright.
 Xhico, Artist, Designer, Creative Educator