Transcripts
1. Class Introduction - Modern Monograms in Adobe Illustrator: Hey, welcome to my class. I'm going to show
you how to design a modern monogram and
Adobe Illustrator. I'm not talking about one of
those fussy things that you see on a fancy hotel towel. I'm talking about
something contemporary, stylish and iconic. We're gonna get started
by choosing some letters. And then we're going
to do some sketches. Take that sketch
into the computer, and I'm going to show
you a few essentials in Adobe Illustrator
so you can design your own modern monogram as a vector illustration and use it for your personal
brand or business. I'm Xhico, I'm an
artist and designer with over 30 years
of experience. I got started in my teens designing logos
and letter forms. Now I specialize in branding
and surface pattern design. Here's a small sampling
of some of my work. I also take my past experience
and teach people like you had to level up
their design skills and be a better designer. Don't worry, I'm
going to take you through the entire process. I'm going to show
you how I sketch, take those sketches
and refine them, get them into the
computer and then draw them in Adobe Illustrator. Then you can export it for
any project that you want. By the end of this class, you're going to have your
very own monogram to represent your personal
brand or business. You're also going to have
some design skills to start creating logos and
more in Illustrator. So what are we waiting for? Let's get started.
2. Class Project - Design Your Own Monogram!: In this class, your
project is going to be to design your
very own monogram. It's going to be easy
because I'm going to walk you through
my entire process. We're going to start out with a few loose sketches
of some letters. We're going to
combine those letters and then we're going to
create a final sketch, will take that final sketch into the computer and then I'll show you how to draw in
Adobe Illustrator. And don't worry, I'm
going to show you a few essential tools in
Adobe Illustrator that'll make it easy for you to draw your very own letter forms
and design your own monogram. And you'll be able to take the
skills that you learned in Adobe Illustrator to use as a foundation for your next
project and continue going as a designer to help you
achieve your project, I'm gonna be walking you through my entire process from
sketch to finish. And I'm gonna be showing you three different monograms
that I'm designing. You'll be able to
use these techniques and design your
very own monogram. Let's get started on designing your monogram for your
personal brand or business.
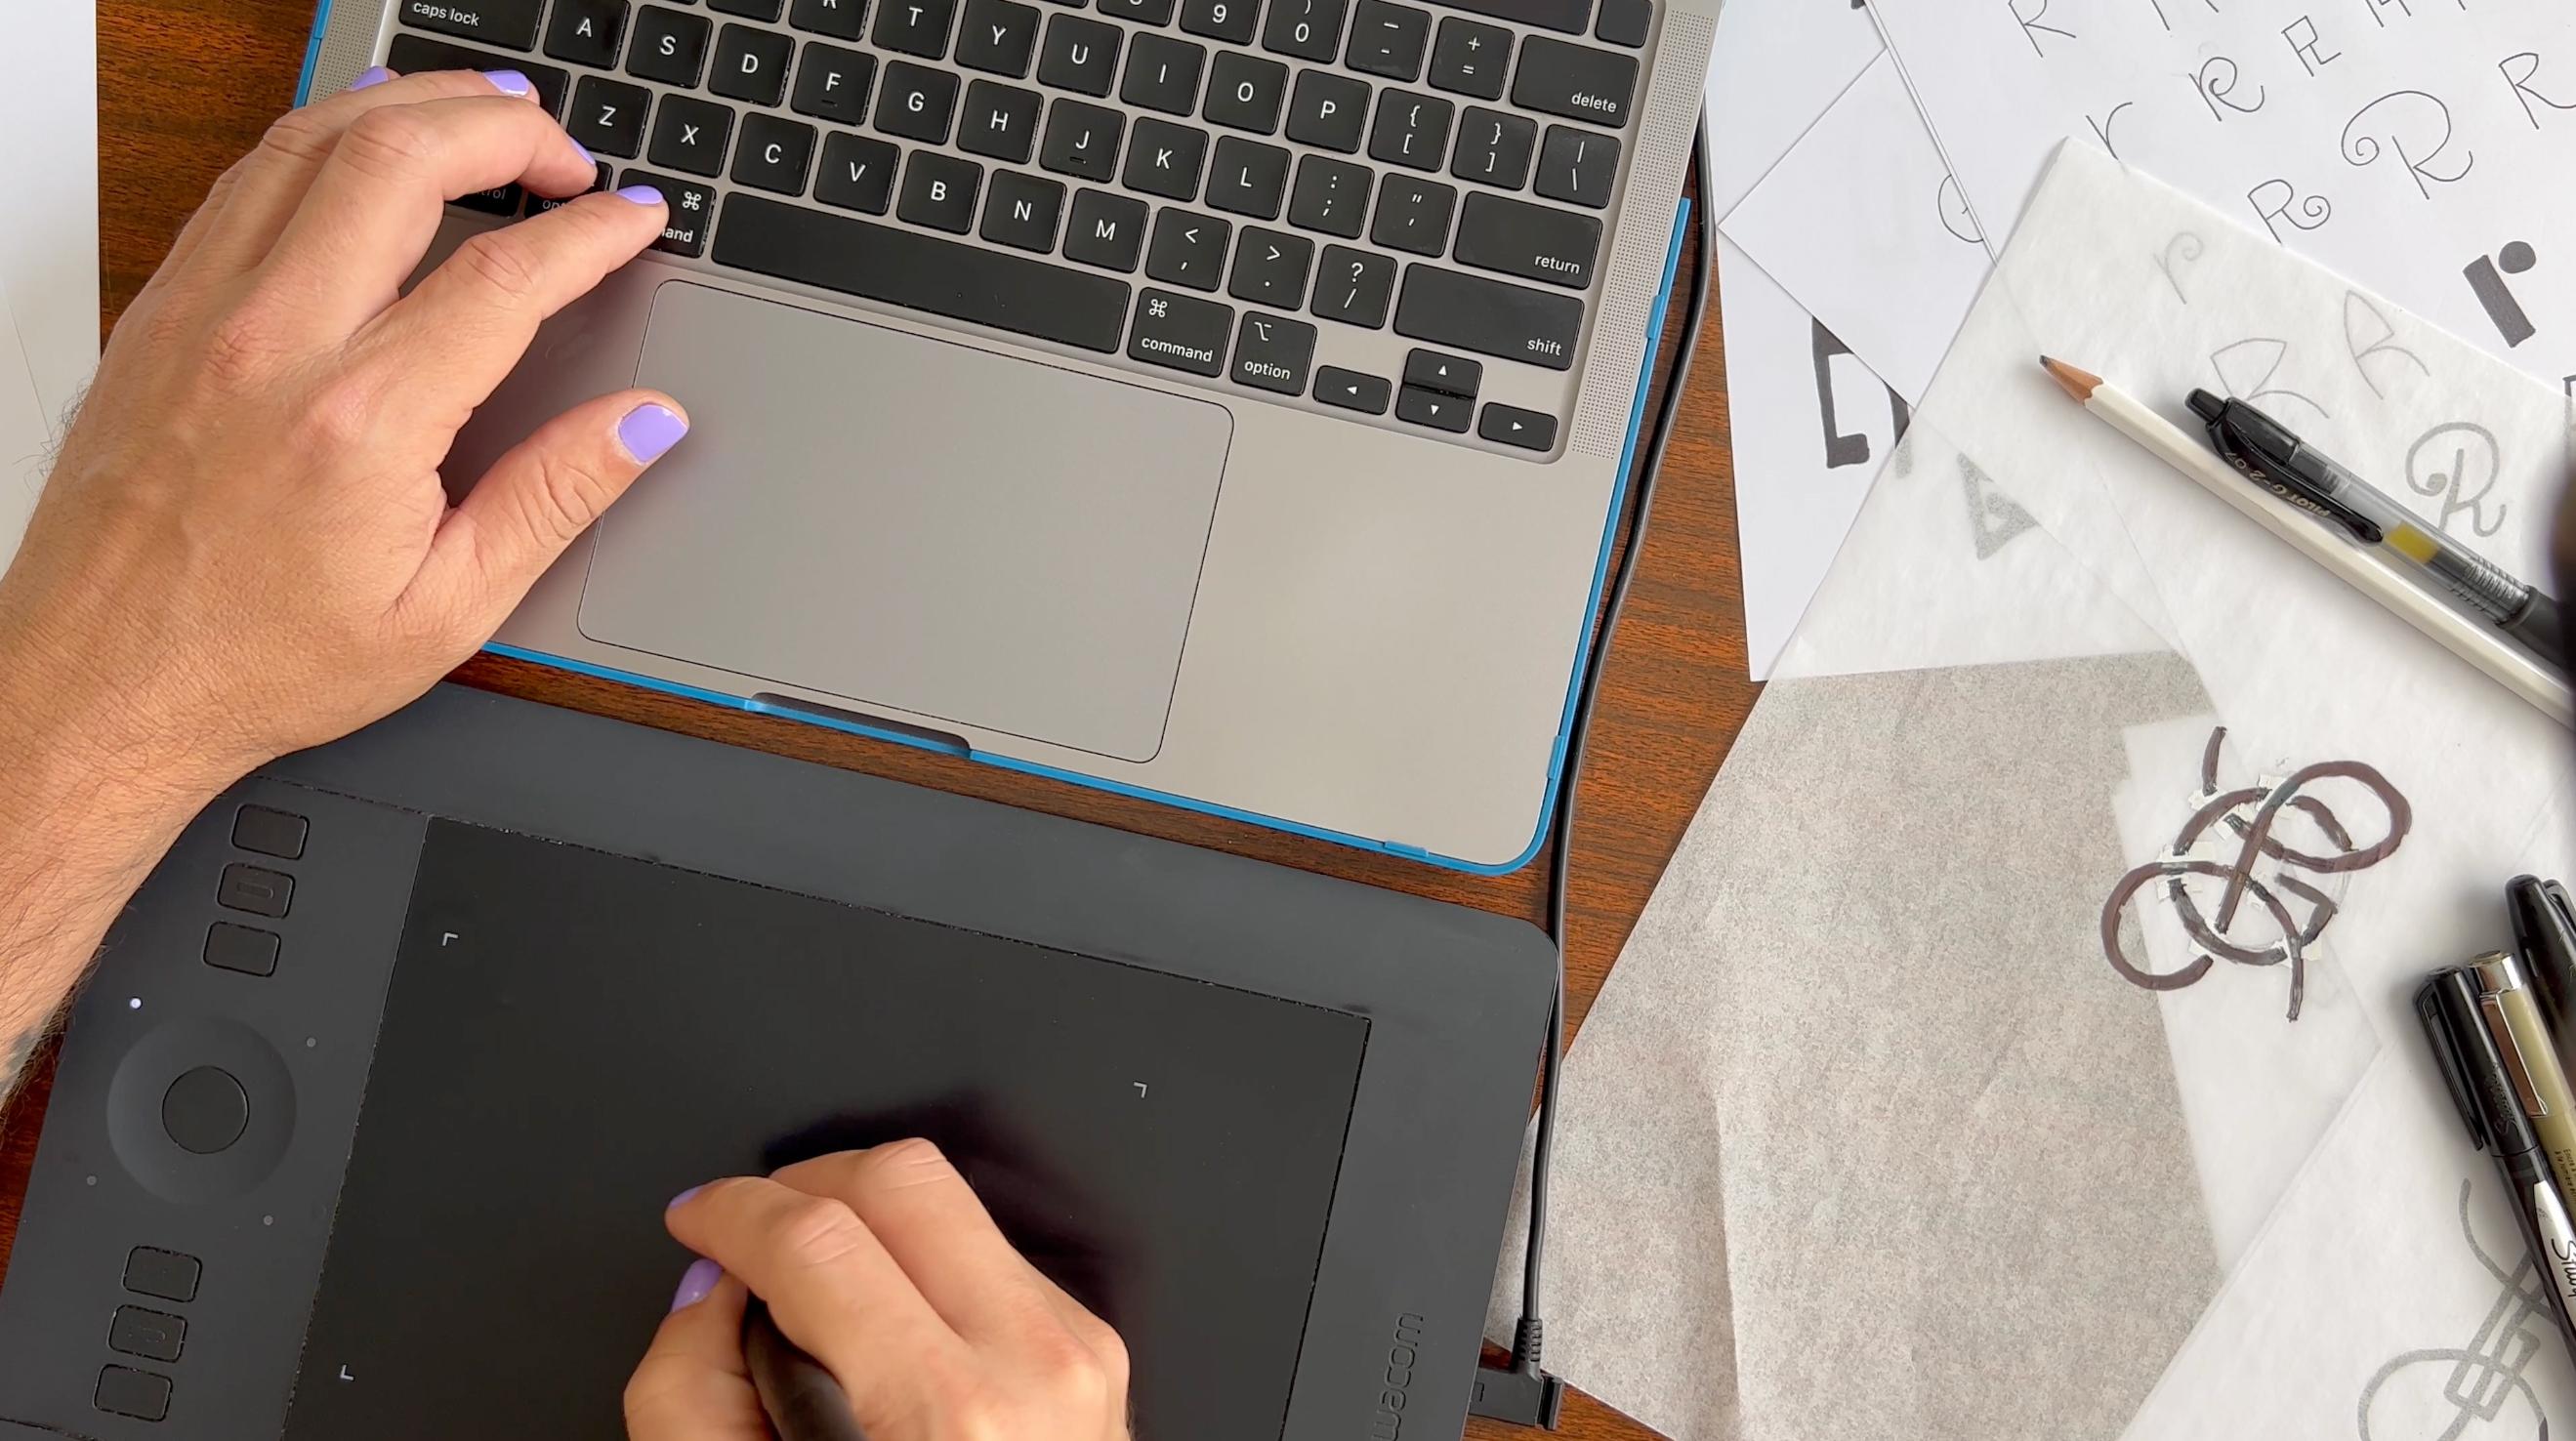
3. Class Materials: You just need a few simple
materials to get started. You probably have some
white paper laying around the house and a pencil. You're also going
to need access to Adobe Illustrator on
a laptop or desktop. That's the version I'm going
to be using in this course. It's also good to have some
black ink markers on hand, but they don't have to be
any fancy art markers. You can just have some
Sharpies to use if you want. I like to have a wide
variety of widths, so I have different
stroke weights and I also can fill in big areas
faster with the fatter pens. But primarily I use my gel marker to do
all of my sketching. It's also great to have
some tracing paper on hand. And some white art tape
can come in really handy just to mask out any
areas that you might have. We're also going to
need a way to get your sketch onto the computer. So the easiest way to do that is with a mobile device
that has a camera. So that's all you really
need to get started.
4. Choose Letters for Your Monogram: Alright, this is easiest
part of the class. So we need to pick our initials. Are you going to use
your personal name or your business name? That's the first
decision you have to make once you decide that.
Write down your initials. So let's see, we're
going to make this for a personal mark. You can also do something. Let's say the local sports team for the local school, o m. And let's say, what about for a
project I'm working on called multicolor minds, MCM. Alright, so those are gonna be the initials that we're
going to work with. Now get out your pencil
and paper and write down the letters
that you're going to use for your monogram.
5. Sketch Letters from Your Imagination: Alright, for our first exercise to get started on monogram, we need to pick which letters we're going to
start working with. And I want you to start
sketching from your imagination. I mean, you're
probably thinking, how many ways can I draw an L? How many ways can I draw a G? I want you to think
of many ways as possible for you to
draw these letters. And I want you to start
with the most obvious ways. Those are the first two
that we know, right? But then I want you to start
stretching these objects. I want you to add
serifs to the objects. I want you to draw
them at angles. I want you to ask
"what if?" all the time. Draw them in cursive. Draw them half and cursive. Just look at all
the different ways that you could
draw the letter L. Sometimes you need to pick up
a different type of pen. It might just help you get into a different mindset with it. And I want you to just
fill up the whole page with as many different types
of L's is you can think of, you might see something
that makes you trigger to another style. And you can see, I'm
refining this idea and getting this to be
more symmetrical. I'm really looking at this
as a symmetrical shape now. And that's how I start getting into some of the
shapes that I might want to start using
in my final piece. What's a lowercase L look like? We start getting a cool loop. So fill up your paper
and see what you can do. Alright, now let's
start with the letter G and see what we
can come up with. So there's all different types
of Gs that you can do. Think about what happens
when the letter gets square. When the letter gets angular. When you write in cursive, the different types of cursive, the different types
of lowercase Gs. Think about all the
possibilities. You can think of. All the different ways that your imagination can come up with drawing different
variations of Gs, try a different type of pen. Now, don't worry about
any of these things being perfect or any of these things
being the right answer. It's really about
exploration right now. And thinking about all of the
different shapes and forms and styles that you can think
of a drawing your shape. There's so many different ways. So just fill up the page
and see what you can do. There's so many
different solutions. You know, when you
start thinking about letter forms and the way
you can draw letter forms. So I want you to
just keep thinking, keep drawing and fill up a page. All right, I'm going to work
on some other shapes here. And like I said, think of all the simple ways first that you can draw a shape. The ones that come
directly to your mind. And then think about the abstract ways that
you can draw shapes. Right now we're just
getting some ideas out and nothing has to be perfect
and nothing has to be final. This is just looking
at some forms and looking at the
different ways that we can see letters and the different types
of letters that we're gonna be working with. How they might be
able to fit together. So just use your imagination. Fill your page up. Just keep drawing.
Nothing is final here. Just doodle and see what
you can come up with. Think about when you're
letters are squared out, when they're angular. There's all different ways to draw your different
types of letters. So just keep drawing,
fill the page. I'm going to keep doing a
little bit of work here. I'll see you in the next lesson. And we're going to
start looking at some combining of these
different letter forms.
6. Tips to Design a Good Monogram: As we move into the
next phase here, you're going to be taking
your sketches and combining them to make your monogram. But before we get into that, I want to talk a
little bit more about style and what makes
a good monogram. Take some time and think about what the style is of your brand. For me, it would
be bold, iconic, pattern, eyes,
creative explosion. Just do a brainstorm
and write these things down on a piece of paper. And keep this as a guide for the styles
you're working around. Style is really important because when you move
into the design phase, it really can determine what your design is
going to look like. For example, if I was
drawing an A and it was going to be
bold and angular. And that's what my
brand was about. It might look like this. But if my brand was about
happiness and whimsy, my A might look like this. So having those words as
guidelines can really help you drive the
direction of your monogram. Now when you're
making your monogram, it could be any letters
that you want to choose. It could be multiple letters, it could just be one letter. But what's important
is paying attention to your design and what your
design is communicating. A lot of people don't realize
my logo's a monogram. And it's basically
abbreviation for Xhico - XCO. But now it's discovering
relationships. How do I make these letters that are so different
work together? So when you do exploring
and you do the sketching, it can take you to discoveries. And then this is how you start to come up with relationships
between the letters. The next thing you
want to think about after relationships is thinking about
repetition and rhythm. Those design elements can really change
everything for you. This is how my logo actually
originally started. I was sketching my name. I was abbreviating it like this. And then when it came
time for our logo, this was my solution to kind
of make this echoing design, this point of origin. And then when I started
thinking about it, my logo really does tell
the story of my brand. It tells the story of creation from a point of
origin, from nothing. As it radiates out. Think about almost like
the Big Bang theory. And it radiates out and it
actually forms a solid shape. The shape could
represent an idea, something that I create. So for me, that's
how I bring story, a narrative into your monogram. When you bring narratives into
your monogram or any logo, you really can make
it much stronger. Here, this is a logo for a company called
Body Bar Pilates. And it was a Pilates company that use these special machines. And so it needed to look
really contemporary, but it needed to have a sense of balance and yet a
sense of movement. And so what I did was
take these Bs and turn them on their side with
the P on its side. But I found this alignment and the sense of rhythm
in there and a sense of repetition that brings
some movement to the shapes. And then even if you're
doing something as simple as one letter, you can bring a story into
it really simply just by adjusting the shape,
bringing in dimension. So there's so much that
you can do with monograms. Here's a few more monograms
that I've designed. Now you're going to jump in and start combining your forms. And as you're doing this, I want you to think about the list of your words
that describe your brand. And I want you to think about repetition, rhythm,
and relationships. As you build a narrative
to your monogram.
7. Find Inspiration for Letterforms: Alright, so if you
don't know where to get started with your lettering, it's okay to take a
look at some fonts on the Internet so you can check out myfonts.com
is a great resource. And you can also use your
fonts on Adobe Creative Cloud. Those are both good resources. You can take a look
at these fonts and draw from these fonts to get different ideas and figure out how to customize them
and make them your own. Another good resource
is to look at architecture or look to nature. So here we have some
architecture here, and I'm actually starting to see a relationship here
to the letter G. So let's just take a
quick look at this. So if I look here at my
architectural piece, I have this shape, I'm starting to see as a top of the G and the little tail that comes off and then this coming
down as the lower bowl. So I'm just going to do a
quick sketch from this. Kind of giving me... probably a
little bit bigger here. So looking at architecture is
just a really good idea and a really quick way to
get thinking about new shapes and get inspired. And eventually, you're going to make these shapes your own. There you go. So look for some inspiration
and architecture, nature, or even in other fonts.
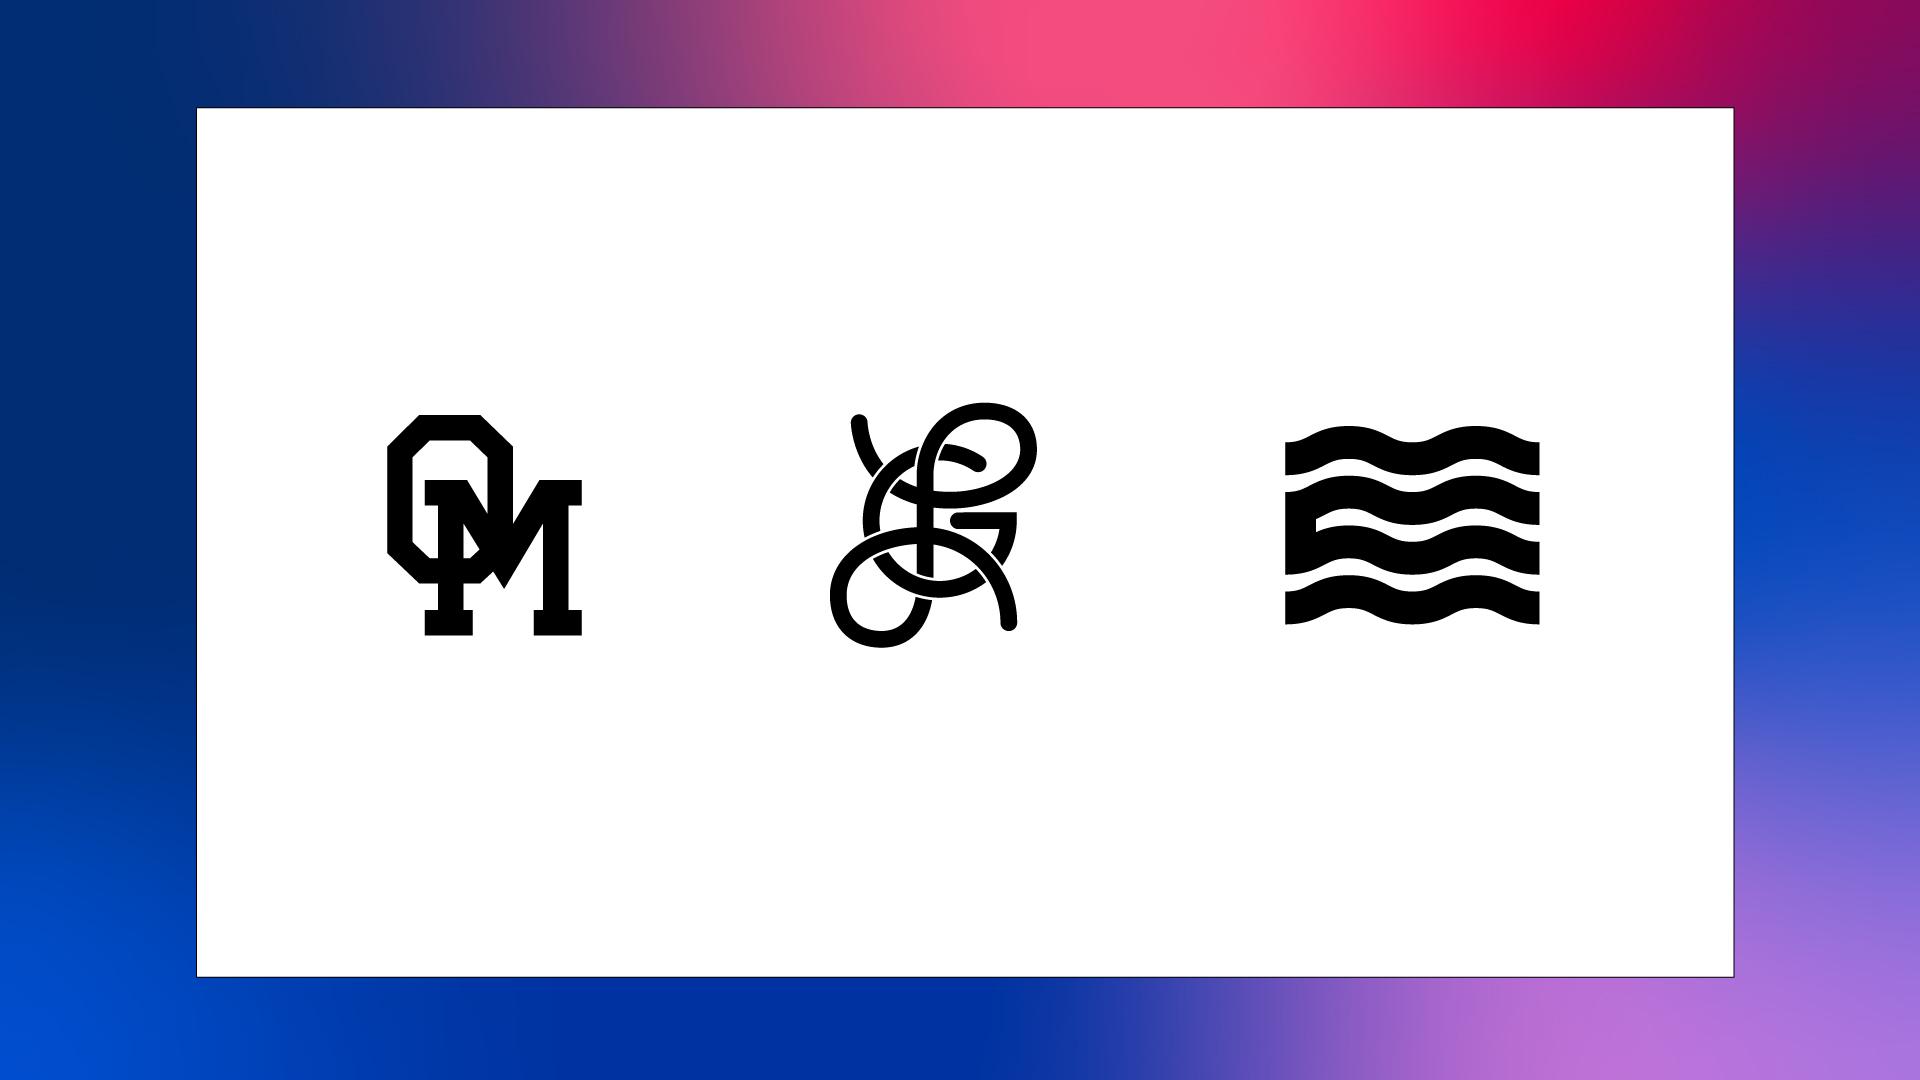
8. Combine Letters in a Sketch: Alright, so now we're
going to look at all of our letter forms
that we have sketched out. And we're going to work on combining some of these shapes. So we have our LG shapes
and we have some MCMC. And then I have some shapes
that I've drawn out as well. But I have an idea of what I
wanted to do with this OM, since it's for a
local sports team. So let's start with
the LGs first. So this one we're going to do more as a personal monogram. And what I'm going to
look for is relationships in the letter forms themselves or contrast
in the letter forms. So in this case, I'm liking this cursive L shape that I have going on here. And I'm thinking of maybe using a contrast in shape like
a very angular G shape, something that is
completely opposite and more geometric than
this organic shape. So I'm going to take
these two shapes here, something like this
in this world. And I'm just going
to start doodling again and combining
those shapes. So you can use any
type of pen you want. I'm just going to draw
my L-shape first. Alright? And I know I want my G shape
to be in here somewhere. Now it's looking a
little complicated and my eyes getting a
little distracted by having so much activity in here. So maybe I'm going
to try it again and stretch that G shape out. Let's see what happens if
I bring the G shape out. Now that's feeling
a little better. That's feeling like
that might work. Maybe I need more contrast. So let me draw my G shape first. How little can my G-shape be? Alright? And then let's see what happens when we
put our L in here. I think they're making
it too tight in here now and it works better
when I draw the L first. So let's go back to
join that first. Wonder what happens
if I make a round G? That's kinda getting
interesting. I liked something
in here, maybe. Now's a good time to
take your tracing paper. You can just take
a sheet of tracing and go in here and
now I'll probably go back and use my small pen. So I have a little
bit more control. What I'm trying to do is
make these two loops match. Because we're looking
for some symmetry here. We can create a rhythm. This is also when a
pencil can come in handy. You can shade a little
quicker with a pencil. Make it a little
more sketchy here. I'm just beefing up the
line weight all around and making the line weight or even. Alright, now I want a
round circle in here, so I'm just going to gently
sketch out a circle. I forget it doesn't
have to be perfect. We're gonna do this all in
Illustrator and perfect it. So here we go. I think I'm onto something, so I think I'm going
to use this as my main sketch for my monogram. Let's see what it looks like. And that's looking pretty good. Alright, next I want
to use the O M. So this one I want, I already know I want
it to be more sporty. And kind of going toward
that varsity athletic sort of look. So I kinda know I want this block O-shape
and I know I want a M, Now I'm not looking
at a font because I just wanted to go
from memory and see what my brain can do. And I'm just going to sketch
that out really quick there. I'm going to beef it up a
little bit with a fatter... pen here. Add some Serifs, make them
about too thick here. And what's going to thicken
this up with another stroke? I'm just holding my pen and a bit of an angle so I
can get a fatter line there. And then let's go
for you, flip these. Now you can see I made
a relationship here where this M intersects the O. Because they want to have
some harmony in there. I want it to end up looking
something like this. So I can play with the thickness of these shapes and stuff
once I get it in illustrator. So I'm not going to
worry too much about it. I'm going to use
this as my sketch. And I'm probably going
to draw these as two separate shapes in
Illustrator when I get in there. So I'm going to probably
draw my O separately. And I'm gonna draw my M separately so that I have
more flexibility with them. Alright, so this
is gonna be for a project I'm working on
called multicolor minds. And this projects a little bit more of
an abstract project. And I was drawing these Ms
earlier, kinda abstract, seeing how far away I can get from an M
but still, be an M. And so I was thinking
about wavelengths and brainwaves for
this project a lot. Because it's really about
diversity and groups coming together and a lot of
thinking about creativity. So just kinda playing
with that idea. I start sketching these
kind of wavelengths as Ms. Then I'm just trying to
think about how do I make a C can work in this shape. And I had a really
hard time thinking about how the C is
going to work in here. And then I start thinking, why don't I just play with the same exact shapes
and see what I can do. So sometimes all you're
looking for is to make relationships
between the letters. And don't be afraid
about getting abstract and not being
literal about your shapes. You can really get out there and make some
interesting shapes. Create more original work
by thinking from your mind, building from your imagination. I think I'm gonna go
somewhere in this direction. And I have a few ideas about how I might build
this in Illustrator. Let's take these ideas
that we have here. We have a few combinations. So let's take these combinations into Illustrator and see
what we can draw in there.
9. Sketch Out Your Final Direction: Alright, now we want to get, maybe refining our
directions just a little bit as we get into
Adobe Illustrator, you can take a look at
your sketches and you have a pretty good idea
of where they're going. But sometimes you might want
to get in there and refine them just a bit more before
you get in illustrator. Don't forget, they don't
have to be perfect because once we're
in Illustrator, we're going to have
a lot of control. We're gonna be able to
make these linewidths all exactly the same. We're going to make
these Indians all exactly the same in Illustrator, we're gonna be able
to control all of this geometry and have
everything square up perfectly. We're gonna be able
to make a perfect circle here with our G. So we just wanted
to get a good idea. While our sketch is going
to look like in the end. Here's a good time to maybe combine both pencil
for some light sketching and your pen. So I'm just going to
square off my shapes here. And I'm going to look at
the negative space now. Between my shapes and right now, I'm really mimicking just this
shape to this shape here. And I'm going to continue
to do that here. And I really looking
at this width now, one thing to be really similar. Now I'm looking at my
negative space again here. And I'm looking at my, what's gonna be my
positive space there. You can see that it's
changing quite a bit from my original box where
everything goes outline because I'm
paying closer attention to my spacing now. We're going to be dropping down just a little bit lower
than we expected. And that's okay because
we're refining. So this is going
to be filled in. Then we have our third area. And I'm not going to do
this because we need to make a curve here joining these for our C. So I'm just gonna draw that in there right now. We're going to have this all a positive shape. And then we have this
positive shape here. It's gonna look something
more like that. Of course, you can get in here and fill it with your pencil. Bit more. You can get your shapes locked up
a little bit more. We're looking for is
a little bit more clarity here on our idea. And this will be our
final sketch so we can take into Adobe Illustrator. So you can see this is more
of our ideational sketch here. And then we have more
of a refined logo. And this is the one that
we're going to use to build our design in
Adobe Illustrator. So now let's take these
three designs and get them into Adobe Illustrator and see how we can perfect them.
10. Get Your Sketch on the Computer: Alright, now it's time
to get our design into the computer and get
drawing in Illustrator. There's a really easy way to
get it into the computer, just using your mobile device. So you're going to
take your phone, get as close as you can, keep your phone parallel to the surface so there's no
distortion in your shapes. So keep your phone
parallel to the surface. Make sure to tap so
you're in focus. Take a photo. Then you can go
down to your photo, go to Share, and you can
AirDrop it to your laptop. That's how I get my photos
into my laptop easily. You can also use a scanner
if you have one handy, but this is a quick
and easy way. Alright, so let's get
our other designs into the computer here. Alright, I think they're
already the AirDrop. Let's get them
into the computer. And we'll be getting
to work soon.
11. Getting Started in Adobe Illustrator: Alright, first we need to
launch Adobe Illustrator. Now, when Adobe
Illustrator launches, it's gonna give us
a pop-up window and we're going to
choose New File. You can find a letter
preset to start with. It might show you your
dimensions in points, but you can also click to
inches or millimeters, whatever you're more
comfortable working with, I'm working in points. You can also change
the orientation of your page here and add
the number of art boards, which is basically like the number of pages that
we're going to work on. We're just going to
keep it at one for now. We can double-click here and
type our title Monogram. Let's call it Monogram 1. And our color mode,
we want to be RGB, raster effects, 300 PPI.
And then we can hit Create. Alright, when your Adobe
Illustrator opens, it might look
different than mine. So to make sure that we're all working in the same workspace, I'd like you to go
to Window > Workspace, and click Essentials. So your workspace might change. And if it looks different also, after you click Essentials, I want you to go to
Reset Essentials. Alright, that's what
I'm looking for. So your workspace
should look like this. The next thing we're gonna
do is we're going to add a few tools that we're
gonna be working with. We're gonna go to Window, and we're gonna go here
to Pathfinder. That's going to pop up. And some other tools
might pop up with it. And that's okay. You can just drag
this over here into this little bar and you'll
have a little fly-out toolbar. So when you click
here for pathfinder, you'll get the full view. Alright, we're also going
to add our color window. We're going to go here and
we're gonna go to color. And we're gonna do
the same thing. I'm going to drag
our window here till it turns blue and drop it. So now we have the
main tools we're gonna be using on this project. Also, the other
tools we're gonna be using are the Selection tool, the direct selection tool, the pen tool, and
some shape tools. Here we have the rectangle tool, but you can see this
little triangle in the corner of my tool. When I click it and hold down, I have a flyout
menu that pops up. And I can click other tools such as
the elipse and polygons. So we're gonna be using some of these tools to build shapes. So those are the main
tools that we're gonna be using in Adobe
Illustrator today. A couple of last things
I'd like to show you is... I like to
work with my rulers. So Command R will show your
rulers on top and bottom. And this is a great way to
pull and drop out guides. If you don't like
where you put it, you can go Command Z to undo. Command Z is a great key to undo any mistake you make when
you're working in Illustrator. A couple of other shortcuts I want to show you a working
around your workspace. The spacebar will give
you a hand so you can drag your art board around or move between your workspace. Option + Command + Spacebar will
give you the magnifier, so you can zoom out. Command + Spacebar will give you the magnifier so
you can zoom in. Command + 0 will bring
your art board back to the center in full view. So those are the
main key commands that I use to get around. Another thing I want to
show you about key commands is if you click any
of these tools here, you'll see that there
is a letter right here. That letter is the
keystroke that I can type in and that
tool will come up. You can see here for ellipses
L and rectangle is M. So right now I'm on
the Rectangle tool. Watch right here in this space. If I click L changes
to the ellipse tool, now I'm working with an elipse. So as you work more
in Illustrator, you can learn about the
keyboard shortcuts to work faster and make your
workflow more efficient. Alright, that's the basics of getting your Illustrator
space setup. Now in the next lesson,
we're going to bring our sketch in and
get ready to draw.
12. Import Your Sketch into Adobe Illustrator: Now that we're in Adobe
Illustrator and we have our workspace all set
up the way we want it. We're going to bring
in our sketch. So we're gonna go
up here to File. And we're going to go to Place. Now you can see next to place,
there's characters here. That's a key command, Shift + Command + P will bring
us to place in the future. So if you learn
these key commands, it will help your
workflow being much more efficient when you're
working in Illustrator. So we're gonna go Place. And now this is going to
bring us to our sketches. And let's bring in our
varsity OM first. So I'm gonna go place.
Now when you bring it in, you can see it shows
me a thumbnail. And wherever my little
arrow clicks is where the top corner of
that is going to be. Now, if I click, it's just going to
drop the full image at full resolution
in here, watch. Click. Alright. Now to zoom out, we're going to use
our key commands, Option + Command + Spacebar. We're going to zoom out my
hand tool to scroll over. You can see how large this photo is compared
to our art board. Well, there's a couple
of different ways we can reduce it. Let's zoom out some more. I can use my selection tool. I can click the corner. And I can hold Shift, which keeps the
proportions constrained. And I can drag it so it's really small and fits on my page. Once again, if we do Command + 0, that will bring us
to a full-page view. Alright, so that's
one way to do it. Another way to do it is
to go to File > Place. Select the same file
here. I'm gonna go place. And this time
instead of clicking, I'm going to click and drag. And now I can make the image
as large as I want it to be. So wherever I drop that, that's how big the
image will be. Alright. So that looks like a good
place to get started. We can click this one
and click Delete. And now we have our starting image placed
and imported into our file.
13. Vector Basics in Adobe Illustrator: So when we're working
in Illustrator, we're working with
what's called vectors. Vectors are basically
some line shapes that are drawn with
points and handles. So let's just draw a circle to illustrate that for
you really quickly. If I click the ellipse
tool and I hold shift, that lets me draw a circle that's constrained
within proportion. If I don't hold Shift, I
can draw any ellipse shape. But if we click this circle with the direct selection tool, you can see that we have a
point and we have a handle. And here we have a
point and a handle. This curve right here is described by this
handle and this handle. And you'll notice that
these handles describe about one-third of the curve. If we go from this
point to this handle, from this point to this handle, and then in-between those are each about a third of the curve. That's a good rule to keep in mind when you're
drawing in Illustrator, you can see that this
curve is different. But this describes a little
bit less than a third. This describes a
little bit more. But the third is the
good starting point. That gives you a perfect curve. You can see that when
you start to distort it, it changes the
shape of the curve. We can drag this handle in and out while
I'm holding Shift to keep it locked
horizontal and we can unlock it and twist it and
drag it different ways to. Now let's talk a
little bit more about the Selection tool and
Direct Selection tool. The selection tool lets you click and drag an
entire object around. The direct selection tool
lets you select part of the object and work directly
with one point, drag a handle. Or you can hold shift to
select multiple points. Now I can move these
two points together. So that's the difference between the Selection Tool
and Direct Selection Tool. The Selection Tool
moves the whole object. The Direct Selection
Tool lets you work on an individual part of the object or the
detail of the objects. Lastly, I want to show
you outline mode. If you press Command + Y, this
shows us the outline mode. This is the underlying
architecture that's used to
build our drawings. If we press Command + Y, this is a preview mode. This is what we want our
artwork to look like. So for example, if I draw, if I make this one color and
I make this another color, and I make one go in
front of the other. We can see here that this is
the way our artwork looks. But when we press Command + Y, we can see the full shapes and where all the
underlining shapes go because this is the
underlying architecture that builds our work
that we're seeing. So just understand that there's Outline Mode and Preview Mode, and these are two different
ways to view your artwork. You can also go to View > Outline. You can toggle on and
off here or Command + Y.
14. Basic Shape Tools in Adobe Illustrator: Okay, In this lesson, I'm
going to show you how we're going to draw
with some shape tools. So this is a really basic, easy way to draw with simple
shapes in Illustrator. We're going to use
the rectangle tool. And with this tool we
can make a letter T. I have it colored blue. So once again with
the selection tool, we can select both
of these by holding Shift and clicking and
dragging to select two shapes. Oops, there we go. And if I want to align them, I can use this great Align
Tool and align them to center. Now you can see they're both
filled with a cyan color. We can go over here with our color and click
black. Alright. Now to make this
a proper T, I probably want to make this
a little bit fatter here. Alright. Now, you can see if we go to the outline mode like I
just showed you Command + Y, that we have two shapes
that make up this T. We want this to be
one complete shape. So let's go to
outline mode again. Click and drag. And now we selected
both of our shapes. Now if we go over to
the Pathfinder Tool, we can go to the first
tool which is Unite. This is going to
unite both shapes. Now you could see
that disappeared. If we go Command + Y, we can see this
is all one shape. Now, we're able to use
the Pathfinder Tool to draw our shapes and combine them to get the one desired
shape we want in the end. You can also use it
to remove shapes. So let's draw a
circle really quick. And I'm going to
draw another circle. And I'm just going to make it
another color really quick. So you can see here. Once again, we can
highlight these and use the awesome Align Tool
To line them up. And now we can go to
the Pathfinder Tool and use that Minus Front. And what that's gonna
do is it's going to remove the shape
that's on the front. It's closest to us. And behind it we have
this black shape. So right now we have two shapes. Alright? And what we're gonna do
is remove this shape. So this is becomes a
see-through negative space. Alright, we've removed the shape and now you can see
it's see-through. So those are the ways we're
going to use the shapes and the Pathfinder Tool to build
our own unique shapes.
15. The Pen Tool in Adobe Illustrator: Alright, another tool
we're going to use in Illustrator is the Pen Tool. I love this tool. It takes some time
to get used to, but once you get it down,
you're going to love it. Alright, just some
basics to get started. When you start drawing
with the Pen Tool, you click and then click another point and
click another point. And you can see it's
filling in because I have the fill set over here. I can switch it out just to
look at the stroke for now. But as you can see, as I click, it's
creating a shape. When I go here you
can see next to the Pen Tool there's a
little circle that pops up. That means my shape
is going to close and I'm going to have a
complete filled shape. Whenever we're
drawing in Illustrator, we want to always close and
have a completely filled shape. So now you can see this
as one solid shape. I can switch out the
stroke and the fill, and that's our shape. Now also, in drawing
with the Pen Tool, you can keep your points
aligned by holding Shift. And that keeps it on
the horizontal axis. Or holding shift will also keep it aligned on the vertical axis. Now when you're drawing with
curves with the pen tool, what you're gonna do is
you're going to click one. And now you're going to
click the next point. And you're going to drag, you can see it starts to bring
out a handle and a curve. You can turn that curve
any which direction. But as we learned,
we want to watch our handle and describe
about 1 third of the curve. And then go down
to our next point here and click and drag. Now you can see that by following my one-third
rule about that, I already start to get
a really nice curve. I can always go back
in and tweak any of these things and clean them
up and get really precise. But just to get a quick drawing, you can see how you can draw
a wavy line very quickly. Let's switch that stroke view. So you can always go in with your Direct Selection Tool
and move your points. You can go with your
Direct Selection Tool and move your handles. There's all kinds of
ways you can edit, but those are the basics of
drawing with the Pen Tool. And as I said before, keep your points
when you're drawing curve at the apex is of
where your curves are. And make sure you draw with as minimal
points as possible. That will make your files and drawing much more enjoyable.
16. Using Strokes in Adobe Illustrator: Another way we're
going to be drawing is with our strokes. We're going to use our strokes
to actually create shapes. So really quick, what we're gonna do is we're gonna
go to our window here. Scroll down until
you see stroke. And that's going to
pop up another window. You can put that over here
and dock it in your toolbar. So here's our Stroke Window. Go up here to the little stacked
menu and go Show Options. When you go to Show Options, you can see that it gives
you some weight options. The cap options, which
is here is the cap of your stroke, some
corner options. So if you have a corner, different ways to corner
can round off or blunt out. And it also gives you some
Align Stroke options. So a line means if the stroke is made to the center of the
line or inward or outward. So let's see what
I mean by that. If we go to, let me
draw a circle to best demonstrate
this, draw a circle. And we have a stroke. We're going to
change our weight of our stroke to ten points. You can see that this
blue line is our path. That's our vector line. If we click Command +Y,
That's all we see. But the stroke is what illustrators rendering
for us at ten points wide. It's aligned so that the stroke is on the center
of this blue line. If we click here, the stroke will go inward. So now the blue lines out here. And if we click the other one, the stroke will go outward. So now the blue
lines on the inside. So that's another way that
you can align the stroke. Now when we draw
with our stroke, we can make this a shape. What do I mean by that? So let's go back to
this curvy shape here. Let's make this a fatter stroke. Now let's make the
cap on this round. Now you can see it kinda
looks like a wiggly snake. Now if I wanted to make
this into a shape, let's go Command + Y. You can see that it's
just this one path that we have drawn. But if I go to Object > Path > Outline Stroke,
It's going to create a shape that looks like the stroke that we're actually
seeing here in the black. So now if we go Command + Y, that one path is no
longer in the center. It's actually a shape. So we have a full outline shape that looks like this snake
that we want it to look. And that's really what we're
going for in Illustrator. We want to convert all of our strokes into shapes and have some really beautiful
clean files built with nice clean shapes. Alright, now we get to the
fun part and we get to learn all these little
techniques that we learned to draw our own
unique monograms.
17. Drawing Your Sketch in Adobe Illustrator - Example 1: Alright, here we are
in Adobe Illustrator. We have our sketch brought in, and I also brought in this
piece of reference material. So we can just get a
better idea of this kind of varsity collegiate
sort of look, we're going for. So to
start out drawing this... oh, I think what I'm gonna do is just start with a basic shape. I'm going to start
using a rectangle. And I'm just going to click
and draw a rectangle. Now I need to make
little angles here in the corner to give this
octagonal look going on. So what I'm gonna do
is let's zoom in. And if we click the
Direct Selection Tool, we can see that we
have a point here, point here, here, and
here in the four corners. What we need to do
is put another point where we can create a joint to create that angle
that's going to happen. So what I'm going to do first is we're going to
bring a guide over, just drag it from
the ruler and drop it at the point of
this stroke here. And I'm going to drop it here. The center point of this stroke. While we're at it, we
might as well go ahead and drop one on the
top and bottom. Guides are very helpful for getting your work
done in Illustrator. Alright, now we're going to
use a little cheater method. I'm going to just take
another rectangle and I'm going to draw it
out just a little bit. I'm going to swap out
the fill and the stroke. So right now it's
filled with black, but let's just fill it
with a different color so we can see it really easily. And I'm gonna go and put
another guide out to this edge. Now we're going to use this
little guy as a measurement. We're going to
drag it over here. Now what I'm gonna
do is rotate it. If you see when I go
to the corner here, any corner, my cursor will
turn into a little rotation. I'm going to hold Shift and that's going to keep it locked. And now I'm going to
rotate it this direction. And let's go and pull
a guide down to here. Down to here. Alright, so now we have all these guides. We can delete our
little cheater. And what I'm gonna
do is I'm gonna go to each of these
intersections here. On the Horizontal. Go here and go to
Add Anchor Point. We add an anchor point at
each of those intersections. Let me zoom in a little bit more so you can see
what's happening. I'm going to add anchor
point right here. I'm going to add an anchor
point right here. All right. Now, if you go
Command + ; it will hide your guides. We're going to select with
our Direct Selection Tool. You can see I have an
anchor point here. I have one here now, all I have to do is click
this one on the corner. And I'm gonna hold
shift and click this one at the same time. So these will now move together. I'm holding Shift to keep
him constrained. Alright. Now if I go Command + ; I can see my guides again. I think it got locked
right and where I want it. Let's go to the top corner. Make sure to click off
and then click back on and hold Shift and
click your other corner. And I'm going to hold
Shift to constrain them and pull them to the
corner where I wanted. All right, so there we
have a block O going on. If I go Command + ; I can hide my guides. Now we're going to draw an M. So our M is going
to look like this. And what I'm gonna
do first is draw the main structure of the M and we'll worry
about the serifs last. Let's turn our guides back on. And our M, we want it to be
at the same height as our O. So I'm just gonna go
to the Pen Tool and I'm going to click down at the
bottom, the baseline here. And I'm going to hold shifts
to the line goes straight upwards to the next point and
they're aligned perfectly. The next line, hold Shift. Now I'm going to
hold Shift and go just a little bit over here. And now I'm gonna go down to where our M is going
to meet in the middle. Alright. Now what I'm
gonna do is I'm gonna make a separate shape for
this little serif here. And I'm gonna make a separate
shape for this serif here. That way we have a little bit of flexibility with our shapes. So let's go here. I'm going to click on
the line and go shift. Now, I might need to
align this a bit better. Alright, and then down here I'm going to
do the same action. I'm going to go and
take my Pen Tool and I'm going to hold Shift. Alright, so now we
have half of our M. So what's next? We got to make this a full M. What I'm going to do
for the moment is I'm going to select all of these together with
the Selection Tool and click Command + G,
that's for Group. You can also find that under
Object > Group and Ungroup. Alright, what I'm gonna do now is go over to
the Reflect Tool. Double-click. And I'm going to keep
my axis vertical. And I'm going to click Copy. Now, if I go back to
my Selection Tool, I can drag that. I can drag that over and get this pretty lined
up the way I want it to be. Alright, so now I have
two different sides of the M and they're each a
group of different shapes. What I'm gonna do right
now is I'm going to group these together one more time. So I'm going to select
both of these groups and go Command + G to Group. Let's go Command + ;
to hide our guides. And now you can see our monogram is starting
to come together. Alright, so now if we select
both of these shapes, we can scale them together. I'm holding Shift + Option and that's letting me constrain and scale them from
the center point. I'm going to zoom in
here a little bit. I like where this is
coming through generally. But I think we might have
to visually cheat this and give the o a little
bit more space at the top. So I'm gonna go to the
Direct Selection Tool. And I'm going to highlight all of these four points here
just by dragging over them. You see these four
not highlighted. So I'm going to
now click and hold Shift to constrain that and just pull that up a little bit to give it a
little bit more space. And now I'm going to click
and I'm going to drag and just go over the
four on the left side. And I'm going to hold
shift and open the O, up just a little bit more. Alright. I think it's feeling
a little bit better. We could do some
adjustment like that, which will make
it really easy to clean up the center spot. But I think it's good to see the M. But I do like the M coming through
this corner access here. I think somewhere in there
is a good place to start. We can also see what that
looks like if we select everything and we go
over to our stroke. And what happens if
we beef that up? How does it look? What happens if we take down the weight?
How does it work? So there's all these different
options we can look at. Now. So let's take this
to about, let's say 50. Alright. So now if we do go Command + Y, you can see we just have one
stroke because all that's describing Command + Y,
this space. So we want to make these shapes. Now, in order to
make these shapes, we're going to select
everything here. I'm going to go to Object >
Path > Outline Stroke. Now you can see that
these are all shapes. So let's make our O one color. It could be any color. And then we can see
our M very clearly. Now the M is the one that we're going to have to work
on a little bit. There's some really
easy things that we can do to clean
everything up here. So first I want to
make sure that there's no weird little
hiccups on this line. So what I'm gonna do is I'm going to
pull our M over here. I'm going to go to my
Direct Selection Tool and I'm going to highlight
all of those on the line. We're gonna go to
our Alignment Tool here and go align to top. And that's just going to
make sure those are, all, those points are all
in the same spot. Now I'm going to select
this edge over here. All the way down to this edge. I'm going do the same thing. I'm going to align them to the left edge to make
sure these are line. Now I'm going to select these
on this side and I'm going to pop them out and make sure they align to
the right edge. Alright, and then lastly, we need to line up this point. I think I'm just gonna
do that optically by dragging this
one-point down a little bit and drag this point down. And I think it's just
going to have to be something optical
like that for now. Alright. Now it looks
like I could use a little bit more extra
link on this serif here. So I'm just going to
select both of these. So just these two points on the outside are selected
on the top and bottom. And I'm going to nudge it out ten nudges just using my
keyboard, 12345678910. And I'm gonna do the
same thing on this side. I'm going to highlight this. I'm going to nudge these out
to the right, 12345678910. And now we have a pretty
good-looking M here. So what I'm gonna do now
is highlight this M. I'm going to go
over to pathfinder. First. Let's take a quick look. I'm gonna do Command + Y. And you can see these are all multiple shapes that
are making up this M. Go Command + Y again. When I do the Pathfinder > Unite. Now this is all one shape. Let's look at a Command + Y again. And you can see this
is all one shape. Alright. As you can see, we're really close to pulling
our monogram together. So I am just going to
pull this over here. And I'm gonna make this black. And I think this is looking... I'm going to line that
up right in there. I think we want to have some
negative space in there. I think something like
that's looking good. That way we have the energy of this O and M coming
together there. Alright, that does
it. That gives us a monogram for a varsity
team with the O and M. You can delete these files. We no longer need 'em. And that does it. That gives us a monogram for our varsity team
or the local school.
18. Drawing Your Sketch in Adobe Illustrator - Example 2: Let's work on a second monogram. Let's import it using Place, but we're going to
use Shift + Command + P. Start using some of the
shortcuts we're learning. And let's bring in this sketch. I'm going to drag to
place it in here. And as you can see when
I go up to this corner, I have a little angle. So I'm going to rotate this. All right, so that looks
about where I want it. Now. I want to draw on top of the sketch like a piece
of tracing paper. So I'm going to use
my Layers for this. So I'm gonna double-click
and I'm gonna click Dim Images to 50% and go, okay. Now I'm going to
lock this layer. I'm gonna go down here
and go New Layer. Now I have a layer
above this layer. So when I draw on this layer, all the images will be
on top of this layer. Alright, so I have a G here. It's basically a
circle with a line. So we're just going to
start with a circle. I'm gonna go back to the center. I'm going to hold,
click and hold Shift + Option and drag out. And that lets me drag a
circle out from the center. I'm going to get my radius about where I want
it right there. And I'm going to put
my fill at none. Go over here to my stroke. And let's make that
about 16 for now. Alright, so my G needs
to end about here and about here because I need to make the tail come off here. So what I'm gonna do is go
over here to the Scissor Tool. You can easily find that
group with the Eraser. So I'm gonna go to
my Scissor Tool. I'm just going to clip it
here and clip it here. Let's zoom in a bit. Now, when I click my
Direct Selection Tool, I can click just this portion of the segment that I clipped
out and delete it. I'm going to hit Delete
twice to make sure to get rid of those
extra points there. So now what we're gonna do
is we're going to go to our Pen Tool and we're going
to click here on our point. And that's going to
connect it to our curve. And let's just click up to here. And that looks
like a good G to me. Don't forget, we
can click here and change the cap to make this more rounded on
the tip if we want to. And I think that looks good. Alright, so now
let's draw our L. I'm going to use the
Pen Tool for this. I'm gonna go up here and start at this part of
the tail of the L. I'm going to click
and I'm just going to follow around to the
lowest point on the apex. I'm going to click
a point there. I'm going to hold Shift to
keep my handles perpendicular. And I'm going to drag the
direction I'm drawing. Now I'm going to follow out and click on the next apex out
and do the same thing. Click and drag the
direction I'm drawing. Don't worry about this curve. We're going to come
back and tune that up. But as I go, I'm
going to keep it my handles about one-third whenever I can,
the one-third rule. So we're going to click and drag the direction we're drawing. Come down to where the
curve stops about. Click and drag, go down. I'm going to hold Shift. So we have a perfectly
straight line here. And then I'm going
to click and drag, go down to the apex. Hold Shift, click and drag, and follow your
entire shape around. Alright. Let's go back and
click and drag. Now we have it
basically plotted in. And we're gonna go back to
our Direct Selection Tool. And with our Direct
Selection Tool, we can move these points
and really get them on the point of
the apex where we want and we can tune things up. Remember the third rule. So I'm going to click this handle and I'm going
to pull it back in. And at the same time
I'm going to come in, pull this one down a little bit. So it's just a little
bit of nuancing. But with a little
bit of nuancing, you can get some really
beautiful curves going on in your work. So this one's
coming out too far. And this one, I
might need to bring this down a little bit. Our anchor point,
same thing here. Bring this anchor point up. And we're just doing
some new on the scene. And once you think you have it looking good where you want it, we can go here and take a look. This is looking a little square, so I'll probably go work
on this a little bit. Similar that squareness
out if I can. Let's usually
bringing in some of these handles just a little bit. All right, that's
looking pretty good. So let's go over here
and unlock our sketch. And we can just drag it
over and take a look. Now, we can see that there's a little
bit of a kink in here. So we're gonna go back up into here and use our
Direct Selection Tool. And just work that
out a little bit. And you'll get the hang of it. What needs to be pulled in? What needs to be
pulled out a little bit as you work a
little bit more. So let's say this is looking good and we're ready to maybe add a little
bit of dimension. So let's look at
adding some layers. And how are we going
to create some of these intersecting and
interlocking shapes coming in front of each other. Let's take a look at that next. Let's look at adding some
dimension to this monogram. Now, this might get a little
confusing, so stay with me. First thing I'm gonna do is show you a tool called offset. So what we're gonna do is
we're going to draw a circle. And let me just reverse this. So all we have is a
circle with a fill. I'm going to go to Object >
Path > Offset Path. What that does, you can see another circle came around it. All that's doing is
creating a path that's from this distance to a new edge, whatever distance
you put in here. So it's creating a path that's offset from our original path. So we could put in ten points. Make sure you have
preview clicked. And if you press, go
into the next field, you'll be able to see how
far offset that path is. Alright, so that's the tool
that we're going to use here. If I click Okay, you can see if I go over
here to my color palette, I now have two circles, and this one is offset
ten points from this one. Alright? So that's the basic
tool we're going to use in this exercise. Let's go down here. And the first thing we need
to do is we're going to set an offset path
to this shape. However, this isn't a shape yet. This is just one stroke. If we press Command + Y, we
can see this is one stroke. What we want is we want these outer parts of the
stroke to be our shape. So we're gonna go to Object >
Path > Outline Stroke. And you can see that
created a shape. If we could press Command + Y,
we now have a shape here. It's no longer just
that one stroke. Command + Y again,
back to our preview. And let's do the same
thing with this. We're gonna go to Object >
Path > Outline Stroke. Alright, so now we
have two shapes here. The first thing we
wanna do is we're going to offset our path. So we have a little
bit of a white edge. So it looks like
that the L is coming over this in some places. You can see our
little messy sketch here is we have the l coming over here and then
the G comes over in this spot and the L comes
over in this spot and so on. So what we're gonna do
is we're gonna go to Object > Path > Offset Path. I'm going to put in
a smaller number. Let's go Three. And that looks good to me. And I'm going to click, Okay, and now I'm going to
fill that with white. Alright. Now you can see that this looks like it's starting
to come over that edge. Well now we need to make the
G look like it's coming over the edge in some locations, this is where it might get
a little confusing for you. So what we're gonna do is we're gonna do the
same thing with the G. We're going to go
to Object > Path > Offset Path, and three
points and go, okay. Now I'm going to
just fill this with a color because
it's just going to be a little bit easier for
us to see what's happening. Alright. So I want to bring the G in front of the loop here. And I want to bring a G in
front of the loop here. The way I'm gonna do
that is let's zoom in. I'm going to click select
both of these G shapes. I'm gonna go over
here and we're gonna go to the knife tool. With the knife tool,
I'm just going to quickly saw down through both of these shapes on each side of
where I want it to overlap. Now, I'm going to come here and I'm going to get my
Direct Selection Tool, I'm sorry, my Selection Tool. And I'm going to click both of these objects so you can see
that they're both selected. And now I'm going
to go to Object > Arrange > Bring to Front, which is also Shift +
Command + (right) Bracket. Now you can see that's coming
in front of this shape. All we're gonna do is
fill this with white. And now you can
see that illusion starting to happen here. Alright, we're gonna do
the same thing here. We're going to select
both these objects. We're going to go to the Saw. We're just going
to saw through both of these shapes here. We're going to click
our Selection Tool. We're going to click
both of these shapes. We're going to go Shift + Command + (right) Bracket to bring to front. Now, I'm going to
color this with white. Now these other green shapes, we don't really need them. We just really need that
white shape for the illusion. So I'm just going to
delete those groups. Alright. And now we have our monogram. And here's our sketch. We have our monogram
with some dimension.
19. Drawing Your Sketch in Adobe Illustrator - Example 3: Okay, let's go to our other
monogram I'm trying now. Let's do Shift + Command +
P to Place our sketch. We've got our sketch here
and let's go Place. We're going to
drag. There we go. So we basically need for
wavy lines that repeat. And then we need to
join this one is a C. I'm kinda thinking this
C might be squared off. I'm not sure yet, but I think that's
what I'm going to try. So the easiest way for me to think of to create
this is to maybe use one of illustrators effects. So let's go over here
and let's just start with four wavy lines. So how are we going to
get those wavy lines? I'm going to draw a one
long line here, a stroke. And that looks pretty good. We're going to do a thick
stroke like 40 points. And then what I'm gonna
do is hold Option. And when you hold
Option and drag the object in Illustrator, it makes a copy of it. I'm also holding Shift so I keep it locked in place
vertically as I drag it. Now if I press Command + D, that's going to
duplicate that action. And I'm going to get another bar exactly where I made the other bar and
the same distance. And I'm going to do
that one more time. So now I have my four lines. Here, we have four lines, and now we need to
make them wavy. So I'm going to highlight these and we're
gonna go to Effect. Let's try Zigzag. I'm going to click Smooth. And I can see already
right here I'm getting in shape that I want. Okay. So I think that's enough
space right here. And I can cut this off
somewhere over here. I'll have my four wavy lines, so I'm going to click, okay. Now remember these
are just an effect and Illustrator's rendering
that if I click Command + Y, I just have straight
lines there. So you click Command + Y. Again, we want
these to be shapes. So we're going to go to
Object > Expand Appearance. So what this did
was this expanded our stroke to be
in the wavy line. Now we need to make an
outline of our stroke. If I go Command + Y, now you'll
see that we have a stroke, but now it's in the wavy line. So now we're gonna go to Object. I'm going to go to Path. I'm going to go to
Outline Stroke. And here we go. Now we have Command + Y. We can see we
actually have shapes. Alright, so that's where
we're going to start. Now I need to figure out
where I want to cut this off. I think I'm going to cheat
by copying one of these. I'm just going to hold Option
and drag and make a copy. Then I'm going to flip this. I want this to be lined up
right here in the center. So I'm just going to go
here and I'm going to go to Reflect Tool
and double-click. And I'm going to select
vertical and click. Okay, let me use my Selection Tool and
I'm just going to drag this down so I can get an idea here of where I want this to flip. Where I want us to cut off. I think it's about right here. So what I'm gonna do now is I'm just going
to delete this. And we're going to get rid of
this whole edge over here. And I'm gonna do that by
selecting all of these. Go into Object >
Compound Path > Make. Now, all of these are
basically one shape together. It's different than a group. These are more than
grouped together. They're actually one shape, but I filled them,
they're all going to fill with the same color. So now I'm gonna go to this
shape that's in front. And I'm going to select both of these groups and
go to Minus Front. And now I have my basic shape. Now I'm going to just
take a rectangle here. Zoom in. Let's just draw...sorry. Let's just draw an edge here. Alright, that looks about right. I'm gonna make it maybe
a little thicker. Alright, now I'm going
to ungroup these shapes. Shift + Command + G to Ungroup. And I'm going to select
these two center wiggles and this one part of
the site of the sea. And I'm going to Unite them. Now. I have all the shapes. Alright, there we go. That looks pretty good. That's our MCM monogram there. That's for our more abstract
version of a monogram. A monogram can really be
anything you want it to be and there are no
rules, no limitations. Use your imagination
and have fun with it!
20. Exporting Your Monogram from Illustrator: I've shown you some different
ways of drawing a monogram. We've done an abstract monogram, a script version of a monogram, and a more classic varsity
version of a monogram. Don't forget, you can
choose any letter style to draw your monogram. I want to show you
in this lesson, how to build your monogram and get it ready for
professional use. So we have all of
our shapes here, but now we really
want to eliminate any extra shapes that we don't need and only get it
down to the essentials. So right now, if
we zoom in here, we can see that this white
shape is a shape by itself. Alright. What we wanna do is
we want to erase that white shape and eliminate
it from this black shape. So the only we have
the black shape. So we're gonna do that by
selecting this white shape and black shape and go
to minus front. And that's going to eliminate the white shape because it's
in front of the black shape. It's now eliminated. You can see there's
just this black shape. But what it did was it brought
this shape down here in front of where our white
shape was overlapping. So let's just drag
these to again. Select those two. And I'm going to go
Shift + Command + Right Bracket – Bring to Front. So that's the illusion
we're going for once again, really quick. These are two
different shapes here. So I'm going to go Shift +
+ Command + G for Ungroup. And now we have now
ungrouped these shapes. I want to do that because
when I minus the front, if I have a group, it's going to eliminate a lot of things and
it's going to look weird. So we don't wanna do that. So now I have this shape and
this one shape by itself. And I'm going to go minus front. Alright, so now we have this
black shape as one shape, and we have this as one
little shape over here. And we can group
these two together. Command + G to Group
those two together. Now we need to eliminate this white part
on part of the G here. So what I'm gonna do is I'm
going to copy this Command + C. So we have this white
part of the L copied. And the reason why
I'm going to do it is because when I use minus front, It's going to eliminate it. But I'll show you
what we're gonna do. We're going to select both of these objects and I'm
going to go minus front. Now it left this part of the G, But, uh, eliminated
our white part, but we need to eliminate that around here
on this edge too. So I'm gonna go Command +
F – Paste in Front. And it brought it
exactly where it was before and pasted it
directly in front. So we're going to grab
our G one more time, that part of the G on this side, and we're going to Minus Front. Now it did our trick again. Now we're going to
Command + F paste in front one more time. And we're going to
eliminate this part of the G hold Shift. Now both of those objects are
selected and minus front. And now we have this
piece of the G, this piece of the G, and
there are no white objects. If I go Command + Y,
everything is a shape. But now I want to bring all these shapes together for the G. So Command + Y, let's go
shift, shift, shift. I want to bring
these altogether. So let's go shift,
shift, shift, shift. All right, I think
all the pieces are selected and we're
going to go Unite. And that brought
everything together. So now our G is one shape
and our L is one shape. Oops, oops, I thought
we'd group that. Let's grab that and go
Command G to group that. Okay, so our L is one
shape or G is one shape. Now if we go over to our colors, we can give these two
different colors. And that is one of them go. Now to export it. Let's say you needed your logo to be exported
at 400 by 400 pixels. You can take a square
here and click and enter 400. By 400. It says 0 points, but pixels and points are about the same. And now we have
just a rectangle. But if I go Command +9, That's going to
make an artboard. You can see it's
black, just like this. So now we have a new
artboard shape here. You always want to keep one
file with your master logo. And then you can
make a new file with your artboards that
you want to export. So let's say you're
going to export this for use on social media. Now you go to File > Export > Export As. We're
gonna go to JPEG. Use Artboards. I'm going to put range 2, I just want to
export the new one which is page two
that I just made. And I'm going to export it
into my monogram class folder. And when I click Export, it's going to give me
a couple more options. I want RGB for the screen. I want 72 PPI. And I'm going to click
here and go Art Optimized. Keep that checked. And
I'm going to click, Okay. Alright, so now we
have an export, a JPEG of our file. Let's go take a look at it. And as you can see here, we have our export, a JPEG file. Now you can open this up
in Photoshop or use it on your social media wherever
you need to use it.
21. Thank You!: Thank you so much
for joining me here. I'm so excited to
see your monogram. So please share it
in the class below. And if you have any questions, please leave them on
Discussions page. And love to hear back from you and know what you thought
about this class. So if you can leave me a review, that'd be very helpful. And if you share your
posts on Instagram, make sure you tag me
at @studio.xhico – that's Xhico with an "x".
 Xhico, Artist, Designer, Creative Educator