Transcripts
1. Introduction: Hello and welcome to this
intermediate watercolour class. Today, I'm going to show
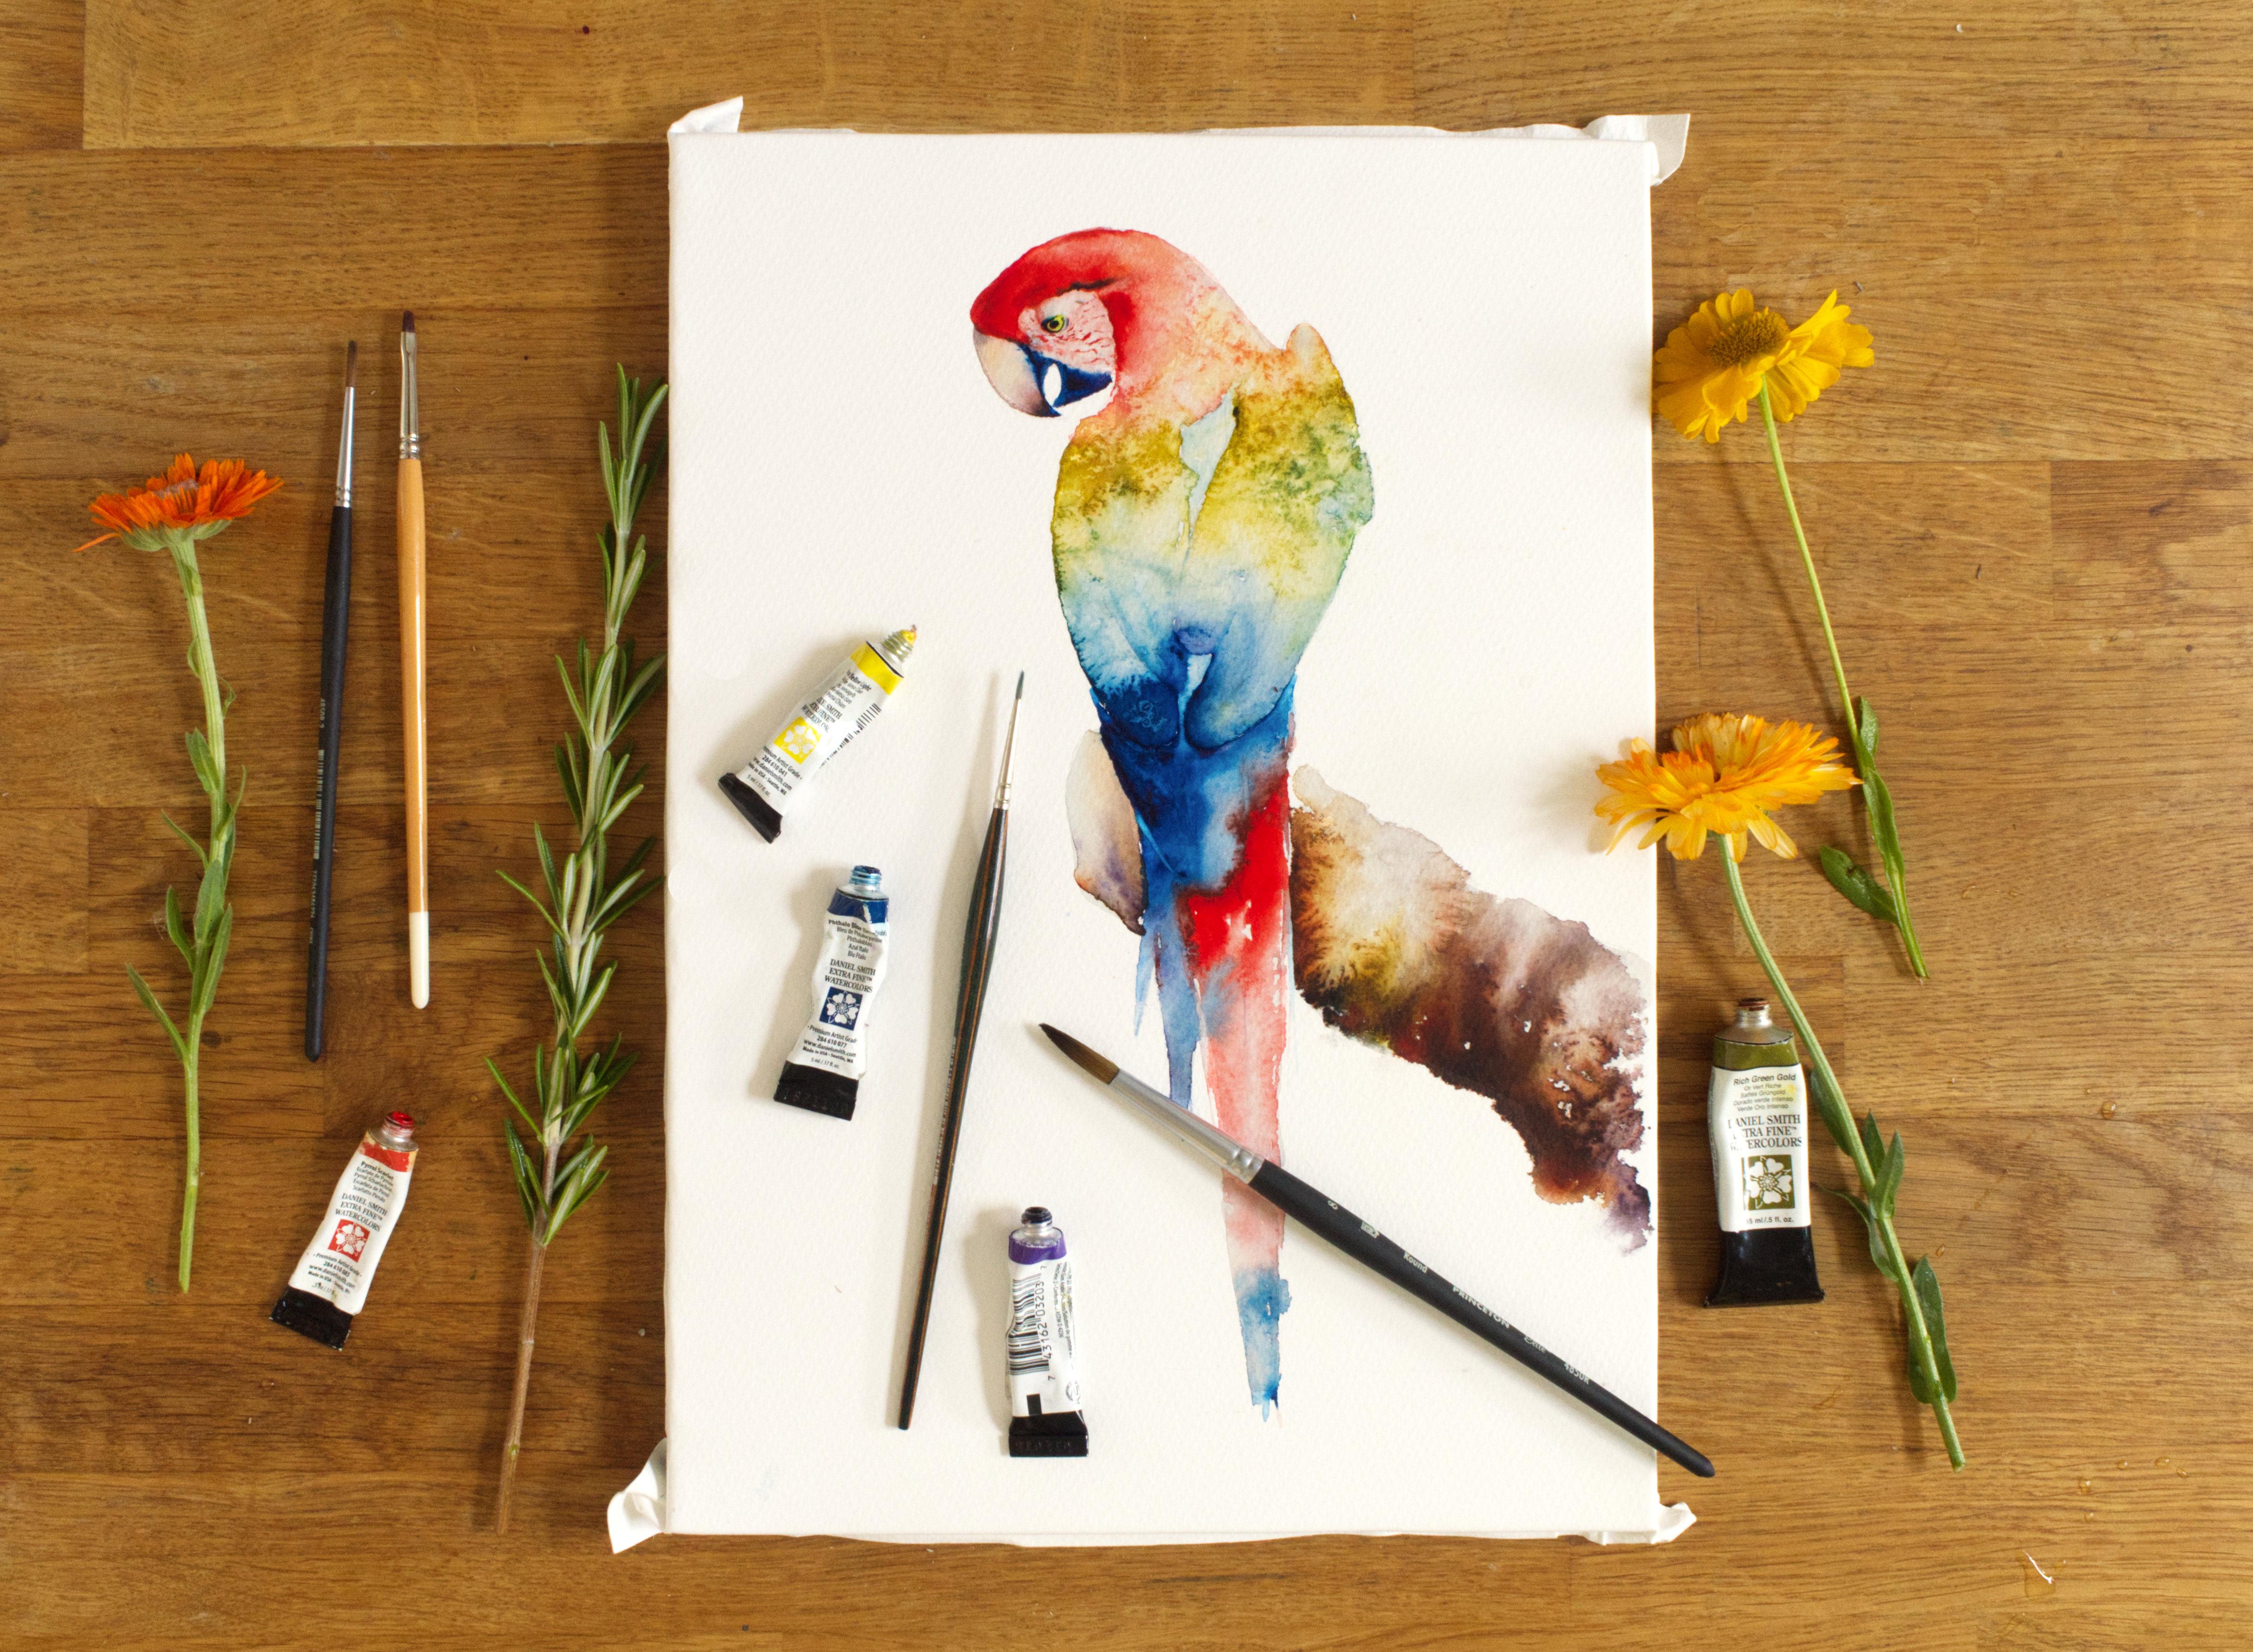
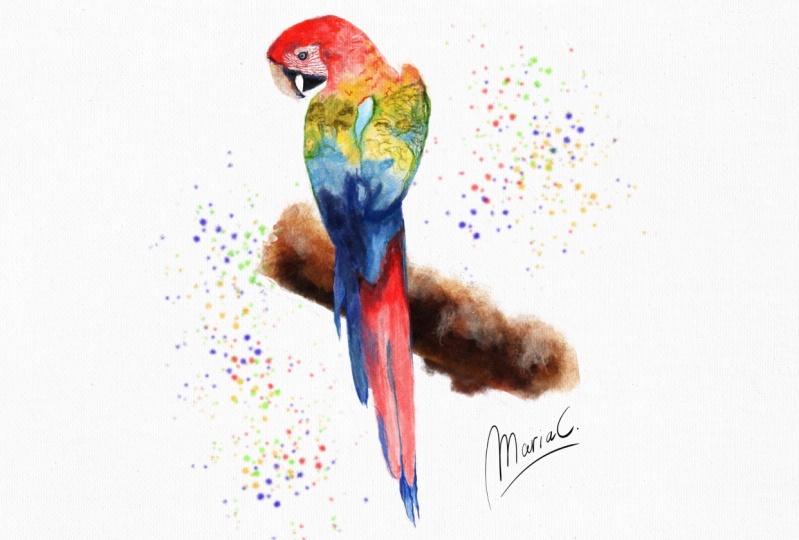
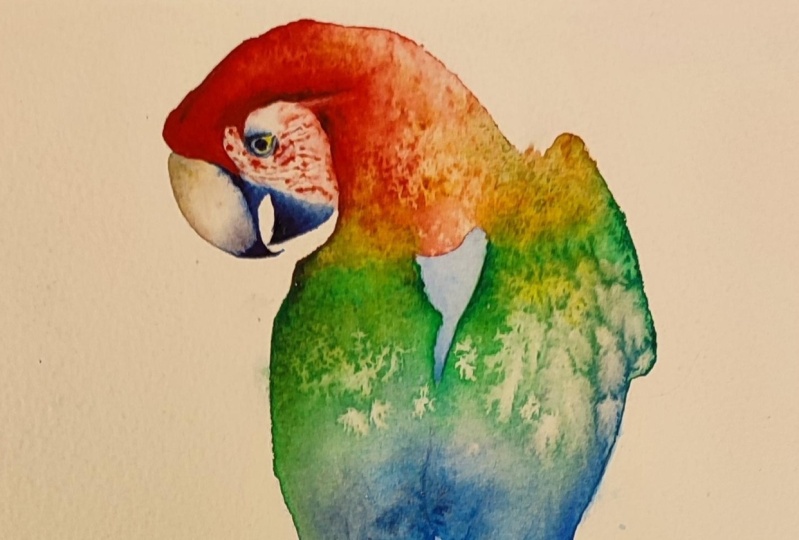
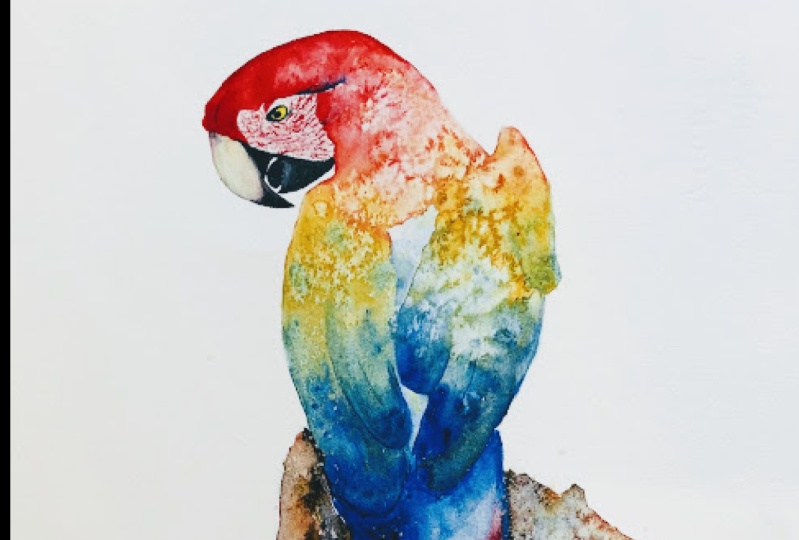
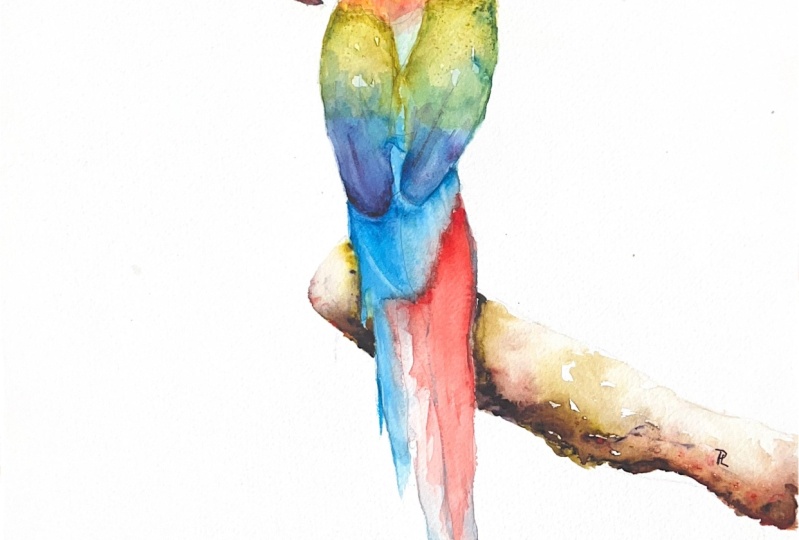
you how to paint this fabulous colourful parrot I've wanted to paint a
Macaw parrot for quite long time now. And I'm really
excited to show you a new technique
that I've learned. I know you're going to
enjoy painting her and she's sure to put a big
smile on your face. I'm Jane Davies. I live, paint, teach, and walk my lovely spaniels in the beautiful South Downs
National Park, England. Over the last 15 years. I've taught myself the free flow technique
that you see today. Not having been to art school, finding my own way has been
fun and sometimes daunting, but it has allowed me to
develop my own style. This has led me to teaching others either on a
one-to-one basis or as part of a group in a wonderful studio in the
heart of the South Downs. I also run a successful
commission-based business, painting pet portraits and wildlife art in my
own home studio. In all my classes, you will follow
along in real-time. Where I can guide you
to keeping your work loose and fresh
without over fussing. I have over 20 classes
available on Skillshare now If you're
just starting out, my three beginner
classes will guide you. Then you will find
over 20 masterclasses covering a wide range
of beautiful subjects. In each one, I'll share the techniques I use in
my own professional work. We'll have a lot of fun together and you'll gain the
understanding and confidence to
incorporate everything you learned into your own work. Plus I'll share a few of my tips and tricks
along the way too. I've provided you with a fabulous reference photo of the parrot along with a
downloadable template. The template gives you
a stress-free drawing. So you can just enjoy painting. I'll be showing you
how to paint her in one big bold layer, using some interesting
techniques to keep those colours
fresh and vibrant. There's a lovely,
easy technique I'll share with you for creating
that textured bough. I'll be guiding
you through adding that lovely crisp detail around the head while still
working wet on wet. Of course, I'll share many
of my professional tips, tricks and musings as we work
our way through this class. If you'd like to learn more
about me, or my work, please pop over to my website at janedavieswatercolours.co.uk This can be found
on my profile page, along with links to my
Instagram and Facebook pages. I'm very active on my
social media pages where I love sharing my art, especially on stories
with many ideas, works in progress and tales
of studio life I really hope you will share all your paintings on the
projects and resources pages. As I love seeing your masterpieces. And don't forget,
I'm here to help if you get stuck or
have any questions. I want you to
experience that buzz of painting in this
liberating wet on wet, loose style. So
come and join me!
2. Materials: So welcome along to this beautiful brightly
coloured Macaw parrot. You know what? I've
wanted to paint this subject for so long. And I'm really excited to show you the techniques I've
found to paint her. You're going to love them. So let's run through the
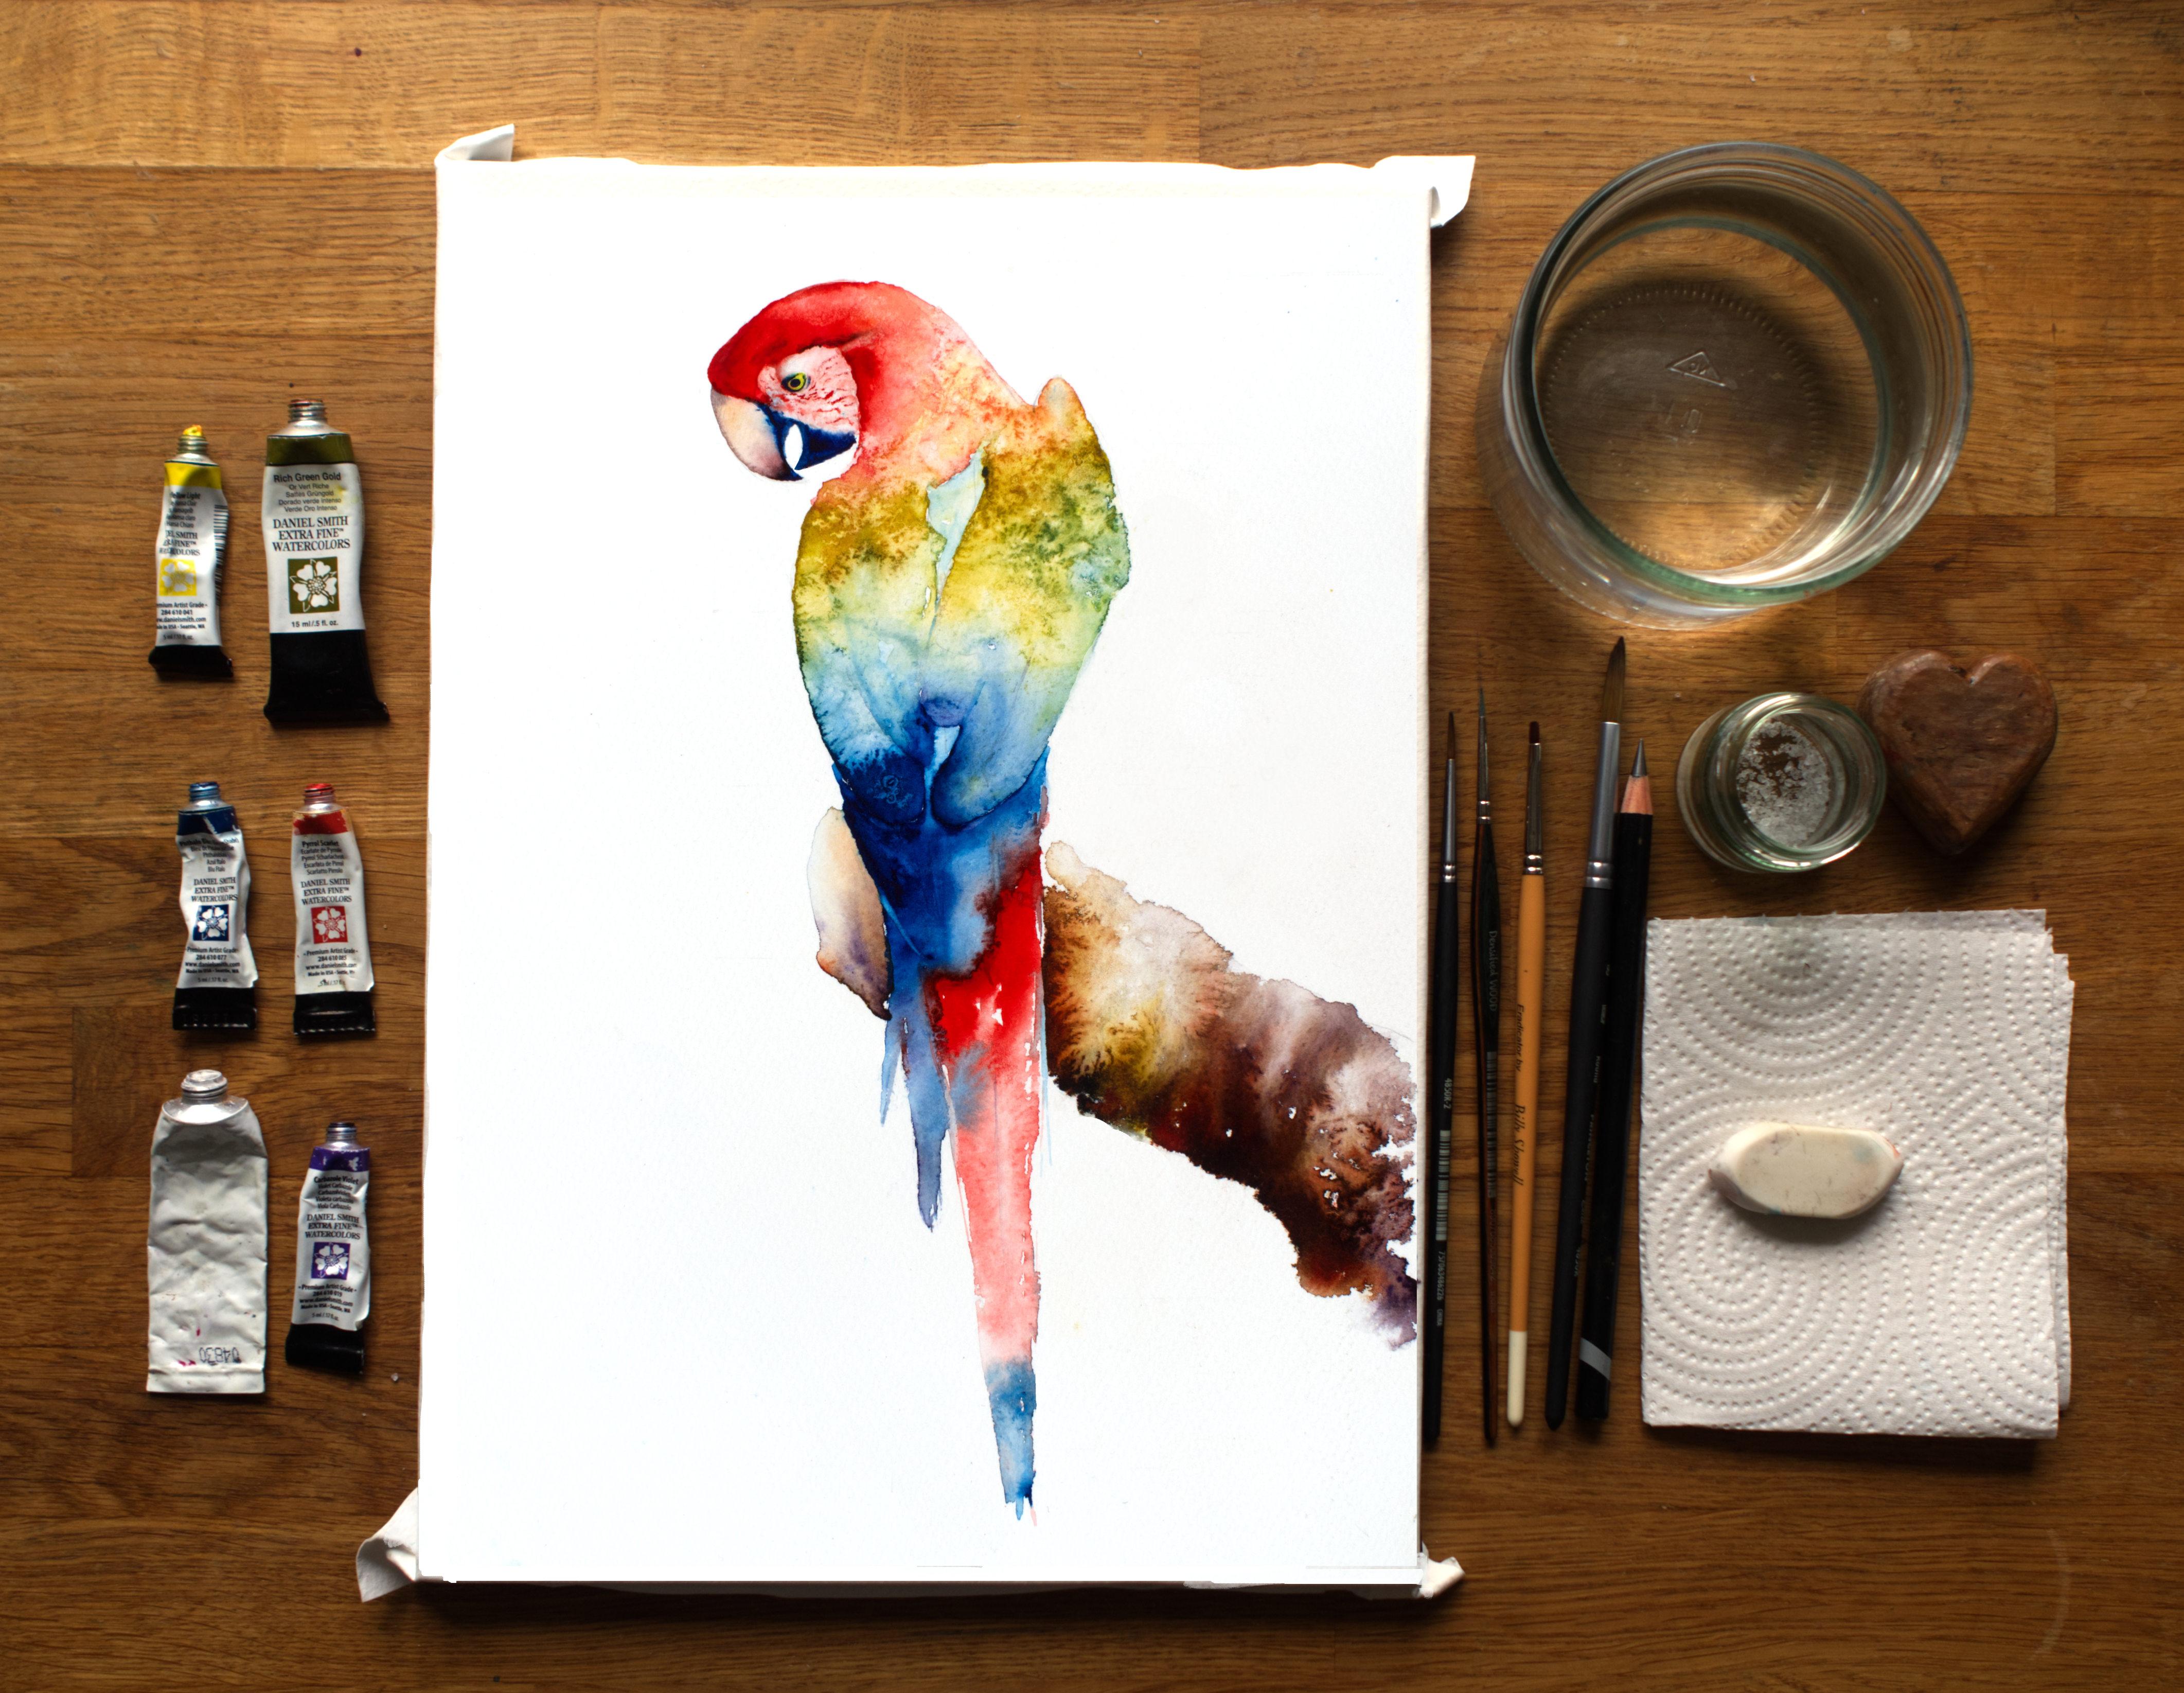
materials I'm using today. And to start with, I shall go through my paints. And all these materials
can be found in the projects and resources pages there all in a long list there. So no need to have to try
and remember them all, or scribble them down somewhere. From the top, I have
a Hana Yellow Light. Rich Gold Green. I've got Phthalo Blue, and that's a green shade. I've got Pyrrol Scarlet, and a little bit of white gouache. Actually, I don't
actually use this, but you may well want to. It's just for the tiny little
catch light, but I haven't. And I will explain why
as we go through the class. And then I've got a
Carbazole Violet. Now, if you haven't got these, then have, I always
say have a rummage in your in your paint drawer wherever you keep your paint. Pull out the colours you think
would match this Macaw and have a play and experiment with what you think looks good. There isn't, there's
no right or wrong. But what I would say, is find colours that have got
a good punch to them. Nothing that's too weak or, or very soft because
we only do one layer. So these colours are going
to have to work quite hard. So that's why I like the Phthalo Blue and the Carbazole because they are really
bright and actually the, the Phthalo Blue does do
this lovely turquoise, so that's a good colour. The others, again, the
violet is a good, good. has some good
strength to it, but I don't use it quite as
much as I do the Phthalo Blue. So I hope that helps.
The paper I'm using, and it has been stretched, which is always helpful because then it
stops any buckling. And that's Bockingford
and it's 140ll NOT. Obviously, I've
got my pot of water. I have my little trusty heart, which just allows me
to tilt the paper. I only do it once and I
actually don't use my heart. I use a rubber. But you may want,
wants something just to give your board
a little tilt at one point but it's a, yeah, it's not important, as important
as some of the classes I've done and have used
that. A little bit of salt. And because this
subject is quite small, I did grind up some of my
granules, I don't know if you can see, some of them... they're quite big! I ground some of those up, so they're a little
bit finer than that. So you may well want to
do that before you start. Kitchen roll or paper towel, little rubber, a pencil. And then I have four brushes. As I say, as the
subject is quite small - I painted this quite small - you get the idea with my hand. Then I've used quite
small brushes. I've got a number 0, which I use for the finer
details around the head. A number two, again, just when I felt I needed
a bit more control. My trusty eradicator brush, which I use in every class. It's just brilliant. It just takes little
bits of light out and it's got a nice
chiselled edge. It's brilliant. And then I predominantly use this, and it's just
a size eight round. And then, I do use a hairdryer. But only on the very, very last part, ijust
as it begins to dry, just so I can speed
the process along. Because this painting
relies on, on a lot of the sections
just drying on their own. But you can speed it
along a little bit. So you want your
reference photo, which is in the projects
and resources pages. So that's nice to
have in front of you. And there is a downloadable
template which you can draw around if
you're not confident of drawing her out on your own. So that will give you the
right shape to start with. And I think that is it. I think we should go and sketch it out and
then we can get painting.
3. Sketching Out: So our first job is to sketch
out our lovely parrot. Now if you've used the
stencil, I'm just, it will give you some blunt ends as you've gone
round that stencil, I'm going to give you a few
hints of how to just make sure your sketch is
looking nice and crisp. And obviously if
you've decided to hand draw him, good on you, and I'm just going to work round and
give you a few hints. So I will try and be
methodical and start at the top. So with the nice beak, he's got a lovely shape and it has a really nice pointy end. So make sure that's
nice and crisp. I've missed out the
tongue because on the reference photo you
can clearly see his little tongue but I felt it kinda made the painting
a bit muddled. It's up to you if you put it in, but I'm personally not going to Make sure the eyes
in the right place. That's quite important. And again, the nice shape make sure that's... and the
tail is really long. It's a lot longer than you will, at least what I thought, because when I was doing
practice pieces, they were getting
quite short and dinky. So it takes up quite a lot
of length of paper anyway. So make sure that's long enough. Get this detailed because
we're doing this in stages. It will all make
sense in a minute. But, so make sure you got this feather line and this feather line and
then the tail feather. Your branch. I'm just sticking to the
reference photo but there's no reason why you couldn't do something a little bit more? Yeah. Pull it right out. That's up to you. I'm going to follow, follow the reference photo, Just to keep things easy. I've done this
little feather here. I quite like that. It's tucked out. And this is a
really nice shape. So yeah, just make sure
your shapes are nice because this is ever
such a loose piece. We're not putting any
feather details in. So it really does rely on your, on your sketch being
the right shape. Because you're going to,
your eye is going to have to make a lot of detail up and it will look for the right
shape if that makes sense. Don't think there's
anything else I need to mention
about sketching out, but just take your time and, when ever I'm doing commissions,
I will sketch it out. And I'll go away for an
hour or so and come back and look at it again just to make sure things are
in the right place. Because it is really
important to get the sketch nice, nice and sharp and right. Okay, let's go and paint him.
4. Head and Body: Right then let's get some get
some paint on him, or indeed her. I'm not sure how you
sex a parrot. I'm sure somebody
does know though. So pick up your big brush. And we're going to start
with the, with the red. A little bit of a squeeze. We're going to put
nice amount of paint on the front here,
right here. And we're gonna go
around like that. Clean my brush. That's nice. I'm not even taking any
excess watch off there. So I'm just giving a
little bit of a shake. So there's plenty on there. And then we're
just going to pull that round up to
that feather mark. We're gonna go down to the, you see where the red
sort of finishes. Obviously we're
going to blend all this and then run that round. The job is, for you, to try
not to over fiddle Easier said than done. I know. But it relies on you
putting a nice amount of paint on the front end here. And you can always use this as
a little palette, tease them out. A little bit of dibbling,
that's all we need to do really for the red.
I'm going to pick up my yellow. I'm just taking a bit of the excess water off. Lets wake this up a bit. I'm going to just drop a
little bit of the yellow. Now what we've got to
keep an eye on, because I really want to put
some salt in here, and as we're doing
this in one layer, this is obviously
going to dry quicker. So we need to just be
mindful to keep an eye. This is almost beginning to dry. But I don't necessarily
want the salt there. I kinda want it
on the back here. So keep that in mind. Okay, before I over fiddle,
clean your brush, pick up the green.
Nice and easy. All we're gonna do is put a
line, don't touch the red. At the moment, just put
a nice amount of green. You've got a clean white piece of paper there that's
not being painted on. Go right onto the other side. Job done. Put your green down. Try to do this as briskly as you can.
Briskly is probably right, not quickly, but we don't want...
we've got a lot of stages to do and we
would like to keep it nice and wet. So I picked up my Carbazole and my Phthalo Blue. I'm just going to...
sorry... My pronounciation on
my paints isn't good. So I do apologize. A nice amount on this, on the tail feathers. A nice, good amount. Now for the fun bit
we're going to join it up. Clean your brush. Give it a good old shake,
nice and clean. And I'm not, I'm not going to take
it off on the piece of kitchen roll, just give it a
little bit of a shake. And I'm going to
pull a little bit of the green down, both sides. Coming into that little
sticky out feather. If it feels like your
brush is beginning to dry a little bit,
or that's sticky a bit, let's give it a
bit of a rustle. Its quite warm today in my
studio and you may have quite a warm studio too,
again, I'm gonna do the same with
the blues and violets. And we're going to let them
join up, its where the magic starts I'm keeping it... plenty of water because it really
relies on everything running. On my practice pieces, I didn't do any tilting. I have got my little heart here in case I felt I needed it. So if you feel things
aren't blending as much, you can always give it
a little bit of a tilt. And that will encourage
things to run. I'm just going to very carefully
just join that up. So these two
segments join. And all you're doing at
this stage now is just make sure you've got
that nice curve around. Then you, you've gone round into that little feather
that's sticking out. If you want to have a feather sticking out. I quite
like things that just break up a line. And at this stage, we just want to fiddle a little bit. As much as I say, you shouldn't fiddle too much. You can use a little
bit of this colour down here and just pop
a little bit there. We want that... we just want a bit of
something to happen. I'm going to just
dot a little bit of the yellow in there as well. Just want to break that up. And at this stage,
I feel I'm ready. This is, you can see it's
still a little bit wet. This is quite wet actually, but I feel I'm ready to
join these two up now. If your
lines a bit sticky, just give it a bit of a rustle,
that should all blend in. And again, let's join
that line up to... bit of a rustle And the minute I can
see... they're all going to be different, all my
practice visas were different... The minute you can see
something nice happening or interesting happening. And maybe I've left some little white patches here by mistake. I quite like that. I'm going to leave them. So I'm just going to watch it a little bit and see
how it all sort of moves along for a minute. I've got to
keep an eye on that. But apart from that...
I'm sorry, I've got to keep an eye on
this little part for the salt. But apart from this,
I'm in no hurry now. I've put my paint
down. It's quite wet. So if you've used enough paint, yours would be
quite nice and wet. I'm just going to
watch it a little bit, see how it goes. I might pop a little bit
more yellow in there. Use a little bit of that colour from the bottom of the tail feather just to plonk a
little bit up here. I like to use very technical watercolour terms, like plonking. Yeah, I like that. I'm not sure if I want to
personally fiddle anymore, but I do need to
put some salt up there. Its just
at the right stage. I'm not sure if you can see
that very clearly, but it's just
starting to go off. And my salt is quite fine. It's not a very big piece. This. So I had to crush some of my
salt up just a little. Just with the back of a jar actually, it
made it a little bit finer. I will put some on the main
body but at the moment is too wet, so I need to hang on a minute. Okay. To stop myself over fiddling, which sometimes if you're sitting there
watching it like, Oh, I could put a little
bit there or maybe there, so at some point, you kinda have to leave it to do its own thing and
trust, trust it. So I shall clean my
brush, big brush again. We're going to pick up the Carbazole Violet and
the Phthalo Blue. And we're going to,
a little like the top there, of his head, not just the top. We're going to put
a nice amount. That was the Phthalo Blue I'm using at the moment Again I'm going to leave a
little white line. You can get this as tight as
you can without touching it. That would be ideal. Gently bring it down. A
little bit of the Carbazole So we're
filling in that, you can see the very
dark tail feather there Now I'm cleaning my brush. Just taken a bit of excess
moisture off, I don't want this too wet because its not
a huge area to cover. Then I'm going to touch the
back of that, and follow it. Being really careful not to
touch those tail feathers, the body tail feathers. And we're just going to wet. You can say how much paler
those right-hand side, they're probably body
feathers, aren't they? They're not quite tail feathers. We just want
something like that. That's worked really well. Might actually just pop a little bit more water on
there just to get it moving. Touch more. Otherwise it's going to look a
little bit liney, a little bit too
rigid for my liking. Don't worry about
these areas here. We tackle those a
little bit separately, so have no fear. There's a plan. Okay. You just want
something like that. So I'm going to clean my brush, pop those colours down. And then we're gonna
go onto the red again. So pick up your red. Similar thing. We're going to put a nice line. I'm almost doing some painting
today aren't I? Again, leaving a
little white line. I'll keep an eye on these, this area here because again, I want to put a bit of salt, but to me that's a
little bit too wet. The salt just
won't work very well. So be mindful as you're
continuing on here. Okay. Clean your brush. You'll find if
its anything like my water, it goes dirty quite quickly. So if you're being very
pristine about your water it would
probably be worth changing, but I'm not going
to abandon you to change my water, so. Okay. Nice wet brush. And we're just going to whiz nice sort of big free
handed as much as you can. Just pull that down. And again, the minute
you've got something that looks pleasing, stop, because it's really easy to over fiddle. And then
clean your brush. Let's pop that red down. I'm with a tiny bit
of Phthalo Blue, Just a diddly, because if
you're using the Phthalo Blue it's quite a potent colour. I'm just going to put, just
a tiny smidge of blue. You can see there's a tiny
bit down here, its just a quick wrist action
really, it's not a lot. Lovely. We're going to actually
borrow a bit of colour from this sort of long back feather, I just going to... if I can get the
right angle so I don't obscure it, so you can see, I'm just going
to touch the bottom of that. I'm just going to pull... she says... let's give
it a bit of a wake-up. I'm at a bit of a funny
angle here. Okay, and then we're
going to touch... The idea is you touch a little bit of red
to it should just bleed a little bit. Its a little bit
warm in this studio, and actually I can see
my red is starting to already dry on this
little white line. So what I'm actually going
to do is to fill that in, still trying to keep
an eye on that area. Bit of multi-tasking
going on here! That's too wet to join up. I can see I've got
quite a puddle there, so I don't want to join that up, but this was ready to join up. Okay. Back to pulling
some of these out. Pop a little bit
of a Carbazole in here as well because
it's sort of violet that tail feather.
It comes right down here. Perfect. I don't mind that little bleed,
that's quite nice. The risk with sectioning
these areas off and then joining them up is they can become
a little bit rigid. So if it's looking a little bit stuck and like
me, you've left it may be a tad too
long to join them up. Just give those little edges a rustle, as long
as it's still damp that will sort of bleed a little bit and give you a softer edge. A little bit of red just down there And then lift your head. Have a look, see what you think. I'm liking what
I've done so far. So I think that's looking good. Still a little bit wet up here, its beginning to dry. What I might actually do, I've got a lot of water sitting at the bottom of this feather, so I've cleaned my brush. take that excess
moisture off The brush is quite dry. We're just going to very
gently just touch, so that paint should suck up the brush. You don't want to
suck too much up because I quite like
that being quite dark, although in the photo there's not a lot of
difference between the two. I quite like it a
little bit darker. Now. This is blending, blending well, but we don't want it
to blend too much. So just while this is drying, just run that little line down. And then we're just
going to kinda watch it for a minute to see how it goes. And as I say, I'm mindful of
trying to keep that in view. This is beginning to
blend quite a lot now. So what I will do, I'm going to see if I
can dry the area off just to stop that
bleeding in anymore. So I've got my little
eradicator brush. I'm just going to try and put a dry line in there very gently. So that should in theory stop this running into
this, a little bit. So we've just dried an area. It's just stopping the
water running really. You can imagine you're
damming it with a dry line. And that's fine. I quite like that little bleed. That's absolutely fine. I think I'm probably about ready to put
some salt in there. So lets see if we can sprinkle
some in there. A little bit on here,
a little bit up there You don't want too much. Otherwise it becomes a little bit
too grainy and spattered, I'm not putting any down
the tail feather. I don't think that needs it. I'm just keeping an eye, that's still bleeding
across a little bit, so I'm just... no hurry, no stress, keep
everything nice and light. Just gently take a little
bit of colour out, some of that red is bleeding into there, but I
don't mind that. I could almost just use a tiny little bit of
it and just pull. I don't want to start putting details
of feathers in, but some little lines
are quite nice. Its not quite worked... Oh no, there we go. Picked up a little bit
of colour from there. If you step away,
it might just give your eye enough to see that
as separate tail feather. But we're not putting individual feathers in here I want to keep this
lovely and loose and light. I'm just looking around
to see if there's anything else that
needs attention. Ooops, dropping my brush. This I'd quite like to
be a little bit rounder I think So I'm just gonna
go back, its still wet. I'm just going to smooth
it out a little bit. And that little line there, I'll nick a little bit of paint
from that, and apart from that that all needs to dry. So keep an eye if you're
still waiting for your areas to dry to
put your salt on, just keep an eye on it. And really this, again, needs to dry
naturally on its own. A hairdryer will, although
it's handy and I have recommended having
it to your side because you can just finish drying the very last parts off, just as it
starts to go, but I don't know if you
can see that that's really wet, so if I was to hair dry that we'd lose that lovely magic it's
creating at the moment. So you just have to be patient
sometimes and let it dry. And don't worry if like mine, we're waiting on that
sort of areas to dry and You know, this tail area is going to be dry by the
time that has dried, if that makes sense,
what we would do is just to fill in that line a
little bit later on. Sorry, this line as in the
little white line. So don't worry about that. This just needs to dry. If we were to let this into here it will all go a little
bit pear-shaped. So don't panic about
that little line. That's all part of the plan.
5. Face: So I've been very good and very patient and allow that
to dry on its own. Although it's been
very tough to do it. But it's allowed it to dry and it's giving it a
really pretty effect. I know if I was a little bit too eager beaver and put
a hairdryer over it, I'd have lost a lot
of that patterning. So what I'm going to do, I'm going to actually leave that salt on for the time being because it still might be a little bit tacky
underneath there, so there's no harm
in leaving it. But we're going to go
and do the face next. Now as this is quite a little painting and actually this would be beautiful bigger. I think this would allow
a lot of this body area to run and give you some
more unusual marking. So if you're ever feeling
brave to do it a bit bigger, it would be fantastic, I think. Right onwards then I've
picked up my number two. And I'm going to wet
the face and the beak. And I'm going to go
around the eyes. We're going to
miss the eye. I am just… I can see a lump of salt there. I don't think that's
gonna be very useful. Okay, I'm going to start right up against that,
because what I want to do, hopefully some of this red, if I actually touch the edge
of that red, it should blend. Just give us a
little bit of colour on that face because
you can see, I'm going to call her a she, She's a little bit too
tinged with pink. Carefully around
that eye as much as I can see it from where
I'm standing. Going down. Little bit more water. Again, I'm going to
touch the top of That, and run right round to the
tip, and be really mindful, especially on the beak, to
stay within your lines. We're going to use some
quite strong colour and it won't be as easy to take out if you've used
the same colour as me. Just add another
little drop of water on there just to
make sure it stays nice and wet so we can work on it for a
little bit longer. If its too dry, it obviously dries quicker, and it doesn't give
us any time to have a play. So I'm just giving that
little edge a rustle You see how it's turning pink? What I want to do, I'm
going to… just the most tiniest bit because as I
say the Carbazole And Phthalo Blue are
quite potent colours. So I just want the tiniest, tiniest little bit
just to give us a little bit of the idea of
shadowing. Just give that a little rustle just the
diddliest amount… A drop on the
end of my brush there… I'm just going to give that a
little move around. At least I've got a bit of a tinge There's not much else really to do with the face, I'll put the lines
on in a minute, but there's, you know, it's, it's quite, quite white. So I'm just going to
put a little tiny, a little bit of red just
to bring that forward. This little area a bit forward Then there's the tiniest bit, just goes around the top
of her eye I'm just going to pop
a little bit there, I've probably blended
that a little bit too much. Going a little bit too soon. If I duck my head I can see. It's always a good trick
is if you duck your head up and down, or bobble your
head up and down, you'll see how that's drying
because you can't always see that at the angle you're
sitting or standing. I always stand, I never sit to paint, but that's just me and
I'm quite comfy standing. Right What I'm going to do,
I'm going to pick up the Carbazole and the
Phthalo Blue And I'm going to actually
swap brushes because As I say I'm
working quite small, so I've actually picked
up my number 0 Just wake the brush
up a little bit. Take the excess moisture off. And now we want this… I'm probably just going to
use mainly the Phthalo Blue, tiny little bit of
Carbazole It doesn't matter, but
you want it really thick. And we're going to fill
in this beak So I would start a
little bit further down. So if it's you're paper is a little bit wet
still is not going to whizz into the head area.
So start at the bottom. And you'll get a feel
for how, how that is. And whether you need to just
hang on a little bit, a little longer, to
allow that just to go tacky. You just want the edge just to very, very slightly blend just to stop a very hard edge.
That's all really. I'm going to pull that over. She's got a little
triangle again, hasn't she? I'm going to run it just… I'm working a little way away
from this, and its quite small, so I'm going to try, trying
to be as careful as I can. Another a little bit of
Phthalo blue Just to do that tip, and I'm going to clean my brush. Make sure that stainy blue is off. Tiny little bit of red, I'm going to touch that as well, just to give us another slightly
different colour, really. Just beginning… I can
see its beginning to go… well, beginning
to dry on me. So I'm just going to put a
tiny bobble of water there just to give us a
little bit more time. This is still a little bit wet. My, my beak was
beginning to dry. And you can always, if
you want to spend a little bit longer
on a painting and you can see areas that you've wet drying, but it's still damp, you can add, just as
we've done there, a little bit more
water and it gives you a bit more time to play.
I'm pop those colours down. I'm going to pick up the
yellow, maybe the red again. I just want to get a
bit of beak colour. So I'm actually going to do,
what I generally don't do a lot of, I'm just going to -
oops that's a bit too red - Just going to put a
bit of… let's take some off… its a little bit violent.
Put that down, so I don't be tempted to use it. I'm just going to give it a
bit of a rustle around. I'm trying to make sure my brush hasn't got too much
water on because if I start dropping water now this could end up whizzing up into the face which
I don't want. As I say, keep an eye on
that reference photo. Keep flipping your
eye back and forth. And be careful if
any of you salt is still a little bit damp,
just be careful you don't put your fist in it. Its very easily done. Just take your time. Make sure you keep that
shape really lovely and crisp. Right I can see this is just beginning to sort of dry on me a little bit. So I need to put those
tiny little lines, so with my diddly brush
and my red paint, I'm just putting them in. It could have dried a
fraction too much now. I'm just going to put a little
bobble of water, give that a bit of a rustle
around, and… that wasn't quite
what I wanted to do! But if anything like
that happens, just get your big brush, clean it, make sure
it's nice and clean and you haven't got other colours contaminated on there and just clean it off like that. That's fine. Right, as I was saying, Let me just check how wet
it is, it's still damp. So I'm just going to put those
little lines on. Now the thicker you can
make your paint the stickier it will be and the more defined lines
you're going to get. As I say, working on a
slightly larger parrot would have been
great because obviously these lines are quite thick because I can't get
them any smaller, because it's a little painting. If it's gone a little chunky
like mine, don't worry, because we can always take some of that chunkiness out, when it's dried.
I'd still quite like to get that little line I was
trying to get in earlier. I'm just going
to paint that in, you can see it goes round the top and…
that's better… just try and take some
of that lump out. It's what happens when
you try to work so far away from a painting, you can't quite see! Little one up there…
Right. I'm going to leave that because
that needs to dry. I know I'm going to overfiddle that in a minute and
very quickly, um, these have bled little bit too much, just, as I say,
because the subject Face is a little bit too small to be putting these tiny
little details on. But I can just see… I just wanted to make sure
before that completely dries… I just want to crisp up
that little... She's got a very… They're very pointy points,
aren't they? Okay. I'm going to leave
that to dry and it's almost dried
already actually. And then we can do the eye and
I will probably correct… yours might be absolutely fine… but I need to correct some
of those rather heavy lines, but I will do that
once it's completely dried because if I fiddle now, it will, it will just
become muddy and messy. If you ever make things that you think are a
little bit too heavy, it's best just to let
them dry and then you can go back once it's dried
and sort of correct. And soften.
6. Eye: Right, So it's on with the eye. Just a little note on the
little red face markings. I did correct that
off camera because I could get a little bit closer
because I'm working at, say, a little bit away from it. So any marks are quite
hard to do at a distance. So I'm sure you've
been able to make them beautiful so that it's no different
than I explained. It just I've corrected mine off camera on with the actual eye. So pick up your brush
with a small brush. We're going to use the yellow. We're just literally going
to paint in the eye. Nothing posh, nothing
clever around. Just make sure you stay within that shape and get that shape. Make sure you stay
within the lines, keep it nice and she'd be
just as it begins to dry. Your brush again to use the fallow blue.
Nice point on there. We're going to go very carefully
around the eye with it. So we're going to give him her
her eye makeup as it were, really very carefully,
no rushing this time. So don't worry, just
take your time. If you've been standing, then it's quite a nice time to sit and
take the weight off your legs because you can
get nice and close to it. Don't have to go all
around sometimes I quite like little missing
parts. So it's not. So obviously, when
you were a child, you have to go round all the
lines of black felt-tip. I can remember
doing that vividly. Yeah. I'm just going to leave that tiny little right-hand
corner without the painter. By which time now, hopefully, and make sure it is. But the middle of your
eye is nice and dry. Again, you can just hit him. Bob your head up and Daniel, see where that's nice and dry. We're going to put tiny
little speck in the middle. And then you can work outward
to get the right shape. Again. Take your time. Look at that reference photo. Take your brush away, see what it looks like. I'm, I'm liking that from, from where I can from y position further round back
home. I'm happy. We're hoping starry-eyed,
looking at it, making sure we've
got the h right. And that is your I done, this is a very easy. Now if you've done this
a little bit larger, this will be very highly FIFA. He followed the size I've done, but you can take little
done my previous classes. You can take, You know
what I mean by taking the little areas of light out. So if this was a
bigger, slight delay, I could just take the
bottom rim out just with a clean brush and I'm just
going to stroke it away. This is too small, I
just cannot get that close detailed with it. But if you look from
afar, I like that. I don't think it needs anymore. So be careful not to over money, especially if you've
used the fallow blue because it's quite
a potent color. And it will stay in very easily and it's quite hard
to then get it out. So do it, do they do that tiny little dot first
and work your way out and you can then sort of get the eyeballing
the right place. But that is your i done.
7. Bough: Right after doing such tiny
little of nicotine work, we're going to do that bow
and that's really nice. I'm going to use
lots of water, Nice, nice amount of paint to
pick up the big brush. I'm going to do this side first. So we're going to wet it down. We're going to touch
just really carefully, just touch the edge of
his hotel feathers out. Keep defaulting back
to him, to her. Tail feathers. Gel so you get little tiny
little blend bit abandoned. I'm going to pick up
the red and the green. No right or wrong
really with this, but they're gonna be the two
colors I'm going to use. I'm going to just pop
color down on that corner. And the bottom
right-hand corner. Tap. That should just
gently blend up, which might put a little
bit of a carbonyl. Little tapping it. And let's see how that
works its way up. A little bit of a
blend like that. Perfect. Then we're gonna do the same. The other side, so wet. I'm gonna do right up against
the tail feathers first. Just so I know I've wet
the area down on top. Make it all nice and wet. And if you lift a
little dry patches, that would almost leave
a little bit of texture. So I might try and do that. I can see I've got, just
because I've been a bit ragged here with
my brush strokes. There's little dry
bits in there. I'm going to begin to have, Let's have, say the
same, same colors here. So we've got to the green, the violet, and the red. And we're going to be quite
bold and we're going to put nice low strength
right at the very bottom. Doesn't matter
what order you put your painting of how you do it. Red in it. Come up against
the her tail feathers. All the way down.
Green in there. Contaminated with the
red or green in there. Bit of the violet. I'm just staying just
working on the bottom, not going up the top here. I'm hoping it will all
just gently blend. Just have to be
patient because that will get to the top long
as it's wet enough. She says just bubbling it up. See how my branches
might you know what? I'm going to put those down
and because I've been quite wiggly with some of
my brushstrokes. This is actually
drawing a little bit. I'm not giving it a very
fair chance to creep up. And again, you could
always give it a little tilt if you
feel it's not moving. So I'm just making
sure this area is wet, so I'm probably
getting rid of some of those whiter dry patches. And then I can if it's
still not moving, I can pop a little bit
of water in there. And then we're just going
to hang on and see how that, how that moves. Because it should do
a little bit more. Carbons are in
that corner there. Lovely. I don't want it, I
don't want it to bold and takeover from her. If we make it too much, it's going to detract from her and we're only
doing one layer on it says She's not we're not
gonna do any more detailing. I'm just going to leave that
to dry and it should work its way all the way up
the bow on its own. And if you find
it's just sticking, you think it's beginning to joy, you can always just
going to use my rubber. You could use anything. But yeah, I'm going to
use my little heart. Give me too much of a rate. I'm actually going
to use my rubber, which is not as not gonna
give me as much tilt. I'm just gonna give it
a little bit of a tilt. Walking the courage
and the mini, I feel it's going up
the bow too much. I can just lower it down. So we're just going to allow
that to say work its magic. Okay, as I've watched
this spread, I'm, I'm aware it's probably going to be spread a little bit too much. So I'm just going to
take a tiny little bit of water sitting
at the top here. I'm just going to take
up some of the excess. Because what I'm gonna
do is lay it flat again, I don't want any pickup here. I don't want this water that's sitting here because
it's been tilted slightly to them run back down
again when I lay it flat. So let's see how it
does when I lay flat. And again, we can always tilt it if we feel we
needed a tilt it again, just say watching to see whether there's too
much water sitting here. Neither use a kitchen roll away. I'm like I'm doing here. You could put some salt
in as well at this stage. My poor little bit and I want
to do too much because I'm aware she'd already got
quite a lot on our body, so I don't want it to look like just a lot of salt in on this
painting, but I'm white. I like to keep this
nice and I'm pain-free, so I'm actually going to pop a little bit of salt in there. And hopefully we'll stop it. Stop the paint from going in there to pop a little
tiny bit there. Probably putting this
on attached too soon. A little bit down
there because I can see that it's drawing
just a fraction. We're going to see
how that goes.
8. Finishing Off: Isn't it amazing what
a bit of time and patients can create youth
because that's just beautiful. And we haven't done
much more than wet the paper and plugs
and paint them. Perfect. Okay. So it's onto the last little
bits and pieces really. So I'm going to
brush away my salt. Obviously let, this has
dried for quite long time. But just be aware if you're
doing this a bit sooner that this is really
nice and dry. Brush that away, making sure I haven't
really damped fits. More like hoping I haven't
got any damp bits. Get rid of that. Okay, Now we can kind
of see what we've got. Now the thought
isn't there anymore. So what we're going to do, we're going to, I just want
to make this a little bit, little bit stronger the head. So what we're gonna do, a
pickup, my bigger brush. Pick up the red. We're going to plunk. Again, same, same
as we did before. I loved my technical terms. Decent color here
you can see that's a really darker bit of
area down there, isn't it? Just clean your brush off? And we're just going to
gently just as we did before, pull that out. I don't want it going
too far because I love this light I've got here. So I want to contain
it a little bit more. Also. Make sure you've gone down
a little bit further. Checking on my reference photo, see what she looks like. Suck up a little bit
to just soften that. My brushes damps are cleaned
it excess water off. I'm just going to just blend it and just
sort of soften it. You can soften it
with your finger. Your fingers always
good for this. Just to stop it. I don't want any what I'm, what I want to avoid
is any hard lines. Obviously, if you put another layer on,
you're going to end up, if you're not
careful with a line, like a watermark line,
whether it's ended. I would like to avoid that. I can also at this stage, take a legal pillar color out. So i'm, I'm taking the top
color we've just put on. And then also hopefully going down to that
first layer as well. Just to give you a little bit
lighter on top of her head, although it's not obvious
on that reference photo, it's nice to do just brushing, taking the excess color off. Just step away, have a look, see if make sure you
don't take too much out. Which is always easy to do. Keep an eye on that
at the same time. And what I like to do, there's a little line that
comes off there. I'm going to put a
bigger brush down, pick up my number two. And let's use the phthalo
blue and just tie again. Be careful, don't use too much
of this because it's good. Solid color. Just gently soften. Next is drawing. Try and quickly in here today. Make sure it doesn't
get too heavy and dark. Take you, clean your
brush, excess water off. Gently, tease it
out very gently. Visit beginning to that
first swayed, not the first, the second layer is
beginning to dry, so I'm just going to keep tapping a little
bit, brushing away. I want to avoid the line. I want to get that
elusive little bit of a red marking in here. That doesn't spread too much. Don't want it to be too obvious. It's actually a little bit of light here as well, isn't it? Obviously we're
creases, I guess. Just take that out as
well at the same time. Were these little
bits at the end make just bring them to life. It's, it's amazing
the difference. I think always very quick to say they're finished and it's just a tiny little
bits at the end that really do pull them together
and make here what leads a good painting even
better. Lovely. Okay, I think I can
see that's just beginning to dry
and I've managed to us given the given her head a little bit more
unpleasant it yet I haven't I've managed to keep
them nice and soft as well. I'm happy with the eye. We're going to pop a pill. Probably haven't done that
little tiny catch light. I wasn't sure at
the time of to put it in and I'm still not sure, so I'm probably not going to, but you can put a catch light
at a tiny little catch of light which you can put on
with my trusty white Gretchen, It's just a tiny little dot. But because he's always so tiny and plus she hasn't
actually got one on that. I then I'm probably
going to leave it. But if you've made that
this painting a little bit bigger and you didn't take that little bit of
light out from that. I then put the little dots in. If you think it needs
it, the worst comes to worst if you put it in
and you don't like it, you can always basically covered over again with the strong
color you used for the eye. Right? So we need to tackle
this area here and join up these lines to make
her look like she belongs to her body. Just to go a little bit
connected at the moment. So I'm going to pick
up the fallow blue, got my number two brush, and I want again tiny amount, but it does leave us a lovely
quick color, doesn't it? So we're just going
to paint it in. Be careful not to go over these lines too
much because again, you'll end up with a watermark. We're not careful. I'm just filling it in
tiny amount of my brush. Again, I can soften
it with my finger. I feel it's looking
a bit sort of stuck to linings for drag
it out a little bit. I don't want it to look
like Here's a layer really. Okay, so we're gonna come down to throw a little white
line as well here. I'm just going to
literally paint this in really nice and strong because we don't want
to see that white line. What do I long? Keep your eye on that
reference photo as well. Keep referring back to it. It's the shape might be
slightly different than mine. Just going to come
up a little way up. Clean my brush. Now I'm going to use drop, going to use a little bit
of this color here that we've put in there and that's
going to run up, hopefully. It'll area there. Perfect. Obviously at the moment
this looks a bit lining, so I'm going to use
my bigger brush. Wake you up again, take a legal
duty excess moisture off. I'm just going to gently similar to what we're
doing did there really? And actually you can see that
the darker area in there. So I might I might
make that into that. That's sort of like a triangle. The other side is a lot lighter, so I don't want that
to be too too obvious. So I'm going to soften that
light down, join them up. Just going to put a tiny
little bit of paint. Just want to don't want to put too much sort of lined
in and feather details, but some are, some
are quite nice. Somewhere along the line I've missed out the
other feather here, have a nicer she
wanted him to do. I'll show you being
clever and done. The second feather in
just a little line there. Fema brush, I'm just going
to put us not clean enough. And I let go gently sort of
swinger a feather up there. It's so easy to get caught in the trap of trying
to put feathers in. And I did try on some
of the practice pieces, but they ended up
looking a little bit stuck and contrived and
wasn't wasn't keen on them. I like, this is
just personally my, how I like my paintings to look. Wasn't keen on that very
precise nice of it. Plus it's a bit fiddly and I'm
not very good at fiddling. I'm not very patient. If you want to put in
some, some feathers. By all means do it is
just a guide really. So you have to find your own way a little bit sometimes if you think, Oh no, I would really like some
feathers in there and then do, hey, these are hopefully
these classes, a little bit of a
guide for you, right? Let's put that fallow
brown, brown, fallow, blue down and pick
up their car basalt. Again, I just wanted
to put a tiny, there's a really obvious
vein on this feather here. So I just wanted to
do a little sweep. I'm going to practice that sweet before actually
my brush actually hits. That's probably enough. I
don't want to do too much. And she'll make it a bit quick. You'd have just gone. I think this is
why the feathers, they have to be right over. They look really odd. So if you're going to
do them, make sure you He had the patient to sort
of sit there and make sure they write something. I'm not very good
at these patients. Yeah, I like that. I'm just enough. It just draws your eye into
there is the feathers. But we're not going to very
carefully putting them in monitoring that a
little bit there. Okay. I think that's dried. Okay. It's still a bit rushed down, a little bit of white. To do that. We want to see that white line because actually shadow
under there isn't a sale. That won't stop
putting it all in. But equally, I didn't want a very thin
one, that white line there. Yeah. I'm sort of stepping
away little bit, see what it looks like from a, a bit more of a
distance, liking it. So again, I'd like to
put that little bit of a hint of that vein
down this tail feather. Again. Sometimes you have
to sort of stand or sit at the right angle so you can get that movement with your wrist. Norms. I'm just going to
back-and-forth, back-and-forth. Hopefully it a touch and it's
blended in the workplace. Yeah, That's enough. Okay. I'm pinging to pick up
my little eraser brush. A bit of a clean, make sure it's not contaminated
with paint. There's a really lovely bit
of light here, isn't it? The sections of
that tail feather. We're going to put that in. I'm going to just be
done with my finger. Don't have to go
all the way along. Just as the hint again here. So we taught him to
myself a little, little. Again. Just another hint. I'm not going to talk. I don't really want to tidy this up. I don't think I quite
like the looseness of it. If I say, it's very easy to go down the road of trying
to put the tail feathers in. And when you actually look back at it after
you've done it, you're like, Oh, I'm
not sure if I like personally, I like it as much. So I'm not going to tidy it up and going to
leave that as it is. I'm looking around and seeing
whether there's anything else that needs
doing that this is always a nice little area. So the way the wink sort of hunches over and there's
a nice little spot to light up their dirty finger. Fallow blue gets everywhere. One of my practice pieces I finished for the day
looked on my hands. I was covered myself a
little bit of kitchen roll, that would be better maybe. Now I haven't because
we've only done one layer. It's very easy to get these
sort of lines here where the, where the paint is
dried up against the the dry paper is wet. You can often get with what looks like it's a bit
of an outline so you can very gently take
some of that out. Airy. Say careful. When I say these, if
you haven't invested in eraser brush,
these are brilliant, so they are well-worth, well-worth a little investment. You don't want to go
around and do all this, you just little parts of it. Again the next always nice. Mine isn't that obvious? Some of my practice pieces, I had quite a line here and I took that out
and that was nice. I might actually, am I
going to do this as Popper? Take a little bit of lighter
just underneath that.
9. Final Thoughts: I hope you enjoyed the class. Did she put that big
smile on your face? Isn't it amazing that by
being bold with your paint, you can create such
vibrant in just one layer. How did joining
those colors up go? A lot of it has to
do with timing. Not too wet and not too dry. Did you enjoy
adding the details? I love the combination of
looseness and tight detail. To me. That is watercolor
painting at its best. As I often say, it's well-worth stepping
away for a couple of hours, looking her with a fresh pair of eyes before you
can claim her done. So we look forward to seeing
you in the next class.
 Jane Davies, Professional Artist and Teacher