Transcripts
1. Introduction: Hello and welcome to this intermediate water color class, where we'll be painting this rather handsome highland cow. We're going to be creating him using layers and lots of lovely flowing techniques. If you're just starting out in your watercolor journey and haven't done my beginner classes. I suggest going back and looking at those first. This will break you in a little more gently before taking the plunge and painting these highland cow. I'm Jane Davis. I live, paint, teach a walk my lovely spaniel in the beautiful South Downs National Park, England. Over the last 10 years, I've taught myself the watercolor technique that you see today. Not having been to art school, finding my own way, it has been fun and sometimes daunting, but it's allowed me to develop my own style. This has led me to teach the others, either on a one-to-one basis or as part of a group in a wonderful studio in the heart of the South Downs. I also run a successful commission-based business, painting pet portraits and wildlife art in my own home studio. In all my classes, you will follow along in real-time for I can guide you to keep your work loose and fresh without ever fussing. I'll be sharing lots of tips and tricks along the way too. I provided you with a template and a beautiful reference photo of the highland cow. In the resources pages. The template is well-worth using as these classes about painting, not about drawing. We'll be exploring many techniques in this class, such as applying heavy paint straight out of the tube, then allowing the water to do its magic to create you that lovely sense of flow and movement. I'll be showing you how to achieve that wonderful depth and light while painting into wet layers. I'll be sharing with you some of my thoughts, tips and tricks on taking the time at the end of your painting to bring this handsome highland counter life. If you'd like to learn more about me or my work, please pop over to my website at Jane Davies watercolors, ko WK. This can be found on my profile along with links to my Instagram and Facebook pages. I'm very active on my social media pages. Go, I love sharing my art, especially on stories with many ideas, works in progress and tells a studio life. I really hope you will share all your paintings on a project pages. Has a love seeing them are species. And don't forget, I'm here to help if you get stuck or have any questions. I want you to experience that buzz of painting in his liberating, wet-on-wet, loose style. So come and join me.
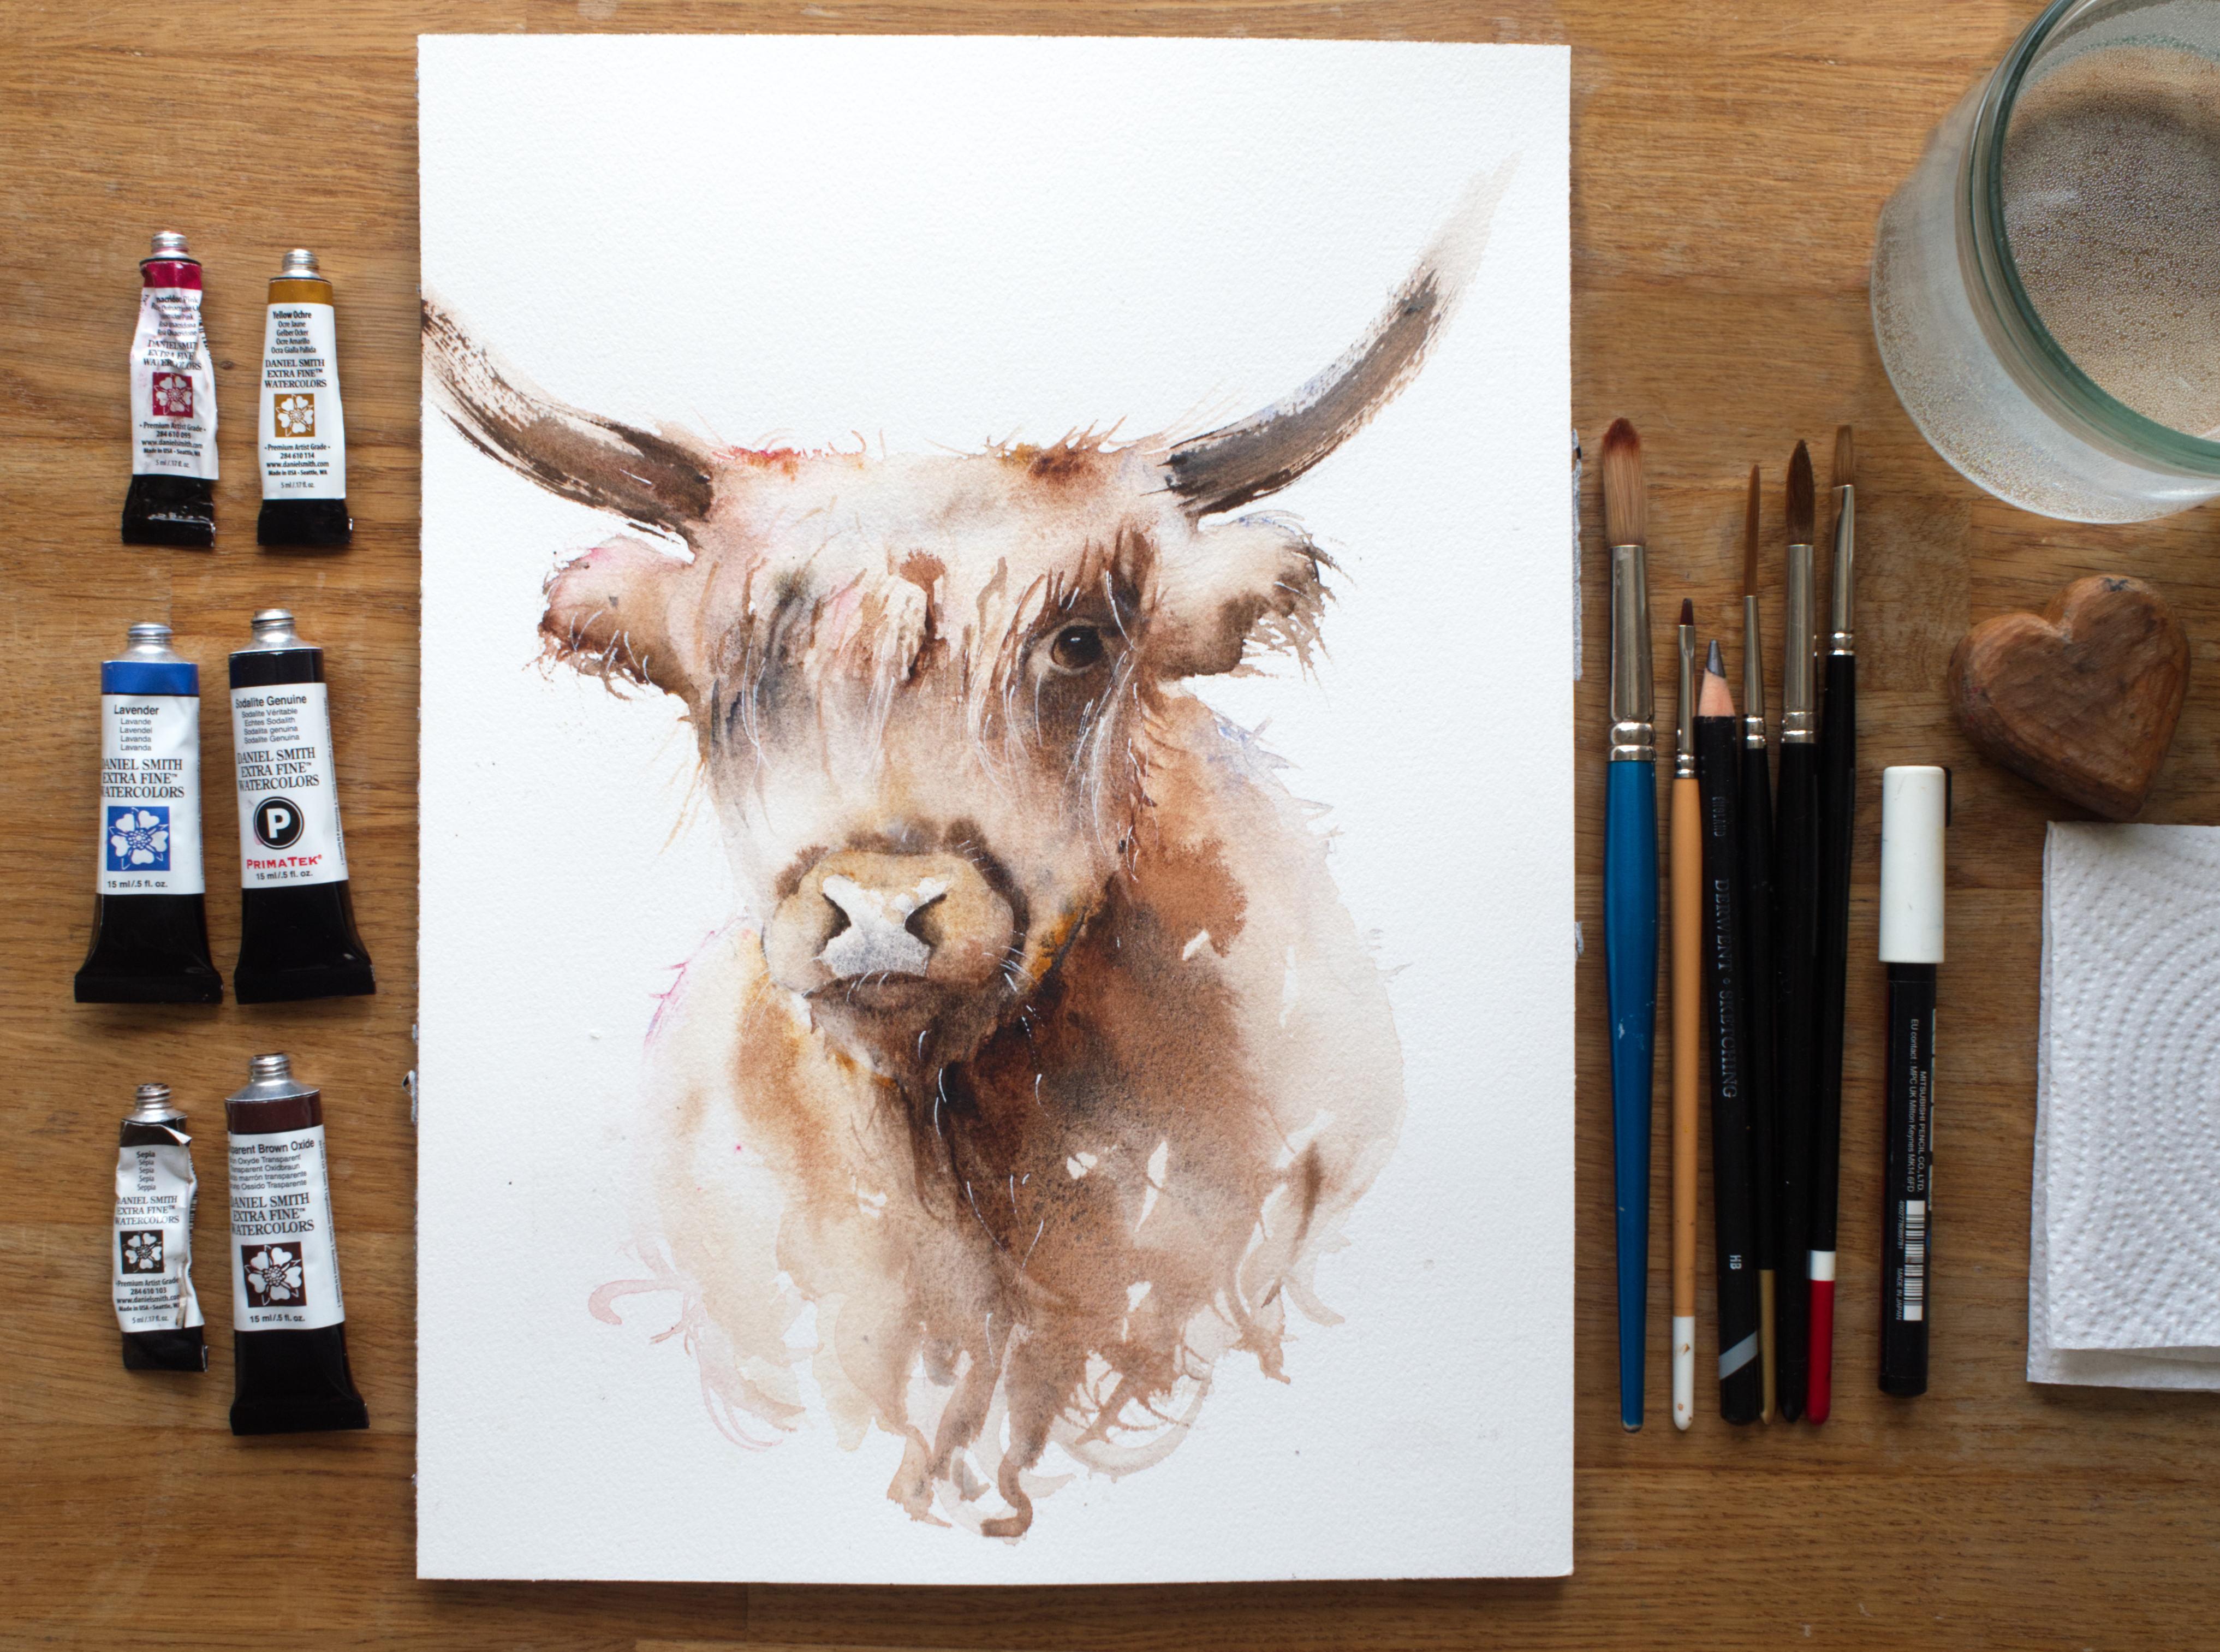
2. Materials: Welcome along to this rather handsome highland cow. I'm going to run through all the materials you're going to be meeting today. So I'm going to firstly start with my paints. So these are all Daniel Smith selection here. And I appreciate as normal, you may not have these exact colors. Just find something very similar. I've got a Kinect could own pink, which is lovely, but any sort of shaded pink will be absolutely fine. Go to yellow ocher. It's just, I'm just use it for this side. But again, another so yellowy of that sort. We absolutely fine. Again, lavender, which is actually a new one to mean it's it's pretty so I'm just using it because it's pretty. So a light blue would also be fine. So like genuine, which is absolute favorite of mine. So if you haven't invested, it's well-worth getting I love it is a very dark blue. So again, a dark blue would be fine for you. Sepia, which again is a very nice dark color. And again, another one I love. And I've got transparent brown oxide, which again is another new one. And I've really enjoyed using its lovely sort of dark green to it, so it's a fantastic color. All these can be found in the resources pages. So don't panic, don't you don't have to scribble them down now. So all these materials can be found. The paper I'm using today is Herman Miller and say, I think it's a 140 pound, not from their collection range of very yummy pay paper and well worth having a play with that. For rushes, I've got a subtler fair selection today, so I've got my trusty old synthetic brush. This is lovely for doing these homes. So you need to find a brush that's going to give you the textures, have a, have a play around, find something that's suitable for that. Got very tiny, tiny brush is actually very kindly given to me by one of my Skillshare folk. So yeah, I'm, I'm open to our gifts. And this I found really helpful for taking little tiny bits of color about, obviously got pencil for sketching it out in the first place. I've got a lovely rigor, which I like. It's got a nice bounce and I use that quite a lot in here because that coach lovely and long feed, it just gives me that length coat. So I use it quite a lot. Got the synthesize ten, and that's more for putting the color one. And I will use it again. And I've got multiple chisel brush as well, the same selection. If he followed a few of these classes already, then I use this color nice to do. And it's actually called a flat brush, not a chisel brush, which somebody, somebody couldn't find it when they searched for it. So it's actually called a flat brush that's making up names. And I've got posca pen. These are, you can see that they just a white marker. So I'm using that instead of my white gouache today. It's a little bit stronger just to do these tiny little flicks is I don't use it a lot. So if you haven't got one white paint and we absolutely fine or any fugal acrylic paint experiment, there'll be two held up thinking you have to use only Ward color, so have a play. But you came from what being in the pencil marks out with bottled water. And I've got this is just a trustee heart. So I put it underneath my painting to allow the paint to one we use, we tilt the paper quite a lot. So find something that's probably what's an inch high paper towel. And I've got my hairdryer at one side. That's quite handy in this one because some nice tool to dry this layer so we can crack on and carry on with the next one. And again, this essay or this can be found in the resources pages, awareness dead. So I haven't caught myself one out today. I, I've actually drawn this one out, but in the resources pages, There's a stencil for you to download and then you can copy around that. And if you're not competent of drawing them out because it's really is about the painting, not the drawing. So you'll find that in the resources pages with all the list of all these bits and pieces. So I think we ought to think MOOC started.
3. Sketching Out: Okay, now I've taken the opportunity to sketch them out while lump of Canvas so you don't have to, again, watch me scribble around my stencil and then fill it in. But again, I'll give you a few tips on sketching it out. I want you to understand, so the stanza will give you all the blunt end, so it's really worth what you lift the pencil away. Just take your time to go around and neaten up any parts have adequate keep a reference photo if you can in front of you on an iPad or whatever devices you use, heaven. And just take the time to really observe, especially at that I in the right place. And this nose is quite tricky, is very symmetrical. I'm not the best way symmetrical thing. So I, I really take the time to get these just right. So it's worth having your yoga I'm drawing, looking so spot-on before you start, societies are now be looking drawing. You're more likely to fail little bit despondent when you start painting. So yeah, get it looking really sharp and nice. And I think that's so little tip you really need. So we will get on and painting.
4. Head and Ears First Layer: Okay, on to the fun bit and let's get painting. So I'm going to pick up my little heart and I am going to actually put it on this side. You can see, so we're allowing the paint to run that away. So a clear way, your, your Baba and g are posca pen or your little penny. If you have one in your pencil, he just need your brushes for a little bit. So I'm going to pick up my size 10, loaded up this nice water. And we're going to whet somebody's head. Now be careful with the fringe. I'm going to call it a fringe, whether that's a technical term, I don't know. Versa, this uncoating, he's fringe. If you work too high up at this stage, you'll find he then ends up, your finished piece will have a very little fringe of white up by heat eyes. And I kept doing that while I was practicing this stage. Keep this quite a long way down if it helps. You can even draw a little line this way. Just to remind you or just make sure you've you've sketched. Yeah, he's he's fringing. You can see. So we're just wetting this down. We're going ground what I call his muscle, this muscle. And that's going to be no sister. We're very title terms. I'm sure. I'm gonna go up here around his eyes were missing out the I and then around underneath underneath his mouth, down to the chin. So this is going to be the very, very first layer. We're not going into the ear just doing this. And by tilting it, we're going to allow that, that color to really sit underneath his freedom to keep it nice and dark. That's why we're allowing it to tilt. So I'm going to pick up I'm going to just work. I'm not going to use my ocher and pink on this first layer. I'm just going to be working all that. I went to the MIT, put that out there. So I've just got these colors. And I'm saying that I will be using my ocher, so a Hummer be using these two until the next layer. So I'm going to pick up this transparent brown. This is lovely. Let's pick this up first, you'll be able to say so I'm working with that achieves is what I tend to do. I like it. It's very spontaneous and I can hold the tube them in and paint straight away. Everything. Try and keep everything as light as you can. And we just say the technical term, sibling, disallow. Kind of put another little pickup here. Pick up my genuine. But this is going to be the slight darker sciences. It's worth bearing in mind that a light and a dark side to him doesn't have to have to have the same side, but I would keep one darker. So I'm just continually strengthening underneath each fringe. Okay, Just, just doubling, doubling and doubling. Keeping on enough on that reference photo in front of me. You flick your eyes back and forth from Italy. It's a, it's a nice way of being able to see as pick up some of this ocher. So try and keep my brush in-between each paint application and you don't get too muddy, just gets going to wake it up. I hope you do with this up last night. So I was ready to go this morning. These are popping out a little bit. I should have broken them up a bit more. I'm going to pick up Maya transparently band again. I'm going to do exactly this. I'm just going to deep. You can see it's all running. Just allow that to do its own thing. Don't try and control it too much. That's lovely. Lovely read around us. So I would like genuine anguish going to do this. I need to be motivating the satellite January, they all have their own characters that you begin to almost use the paints. Not always necessary in a color they're going to give you, but sometimes in what they're going to do. So I know that that's a spread datum, transparent brown out and allowed it to move around. That's beautiful. I'm really pleased with how that's looking. I'm going to do because this is obviously because that's allowing run. We're getting quite a big blob of paint here. So I'm just going to suck. So I'm going to upsell, picked up my vigor and it's nice and dry. And if I just touch in there, some of that soak up. The bigger you can do with this, the edge with the kitchen world as well. And it's quite effective, but to my Prussian limit. And before this, we don't want it really paddling. We also want it nice and wet. So what we're gonna do is to start putting some of these flicks. So this is going to give him the heat fringe with heads and the thing. And it's very easy to get carried away with this. And as I end up with these fringe right up to the top of his head to just go steady. We will do this a couple of times on a, on a few layers or you don't have to get all done at the at the stake. Just a few. And if your problem might be better, maybe I, I, I find, I struggled to see this is a fringe. But if you can visualize these, obviously the white hairs of the fringe said, I think some people are better able to see that in the me. I think I would leave him and obvious because we've now allowed some of these paint to run into the digital Really bit. We're losing some of these strengths. Now, what I'm gonna do, check your own pieces so you don't have to use exactly the same. People. Don't necessarily have these exact same colors, but just have a look and make sure they really wanted to keep this lovely and heavy. So I've picked up two together. Holding to do is say, which really spontaneous being able to paint chips because it's instant. Looking down here, your palate and trying to find where that color wasn't. I do not working on this. And I love the BI that's just moved on its own. I'm not going to interfere with that at all. I love that. Looks great, so I'm pleased with it. I think for that layer, we probably about there. And we're going to put those down. And we're going to do is it's going to pick up my, so I ten again. And we're going to weight the E is no, try not to touch the body color because you'll find that body color will wheezing to the ear and we don't want that at the moment. Yeah, the way down. You want it nice and wet but not bubbling. So a tip is just to gain nice to just put your head up and down. You can see if it's sitting in a big puddle. You don't want max that the paint would just sit on top of that and age is the DOI is a nice fun. You're going to pick up that rigor again and like my weaker side, it is more No, I can't even tell you what size, but it's a nice spring I like because I'm going to pick up my foreign oxide. So like genuine together. Just gonna touch the bottom that would do anymore than that. Try and get as close to the head as I can but not touch the head. We're not putting any fluffy bits on that goes, do the fluffy bits a little bit later. But nice and strong When he did the stack is exactly same as that purpose I would like genuine down what I'm going to pick up the ocher. I'm going to do the sign the other side, but trying to keep this side a little bit lighter. The idea is you, we don't get traumas get too much color. Is 0, that heaviness is at the bottom. Just try it. Try not to let that actually creep up to the trapezius. So I'm just just pushing it down a little bit. And I think at this stage I might just take my whiteout. So on lowering my board now so it's lays flat and that will stop it creeping up, sum to one side. Now that's the first layer down. What we need to do is to let that dry. But the best things I feel like I repeat myself between the same lessons, but you really don't want to the hair dry down when it's still damp like this wet because you're blow the pigment around so just let it dry so it gets tacky. So when you bob your head up and down, you can see is almost dry. Then you can use a hairdryer over it. So that's the once you've done that, we'll, we'll do the next the next layer.
5. Horns: Kth, that's lovely and dry and it will stop me from putting my big old hand in a when we do these holes. And the holes, are there any interesting technique and they're fun. But it's probably worth having a little play before you commit to doing them on your main piece. So I've got a little bit of scrap paper and hopefully I'll be able to show you the best way of doing it. But this is where my big synthetic brush comes in handy because I know it just gives me a nice rough look I'm going for. So what I'm gonna do, I'm gonna pick up my brown and I'm going to pick up a satellite genuine together. And I'm going to push down and just sweep up and there's nothing there. So if that happens, you that I haven't got my brush wet enough and I probably haven't got enough paint. So this is why it's worth having a think experiment. I'm just going to go back over that again. And that's given me a better look and then try to lift the partial of as you go. Probably get enough satellite January on that one. So this shuffle the upper bit for enough camera. So again, try and try and keep it Bosch. Hold it here towards the end. You can just keep that lovey, your waist nice and loose. So pop it down, drag it along, and then try to lift as you go off. And that will give you the nice textured look. You can do one home, especially the lighter one that, that left-hand side. That might be enough. He may not need to do anymore than that. Because we actually do wet it down again right at the end and an additive color. So you don't have to think this isn't going to be your last. The last layer over the tone to say, again, just drag up. Adding enough blue here. Blues, nice in it. So that's almost a little bit too much a nightmare, right? I think I just put that to one side. Should be brave. And do it on my main month. Again, just hold it right down at the base for that line along. Get it nice and it's covering the lymph, the hole or the width of 100 or industry or I get up. Works. Okay. So if we did the second one is length, okay? Just place it down. Or we also call that nice width and just drag up. It's going a bit darker, which is what it is. You can't do an awful lot more. So I'm just going to leave it like that. Ideally, I'd like that to be lighter. Who's the one way round for the light and dark, but it doesn't matter. That's what colorfully. That's that's it for the homes. Again, that needs to probably dry before we we crack on with the next lab. Actually, that should be fine because we're going to work on here. But, uh, so if you haven't got a hairdryer, it doesn't matter for that layer. Yeah. He's a gesture.
6. Body First Layer: Might go Rabia, criticize 10 or you have your big pick a brush. And we're going to do he chest. This is a fun, Fun Home Ec, size and shape. Before I start, I'm just going to get my white and I'm going to take my board forward. So it's going to allow that paint to run down the board. So I'm going to grab my transparent brown. Going to, again is a nice, nice ways of working to achieve. You can sort of grab a nice amounts on a run. And if he chin doesn't match a moment, this is all going to be wet in a minute, so it doesn't matter. These don't have to be. These are the three pretty genuine, exactly the same. You can say you on your reference photo, it's lovely and dark underneath the chin. We want to emphasize that unless you can have CPU as well, I, so I can wake these little chap up. This is the problem we're dealing. Needs of your paint, especially especially I'm not sure if he's going to wake up. Somebody asked me what do I do? Because I do get skin sometimes you just have to wet the tops and the skin quickly disappear. Ideally. I put leads on until I finished painting the leaves go on. Peter tried to be organoids into having already. So I've just just pad you all those colors in there. I'm going to pick up that ocher. I'm going to do the same a little bit around here as well. And just add a little bit of brown oxide on top of that. The other size, I'm not using that those things and lambdas for a little bit later. Because he has a nice amount on there. Join up. And this is where the fun bit, so make sure your brush move it closer. You can see me water though your brush up with lots and lobby water on your brush, almost dripping. And then just touch this. Because we've got that paper tilted. It's going to run. Just let it run down. Just wiggle your brush around. Bringing out here a little bit, you can leave your lights white, patchy. So it's lovely because it's coached, loving our shaggy, isn't it? So go up underneath the chin where you want to leave a white gaps are pushed up underneath his chin. Just by doing that as adding, you're putting a little bit more water in there, so you're getting a few more. So textures going on. Xist coats, lovely and rough and ready. You can have as much texture as you like. Very pick some pieces. The soon as you've got something that looks pleasing to you, Stop, don't do too much is really easy. It's just fun doing this. And it's easy to overfit island. And you lose a lovely feel, freshness. It's going to make sure if you keep adding water, you are fine. You got bubbles at the bottom here, so sometimes you just suck those up. I'm going to grab my rigor. I'm just gonna do a such everything's really light. I'm just going to pull a few of these. So I'm just flicking. I'm starting in the middle of the body and just flicking out in a few circles. Let's company. Just, uh, just to give me a little bit of texture. Yeah. Don't be afraid just to add some water and we're going to get, there's a lot of white line down here. So I'm actually going to grab the tip on my board here and a tilt a little bit more. She just going to load a bit water up there, touch it at the top, just underneath the chin and allow that to run down. And if it's not, He's not moving or not doing it, just add more to say that's creeping down. He said his chest and that will give you that nice white or light. Just again, be careful because you've tilted this now you're going to find these bubbles, these bubbles in an IEP, even more pronounced, pronouncing that word to probably not put they're going to fill up quicker. And we're going to do another layer of his chest. So don't worry if it doesn't if yours doesn't look dark enough, mind a little bit pile still. Surprising, you can put so much paint on here. And what looks like a silly amount that she would leave, put it all out, and it's got to go quite a long way really. It's got to go around his body is a tube, a hold of it and my mom still tilting angle. Say try not try to let the water and the paint do its own thing. Try not to interfere. And it's very tempting, but usually does a better job for you. Then. And actually interfering with I think that's, that's creeping down quite nicely now I can just lay that past conics tilts, it's still the boss do tilted, please. He's just this angle. Now. I'm just going to leave my little bit of kitchen roll. She's got a bit dampen the tamping, yucky, but I'm just going to try and get a little bit of texture. So I'm just going to dab, just decide. And that's gonna give me a little bit of texture. And if you can see that, just helps a little bit. And that's it for that layer. Again, we need to let that dry.
7. Head and Body Second Layer: Okay, well, that's lovely and dry. We're onto the, this is a really fun layer now. So I've just got rid of some of my other brushes. So I've just got my, my to my vigor and my psi tend to. So I grew up other brushes. And they're not, they're not needed on this layer. So what we're going to do, I'm treated myself to be a fresh kitchen roll because secan personally, and I'm going to load up my big brush and we're going to wet a lot of this dam. So we're going to what is fringe down? We're going to wet is hedged down. We're gonna miss out the I and we're going to miss out the ears. We're going to go into his muzzle but not his nose, and then we're going to wet the rest of it. So hopefully that makes sense. So start at the top because our boats still COTAs, I've still got a slight tilt one here just allows everything to run and gives that nice. So the sense of movement. So long coated animals, if you can get some sort of movement in it, gives a nice illusion of movement and length. Length of code. Just working. Kate, keep, go gentle because you want, you don't want to do it anyway, your papers, but some papers will lift the color that you've already put down up. So co-vary carefully. Keep everything. Like don't. There's no need to panic at the stage. In a muddle. Could carefully, is it really worth going carefully around his nose? Because the water, the paint will find that wet paper very quickly. So you want to go quite carefully than that. Knows what, QA gently down, right down. I just keep everything nice light. And we're going to stop sort of about three-quarters of the way down here. That will become apparent. Why in a minute, hopefully, everything else nice and wet. We get to play with the pink now in the lab under. Okay, so once I've bought my head up and down, you can see it's nice and wet. And if you've you've just given this a hair dryer to dry that previous layer. Just be aware they obviously it wounds the paper up so you'll find your it dries quicker. Don't oversell kicks. You don't want this because the paper is tilted. You're gonna get a big bowl of water running here, which is absolutely fine, but just be careful you add too much water. Okay, So we've missed out is we've missed out the hidden. They've gone around that nice and carefully. Hopefully I can see. Okay, so I'm going to pick up and going to pick up that pink and the ocher. Nice together. I wouldn't mix wasn't very nice. Who's a pink and the satellite genuine. It made it a little bit purpley for my liking. So you get, get familiar with some of your colors. Sometimes worth having a little play before you even start painting to see what the mixes are like. Now I'm just going to. Depot. Again, actually, I don't want deblurring with this big brush. I'm going to switch brushes again. I've got my vigor and Latin America. Okay, so when I say light, because we've got that tilt on that board, your papers, your paint starting to run down a bit transparent brown here. A little bit of that. File it in this way. But violet will be fine if you've got ultramarine violet, which I use a lot, that would be absolutely fine. It's quite a, quite a pale color, but it's very pretty dodgy. My new paint to 80. He could he could always have your boat tilted just a little bit that way. You want to feel like you want a little bit of movement going that way. We'll see depending on where you're having your boss tilted, would depend on where your paint's running will give you that overall effective of the direction. So if you wanted to feel like the wind was blowing across him, you can add the dope who just tilted a little bit more that way. So then you'll get that paint direction running down. But I'm going to stick with just coming down because it's a enough things to think about. A little bit more with more. Ok? Again, you just have to look at your own paper when painting, so say and, and judge for yourself a little bit how much strength you want and how much depth, how your papers reacting. Now while this is still wet, we want to do some of these flicks. The gain is why the biggest, nice, and you can stop somebody so they don't have stopped right on the edge. And just do some flicks. You can put your brush down at that sort of angle and just move out. Up, click, it's quite nice to flip some courses. Is Holmes W H2O. Try not to be too uniformed. And again, if you wanted to look like the wind was blowing a certain direction, which you then blow it in a fluid painting in that angle. A little bit of my CPS exploded Earth which tubular me pushing too hard. That's the that's the downside to having a cheap painting attitudes. Do I want to type it? I haven't done that. And you've got a so dark area here has an a. So what we're going to try and do, keep that emphasized little tiny satellite, genuine, tiny bit. So just keep your eye on that, on your reference photo, particularly back and forth. Now again, so I was trying to be systematic as much as I can be. We're going to color work down. So pick up your ochre, light color. We just want to make that fringe. Don't want it to white in the last, in the final piece. So we're just going to add a little bit color. This would be the only layer, this fringe. Hence. You want to try to visualize his friend January, the, how it's going to look at the end. Not me. Don't do another layer on this one. This fringe right up here, so you just don't panic Walla, Walla, all the while your paintings were your paper's wet, you've got plenty of time to play in the exam. And because we've got this tilted, I can answer nice strong colors aren't going back to these colors that we originally started with on that first layer. So I've got my transparent brown and the satellite genuine. And we're going to add a bit more strength and darkness here. Because it's tilted, you shouldn't find it. It will seep up a little bit, but hopefully not too much. By, by just allowing that to move up. You're just keeping everything nice and soft. And quiet tricky thing, highland cows, I haven't actually done that many. Took quite a few goals to get him. So I can work them out and to get to know us easy stage to you to follow along. Keep keypad and that strength, we do do another layer, so don't worry too much if you don't go too thick. I'm trying to say to unconstrained and paint. I'm kinda pick up a little bit of pink, pink in there. That pink and the ochres nice together. This is where as all running down you don't get no sort of any hard lines here. I'm going to keep 0 to these two. I want to make a little bit of strength just round. And here you can see that's just moving into his he's muzzle area. Like I naught be the strength around that. And how I deal with mesa gain. I want to put a little bit underneath. Cool with that. Just remember those patient tiny touch here. Sit down for sick and you pick up my ocher. Want to make my keys Muslim little bit accretion. By doing that, I will push some of that color where we added digital strength around there. By adding this ocher in here. It just pushes it back out again so you can kind of control, breathe and enjoy it and say it's a lobby process. Just take a deep breath and it's easy to panic on the stage because it says a lot of stuff that's very wet. Butter. Say, Oh, all the while is damp. I mean, that's beginning to dry up here. That's why we worked at the top and work down because of that. That flow down as your tops going to dry quicker. So try to work from top to top to bottom. You're going to add a little bit of strength here to sticking. See new reference photo. A little bit dark underneath a squint your eyes, squint your eyes comes as quite helps with step back from it. And again, I'm, I'm standing, say. I always I perceive fill that helps me. Do you realize standings not always. As easy as for any length of time? My poor CPR. If this does happen, I will, I squeezes onto a little piece paper and then I will use it for that piece paper until at Mons answer being overzealous, trying to squeeze it out early within it. So what I'm doing, I'm trying to add a little bit adult nice underneath his chin. That's doing a nice job. Keep an eye on that on that reference photo and tried to keep where we let that water run down, try and keep that clear. Try not to paint into it. A little bit of the brown oxide. Pivot talk a bit later has neater. Let's pick up. So like genuine again, it's nice and dark on the hexagon to release this. You see that line, they're going to really set in a minute. So the paint is going to reach down a little bit further. So nice, nice amount up here. It's going to copy this down for a minute and pick up my big brush. Just see how it moves down, isn't it? You can be a bit rough again, don't you don't have to especially at the bottom here, don't fill it all in. Just this that allow us to deduce and she would get left with a little bit dry paper. And then have a look at ISI where you think you're, you're at at the moment. I want this guy a little bit further down. I'm going to add a little bit more down there. Say to squint your eyes and step away and get a little bit distance. Keep everything very light. I'm just just touching it, barely touching it. Pick up my lab and does have a little bit of lavender up here. It doesn't matter, get any watermarks on this moment in any sort of blooming. Let's just ideal for his coat and say, don't be afraid of popping color on top of one another. Are popping it down when it's a little bit damp. So as it dries, you'll see me. Your phone, you get little. If it's damp and starting to go off what she is now unjustified. If I take my head, I can see it's starting to dry. If you pop water down, that will give you a little watermarks and things and that's ideal for his coat. Have a little bit of pink. Pink decide hopefully there's no pink on him. So you have to you have to make that up. The way you'd like that to be clear a little bit of all that. If you do, if you get to something like that and it's a little bit too sudden of the just suck it up. Clean your brush off. Don't panic. I could probably get rid of all that if I wanted to. Just gently blending things really soft, still, using a little bit of light around here. I think. I'm just going to very gently add a little damp brush. Just very carefully. Lifting some of that. Really gently. Say some pipe. Just getting to use to your paper because some papers will react differently to that. And paints, again, is getting familiar with urine paints and paper. Right? There's no shortcut for that is just just playing less talking. And I'm pleased with that, That's looking at Xiang, I'm starting to lose my little white line influenza. So I've dried my brush is damp and not wet and it's not dry. And I'll just just laying it down and just allowing some of that paint to be sucked up. Be careful because obviously that was quite didn't have much paint there anyway. So all I'm doing is taking the top, the second layer off. And then obviously revealing that white underneath. Go Careful. They want to be left with a very hard line. So that's why everything's done very soft. And it's also a nice bit of color here isn't a color. So it didn't light. So I'm going to do exactly the same. We go a little bit out. And where you may have blocked some of this paint. I can see my ochres sat on a little bit about a bubble level would go to the doctor with it. I'm just going to gently remove that. And that's drawing really nice. I'm pleased with that. Looking, you will get to the office tricky stage with this. I can see it's just about them. And this is quite wet down here. It might be I think I'm going to stop him. What I'm gonna do, I can see this is starting to creep down, losing anything. Say I've got a bit of a almost Hitachi nice starting to slip down trying to say so I'm going to remove I'm going to move my heart. And that hopefully will just allow that to gently run backup again.
8. Flicks: So before this completely dries, we need to just do a few little flicks. So I picked up my, my brown, just like we did here. Everything's really lovely. Light stroke. Just to a few little flicks out, too carried away there. You can do your fingernail. I don't know if he did the simple trees for that. We did a fingernail. So I'm just just pulling out nothing else. I'm laying it playing with your finger down there. Pull out. One of them is pick up the ocher. I'm going to do the same to this side. Don't go too crazy, just want to feel a little bit. We're going to do another layer around his head, so don't worry about the head. And we just want the body we're visiting. A few little flicks. And again, if you were going for wind direction, you'd obviously make sure that one side was more wind blown than the other. Um, I think I will stop carried away. And we just need that lead to lab. We need to allow that to completely dry before we do the next stage. So either either give it a blouse with the hairdryer or like me, I'm going to go make myself a cup of tea and allow that to dry naturally is always best if you can, especially, um, we've put a lot of paint on there, so it's nice to allow it to become mature, white that way. So yeah, well, we'll see you in the next layer.
9. Eye: Well IT WHO on with the eye then. So make sure that is lovely. Enjoy because you don't want to be, say, putting a hand, hand in your damp paper painting. So we can do this lovely I as a pick-up medical rigor. Or if you've got something smaller and you feel more comfortable with a slightly smaller brush, that's fine. But I'm going to, I'm going to be using my vigor. Now on your iPad, whatever device you're looking at your reference photo. I would I would dumb. Like the image of the eye biggest. You've got a real good look at it. And we're going to slowly, it starts in the middle of the eye and just go round and round and round. So you just damping the eye. If you look really closely, there's the his eye and then you've got his, he sort of pupil I suppose. So we're just doing the pupil bit. Be really careful. You stay within that line. And then we're going to pick up my brown and transparent brand. As long as he's not dumb bumbling, you don't want a big bubble of water. We have, then just just suck the up the brush along during the do now is just a depot that painting, make sure gets right to the edges. I'm going a little bit more strength of the torques is normally within, either be shadowing or, or dark area to the top, light at the bottom. As a general rule, just allowing all that says well, bled gently if he almost had to draw it. So I'm just going to pop a little bit more water in there. You see that's just soften that out. Otherwise you just have to be really quiet with them. Really mind for seat if that helps and get EOG will be on top of them. If that's easier for you to see. Thinking is not to panic. You can do many layers. Quite often. My pet portraits there be before five layers on over the ICER. If you don't have to get them done straight away. And it always looks at first layer, 0 is explored. So the thing is not to panic and go like goodness, that layer that looks awful. The eye looks worried. Suggests that it's how I am. So I picked up my Cp at arithmetical grouped sepia. And I'm just tapping on the top just to get a little bit darker. What we're gonna do in a minute, we're going to very gently curving around. You can see he's always lined just very gently around it. And if you can over the next lay off to the eye, we wet all this down and then we can shape round his eyes. So don't worry if these lawyers looks like it's going a little bit thick. And we can adjust that on the next layer. Initial stock and weird at the moment, isn't it? Don't worry. Just give it a little bit more CP on the top there. A little bit more. It just watching it really and taking a little bit out, a little bit in really being mindful to watching as it dries. Now I think I'm going to leave it at that for this layer now and I need that to dry before we do the next layer. So either dry naturally, you finish a cup of tea like I could take because I, I went down to me must have compensation. Whole body dry or just with overhead drive. Either way, we need to let that layer dry. Okay, once that's done, once that that layer is dry, make sure it really is nice and dry. And we can do another layer over the top. So we need to push again. And we're gonna go into these little white area this time. So we're just going to go around the eye. And then we're going to go a little bit transparent brown, just going to add a and this is where you have to monitor it, I suppose, and see how it looks and just pour a little bit about transparent brown at the bottom. I'm going to pick up my CPU again. Put a little bit. So we're always getting the trick with how wet your brushes, how much paint you've got. It quite fun just to do an exercise on your own. It's own view of just doing our ways. And step away, sort of glance up and have a look at it from above. I can leave a bit of that white out. Let's just taking that that paint out a little white area that we had. Can keep looking. If I tell you being here, just watch it and monitor it. And it almost got a little flick that it just comes out, has knee and he's got some amazing eyelashes which will actually put you on a little bit later. The eyelashes, but he's got a fantastic deepening a little bit more. Is it's very hard to me to guide you through the whole lot of the AI because it's so nice to see how you're getting your CI or can only do mine and hope it gives you enough guidance. Just watching it and watching as it dries. And because I wish the hairdryer over, it's drawing quite quickly. A little bit more CPU there. And you can always find, so like January is quite good for pupils. You can put a little.gov of blue that hasn't shown up at all better. And you can see I'm starting to lose that white again to clean your brush off. Point. Reclaiming. Again. The mini, you have something you like, really need to stop and say we can shape this and as the associate white patch there, but we take that out in a minute. I think that's not looking too bad. I should keep an eye on that and make sure that slices of angles can make him a course or making me happy is a VD is the eyes. Minute news. Sometimes you don't even realize what you've done. And suddenly looking out here, that looks quite good now, I'm not sure what I've done, but hey, go with it. I'm using a bit of the brown in the pop, a bit more brown in there. Sorry. Because I am I can't get quite close enough to my eyes. I'd like having to sort of hangover so you don't see my my head and I say it's quite half meter. Actually see what I'm doing, working quite a long way away from this over here. That's my excuse, have just put my feet in. I think it just got to the above is tricky stage where it's just beginning to go off and I'm going to leave that in and that needs to dry. And then we can take a nickel little, tiny little bit of light out and pop that catch light in. But gay, not nice to draw. Okay, so it's nice that I love in dry. Brush down. I just want to take a toy even though it's actually can't see it on, on him. I want to take a tiny little bit of light out, really gently stroking. See that I'm starting to paint just a little bit and fingers quite handy for taking it. It's not going to suck up as much as it. Pizza Kitchen Roberts, just give me a tiny little hint to light. The second I were hoping, just a loser in the fringe is you can't really see the eyeball week. We tackle that in many fucose you wondering about the second eye. So I'm just going to put a tiny, it'll catch light in and I've got that little posca pen. So I'm hoping it's woken up enough. And I'm just going to put a little tiny dot, word important, this little dot. And that really pings, isn't it? Soon as you've got that in so that he sees little I done.
10. Head Third Layer: Okay, it's a bigger brush and we're going to do a third layer of his head too. So we're going to go a little bit like the first layer. We're going to wet down the head. And we're going to go into this. Muslims took this, he's no exams as well. So we'll come down here. Try not to go too far up again, we end up with about fringe, so try to stay a little bit lower down. We're going to go around. He's no start with slide before down to the chin. Nobody go around this eye and this is where the state you can sort of scope that I little bit more as well. And it's not some weight. First, came Bobi head up and down taking see where you've you've wet it down to you and all nice and wet. What I'm gonna do now, why do they being made sure to always nice sculpted. So I'm going to pick up my little rigor as if it gets close as I can to put him a big old head in the way. Just kinda schon just that one should a shape in a little bit. Slowly along. A bit better, a little bit too heavy. Say. It's always worth when you've done, actually finished this is to put it away and look at it. So the next day you can quite often see things that you've haven't got quite right home. I rarely finisher. Why never I never finish a painting in one sitting. It's always done over several sittings. You use. You go back the next day and go, Oh, look, I should have done that. Just trying to get better, right? I'm going to try and get this finished. Nice and heavy steel save you. If you've gone a little bit weakness still looking a bit wishy-washy. Wishy-washy underneath his fringe so we can document again. And we will take that little lighter in a minute. But most of them, I'm just tapping exactly as you did that very first layer. Just want it fairly dark round round his left hand side as well because we don't want to do is to we don't really want to be putting a second into we're going to try to use it. And we're bearing in mind, this is the lightest. Scoop it around a little bit more transparent brown down here. Say this is where you need to sort of look at your own piece because at this stage now we've, we've painted for good ours, yours is going to start to look a bit different. The mindset, look at your own piece. And I will put a, I will, but some of the finished ones. So the finished Harlin comes up, you'll be able to see them. So that's quite, quite high and use web to see what a finished with K1 looks woven just the reference photo. Before they try it too much, we're going to put up some of these. Here's again, almost don't need any paint on your brush. So we're going to rely on some of these patents that's here. Just going to try not to get too is to run uniform turnips. Think about it too much to try to switch off your thinking brain if that's at all possible. It's quite easily we usually just see I'm reconstructing, it goes quiet and I stopped talking. These got this lovely strand ahead. We will sort that out in a, in a little bit. We either put it in with that pen or we can take color out and that's where that little tiny brush comes in handy. Just going to few little bits and pieces here, not much in it and it's very little color on my brush. Would just give us a little bit of ideas. A little bit. Well, I really don't want to do is any, any start to do individual has stopped to look too uniform. And losers at nice looseness. Step back, really, you squint your eyes and have a look at even paint me your eyes squinted. And again, the minute you think you there, stop and go again today. And we want to get a slight impression that the second allele. So we would like genuine. Just going to darken around whether that second I would be here. So to line it up, give me a rough idea where it is. And if you need to bring that finger up a little bit to do that and then do. So I'm not painting, I'm just a dog. A little darker area should give you enough of your impression. We can always, once that dries, we can always some, have another thinker. It's time to add these begin to Azure. As the paper begins to draw, you'll find that paper, the paint isn't moving as much. And again, that will that will follow the more layers you have, the less the paint moves around the paper. So I'm just kind of beginning to dry, so I'm just going to stop when that those dark or nostril color in there. And it's tapping with a little bit. So like genuine might pick up the oxide as well. And if it's wheezing too much, just give it give it another couple of minutes. So it's moving too much in you're finding it's somewhat holding its ground very well. Just hang on a minute. Yeah, that's right. Again, with this stage, we can sort of take color out and adjust things as we go. So I'm just going to try and keep some of this a little bit lighter. I'm going to go into that nose into minutes or I haven't forgotten, it can take some of these color here if I fail, I Anita little bit color and want to keep this lighter here, right here underneath these. Female, So I was looking okay. Before it dries now we need to put a few. These will be every bit as well. So I'm with the transparent brown can keep everything like keep all fluid. You can stop somewhere. I'll pay you don't have to start my tone the edge and just pull up some wispy bits. Many healthy but just a few. This, I don't go too crazy. But this will give you idea of a bit of a petticoat to there. So a bit of fringe. And if a little bit more so like genuine him from losing a bit of strength and dogs. We speak, it's stopped taking this video, but a color outlet for carry all fiddling. And now I'm going to pull back some of my little brushes. So that fell flat brush, which I think I will use start with home going to work that down. Get a nice sort of cheese all look. And I'm going to take that color out there. And if you found like me, I've done my little skull alone on this a little bit too thick that he's walking. Take out little tiny it'll push. Woken up first. Yes. Very carefully. So you be quite not sit still sit until to get y's on top of it. And so you can see what you're doing as a noise white line at the top. Try and pull that out as well. Go back and forth, Sqoop to very gently, stopped, same appearing colonies, sloppy when they stop hearing. He's got tiny again, another tiny line right underneath as well. And this is where you can sculpt that, that line if a CP line with a little bit too bold, this is where you can take it out this weekend so softly, oh damn. I mean, don't panic with the eye. When we were doing the ICC. Lot of it is this stage we're used to sculpt it from the other angle must seal. You're going in from the body of them actually adjusting the eye itself. That makes it make sense to me. Okay, I think that's looking quite nice. Now. There is that loving eyelashes. I'm going to see if I can just pull some of that color down. Things papers ideal for that, some probably won't do too much. And what we learn that posca can sum. Email I find your paper will lift a really nice little straight line. Beginning to come. Actually. Just going to always put a tiny little bit back in because it's pushing my luck a bit because it's gone a little bit. Almost drawing here. So I have to be careful, but yes, I think I should stop fiddling little bit because it's that little problem areas like this where you've taken a just a tiny little bit too much color wax. I couldn't quite close to it and it close enough to it. And it can be adjusted. You can wet the area down again and then go back in. And that's how you would rectify that. And I'm trying to look above and have a good old looks if I need any light taken out anywhere else before it dries. Still like take a little bit how he actually haven't used much of that London to have. Because I've got it here. Very pretty color. It's a neglected in this painting down here. Now. That's beginning to die of a nice little attacking this. Now, what I'm gonna do, just going to go into that node and just wet it all down. And because because I've allowed this justice to go off and start to dry. You say it's all blending in now. Sometimes you just need to give it a little bit encouragement. And that's almost done your nose. You don't need to do much more than that. It's just almost need to monitor it and make sure that too much color doesn't run into the nose and you lose that nice whiteness at the top. Just keep an eye for an eye. Gaze upon less on what they are just keeping on in this little area that I still keep a little bit adult nice. I'll just pick up more so like genuine. And that's happened little bit more color in there will be enough. Just observe your own work really is at this stage. So the further along we get, the more works for me altered. And this is a nice stage you do just looking now it's just, oh, this is starting to go damp. Starting to join. You can just look Hawaii, cup of it, see where you need stuff. And you think needs some adjusting. Just kinda pop a little bit. So like genuine in their companies, no screwed up a little bit at the two brown little bit there and we lost again. Tiny bit, tiny little movements of further you get into the painting. The smaller gestures are little bit of a line here has an accent, just a hint of it. Doesn't have to go all the way along, Eva. He didn't just do one side of it. Just enough. Just keep looking keep looking at reference photo. Picks out here. What do we think going out? My sink. And I can see that's almost dry and this is still tacky. So I think we'll get into a tricky stage where we get one part that's wet. So I want to draw him one part that's wet. We don't want to start sort of putting just want to leave it. I think he's a good advice to give. Use it. If you find your painting starting to dry at different stages in one bit, dry one bits ways best just to let it let it dry completely and it is air is you still wanted to work over. You would then wet the whole thing down again and then with those areas. But when you get to a rather tricky sage II, and this is where things can go a little bit pear-shaped. So I'm going to let that completely dry. And then we're going to do the last little tweaks on him.
11. Finishing Off: Okay, So it says finishing off little bits and it's probably one of my favorite, favorite parts. One I'm going to do is to start with, I'm going to rub out some of these pencil marks. So hopefully you haven't done them to bold. Ideally, don't really want to see your pencil marks at the end. You know, finished piece. Square that up around the ears. Give you a good overview. We start to find some of the how Lavie these years are that we haven't painted white to the top, but yeah, looks good, doesn't it? You can start to see some of that sort of Lost and Found edges. See where we're headed. So I'm going to tackle the disease next. What we're gonna do and pick up my bigger brush. I'm going to wait and down again exactly what we did. The first layer of these nice wet. This time we're gonna do a few flicks a week over again, hunger into what do we have. So like genuine, I think in the brown oxides are going to do the same. Kind of just drop it on the bottom. That won't go anywhere near the top. It will work its way up naturally anyway, so just, just doubling. And if he found, if you've got a strong enough and you don't want to add any more color. You really don't need to say, you could just write it down and just add a few flicks. Again, it's just working. Work if in the century AD because you can end up doing where we don't fix otherwise. And I'm just sort of doing little circular movements and I want to do, I want to get in too big. Like genuine. And again, even thinking I might help actually, smaller, small little flicks that I think is probably enough. I might put a little bit of lavender or haven't used 11 too much time on it will be on top of the year. It's quite a tiny bit more heaviness of them sticking with the satellite January next year. No, no, no. I'm going to add the ocher. A little bit dark and the bottom. That's nice. Okay, just using a little flicks. I need to go crazy. Just a few. That helps. Or something you can use EEG. Think gosh. I've just gone a little bit too far out with that. So I'm going to do with my flat brush and you're going to push that back in again. Could a little bit ambitious there with the flux would have too much paint. I think that looks nice. And what we don't want, don't really want too much of a junction there That's looking quite 100 if you see it's quite hard edge. So I can just saw finance as a damp brush. The damp brush. Just to soften that in a little bit system, just wetting tooth, just allowing some of that into the fringe and almost taking out again. So this is the finishing of bits of the way you can really give a little tinker with it. Pick up a little bit of pink. Pick up the top there. Tiny little hint you don't need a lot. Just alter it just the tiniest little bit and we'll move that up. That's enough. You don't need it on. And what we're going to do, I'm going to do these horns. I'm going to wet my brush down. Don't need that synthetic brush that was ready to just get that rough texture looks. My natural bush would be absolutely fine. I'm just going to run public Zach slimy followed. Depending how yours sort of worked with you need to put in an extra column in the bottom there. I'm going to put, just started some pondering what to do with this light, this light to swap the horned around 3D. But hopefully I can do that. So just a little bit of heaviness and the bottom, they're not going anywhere near the top. All added at the bottom. Now this champs are still going to wet it down. Might take some color out and she doing exactly the same. I might say, pick up the chisel brush. Just take a little bit out for the kitchen. Well, ideally RSA and I liked it to look like that. If I take a little bit cold out, we'll get a little bit lighter on the top. And it's taking out the haveing again. And see how that's helped to, just to get that contrast, begin to write it down again. I just want to put a tiny little bit of color underneath it. I might use a brown in that corner. I think. I want to do anymore enough to carry out your colors across. That's it for the hones. What should be then them? And then we're going to be MANOVA touched for minute movement which round, and I lost him for a minute. I need to take some of this color out so you can see on the reference photo He's got a lovely little bit of light there. So we can just take that out. If I've lost my navel bit, you may have mailed to keep your butt lines disappear it a bit. I could just swap with a synthetic brush. So I have an actual budget we do with synthetic brushes and bigger, a little bit hard. So I find just to take color out, unless I really want to try and get rid of it, I use an actual brush because that's a softer. It won't, it will just pop it right the top layer off in Mongo won't be quite as hard. Little bit off the edge. Just to touch. Really want to keep the idea that light going across it. If you've fringe got a little bit carried away, you may be a little bit too heavy. Here is quite a lovely light band. I've managed to keep most of mine, so that's okay. But if you always call it a little bit, lost that line. Again, you can just take a color out and just with a damp brush and dab it out. Now I'm trying to have a look away from a little bit away from him to say what I think I need. Thank you. Oh, I'd actually been pretty pleased Him might take a little bit off the top of his nose. Fuels disappeared just about lab and that's quite nice. Little tiny tweaks at the end really is putting these little pits the life of here. Just really go around it. Although I loved the way this paint brush drowned in that very first layers are actually going to leave that. So I like that. Look, you may, well, he's got a nice sort of light here again, you may want to write down, I might take a little bit out here. Very deadly. Going to leave that Usha coaster. What I think I don't they go on to take any more out. What we're going to do is just try and add some wispy bits. And I can even try and do with the pasta pen. I'm going to try to start with if we get this out again, this depends on, on your, on your paper, some paper would, this would leave that very easily. This is, it's a beautiful paper. Betas stains a little bit more, but we're not going to try and do is actually take. So I picked out about little handy, little nephew Bush, somebody's kinda given me and how much it's going to take it out. Now, it's going out again and she turn kidneys as natural as you can, gain nice swooping movements. We want down here. Thank you. Bye guys up if it, if you feel you need one somewhere else just to balance on the outline, do don't be a slave to reference photo. Again, I'm not pose some of these. Just going back and forth as the same. Just scrubbing it out, reading, squabbling those layers. Okay, to come over this side, let's say we want that second item disappears. You can just add a little bit more hair in there to make it that darkness is hopefully just enough to give the impression that there is a second way and make noise do. Tiny little line may be that, that line underneath there. That's helped will make it look too to obviously be that sometimes you can do too much innocent, suddenly feel like you've gotten other and then you have to do something with it so don't get too carried away that Second Life. You can see what I'm doing. So I could Spend, spend a long time doing these little tiny bits and the end. So I don't want to bore you too much with it, but you could go around and take more of those out. Or we can do a little bit of posca pens or add, well, I should say. So. We can just do some tiny little bits of wispy that again, try and keep all that movement is. Just imagine that blowing in the wind a little bit here and there. And it's got some quite good look whiskers going on there has an ISA. Again, to chunky that movement. Just this very light. Sometimes I do this and just this fucking loa, loa, loa loa. And just as it hits, that's just enough. You don't want these very regimented streamlined. You just a few little wispy bits humanness. I think he is about done. A few bits. Popup down. I'm going to get 1 Gillespie brush and take a little few colors. There are a few. It'll be the paint out to make some. I'm trying to say. We do stress. When you finish. You don't have to complete the finishing if you get to stage two, I had enough. That's enough is enough for today exists. It's probably going to be a failure you don't clause is one who haven't looked at my countertop uncountable. And it's really nice to go back the next day or maybe in the afternoon off you've had a had lunch and maybe you booked a dog or something and come back and reassess him and say You see how you feel about it. It theory, we've done three layers, 23, you could wet that all down again and add more strengthened depth. Or in petitioning off again hall and add, add more color and depth. But sometimes you can lose some of that freshness if you keep doing multiple layers. So I normally like three or four less. It's a very dark subject like a black Labrador, where you may need a few more. Anyway, that's a subject, whole subject for another day. Am I I'm going to leave him at that because I'm I'm pleased at how he's loops. I'm sure there might be some tweaks I could do when I say Say you when I see it, refresh eyes, but I've really enjoyed doing this. He's come out really well and I hope you've enjoyed doing him too. And please, please put these your projects on the projects and resources pages and load them up because I, I adore seeing them is my favorite part of doing these glassy, so so please do share those and yeah, I hope you enjoyed painting.
12. Final Thoughts: So hope you enjoy painting the highland cow. He was quite a character, was ni hao de painting the horns go. Did you manage to get that lovely texture and effects on both these? Well worth having a play on a scrap of paper before committing. Did you enjoy adding the color on his chest? Is an amazing feeling when you add that water, isn't it? How did the fringe go? It can be tricky not to give them a crew cut. The trickiest to start the first layer far enough down as it's very easy for it to creep up. My tips and tricks helped. It really is the smallest, the gestures and the time observing your work at the end, that makes your painting come to life. It always helps me to look at my work the next day with a fresh pair of eyes. So look forward to seeing you in the next class.
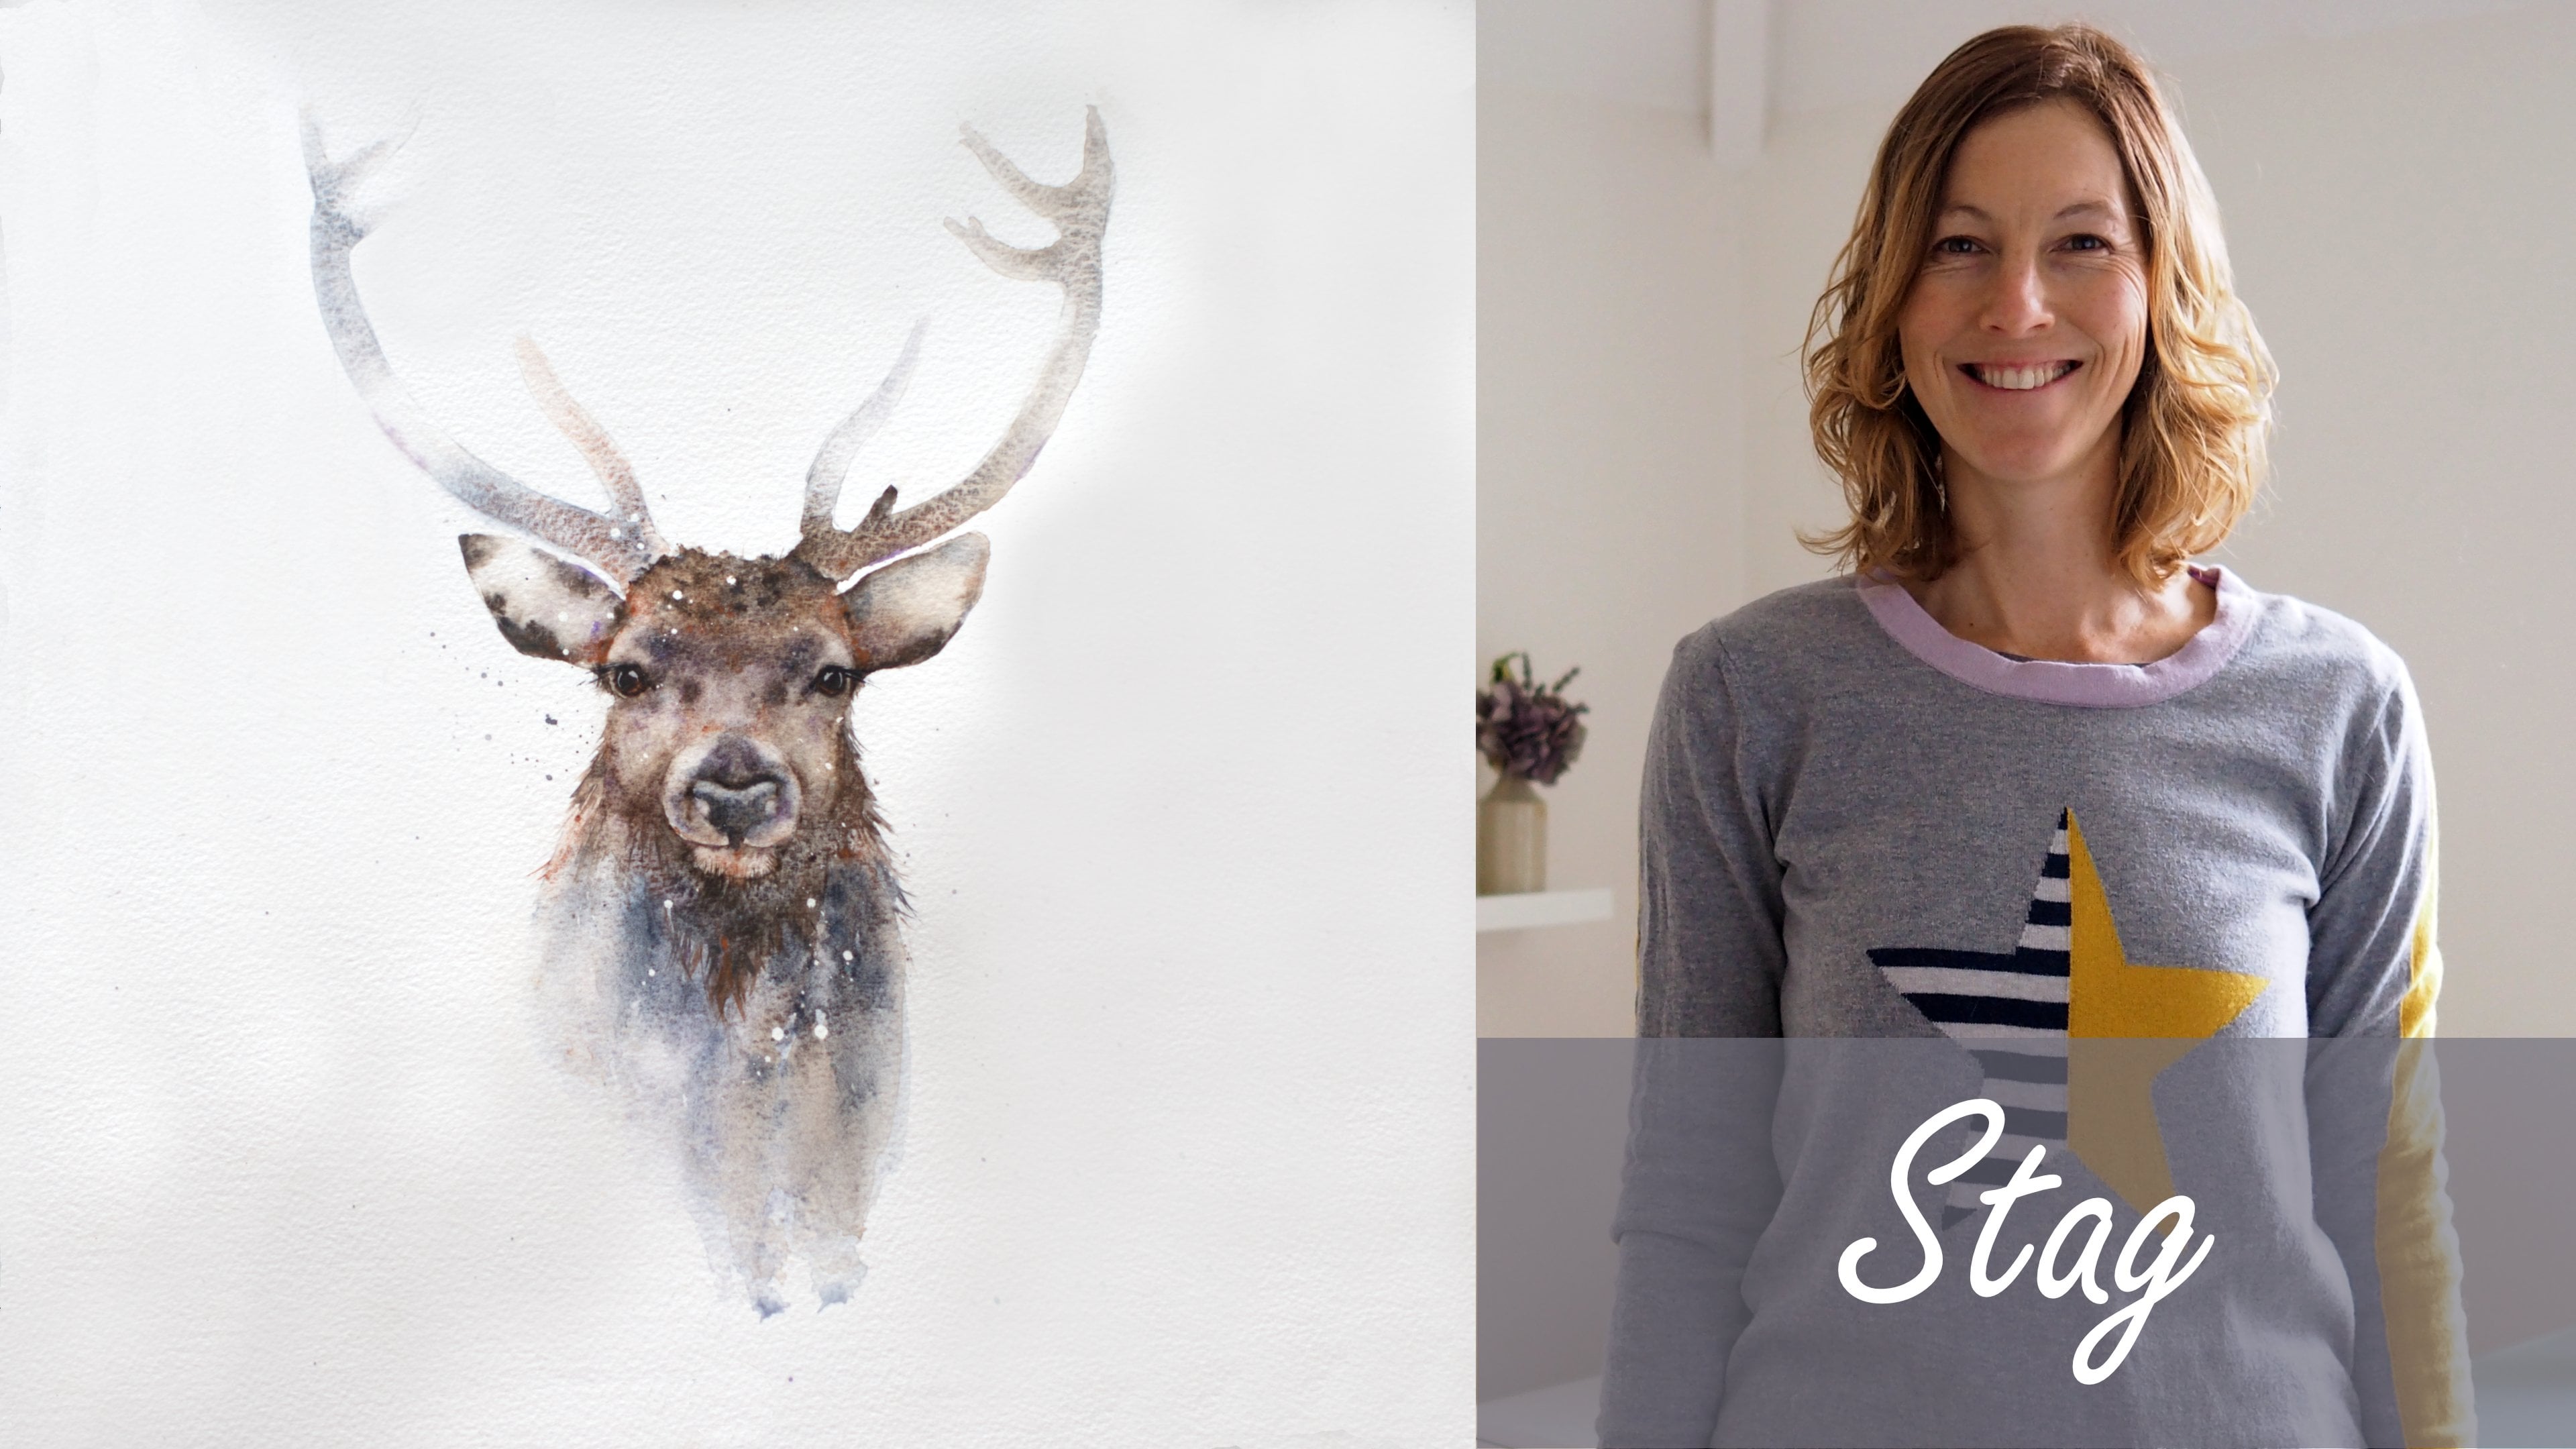
 Jane Davies, Professional Artist and Teacher