Transcripts
1. 01 Introduction: Ready to make this? Welcome
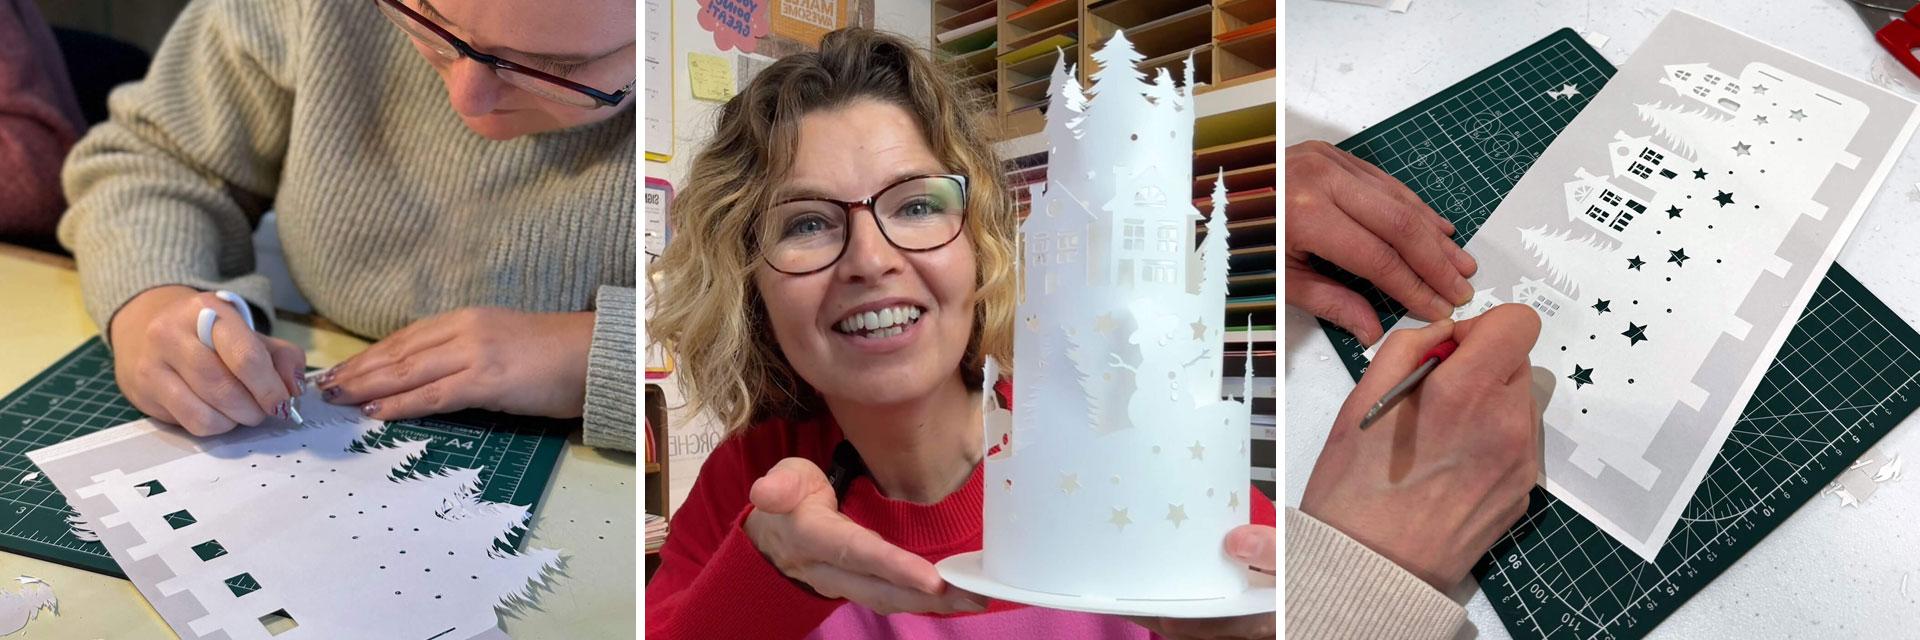
to your Christmas workshop. Hello, I'm Kylie, papercutting artist and author of Papercutting
Tips and Techniques. Today, I'm gonna be teaching
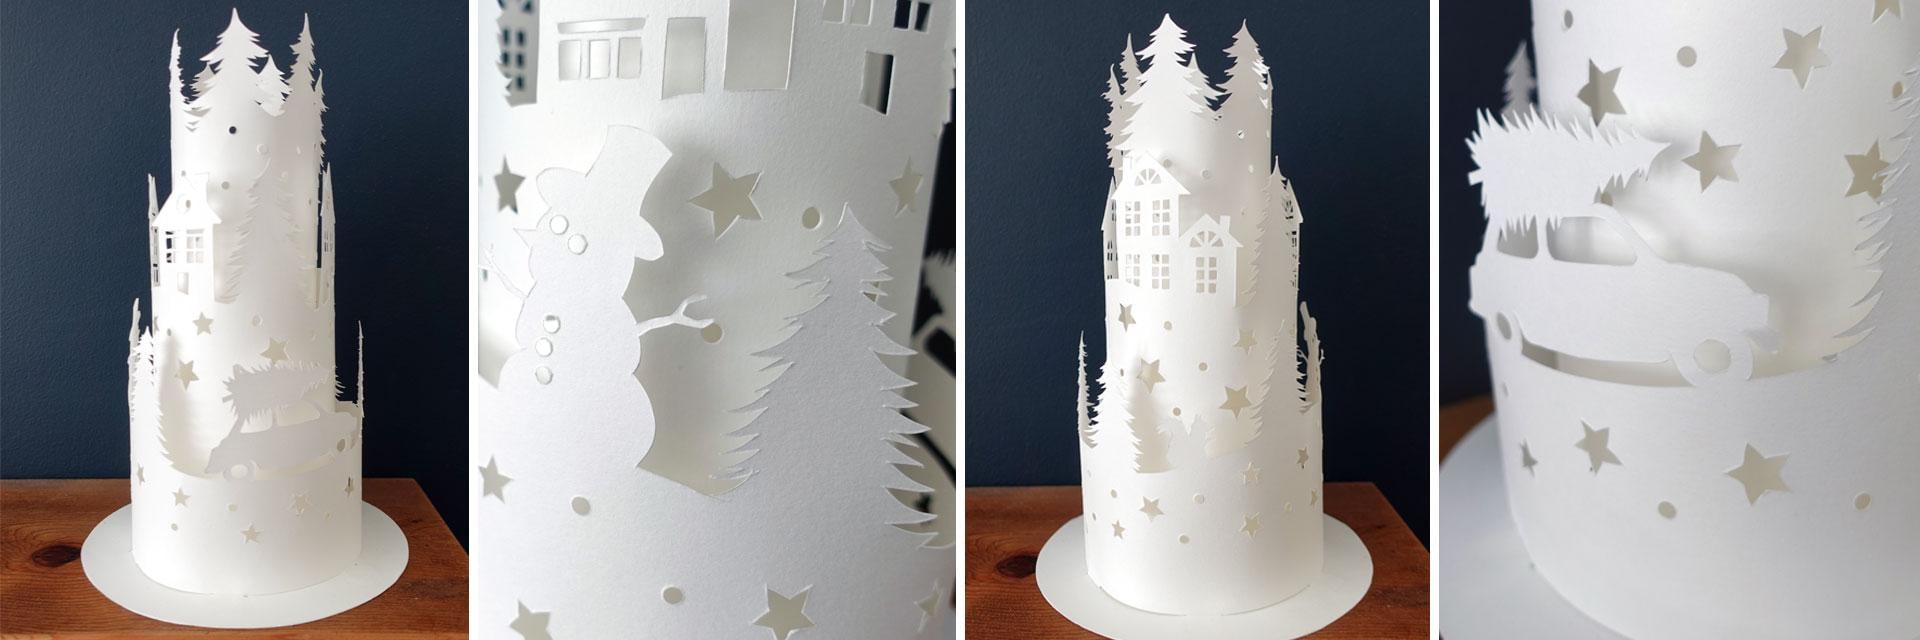
you how to cut and assemble your very own three layer
papercut Christmas lantern. It's the same design as I teach in my in person workshops, just maybe with fewer
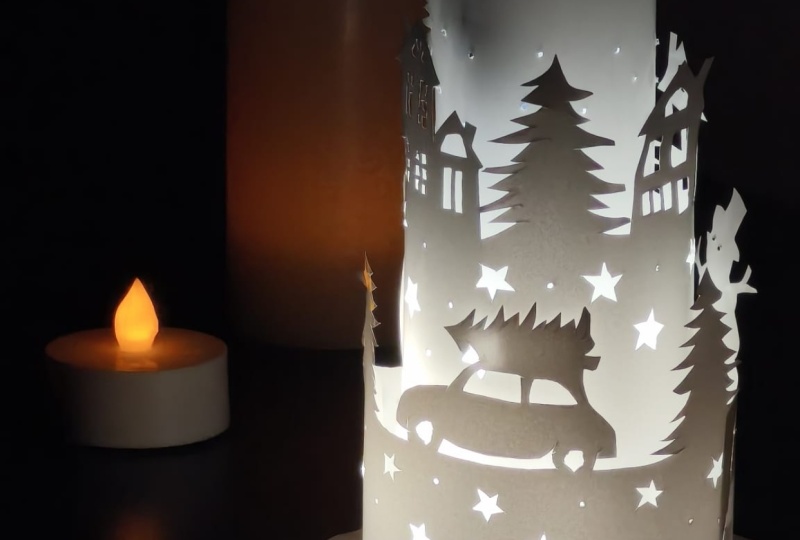
tunics tea cakes. You can light it using a
battery operated te light. Don't use a real candle. It's paper. Okay. Well, you pop
it inside at the end, and it just looks divine. I'll be telling you about all the tools you need and
the best paper to you, and I'll guide you how to use a scalpel
as we work through a practice sheet together before cutting out and
assembling our lanterns. Gorgeous. You can download the templates and cut
along at your own pace. Grab yourself a cupper
or maybe something mold, maybe some mince pies,
and let's get cutting. Okay, gang, here's what
you're going to need. You're going to need
an A four cutting mat. Scissors can be useful for cutting around the
circles at the end. I've used a single hole
punch for these holes here. If you haven't got
one, that's fine. I'll put the link in the
description of this one. You will need a
glue stick, and I use a little T to light
it up at the end. You can get these. Again,
I'll link in the description. Also to cut everything
need your trusty scalpels. I use a fixed blade scalpel, a swan Morton three handle
with a ten A blade, and I use a Fiskars
swivel scalpel, which is a very fancy
little swvely thing here. And then you've got
your printouts. You've got your
practice sheet here, so we go through
that in a second. You've got your
four, ten plates. You've got your base here. G to cut this out first. Leave that circle right to
the end and then you've got your inner layer which is where the whole punch comes
in with all the trees, and these are important
to let the light through. You've got your middle
layer is the houses, and you have your outer layer, which as you can see,
is in two halves. That's so because not everyone's
got an A three printer, so it's actually handy
to have it in two halves so that you don't have to worry about having to print
it out on A three. We've got it all fitting nicely onto A four and they
all slot in together. Now, the paper I use is a
GF Smith, bright white. Color plan. It's 120 GSM. The practice sheet,
I've just printed out normal standard, 100 gram printer paper. This is a silk. It's slightly posher than your
normal sock standard, 80 GSM. Just silk paper. That's nice for practicing. I would recommend getting
something slightly meatier, but don't go above 135
grams your main template. It does need to be sturdy. You could make it
out of office paper, but it might look a bit flimsy. Slightly thicker a weight of paper will give
it that rigidity. It's really worth getting
120 grams, if you can. Don't go over 135 because then
it starts to really hurt. We're not talking cardboard. You really struggle
and your hands are really hurt when
you cut in cardboard. Okay? All right. Let's get
going with the practice sheet.
2. 02 Let's Practice: As you can see, I'm left handed. Right handed people
can do it too. But if you're left handed,
don't let that worry you. I hold it as I would a pen. I don't hold it as if
I'm chopping a cucumber. I hold it the normal grip. Now, it's important
when you hold it to not put your finger on this bit. Although it's not the blade, it's going to really
dig into your finger, hold it on the handle. Now, you can put some
sticking plaster round there to make it a
little bit nicer to hold. Sometimes also pencil grips, you can get foam pencil grips, pop them over the top,
and then also makes it nice to hold to make sure
you're holding the handle. Okay, we're going
to start off by cutting these lines here. We're going to start at
the top of the line. I've got a nice comfortable
45 degree angle. I'm not cutting it on the very length of the blade and I'm not holding it like that and cutting
at the tip of the blade. So a nice comfortable 45
degree angle on the table, and we always cut
towards ourselves. I'm pushing the knife in and
I'm slowly cutting through. Don't worry about
coming off the line, practicing the pressure we
need actually to get through, you cut that lovely line. And then we're going
to do the zig zag. First of all, let me demonstrate what not to do
with your zig zag. What I don't want
you to do is this. What I want you to do and
get into the habit of is moving the board so that my hand is not
really moving angles. What I'm doing is I'm
cutting at the same angle. I'm moving the paper
and the board. I'm meeting where I ended the
cut, lifting the blade up, moving the board,
picking up where I met, and moving all the
way down like that. The reason I say
we need to pick up the blade is because
you don't want to be inadvertently getting
used to doing that when you move it because you could gouge your papercut
and you don't want that. As you can see, I've
got to the end. If any of your points on your zig zags
are still touching, I recommend turning the paper over so you can see where they join and then just nicking
that little bit off. What I don't want
to see is pulling. You don't want to get
into the habit of pulling your papercut.
We don't want that. Now it's time for
some swively action. Here's my little swivel. I ignore this claw and I hold it in the crook
of my thumb like this. Holding firm on the gripper, I don't come down further, I hold on the gripper. The blade, it moves round
and round and round. As you approach the paper, it might be upside down. It will find its own
way as soon as you put the blade onto the paper and
then it'll go the right way. Then you're free to
move it as you would. Now, let me demo that. I might
need to get a bit closer. I'm going to show you to
the side of this line. Even if that's upside
down, it doesn't matter. Push it down and it will
find its own way around. Okay? And I'm showing
it who's boss, and I'm moving.
I'm very careful. I'm moving it with
my hand as I go. Okay? You can almost sketch
with these like that? Or you can just
go who like that. Okay. That's quite
cool, isn't it? Now, likewise, if
you haven't got one of these, don't stress. Let's do it with a fixed blade. Right. So what you're going
to do is on the line, I'm showing you off the line because I've sliced
right through it. You can just go in tiny
little increments, just slowly following,
moving it with your hand. Okay? And that should
still give a lovely line. Okay? So if you haven't
got one of these, do not fret my sweeties. Either will do, but I
like to use this one for intricate little things really handy when we come to these. I'll be using these
when we come to these, but I'll also be
demoing in this. But these are my two babies
that I love very much. This for straight
lines, this one for detail and curves. Right. Let's do some shapes. Let's
talk about some slits. The slits are important because
on every single template, you've got the
little slits here. This is where they attach, where they may fold
in on themselves. Also, they are underneath. So when you look at the base, there's the slits.
Let's look close. You can see they are
actual rectangles. What I don't want is a slit
where it's just a cut. You will really struggle
to assemble this. If your slots are
slits and not slots, we need some proper
slotty action. You've got a big one here to
practice to show that it is an actual slot and not a slit. Let me
show you what I mean. I like to cut one side, followed by the other side. Then you have to move it around. Now, you cut the
tiniest little bit. We don't want to overlap because we don't want to cut into the white, okay?
Because you'll see that. So what we're going to
do is just a very tiny, tiny little start and finish and then stab
that shape out. How lovely. Right. Let's try it at the
actual size now. As you can see, I'm moving it back to the nice
angle of my hand. I'm going to come in close, and we're going to
go slice Slice. Okay? Turning it round. And we're gonna go plop. I'm almost pressing
'cause it's so tiny. Whoa. Look at that
beautiful slit. Those will go slitting into these, if you
know what I mean? Let's talk stars. The stars are important on these. They
let the light through. When your candle is in there, it will show through. Okay. Oh, you can
see it flickering. How cool. Okay, because the stars
are part of the design. We don't want to
cut out into the white 'cause you'll have a nasty little I'll show you what? I mean, we don't
want to do that. And that because you would
see that in the design. We don't want that
at all, do we? In that way, we need
to control the cut, start at the tip and come down. The gray is getting thrown away so we can cut into the gray. Start. Top, come
down into the gray. Move the star around, start at the point, come
into the gray, you can crisscross
into the gray, start at the top, come down. I've already done
that one because that was the demo how not to do it. Turning it round each time. Pop. Oh. Oh, that's
attached there. So instead of pulling, I'm going to just nip. So as you can see, the
demo of what not to do, that would result in
not a very pretty star. So that's why we don't want
to crisscross into the point. We start at the point,
we criss cross into the gray because that's
going in the blinking bin. Now there's a little practice
one to do at actual size. You'll be a wizard
stars by the end of this template. Beautiful. There we go. Let's talk
about the hole punch. This hole punch is a
singular hole punch, probably about about seven
pounds or something, and it comes with various
different sizes of the holes. It gets attached by that. That goes in on top of
that, screws tight. And when you use it,
push down vertically. It's very satisfying. It hasn't quite gone
over the first time. Grab your fixed blade scalpel and just cut where
it hasn't, yeah. Let's talk houses. There's lots of
little windows to cut on this third layer here. So let's practice on
the practice sheet. There's different ways to cut the windows according to
how much time you've got, how intricate you want it, how confident you feel of cutting lots of
tiny little ones. So as you can see, I've got a dotted line where you
can completely ignore the whole window frame and
just do a big square hole. Or you can just add those two
together and have more of a sash window or you can cut each of the panes of glass.
It's totally up to you. Let's start with this semicircle here and I'll show you
how I go about it. So up there, but
because it's white here and we're throwing
the gray away, I'm not cutting
either side of this. I'm trying to keep my
cuts just on there. Now, if you're on a fixed blade, you can just gently
go round there. I'm going to do this bit with my swivel because I like it. I did half the circle
there towards me, and then I'm going
to move where I'm comfortable to get the
same angle of my hand. Stop where I stopped, and just come and join up stop. Windows, I like to do
all of the lines in one angle and then move the paper and do the other
ones to the stab it out. I'll do the other
two sides, one, two, stab. Very satisfying one. Two apologies for
the wobbling here. One, two Sabby, stabby. Love it. I'll show you
what I mean by the others. So one, two, turn it round. One, two. Now, you see here where I didn't quite cut the line off?
It doesn't matter. Really, because when we assemble it, that
will be the back. So you're not going to really
see it. So don't stress. I mean, you could neaten
it up if you wanted to, you can always shave
tiny little bits off. If you're shaving
little bits off, use your fixed blade scalpel and not the swvel scalpel because it just keeps it in
control a little bit more. Right. Let's do the
little sash window. So I've joined the two
up together at the top, but kept the ones at the bottom as two separate panes of glass. Again, apologies for
the wiggly camera. Blue Peter never had
this problem, did they? They probably had
a good camera man. Oh, no, look, I've
ruined that one. I'd sooner ruin
the practice sheet than ruin the real thing.
You know what I mean? Right, they're done. Now, what do we do with that, it's totally up to you.
You could leave it. You could put a tiny
bit of Sellotape there. You can cut the
bloody thing off. Boom. It's like it
never happened. Dorway I've moved the board
to a comfortable angle. I'm going to just do like
I did the arch window. I'm going to start there and come to the middle of the door, and then I'm going to move around to a nice
comfortable angle. I'm going to pick up
where I left off, and I'm going to just
come round like that. I've just done the arch. And then I'm going
to put that down, pick up my fixed blade, and I'm going to pick up
where we left off to do the nice straight lines down and down before going
right the way around the edge. One. Oh, my God, I complete that's better, Kyle. Thank you very much. And then
that one turning it round. There's a lot of swizzlin round. Okay. We're nearly there going. Are you keeping up with
me? How's it going? How's that mulled wine going, anyway? Finished it yet. Don't cut yourself.
Alright, little chimney. So the way I do this,
I'll go up, up. Now, a little boozy bit. I could have just
made that, you know, straight chimney, but I wanted a little brick
bit at the top. Do you know what I mean? Extra
little tiny bits just make all the difference in
terms of detail. See? Cute. I mean, it's
just a practice sheet, so we don't need to worry. Right. Let's practice some tabs. These are the tabs
that go into these. Okay. So you have to make sure that these
are pretty accurate. You can go lousy goosey on
some of the shapes and stuff, but these need to be accurate. The way I approach
these tabs is I'll start with the inner slits. One, two, one, two, and then while I'm here at this angle, I
might as well do that. Then I'm going to
turn it around. Then at the tiniest, tiniest little bit thereof Poof, slice slice, slice, slice, and then the other bits. In this instance, it
will be your design, the rest of the template. It's important that
that is a rectangle. I don't want that just
to slit, otherwise, you're going to really struggle trying to thread that
into your slots. Okay. Slots and slits, guys, slots and
slits. Right, trees. As you can see, there's
rather a lot of trees, but they look so good, so you really do
need to master them. I'm going to be using
the swivel blade, but you can also use a
fixed blade for this. I'm going to start this way
'cause I'm left handed. You might want to
start that way. If you're a tighty righty, I'm a lefty wirdo,
so I'm doing this. Right, I'm starting at the
tip, and I'm coming down. Can you see what I'm doing? I'm cutting I'm
loosely following the loosely following
need a steady cam. Again, don't worry too much. If you snarl up this bit, the gray's going
in the bin, okay? So cut, cut. Also, some of that, you can see I've
made that branch smaller, that branch bigger. It doesn't matter because
this will be the inside. You'll see the inside
of your lantern. Now, when you've
got all one side of the tree, you
then section it out, so you go actually going to cut that off and
then cut to that, so you take that little
corner off, you see. But that's what I
mean by section. So you come up here like that. And then for the purposes
of this template, this practice sheet, we're just going to take
that off here. Look at that. She's a beauty. There's your tree. So we cut down that side, and then we turn it round, we do the same to that side
before coming up here, section that and take
that middle bit off, and then I'm going to
leave you two this bit. And then we do the other.
Again, from the top down, do do do do do do do do do. And then you're done. And then you'll be ready
for your template. Oh, forgot about
the snowman's arm. It's a gnarly little thing.
So I'm going to use. It's quite little as well. So instead of using this,
which can be a little bit too wiggly for tiny, tiny branches like this, I'm going to cut with the fix
blade and go a bit wobbly. Let me show you. So
I'm going to just sort of wobble as I cut
because it's a stick. I'm not cutting that
end off just yet. I'm going to do all the ends and then because it keeps it flat on the paper for
longer so it doesn't get like a dying spider. That's all the lines cut, and then right at the end, nip off the little fingies. In there. There's
your snowman's arm. For those that need a bit
more practice on the trees, let me just show you again. Coming round to meet
this other side now. I told you it got n, it gets gnarly. No scribbly. If that's annoying you, you can just just bloody get it off. There me. Nearly at the top. Slice it off. And hopefully, if there's definitely
something attached, turn it over and see
where it's attached. You don't want to start
going pulling off your branches. Oh,
that mine came off. But I mean, even if you did, you could always just
neaten them up like that. Trees are starting
to look like trees. We've just got to come
down one more side. The gently there yeah. Now, you can go back
and do your little extra bits, last little bits. They are, guys. Your practice sheet
should look like this. You might have some
beautiful trees. You might have Olaf's arm. You practice, your slips,
your slots, you're stars. You're all ready
to go. Let's go.
3. 03 Cutting the Inner base and inner layer: Right, so we're going to
start with the lantern base. The rest of the templates can just be put to one
side for a minute. And what we're going to
do is we're going to cut just this circle. This one, the base B, we use right at the end, okay? I'm using my fixed blade.
What I'm going to do? What I find is easiest is to cut each of
these little slots, all of the lines in
one go like that. All of those in that angle, and then I'm just simply
going to turn around. I mean, you could finish
them off there as well, but I just do all of these, and then go round
and knit them off. So either way is fine. It doesn't matter, so
long as you've got a decent decent rectangle. Okay? So it doesn't matter so much at the moment if you go
over the lines a little bit, but do try to keep them
a little bit accurate. After I've done all of those, actually I'm going to
speed that bit up. No one needs to
see me doing that. If only I could cut
that fast in real life? I only. I'm just
going to go round. I'm not using a swivel scalpel because this really
sweeping curve. I find a fixed
blade scalpel gets a smoother line because
with a swivel scalpel, it could go everywhere. For sweeping curves like this, I stick to the old fixed blade. And there we are.
There's your base. Those slots are
looking mighty fine. Right, so we don't
need that anymore. I mean, we do need it. Don't throw it away.
We won't need that till the end and
that till the end. So just going to put that aside. We are going to start
with the inner layer. If you've got a hole punch, now's the time to use it. If not, I mean, you could use a swivel scalpel and
cut little circles out. I'll show you how to
do that in a minute. If you've got one of
these, then, let's go. That's a teeny teeny
tiny little hole though, but it's just big enough to fit over one of these circles
that's on here, okay? So I'm going to go ahead
and push all of them out. A all those holes looking good? No, I was going to show you how to do a hole with
the swivel scalpel, isn't you haven't got
a single hole punch. Let me get a bit closer. I'll show you on the
edge of this template. So what you're going to do? Now, I'm left handed,
so I'm coming this way, but if you're right handed, then you'll come this side. I'm going to do the circle in
four little quarters. Okay? One round Another quarter. Round. Another quarter. Round. Bit fiddly, but it can be done like that. The next thing
we're going to do, so I'm gonna put that down. Pick up my fixed blade. We're gonna cut the
windows at the bottom, and we're gonna cut
our lovely slots. So I meet it back here.
Right. There we go. What we're going to do next
are the trees at the top. Remember the practice sheet. We're going to come
along one edge and with a view
cutting off here, and then we'll cut off up here. All of these can be taken
in little sections. We'll do this section first, this corner, and then
we'll do that one, slicing up here, and
then this section, et cetera, all the way along. Okay. That's so close to the
edge, I could just do that. But the other ones, I'm just
going to cut the way up loosely loosely
following the shape of the branches on the template. Now, I'm going to cut off here, and that should all come off. Good. So the next
section we're going to do is gonna cut down here, okay? And then cut down here and
then slice that bit off there. Okay. So does that
all make sense? I'm gonna speed myself up
and go all the way along, kind of cut in little
sections off as I go until we get over to here. And then it's just a case of round round the square
bit with a fixed blade. And then your first
template will be done. Let me speed myself up and
do the trees. Let's go. There we are. Last little bit. Eagle eyes among you will have noticed that I kind of trimmed
some of these branches. They just looked
a bit big to me. They were all touching
like that one. Doesn't even notice, is it? So I'm just going to say, you can go ahead and kind of
change some of the branches, should you wish. It's
not going to notice. Right. Next thing we're going to do is all around the edge. All around the edge with
the fixed blade scalpel. So if you remember
the practice sheets. We did the inner of
the tabs, didn't we? So one line, the next line. One line, the next line. And then while I'm
here, I might as well do all the
lines in that angle because that makes it easy
before turning it around. Oh, missed that one, didn't I? Before turning it around
and doing the other edges, the other angle, sorry. There we are. Boom, boom, boom. Just to say as well, get
these quite accurate. If they're too long, if you accidentally
cut them too long, they're not going to fit
through your slit your slots. They're not going to
fit through these, be accurate with these. If anything, if you're
going to cut them wrong, cut them a little bit
shorter rather than longer. But you're going to be on the lines anyway,
guys, aren't you? Because you're so bloody good. Right, that bit off. Swize the rest of this.
And these bottom ones, these bottom tabs here
are what fit into. You've guessed it. They
fit into these holes here. So this one that we're
cutting now fits into the middle circle of holes, and then the next
layer goes into these, the next layer goes into these. It's important that these are good size because if
you cut them too big, they're not going to
fit in there, and you're going to have
trouble assembling. But, we don't need
to have a ruler. Just do it. There we are. Jack your paper around, Kyle. There we are. Boom.
Your first template. It's done. I gonna keep
these all flat for now? It's handy to keep them all flat until you're ready to assemble
them cause otherwise, they could get a bit damaged. So we're gonna keep
that one nice and flat. Pop it on top of the rest. There, put it to one side, and let's make the next one.
4. 04 Cutting the middle layer: You've guessed it.
The middle layer is the next one
we're going to cut. First things first, though,
we're going to do more of the holes and the stars. We don't want to cut
all the way around the outside and
then do the holes. With it all cut out, you haven't really got
much to hold onto. We're going to do
the holes first, which includes the windows, and then we're going to do
the top followed by the rest. Let's do all of the holes
first with matrustyHle punch. Now, I've got a little
weeding out tool, which helps getting out all of the little bits of paper
that get stuck in there. A little needle we'll do. Try and push it through
with something. Something sharp and pointy. Let's get holing. Right, so with the holes done, let's clean our workstations, guys. Don't get messy. With the holes done
here, I'm gonna then do all of the stars. And then I'm going
to do the windows, and then I'm going
to do the slots. Alright. Let's go. That didn't take long,
did it? Or did it? Are you cursing me now 'cause there's so many bloody stars. It'll be worth it, guys. It'll be worth it,
I promise you. Right, there we go. Who's
ready for some windows? Yeah, should actually
should we do the slots first?
Let's slot it out. Come on. There you go. In my Christmas workshops. Even though I said about how
you can simplify the windows and just make them big squares or turn them into sash windows. Absolutely. Every
single person wants to cut the entirety of all
the little window panes. I admire that to be
fair. It does look good. It is worth it. So if
you can, fantastic. If you can't, that's fine too. I thought I'd mention it just in case you did want
to simplify them. I'm going to speed
myself up doing these, but I'll slow myself down when I'm doing that
circle one and we've practiced an arch
window. Let's do the windows. When you get to
this middle house, both middle houses, actually, let me just bring you closer. Let's talk about these lintels because they can be
a little bit fiddly. I'll show you how I do them. This one up here underneath this arch window is
the most fiddly, because it's teeny tiny. It's almost like doing
a teeny tiny slot. Let's do the inner line
first and then the outer line and then just nip them off. Init, tiniest little almost just pushing the blade.
Then that should come off. These other three in this house, what can look a little bit
extra a nice detail is to angle each end as a
lintel would be in a house. Let me show you what
I mean by that. Instead of going straight down, just going to go a tiny
little angle like this. Let me show you on that one. Can you see it's
not straight down. It's a teeny tiny angle, which then is more like
a lintel would be. And that's all the
little extra bits of nonsense that would be fun. It's likewise for these. I'm gonna speed you up now, like Bucks fizz would say. Oh I'm just going to talk about this window now. We're going to cut
it in four quarters. So one quarter, turn it around. The next quarter,
turn it around. Pick up where you left off. The next quarter,
turn it around. And stab it out. There we are. One more house to go. And then we're home and
dry. There we are. That's looking good now, eh? Whoa. Right. Okay, so as
we did with the trees, we're gonna section it off
so we can start anywhere. And use the tips of the
things to slice it off. For instance, we'll go there
and we can go right the way you can bring it
up to here or you can go use the trees as sections. We'll take that corner off from here right
around these houses, the edge of that one tree, and then slice up here. Then that's corners
off, and then come down that tree around
these down that tree, slice up there, take
the middle section off, and then the last section, followed by around the outside. Let's speed it up. Has
everyone got enough snacks? Has everyone got enough drinks? Are you enjoying yourselves? That's the most important
thing. Let's go. There we are. Run
the outside now. And that's the second
template done. There we are. Well done. Good work. Right. So we gonna put that
with the rest of our gang. And also that last one. Don't
forget that over there. Just these two little
beauties to go now.
5. 05 Cutting the outer layer: Remember to take a break,
give your hands a rest. Maybe have a tiny dog to cuddle, or a big dog, any dog or a cat. Now, can you get back down? I've got cutting
to do. Right, so I'm going in with a whole punch. This time, we've also got the
Snowman's eyes and buttons, which if you want
it to be extra, you can switch to
a different size. Let's do the stars next on
both of them and the slots, and then we're going to
take each one separately. Top first, followed
by the bottom. But at the moment, the stars and the slots we can all
do right now. Go. So once all your stars are done, then it's time to do the
car. Star before car. What we need to do is the
underside of this car, the wheels and the windows, and then we can cut
the rest of it. So as you can imagine, with the wheels, it's exactly like we did the circle window. So we're going to take them in four quarters like a
little pizza, one, two, turning it round as
you go so that you're not getting any weird
angles like that. I think it's time I changed
my blade, actually. And the other one like that. That's not that circular. I'm gonna shave a tiny bit off. I'm going to go in with my fixed blade to shave a bit off. That's a bit better. Oh is where you get bigger
and bigger holes. All right, I'm going
in underneath the car, and this bit comes up
here. Around the wheel. Round this wheel. And then along the base. There we are. Now, for the windows, it's pretty much like
how you've already done the sides of the tree. So we just do the
little branches of the tree that's sticking out
over the top of the windows, and then you do the
rest of the windows. Do the tree first,
little branches first, and then round the window
whatever car this is like that. Then the other one There, yeah. That's the tree done. We can
do the rest of the top now. I think I'm going to
take this corner off, and then I'm going
to come around here. I might take it up there and
then do this next corner. But also, actually,
what you can do to make it a little bit easier than
swizzling it all round, is you can chop off one half. Now, be careful when
you get to this bit. You don't want to chop
the end of that tree off or the snowman. But I've just taken
that bit off. I'll put that to one side
so I can concentrate on this top half. Okay. Amazing. Right now we just
go around the outside. There we are. The
penultimate one. We've got one more left, and then it's assembly time. I'm going to show you how
you can be a little bit extra with this squirrel's tail. Okay. So a little bit like you would do the Christmas tree, but they would have
tiny little tiny, tiny little bits of hair
coming up here, wouldn't they? Do tiny little like
you did with the tree, but tiny little branches just on the underside of the
squirrel's tail. Because then when
you cut it out, it'll look more realistic. So let me show you that what
I mean? Right, there we are. For that, you see. Then
we've got a bushy tail. You don't have to do that
at all if you want to. But that's the way you
can be a bit extra. Remember, on the practice sheet, we did the little snowman's arm. Well, we've got two
to do this time. I'm gonna use fixed
blade for this one. And, gosh, it's even smaller, would you believe, than
on the practice sheet. So just come up. Remember, we're not going to do the fingers yet. We're just going to do just
the little branchy bits. Can't hardly see them, but I'm just kind of there. I haven't trimmed
off the end yet. I'm going to do
that in a minute. Once I've done the rest of it, I'm going to come
back and nip them out because otherwise they
could start curling up. I'm just going to
leave them flat and do the other arm but not do
the ends of the fingers. Similar thing. Then I go around the rest of it quickly and then
I'll nip it off. Now, you might have noticed
I went I didn't cut. I didn't cut down
the snowman and then come towards the arm
because it's so tiny, I could have inadvertently
cut that off. So what I did was I turned it around and started at the
arm and then came down, and then turned it
around and then started at the arm
and then came up. So I wasn't cutting towards the arm either of those times. Just in case. Right. Let's chop off the fingers.
That sounds nasty. And then that should all come away. There we are. Quick round the outside. And
then it's assembly time. There we go. We're all done. So we have all of the
templates ready to go. I think it's assembly time. Refill your glasses,
maybe have a lou break, maybe get some snackets. But either way, you're
gonna need to grab your glue and let's
get ready to assemble.
6. 06 Assembling your lantern: Some scissors later, and you're definitely going to
need your glue stick. We're going to grab our base. Put that base to one side.
I hope you still got it. What you need first
are the trees. So there will be a
definite front and a back to your template. So you might be able
to see the odd bit of gray around the outside
where you cut it away. So that will become the
inside of the lamp. So with that in mind,
with the trees, I can see that there's
bits of gray on this side, and this one is this
must be the front one. So with the trees
pointing towards me, we're going to just fold
it back in on itself. Now, what we're not going to do, we're not going to go like
that and push the tabs through these holes
here like that because it would give
a teardrop shape. Instead, I'm coming over
and in to these slots. Sometimes it's better to go onto the cutting mat or just
a table and bend round. This is where we hope that our slots and our
tabs are accurate. There we are. Now, once they're all
in, simply push down, pull it there to lock it, and then that should even up. If that's a little bit higher, then you'll know that
you can just pull it just to lock it in there. So there's your first template all rolled round on itself. These tabs at the
bottom will fit into this inner ring of slots. Push them all in to make sure that they all fit in properly, and you've cut your tabs and cut your slots with
great accuracy. So you can see they
all fit in there. We want to glue them out. Each one needs to be
glued out and not in. The reason I say that is because
you can't get purchased. You can't hold on to that
middle bit very easily, but you can hold on to push each of those tabs
down with the glue on. What I find so I know they
fit, so I can take them off. But what I find is
easier to make sure bend round easy as I just
bend and release, bend and straighten,
bend and straighten, bend and straighten,
each of these tabs. That way, when they go in, they will bend round
easily where I want them. Now, because I know they
fit and because I've bent them now is a very good time to take the lid off
your glue stick, otherwise, you're
holding your template, and you haven't
got a spare hand. So get your lid off
ready and then pick up your template back up again
and just put one tab in. So I'm holding one tab. I know the rest fits
because I tried them. So a bit of glue on that tab and then fold it out on
itself like that. Okay? It won't cover the other hole if
you've cut correctly. I just find it's
easier to get one in and then do the rest. Okay? So I'm going to then push
the rest of these in. They've gone in quite nicely. Glue one in, push the rest in, and then glue the opposite
one then coming out. Push that against that. I'm holding it like that. And then I'll just
glue the rest. Generous with the glue. The last one. There we are. First layer done. Put that to one side and
grab our lovely houses. Now, I need to figure out which one was the front
and which was the back. I think that was the gray side. So I'm going to make sure
that that's the outside. So again, push it
round with our hands, line up all the tabs with
the slots, push through. And then, as you can
see, that's lined up. So we just pull to lock. And I'm going to fold,
release all of these. Okay. There we are. Now, let's grab
the lantern again, and it's a good idea
to line up the seams. So I can see this seam is
here. This seam is here. So when I push it over the top, I'm going to make sure that
that seam is lined up. As you can see, you
can see one seam there, one seam there. And now I'm going to
go ahead and push all of these in and make
sure that they fit. Now it's a case of gluing one. Glue one there, and
then the opposite one, just to stop them
all falling out. I'm gonna go ahead and
do the rest of them. Your nail does get a bit gluey. I get a bit gloyOn on your nail. Oh, my God. I can use
that glue on there. Yeah, get your
Christmas manicures done after this crafting. Alright, ladies. And gents. Right. That's looking good. Even that on its own would
look great, wouldn't it? But no, we're gonna
make it even greater. Put that to one side, get
the glue off your nail. Actually, it is a good idea
to get your hands clean. The next layer, we've got
the snowman and the car. So this is the gray side. You can see that some of
them have Bs. There's B. You need the B slots to
line up with the B tabs, leaving the A's for now, okay? So with the Bs in the middle, what I want you to do
is I want you to come in like that with the B tabs. So they're facing
you, because this is gonna be the back because we don't want to see that, do we? And then turn it round, make sure that looks all
lined up properly and lovely. Then I'm going to bend
it round in on itself. To put the A tabs
through the A slots. You could say A holes. They're going to do the same
with these fold and unfold, fold, and unfold,
fold and unfold. Now, what about the
seams, I hear you cry? Well, on this one, it's nice to put the
seams at the side. You've got the two
back seams together. I quite like placing the car in front of the houses there. So you've got the back
there. There's the front. I'm going to put the
car over the top. You have to be very careful.
Get it over the top. Don't get it caught
up on any trees. So then that is just a case of, again, making sure
that the tabs all fit. They all fit, so
I'm gonna glue one. Stick it on. So as you can see, they've all come out in front of each other. Loads of space. Now I'm going to
get the rest in. And my last tab. Great. Make sure they're all
pushed down tight. And there you have
it. Straighten out any trees that might
have got bent. And that's how we're
looking. Look at that. Right. Base time. So let's put that to one side. Grab our base. I'm just going to
cut this bit off. And I'm going to put
a generous amount of this glue all over the base. And then we grab our lantern, and we line up the sides, line up the edges, push down. And then it's just a
case of cutting around the edge with some
scissors or a scalpel. And there it is. So now the bottom's all
lovely and covered up. And it's looking gorgeous. The last thing to do is pop
your little tea light in. Once again, don't
use real candles. Okay, that's very important.
I'm gonna pop that on. Literally just drop it down in. Now, you can't see
that until the dark. So we'll come back in the
dark and have a look at that. A little tip about
fitting them into these lovely big
glass cloches from our favorite Swedish meatball
emporium is take it off the base and get your lantern
onto the cutting that. Put your glass
cloche over the top, sometimes it doesn't
quite fit the base. So just take a pencil have
the right here and just drawl around the glass and cut around again
with your scissors. And then that then should
fit your base better. And then it's time to pop
up on the mantelpiece. Congratulate yourself
on a job well done. Enjoy. Merry
Christmas, everyone.
 Kyleighs Papercuts, Papercut Artist - Graphic Designer