Transcripts
1. Intro: Hi friends. I'm Tammy K.
Welcome back to another class. And today, we are talking
about painting outside. So I am a flower girl, and I do a lot of
florals with watercolor. But one thing I haven't done in skill share is just give you an idea of how
to paint flowers outside. So it's very easy
setting up your space. I will tell you what to do. But I'm so excited to show you the idea of how to be mindful when you're painting.
So it's not just about being outside and
trying something new, but it's about thinking about
the things you can see, smell, taste, touch, and hear. And maybe all the senses are not involved when
you're painting. But what do the
flowers look like? What are the colors, the
petals, the textures? How are they moving in the wind? Do you hear the wind?
Do you feel the wind, the sun on your face,
the sun on your skin. And being able to understand
that those senses, when you're tuned in, can
make you feel very calm, very peaceful and very sooth so I'm glad you're here today. Join me as we're going to go over the painting supplies
that you will need, how to set up your space, and also just how to create a watercolor composition
that is easy, stress free, and allows you to be in the moment practicing
what you love to practice without the idea of
perfect. So let's get to it.
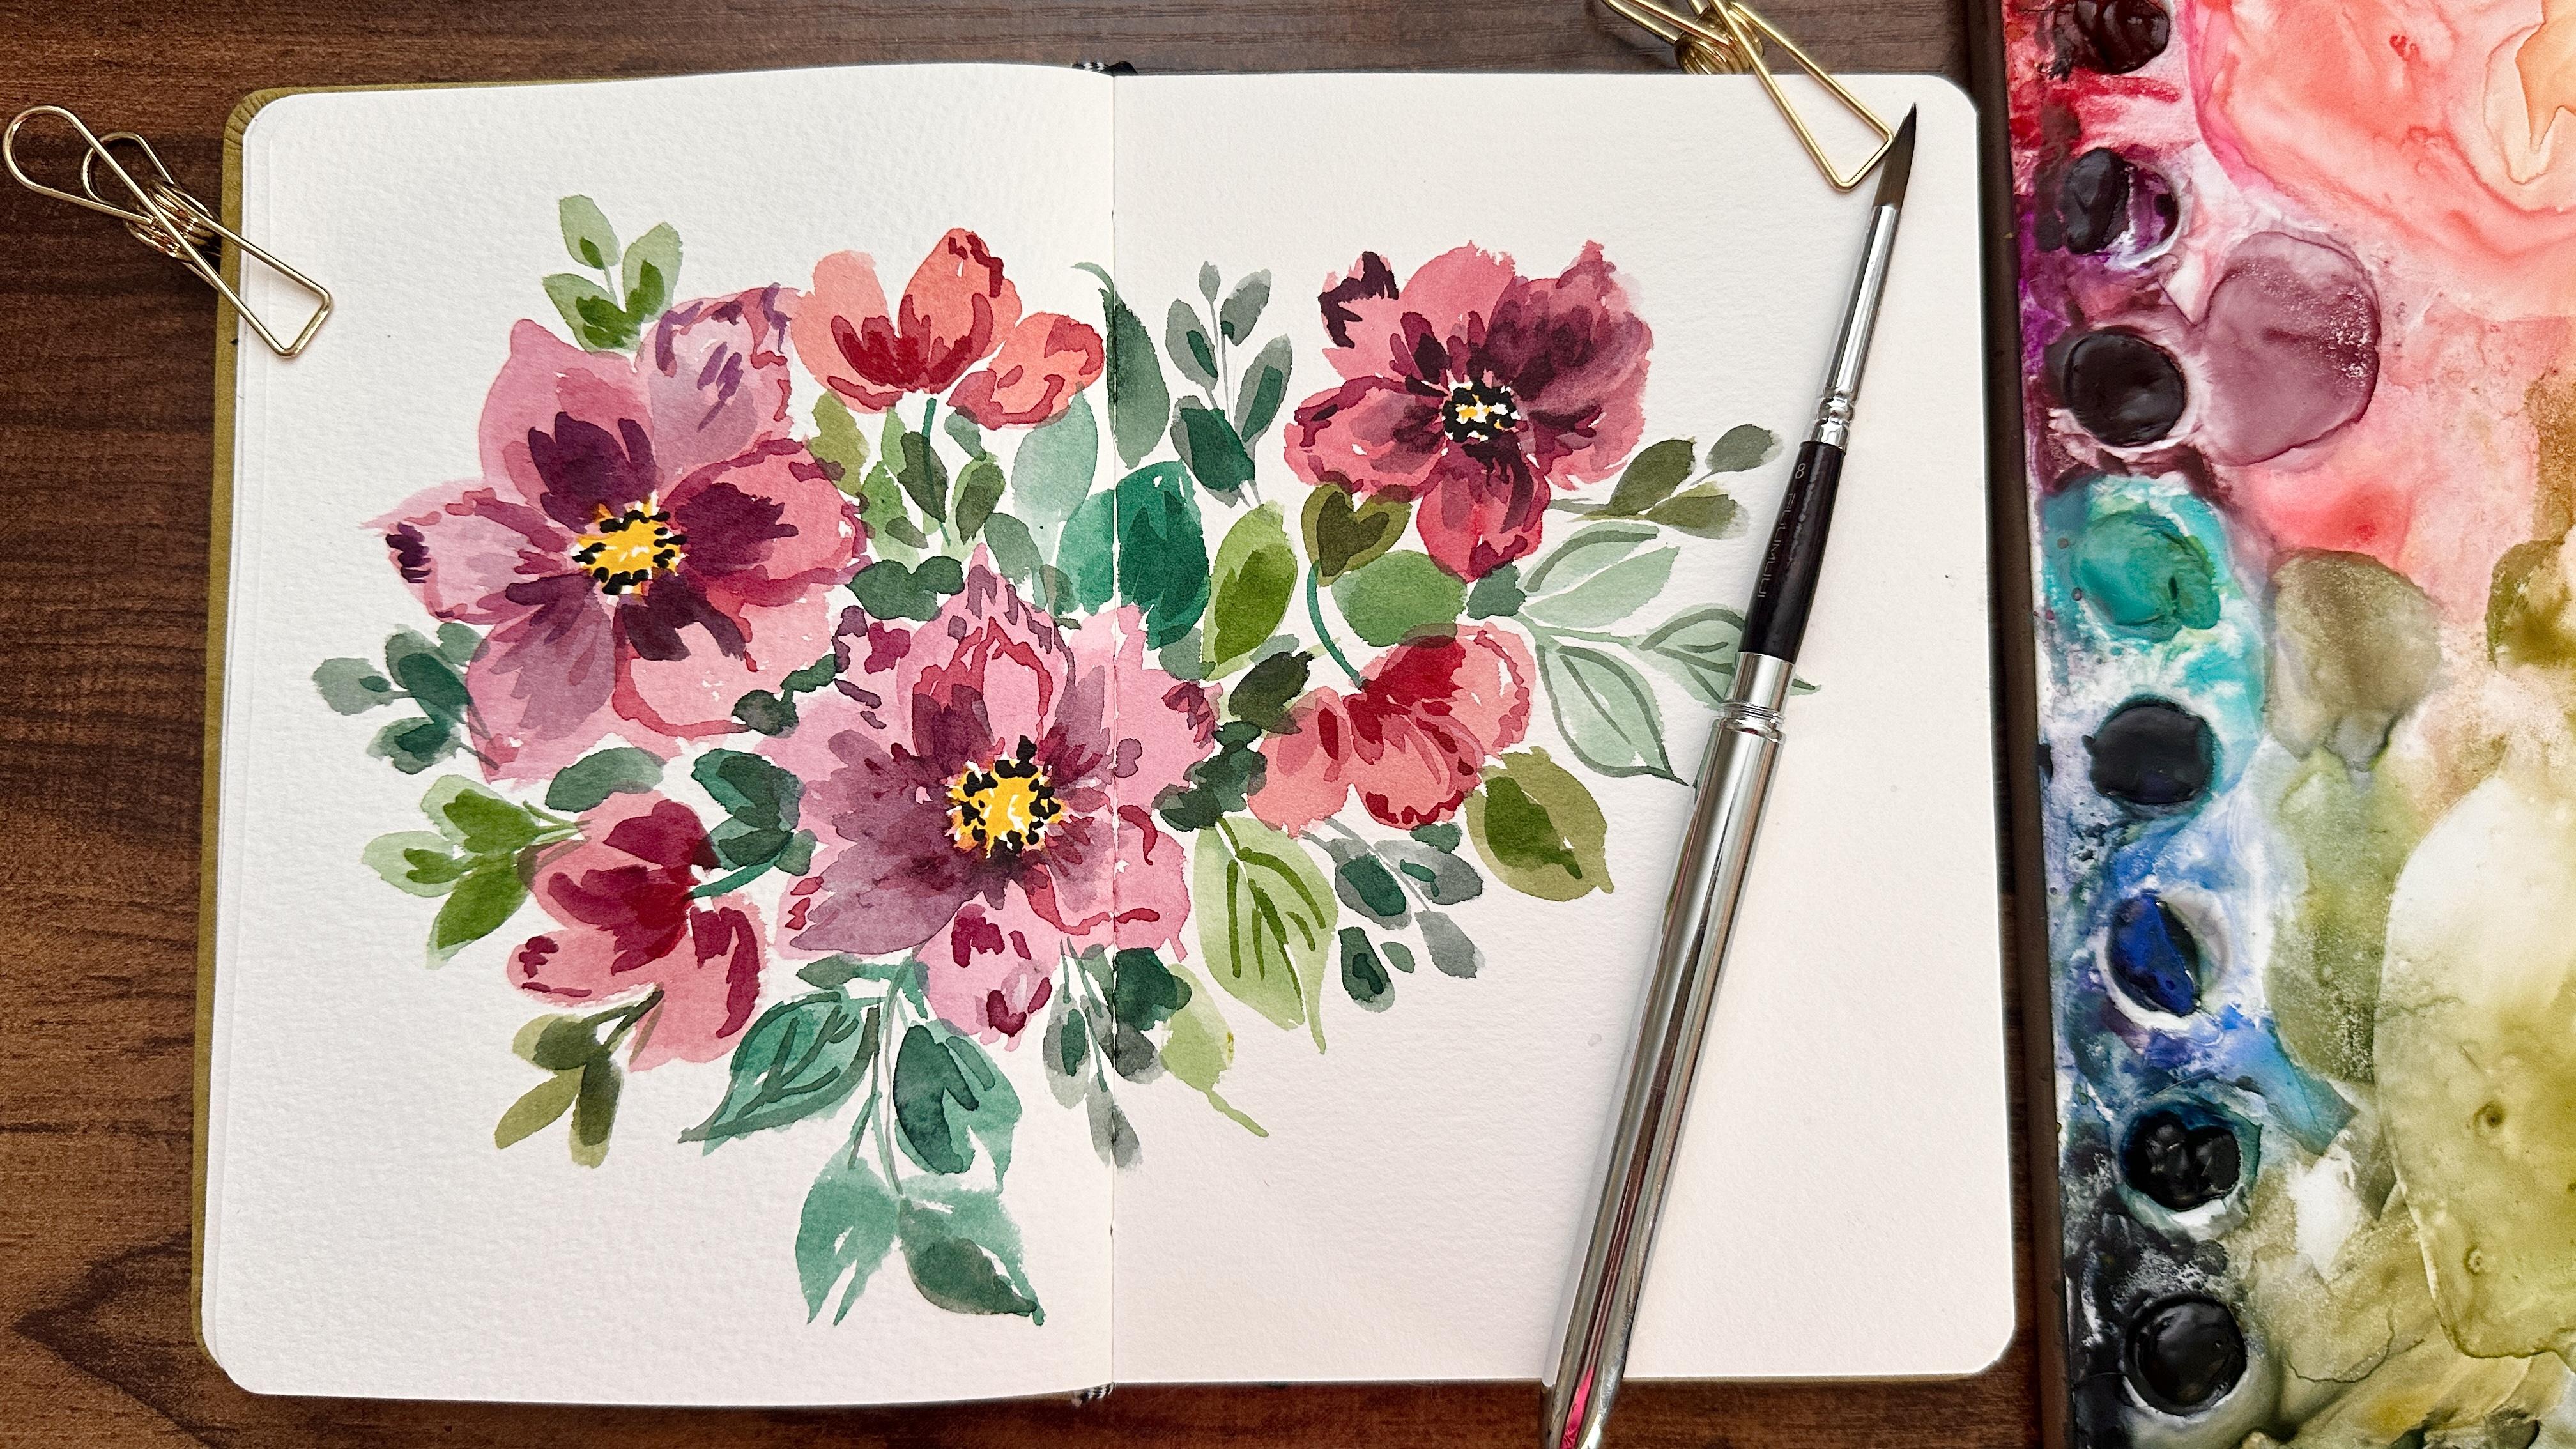
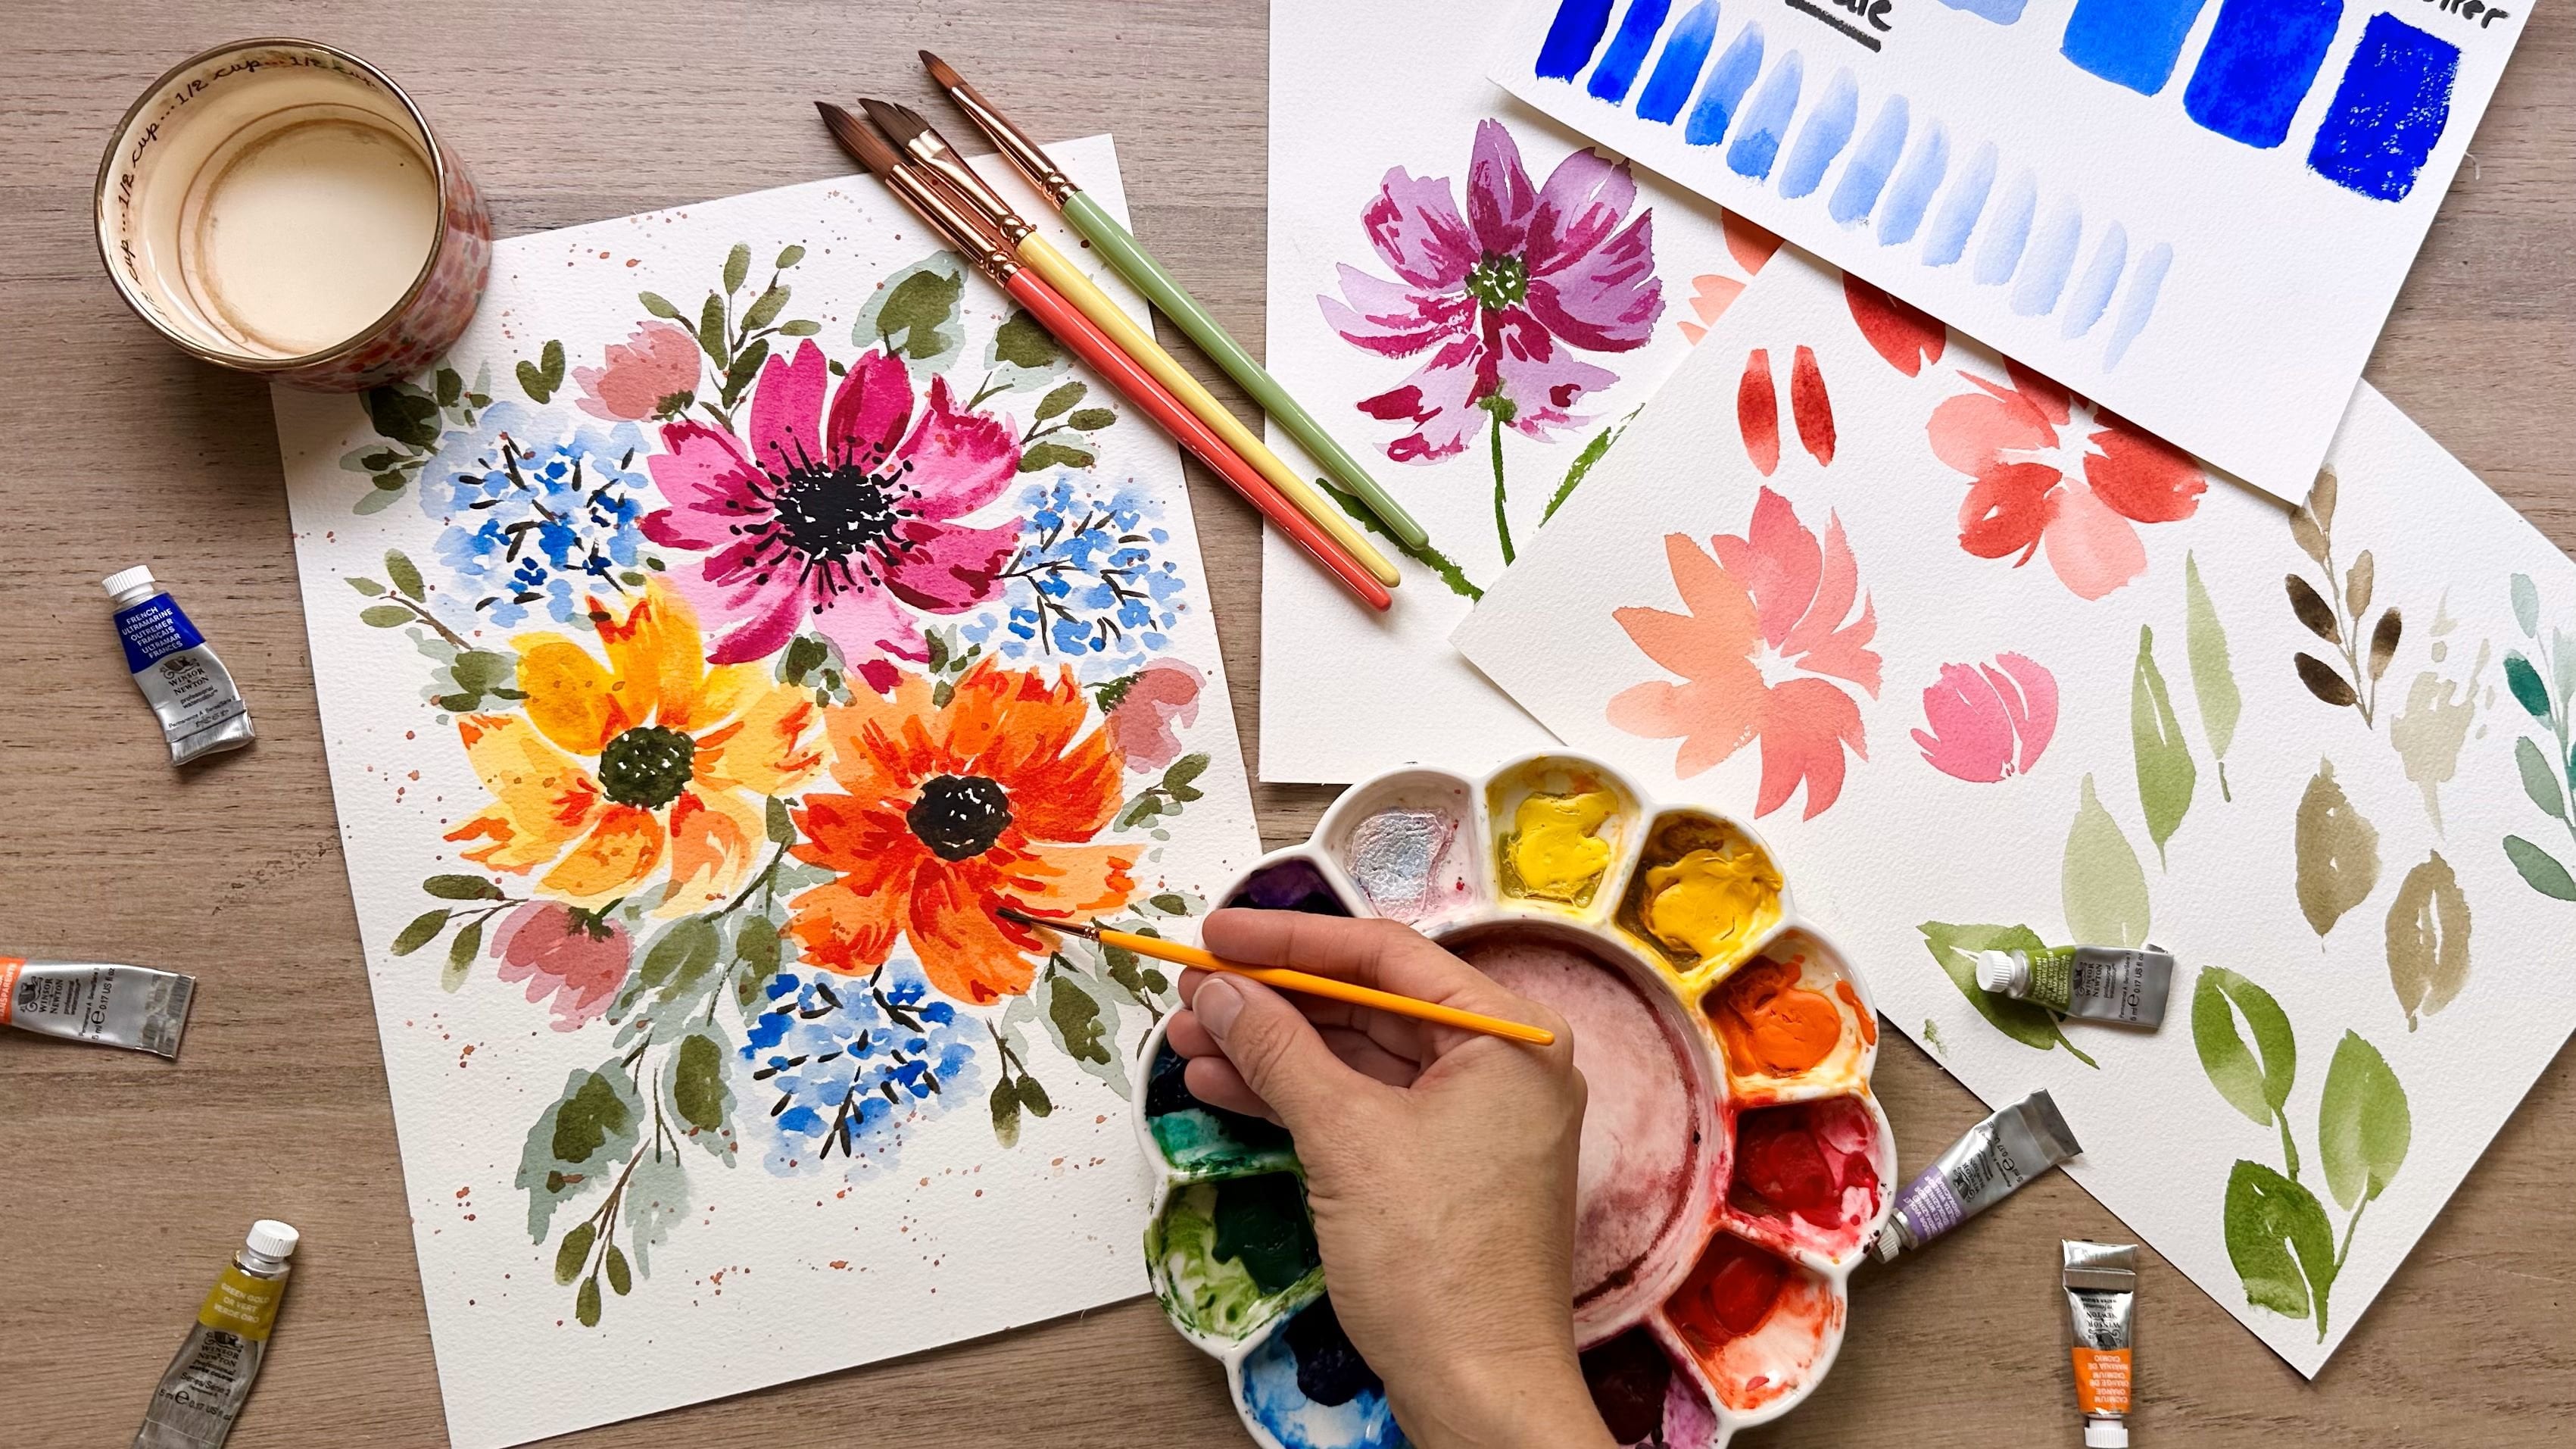
2. Flowers: First Layer: When it comes to finding a space for you to do
your painting outside, you want to find a space
where you're very familiar. And in this case,
I chose my garden. It's in the front yard.
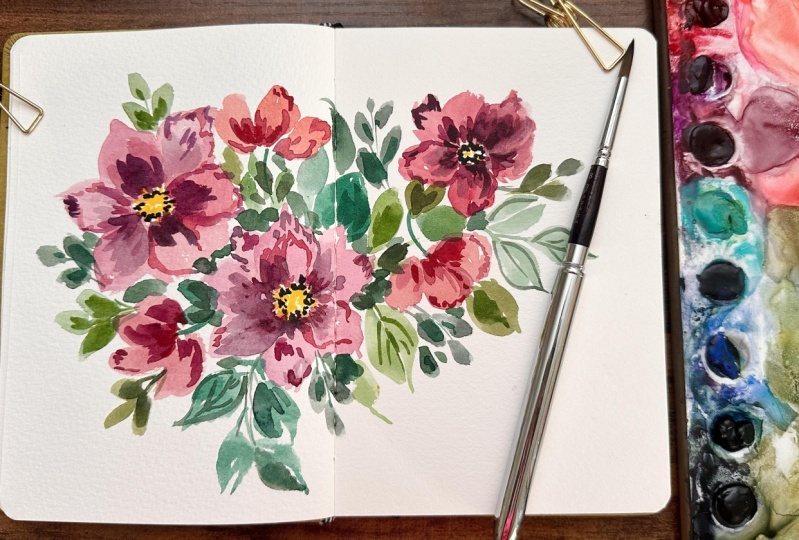
These gorgeous pink flowers, these roses that are just
absolutely gorgeous. And Nx you're gonna want a
very comfortable place to sit. So a lawn chair or
some chair with a nice pillow where you can sit there for maybe
20 minutes or so. I've got a little lap
table that I use, and I love to use the clips for my journal just to
keep it flat, open. I've got my
collapsible water cup. My paper towel for dabbing, and then I've got
my spray bottle, and I spray down
my small palette. It's hard to fit
everything in that space. And so I'm keeping that
paint just on the side. I'm actually sitting quite low, but if you have a high chair, you might want a larger space just to be able to kind
of paint and spread out. So I've got my
travel brush here, and this brush is amazing because it has a little
cap that goes over it, and it's actually quite
small, and you unscrew it, and then screw it on the bottom, and now you've got
a large handle. Starting with our
painting, we are starting with our little sunburst,
as I like to call them. They are just nice yellow paint, and I'm using that
really quick brushstroke to create this
nice, loose center. Now, some people start
with their petals, and I often start
with the center because I feel like
that gives me a space, a guide for where
to put my petals. So if you're kind of like me, try doing this and seeing if it kind of makes
a difference for you. So as we're sitting out
here and we're painting, I'm getting my nice
pink color together, and we're starting with a
very light value so that we can go ahead and
spread out that color, making some really
nice loose petals. And then once that is dry, we can start adding
darker layers just to create more
dimension for a flower. So as I'm doing this,
I'm going to do this with all of
the florals today. And you can use a large brush, or you can use a small one, but I'm using kind of a
number eight round today. That's what I have on hand, and that's what's comfortable. And you can do everything
with one brush, or you can have several
brushes if you'd like. So these roses
that I'm creating, I'm not doing a
realistic version. I'm doing my own loose version, but sitting out in nature
is what inspires me. And if you were to hear
the sound in this video, you would notice it
was a very windy day. You can sometimes see the leaves to the side
they're blowing in the wind. And so there's a lot
of sound happening, but it was absolutely
gorgeous sitting there, being in nature, breathing in the breath of fresh air and just enjoying
being in the elements. I was sitting in the shade, but the sun was definitely out, and it was just lovely to see. When you're sitting
there and you're using a reference
from real life, it just kind of opens up your
mind more to the senses, the things you can
see, smell, hear, touch, and sometimes
even taste if you've got something that you're
drinking or a snack. It's a wonderful experience. So if you feel like
you struggle with, maybe your mood is low and
you need to boost your mood, or maybe it's just elevated and you need to
lower the anxiety level, sitting outside, being
in the fresh air in the sunshine really helps
to make a difference. So often we just tune
out the things that we can experience in the present
moment with our senses, and we're just focusing on maybe that narrative
that's really frustrating or scary
or anxiety provoking. But when we just focus
on those senses, because the narrative
then goes away, we're not giving
it any attention, our body can naturally
start to distress and just kind of relax
and find that piece. Alright, so I've put
in two flowers here. They're slightly
different in their color. And again, it's the base layer, so it's not like you really have to think too hard about it or just belabor the
painting experience. You are going to
be adding details later as you have seen. And you know that is just a placement of the colors where we
want things to go. Obviously, the shapes are
important, but at this point, it's really about just mapping things out and keeping
that really simple. So as I like to ask, how are you feeling right now? What is something that you're enjoying about your
painting at this point? What do you like about
it and maybe for feedback is there
something that you don't like that you just don't
want to repeat next time? So right now, we are going to continue with our
learning experience. We're going to do more
of that reddish color, and we're doing some
side facing flowers. So just creating several
different petals here. You can work quickly or
you can work slowly. With this composition, I didn't want it to be
really matchy matchy, but rather wanted
it to be, you know, pretty loose and
asymmetrical and also just leaving a lot of white space because I tend to
fill up the page, but it can be fun to try different compositions and just see how they make you feel.
3. Leaves: First Layer: So now that we're
adding in our greens, we're going to start
with our stems. I like to curve them, have a nice little curve to
them versus just straight, and it gives a little bit more, I think, of an interesting look. And then I want to start
adding in my leaves. So doing some sea curve
shapes, filling in the center. Now, I have to say,
with this palette, I really love the
size, but I don't necessarily love
the colors in it. The greens are just a
little too intense. There's not a lot of mixing
space as well and also I am painting with one hand and holding the paper
with the other. And so I wasn't able to use
both hands to do some mixing, but I still went for it. I wanted to just give it a go and see what I could make
of this whole composition. So I feel like it was a good
learning experience for me and also an experience
in letting go. I just kind of embracing
whatever happens. And using what you
have is so powerful. Sometimes you learn that you
like colors that you didn't imagine you like or the shapes that you use
or the types of brushes, you get surprised by that. And those are good things. So I love to close in all
that white space, especially in the
center of a bouquet, which is what I'm doing here. I've got some nice kind
of turquoise leaves, and then I've got some
darker ones as well, some lighter, and, of course, those brighter green ones, too. So sometimes I'm really
detailed with my leaf, like those seacurve shapes, and other times I'm literally taking the brush
and just pressing the belly of the brush down and creating whatever
shapes come out of it. Right now, I'm working
around kind of the outside of the composition, just looking at where I want to start putting
in those leaves, where I want them to stick out, where I want them to be shorter, thinner leaves, thicker leaves. Now, playing with the values of your leaves is
so important, too. And, of course, later
on, we can go in with a second layer and really
darken up some of the values. But we can also start dark, too. Like, there's no
hard rule on that. So I've got a different
green on my brush here. It's more of that muted green. You can mix some brown in there with your green
to create that. You can mix in a
nice blue to create a muted bluish shade
of green, as well. And as you can see, you're
changing up the values, you're changing up the shades. You're changing up the sizes of the brushes that
you're using for the shapes and then
also the sizes of the leaves and just really
playing around with it. So I didn't have a specific
plan when I started this. I just wanted to go for it. And again, remember,
we're just blocking out color so pretty easy, peasy, not stressing and not worrying
about where we need to go. So at this point, I
want you to kind of connect with what's
happening in your body. If you're feeling any type
of anxiety, frustration, take a deep breath and pay attention to some
of those senses, mindfulness is all
about paying attention to what is around you and
what is in the present. So right now, what can you see? You can see all the
beautiful colors of not only the composition, but also of flowers and
foliage around you. Maybe you're next to your house, and you can see that
or some cars or some animals, clouds in the sky, just paying attention to all those beautiful
things and allowing that to soothe you and calm you down if you're
frustrated at all. It really does help. And then also paying attention to
the brush in your hand. How does that feel? Is it cold? Is it warmed up from your hand? What does the paper feel like? Is it a nice? Does it have
a nice texture to it? Is it smooth, rough? Just being aware of
those things and really toning or honing in on that tuning in and
honing in is what I meant to say. I said toning. So you can see I've taken
some darker around some of the flowers and really kind of, you know, painting
that negative space, which really allows
the flower to stand out because you've put
in some nice dark marks. And so just looking around
and adding wherever you need to add some little dots
or blobs of paint. I do like how the composition
is turning out right now. So just pay attention to
what you'd like it to be like and continue to
work towards that goal.
4. Flowers and Leaves: Second Layer: This is my favorite part of
the painting experience. It's starting to add
in that contrast that really gives you that
three dimensional look. And so I've got a kind of
a mid tone color here, so a medium, kind
of a medium value. And I'm starting to paint
in some of the details. So sometimes, when
it comes to this, the idea is just to add
in shadows and textures. Sometimes I like
to outline a bit, some of those petals,
and other times I like to just put in some
very interesting, very light or medium marks just to make some dark parts and some medium parts and give us that really good
contrast that we're needing for our composition
for our flowers. So this part can feel
really scary take a breath. Remind yourself it's not scary. It is only what you tell it what you tell it,
what you tell yourself. So sometimes I like
to take the brush and outline on the outside of
the petal just like that. And that's giving me
that beautiful edge. And then sometimes
I like to take a very light version of
the paint and just add, you know, some larger areas, covering more of
the surface area. So it's really about
intuition. At this point. Now I have more of a
darker purply color that I've started to
add in some contrast. And, you know, you
can think of this as just sort of sort of a game where you're trying
to figure out, Okay, where do I put the marks? What do I like?
What don't I like? Because you can
outline your petals. You can outline the edges. You can put really dark
paint in, like, blobs. You can put small
little sketchy marks. I think it's really about just experimenting with
what you find to be interesting and then
kind of going with that. So, right, you can see I'm dabbing my brush
whenever I'm getting more paint so that I don't have this puddle
that's left behind. And over here with a
side facing flower, I'm just kind of, you know, quickly putting some
of that paint down, kind of outlining some of
the edges in between petals. So that gives more
of a contrast look, and you can see one petal
ends and the next one begins. So we've got our last one here that we're starting
to add those marks. And I'm going pretty dark, allowing that paint
just to it doesn't move much because I'm
using very thick paint, so it has more pigment
and less water than, of course, the first
one that we're using. So again, being mindful, continuing to breathe deeply, reminding yourself about how
lovely it is to be outside. I've got a nice dark mark here
and just little squiggly, sketchy lines for this. It's quite nice. So I
love painting this. Roses can be really hard. And, of course, these roses,
as we're calling them, have these beautiful
yellow centers, which you typically don't
see the center of your rose. Usually, it's closed. It's not open all the way. But when we allow roses
to open as they should, not like in the store, you start to see these
beautiful centers emerge. Now I've moved on to my leaves. So this is that second layer, adding the contrast
and just that boldness that maybe you felt
like it was lacking before. Again, with that first layer, you know, not exciting,
pretty boring, but yet so vital to help you feel like you have some control and knowing where
you're putting stuff. So I'm switching
out the types of greens and the types
of marks I'm making. For this part, I'm selecting some leaves just
to add in some veins, and then some other leaves, adding some kind of blobby marks or sketchy marks over the top. And, of course, I am going
darker, which makes sense, so I can get that contrast, a little bit darker
for that second layer. And sometimes you want
to do a blue green or a yellow green or a brownish
green really up to you. But you can see now as I'm putting these marks
and starting to layer, you are beginning to see this
composition come to life. That is not just
flat and boring, but it's really starting to hopefully spark
some interest in you. And, you know,
we're not done yet. We still have a little
bit more to go. But at this point, I want to encourage you
to be super proud of yourself for having
come this far. Over here, I'm choosing to
outline some of those leaves. So you can see, I
want to keep it interesting and
different and so that, you know, our brain
is not going to get bored by what we're looking at, by what we're creating here. And so, but you should
be absolutely proud of yourself for coming this far and painting outside
is no easy job. So if it is a new skill
for you, congratulations. It's a work in progress. If there's something
that you didn't really like, no worries. You can always go back and try again and stick to it, though, because you never know if
you're going to find, like, a new skill, a new way of painting
that you absolutely love. You might be extremely surprised by what you learn
in this painting process. You can see that I mixed up
some really dark purple. We're still going
through that, you know, second layer, maybe you
can call it third layer. If you're laying over
that second layer, like I just did
there, really dark. But I'm not covering up
that first or second layer. I'm just not covering
it completely, but I am still working with it, kind of gingerly
putting down the marks. There are some spaces where
I feel like dark is good. Some people like to work
with black or, like, a navy, and that can
be really intense. But if you're going to do
that, really minimal amount of paint so that you're just a little bit adding
little by little. And then kind of stepping
back and seeing what your result looks
like if you enjoy it or maybe you don't. Maybe you wish that you
could change something. But again, it's
never too late to try again and, you know,
kind of go with the flow. Alright, so now I've
added some black to that purple to get a
really, really dark result. And with this, I'm going
to go very minimal. I just want to kind of
have that shock factor. Sometimes you mix up your paint and it's really concentrated, but it's just not giving you that look that
you're wanting, and you need to go
really intense. So adding some
black or some navy or some really dark brown
can really do that for you. I'm still painting, trying
to paint intuitively, trying to just randomly
put that down. When I make a mark,
I quickly move to the next section
and see, you know, adding just a tiny bit
at a time, you know, seeing how it's coming together, if I'm enjoying it,
if I'm liking it. Sometimes I remove paint
and where you take a clean damp brush and you just scrub
lightly in that area, which will remove
some of the paint. And that's just a way
that you can have a little more control if you don't exactly like how
something turns out. We are almost done
with this, guys. I'm so grateful that you've
been painting this with me. It is quite an effort to be
outside in the elements. Right now, I'm taking
the clean damp brush, and I am just blending some
of the really bold marks. And you can do that
if you feel like things are a little bit too bold and need to be softened
to have some softer lines. It's totally fine and appropriate and really makes
a good difference, as well. This has been so
much fun to paint. And I really hope
that you can share, as well, your experience
in the project gallery. I'm so excited to see what
kind of paintings are going to come out of this from sitting there painting outdoors and, you know, experiencing the
beauty of good weather and fresh air and sunshine,
all those lovely things. They really just help us. They sing to our soul and bring us that soothing
experience that we need, a little bit of stippling around the center and a little
bit in the middle, as well with a dark color. Just to emphasize, and I really hope you had
a fantastic time.
5. Final Thoughts: And So, friends, you have
finished the painting, and I'm so proud of you. I hope you enjoyed having just a little bit of a taste of what it's like
to paint outdoors. Maybe next time you can start
going to the mountains, if you have them and
painting a landscape or going to the beach or
a lake to paint that. Maybe you want to find more flowers on the
side of the road and just sit and look
for those basic shapes, putting those in,
sketching first, or maybe just painting free
hand and seeing how it goes. The number one bottom line is to learn to be mindful,
to be present, to be in the moment because that is the part of
the experience that really resonate with you to help you find that
sense of calm and peace. If you enjoy this class,
please leave a review. It helps others know
what your experience with the class was
like and make sure to upload your project to the project gallery as well in skill share so that we
can give you feedback, support each other and learn what you have learned
in this class. Thank you so much for
being here, guys, and I will see you soon
in the next class.
 Tammy Kaye, Artist and Mental Health Therapist