Transcripts
1. Introduction: Hello, hello. I am
Shivani and welcome to my new class on
Painting Fire with gosh. If you have taken
my earlier classes, you already know how
much I love painting, color and calm moments. Lately, I've been completely fascinated by one
particular subject that is painting fire, it's warm, it's glue, and the way it transforms
everything around it. If you've been following
my journey on Instagram, you might have already
seen me paint fire in a few different ways in gash, in watercolor, and also some mini studies
that I keep doing. There's just something so
peaceful and alive about it and that's exactly what we're going to try to
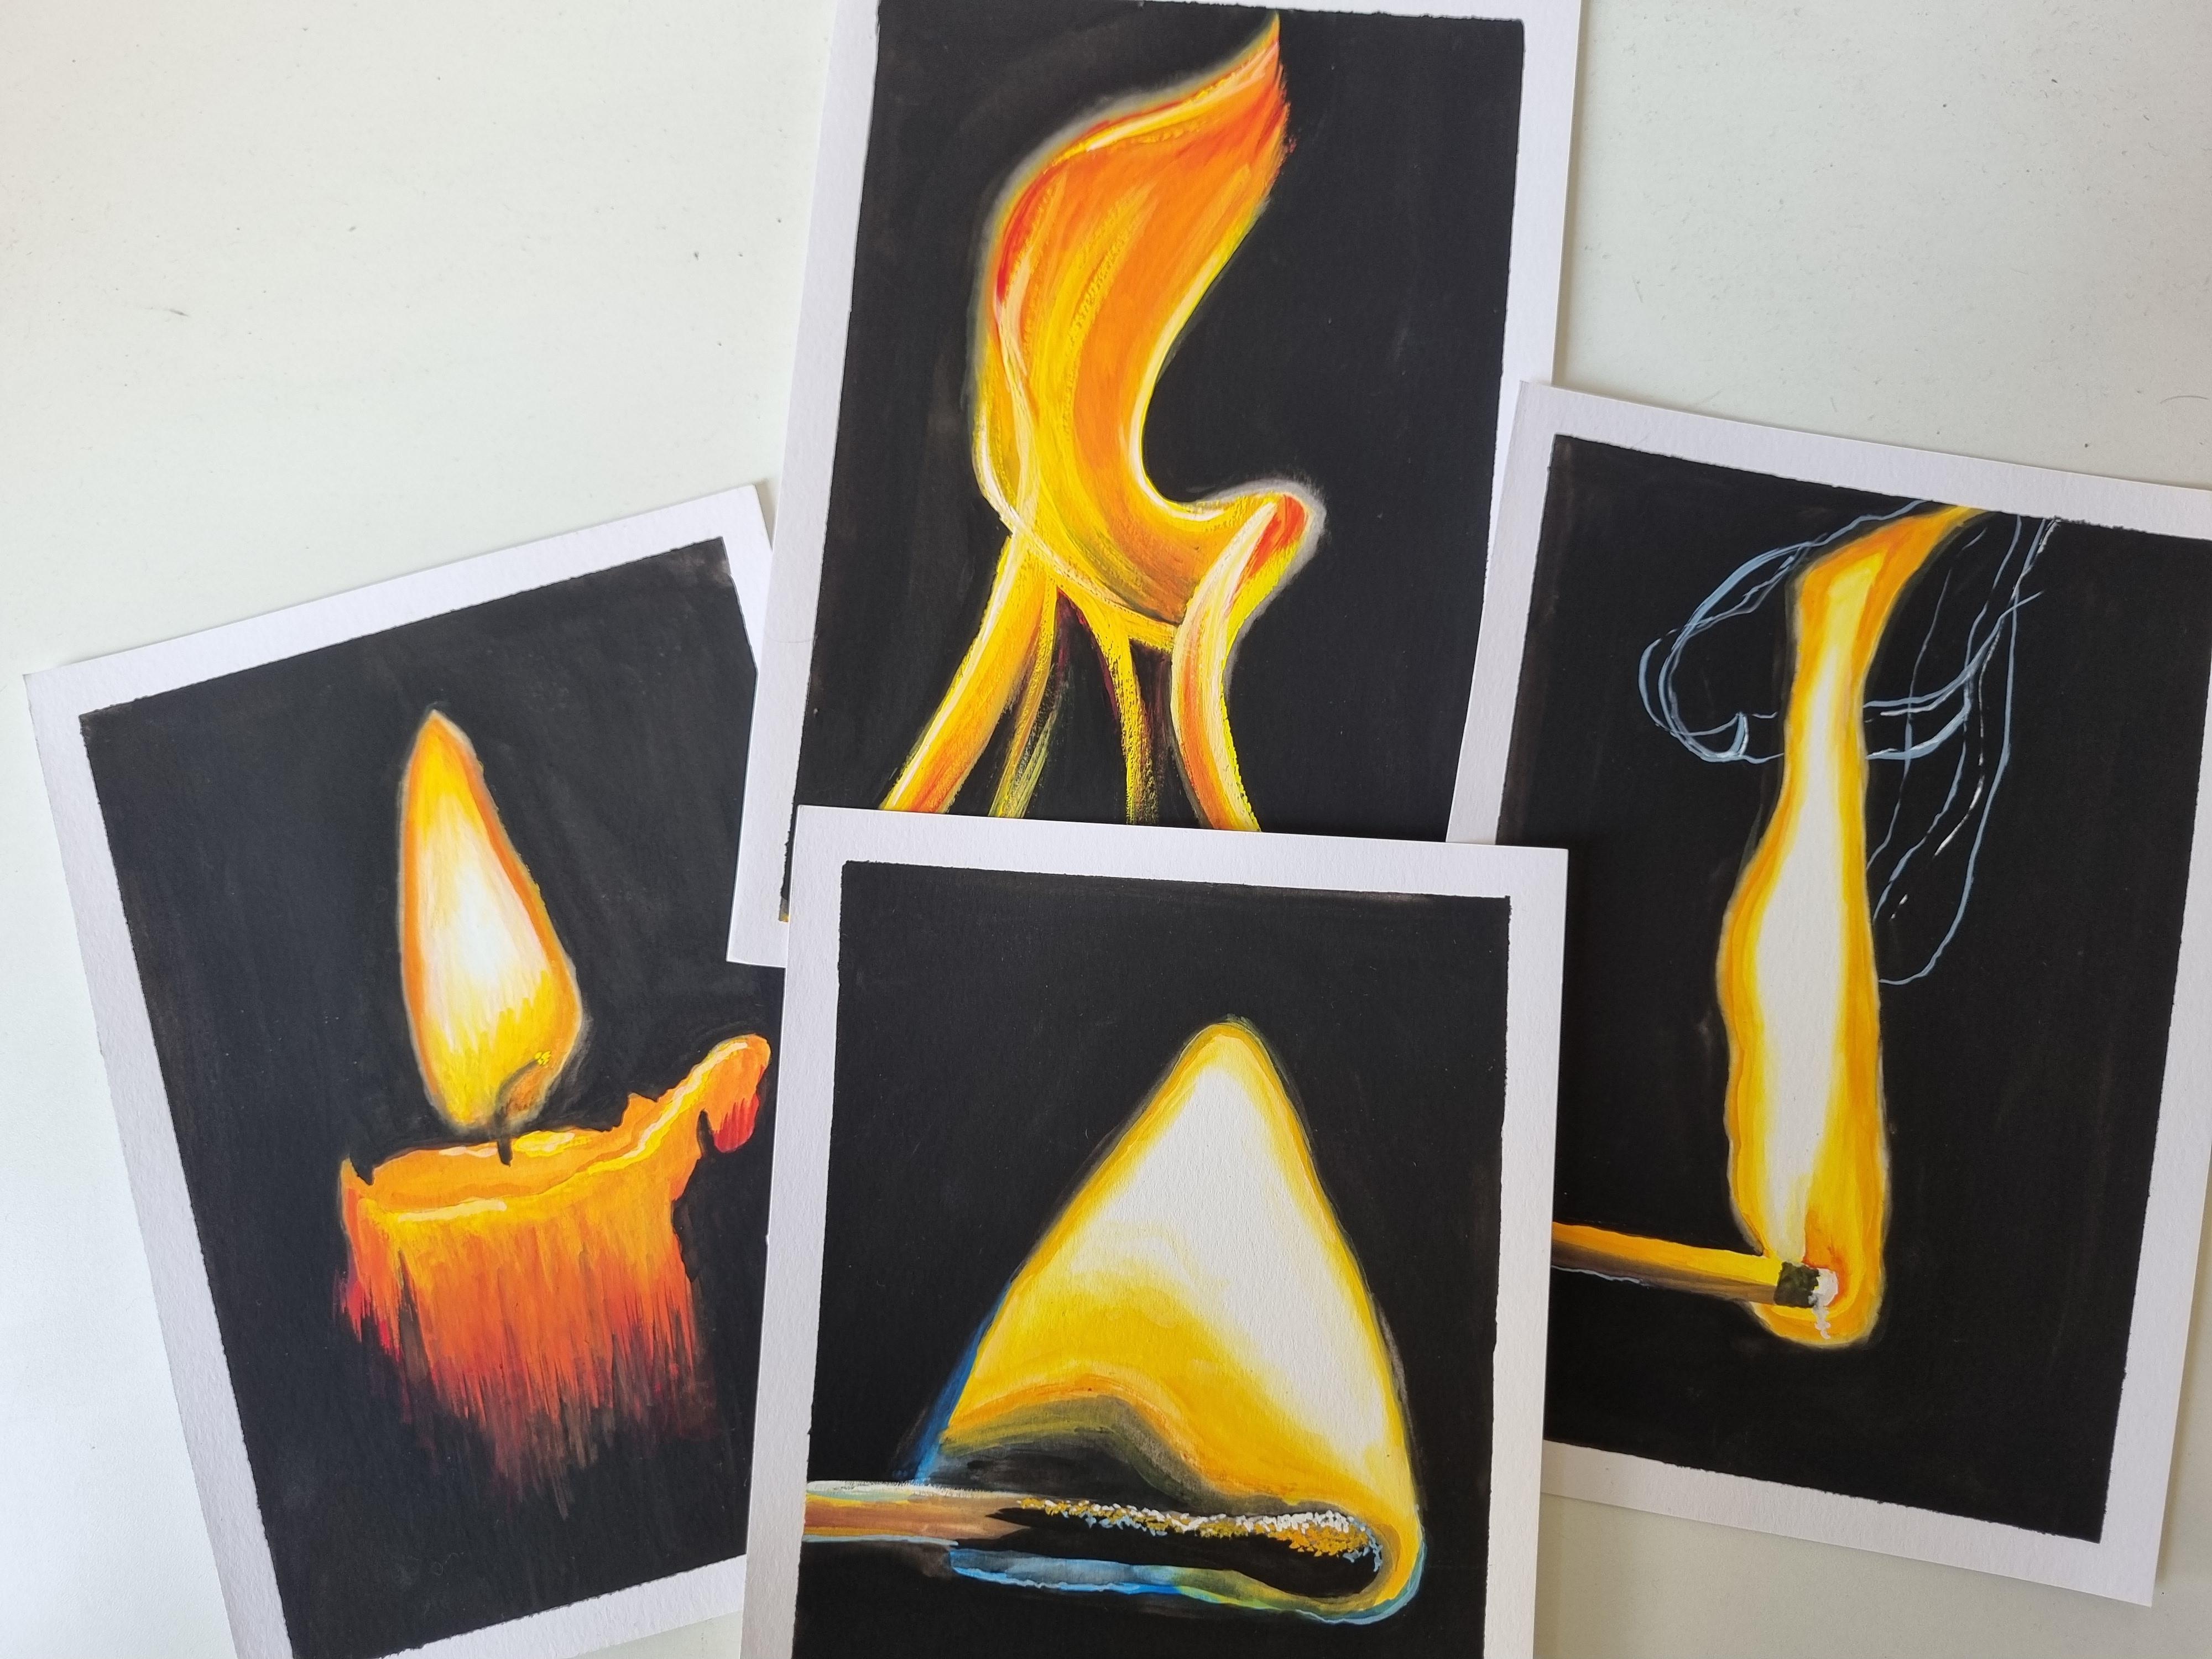
capture in this class. We'll start with
three mini studies. One would be the flame, the other would be a lit
candle and the third one, which is a matti spark. You learn how to choose and mix the perfect
warm color palette, layer and blend gauche to
create that realistic glue, add subtle light effects
to make that painting come alive and also capture that warm atmosphere
that fire creates. We'll take it slow
one step at a time. Even if you're new to gauche, you'll be very confident
by the end of this class. Just like always, I'll share my quick tips
throughout the glass. Grab your paints, your brushes, and maybe a child late, and let's bring some fire and
glue to your art together. See you in the next lesson.
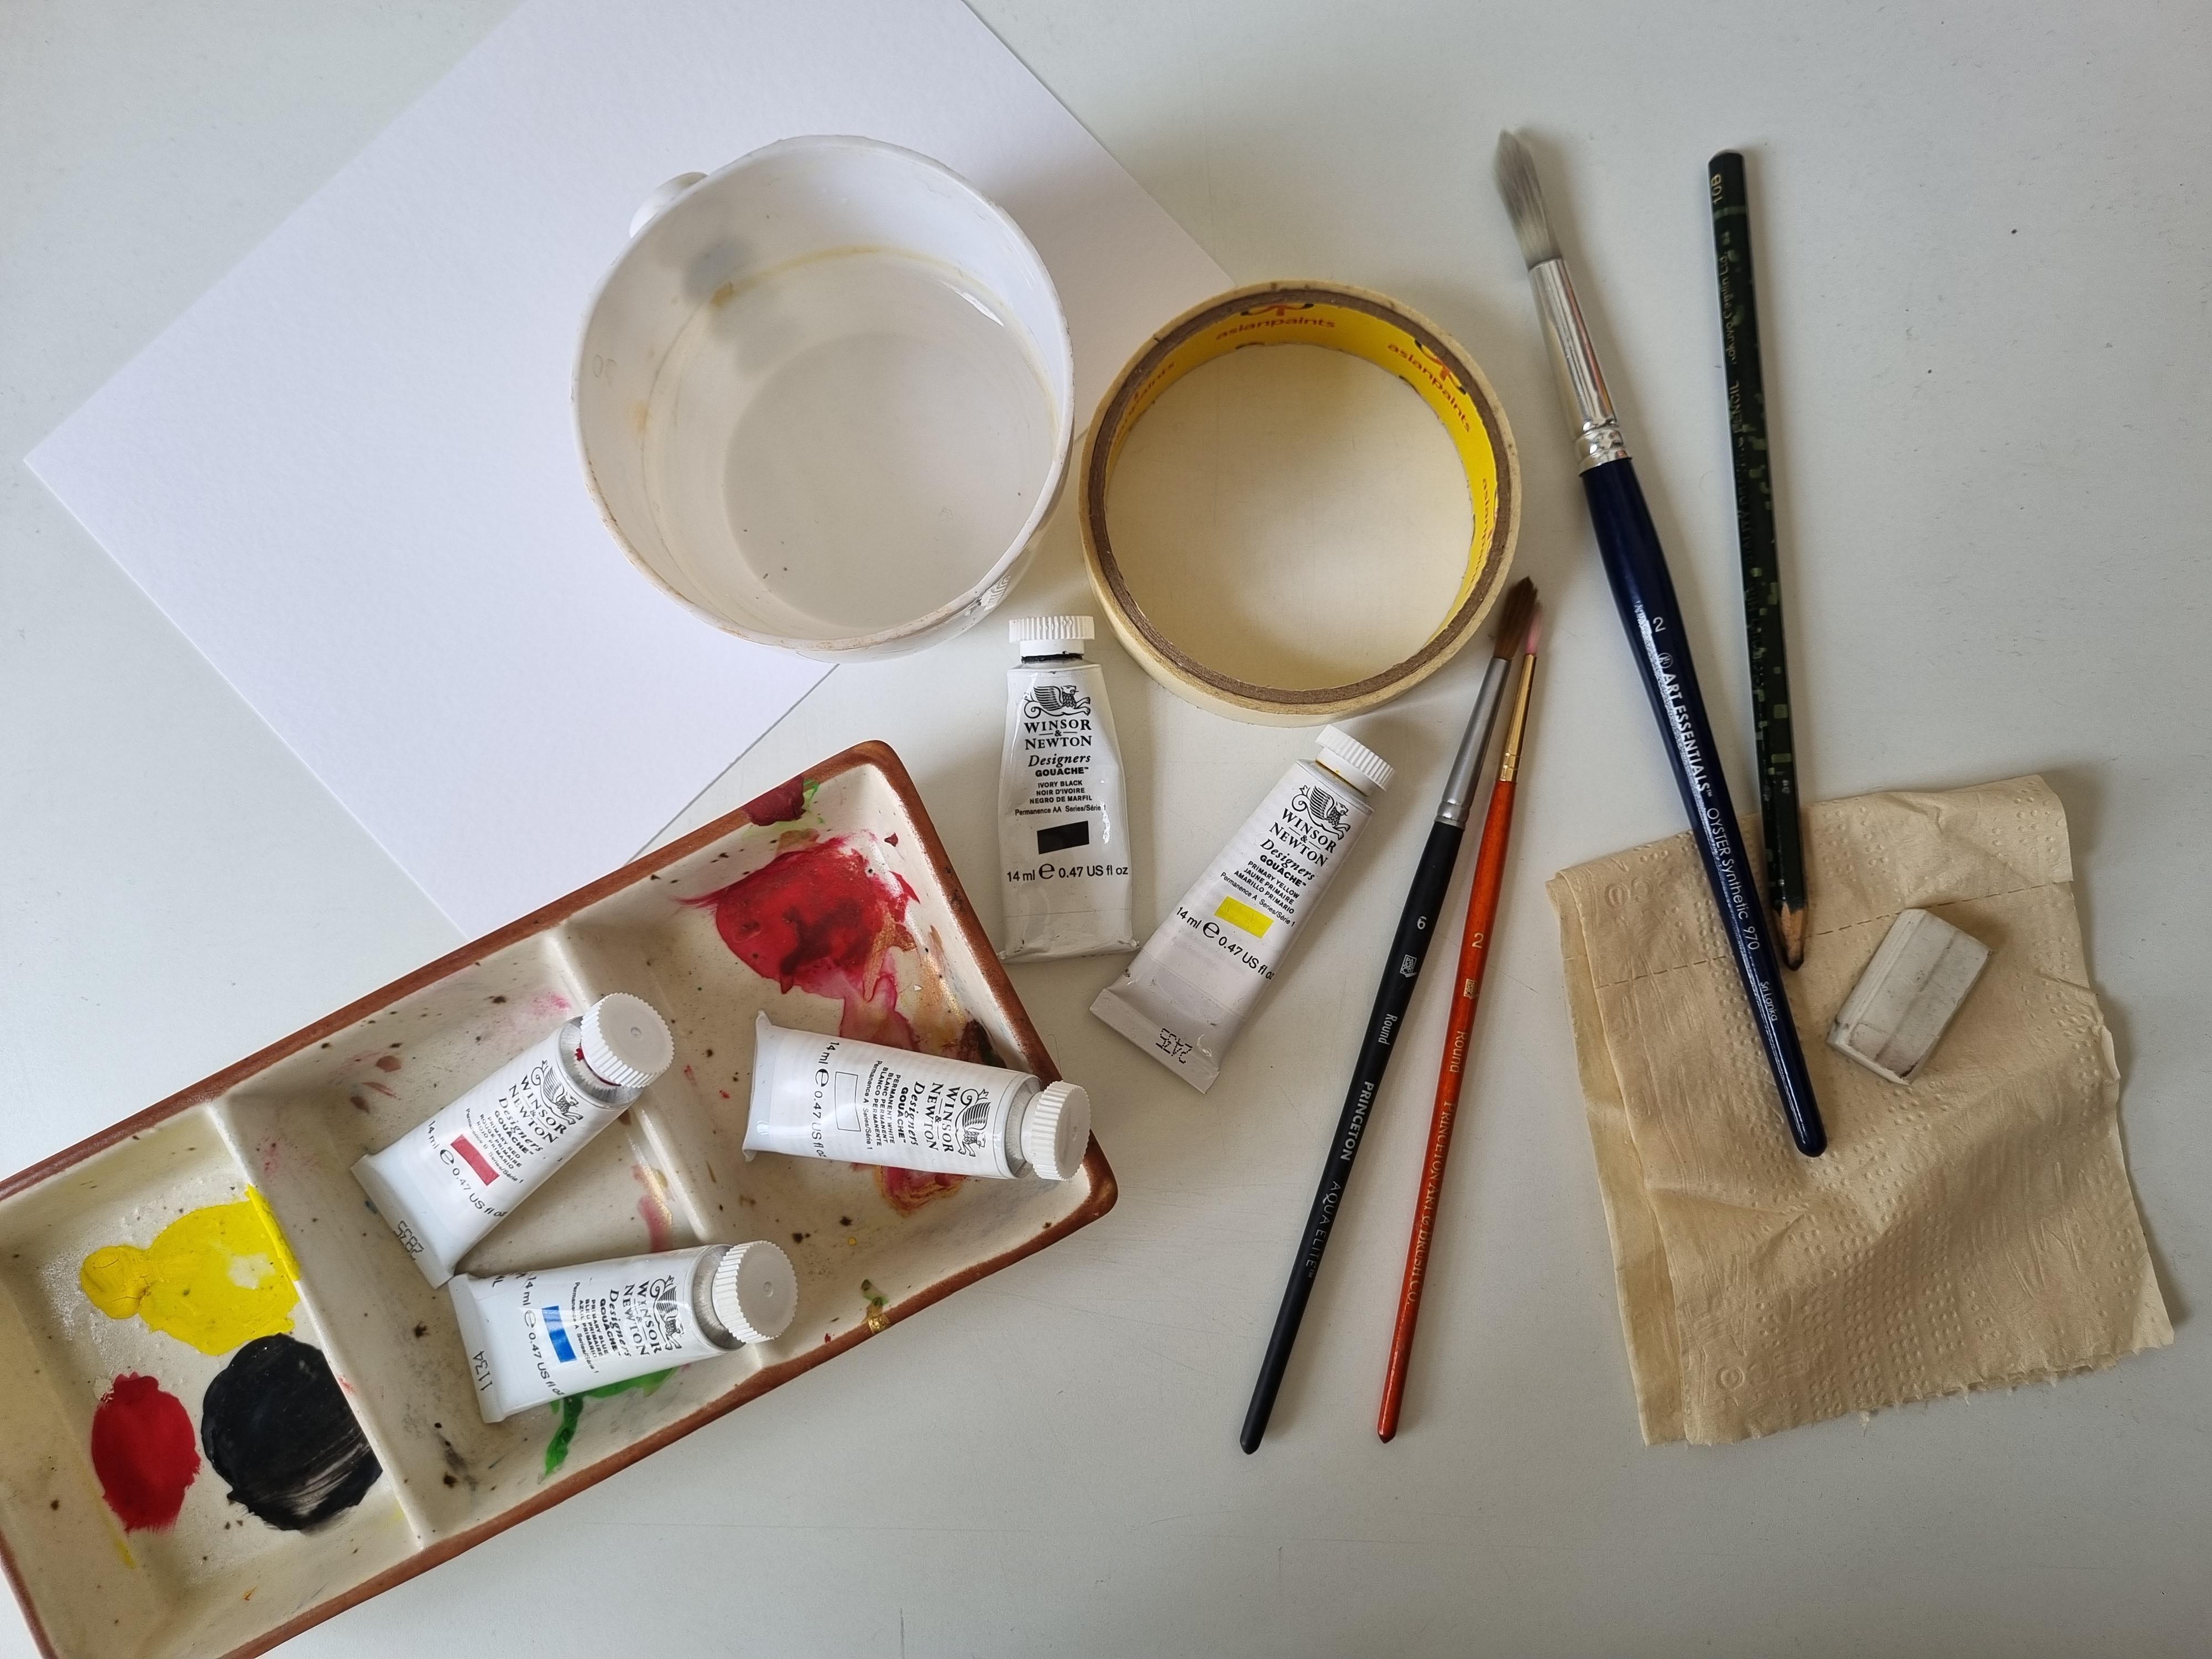
2. Materials & Tools: Let's start with the
materials for this class. We are starting with the Gauche
colors, permanent white, primary red, primary yellow, ivory black, and primary blue. I'm using 100% cotton
watercolor paper, hot pressed, a graphite pencil eraser, a tissue paper to clean, or you can also
use a cotton rag. This is the brush that I'll be using in most of my paintings, a round brush with fine tip, or you can also use
a detailing brush. And a bigger round brush for the washes and
the background, a masking tape, two
jars of clean water, one for color mixing, and the other for
cleaning, a color palette. Now, let's start painting.
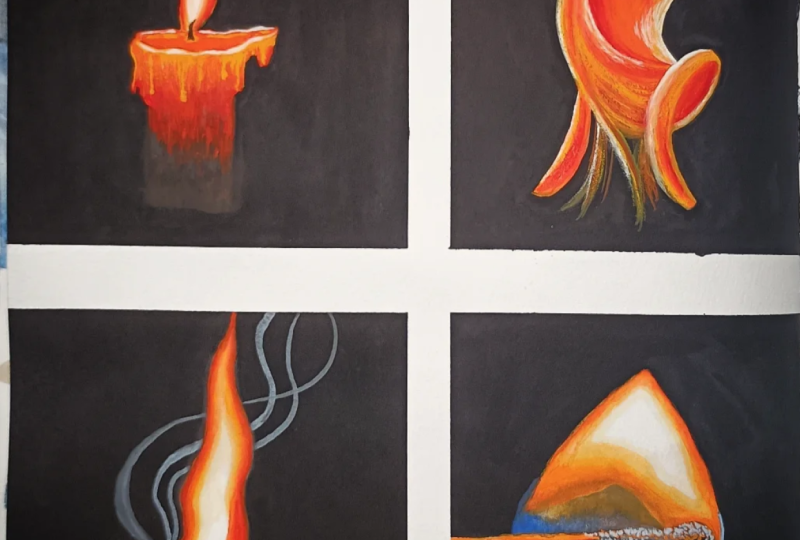
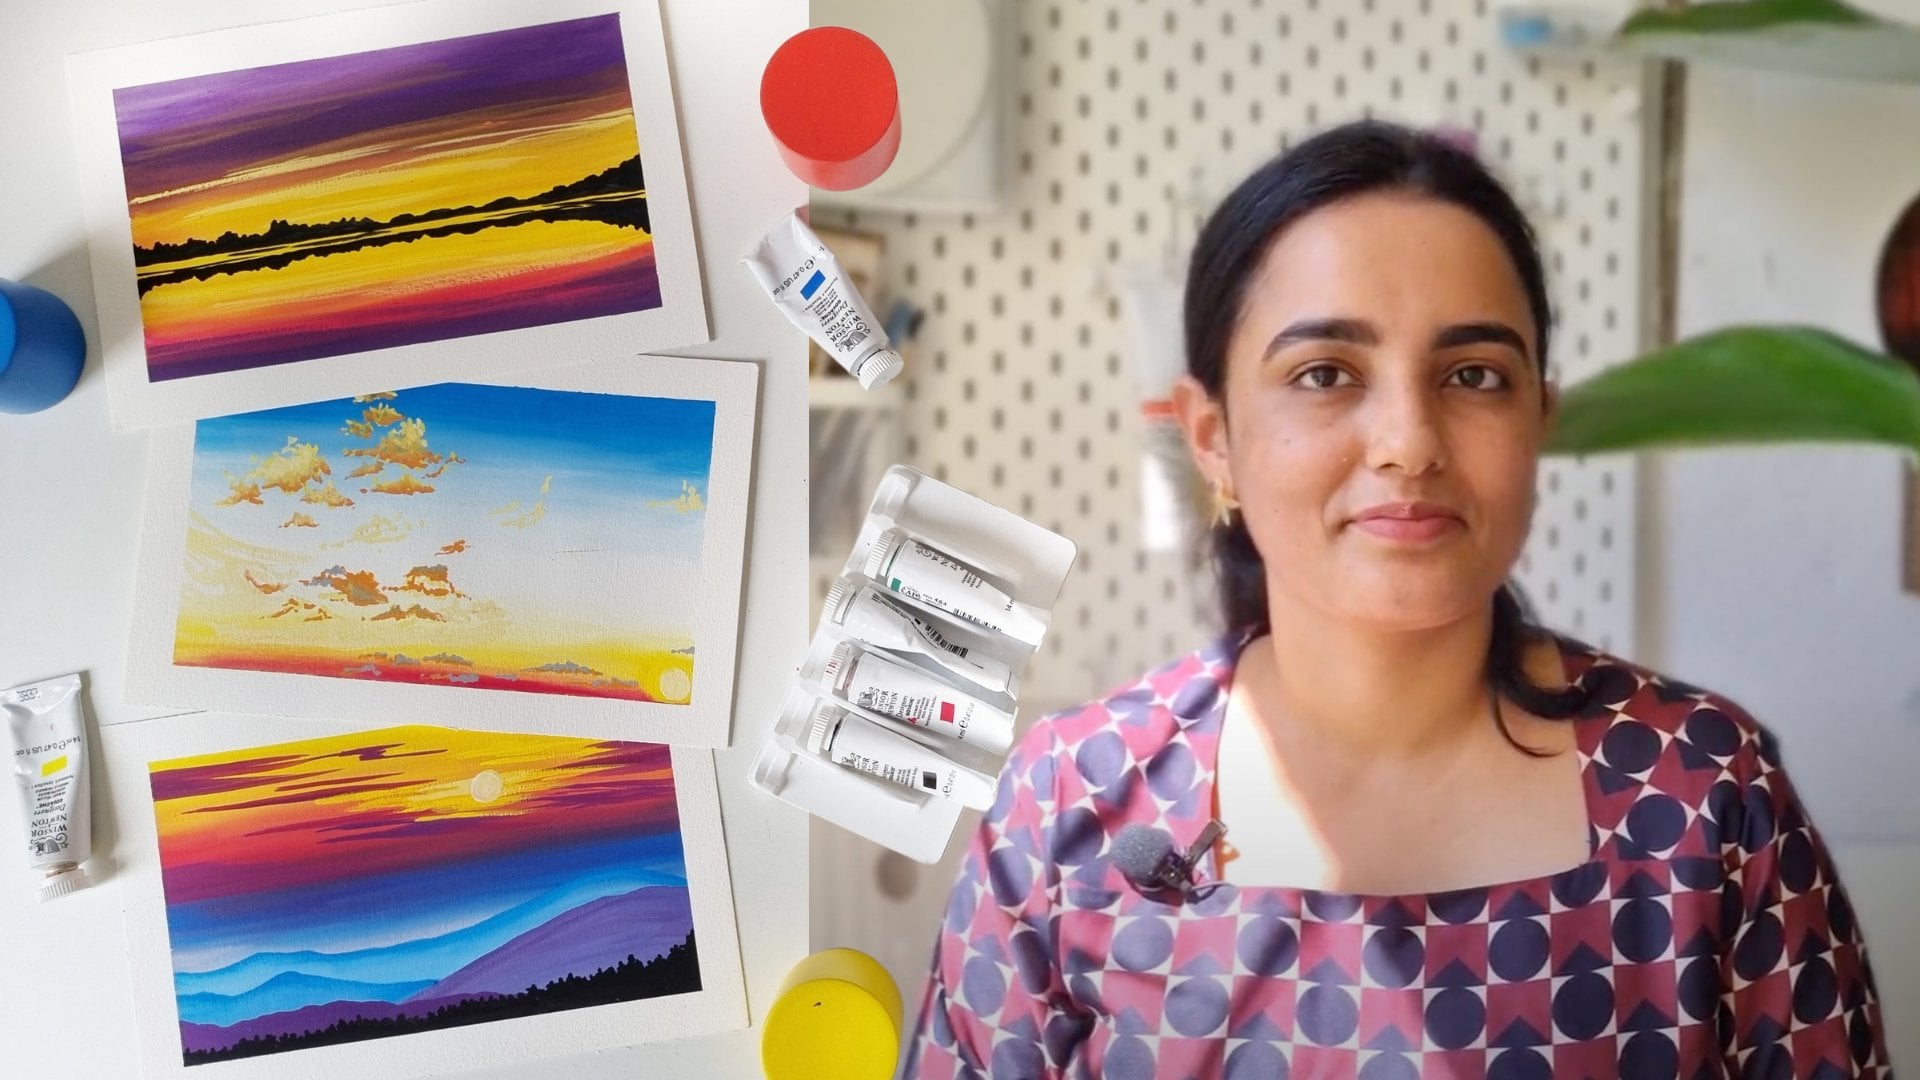
3. Colour & Fire: Paint these beautiful
four fire paintings, let's start with the basics. So as you can see, all
these four paintings have this black background, and we are going to blend the
very lighter tone pigment, which is yellow into
the black pigment. So let's see how are we going
to do it the right way. Here I'm swatching this primary yellow
color onto my paper. I'm going to create
two batches of this. Let them dry, and then I'm going to add black color
just beside it. Make sure that you use a lot of pigment and very little water. Very little gap between the
black and the yellow shades. Now I'm going to let
them completely dry out, take a pointed tip
brush and then remove the excess water on the tissue
and then blend it like so. In the other way, I'm showing if you blend it with
a lot of water, how the black pigment
will start mixing with the yellow pigment and will
create this very dull effect. Now, the third way
I'm showing is if you blend it while they are still wet and the blending
is not right. So what we need to show for
the glue is the first one. As you can see in all
these four paintings, that's the one that I've used. Now, let's begin with
the first class.
4. Flame: Start with painting a flame. Making sure to add masking tape on all
four sides of my paper. This helps with making sure
that the paper does not move while the painting process. Here is the flame that we will be sketching
first with a pencil. It has all these curvy lines. So start sketching
along with me. Just follow sketching the curves along with me as
much as you can. Make sure you use the pencil
pretty lightly as we will be erasing these before
we start painting. Just leaving a slight feel
of the drawing on the page. Here is the mini study
I did of this flame. As you can see, we
will be painting in the direction of these
lines in the flame, starting with primary yellow and mixing it with a
little bit of primary red. We get this nice orange shade. As you can see, I'm using pretty decent pigment
on my brush and a little bit of water so that the brush is smooth
on the paper. This is just the first layer, so you need not worry about
where you place the colors. Just follow the direction
as I am doing it. Now I'm going to
take the black paint and add it to the background. Just leave a little bit of
gap between the flame and the black background so that we can blending it together to
add that warmth and glow. I'm just adding another layer
of the black color because I was not very happy with how watery the first layer looked. You can avoid that mistake and do it right the first time. Now, I've taken a
clean wet brush with a little bit of water, not much, and I'm just going to blend the edges
with the fine tip. Again, taking the
clean brush and just blending the yellow
and the white space. Make sure that you keep
wiping the brush to remove any excess pigment onto a
tissue paper or a cotton rag. That way, the yellow and the black colors will
not really blend, but just create that
slight gradation. I'm going to do this all
across the whole flame. I know it's looking a
little dull right now, but trust the process, we will be adding a lot
more layers on top of this. Now that the edges
are pretty smooth, I'm starting again with
the primary red and adding a little bit of primary
yellow to it to get a dark, reddish orange shade. Follow the curve of the flame, the brush should move
in a similar direction. As you can see, if you don't blend it in the
direction of the flame, it wouldn't look very realistic. So, in certain places, I'm adding a dry brush
technique as well. I've taken a lot of pigment on my brush and very little water. Now adding the
primary red shade, the darker shade and
adding a few shadows. Keep following these
brush strokes along. Make sure that you
have minimal water on your brush and
a lot of pigment. Now slightly blending
the primary red into the orange shade. For this step, I have slightly wet my brush so that the
blend is a little easier. Here again, I'm blending. All the strokes are in the
direction of the flame. Now taking primary yellow and adding highlights
with a dry brush. So basically, no water and
only pigment on my brush. And adding these dry
and dry bra strokes. I'll add a nice
glow to the flame. Your only takeaway for this
particular lesson would be to move the brush along
the direction of the flame. The rest, you can
just keep following the steps as I'm painting. Now blending it with
a clean wet brush. Adding some highlights
with primary yellow. Most of the highlights that I've added are with a dry brush. Now I'm taking black colour and adding the finer
details at some of the edges so that the flame blends pretty well with
the black background. This is just to fine
tune the edges. Now I'm going to add some
white highlights to the flame. You can see the flame
is coming together. Also, the white highlights will add a lot of dimension
to the flame and also give a good sense of its shape and direction and
make it very realistic. Now with the black color, again, making sure that the edges are defined well to make
it look very finished. Last few final touches with
primary yellow and white. And we're done. Look
how alive it looks.
5. Candle: Let's start with painting
this glowing candle, starting with masking tape. I'm securing the paper
to the table with it. So here, as you can
see, the candle has this weird shape because of
all the wax that has melted. So follow along
while I sketch this. As mentioned previously, just make sure that you use
the graphite pencil very lightly on the paper as
you're going to just erase it and use its dull
reference to paint. I'm starting with
this orange shade, which is mixing primary
yellow with a little bit of primary red and just giving it a rough wash to the
body of the candle. You need not worry about the shape and all
the details for now. We'll be adding multiple layers. Now adding black
to the background, using a lot of pigment here, making sure that it's very pigmented with limited
water on my brush. Leaving very little gap between the flame and the background
so as to blend it together. Now I'm using a wet clean brush and going to blend the
flame into the background. Make sure that you keep cleaning the brush on a tissue
or a cotton rag. I'm just using the
tip of the brusher. I'm going to blend
it all across. Now, taking primary red and adding a little
bit of yellow to it to get this dark
orange shade and again, giving a wash of that to
the body of the candle. Going to blend it into
the black background now, again, using a clean wet brush. I know it looks ugly and
very muted right now, but as I mentioned, trust the process, it's
just one of the layers. Now, I've taken primary red on my brush and going
to paint the candle. A lot of pigment I am using
here and very little water, now blending it with this
orange shade which I made by mixing a little bit of primary yellow to
the primary red, blending it into
the primary red. Post which I'm going to create
these brush strokes with black to blend it or rather
merge it into the background. With the fine tip of the brush or with
the detailing brush, adding these details with the ivory black
color to add more Now, taking primary yellow
and adding highlights. Again, a lot of pigment on
my brush, very little water. With the orange
shade, I'm going to give this blend to the flame. Now, with a clean brush, going
to blend it into the glue. Blending the yellow
color to the orange bit. Now adding more details to where the wax has been melting
the top of the candle. Adding more of primary yellow to the flame and blending it into permanent
white in the center. Adding yellow highlights to
the wax where it's melting. Now adding a few
white highlights. I was not very happy with
the body of the candle, so I'm just again, blending it a bit more
with a clean brush. Now I'm going to add shadow to the top of the candle
with the orange shade. As you can see now, it's
added a lot more depth, the same I'm doing to the flame, with the black color,
adding details to the wick. A little more details
with primary red to the flame and blending it
into the lower layers. With the black
color, making sure that the flame details
are very realistic. And here we have it
a glowing candle. Mm
6. Match stick: Start with painting
this matchstick spark. So this is the spark when the matchstick is almost
about to burn out. I'm starting with
pasting the paper to the table with the masking
tape on all four sides. How the flame is going to look. So it's going to be more
of a triangular shape, and there are going
to be a lot of details on the mat
stick as well. I'm sketching the flame
onto the paper here, a rough, light sketch, and then we'll erase it before we start the
painting process. Starting this one first
with the background. So I'm starting painting
the background black. Make sure that you use a very pigmented black color
and not very watery. That would make the
fire glow even further. After the background,
I'm starting with a mixture of primary yellow with a little bit of primary red, very slight red,
and follow along to paint this shape
with this color. Then I'll take a clean brush and just blend the edges
into the background. Then I'll blend the
inner yellow edges to the white in the center
with a clean wet brush. Now taking a primary
yellow color with a little bit more of primary red and blending
it again to the yellow. I'm going to add a tinge of that yellow to the edges
as well slightly. Now coming to the matchstick because the match stick
is almost burnt out. It's again, blackish in color. Here I'm taking a more
watery shade of black. A tinge of blue being mixed into the watery
shade of black here. As you can see, it's
not too pigmented. Then I take a clean wet brush and slightly aplent
the edges very slightly adding more details with the primary blue at
the bottom of the matstick. Now I'm taking that orange
shade and blending it into the black doing the same below. Using a clean brush
to do the steps. Now for the mat stick,
I'm going to take primary red color and
bred it into the black. Now, taking a more
pigmented black color and adding these details
to the matchstick. Again, taking a very
pigmented orange shade after the black color is dry and adding these
highlights on top. This is basically where
the matchstick is burning. With the white shade, I'm
going to add these highlights to the matchstick and to the
burnt area, the match stick. I'm using a detailing
brush for this one. You can also use a round
brush with a fine tip. Now with a lighter
blue colour, again, I'm going to add
these highlights to create the
lighter blue shade, you can add a
little bit of white to your primary blue color. Adding more details
at the edge as well. And here we have it.
The completed piece.
7. Match stick smoke: Start with painting this
beautiful matchstick. The difference
between this one and the previous one is that this is the start of the matchstick when the matchstick is just lit. I'm securing the paper with the masking
tape to the table. As you can see, here
is the shape of the matchstick that we will be sketching first with the pencil. I'm sure you know
the drill by now. Make sure that the sketch is
pretty light on the paper. Try to sketch it as
similar as I have. Now I'm erasing the sketch. Starting with primary
yellow and mixing it with a bit of primary red, we get this orange shade. I'm taking this
pigmented color on my brush and just
outlining this flame, as you can see, as well as
some part of the mat stick. Now, taking the ivory black
color for the background. Again, a lot of pigment and very little water on my brush. I'm painting the
background here. I'm leaving a very slight
gap between the flame and the background so that I can blend it later to
create that glow. Now I'm taking a fine tip brush. I've not taken any colour or
any pigment on the brush. I've just wet it a
little bit and then blending the edges with
this clean wet brush. I will keep wiping
my brush on cloth or a paper towel so that no
pigment gets transferred. Now, I've taken a little bit
of a darker pigment of red, mixed a little bit
of black with it, and I'm taking this
very light watery shade and adding it to the mat stick. I'm going to blend it
with the orange shade. Now, just where the
match stick is lit, adding the orange
shade and then adding the yellow primary yellow color to blend it into the orange. Make sure that the color
is not very watery. Keep following the brush
strokes as I am working on it. Now in the middle part,
I've added permanent white, and then I'm going to blend that white into the primary yellow. I'm going to add
this white highlight at the edge of the mat stick. So primary red highlights to where the flame has been lit. And now this grayish
smoke that I've added when the
mattick is just lit and you have that
smoke that appears, which is basically mixing a very little bit of
black to the white shade. Make sure that you use a dry brush with only
pigment on it and not water. A fine tip brush
would be preferable. You can also use a
detailing brush. That way, the layer on the black color will
be very much visible. A few smoke lines have added
with the white pigment, and here you have
it a lit mat stick.
8. Class Project: Now that you've painted
your glowing fire studies, it's time for my favorite part of the class, your
class project. For this class project, I would love for you to create your own fire study in Gosh. You can pick any one of the lessons that we
painted together, or maybe you can
try all of them as a beautiful title Fire series. Focus on what most
resonated with you. Painting glow is all about patience and every layer
teaches you something new. Once you're done, take a
photo of your painting and upload it in the projects
and resources section. I love seeing your work. It's honestly the best part of teaching here on Skillshare. I can't wait to see your glowing creations see you
in the gallery.
9. Final Thoughts: Thank you so much for
joining me in this class. It's a special one for me. My first class after
welcoming my baby girl. If you did paint along, I hope you feel much more confident about painting
glue and light. Remember, every stroke is one step toward
expressing what you feel. So keep painting, keep
exploring and let your art reflect your own
light. Thank you once again.
 Shivani Jadon, Gouache & watercolor artist