Transcripts
1. Intro: Hello, and welcome to
the skill share class. Today, I want to paint
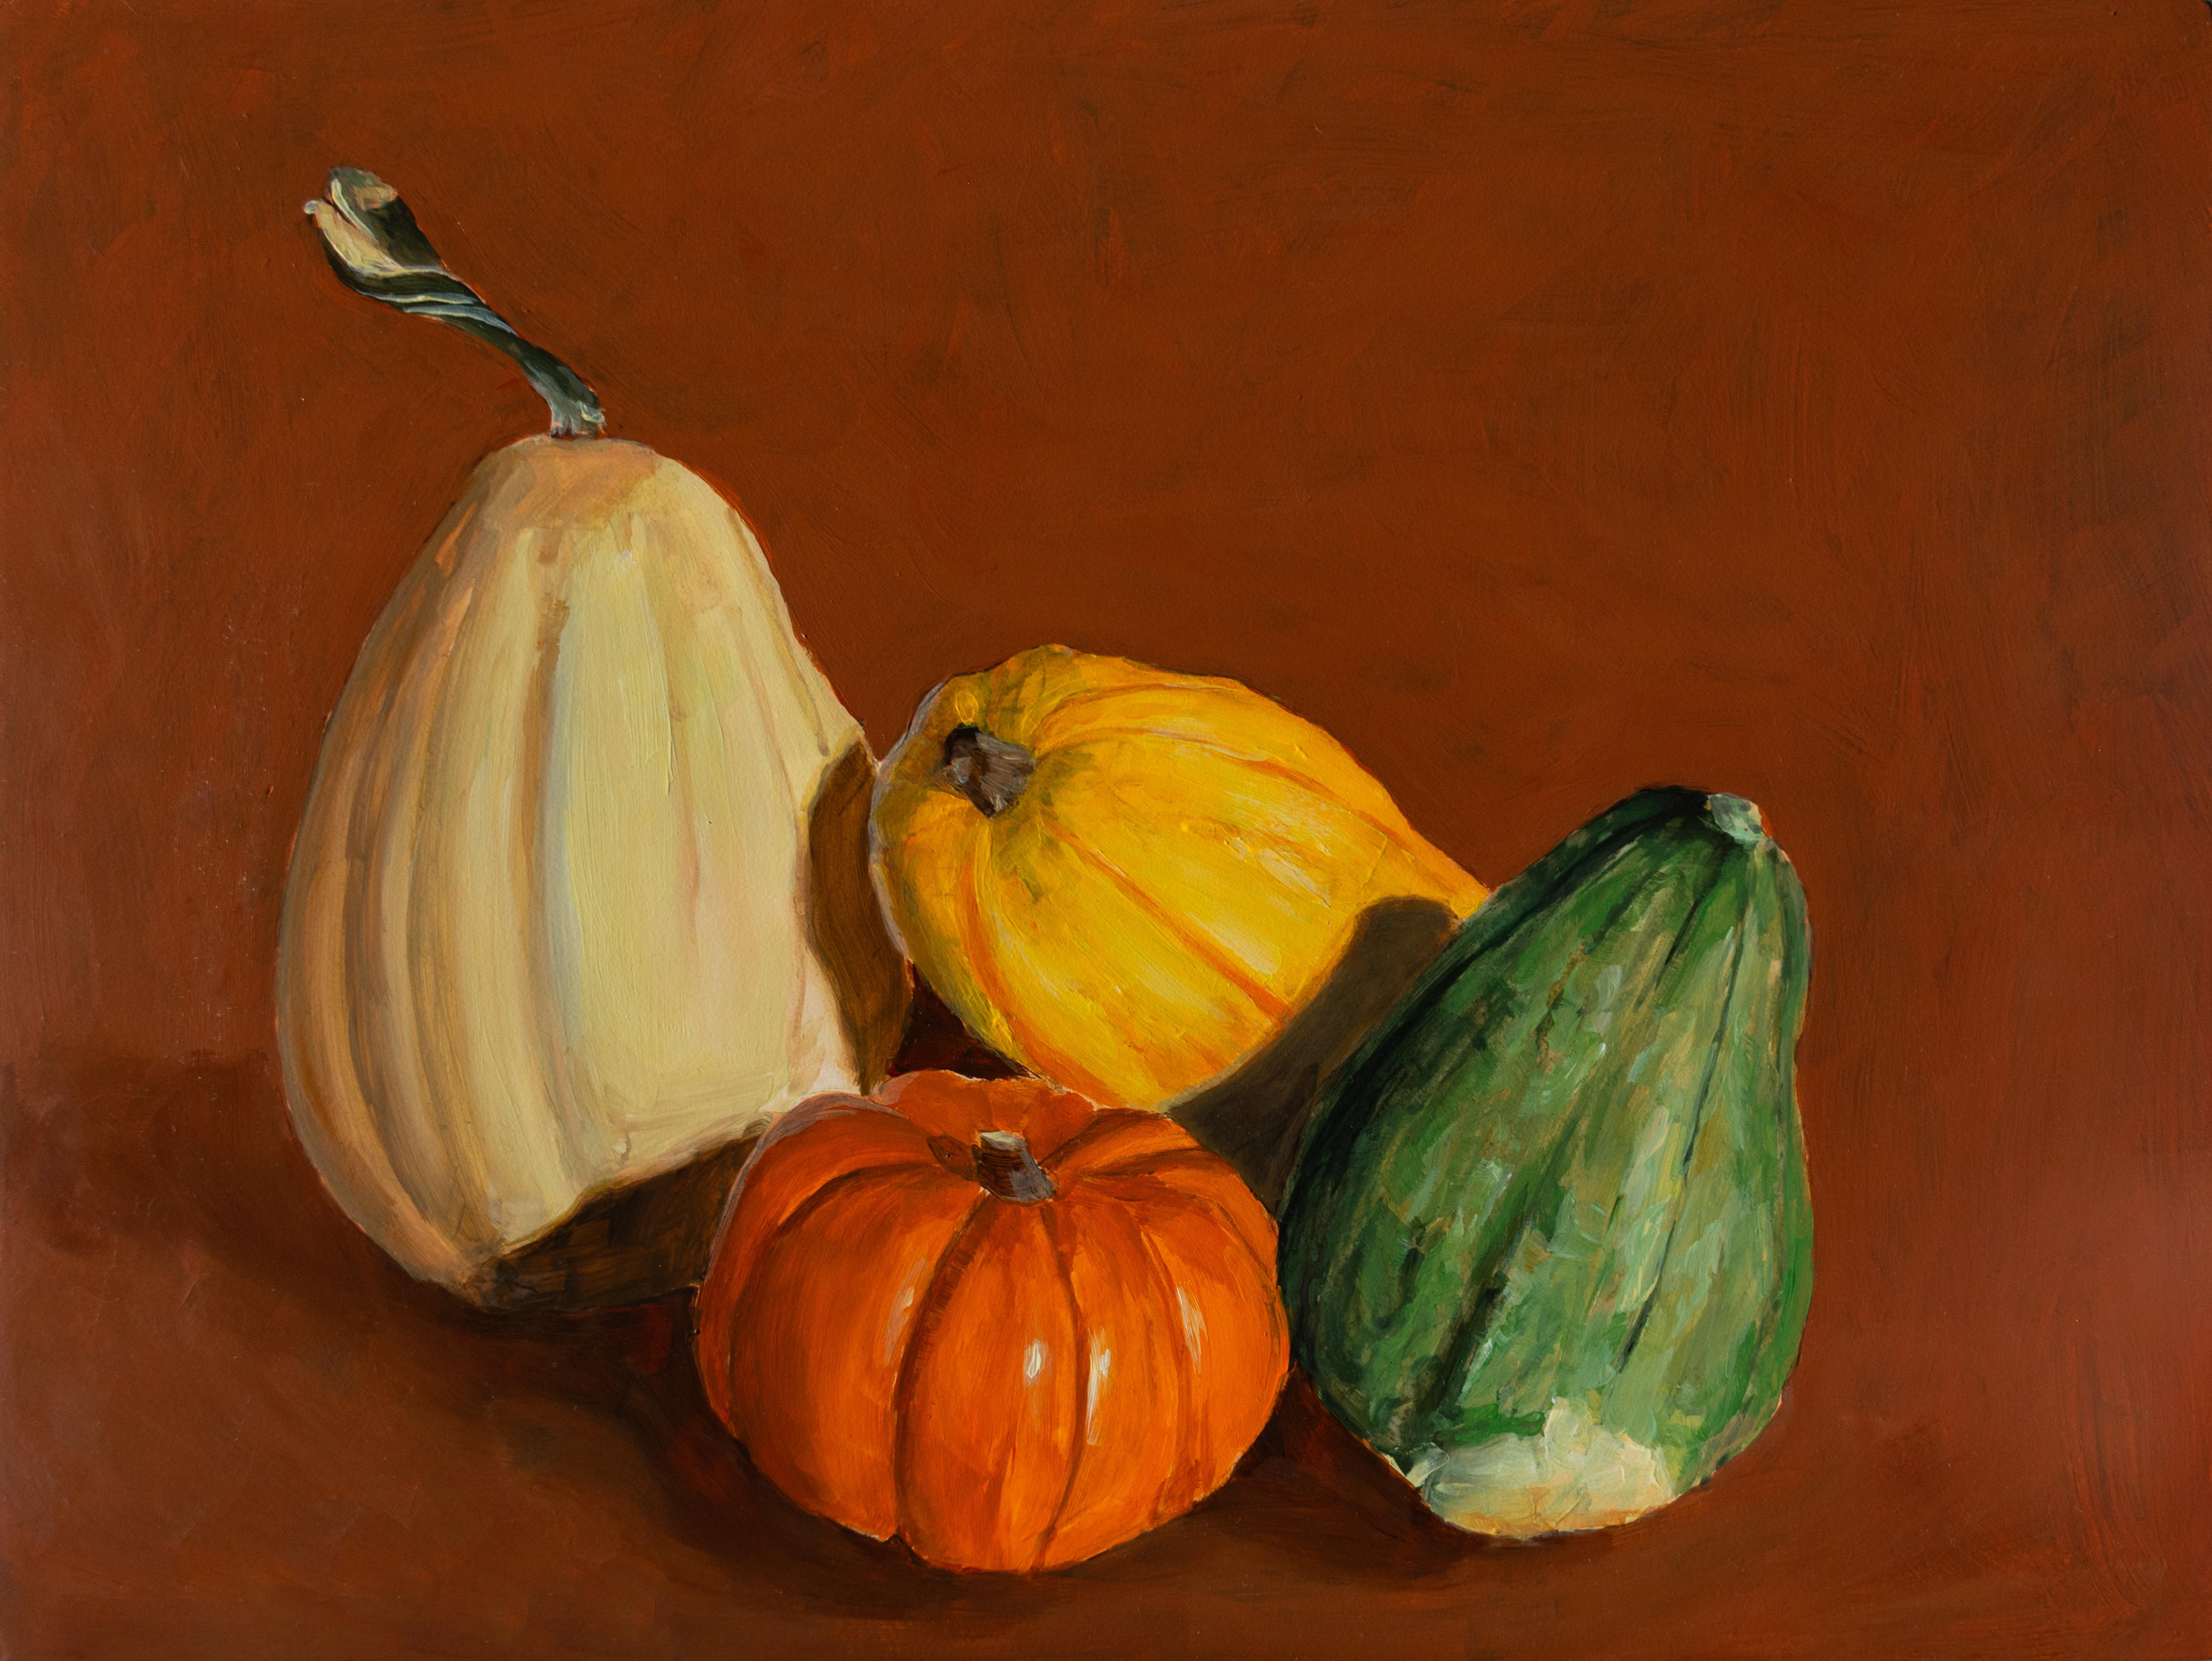
with you a pumpkin painting from real
life pumpkins, although we will be taking
photographs of them. I will show you how to
photograph them properly, but you can also use my
own reference photos, which I take in this video. And then I will take you through
the process of painting, first of sketching, of
painting the pumpkins. And at the end, I hope
that you will all have a beautiful pumpkin painting that you can hang
in your own home.
2. Taking the reference photo: So I got these
beautiful pumpkins, which I got from my mother. She grew them herself in her
garden, except for this one. And I really want
to paint them now. And to paint them now. So I got these
beautiful pumpkins, which my mother grew
in her garden herself, except for this one,
which I bought. And to paint it now, I want to photograph
them properly. Professional still
life painters would probably never paint a still
life from a photograph. But we're not professionals, so it's way easier
if you take photos. The lighting doesn't
change in a photo. You don't change your position, so you can always have the same perspective
onto your pumpkins. Then you don't have to do a professional standing with professional lights and
professional background. We will do best as we can, and you can either do
that yourself with your own pumpkins or you can just use my
reference photos, which will be linked down below. I will use the backside of my oven as my background because I do want to have
a brownish background. It's a warm yet neutral color, which fits pretty well
with my pumpkins. I want these autumn
vibes to be fully there. So I want the warm colors. And yes, theoretically, you
could use any kind of cloth, which would be perfect, but
I don't have a brown cloth, and I don't want to use a different kind of cloth
and change it afterwards in Photoshop because it's important how the light reflects
onto the pumpkins. And if you use a
brown background, you will have a brownish
reflection on the pumpkin. So it's important to not
switch the color later on. I will use my cutting board as the underground
for the pumpkins. I will just put it here, and then I will position
the pumpkins there and adjust the lighting. I got my cutting board here
already for my underground, and now I will try to adjust
the pumpkins to my liking. I will use some smaller things. You can use whatever you find, whatever it fits to put the pumpkins in position so
that they don't fall and so that they have the
right height that I want and just play around and
do whatever you like best. It will be a lot
of playing around, but don't lose patience. It will take its time and
maybe fall apart again. You can also use some
blue Tech, if you like. Just while you do
it, don't forget to think about where you
want to photograph from. I want to have my
camera come from here. So this is the view
I'm working on. If there's something
behind there to position the pumpkin right, it doesn't matter because it
won't be seen from there. And if it's a tiny
thing that you see, you will just paint it
later and we can edit it out or just leave it
out while painting. Sure. Now that I have my preferred
precision for the pumpkins, I will take my light, which is this lamp and I
will adjust it to my liking. Whoops. This is rather hard light, which usually is not what you want with portraits and stuff. But for still life painting, I think it works
quite well as you do want to have those hard
shadows and those hard edges, especially around the pumpkin. So I really do like
this in this case. I will certainly take multiple photographs to have
different options later on. I really like this
kind of lighting, but I will also do a
photograph like this to have more classic lighting and more natural as the sun comes from above and
not from down below. But I do like to play around. This would imitate a candle
more likely than the sun. And yeah, just play
around, have fun. I will use my phone first
now to photograph it, but later on I will
also use the camera, which you won't see because it's my camera that I'm filming with, and then I'll show
you the results.
3. Materials: So what do we need
for our painting? First of all, we need
something to paint on. You can use a canvas or I
have a gesso board here. It's just important
that it's primed. Most canvases that you buy
in store are already primed. This thing is prime too, but you can also
prime things yourself with Jesso and then
you can send it down, and then you can use
it as an underground. What I don't recommend you
to do is to use paper. Don't do it. Trust me. Hello, Tuffy. Then we will need a
painting palette. You can just use some board
to put your paint on. But I want to take my
time with painting, and I know that I will
not rush to process, so I like to use something that people call a stay wet palette. These you can buy online, but I simply got
an old candy box, and I will spray it with my spray bottle which is just some old bottle
from a Diodorot. And you can simply put
your paint in here. No. You just put your paint in here, and then you spray it slightly, and then you spray
a lot onto the lid, and then you can close it. And it stays wet for
days, weeks even. So if you don't want to rush your process
and if you want to have your pre mixed paints
still ready after a few hours, I very much recommend
you to just get some kind of box
to put your paint in. Then of course, we
need our paints. I've got all my
acrylic paints here. We're painting with
acrylics, by the way. I got the Windsor Newton
Professional series. You can use whatever you
like, whatever you prefer. Just know the cheaper paints and also some professional brands than just preferred might not be the same might not
have the same kind of opacity in each paint
that other paint does. So if you see me use a color
and it's completely opaque, and you might use the same
color from a different brand, it might not be opaque. You'll just have to
adjust with that. But you don't need to buy super professional
acrylic paint for that. So depending on what you
like, just use that. Just make sure it's acrylic paint because that's
what I'm using. Then we need some water cups, which I'm just using some
very old water cups, they're super dirty already, but just use whatever you have. Some cloth that can be dirty
to dry your brushes on, and, of course, brushes. What kind of brushes do we take? I very much prefer to
take flat brushes. So they have sharp edges. And I will also use
probably some round brushes and some rounded flat brushes. That's the word. They like this. If you have brushes that you already prefer, just use them. It's sometimes really better to just use what you're
comfortable with than to just exactly imitate me,
for example, the teacher. When it comes to the canvas or the ressobard or
whatever you're using, not paper, I want you to think about the
size and the format. Think about your reference
photo and the format it has and how you would like the pumpkins to be
put into the picture. I use a 30 by 40
centimeter board format. And I do not recommend you to use
something that's very big, but also not something
that's very small, as I at least, maybe you're choosing
a different photo, but I'm painting
multiple pumpkins, so I want them to be a reasonable kind of
size and not very small. So I use this size, but I don't want to
go huge as this will get very hard and
especially for beginners, if you have a simple
reference photo and there's not a
lot of detail in it. The bigger you go,
the let's say, the more room there is for mistakes and for weird
details that you don't want. So yeah, the bigger, the harder, but you also
don't want to go too small. And before we even start
the painting process, we will need a pencil
for sketching and, of course, an eraser
and maybe a sharpener. I am painting on my easel. If you have one,
that is awesome. If you don't have one, you can, of course, paint on your table, but I do recommend you to not put the painting
flat in front of you as you won't have a
perfect view onto the canvas. I recommend you to
put it up like this, maybe just put some books behind or something that is
heavy enough to hold it so that the perspective
is not flawed. Yeah. You can just paint
on your table if you like. Anything else, Sophie?
I think that's it.
5. Outro: And with that, our
pumpkin painting is ready to hang up a wall. I hope you've enjoyed
this tutorial and I hope you've learned a lot. If you've got any more
questions, please just ask them. I'll be happy to answer them. And yeah, I'm excited
to see your projects. Please, please show me. I really want to see
your pumpkin projects. All the reference
pictures are down below. You can choose from them freely. And yeah, have fun with
your own pumpkin paintings.
 Anna-Carina Weiss, artist