Transcripts
1. Intro: Hello and welcome to this
new Skillshare class. My name is Anna, and I'm an artist who's mostly
concentrating on portraits and who's worked with acrylics and watercolors and
now also charcoal. And in this course, I will show you how you can make a charcoal
portrait yourself.
2. Materials: Now to the materials for
this charcoal piece, I will only use the bare minimum because for all of you who have never done
done this before, I don't want to just spend
a **** lot of money. So I'll do this only with very minimum that you
can do this with. Most important thing, of
course, the charcoal. Charcoal is from
Connecticut law. It's not important
what brand use. What is important is that it's a very soft charcoal so that you are able to erase it later. And you see mine
is already broken. You want to, you want to
break your charcoal into smaller pieces to then
also use the side, because we will
mostly actually use the site and the tip
only for small details. Second thing you need
is maybe not that easy to get everywhere and
you find it in art stores. Usually. It's soft palette knife. It's a palette knife with a
soft tip that you can take off and turn around
and stuff like that. It's usually used for pastels. So you will find it
with the pastels, but you can use it for charcoal. If you really can't find it. I do recommend you to
use a paper stump. And the last important tool, except for the paper which
I'll talk about in a second, is the eraser. I have a kneading eraser, which is very practical. I don't recommend you
to use a normal one because the particles
that fall off, you can swipe over
your painting with your hand or with a brush or else you will smudge charcoal. So really use this one. You see it's also
from cryptochrome. You can use whatever
kneading eraser you prefer. You see that mine is
already very dark. If you use your kneading
eraser for charcoal, and especially for
this technique, do not use it for any pencil
drawing later on because you will just smudge
your pencil drawing and you don't want that. So really only use
it for charcoal and buy another one for your
drawings if you need them. The last thing you need
is a drawing surface. The paper I use is 180
grams per square meter. That's not extremely heavy. But since we're
not using acrylics or watercolors for it
and only dry medium, but you don't want to use to thin paper since you might
rip it while erasing. And you wanted to be sturdy, use a thicker one minus A3 size. And you can use
whatever size you like, but don't go too small
because I want you to work very freely and with
very intuitive strokes. So you rather big paper. This one is slightly grained, which makes great structure. Some people might
prefer a smooth paper. You won't get a structure there, but it will be easier to erase. For the beginning, try
a lightly grind one. And once you know
what you prefer, you might choose another
one. And that's it. That's our materials. With this, we can start.
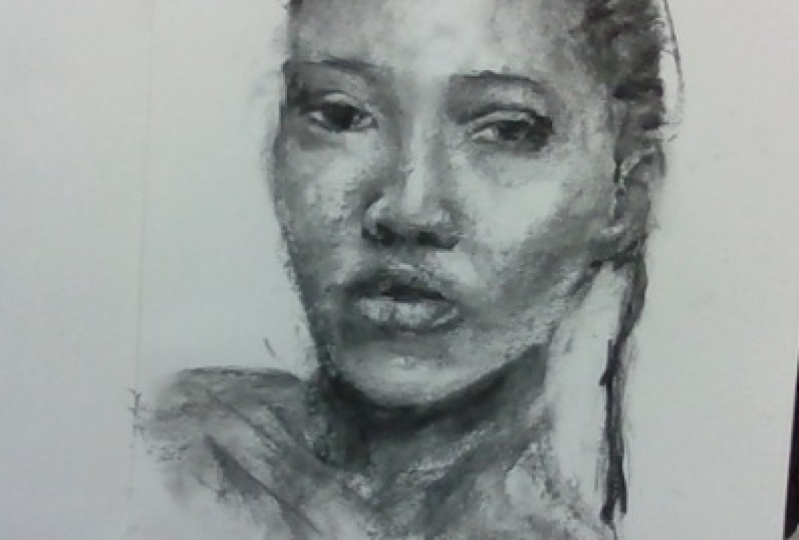
3. Drawing: Start by drawing very
suggestive and random lines. Use the side of
your charcoal and not to tip that you
draw soft strokes. Then I start
withdrawing the chin. We have a dark shadow
under the chin. So I use broad strokes
beneath the chin. Then I go up to the
cheek and the eye. You see I started a little
too far on the left, but we will erase it later. Now, we just focus
on the shadows. I draw the second eye
shadow and then the shadow underneath the nose and
underneath the lips. At the beginning, you really need to concentrate
on the shadows. Don't think in lines, think in shadows and use
big strokes to sketch them. We have a very soft
charcoal so we will be able to erase the parts that need
to be lied to her later on. I do draw lines when it comes to the outer edges,
not everywhere, but at some places where I want a sharp edge and not
want a dark background. But most of the time
I try to really use the broad side
of my charcoal. I roughly sketch the hair and then the lines
with the neck. Then I already go back
in with the broad side for the dark shadow
under her chin. When starting to emphasis the shadows of the
eye and the form. I start with the bottom line, because no matter whether
the eyes are closed or open, the line stays the same. And it's the easiest and
the most important to find. The first rough sketch
and erase parts on the side where I immediately saw that I was too far on the left. And then I already
concentrate on the ice. The darkest shadows are
clearly close to the nose. So I'll emphasize them and then go over the lighter
parts with my eraser. You'll see that at first
that you raise it, just smashes the charcoal and makes it may be even darker. But if you need it again to get a fresher side
of the eraser, you just go over it again
and it will be lighter. I then go to the lips. You saw me only painting the upper lip and then the
shadow under her lower lip. If the light comes from above, like in this case, you realize that the shadows
are under the eyebrows, under the nose,
on the upper lip, and under the lower lip. This is very practical. So you simply draw
the upper lip dark. Because of the angle of the lip. The lower lip is usually in the light and has a
lot of highlights. So for beginning sketch, I don't draw anything
there at all. I tried to adjust the nose
shadow and place the nostrils. And after a quick stroke
for the left cheek, that should also show the
shadow under her cheekbone. I go to the nose and quickly erase the brightest part of it. Now I go in with my
soft palette knife. Launches the paint
and makes it look much smoother even on
the grained paper. I do the same as I did at the beginning
with the charcoal, I just make a mess. And then I go into detail again. I want the lip to look very
smooth. So I smudge it. And then slowly go over the
skin parts on the cheeks. You can see that this really
darkens the charcoal in some areas depending on
how much pigment theories. And so you can really apply
very dark charcoal and rather bright shades depending on how much juries on the
tip of the palette knife. I again erase some parts
and then I go in with the palette knife again to make the shadow under her chin, which is very
prominent, even darker. And to make a
contrast on this side from her neck to the background. Again, some Smartsheet
strokes over the hair. And a small stroke to
emphasize the top of the head. And then I use my charcoal to do some shadows on the neck. Just very quick strokes
to show the collarbones. And then I want to do the lines of the lips a little finer. So I erase the parts
that I overdid. Then go in with the
palette knife again. If you have parts that
need to be lighter, it might not be that
easy to go very exact with your eraser. So I do recommend you, just like I do now on the ice to erase it first a
little too much. If you can't erase just the
part that you want bright. And then go over again
with your charcoal. This is the easier
method to get details. I then start with the
lines of the eye, with the upper one, especially because we
already did the lower one. This is why we erased it. As I said, it's easier to go in with the
black parts later. And now you really want
to look forward to do the exact line and to do
it rather symmetrical. But remember, this portrait
is not from the very front, but from the side of the face. So it doesn't have to
be a 100% symmetrical, that will be not realistic. You also want to think about the inner part of the IoT line and not
just the outer one, which is why I go in
with my eraser again. And you can see how
I go back-and-forth. To make the eye clearer. In-between, I like to forget about parts of the face
and concentrate on others. So I do lip a little
more and the chin. At this stage, I didn't have enough shadow on her chin yet. I will do that later. But the darkest areas I
already tried to show, I will slowly develop that. You realize that on
the right eye there is a very bright spots
between nodes and I, I erase that to make
them more visible. And then also erase the
bottom of the eyeline. Not completely, but just the top of it
because you can see the eyeline is not just a
black line or a dark line, but there is very
bright parts to it. Are exposed to light. And we want to show that to make the face seem more
real and more 3D. Also, I'm drawing the pupils. I will adjust them later on, but for now they are fine. Since I want them to look soft. I go over them with
my palette knife. And then with dark particles that I will now have
on my palette knife, I put in some
shadows on the face, on the forehead,
and on the gene. But I realized that
all in all the face will still too bright
in many areas. So I went wild again with
my applicator and then went in with my eraser to
highlight the lighter spots. This shadow on the forehead
was a little too hard. So first I went in with
the applicator and then later on again
with my eraser. Same cons for the chin. There was the
palette knife first. Then I use the eraser. We slowly go into
more and more detail. I go back and forth with
palette knife and eraser. And with that slowly develop the smaller shadows under the
nose and on the left cheek. And also the bigger
shadows again because they're not fine enough. I don't concentrate
on the ear a lot because it's in the
background and I don't want it to be in focus. So just a few strokes
before I go in and darken the shadows
under her chin. You may realize that it's
a little too dark now. So I tried to slowly also add some shadows on the
rest of her neck. You have to realize that
it's not just two shades, but a 100 grades of it. So if it's too bright, use your applicator
over the charcoal. If it's too dark, use
your eraser again. Then I go back to the eyes again because the eyes are the most important
part of your face. It's the thing that
we look at first. And you now realize
that I tried to not make the eyeline with
just one line anymore. But I tried to have darker
parts and brighter parts. Also, the eyeline does not have to be outside the
eye because there is shadow on the eyeball and a
bright line on the eyelids. I tried to draw very clear lines for the
eyebrows and don't go over with a palette knife so that you can see the
structure of the paper. And then back to the nose, because the nose is
a little hard since the bright part is not directly situated on
the top of her nose. So not on the line. But it's a little
bit to the side due to the lighting situation. So I tried to concentrate
on that and also emphasize the shadows on the left and on the right from
the nose a little more than I go to
the tip of the nose. Realize how it is kinda like a bowl and how it's round
and not sharp edge. And so realize that there is a gradient from very bright on the side of the tip to a rather
dark part on the nostril. Back to the eyes. I tried to
add some more highlights. You really have to
watch out to not have just a dark smudge of AI. It's always good to have
some bright points there. And then I emphasize the
shadows again next to the nose. And also a little on the
nose because the nose is not in one line
with the forehead. So you need to make the
little dip visible. And then I darken the
area on her cheek more and go back down
to her cleavage. I correct the line on her cheek a little more
because it was too broad. I first erase parts and then
draw another clear line with my charcoal piece and smudge it a little so
that it doesn't pop up as a line between
skin and background. With the palette
knife in my hand, I go with the eyes
again, surprise. You see I always switch between the parts that really
helps to keep I'm fresh. I I really don't recommend you to work from
one part to the other. You always need to have an
overview over your work. So really tried to switch back from one thing
to the other. You might step back in-between
and then you realize, oh, I just worked on the ice and you don't
see any mistake. But you see all your chin. It's still not sculpted enough. You will work on the chin and then you step back
and get a new like, Oh my God, what did
I do on the eye? And you want to go back to
readjust the eyes again. That's really all the theories
with drawing and painting. You try to adjust and
work with what you have, but you will improve slowly
and see your mistakes. That due date, you'll
never be perfect, but don't worry, no one ever is. So yeah. Try to improve
slowly and go back and forth from the body parts, face parts, whatever you're
drawing. I draw the hair. I very roughly only tried to
draw the top of the braids. And then I use my applicator
to only slightly make darker areas around the lines
that are used for braids. But I don't go over
the braids itself. Because just like
with the eyebrows, I want to use the structure of the paper to show
some variation. The skin is good when
it's very smooth, but things like eyebrows
and hair are very good. One, there is some structure in it than my video broke
off offers second, but don't worry, you
didn't miss anything. And then I go in with
my eraser because yes, I over date the shadow
under her chin. And so I tried to lighten it. You can see that there
is a lot of pigment on my eraser and so I always
need an in-between. And that's why I said, you don't want to use
the eraser later on for delicate graphite
drawing because you would just smudge
it with with charcoal. So yeah, really only use that eraser for
charcoal from now on. Then I smooth things
out again with my applicator and add some
dark areas again, on the year. I tried to make a clear
line on the bottom lip. But on the upper lip, you can see how there is a slightly brighter shades
and not just all the same. So I tried to erase that. There is also a very small, delicate bright line
on the lower lip. And so I go in with my
eraser and then with my palette knife to slightly darken and
even out the lower lip. I then go in with
my charcoal piece again to make a sharp line just on the corner of the mouth. And I don't go over it
with my palette knife again because I had the palette
knife, charcoal beneath. And with the charcoal
again on top, It's very dark there now
and I want it to be clear. Now one last time, I go back to the nose, I make the shadow darker again. And then erase parts and go
back and make them darker. And I also even
out the shadow in the middle to really make it a gradient again
and not a sharp line. And then just a
quick stroke with the eraser to make the
bright-line visible, but I use a very small tip. Now it's really just
adjustments on the lights. Just like with the nose. I want a gradient from dark to bright and not
the sharp lines. So I go again in with
my palette knife, make medium dark strokes, and then go in with my eraser, trust on the brightest parts. And I do that not only
on the forehead but also on the cheek
and under the eye. I tried to make the line from the nose to the cheek
a little lighter. And then the last strokes are just small details on the lips. And I again try to adjust the pupils and the precision is up to pupils with my eraser. One last time, I go in to make a clear line
with my charcoal. And that's already eat.
4. Outro: At the very end, I use a fixative to spray
over my drawing. We used a lot of charcoal, so you will need a few
layers off the fixative. If you don't have a fixative, you can use hairspray
if you don't want to buy an expensive fixative. And if you just
want to try this, but whatever you use, make sure that you either do it outside or you have
your windows wide open and then leave the room for at least an hour because it's not healthy to
breathe that in too much. So I put it in a layer and
then wait a few seconds. Hold on a second layer
and then I'll let it dry. Maybe sometimes I test it and then put over a third and
maybe even fourth coat. But you at least want to add two coats of it so that your
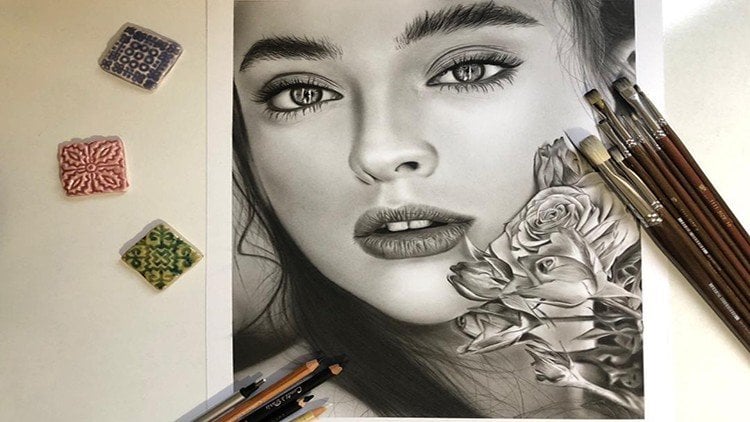
charcoal doesn't smudge. With this, you're done, let the fixative dry. And here you have your
finished portrait. I hope you enjoyed it, and I hope you've
learned something. If you're created a piece, I would love to see it
in the project section. I wish you a pleasant day
and see you next time. Bye.
 Anna-Carina Weiss, artist