Transcripts
1. Intro: Hello and welcome to this
new Skillshare course. It's only a few days
before Mother's Day. And like many, I
started thinking about what my mother
would appreciate to get the most as she
never wants me to buy her something and rather has something
that she knows. I thought about deeply. Buying chocolate or available
kit is not an option. But my mother's still loves
flowers and she loves, or at least enjoys
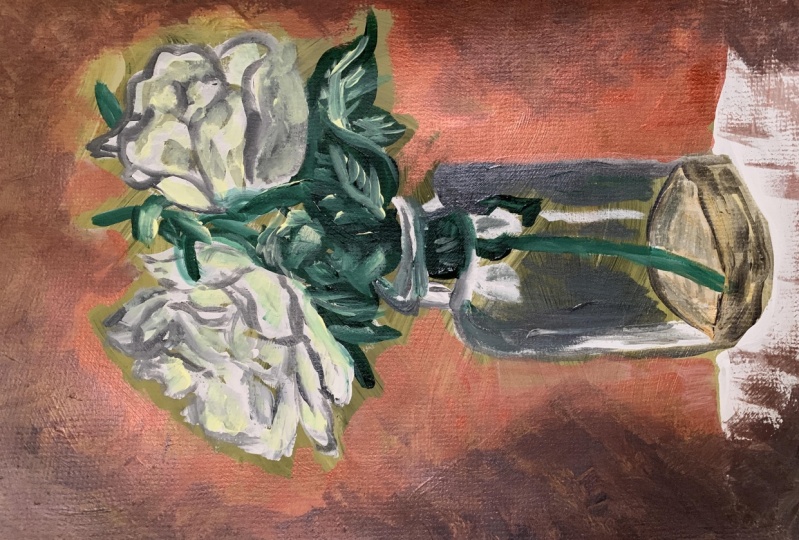
looking at my paintings. So why not make her a
painting of some flowers? Follow my working steps
to learn how I created a small rules painting in less than an hour
from start to finish. All you need for it to make your own painting
for your mother, grandmother, or father, or another beloved person in
your life is a small canvas, some brushes, acrylic paints, and maybe a pencil. Search for your art supplies. And let's get started.
2. Sketching and Preparation: I take a reference photo
that I took last summer. You can either use the
same photo which I've put into the resources
section down below. You can follow the tutorial with your own reference picture. I start by sketching
the room, says, concentrate on where
you're positioned roses and on sketching them
in the right size. Draw a very rough shapes
for this at first. And don't start drawing
the inside petals of the rows before you have sketch the outlines
of the others. Then when you have
your outlines, search for the center
of the first rows from their own start drawing
the biggest of the petals. Don't try to sketch every small petal right
away as we're trying to make a quick and
intuitive painting rather than a
hyper-realistic one. If you get the proportions
of the biggest pedals right, you will later have an easy time adding details when painting. Repeat the same with
the other roses. As you can see, I'm not starting at the center
with the second row, but I do search for
it with my eyes. Then I start sketching
the petals at the bottom. That is because the
center of the rose has no particular petal that stands out and would be a good
orientation point. But it's still important to realize where the inner
parts of the rows are in order to draw the petals around each relevant
just next to it. Same counts for the last rows. Think about where the centers and then draw the petals around. When I finish the sketch, I've taken my acrylic burnt sienna to cover the
whole canvas with it. If you don't have this color, take a similar
color or try mixing a very warm and
vibrant brown thing, the paint down with water and paint the
whole surface with it. If you have some problems with spreading the paint evenly, you might want to
add some more water, either with your brush
or with a spray bottle. Or you can also try using
a bigger brush for it. You want to have a very light, yet differently out of the color where you can still
see your sketch through. We do this in order to later let the painting
appear warmer. Since we paint very
fast and sketchy, we can avoid white parts in the places where the paint doesn't cover the
canvas completely. Let the paint dry for a moment before we start
with the next layer.
3. Painting: Now to the actual painting, I will only use one
brush in this process, a medium-sized flat brush. You can use multiple
brushes, of course, but if you want to do it quickly and sketchy,
follow my knees. I start by quickly going
around the edges of my roses with a dark green to clearly
see where my roses are. The colors here are easy. Pink rotors are dark
green background. That, since they are
complimentary colors, you really need to dope
both sides down enough. When mixing the greens, make sure to add some
red and brown tones to desaturate them
and make them warmer. You don't want an
intense and moral green to distract the viewer
from your nose. And even for the pinks, I add a little bit of green and orange in order to make
them look natural. If you want to learn some
more about color theory, you can check out my other Skillshare class for
more information. When starting with
the roses first, I go in with a darker color. With this, I can outline
most of the petals since the shadows of the rows
are darkest on the inside. I laid two will go in with an even darker color
in certain areas. Then I go in with
a lighter shade and slowly developed the petals. Watch out to use
multiple levels of brightness in order to avoid
the painting to appear flat. Look closely to what shade one rose petal next to
the other hairs. Work with the different
color intensities. I don't go too much into detail. First, I want to cover most of the row surface with
broad and quick strokes. But as I said, don't cover it
in one and the same color, but rather go petal by petal and choose
your colors wisely. When there are some places where you can still see the
background color. This is the reason
why we painted the background brown
in the first place. And we also will add
more details later on. Once I have the first
layer of the rules done, I quickly paint a little more around it to develop
the green background. This lets the roses
layer dry for a minute. Where painting and
acrylics and not in oil. This technique cannot be called allopurinol because it's not
a wet and wet technique. Since the acrylic
paint dries too fast. It's still nice to let the
first layer dry a little and we need to work further on the
background later anyway. But then I go right
back to the roses. Now, I use the even darker shade of pink to give
the rows is more. I do the same with
the bright colors. Be careful with it and
don't overwork it. Or you're contrasts
will be too harsh. Best is if you go back and forth with several
hues and shades, realize where the
light comes from, the reference photo, it
comes from the right side. So make sure to have slightly more darker areas on the left side of your roses. Make darker brush
strokes on the left. And look at the reference photo closely to see the colors. But also take your
freedom from the photo. We want a loose
sketching painting. You don't have to paint
every little petal and detail in order to make everyone realized that
this is a painting. In fact, sometimes
it's better to leave some things out of your painting to make
your painting theorem. Once our roses bloom
on our canvas, we let them be and go
back to the background. I simply go over all the ground parts with
some more dark green. But I don't worry if some of
the brown shines through. After that, I again, going with more paint. I use the dark green
because I don't want the background
to disruptive viewers attention on the roses. I again want to warn you to not make your greens too saturated. Mix it with more brown and
red if you're in adults. Then I only very
carefully go in with slightly lighter greens to
sketch out some leaves. I make them up
completely by myself. So when you try to paint them, you can either
follow my painting or you can make
them up yourself. Go from darker greens to build up the forums
of leaves to lighter. Lighter paint is only there to give the leaves more of a
three-dimensional look. So use it for some highlights. Don't paint the whole
leaves in bright green. I add a few more rather intuitive strokes
to the background, and then I'm done with my
vintage looking growth. I hope you enjoyed this quick
flower painting tutorial and I would love to see
what you have created. Please show me in the
project section down below. And I hope your mother
will enjoy her present.
 Anna-Carina Weiss, artist