Transcripts
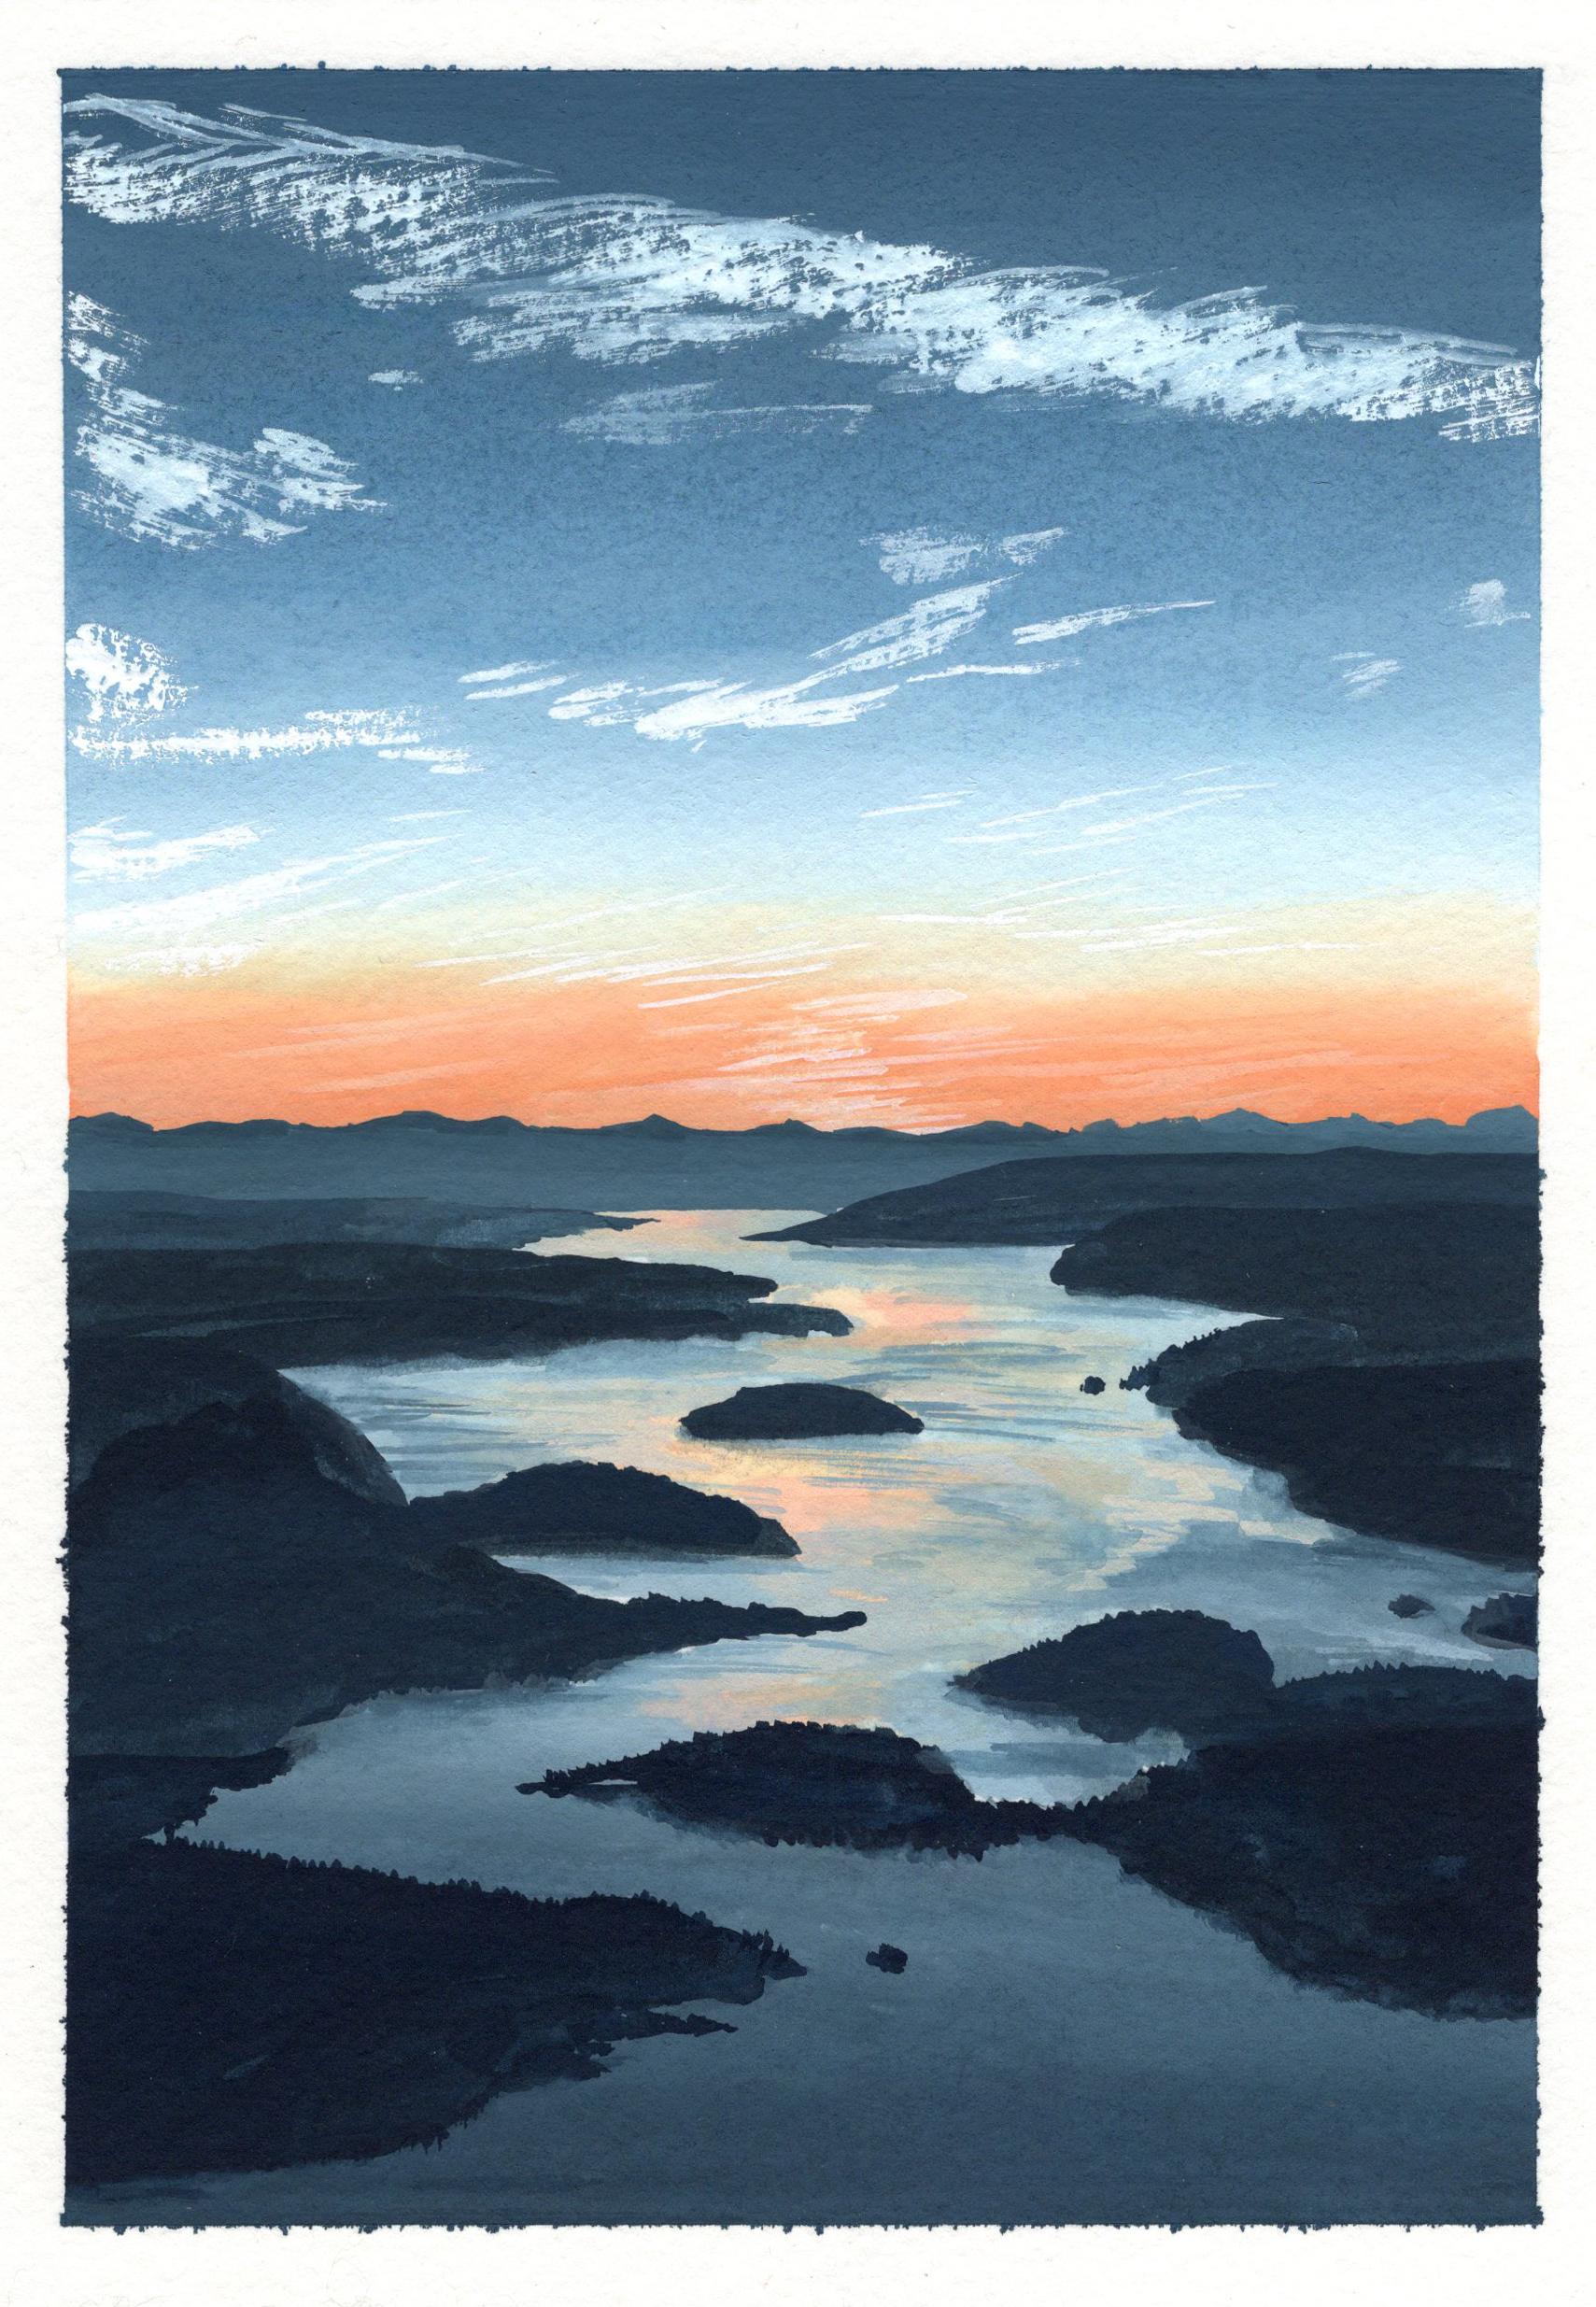
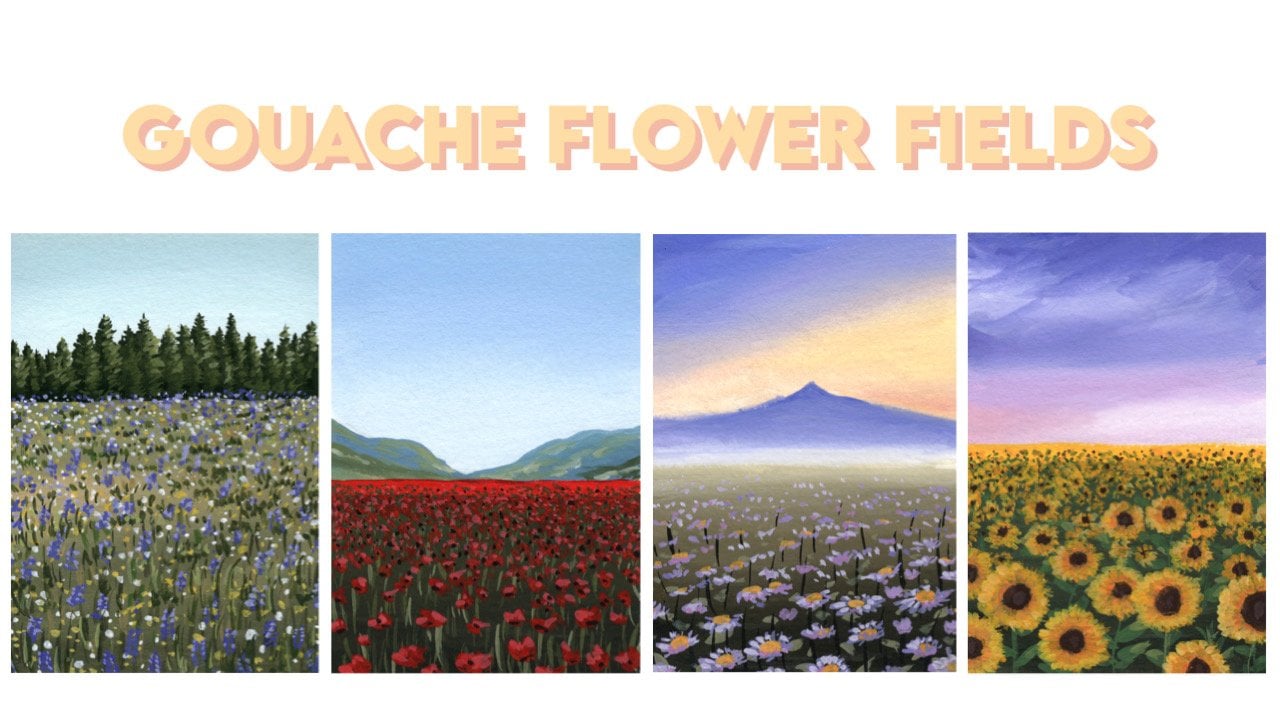
1. Introduction: Do you want to
learn how to paint this beautiful
landscape using guash? Well, that's what we'll
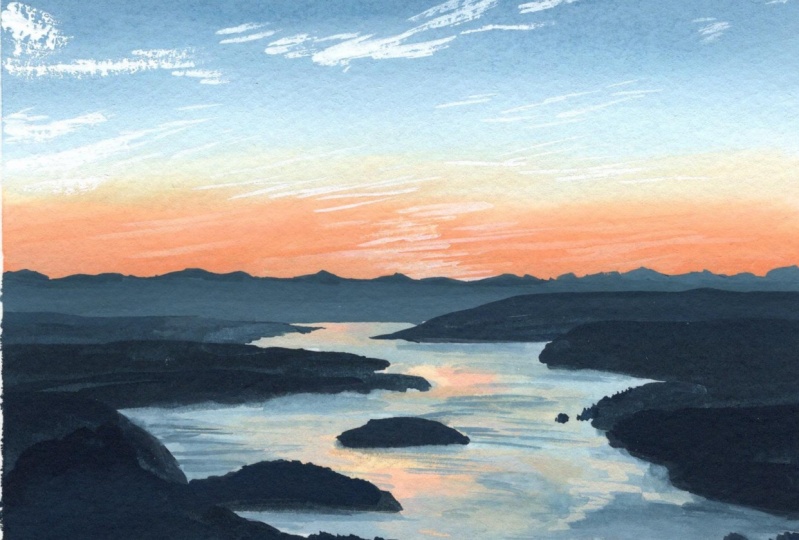
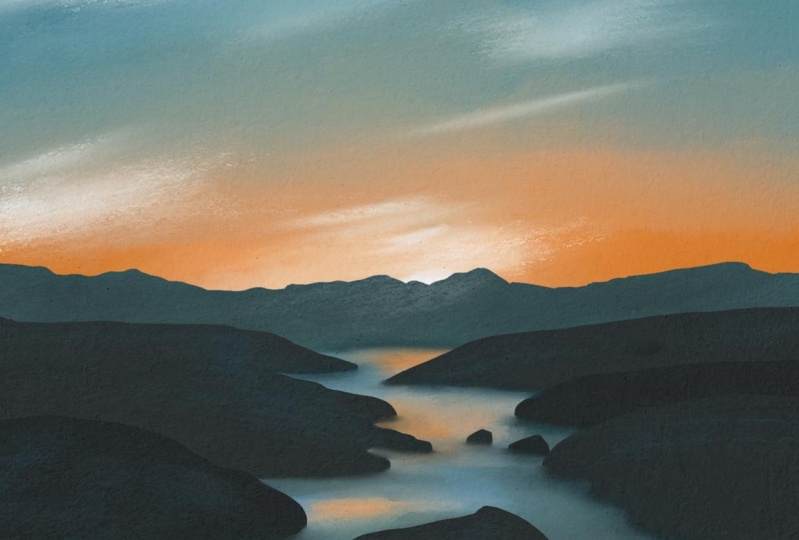
be doing in this class, using a reference photo
which I will provide to you. I'll show you how to
approach this piece from the very start from the
initial sketch where you practice blocking
in large shapes to mixing colors and blending
smooth gradations. I'll talk about the
consistency of paint to use, whether you want
to use thin washes or creamy opaque consistency. Some other guash
skills will practice, include techniques to
softly blend colors, creating dry brush
textures to paint convincing clouds and
your control of water. This whole class is
kept in real time, meaning you can follow
along with me every step of the way as I don't speed
up or cut out any parts. I give tips along the
way to help you avoid common mistakes and explain
what I'm doing step by step. So if you want to have a go at painting this piece,
then keep watching.
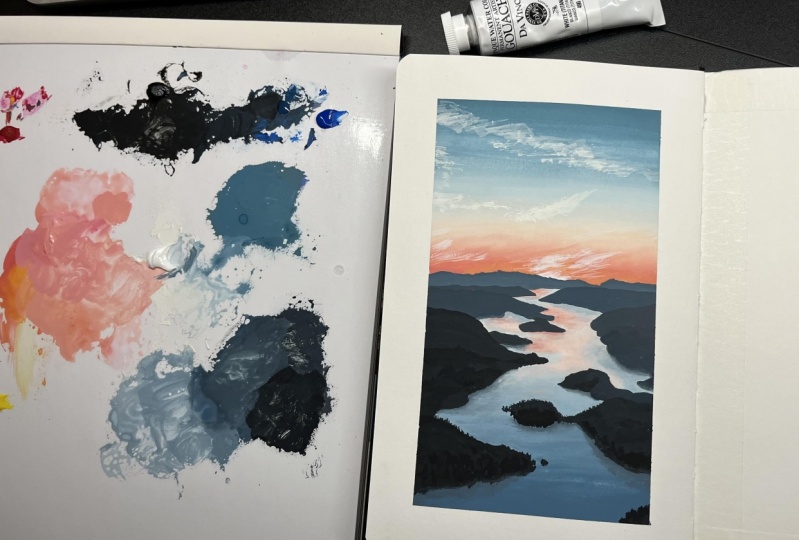
2. Materials: Let's quickly talk about the supplies that I'm using
for today's tutorial. I've got some
watercolor paper here, which is 300 GSM. It's also cold pressed, meaning it has a little
bit of texture to it, which is my preferred
texture of paper. Then I've got a palette here, which is a porcelain palette, and I've got a water tank
which is split into two parts. One half I'll use to
clean my brushes, and the other is clean water
for thinning down my paints. And then I'm just
using some tissues to soak up any water
off my brushes. I'll be using just
three brushes, a flat brush, a ram brush
that comes to a pointy tip, and a ram brush that doesn't
come to a pointy tip, so I can use it to create different kinds of
textures with it. This is the brush that
I designate for using stippling and other
kinds of textures, which is why I've made the
point of it quite blunt. I've also got a spray bottle
to miss my paints and also a pencil and
a edable erasor just to do a light sketch. I'm using painter's tape to tape down the edges
of the paper. So it doesn't move,
and also so that I can get a clean crisp edge. For the paint I'm using, I'll be using tube guash today. So I've picked out
the colors I need. First, I have two blues. A Prussian blue and
a primary blue. Primary blue is a cool blue, while the Prussian blue is
like a dark, midnight blue. Then I have a burnt umber, which I like to mix with the blues to make
them even darker, and then I've got black
and also a warm yellow, and then I've got a primary red, which is a cool red. And when I mix the warm yellow
and the cool red together, I get this peachy orange color, which I'll be using for the sky and some of the
reflection in the water. Do keep in mind that
you don't have to use the same brand or the
exact same colors. As long as you have a cool blue, a warm yellow, a cool
red, a burnt umber, or you could even just mix up a burnt umber if you don't
have one from the primaries, a black and white, then
you'll be good to go.
3. Sketch: Starting with a pencil, I'm just going to do a
very light sketch where I just pencil in the key
features in this painting. It's better to
make your mistakes here than it is when you start laying down paint on the paper as it's much easier to fix now. So I'm going in with very
light pencil strokes, and I'm going to start by
placing in the horizon line. Which is about
perfectly halfway, then I place in the
distant mountains, and I'm doing this
all very loosely as I want to leave room for
if I make any mistakes, then I don't feel so
bad having to erase the lines that have
already placed down and start over again. So when I'm placing
in the islands, I'm trying not to
get too stuck into the details and the
exact shape of them. I try to just loosely place them in according to
their rough shape. So sometimes I just
use an oval shape and just block them in the position
or a triangular shape. It's most important
that at this stage, you're just placing
the large shapes in. So again, if you make mistakes, you don't feel bad
having to start again. To help you see if you've placed everything in in the
correct positions, you can place reference lines
onto your reference photo. So here, I've just
put a simple cross vertically and horizontally
onto the reference photo, and then you can do the
same on your painting. And then to help you see if you've placed
things correctly, you can match your painting with the reference
photo and see if This particular island is sitting perfectly at
this intersection. And you can always add in more reference
lines as you need. Usually, with simpler
reference photos, I don't need to do this, as I can just do it
mentally in my head. I'm always measuring things
against one another. But for more complicated
reference photos, this is definitely
a strategy that I used to help make
it easier for myself. And once I'm happy
with the sketch, then I go in with a edable
eraser just to soften out all of the lines and
to also fix up any areas. I try to erase any lines
that are unnecessary, so as to prevent my sketch
from being over clotted or looking messy as I just want the
essential lines there. I'm also aware of areas
where the paint might be a lighter color and may not cover the pencil
lines as much, so I make sure to lighten
those specific areas.
4. Sky: I'm going to start
by laying the colors primary blue burnt umber
and white on my palette, and I'm also going to miss the paints just to keep
them fresh on the palette. Then using a flat brush, I'm soaking it
through with water, and then I'm going to mix
up the color of the sky. So I'm going to start by
just blocking in the color, ignoring the clouds
or any other details, and I'm just going to paint in a gradation from
a bluish green up to top into a much paler color and into a peachy orange color. So I've picked up
a little bit of primary blue and mixed
it with a lot of white. And then I add in
some burnt umber, which helps to firstly make the blue a
little bit more dull. So the blue isn't as vibrant. And also, I find that burnt umber when added
to a primary blue, makes the blue a
little bit more green, which is what I'm going
for a bluish green. And I test out the
color on the paper, as sometimes the mixture
on the palette is a little bit different to the actual color when you
lay it down on the paper. Once I test it out,
then I adjust. So now I've placed a little
bit of black on my palette, as I want to tone down
the color even more, I want to make it
more of a blue gray. So I add in a little
bit of black at a time, making sure to be careful
with how much I add, and I'm mixing it up to be
a very creamy consistency. I want the paint to be
quite opaque so that it can cover the white
of the paper easily. And once I've got the mixture, I'm going to just
sweep it across the top of the paper and
slowly bring it down. Now, as I bring it down, I'm going to add more white
into it to make it lighter. I'm also adjusting
the color as I go. You'll see that I
can take a while to mix up the correct color or the correct
value of the color, as I'm always laying it down
and then comparing it to the reference photo and
adjusting it as I need to. You can see here that
the second stroke I've laid down is lighter
than the first one as I'm starting to build in more white into
the paint mixture so that I can have a smooth
gradation flowing downwards. The paper that I'm
using is 300 GSM. If you're using paper
that is a light away, you might find that the
paper buckles more. From one of the lower angles, you'll see how much
the paper buckles. It's not too bad at this point. But later, you'll
see that I decide to go over the sky
one more time, as I felt that when it dried, it looked a little bit she. So when I go over
it a second time, you'll see that the paper
starts to buckle a lot more, but it's not an issue because after I
finish the painting, I can just flatten it under some books or some
heavy objects, and that will flatten
out the painting again. When I get to about
halfway down the sky, I wash off my brush completely because there's just too much of that dark blue paint on it, and with a clean brush, I mix up a dramatically
lighter blue. So I'm picking up mostly white, mixing it with some of the
existing blue on the palette, and I brush that across
the middle of the sky. It can look very light at first, but it's very easy
to blend it out with the colors above
by just cleaning off the brush and using a clean damp brush to
just sweep over the edge. And you'll find that you
get a very nice transition. Then I'm going to repeat this
step again and this time, I'm going to pick up even more white and lay
that underneath, and then I'll just bring it
upwards into the blue above. And again, I can use a
clean brush to smooth out any edges that
aren't smoothly blended. I also run my brush back and forth just to smooth
out any other parts. Usually, at this stage, I would be done with
the sky transition, but I felt that this time, it was a little bit sheer or the way that it dried
wasn't as opaque as I like. So instead, I decided to go over the entire
sky a second time. So I laid down a lot more
primary blue paint on my pale, and I've just mixed
up some more of the darker blue color mixing in some umber and a
little bit of black. And this time, I make sure the consistency is quite creamy, so I won't have that
same issue again, although usually if you're
going in with a second layer, it should already help to make the paint a lot more
opaque on the paper. If you also think that your
paint is a little bit sheer, then feel free to follow along and go in with
a second layer. But if not, then
you can also skip ahead to the next part
of this tutorial. Do keep in mind that
you have to be a little more careful the
second time round as the paper is a little
bit weaker now that it has a first layer of
quite thick paint on it. So make sure your
paper can withstand the amount of water and paint that you're
putting onto it. You can probably see
from this angle already that my paper has started
to buckle quite a bit. So I'm being extra gentle with it and trying not to
overwork the paper. Buckling is okay,
as I said before, as I can always flatten
the painting afterwards. But when the paper
starts to peel, that's when it's hard to
reverse the effects of that as the paper starts to
flake off with the paint. So I have to be
very careful here. I'm repeating the same
steps as I did in the first layer where
I'm just adding in more white and cleaning off my
brush at some point so that I can brush in some
really light colors. One of the reasons I
decided to go over the whole sky rather than just parts of it is
because with guash, it's very hard to match the value of a color
once the paint has dried as lighter colors tend to dry while darker colors
tend to dry lighter. So instead of just trying to
fix up one bit of the sky, I just went over the
whole thing as that's going to give me the
smoothest outcome. You can see here that I'm trying to lighten the top
part of the sky. And again, I just decide
to go over the whole thing again and just run my brush over all of it
so that when it dries, I know for sure, it will
dry to the same value. I'm much happier
with how the sky looks now that I've gone
in with a second layer. And now I've placed some of the warm yellow and
cool red on my palette, and I'm just going
to mix it together to create a nice,
peachy orange color. So I need to sweep this in
at the bottom of the sky, and I have to be careful here that where it meets
the blue above, it's not going to muddy and
mix into a very dull green. So what I do is I start
from the bottom first, and I'm going to slowly
make my way upwards, adding in more
white as I need to. And when I meet with the blue, I'm going to be very careful
with how I blend it. I'm still working in the
creamy opaque consistency. I'm adding in more
white as I move upwards and just sweeping
the color across. Now, just like I
did with the sky, I'm going to clean
off my brush here as there's just too much of
this paint on my brush, and I want it to
lighten dramatically. So now I'm going to also
switch to a round brush as this is going to allow me to
blend a lot more accurately. And I'm going to bring the
slighter color upwards until it gradually meets with
the light blue from above. So I've purposely made that
blue very pale at the bottom, where it's almost white, so that when I blend
it with the orange, it's going to produce less of a green and more of
just a pale color. I'm picking up even more
white as I move up, and I just softly glide
over that transition line. You can clean off your
brush as you need to so that there's not too
much orange paint being brought up into the blue. And so here with a clean brush, I'm going to brush over
the transition line. I also want to add
in some strokes that just move in the
direction of the sky. So they're kind of moving
upwards diagonally. So using my brush, I'm just going to sweep
upwards in that direction, just to create some
interest in the sky. A lot of the times
when I'm blending, you'll see that I'm just
using a clean brush to just softly brush over the
edges because with guash, it can be reactivated
after it has dried. So what I'm doing is I'm just using a damp
brush to lightly reactivate the
existing colors on the paper so that they will
just blend together softly. That's also why I like to work
with Guash very opaquely, so that way, there is a lot of pigment on the paper
for me to blend with. Now, in the next step,
I'm going to paint in a few bright rays
of light in the sky. This would have worked better if the orange part was still wet, but you can also go in when it's dry and just
reactivate the edges. From this angle, you can
also see how much the paper has buckled so far under the weight of
the water and paint. I switched to my other
round brush for this, the one with the
more pointed tip, as I want to paint
some very thin lines. The sky is already
completely dried for me. But if you went in,
while it was wet, the white strokes would bleed nicely into the sky,
which is what you want. Because mine has dried, I'm just going to
reactivate some of the edges so that it bleeds together a
bit more naturally. And you can also
go in with some of these lighter whitish
strokes along the sides, the left and right sides of it. I'm just mimicking some of the textures that I can see
in the reference photo. I soften out any harsh edges as I need to with a clean brush. Here, I've just noticed a little bit of a
harsh line in the sky. So using a clean brush, I just brush over and
reactivate the existing paint, and I've smoothed out that line.
5. Clouds: It's now time to
paint in the clouds. And for this step, I'm going
to use a dry brush texture, which is one of my favorite
things to do with guash. So using the brush that comes
to more of a blunt tip, I'm going to remove any
excess moisture from it. After taking off the
moisture on the tissue, I also like to just
run my fingers along it to feel if there
is any excess moisture. And then I'm going to pick up some white paint and just
sweep it across the paper. This is also why I like using cold pressed paper for guash because it has
that paper texture. So when you use a dry brush to sweep paint across the paper, the paint will
naturally cling on to the more toothyer
parts of the paper, and that's how you can
create this texture. If you're using hot press paper that doesn't have
any tooth to it, then this technique
may not work. So using cold pressed
or rough paper will work much better. Your control of
water is essential to the success of
this step as having too much water in
the brush will cause the paint to not have this
scattered look to it. If you've never
done this before, you can try to practice it on a spare piece of paper first, or you can also keep a piece of paper or some paper towels next to you so
that you can first test out each stroke
on the paper, and once you feel
like you've got that correct
consistency of paint, then you can apply it onto
your actual painting. I also go through
this technique in a lot more detail
in my beginners guide to quash class
here on Skillshare. So if you're not feeling
as confident with this, you can check out that class for a bit more practice
before you attempt this. My biggest tip here is it's better to start
with less water on your brush than more
because if you don't have enough water and you
try to pick up paint, then you'll just find
that the paint's not going to spread very
far on the paper, which is easy to fix, as you can just gradually add in more water and just go
over that part again. But if the opposite happens and you start off
with too much water, and you apply that
onto your painting. It's going to be much harder to reverse the effects of that. It's also important here to note that you don't
want to go over the same area many times as the more that you go over an
area with your brush, the more likely you are to
start to reactivate the paint, and we want to keep
this white very pure. The only reason
we can layer this white on top of a darker
color without it, muddying with the
layer beneath is because of our control of water. We have barely any
water in our brush. So this paint is just
going to be sitting on top of the paper,
whereas, usually, if you try to layer light colors on top of dark colors in quash, it's very likely that it's
going to start to muddy. Sometimes I also use my finger
here to blend out some of the edges just to
soften them out a little bit and make it look
a little bit more wispy. You can go over an area
a second time to make it more opaque as long as you
let the first layer dry. So I do do this for certain parts where
I let the paint dry, and then I layer on some
more white paint on top. So that way, the center of the cloud can look a little bit more full and the edges can
look a little bit more wispy.
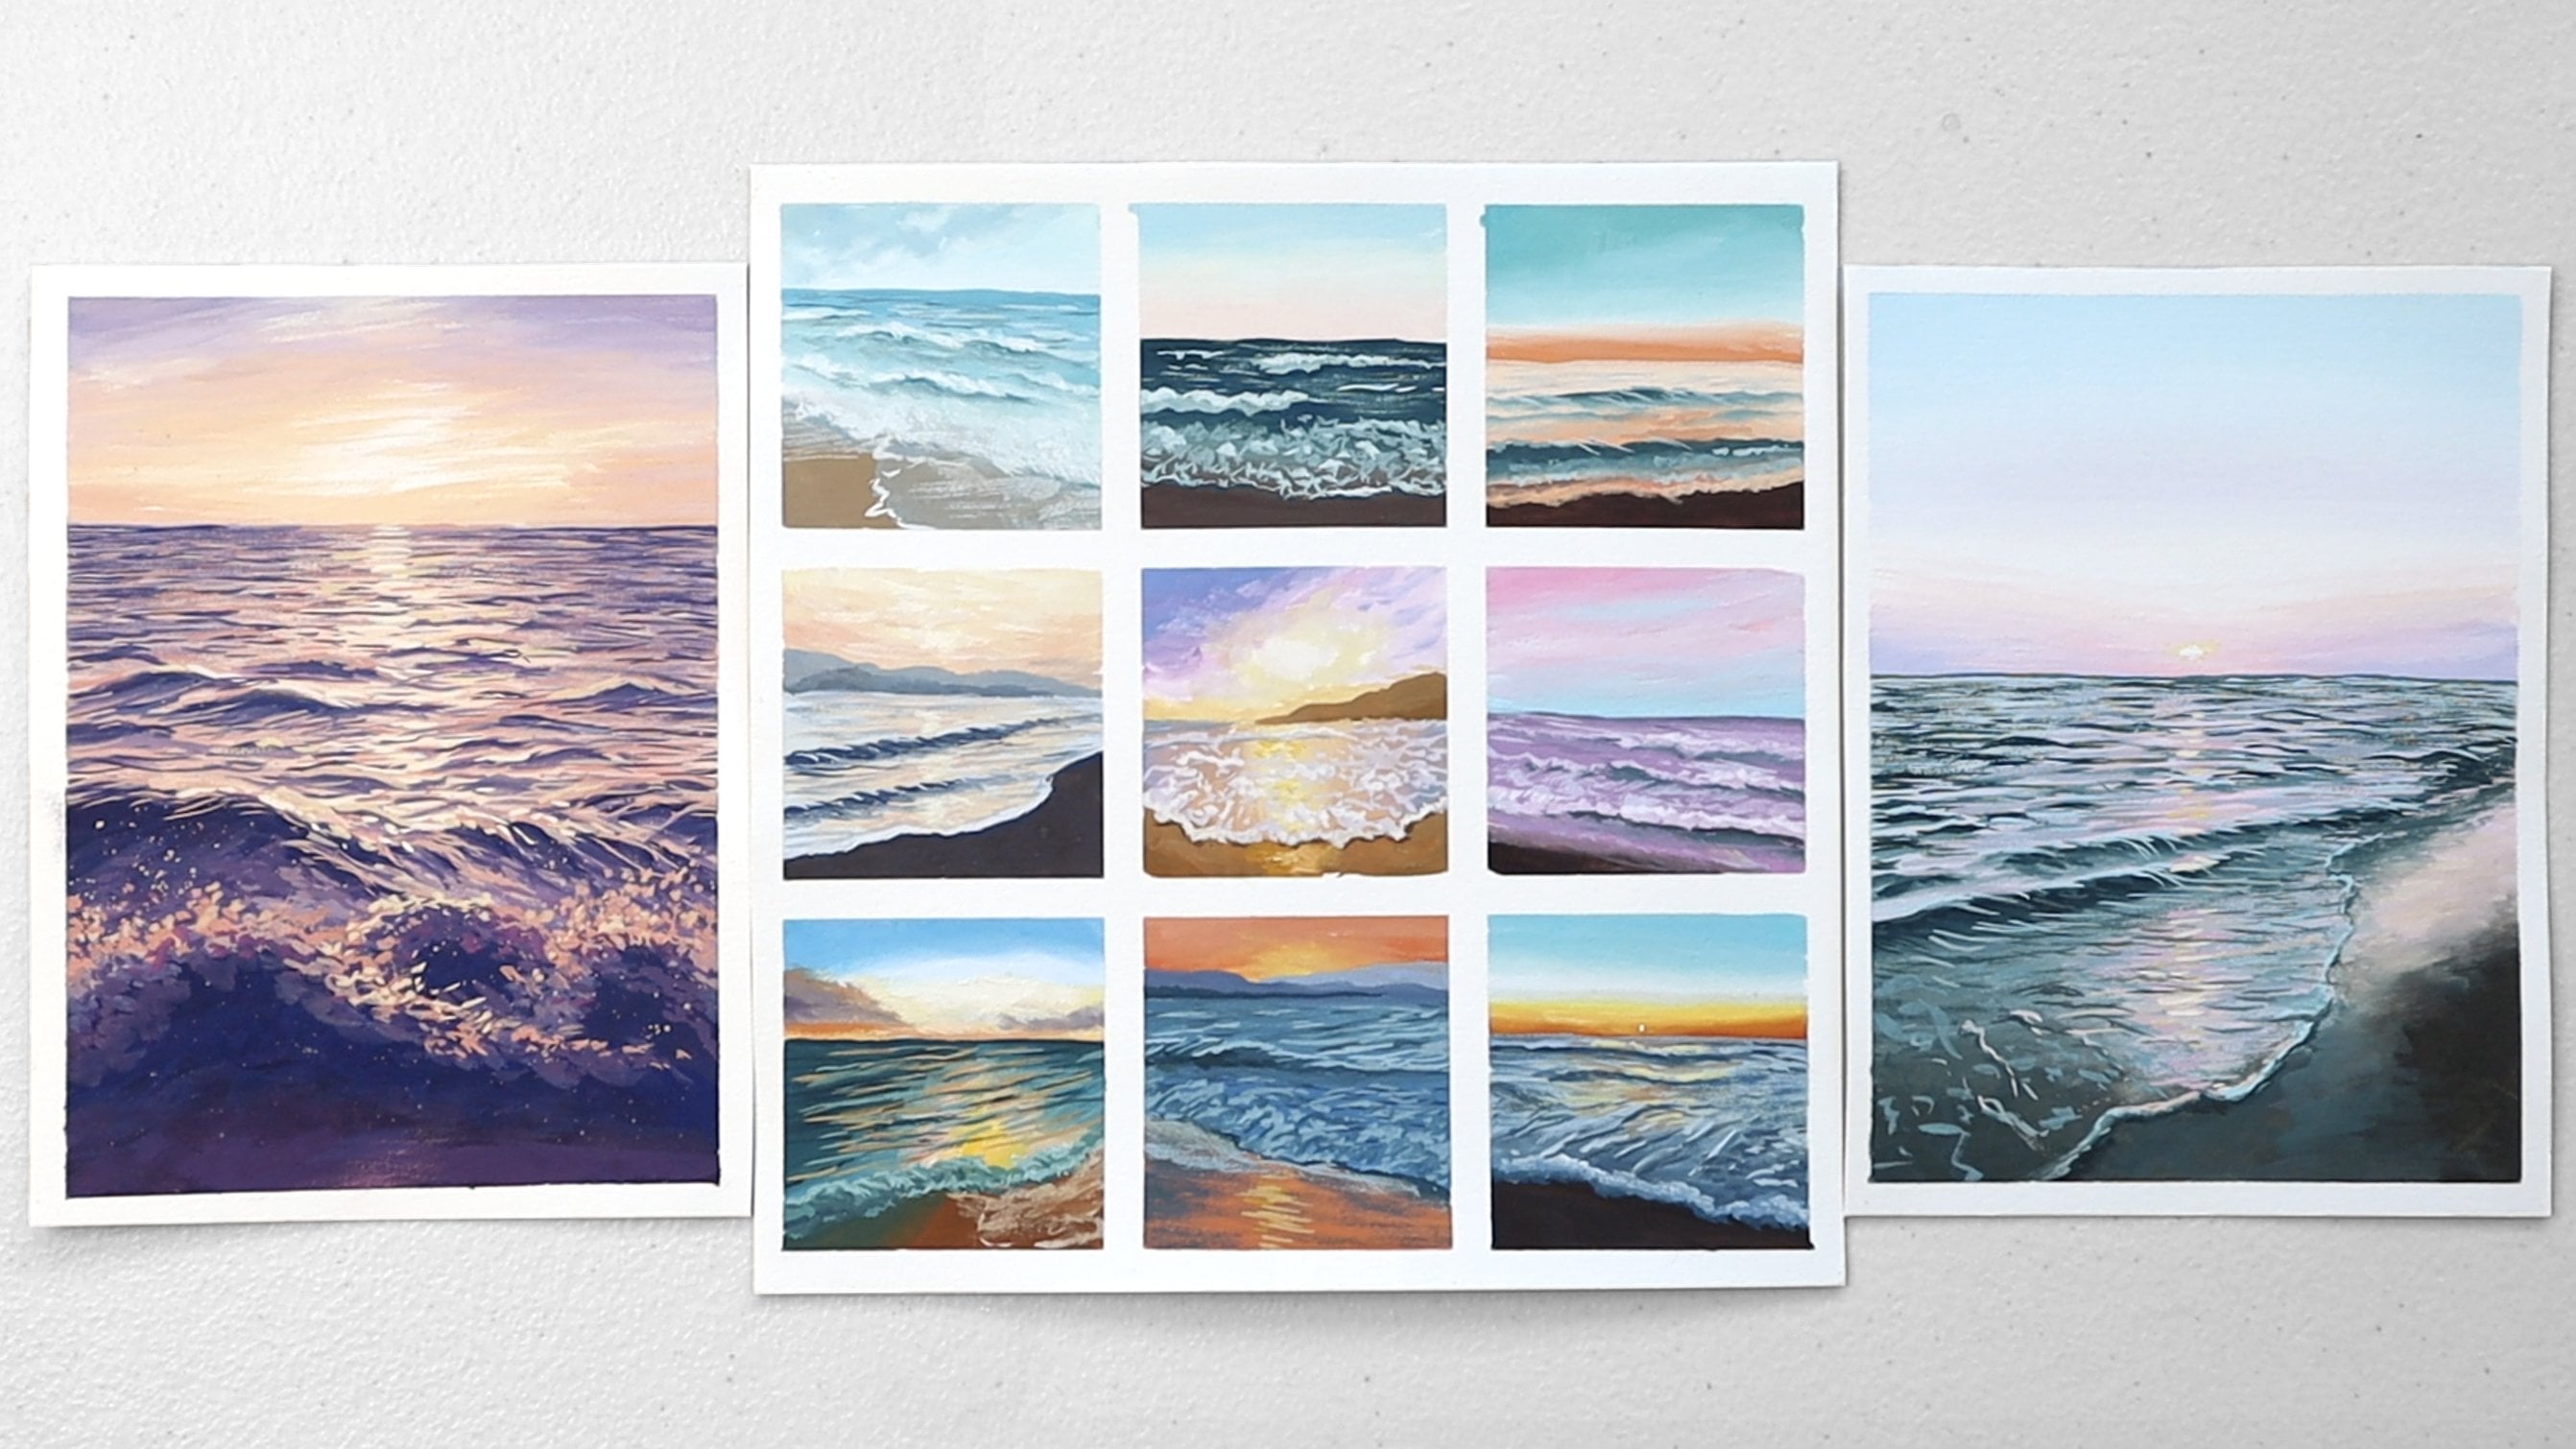
6. Lake: I'm now going to
work on the lake, which is mostly
just a reflection of the colors in the sky. The reason I'm working
on the lake next and not the islands is because the island stack on
top of the lake. So I want to get the
colors of the lake down first so that when I
paint the island on top, I can get some really clean
edges and not have to worry about going back to fix up the edges of the islands. I'm going to go back into that peachy orange color
I used for the sky, and I'm going to dilute
it with a lot more water. So I'm using a much
more thin down mixture, and I'm going to
just place in some of that color into the water. I try to vary the color. Sometimes I add in a little
bit more warm yellow, so it's more of an orange and sometimes I add in more
of the primary red, so it's a bit more pink. That's just to keep it
interesting as it's not just a reflection
of one flat color. The reason I'm
using the paint in quite a thin consistency
is because later, I will have to soften out
the edges with the blue, and I don't want the
colors to muddy too much. So the thinner the
paint is on the paper, the less the colors will be able to blend and
muddy together. So I'm being very careful to keep the edges of it very thin. Now, instead of using primary
blue for the reflection, I'm going to try
using Prussian blue, which is a dark blue. And if you don't
have this color, you can just continue to use the same mixture that
you use for the sky. I just think that
Prussian blue is a bit of a shortcut
in this step. So I've laid down some
Prussian blue and some as I want the
blue to be quite. Since the reflection in the lake isn't quite as light as the sky, since it's receiving a
little bit less light. I'm going to start
at the bottom, and I'm going to mix up quite a dark blue using
the Prussian blue, some of the existing blue
sky mixture and some black. And this time, I am going to lay the paint on quite opaquely. But as I get closer to the edges of the
pinkish orange parts, I am going to thin down
the paints as well. But for now, I'm just going to block in all around the islands, and I'm going to add in white as I move upwards towards
the horizon line. You don't have to be
very precise when you're painting in around the
edges of the island, as if you go over the edge, you can always come
back and cover the edges when
you're painting in the island since it is
a much darker color, which is again, the reason why I'm painting in the lake first. To help me blend out
this transition here, I'm just going to clean off my round brush and using
a damp clean brush. I'm brushing along the
transition line to blend it out. I've now added a lot of
white to the blue mixture, and I'm going to start painting in some of
the lighter areas. Even though the transition is going to be
very harsh between the darker blue and
the lighter blue because I've got a lot
of paint on my brush, I can easily just blend
out that line later. You can see I'm
loosely just blocking in all of the areas
that I need to. My aim here is just to block
in as much of the white of the paper as I can while
leaving the island still white. I avoid going right up to the edge of the
pink in some areas because I've got quite
a creamy consistency of paint on my brush
at the moment, and I want it to be a little
bit more thin down as I approach the peachy
pinkish orange parts. I Now I'm going to start thinning down the
blue paint with more water and work with it in a bit more of a transparent consistency. I'm going closer to the edges, but I'm not quite
going to blend it out. Yet. I'm going to use a
clean brush to do that. So first, I'm still trying to just block in all the white of the paper using a slightly
more thin down blue pain. Now I'm going to clean off
any paint on my brush, and this is when I'm
going to start blending, just using a clean brush. I'll also use my fingers just to test the amount of
moisture in the brush. And you can see
I'm going to just run it across the
blue parts and into the pink parts so that it can just transparently glaze
over the top of it. You can see that
I'm doing this in a very soft and
gentle way so that the colors just blend
together ever so slightly. And using this clean brush, I am slightly reactivating
a little bit of the blue and just glazing it
over the edges of the pink. I feel like I am in control of how muddy I want
the colors to look. I only glaze over
the areas where I want the blue and the pink
to look a little bit muddy. But in the centers, I still want the pink to look very
fresh and untouched. I continue to do this until
I've covered the entire lake, and I'm happy with the
transitions and blends.
7. Islands: Now we can go ahead and paint
in the distant mountains and all of the islands that
sit on top of the water. So I'm going to use the same mixture that
I did for the water, but I'm going to make
it a little bit darker. So I'm using the Prussian blue mixed with some burnt
umber and some black. And I'm going to start with
the most distant mountains. The mountains are lighter, the more distant
they are from us, and they grow darker, the closer they are to us. So I'm going to
keep that in mind, and I'm just going to block
in along the horizon line. And then for the edges
of the mountain, I am going to use my
brush just to nudge it a little bit so that the edge of it isn't just
a straight line. It's got a little bit
of texture to it. I add in more white paint
as I need because I have to keep in mind that this must be the lightest layer, so I can't start off too dark. But again, keep in mind that darker colors will dry lighter, so you can go a little bit darker than you think you need. Also, I noticed that when
you're painting mountains, the top edge of it is
just a little bit darker. So I try to make that
a little bit darker, and then I add in a bit
more white to the rest of the blue for the rest of
the body of the mountain. I'm using the round
brush that comes to a pointed tip so that I can
get quite precise edges. When I finish with
this first layer, I wait for it to dry
completely before I go in to paint more
mountains on top of it, because if I don't let it dry, then the colors will muddy. So I make sure to give it
enough time so it can dry before layering more colors on top because they are
in separate layers. Now that the first
layer has dried, you can see that it
has dried a shade lighter than the color of
the paint when it was wet. I'm now going to mix up a much darker blue
using the same mixture, but just adding in
less white into it. The step is pretty
straightforward as it just involves blocking in
the white of the paper. I use the tip of
my brush to help me create some textures
along the edge. But other than that, it's
a straightforward process. While I wait for
one section to try, I will work on another section because I don't want
all the layers of the mountains to just bleed together because I want to create that separation
between them, so it looks like they are
closer or further away. The other thing I keep in mind is as I move closer
to the foreground, I'm going to make the
paint mixture darker. So I'm going to
add in more black and more burn umber
into the mixture. I want to bring
the paint right up to the edges where
it meets the lake. As by the end of this step, I don't want to see any of
the white of the paper. And again, I'm
keeping my paint in a very creamy and
opaque consistency. I make sure that
when I'm mixing up Paint, I'm adding in more paint to it as I am adding
in more water. So I'm making sure not to thin down my paint
mixture too much in my part as I want to keep up that same level of
opacity throughout. Here you can see I'm nudging
my brush up and down along the edge of the island so that it creates some texture. It's best to do this while
the paint is still wet, just so you don't accidentally
have the paint dry to a different value and
have it disconnected. So I try to work quickly
and I do this in the same step as when I'm blocking in the
body of the island. It's hard to tell in the reference photo
because it's very dark, but actually the bottom half of the island is actually
a reflection of it. We just can't see the
dividing line between the actual base of it and
where the reflection starts. So that's why I paint in some of that tree line texture along the bottom as it's actually
reflecting the top part. Right now, the edges
are a little bit harsh to look like
a water reflection. So later I will come in and
soften out the bottom edges. So they look a bit more
like a reflection. I've now cleaned off my brush, and using just a damp brush, I'm going to go in
along the bottom edge, which is the reflection in the water and just
soften it out. You'll see that I wipe off
my brush on the tissues frequently just to remove
any excess blue paint, or I just rinse it off
again in the water tank. I'm being very
gentle here and just blurring the edges
ever so slightly. This is a very minor detail, but I'll like how these
small details really contribute to the overall look
and feel of the painting. I feel like it just
makes it look that a little bit more
convincing and realistic. So I'm going to go along
most of the bottom edges of the island using
a clean wet brush and just loosely run across it. You want to be
careful not to have too much water on
your brush as you don't want the edges to start
to bleed out of control. You want to control how
much they are blurring.
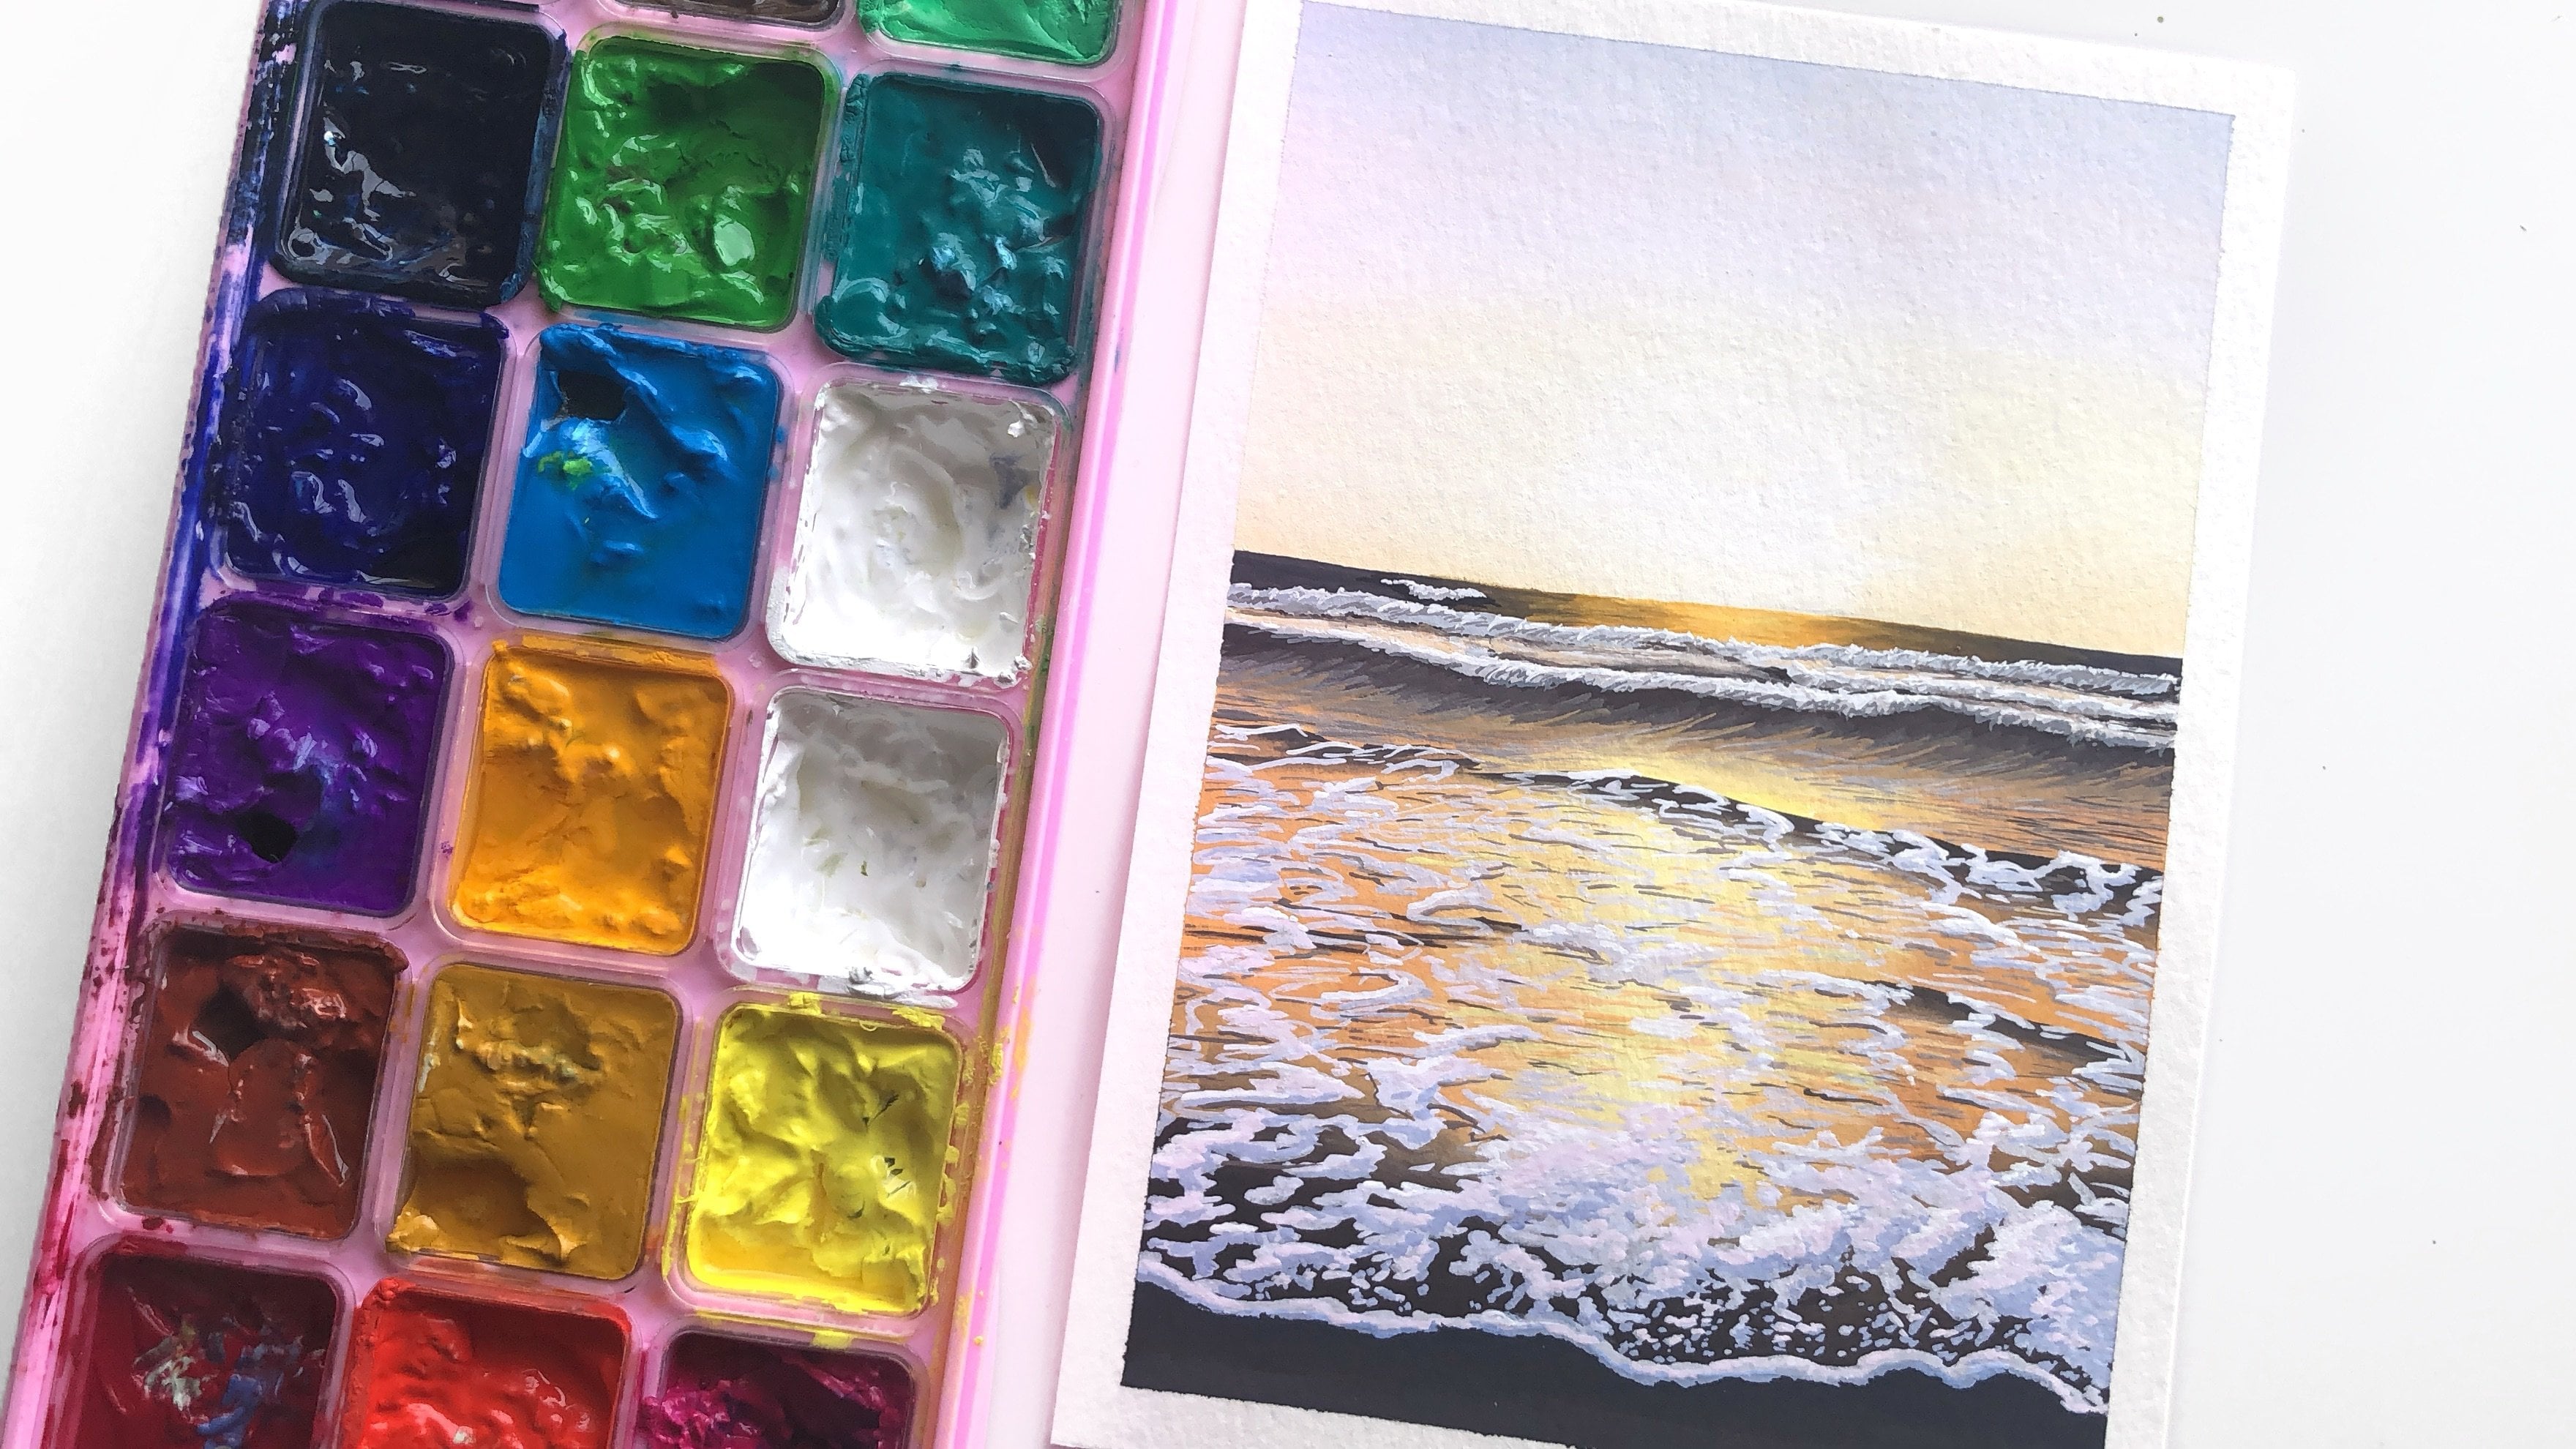
8. Finishing touches: In this final step, I'm just going to fix
up some areas and just add a little bit more
texture into the water. So in the previous step, I said to cover any
white of the paper. But I felt like I miscalculated where one of
the islands should sit. I left that area white so
that I could come back in this step and just fill it in with some of the light blue. Now, I'm going to go back into that pink mixture and just pick up a little bit
of it and sweep it across in certain areas where I feel like it could
do with a little bit more of this color
as quite a lot of it has been covered up or
blended out with the blue. In the water, I can see
a little bit of texture. So I'm going to try
to recreate that. So I'm going to pick up
some of the blue paint in a very thin down
consistency and run it over some areas
just below the pink. Now, it's going to
produce a harsh edge, and I'm just going to soften out the bottom of it using a brush. Keeping this paint consistency as I don't want a lot
of paint on the paper. It's much easier to
blend it out with the surrounding areas if there's only a little bit of pigment on the paper because there's already a layer of
paint underneath. So if I continue to add
a lot more paint on top, it's going to get a
little bit messy. So I keep the consistency
of the paint very thin, and I just work on it
section by section. I also look for any areas where it's a little bit
darker in the water, and I just add in a little
bit more of the blue. There is no right or
wrong in the step, as you can add as much
extra details as you want. Or if you're happy
with how it looks now, you can just leave it as it is. Usually at the end
of my paintings, I like to just re
evaluate it and have a look conceived as any
tiny areas I can fix up. Although sometimes I do have to tell myself to stop as
there's no end to this. I could continue to add in
these little details forever. So I do my best not
to overwork it and just enhance some areas
that I think needed.
9. Project + Closing Thoughts: This is the result of the
finished piece from this class. I'll have a scanned
version of this available under the
resources tab along with any other resources such as the reference image and all
the materials that are used. If you enjoy this class, then I would really
appreciate it if you could leave
a positive review. Also, I would love to
see your finished piece, so please feel free to take
a photo of it and upload it under the projects tab so that everyone else can
also see your result. If you would like feedback
on your finished piece, then when you upload it
under the projects tab, feel free to write a little
comment asking for feedback, and I'd be more
than happy to give you some constructive criticism. Other than that, thank you again so much for taking this class, and I truly hope that
you found it helpful. If you want to see
more of what I do, you can find me over on
YouTube and on Instagram. Thank you for being here, and I'll see you in my next class.
 Jess Chung, Gouache Artist