Transcripts
1. Introduction: What's happening?
The kind folks, Welcome to another I
pay increase your skill share class on skillshare.com. Today. Gonna take you
through the process of doing this bucket hat. This is, I think one of the third or fourth
bucket hats I did. I have one class that is here on Skillshare that is about
painting a bucket hat a. But I have applied
a whole bunch of new techniques and I'm using some pigment
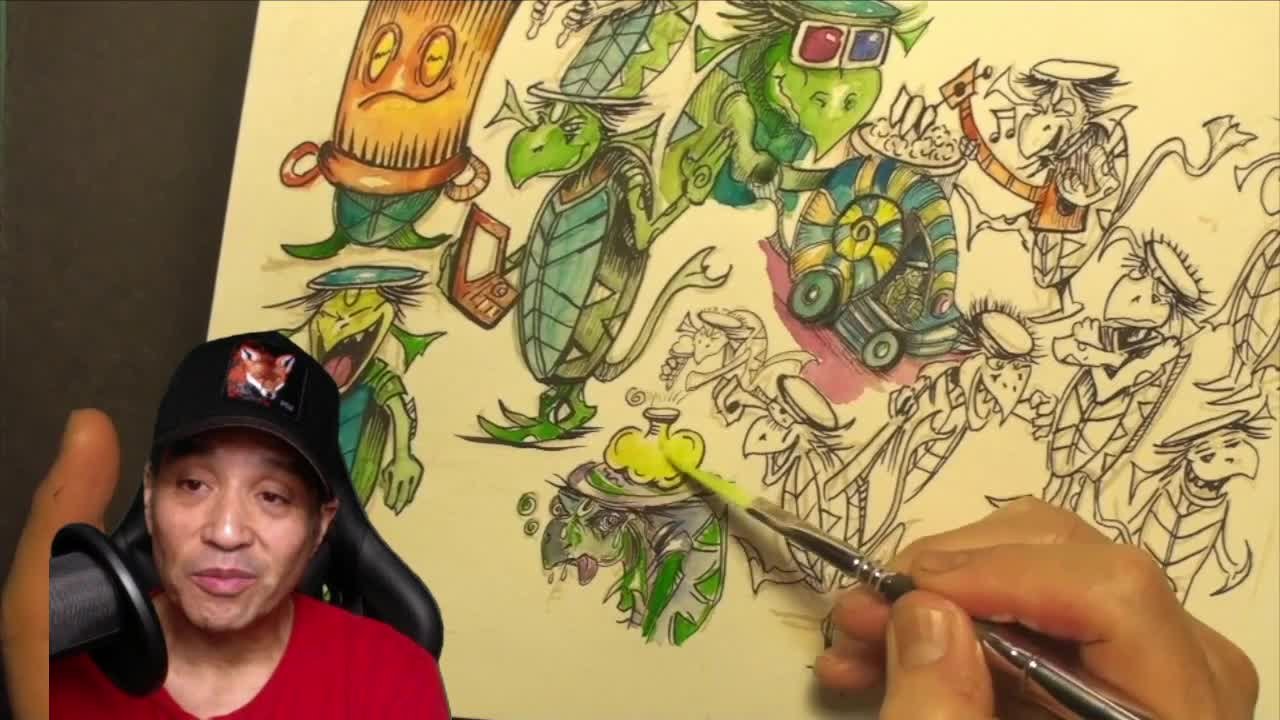
inks and acrylics. I'm creating original characters from imagined storyworld. So each little panel on one
of these tells a story. And so in this class
I'm going to take you through how I get started and show you a little bit of the sketching process and talk
about what tools I use for the sketching tools basically inform you of all the
different thoughts I have. The different tools I
use, the processes, the ways we bring
things into fruition. And we take it to
the next level. We're basically going to give it a real perfect way of letting, you know all that goes into
creating a one of a kind hat. Definitely go into all
the acrylic techniques. And when I choose to use the pigment inks
versus the acrylics. And basically take you
along for the ride. Like to always bring a
lot of inspiration and influence to try
your own artistic, creative characters from
your imagination and apply such powerful tools like these pigment ink pens and the basics of acrylics and industrial
way of doing things. I will see you over in video two where we will
start the inky. And basically we'll go through how I get the
drawing locked in. All my thoughts of how I render things to a story
level more than just rendering and how I pull off certain things like I
drew an aspirin right there. I'll go into a little bit of the illustration process and then how I start to render it with the ink and how the paint applies to
this type of surface. Get your ink pens out. You're not necessarily they
have to have a bucket hat, but get some type of
Canvas type material, maybe even a patch. And it all be about how to get your illustrations
and your details. And of course fulfill it with full color and bring
it to life and tell a story alongside of basically putting
it all on this hat. And then at the
end, while Locke, you get original hat, it has a storybook
element to it. It has fine our element to
it because I really used acrylics and really
painting layer and use a lot that tried and
trued acrylic techniques. And then I go back and forth with the pigment
inks like right here. I'm showing basically the end of the process and showing how I make sure the details are locked in so you can get the
story of what's going on. I have a lot of my
original characters that came from my imagination. And so I will talk about how I developed them and
brought them to a level where I can draw them over and over again and have the confidence to draw it on, on such a challenging
surface as a bucket hat. Course, we'll go into all the different steps and
methods to get there to make sure at 1 you have the fluidity and the surface takes all the ink and the paint. You can tell your story. So I will see you over
in video two where we will get into the
drawing process and a little bit of the inking. And then the last video
is the full-on color. And how we get to a final rendered story book
on a hat, on a bucket hat. Thanks for attending the
course that hit at a time. Painting original
characters from the imagination and acrylics and pigment ink on a bucket hat. C over video too.
2. Drawing - Inking: All right, Welcome to the inking part of this
class on Skillshare. And this is painting
in a bucket hat from the imagination
and creating a whole. Imagine a storyworld
with acrylics and pigment inks and
a few other tools. Just wanted to show
the process of this and really give as
many tips as I can. This is the part where you can really lock in your drawing. And of course, I
always recommend to use your
sketchbook and really learn how to draw
your characters or your original imagined
creatures are figures. And really learn how
they all connect. And of course, one method to use is use what's called
an art board. And you can do it digitally. You can do it just by collecting a bunch of
images off the Internet. Just that suggests
where you're going. So like I'm drawing
a tattoo right here, which is basically most
people know it as a dragon. But tattoos are pretty defined. So tattoo take on like a camel and maybe an
alligator and a lizard. They have horns that
are like a deer. And so I would, what I usually do is I don't really like
to make the art board. I like to make it in my mind. I basically go on Internet and start just typing in
search engines for images, all different types of things
that I want to represent. And I'll just spend some time observing more than
making an art board. And I'll basically go
on there and I'll type alligator and look at alligators from all
different angles. Look at how all
the parts connect. Go through the basic anatomy, figure out like how has it Joel's and how it
has its cheekbones. And specially because a lot of my characters are
imaginative characters. And so they may be
animals or creatures, but I also want to
build the structure and so I can make them smile
and have expressions. And so I think it's really
important the sides of the mouth and really defining the cheekbone and
not necessarily doing dialed in
anatomy or proper NAS, but getting the drawing. So it's fun and it communicates the story you're trying to do and the nature of the character. I'll look at camels and alligators and lizards,
and maybe horses. And look at deers and different types of deers and different types
of that type, fannie antelopes and
look at the kind of the way They had
their horns at all. They're Creature Feature parts. And like I said, I don't particularly
like to click them. I like to just look at them. I don't even like to
draw off of them. And I just kinda put it in
my visual library my head. And then I go into my sketchbook and I love using a big stick, which I'm using right now. And a big stick is
a ballpoint pen. And they have some type
of AgCl ink because it works with mixed media a
lot like after it dries, it doesn't smear and actually alcohol-based markers and
anchors can handle it. And then it's just a
great sketching tool I've always found for me, at least, to bring in the acrylics and render it all fully out as acrylic piece. But so I dropped my sketchbook. I get all my ideas down. I really get to look. And then when I'm
in my sketchbook, I really pay attention to how all the Creature
Feature parts of the character connect. If it has a hat
or horns or hair, different structure
like this tattoo, which is like a dragon. I make sure I pay
attention to where the neck is connected
because their neck on Dragon Tattoo is connected
to the back of his head, not like our next subtle
things like that. And I'll sketch
enough until I get the expression and
the look I want, because I'm a
character designer, I really dial that in. And then when I'm
comfortable drawing it, I'll draw it and I'll
actually look at the clock. And I'll sketch it
really quick in my sketchbook and
see how fast I can draw it and get the look
and the feel I want. And then when I'm
in to that level, then I bring it to this. And what I've found
on these bucket hats, the first ones I did, I didn't do what's called JSR. And Jess is basically a white acrylic that is a
ground for acrylic because acrylic works
really well because it's binders, polymer, plastic. So if you lay the
first layer down, the next layers can
smoothly glide across the surface and it really is good for
detailed illustration. I found that if I just
saw the whole hat, so this was Jess ODE with
like three or four coats. What you need to do, I
usually don't film it because it's really messy and
it's kind of boring to see. But basically I go out
on my front porch or my back porch and find the place I can
kind of make a mess. And I just take a
really cheap flat kind of pain or house painters brush. And I basically cover the coat
and then I am not patient. So I'll use a hairdryer and then dry it off and then add a second layer and add as
many layers as possible. It makes the hat
really not aware of. But that's kind
of the compromise you get because you get
such beautiful art. It makes the hat get a
little stiff and not so soft because a lot of these hats are cotton and they found
cotton works pretty good. Ideally, I'd like a cotton that's a little more resilient. That would represent
the kind of like a cotton canvas
and it gets close, but the JSR helps it like crazy. And then I found the gesso really makes a great service
for a ballpoint pen. And you can see, I'm sketching
a lot like using a pencil. I don't just go straightforward
to get the lines. I, I do kind of sketchy method and then I put the mixture, I pay attention to the
ratios and the perspectives, the proportions and put them
all right, and the angles. Then when I have them all in, I'll go back and darken it. But right there and just
wanted to show you the process almost in real time of how I sketch the
characters on here. I'll meet you over
in the next video. In the next video, we're going to color the whole hat and take
you through that process. It sped up pretty quick, but I'll see you
over in video three. Let's go color.
3. Coloring and Painting: Alright, welcome to video three, where we are bringing on
the color and the acrylic. So one of my favorite
part of painting and been working with
acrylics for years. So I'm gonna give you
all kinds of tips and kind of the pitfalls, but also the joy of
making a hat like this. First of all, the first
thing I'd like to cover is the tools
I'm using right now. Basically to decide
is the palate. And basically it's called a stay wet palette and it's
specifically made for that. You can make homemade ones. Basically you just
gotta get them absorbent sponge type material or like I enhance this one even though it was made
to be a stay wet palette, I use squeezy like a squeezy type sponge that's made out of
leather and stuff, also known as a shammy. And so basically I put
that underneath and I soak it in really hot water
for a little while. And then I have the
little spongy material that came with the
stay wet palette and I will soak that in really warm water and then
let it dry up on its own. Then I use what's
called pallet paper. And it's kind of like
synthetic paper, but it definitely does
absorb the water, but it also resists it too. So you soak that for like five or five
to seven minutes in the warm water and get it all dialed in and squeeze
it out a little bit. And then I'll try to do because the key is
just to keep it moist because acrylic paints, like I mentioned last video, are made out of their binders polymers,
so they're plastic. So it dries pretty quick and
it sets in pretty quick. Another thing about acrylics is not what you
see, what you get. Usually acrylics and
will dry a lot more darker than it looks because it's almost
like it's wet field, but it's just the nature of it. So I love to paint really bright and bold and so it really
doesn't affect me. But if you're doing
more realistic stuff and not so imagine your stuff, you've got to pay
attention to that. You might have to lock it in a little bit later after
you filled it all in. I'll talk a little bit about the brush I'm using right there. And many of the top, it's a very, I'm not going to
be brand specific with it. But basically a lot
of the top brushes, it is a Princeton brush. It prints it and makes
a wide variety of acrylic oil and mixed media
and watercolor brushes. And I think this one, can, I use it for watercolor? I actually have used it for oils and I love it for acrylics. And what is, is it's a 1 fourth
a brush that's the size. And why it's so powerful is because it's
kinda like an edge brush. So you could call it a dagger, but it's not especially
like a dagger is more like an angled almost going
to a dagger in there. I zoom on it a little bit. I found you can get really, really thin lines
with this brush. I feel I can control
it more than a really fine point liner
around there called lines, liners that have a really stretched out
point and usually made of really fancy brush hairs, natural brush hairs
from animals. And I think this one is, it might be, I don't know
if it's a natural Bushehr. It might be synthetic. Which is synthetic basically
means they use the brush. They simulate the brush
with synthetic hairs. They very much studying animal hair brush and
then simulate it. Sometimes there's advantages
they do it right? Because then it's more resilient and it could
take a little more BD. And you can kind of formulate into what's
called snap back to point. But I loved this burst because
I can wielded a lot like a dagger in the sense that I have the base edge of
it and the other ends. So I can do a lot of swoosh, isn't gonna get a lot of special effects and
a lot of coverage. Real quick by using
the rest of it. But since it's angled, if you prepared enough and you'd get the right
consistency of paint, right consistency and liquid. And you dial it in, you can get really fine details. And that's one thing because
I'm an illustrator to that I tried to do and I
would recommend to you if you like drawing
and you like painting, because painting to
me is more shapes and the light direction of things drawn is more lines to make what you're trying to
formulate, bringing the form. And they both use
light but painting, you can really get
quick feedback on the light by just defining the light and splashing
different hues and shades and
values that come in. The Princeton works so amazing. Like I said, all the
professional brush companies you can find basically what's called an angled brush. Yes. If you take care
of these brushes, especially the
princess didn't want, it will last a long, long time. It'll snap back to the point and the angled brushes the key. So now going into a little bit of my process of painting here. First of all, if you
look at my palette, I define my palette, the colors I'm going to use. And a lot of times I would
suggest for any of you, especially if it's a new
acrylic brand you're using. Spend some time on in your
sketchbook or scratch paper or something and find out all the colors that
really blend together. And I'm basically working
with an earth tone palette, but you will always see me
work from a CMYK as the basis. So I have a lemon yellow on
there or a Hansa yellow. Then I have a cyan up
top I just dipped into. Then I have a
magenta down below. Now, I built my palette a little more out so I can
get the vibrancy, which I loved to do and
punching the color. And so there's almost like a maroons sitting
next to magenta. So it's a darker red, more headed toward the
brown's earth tones sitting next to
the lemon yellow, the Hansa yellow,
and there's like a burnt sienna and
there's some type of warmer yellow That's going more towards the
red and orange area. Then of course I have my
darks over them, right. So I actually have some
bone black and I also have some Diaz I never
know how to say diazonium wherever the
dark, dark purple color. And then I have very dark, dark, the darkest blue
that you can use. And then I compliment
it with a slimy green, which I'm punching
the background off, and then some yellow green. There's all different names
for all different brands. And so you just got
to try them out. And then that's definitely
a fellow bleed blue or what some brands call
it as a primary blue. It's very headed toward the more the yellow
teal area of the blue, which helps you when you mix with us really
strong magenta, you'll get a beautiful violet
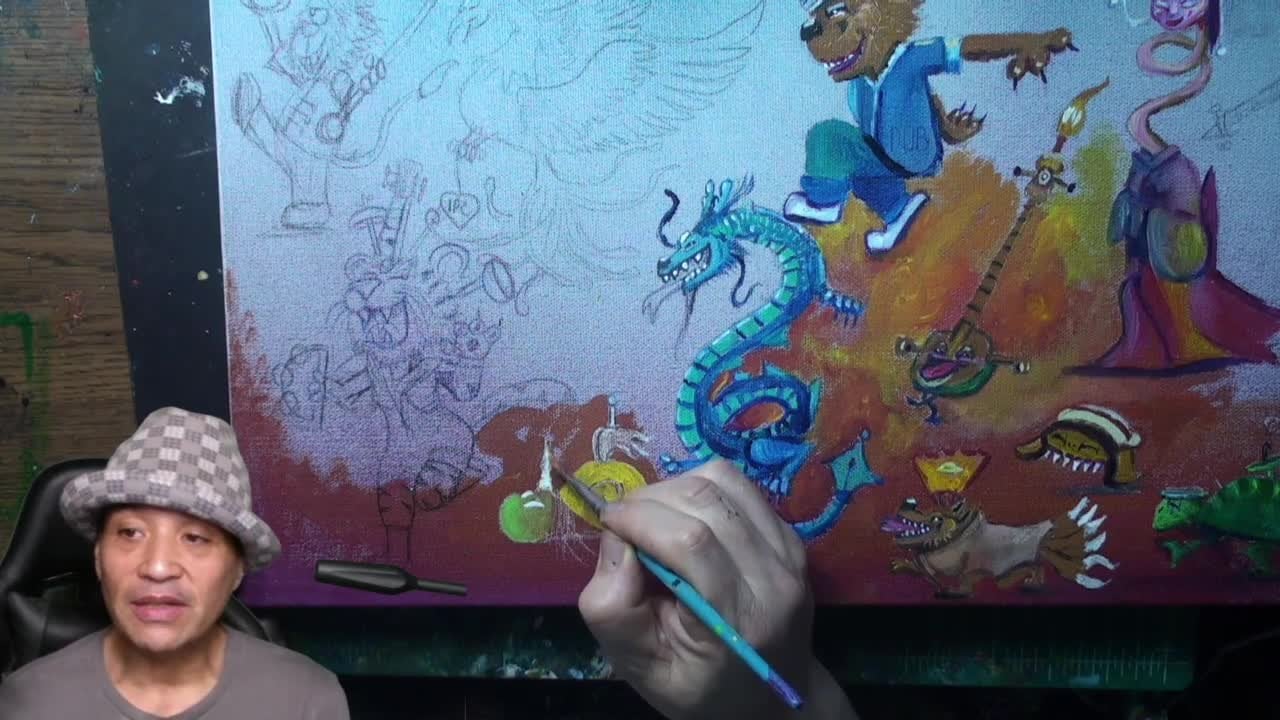
or purple instead of brown. Purple. Now in the layering process, what I've been doing here is I do what's called
negative painting. I paint, I sketched all my characters
and creatures and objects and props
with ballpoint pen. Just showed you the one
tattoo drag that I did. Just to show you the
process that and then I just enjoy myself. It does take some time. It is a challenging surface. Sometimes you'll try to draw a line and
then it'll go over a bump or something on the hat and he just
got to roll with it. And I think the more you do it, the more comfortable
you get in doing it. And that's how I've got two real comfortable
state to really get some really detailed
illustrations and be able to focus on the story more
than just painting the hat. I do all the negative painting. That way it really defines
the character punchy. And then it helps
me really decide the colors to color
in the character. The character is very
readable because once again, like I said in the intro, I'm, I'm a visual storytellers. I render 98% of my paintings and illustrations
to tell the story. And so if it's a certain
kind of fish and it's combining something
that's really out there and what
I call fantastical. You got to really make sure
you nail the shape of it and color it with the
complimentary colors so it pops. And it brings to the next level. Example right there is the fish has one of
those lights on the top. So it could be one of
those official fishes. But I invented it a lot where I've been It is in my
sketchbook all the time. Basically. That fishes beaming some light. And so here I'm using the
negative painting technique. I got that pretty dark teal mixed in probably
with a little bit of blacks or darker blues to get it to start going
through a darker color. And then I do the
negative painting. Negative painting really
works really good because you can see that
first that I just did, I totally use oranges
and agendas and reds. So when I put the
blue behind it, it just made it bump off the
page and fly off the page. Here is a real challenge
because this character is called Bob Massu in his little mouth and
he has a big afro. It's a challenge to
use those grays. And how do you get
grades in acrylics? You either add, start adding
a little bit of black. Another way to do
it is start adding white and then work in
a wet-on-wet technique. Not too much but enough that you can start pick up the edges. So it's just not a pure, pure white that's going down and you can start to
see more values. And then just like
I've been a form, some people have the
background of inking, even if they just loved comics, they were always
paying attention. There was grabbing
the tools, right? To hone that. And then I think the
real magic comes in when you commit and you go, wow, I do this and I'm good at it and nothing stops
you from there. And it's a lot of what
I hear about a lot of acrylic rendered stuff and getting good at acrylics
or you can come forth. And one of the most
important things to me, which I'm demonstrating here is the ability to tell a story. And a lot of that can be
done through your mouth, into your voice, but a lot of it can get
grounded in writing. And when you write
it, you also have a more process of really understanding
where it came from. If you're like me
who really loves to use Rick mediums
and try new methods. And especially this is
why I like bringing it here to Skillshare, to basically always show you the cutting edge of traditional
media in some digital. But mainly I follow all that. So I can basically inform you on all these new
techniques because another thing I work really a lot with is integrating
the computer, not necessarily to digital art, but to integrate the computer, to acknowledge that we are living more of
a symbolic world. And like I tell people, most people is if you get a chance to play with
the software, first of all, really realize,
go back and forth to the acrylics and
realize the power of how they've evolved
that from how people have painted for years and centuries
in the physical world. Here's where I'm protecting me and find all those cases. Yesterday. Ballpoint
cameras have gotten down. Incredible maintaining. I also have a whole
bunch of other prime. These are lunar color than me, but still they're
the same thing. And they said, What's key? Major tip, I would always try. Not great brush tip more the street but sit that
has all the hairs. And here's the number one tip. I'm leave you with. Make sure that the
acrylic has some time to dry because especially
with a fine liners, when you go over the
acrylic is still wet. It gets up in the pen and
you can ruin your pen. It doesn't do as much with
the brush pen because the brush pen is made to the way painters
loved dirty brushes. It brings some of the
color over with it. So get out there, find a canvas or even just a patchy material
JSR and paint along with me. And then when you
get confident and get one that hat and come back to the course and put it
on and take on a hat. Thank you for watching my Skillshare class and
I'll see you folks soon. Lease and feedback. I loved the feedback you've
been leaving lately. And that really helps me do cool creative ideas and
bring you into my world and bringing more incredible
learning experiences right now on
Skillshare that time. Thank you very much, piece.
 Ipaintcreatures . poet painter illustrator and storyteller, drawing and painting from the poetic imagination