Transcripts
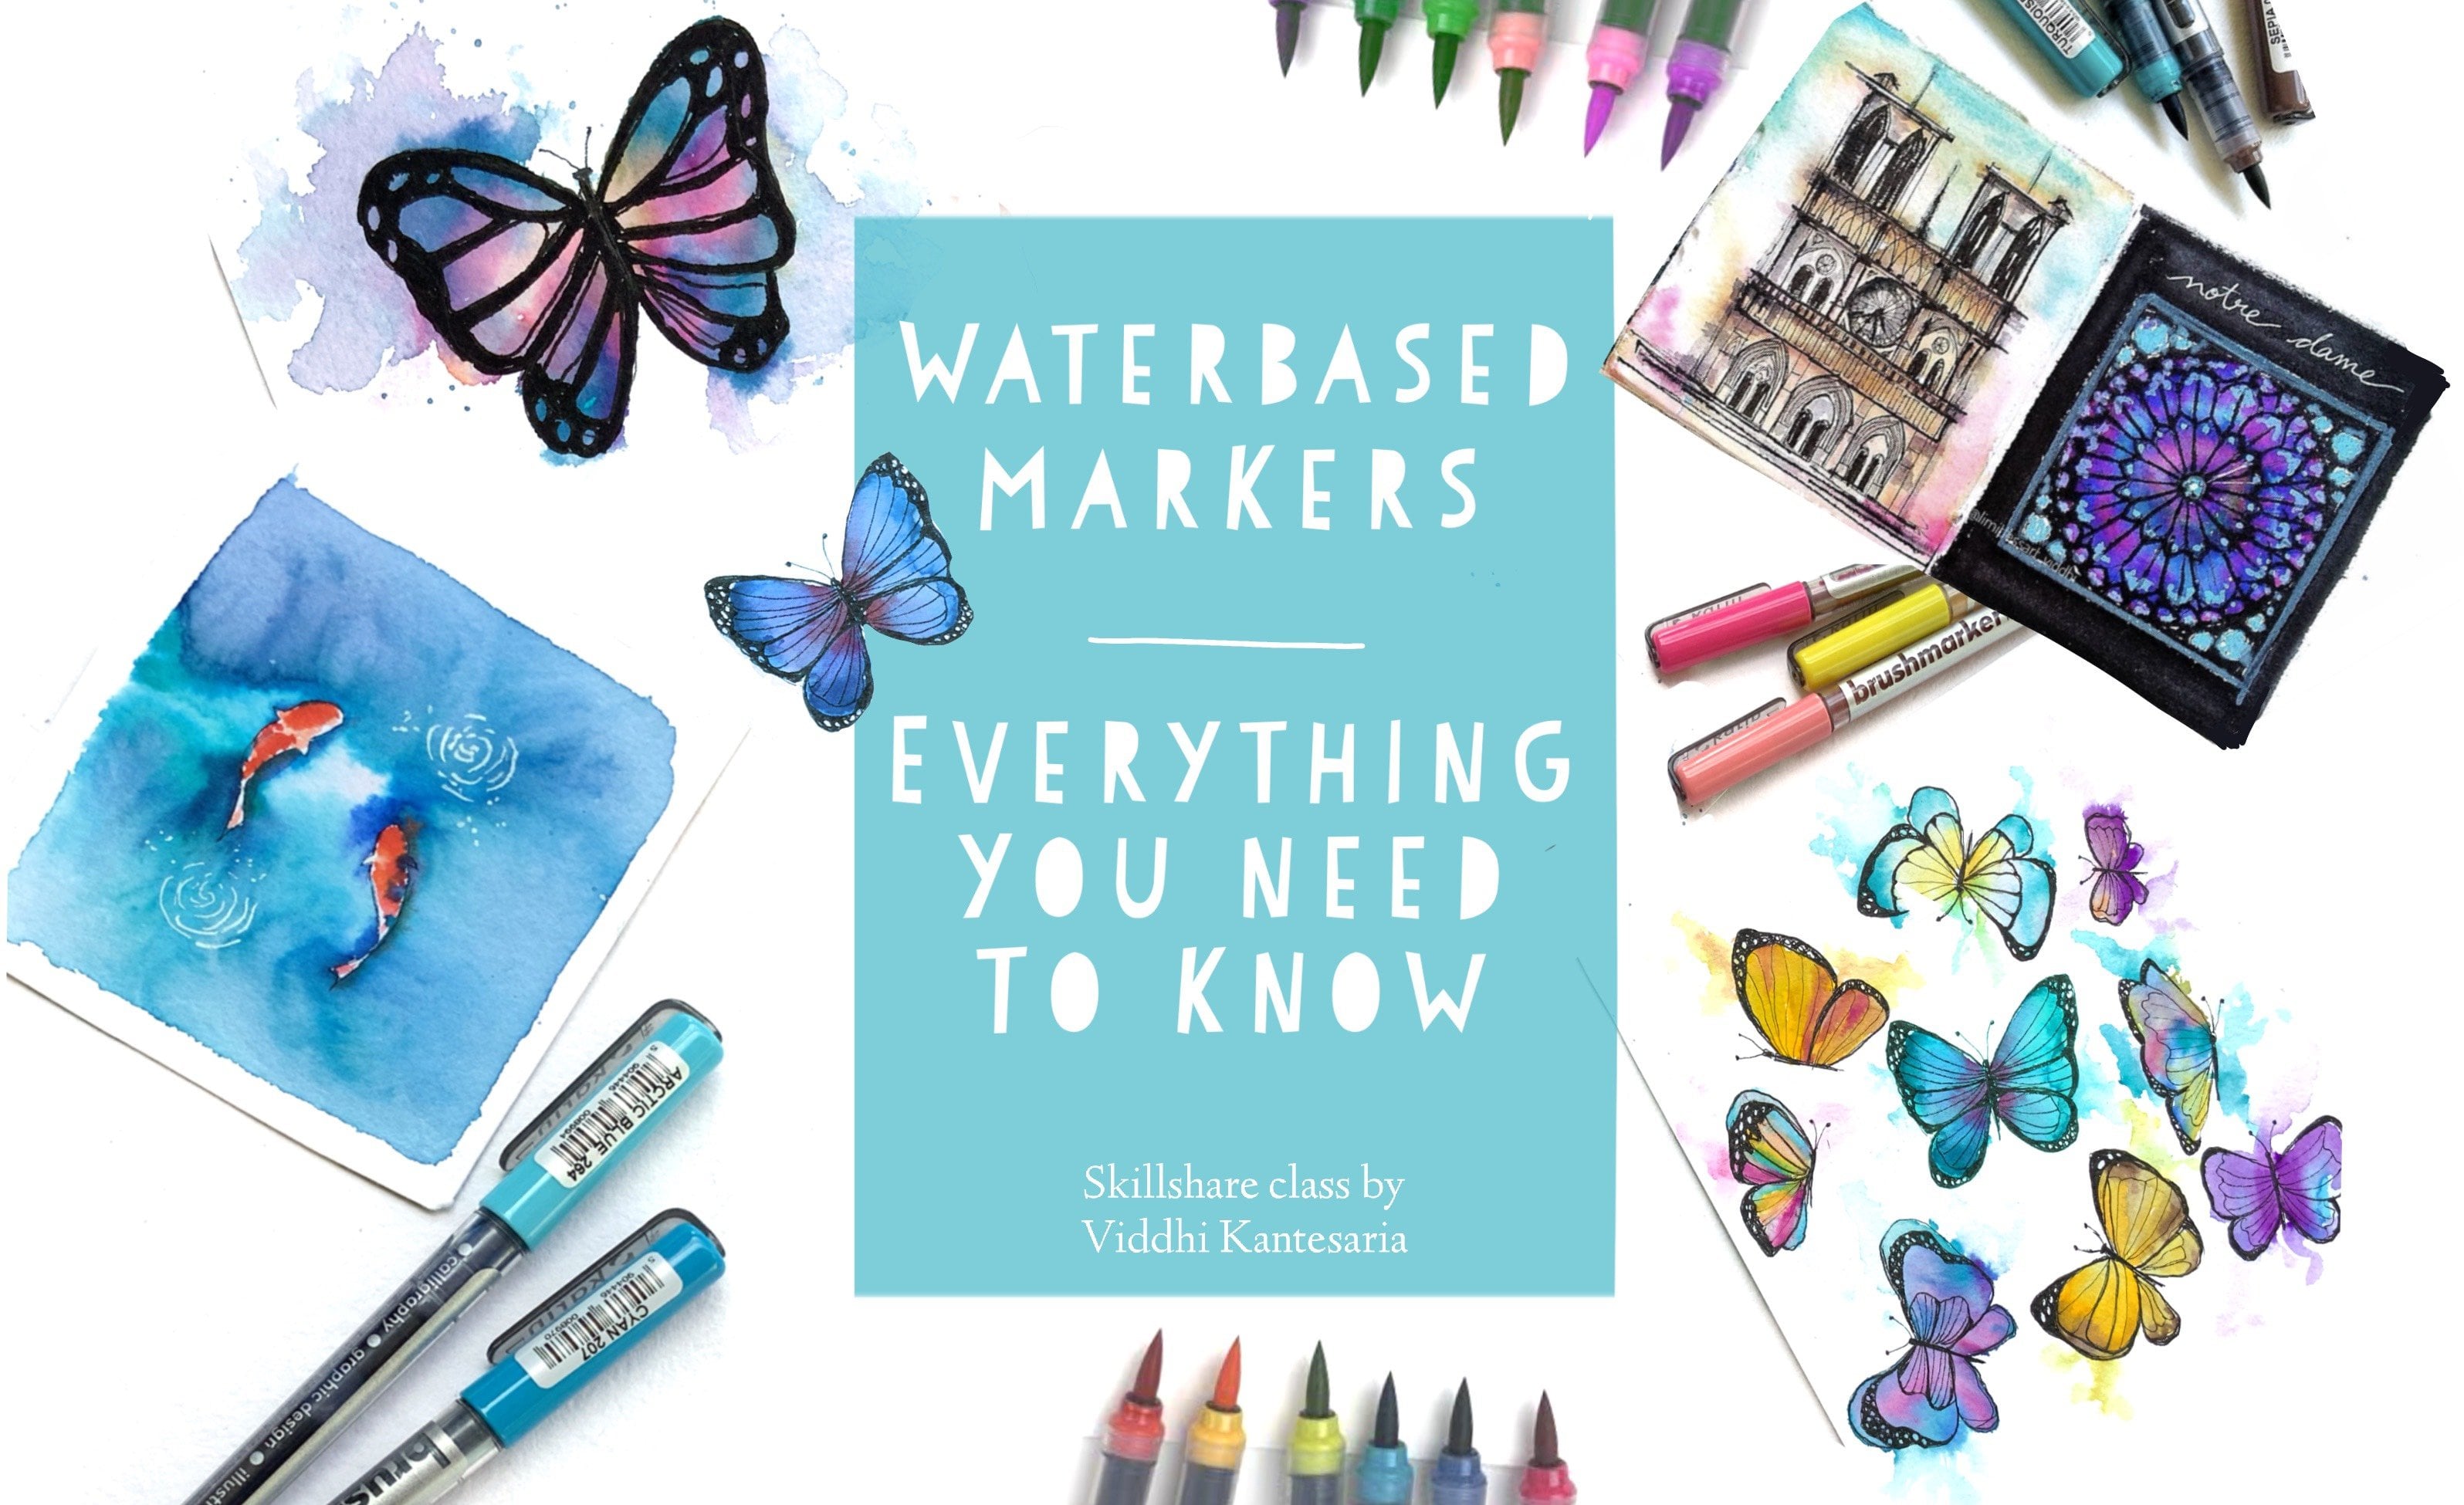
1. Introduction: Hi there. Welcome to my second class. But what it means markers for the country. Syria from limitless. If you have taken my previous club with what? These markers where I cover all the basic techniques and sample vilification, you are perfect to take this class. And in this clause, I'm going to share the most easiest and the simplest way to create afforded stamp side illustration with water based market. I'm going to walk you step by step to love the entire illustration, right from basic players to the finishing skins. And by the end of the class, you would have your own beautiful illustration that she will be proud off. So come join along with me. Let's create and have fun together. I will see you in the class by
2. Materials required : the materials that are required for trees. Clauses. Very simple. Obviously, you need some brush Marcus off any water babies Marcus will do. We would need colors like blue, green and some brown colors. You don't need a lot of color stow, so don't worry. Next you would need is thes pigment liners or the micron pens. And I'm having off two different sizes. One is off 0.1 and 0.8 for me to really with different line weeds and a white pen gel pin. And any watercolor brush will do just toe give that watercolor effect, and you would need off course water. And for the people. If you have seen my previous class, you would know how to do the the paper test for picking or right people to work with Marco . So you can watch that if you haven't watched it yet. And next you would need some circular object to draw a circle. Amusing my masking tape just to drop outline and yeah, that's it. We are ready to take class
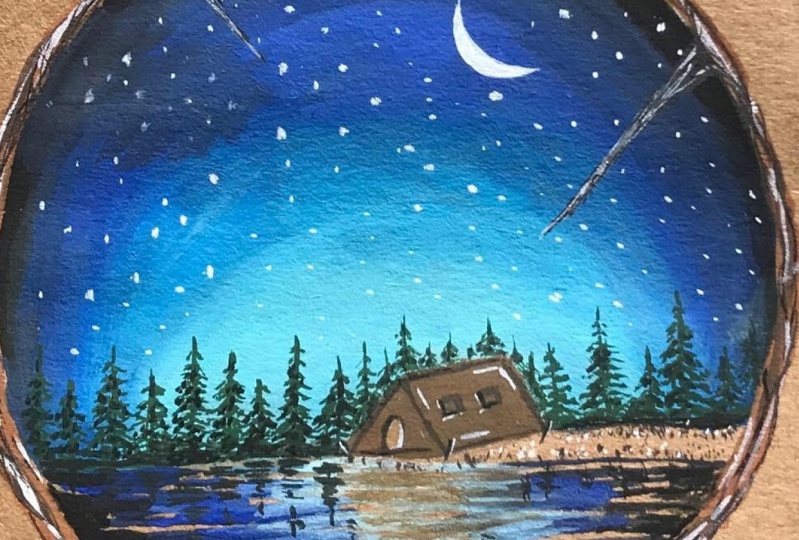
3. Part 1 - Adding first layers : we will directly get started with our class projects because everything have covered in my previous class. So if you watch, it's gonna be easy for you to just capture from kill. So what I've done is already drawn a circle, and now what I'm doing is with the waterproof pen that is micron pin. I'm just drawing and lines like this, which is where the trees will be. And I'll draw very simple cabin or house like it was just a triangle and rectangle shape like this, and that's it. So this is the basic drawing that we'll be doing before we start painting with the water based Marcus. So the first layer that we're going to create is going to be light. And it's basically a Bagram Leo, for which we would be doing the wet in red marker technique. For that, I'm just reading the bottom part that is, like about the lines that were drawn where the trees are gonna be there. So what I'm trying to give is just applied cream background behind the trees like that. So I'm just waiting that part of the woman, remember, I'm not backing the whole part just around the house, and about that line, just little water will. So you don't have toe put a Lord off water because their chances that the calos might spread so much so medium water is more than enough. And once you're done fretting that part off the people, what you do is take your light green. Marco INGE's do this wet on wet technique and do it from the bottom so the colors spread upward, and what you do is just draw these lines on the wet sofa so the calos will spread. It's just like giving you the idea off how the pine trees will be so drawing and with the brush. Man in this direction will also have background like perfect background for your trees in caves refuges. Do it. Oh, very randomly. It might not go well with the trees that you're going to draw, and later you can just add more water and spread the colors like this little bit. So that becomes a beautiful background for the pine trees. And once you're done and happy with the background off the trees, would you can do is pick up the blue markers for the sky and just randomly scruples. Remember that like we did the wedding with technique, because we wanted to give a soft background for the trees and for the sky we're not doing wedding with because we weren't very bright and a nice guy, so that if we do rated wet, the colors might get little lighter. So that is the reason why there's no acting a bit just randomly scribbled all the different shades of blue you have because and then everything is just going toe smudge and give you different shades of blue. That should give you a very beautiful sky and now a real pig, though brush and taken some water and just blend all the colors you can add, like move water and blending those sent over which we wanted to be little light and glowing - and ones you're done with sky. If you feel that though background for the trees has become little lighter when in contrast with the sky, you can just add in just little more green After waiting that area again and just put in more colors, this is only if you feel like, but if you feel that your green is like dark enough and good enough. You can completely skipped the step. And I'm just repeating the same tang, which I did before. And I'm just blending it well with the sky so that it doesn't look like two different patches like one for the tree and one for the sky. And the next is the bottom part, which I'm just gonna vet and randomly hard blue and green colors. So it's basically like a reflection. Oh, the green colors coming out because the ink that we put from the brush pain is little concentrated. So it is just coming off when you add more water. Sony. You need to be very careful sometimes. If oh, if the color bleeds like this, I'm just adding a little blue. After that, I'm just going to load my brush with some water and spread the blue color, and I'm just keeping a little glowing and little white somebody close to the house that gives beautiful effect when it is tried and a marriage a little bit off brown. It's basically a reflection, or just like to bring in contrast with the house because the house is going to be brown. So I thought I'd just given some brown also below, so that the entire image comes out well. And what additionally also do is just like adults love black color on the corners, as in the top off the galaxy that were being dead. So it becomes like, more vibrant and like, you know, intense and dark, and it will actually give a very nice effect. And if you woz like I could have done this with, though previously, when I painted the sky. But then, if I did at Black Color, then there would. The black color would spread and blend into blue so much, and I think it would bring in more black. So what I did is added as the second layer. So like I can just layer it on top off blue. And if you want, you can just add in more blue and just add more colors. If you feel it's a little light or lacking in any off the corners. And I think the forced layer off the last project is almost done. I'm just lending it more to give a nicer effect, and that's all. Once you're happy, just let this dry before we add the next layer
4. Part 2 - Adding elements : after the first year is dry, we would add in mood details, toe this illustration, and I'm just putting some brown for the house just little bit. I'm not fully coloring with brown or it will be too dark just adding another shade off to. And then I just pick up some water. INGE's blend it and that's it. And next, what are gonna do is just pick up the same brown markers and just all klein it or the galaxy off sky that were painted. So this illustration is basically like you are painting on a wooden piece like that, so it just to give that would effect just drawing with the brown Marco all around. First, I'm drawing just a very random like So you see how the circle that I'm drawing is not perfect. It is just like random, please, so that it gives that for texture and feel. And after doing it with the light brown, I'm just doing it with the Darko brown Marco. And after you're done with that, just pick up your green Marco next and draw some simple trees directly. They don't have to be ready perfect or something. You can just watch how I'm doing it and how randomly it ISS. And I'm going to draw a couple of more trees like this, and you can closely watch how I'm just drawing directly. You can feel free to fast forward this if you want to do it on your own. But if you want to just follow along and troll with me, you can simply keep continuing. And I leave the video and really time so that you can do that. It is very important to wait Eve, different sizes off trees. Or does your illustration will be very monotonous with just one size off tree and once you're done, and then if you feel that off, some trees have lot off gap in between. What you can do is just take some water and your brush and spread the colors a little bit so that the gap doesn't look very empty and it looks little filled. And once you're happy with it, just leave it in the next lesson. We will add in moody deals and finish this illustration.
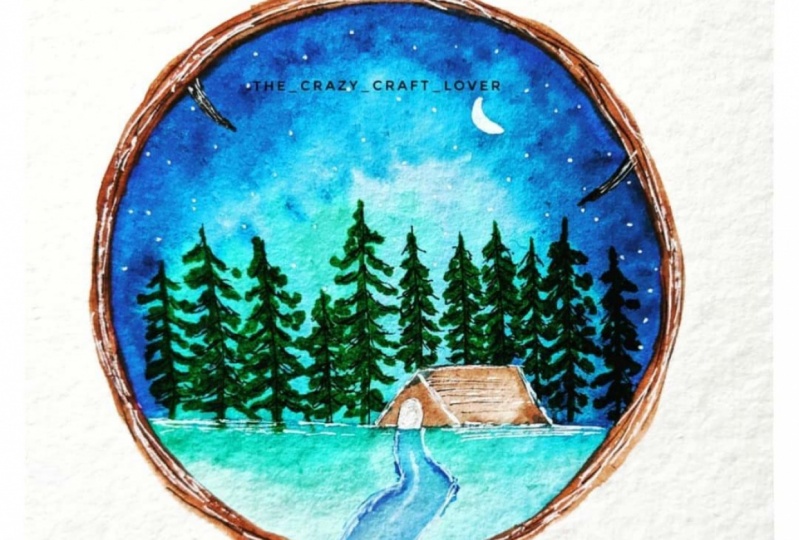
5. Part 3 - Adding final details : So this is the last part off this class project where you will added more details and I'm just picking my my trunk pen and adding more details and outlining the house is drawing a little door with that. And then I'm picking my 0.8 Marco. I mean, though, pen and I'm just simply doodling or you can even call scribbling and whatever. But I'm just basically outlining the trees. It just a very droves and, oh, lose way off doing it. I think it's more about, you know, enjoying the process off creating it. I feel that these lines that I'm doing just give all bringing more structure to the trees, which is all redone with the Marko's. Oh, I don't know, it's a different style, but I really like doing this. And yeah, I'm just going to continue for all the trees like this. You conclusively watch those strokes that I'm doing this no perfect stroke, just like very random. I'm not sure of anyone will personally like this, but I really like it, and I'm happy with how it is turning out. And once you're done with the pen Vogue, you can take in the green Marco and add a little more Kahlo's toe. Bring in that shadow effect kind off, and after this I'm going to pick up my wife, jump in and add in some highlights, like the door and also some on the roof off the house and also added some stars directly with the spin. You may also want to use squash or something if you want, but why Gel pin is just a quick and easy V to add in details toe such illustrations. I am also drawing a little moon over here, a present moon and the thing that will make the entire illustration look more pretty. But a little more elements, and I'll also add the's textures and highlights to the would also with the black men and just drawing. Oh, just a crack, a wooden crack kind of thing. So it gives the feel off. Oh, the wooden sly eyes. I'll add some highlights, but the white gel pin, too, and I think detail ing is the most important part. Adding all these highlights and shadows makes your illustration look more interesting. I'm happy with how this looks now, but I think I can add a little more colors at the bottom and bring in more contrast. And I think I can also add a small part ways. Just add a little blue and I'm blending it. And now I will just take a pen off omicron pen. Just draw a gold. But we like this so that it doesn't look empty over there. And I'll take the Blue Marco and just draw on one side, just little, but not even the complete once A just a little bit. And I'll just stick water in the brush and spread it across. And I think this looks great and that's just little central line in the part way. And there you go. You are done with the illustration, and I think that looks so pretty and isn't It's very simple to illustrate with these brush pens. I mean prep watercolor. It would have been more complicated. Toe understand and control the brush and the water word. Water based Marco's just makes it already easy
6. Final thoughts and thankyou : So that's all for the class. And you have your very own beautifully painted story. Forest illustration. Of course, you completely different colors and combinations, like sugar with Pinkola Sky and rest is almost the same. But you can always try different elements and different times and creative. And of course, you can even try with watercolors if you want. And I think now that you know how to work with this illustration in different players, I think for the colors might be easy to, but again depends upon your skill. But I wouldn't put it. You just tried an experiment, and still and and lastly, if you really like my class, I would appreciate if you could leave class review and also create your class project and upload eo mich over. If you're falling me already on skill show. You can also follow me on instagram so that you get sneak peeks and next class of dates ready soon on. Thank you so much again for taking my class. I will see you soon in my next class
 Viddhi Saschit, Author|Artist|Surface Pattern Designer