Transcripts
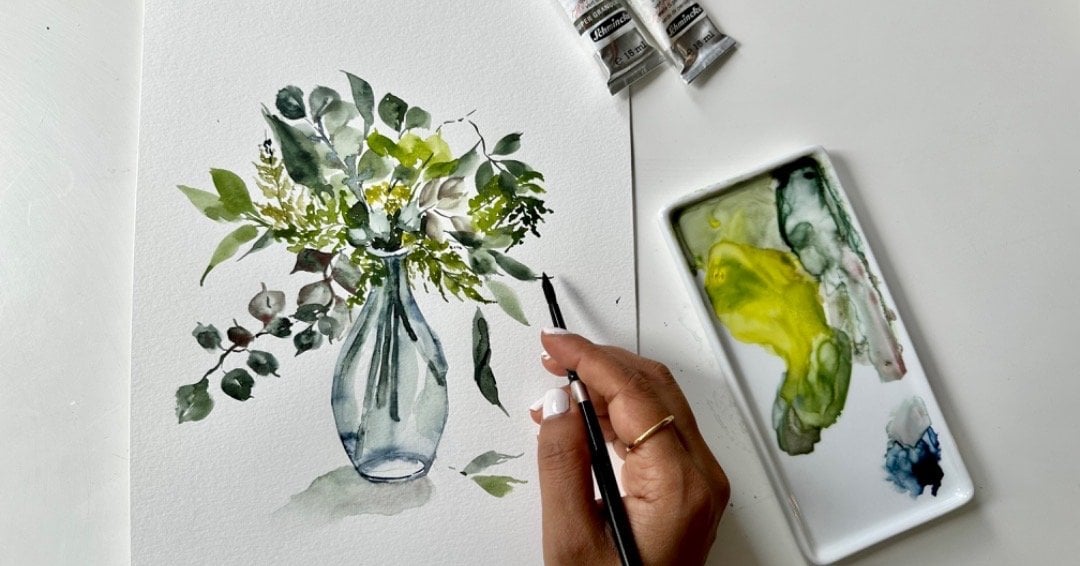
1. Welcome to the Class: Hey, this is Kunshan and you probably know me as Petite Procrastinator from Instagram. I'm a watercolor artist and an illustrator. In this class, I'm going to show you how you can paint a leaf using a live subject like this. I have used the same process to paint many leaves like this and believe me, it works. It may seem a bit daunting to pain from a live subject, but with patience and practice, I'm sure you will be able to paint just like this, even this beautiful dried leaf with all the twists and turns. I will teach you how to study the leaf to get your color palette right, then how to draw the leaf in correct proportions, and how to layer paint to get the depth and then to add the details to give it a life-like appearance. While you don't have the same leaf, but I have included a photograph of this leaf in case you want to paint along with me. With the techniques that I teach you, you can use any leaf as reference and paint along with me. I'll see you in the class, and I hope you have fun.
2. Select the Perfect Subject & Supplies: Before we dive into the class, I wanted to talk about a few tips for selecting that perfect for our subject, if you're trying This for the first time. For example, This leaf although really beautiful, I love that yellowish-green color that it has. It won't make for a perfect thought subject, because it's really soft, it's not able to hold a shape. What I'm looking for is a leaf that can hold a shape slightly more firm. You should avoid a leaf that is something like This. Now coming to This leaf, I really love the color and the shape of This leaf. But I may not choose This leaf as my first subject because, firstly, it has only one shade which is the brownish color, and it's difficult for you to see the tonal differences as a beginner. Secondly, This leaf when I place it on the paper on my table, it is rocking. It's not lying down flat on the table on my paper, so it will be difficult for me to keep that perspective if it's not able to stay stable. Now coming to the leaves that I think would make a perfect for our subject. These leaves are medium-sized, they have two or three different colors, they can hold their shape form and they lie flat on the paper when I put it down. For the first leaf, I see This beautiful green-yellow color. It has two main colors and it has a little bit of burnt umber. Then the second leaf, I think will make a great subject, because it has three different colors which are quite prominent on the leaf. Thirdly, which I use for This project is the longer leaf, which has two different main colors and some details. Keep These tips in mind, if you're planning to choose your own subject for the class project. Since This class is for intermediate level, I'm guessing you already have your favorite paper, brushes, and colors ready. But I'll just talk a little bit about the supplies that I use. This is Clairefontaine 300 GSM hot press paper 100 percent cotton. I like using This pad for all my detailed artwork, because This paper is very smooth and it's easier to add more detailed work in This. But for This class, I'll be using my Etchr Perfect Sketchbook, which is 300 GSM cold pressed paper 100 percent cotton. This paper has a rough texture. But I wanted to use This paper for the class, because I think cold press paper is more popular and I wanted to show that it's okay to paint This artwork on cold press paper too. Unless if you want to add really minute details, you can use hot press paper. But if you have cold pressed paper, then go ahead, use cold pressed paper for This class project. Now coming to the brushes, I will be using my Etchr watercolor brushes in size 6 and size 1. Apart from that, I will also be using This Princeton Heritage Short Liner in size 10 by 0. I like This brush for making all the detailing works, I think it's just perfect for those. For the paints, I will be using my two prints with a ceramic palette. But if you want to use bands, then that's perfectly fine. You can use watercolor bands or any other kind of watercolors that you have. In fact, if you want to use gouache paints, you can go ahead and try This with gouache instead of watercolors. It'll be interesting to see the results. That's it for the supplies, I'll see you in the next lesson.
3. Leaf Study & Color Palette: In this first chapter, we're just going to study the leaf. When you're working with a live subject, it is really important that we study the colors and we do the picture in case the subject changes overtime. We do have reference of the original subject. I would request you to take a picture. I have the picture of this leaf in the class resources, you can use that. But if you have your own leaf, then place it on a white paper and take a picture in the natural light. Once you have done that, we will come back and study the colors which are there on the leaf. The most prominent color that I see is sap green and for any darker shades of green, I'll use a bit of olive green. I see the center has a brownish thing, so I will use [inaudible] for that. I see a bit of yellow dots, I will use lemon yellow for that or you can use a little bit of ocher, I saw a yellow ocher. I do see the center line has a whitish thing. When I'm painting actually I'm going to keep these veins and the center main vein lighter than the rest of the leaf. You'll understand better when we start painting. I will suggest you do a swatch of the colors just like this to ensure you get the colors as close to the rear leaf as possible. Once you've done that, I'll see you in the next lesson.
4. Drawing the Leaf: Welcome to this chapter where we start drawing the leaf. What we will do now is draw an outline. I'm just using a simple HB pencil for this, and I'm going to draw the outline. Place it on the paper formally, and draw the outline of the leaf roughly. You can use this technique for any leaf that you have. I use the same method for all the leaves that I have painted so far. While your leaf is still on the paper press it firmly. I'm going to mark the end of these wings just as a reference. This is an optional step. If you don't want to do it, it's perfectly okay. If you're comfortable drawing the wings free hand, it's fine. I'm also marking some of the dark spots on the dried area so that I remember it. There are a few here and here and then I can make the rest later. Move your leaf aside. Now what I'm going to do is just make this more prominent. Start with the center. When you are doing in this side, I can see some markings like the dried part of the leaf, which I want to mark right now. Then I want that to mark this part that is turned here, so I would love that. It's turned here as well so I am going to mark this as well. Now we have the drawing done.
5. Painting the First Layer: Let's begin the most fun part which is the painting of the leaf. Before we start painting, let's see the lightest shade. The lighter shade I see is sub green and the yellow. What we're going to do is wherever the yellow is supposed to be, which are these dots here, I'm going to drop yellow first. Just erase the marking first. Take your lemon yellow slightly and just drop it where it was supposed to be. Do the same for the rest. The reason why I'm erasing the pencil marks is because once we put the lemon yellow there, we will not be able to erase it and lemon yellow is quite light, so you will be able to see the pencil marks under it, so you don't want that. Let's put the lemon yellow in all the places where you can see it. Even in this point I can add it as a bit. I see some lemon yellow on top here as well, very slight but there is like on the borders. That's my lighter shade. Next, I'm going to notice the wings. The wings are really light in color. What we're going to do is leave these pencil marks untouched when we put the sub-green. The [inaudible] brown can be put on top of the sub-green, so we don't have to worry about that. I'm going to put sub green on the entire leaf but leave the veins untouched. Let's see. Take really light wash of sub-green. In this first layer, I suggest everything should be really light, so if you want to join something later, you can do that easily. Let's leave the center wing as it is untouched and leave these pencil marks untouched for the side wings [inaudible]. Just add the paint. Really light wash for the rest of the leaf, which can be made darker later. I'm in here right now is just to put the first layer to give us the guidance of where the wings should be. Let's do that all over entirely. For this last part, the wings are actually not as light as they are for the rest of the leave, so I'm going to just put the entire leave with this light wash for the tip. Because I'm going to add our darker shade on top of this and this light wash would become the vein eventually. You'll see what I mean when I get there. We are done with the first, congratulations on laying down your first layer. I'll meet you in the next chapter where we're going to add the darker shade, which is the [inaudible] brown and some more details to this leave to make it more realistic. See you.
6. Painting the Second Layer: Now, we're going to start adding the next layer, which is the Van Dyke brown. With your brush, light wash a Van Dyke brown and study leaf and see which areas you want that Van Dyke brown to be. When I'm looking at the leaf, I see it's all along the center, and it's quite prominent here. I will start adding the Van Dyke brown and make sure it's really light and you also don't spread it on the leaf. Just have this stepping motion when you're putting the paint. You don't want it to be too perfectly spread around. Have a light wash and then just put it like these small dots but you still have the green popping out and it looks realistic. Do the same on both sides. Study the leaf carefully when you're doing it to have some similar effect. But the bottom part about painting a leaf is that don't spread the color. Just use the tip of your brush in a stepping motion to get that leafy effect. This layer is done as well. I'll see you in the next lesson where we start adding more details to this leaf.
7. Adding Details: Hello. Welcome back. In this, we're going to start adding more detail. But before that, I'll just erase all the pencil marks and they're just annoying. I get rid of those. For some reason I completely forgot to paint the stem of the leaf. I'm going to start building this stem now. First, I'm using my smaller brush. This is size one. I'll just add some awesome color for the stem. Then you're going to go ahead and add some details. What I'll do is just pick up the color and add some van dyke brown on the edge, does this and merge it with the stem. It's a nice realistic effect. Let's see, now what should we do first? I'm looking at the leaf and I'm seeing that I need to give more details to my central vein first. Let me start with that. I'm taking my van dyke brown or really dark shade the stem like a good value, not very watery. I'm going to start adding that here. When you see the vein I do see some high lights and low lights, I'm going to try and see if I can get the same. Smudge it a bit, then take your van dyke brown again. This one is leaving a really thin gap now that I've added the van dyke brown. Very barely visible. Just a bit. Let's add this, shape the rest of the center vein as well. I can see it goes all until here actually, quite low. I'm going to get that all the way down. I'm going to start adding more details with Van Dyke brown. My central vein looks pretty good, better than before. But I'm going to keep it untouched for now. Now, I just leave it there until it dries and I will get more details to the leaf first. We're using sap green. Let me just finish this up which is just adding the clear edge and leaving the center. Watercolor usually dries up quite light so if you feel some of the edges have completely vanished like I see here, it's pretty light, just add those details again. Let's go to the leaf now. Now, I'm going to again use the same small brush and I'm using my olive green color this time, which is slightly darker shade. I'm going to start adding all the details all along the leaf. I'm seeing like the leaf is quite dark here, so I'm going to start adding details here and seam stippling motion, a little bit of dotting motion. Make dots instead of spreading it evenly. That gives a slightly more realistic look to the leaf. Now, since we have a smaller brush, use this opportunity to get the veins really thin and narrow and that will give a really good effect to the leaf. The idea for the stippling motion is to have the first layer see through so it looks like it has some unevenness, but it's still got some color, it has the lighter shade of the sap green under it showing through. I'm going to do the same here as well. On the top of the leaf, I do see some green which has not been prominent. I'll make that prominent. This is the step when I even make my veins more prominent here. Let's do this for the entire leaf now. Keep studying the leaf as well. I can see the veins are thicker here and thinner as they go. I'm going to try and see if I get the same effect. I'm using a bit of okra for this turn. Just to make a different shade here and then continue to add olive green. I know this is a very time consuming process, but the end result is really rewarding, so don't lose your patience when you're printing. Just keep going. You'll see it will turn out to be extremely beautiful. Not bad. So far, so good. Continue this process and you'll be done soon. If you're doing this for the first time, maybe you can choose a smaller leaf and then as you get more confident with this process, you can progress to a bigger leaf, more complicated ones. I have made really twisted leaves as well and the end result is so rewarding always. We're done with this step. I'll see you in the next lesson.
8. Finer Details: Welcome back. In this lesson we are going to start adding more details. I would highly recommend you take a picture of this and see, compare it with the picture of the leaf to get a better understanding of what you need to change. I did that and I can see that these whites are a bit too prominent, some are too thick. I want to make them slightly thinner. Now I'm going to use a detailing brush. Mine is size 10 by 0. You can use any detailing brush. This time I'm going to use silver and dark brown with my small brush. I'm going to go ahead and add some more details right along the veins. It has to be really thin and it seems to be too thick right now. I'm using my brush to smash this with the background. I'm doing the same here. In fact this vein is barely visible, but I want some definition here so I'm going to keep it. Go as close as you can, but don't completely cover it. I'm going to go ahead and do this for all the veins. Now it looks better because I don't have those thick white lines. I'm just adding some details and color to make it more even with the background not standing out. Not bad. Pretty good. I would say this is done. But if you want to go ahead, add some details, make some changes, then go ahead and do that. I'm so glad you joined me. I would love to see your project and leaf that you have painted.
9. Final Thoughts: Congratulations on finishing the class. I'm so glad you joined me and I look forward to seeing your creations. You can either post it in the class project here, or tag me on Instagram @PetiteProcrastinator so I can see what you made. As a final thought, I'd like to add that painting from a live subject like this may seem a bit daunting, but it's not so difficult if you give it a try. The end result is always rewarding and I'm sure you will have fun as you progress. Thanks for watching and see you in the next class.
 Kanchan Kaul, Artist and Illustrator