Transcripts
1. Welcome!: What would your reaction
be if I told you, you can paint this
entire hydrangea without even using
a reference image. I know it seems difficult
and I've been there, but now I have a tried
and tested method to paint hydrangeas
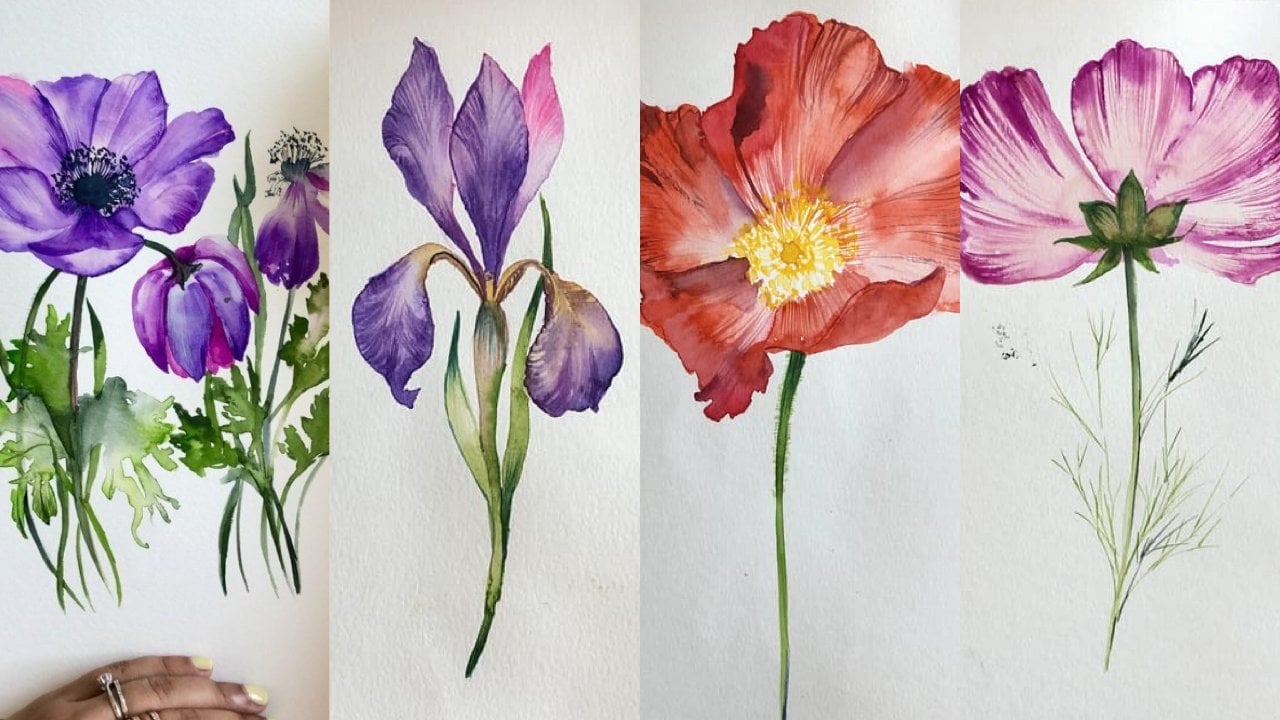
that works always. Hi, I'm Kanchan, I'm an artist, illustrator,
and an art educator. My art has been used for books, wall art products
and even tattoos. I truly believe that
sharing is caring, and that's how my Instagram account @PetiteProcrastinator
started, where I share all
my tips and tricks, as well as my experiments with watercolor and digital art. Soon I started making more in-depth classes
on Skillshare. Now I have a strong community of hundred thousand
on Instagram, and this is my fifth
Skillshare class. In this class, we
will break down the hydrangea into easy steps. We will first practice
how to draw each flower, then we will learn how to
paint the first layer, and finally go on to
add more details. For the class project, we will put all
our learnings from the practice lessons to
make the entire hydrangea. This class is more
than just painting. It is also a fun way to
work on your patience, which gets better with practice, and stronger when you see
a beautiful end result. My method of painting
hydrangeas is not only fun, but also very relaxing, so grab your paints and brushes, and let's get started.
2. Class Orientation: Now, let me walk you
through the class. We will learn the hydrangeas
in a step-by-step approach. First, we will see how to
easily draw each flower, then we will go on to
add the first layer, and finally the beautiful
details and petal tones. Using these learnings, we will paint our
final class project, where we will build the
entire hydrangea gradually. The process of painting
hydrangeas can be long, but I will encourage
you to take breaks and finish the entire piece. However, I totally understand if you paint only a part of it, whatever it is, don't
forget to share your class projects in
the projects gallery. Seeing your project can be a great motivators
for others too. Let's get started.
3. Materials: In this lesson, let's
go over the materials that we will be using
throughout the class. For the materials
we will be using this 100 percent cotton
coal press paper. I like this brand for Canson
watercolor paper for this. It's quite affordable
for practices and it is not too grainy. As you can see there's
very little texture and it's good for adding details and it holds the water well. It's a very good quality
paper to get started and practice your florals. Apart from that you
will need paints. Of course I use this student
grade paints by ShinHan which are called
ShinHan Professional. They're quite affordable
and good for practice. If you're using tubes you can use ceramic palette as well. You don't need to use
tubes if you have pans, you can definitely do this
class with the pans as well. For the brushes, I will be
using these two brushes. One is the silver
black velvet size 6 and it has a nice round tip
and I like this brush a lot. Don't get a brush
which is too big. Size 4 or 6 is good. If you like adding
details then you will also need a small brush. For me this short liner brush is my favorite for detailing, it's called the
Princeton heritage short line is size 10-0. This is good for detailing. Apart from all this you will
require a jar of water, a towel to dab your brush, a pencil, and an eraser,
and you can get started. I hope you are ready
with your materials. In the next lesson we
will start the drawing.
4. Practice Drawing: In this lesson, we will learn how to draw each
flower individually. Before we get into the painting, I just wanted to show you
how I draw the flower and outline for this
to get started. Let's break this
entire hydrangea down into smaller flowers. It's basically a bunch
of small flowers. We'll just learn how to
draw these small flowers. What I do usually
is mark the center, something like this. I'm drawing it pretty
dark for practice even you can draw a dark center. But when you are drawing it on the final paper try
to make it light. This is how I mark the center. From here I'll have
four petals coming out. I'm just marking
these four petals how I want them to come out. The general shape of
the petals are similar. You have these two
small lines coming out. If you want, you
can break it down further into a simple shape. Here I'll have a circle drawn, and what you do
is join this line with the circle
outline like this and then let it meet in top. It doesn't have
to be too pointy. Something like this. This is the shape of each petal. You make four of these petals
to make one entire flower. Try to change the
shape a little bit, to not make it too symmetric. I feel this petal is too narrow so I can even make it bigger. This one I'll try
to make bigger. Make a circle here if you
feel you need some guidelines and join this towards
the end of this circle, something like this
and meeting here. Same way, this is how
the petal here would be. Sometimes this petal
will be overlapping. For example, this petal, I will make something which is going behind
this narrow petal. Something like this. It doesn't have to
be very symmetrical. I again make a circle where
I want this petal to go, something like this. This is the basic
shape of a flower. You can even try to bring some variations in
this and some folds. For example I anyways found this petal a
little bit narrow, so I want to make
this into a fold. Something like this. You can use a maximum curved
petal to add some folds. For example if it is this, and then I'm just going to add a small petal turn like this. It looks like the tip
is turning inside. It gives some different
variations to your flower. Just practice this
until you are satisfied with the shape of the
flower, the basic shape. What we'll do is
put it all together to make the hydrangea. It's good to practice
this basic shape. I hope you enjoyed this
lesson where we broke down the drawing of hydrangea
flowers into small, easy steps. I will see you in
the next lesson where we will start painting
this hydrangea flower.
5. Practice: First Layer: In this lesson, we will paint the first layer
of the hydrangea. In this lesson, I'm
going to start painting. We will paint just one flower
first and practice it. I have drawn a few more
of these flowers on my paper. You can do the same. I'll try to fill up
the entire page. It's a good practice
and it's also fun and it looks
beautiful in the end. Let's get started with this. What you need is
your brushes now, so I have this small
brush which is size 6, and I have my liner
brush as well with me. I'll keep this with me. For this hydrangea, I want to make it
a blue hydrangea. I have taken Prussian
blue on my palette. You can take any color, it has pinks, some hydrangeas, I haven't green, so
you can just pick and choose whatever
color you want. I'm just activating the
color a bit on my palette. When I start painting, just take a little bit on
the tip of your brush. The brush is not very wet. These flowers are not very big, so I don't want a brush, which is extremely wet. What I'm going to
do is just wash it, make sure it's fully wet. I'm just making it wet and
I'll dab any extra water. The color is already activated so it's already quite watery, so I'll pick the color just
at the tip of my brush, there's not too much color. I've just picked it a little
bit on the tip of my brush. Then what I do is I
first mark the center. I just draw a circle
with my dark pigment. Then again, I'll wash my
brush and dab it not too wet. Just dab it once and
then pull this paint to the rest of the petal
with the wet brush. If you feel it's too light, this is the time to just put some more pigment
near the center. Then wipe your brush and you can pull it to
the rest of the petal. I don't want it to be too dark. In watercolors it's always good
to have a light for a slit and you can keep adding details. If you use a very dark
pigment in the first layer, you will lose the beautiful
transparency of watercolor. Try to keep it light,
so let's repeat. In case your center has dried up and you're not able
to pull the paint, you can always add some
more paint like this. Then I'm going to wash
my brush not too wet, and then just pull it to
the rest of my petal. Great, so let's repeat that for the other petals as well, again just add some more
pigment and pull it. Remember, the brush
was not wet enough so I'm just making sure
it's slightly more wet and I'm pulling the petal. Now I feel this center
has become too light, so I'm just dropping some more
pigment to make it darker. Great, let's do that, the last petal here. This is the first layer, let it dry and
while it's drying, it's always a good thing
to practice more so paint the rest of the petals
in the same way. Let's go ahead. I hope you enjoyed this lesson where we painted the first
layer of the flower. In the next lesson, we will
add more details to this.
6. Practice Detailing: In this lesson, we will add more details to the hydrangea
we painted earlier. While I was waiting
for the flowers to dry, I painted two more flowers, and for practicing the more
you paint the better it is. I will suggest you do the same, pre-paint as
many flowers as you can. As you can see in
the first flower I've added a few details, so I'll show you how
to do this detailing. Let's take this
flower for instance. I know the pencil marks are
dark that's because I created really dark flowers for you to be able to see it on the video. Your pencil marks
should be lighter, and this is the right
time to actually erase out any of the pencil
marks. Let's do that. Let's start adding the
details for this flower. I need a short liner
brush for detailing. You can use the tip of any
small brush that you have, but I highly suggest you
use your short-liner brush. It's much simpler
to do this part with the detailing or
short-liner brush. First things first,
you wet your paint and get it into a
watery consistency. You don't need too much
paint for the step, I'm just taking some paint on my brush and adding
it to the center. For example, I'll
just add it here. Then wash your brush, take out any pigment that you
might have on your brush, and use this wet paint to
pull it to make your veins. I'm just pulling it to make it really light beautiful veins. Let's do that for the rest
of the petals as well. Let's put some paint. This is getting too
dark, I don't like this. You can always correct it. You'll just take your brush and make it wet again
without any paints. I'm just lightening the pigment
so that it's not so dark. Let this petal be because it's wet right now I can
add details later. Let's see how we can
undo the same here. Again, I'm adding some pigment. Wash your brush nicely, so that the veins are not too dark. In this case, the veins are dark because my brush was not washed. Now, I'm just pulling
the paint again. Make the center vein
with a wet brush and pull this to make more
veins on this petal. Something like this. It gives a nice beautiful texture and it is very subtle and delicate, so let's do this as
well on the top petal. You get this beautiful textures to your petal and the veins. You can make more
veins if you want, I can show you another
way of doing that. For example, the first
petal has dried up, so I'm just darkening this
vein, the central vein. Again, I'm washing my brush and pulling this
paint to lighten the central vein at
the same time making more vein on this
petal more texture. I'm just doing this to add
more textures to this. You can do the same
for a sideways as well. Something like this. I'm just adding more pigment. Again, pull it with a wet brush. You can see it's
the more you do, the more textures are
there that this petal is looking really nice
and beautiful texture. At this point, the flowers
may seem a bit rough, but when you put
them together in a Hydrangea you
will be adding more detailing or darker shades on these gaps and that's when
these petals will pop out. For now, just practice
this adding veins. One more thing you can do is
practice the petal folds. In this case I
created a petal fold, so what I do usually
is darken the edge of the petal fold like this
which looks like the shadow, and then take a wet brush. It's just damp, it doesn't
have any water in it or very little water
and just making this blend with the rest of the petals so that it
doesn't stand out but it gives the effect of a
shadow of a toned petal. Something like this. Let's do that with another petal here
this here as well as a ton. I'll just add the pigment
to make it dark on the edge and then I'll blend it. That's it. Practice,
create as many petals and flowers as you can and
fill up this whole page. I'll make them individually
for now because you want to practice this
petal folds in details. If you're not yet in the mood to create
the entire Hydrangea, you can create as many
of these flowers on one page to practice and post that as your
class project as well. I hope you enjoyed
this lesson, where we added these beautiful
petal veins in details. I'll see you in the
next lesson where we will start painting
our class project.
7. Class Project Part 1: Welcome back. Now is the time to paint
your class project. For the class project, like I explained earlier, we will be painting
step-by-step. Let's get started. In this lesson,
we're going to see how we can create this
entire hydrangea, and what is the process that I use to create
the hydrangea? To draw the entire hydrangea before you paint can
be very complex, so what I suggest is you
take it one step at a time. First step, hydrangea
is a complex flower. If you painted on a small paper, it's going to get
even more complicated because there's
such small details. I will suggest you
use an A4 size paper. Now I'm using a bigger paper. In the A4 size paper, what I'll do first is create
a rough circle of the shape or the size of the
hydrangea that I want. I'm just creating
a rough circle. It has to be really rough
just for reference, and maybe you can
start from the center. The trick in hydrangea is you
don't have to create each and every flower in
a very detailed way, you just have to
create the petals. There will be only few flowers which will be seen
very clearly and full, the rest of the
flowers around it will be just a part
of the flower seen. What we do is start
with one flower, which is very clearly seen. I'll just mark the
first flower here. It's the same
process for drawing, so let's draw this flower out. Now that we've drawn
the first flower, I'll use the same
process of painting. The first step is to
add a light wash, and then the second step
we add the details. You can either add the
details right in the end, or you can add details as
you go for each flower, that's your choice. Let's start with the first
layer of this flower. As I said, it's going
to be step-by-step. You don't have to draw the
entire hydrangea in one go, we will go one flower at a time. It is much easier to
handle it this way. What I usually do is add the
detailing right in the end after the entire hydrangea's
first layer is painted. While this is drying, I'll start adding
another flower. Now what I do usually is not
create the entire flower, I'll just create
just a part of it. I will still mark a circle to mark the center, for
example, like this, and I'll add these
petals around it. Again, something like this here. The center helps
you to determine where the petals are going. For example, in this
the petal is going to be behind the one that
we painted earlier, so I'm just going to paint
a part of this petal. I'll just draw a part of this
petal, something like this. Again, this petal is going
to go behind this petal, so I'll just draw a part of it. Something like this. Let me erase this, I think that is too big. Great. What I'll do now is
paint this flower and with the same technique. Let's go ahead. This is a second
flower that I've painted which is overlapping, we can continue this. You don't have to make
centers for everything. You can make an imaginary center as well that you want it hidden. For example, in this case, I am imagining there's a center which is hidden somewhere
behind this petal like this. Very lightly just draw it so
that you have a reference, and use this reference
to draw the petals coming out of it. This is my center. I have a petal coming out from
here, something like this. Maybe I want to make a nice beautiful
tone for this petal. Again, this is the center. I have one petal
coming from here, and maybe a part
of this petal is shown something like this. Now in this case, most of the flower is hidden, there is no center, so just use a wet brush
to mark the petal without too much paint. This one has a tone as well, so we'll mark that after
this petal has dried up. I'm going to mark this as well. Now for this petal, I had made a little
bit of a petal turn, so I am going to add
that detail as well and I'm going to blend it. You can either use
a bigger brush, or you can use the same short
liner brush to blend it. The wings I add
right in the end. First, I'll just
make all the petals, and I'll repeat this
process by adding a lot of overlapping flowers
all along this circle. Just keep in mind
that the center, you either show a little
bit of the center and just draw a
flower around it. Sometimes, like in this case, we tried to hide
the center here, so you can have that
hidden flowers as well. Try to make petal folds as
well to give it a nice look and enjoy this process. It has a lot of patience
involved in this, because you're making
really small petals. But the end result
is really beautiful, so keep some patience. Take a break if you feel like, and just keep repeating this process for
the entire circle. I'll see you after I
filled up some of it, and then we'll do
the edge together. As you can see, I've covered most of the circle by just making flowers
in different angles. Some places I've
just created petals which don't even have
the center showing, so it's a good way
to balance it out. Don't have too many of
these centers showing. Some of these centers will be hidden behind different petals. Half of it is done. I will continue to
make the other half, and then we'll come
back and add details and some more shading to this. This may seem like
a long process, but believe me, the end
result is very rewarding. Keep going, and let's go
to the second part of the class project where we add more details to this hydrangea.
8. Class Project Part 2: Hi. I'm glad you're
still with me. Let's start adding more
details to this hydrangea. As you can see, I have just made the flowers are
close to each other, overlapping, and this is
just the first layer. Now, I'm going to start adding details like we had
learned earlier. Let me show you
one flower again. For this flower, I'm just wetting it again
with some darker color, I'm cleaning my brush, and I'm going to pull this
paint to add some wings. Before you start adding details, it's a good idea to even erase any pencil
marks if you can see, this is a good
opportunity to do that. Towards the end, I almost
started painting it freehand, so I didn't really
draw the petals. But if you have drawn them, then go ahead and just
erase those pencil lines. I'm also using this opportunity to create some slight edges to these petals to make
it more defined. I'll do the same for
this side as well. Then just pull it with a wet
brush to get some texture. I guess you get the idea. I'm going to fill up
this entire hydrangea, again, with some
details and wings. I'll see you on the other side. We're done with the detailing. I have not added too many
details on the edge, just in the center to bring the attention to the
center of the flower. But if you want, you can add as much and as less
detail as you want. It's your wish. Now, let's add the finishing
touches to this hydrangea. One thing that I like to do
is add the center lines. Like in this center,
I will add two lines, those are just
crossing each other. It looks like a
beautiful bird detail. I'll add it to all the
centers which are visible. This is one of the detailing
that I like adding right in the end to give it
that extra depth. The next detail that I like to
add is filling up the gaps. Whenever there is
a gap in white, just add a darker shade of blue and fill it up with a
nice dark background. I'll just fill this up
with my short-liner brush. Just use a small brush, it doesn't have to
be a short liner, and fill all these little gaps. This can be very therapeutic because it's a very
delicate work, so enjoy it and finish
up the entire painting. I'll see you on the other side. As I said, this is a hydrangea. If you've noticed, we used only one color for
the entire hydrangea. What you can do now is add
a bit of another color to give it a different
depth to it. A blue hydrangea, I like
to add slight amount of Bordeaux or a pinkish tinge to it and it has
to be very light, I don't want it to
be too overwhelming, so I'm just using this to
add some of the petals with one more layer on top
to give it a different shade so that it doesn't look like
there is only one color in the entire hydrangea. I want the hydrangea to
look a bit more depth and not just a monochrome. What I do is, in the end, I just wet the petal and take a bit of the color
that you want to add, and drop it at the edge to give it some slight more variations. You don't have to do
it for each petal, just do it for a few
petals to give it a beautiful depth
and dimension to it. That's it. I guess I'm very happy with the way it's
looking right now, it has a beautiful depth, it has textures, you can see the petals clearly. I made a bit of a mess here, so just ignore this part, but otherwise, it's pretty nice. The hydrangea leaf
is very big usually and I like it to be
nice, loose, and big. I'll just make my
leaf like this, I will just move my brush like this to make an edge
which is serrated. This part can be
completely your choice how you want to make the leaf, or you want to
make more flowers, you want to make
another jar here, maybe, you want it to
look like a still life. It's your wish, how you
want to fill this up. I like the petal
to be big, loose. I'll add one more leaf. I keep calling it
petal, it's leaf. I try to cover this patch up, which I messed up by
adding a leaf here. I'll just wet it first
and drop the color. Flower itself is pretty
detailed, I would say. I want this leaf to
have a nice watercolor, loose look to it to give a
nice character to this piece. Again, I'm just using one color. Feel free to mix it
with some more color, maybe a yellow to give
it some more depth, I might make some brown here. I hope you enjoyed this class where we painted this beautiful
hydrangea from scratch. I know it can be a
very long process, but it is extremely therapeutic. Take breaks, take your time, and try to finish this
entire hydrangea. In the end, the look
of this painting will give you so
much satisfaction that you would want
to try it again. Wow, I can't believe you stayed with me for the entire process, I'm so proud of what
you have created. I'm very eager to see
what you have made, so please post
your class project in the projects gallery.
9. Final Thoughts: Congratulations on
finishing the class. I'm so happy to see that
you stayed through then. I know it can be a
very long process to finish an hydrangea. But the end result
is so rewarding and this is a great way to relax and practice on your
patience as well. It is completely all right if you couldn't finish
the entire hydrangea, take some break and maybe
come back to it later. A hydrangea is
equally beautiful, even if you paint
only a part of it. So post whatever you've painted
in the projects gallery, I would love to see
what you've created. If you like the class, then don't forget
to leave a review. It really means a lot. Follow me on Instagram as well as on Skillshare
for future class updates. I'll see you next time.
 Kanchan Kaul, Artist and Illustrator