Transcripts
1. Class Intro: Hi there, and welcome to
the skill share class. My name's Avraham, and I'm
a professional artist. I've been giving classes both in person and online
for nearly a decade. In this class, I want to do something
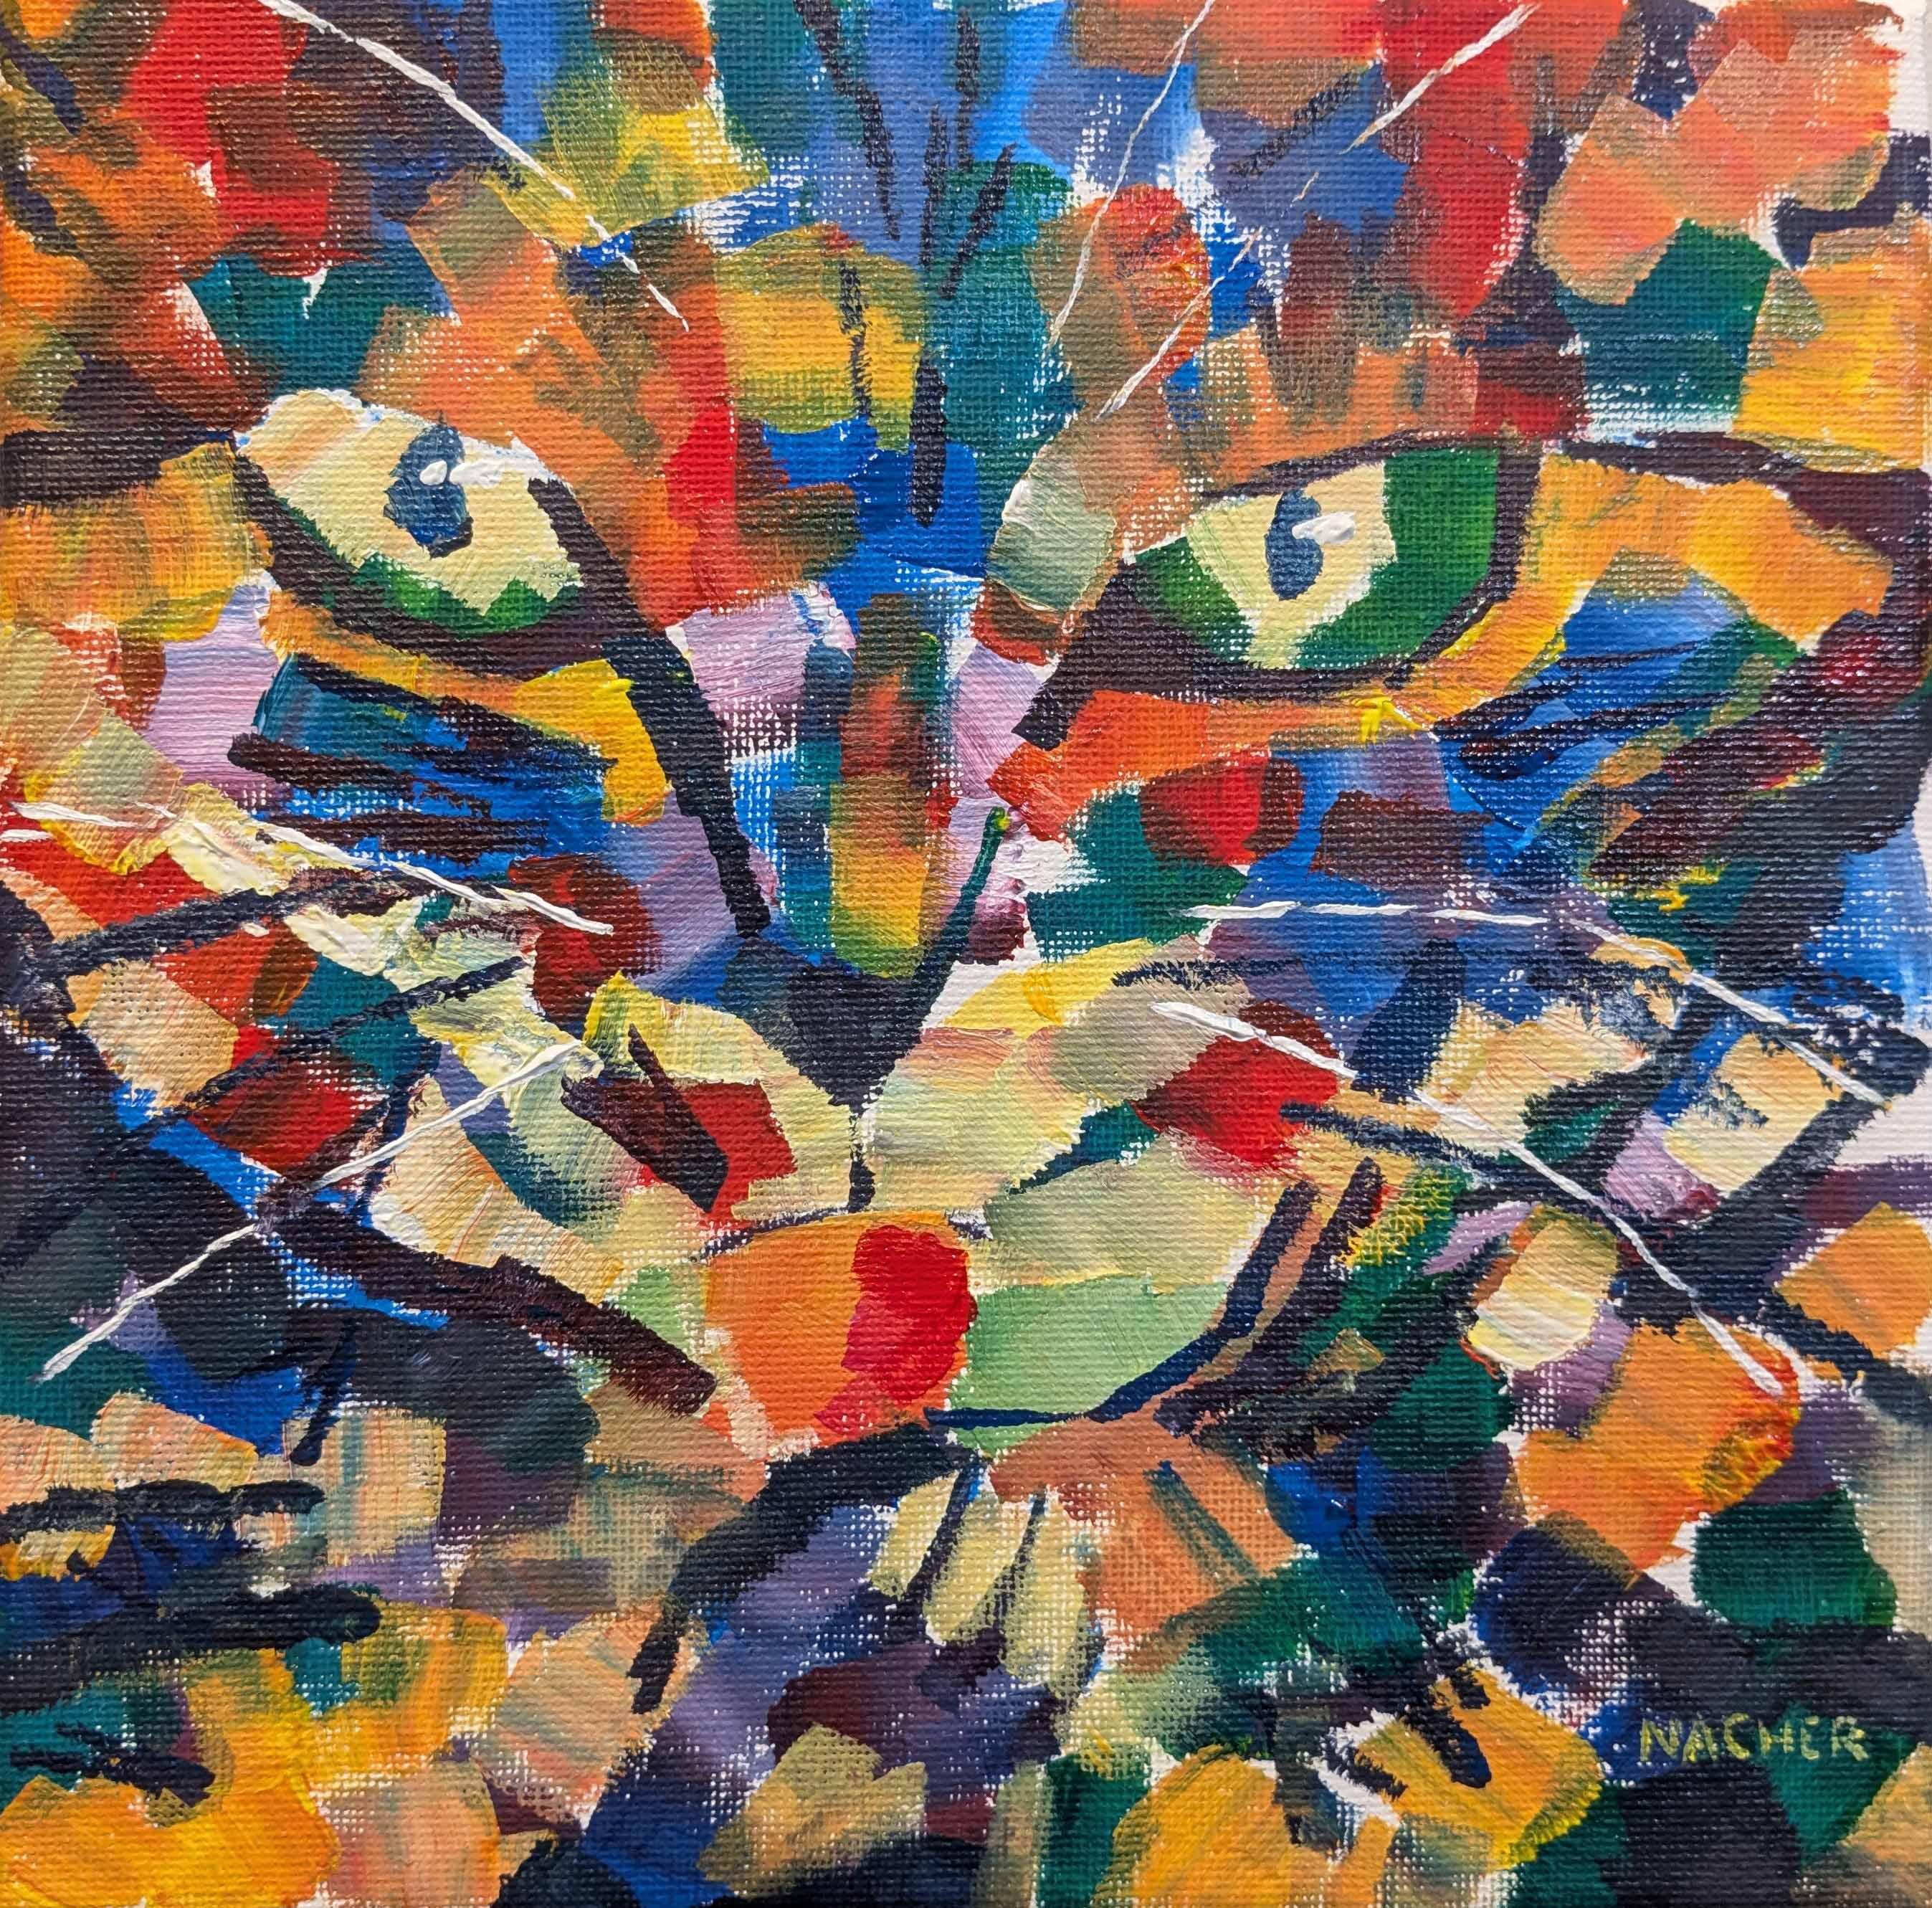
really fun with you. We're going to
create this acrylic abstract painting together. Now, the reason I chose this is because we're not doing
something so realistic. In which case, we don't have
to worry about so much if the shapes are correct
or even the colors. Who sees a cat that
looks like this? The most important
thing is that we have the eyes and some whiskers, and the rest is gonna
fall into place. But what that lets you do is to really let your
creative juices go. So this class is
really for everyone. At the same time, I want to give you a little
bit of a challenge, because to create this painting, I'm only going to be using these three primary
colors and white. And then mixing them to create all the colors
that you see here. So if you feel more
comfortable using a variety of colors, you
can totally do that. But if you want to challenge
yourself a little bit, I'll be explaining through
the class exactly how I mix these colors to get all the different colors
that we see here. But as I said before,
the goal here is to have fun exploring
acrylic painting. So if you're ready
to get started, I'll see you in the next lesson.
2. Colors and Palette: To get started, we need
to have a palette. So there's so many different
options available. But for me, I'm using
a simple plate. It's a little bit
on the thick side, as you can see, I've been using this many times, and
it works great for me. I like to have the reason
I like this plate, actually, is because
I like to mix colors. We'll be mixing these
colors as before. And by having a room, I can place the
colors down and then have an area in the middle to
start mixing things around. And so I'll show
you how I do that. First, we're going
to get our colors. So these colors came in a tub, and to get them out, I'll be
using these palette knives. If you have a set of tubes, then it's just easy to
squeeze them right out. But since I have these tubs, I have to get the
paint out somehow. So I take the small
palette knife and I go in really deep and get a heaping glob of this and just drop it down over
here like that. Maybe I'll do two globs, okay? We want to have a lot
of paint here and because just have
we don't want to feel stymied or limited by
how much paint we have, so I just throw down
a whole bunch here. And I use the other palette
knife to just shave it off and make it very to try and get anything that remains, okay? And then so you have a
little bit leftover. And for that, I'll
just use a piece of tissue paper and wipe it off. Clean off our pot knife before
we go to color number two. Close this up. I'll get the red. I always like to
go from the light to darker colors
when I'm doing this. That way, in case
there's any color left on the palette knife, the yellow won't really make
any difference in this red. But if you have red
into the yellow, a little bit of red will make
a huge difference in how much red is in the color of the yellow
that comes out afterwards. To the blue. So for these darker colors like blue, you might not need as much. I find I go through yellow a lot more just because it
takes more yellow to mix with things to get
the colors I'm looking for. And I said before,
if you're just going to use other colors, just, you know, place them
down wherever you want. And then for white, we obviously don't need any palette nie. We can just squirt this on out. So you'll notice the way I
lay out my palette is I have the primary colors a
little bit separate from each other and spaces
between them all. So that way, as I'm moving
along and mixing colors, I can say, if I want an orange, I'll take a little bit of
yellow and put the red, and I'll mix it over here, the blue and yellow to make green. So I'm sort of making a color wheel as I'm moving
along here and I'll have areas that I can start
mixing around and just I'll have space to add and mix colors to
my heart's content. As far as for brushes, I'll be using these two. I'm planning to use these two. One is a pretty wide brush. It's a bright number ten. Los about half an inch. And then I have a quarter
inch one bright number six. Difference between
bright and flat is a bright is a little bit shorter
hairs than the flat ones. So it gives you a
little bit more control when you're laying
down your colors. But just feel free to
use any brushes that you feel comfortable with and
just have fun painting.
3. Initial Sketch: The first thing we're going
to do is start off by doing a base sketch of our cat. And to do that, we're
going to mix up a little bit of a dark color. I'm going with blue and white. I don't want such a dark
blue because this blue is a very dark one, and
by adding the white, it will tone it down
just a little bit, and we can then start
painting with it. So I'm just looking at
the reference photo and seeing where the main
features that one preserve. Mostly focusing on
the darkest lines. That's the easiest. So we have the top of the
head and then his nose is obviously very dark and try to indicate a
little bit of his paw. So those are the main
top to bottom area, but now what I'm trying
to think of right now is sort of the dimensions
and perspective. The ratio of where to
place the other items, like the eye is for sure, the most important
feature of the cat. I want that to stand out
the most in this painting. And so I want to make sure
I get the size right and particularly the angle of a cat's eye is different
from a human eye. So I'm trying to be
very careful about the angle of the
lines that I'm using here. And I'm going
to sketch that in. Now, it doesn't matter that
the blue isn't as dark as the shadows around the cat's
eye are going to be in the end because all these colors that we're putting in are
really just reference lines, and we're going to cover
them up later anyway. So don't worry about that.
It's more just trying to map out where everything
sits on this canvas. And then we can start
actually adding the colors.
4. Placing the Cool Colors: I'm going to start with a
medium cool blue color, which is very close to the color we start off
for our sketching. And I'll place down large
confidence strokes of color. On different parts
of the canvas. I'm trying to put
each stroke following more or less the direction
of the cat's contour, fur shape, things like that. If you see on the top
of the cat's head, the stroke was
vertical top to bottom and not left to right because
that is for the most part, how the shape of the fur the colors are
flowing over there. Then here under the eye is more horizontal and sby under the cat's head where it's
a little bit more shadowy, I'm making also this cool color. Initially, I want to
start with cool colors on every area that is more or
less shadowy or darker, and then we'll switch
over to warmer colors as we get to the lighter areas. But for now, we'll continue
with this blue and maybe add a little bit of red to it
to make it slightly purple. A little on the
darker side because the intensity of a purple
is just a little bit more deep than blue.
So we can add that. We can mix that and put that
places where maybe we want a little deeper shadow. For example, on the cat's paw, we want to stand out
a little bit from the rest of the cat so
we can make that darker. And then go back and have a
little more blue areas around since it's now has a purple
and a little bit whit. So it'll be a slightly
different color than before. And so these small variations just make it a little
more interesting. The point here is to have fun, and we're not really going
with a realistic coloring of a cat because cats aren't
blue, obviously, or purple. So the idea, mix up the
colors and experiment, and as long as we have, like, the main characteristics
of the cat, which would be its eyes and
some whiskers and its nose. So I think we'll
have a cat something that's recognizable
as a cat at the end, even though it's
going to be a little bit more on the abstract side. But that's what's fun
about art because you don't actually always have to go for something
that's realistic. You can let your personal
interpretation take over, just get into the zone, start paying with
things and have fun. You'll see here
I'm also trying to manipulate the brush to create interesting
shapes so that there aren't always just
flat rectangle shapes. Here I'm using the tip of
the brush to get more of a angle and to make this more triangular shape that's under the corner
of the cat's eye. And sometimes I'm going to
put down shorter strokes or longer strokes and keep varying the angles and the direction to keep things
interesting and variety. So for this area around the
cat's eye, it's very dark. And so that's why I'm mixing, again, a type of purple. That's why I'm trying to
get a purple type of color here to make it the darkest area, hopefully,
of this painting, so that I'll also
maybe in that way, it'll attract the
most attention and stand out because I
have the most contrast. Right now, it's a little
hard to see because there's so much white and open
area in this painting. But as we fill it in, so every other area is going to be not as deep and
dark as over here, so that will leave it with the most I'll stand out and be a
unique area of the painting. So these lighter purple
areas are a type of a bridge between what we have here is
the dark blues and purples, and now we have this
more lilac color that will create more of maybe a contour or bridge between the dark and what we eventually will get
to the warmer colors. I'm trying to place
that in areas on the painting where I
seen the source photo that it's slightly lighter but still within the shadowy
area of our painting. You really can't go too wrong when you're doing a
style like this because this painting isn't so
representational to be realistic. It's more whimsical
and more fun. So you can basically put down sweats of color
wherever you want on the canvas and just continue playing with it and
building up the piece as it goes along. And then at a certain point, it'll sort of become
more intuitive painting where we're looking at
what's on the canvas already and then going from
there to see how we can improve and modify the painting to get more look what
we're looking for. Now I'm mixing up that darker
purple again to go for a nose and try to make
that area also quite dark. I'm trying to keep to the sketch lines I did originally of the
size of the nose. It's a little hard
because my brushes are slightly larger
than that area, but holding on the
angle like this and just painting with a tip,
it's working out okay. Trying to represent
where the bottom part of the cat's head is. And now maybe some we
have above the eyes. There's also I see a little
bit darker hair over there. So let's use our dark
color this dark purple to indicate that with some short with some short and
sharp angular strokes. Sort of like the cat's hair that goes out at those angles. And now the digits between on the cat's paw to make them
also as dark as possible. I think now it's time we can put in where the cat's mouth is. Indicate that with this
little few strokes over here. I think now this is more
or less where I want to get to with the cooler colors. So now we're going
to start adding in a few warmer colors.
5. Placing the Warm Colors: So now we're going
to start adding in a few warmer colors. So for that, we're
going to take some blue and mix in yellow. So we'll get a green. And I'm keeping it more blue
green than actual green. So it's still a little bit
more in the cool area. And that way, it
works similar to a bridge like we had with the
purple, the light purple. So we have this
green is also going to be the type of bridge between the very cool colors
and the warmer colors. I'm trying to now choose areas where in the
reference photo, it's more on the lighter side. Any place I see lighter color, I may be putting
down this green. There's a lot of
areas where his hair is a little bit more
on the white side. Those will all be great
candidates for this green. At the same time, I do want
to keep things with variety. I'm not putting on
large areas of green. I'm putting small
patches of green like we did before with
shorter broad strokes, sometimes a little bit
longer at different angles and always trying to follow the direction of the cat's fur. And Each time I'm mixing a small amount of
the green that I need. And what that lets me do is
every time that I put down another every time
that I mix more green, I can decide if I want to have the same color or if I want to make it slightly more yellow or slightly more blue. And I can add a little
bit more variation each time I'm putting down
the swatches of color. Something I'm also trying to do is I'm jumping around the page. I'm jumping on the canvas a lot because I want to make
sure all the colors are represented in
different places so that we have a little
bit more balance. So if I'm putting a
green on one side, so then I want to
make sure there's green in other areas
of canvas, as well. And that way, it makes it more balanced and not so
heavy in one location. If there's something that I
want to be stand out more, so then we can make
sure that that color appears in very limited areas. Like me, it comes to the eyes. We want the eyes to
be our focus point. So we're going to make
them, make them unique. So make them in a way
that their colors don't appear at other
places in the picture. Now I'm going to switch
over to truly warm colors. And for that, I have
to clean my brush because I could use a different brush, but I'm
going to use the same brush. I'm just going to wash
it off with water, and now I'll have a clean
brush that I could use to get really much lighter colours
because there won't be the blue in it to make
it to cool it down. So I'm picking up red and mix
it in mix in with the red, some yellow to get a
nice orange color. In the ratio of red to yellow because red is
much more pigmented. So to get an orange, we need a lot more
yellow than red. So right now, this is
tending more towards a fiery orange than just regular orange.
But we'll get there. We're going to add in
more orange later. Right now, we're just
going and dropping down some splashes of red
in areas that are warm parts of the picture or lighter that I want to come
forward and stand out more. So we'll add those with
this more orangy red color. We'll mix up a little
bit more orange. But at this time, we're going to include
more yellow than red, and then we'll push it a little bit more towards
the orange color and away from the fiery orange
that we were using before. The goal is to try to paint over all the
areas that are white. So that way, we'll have very few areas that are white from the canvas appearing
at the end of the painting. We do have a white
acrylic paint, and if we need to add white in, we can always add
that in later on top of whatever we've
painted already. Because white, the
titanium white is a very opaque paint,
unlike yellow. Like if you painted with
yellow over a color, so it doesn't show up so easily, and it blends in with
what's underneath it. But white, the titanium white is opaque and will cover up and obscure
whatever's beneath it. So it's an easy way to redo
areas of your painting, or what we'll be doing also is just adding a highlight here
or there with the white, such as when we get
to the whiskers or the highlights of the eyes. Here's try to lighten up our orange and place it over an area that was
before not so bright. Here I'm getting
some more white. I'm placing it down here
and you can see how actually covers up and
obscures what's underneath it. That's a very handy tip if you want to change the
color or something, put down the white, and
then you can paint over. But it's important to let that white area dry a little bit. Otherwise, you'll
just be mushing around moving the
white out of the way, and then you'll end up revealing the darker color underneath. So if you give it a
little time to dry, and acrylic paint, as we
know, dries pretty quickly. So if you give that
little bit of time, and then you can start
painting right over it and have your new color. So for now, I'm going to move to other areas which
don't have any paint and put in this very nice yellow that we're
using right now. I see my brush is a
little bit dirty, meaning that it's not painting a straight
color right now. The yellow does have hints of blue tending
towards green in it, so it makes it a
little bit muddy, which is a different style. It's okay. It adds a little
bit of complexity to the stroke because we're not painting down just a
straight swatch of color. And now mixing
yellow with white, we'll get a lemon yellow
color, very bright. I'll put that in the
area around the nose. You can see that I did pick up a little bit
of color over there, so it made it a little
bit more messy. So I'll go back and get
some more white and yellow. Mix that brush mix
that color again. Let's see if I can cover
up what we did before. So my goal right here is using
that lemon yellow color to outline the lightest area of the cat's face under the nose. It's a more muted
yellow right now. So that also works as this
bridge color, you know, adding something
that's not as bright, but it's still on the warm side. And the more you paint with it, you can see it it's
actually mixing on the brush to be more
uniform muted yellow color. Now I'm going to mix up
the color for the tongue. So that's definitely more red. But I'm going to start with this bright yellow because I think it's a good focal point
and I want to stand out. So I'm using a large area, a much larger swatch of color than almost every place else we've used
in this painting. So both because of its bright color and
the fact that it's a large area will make it stand out from the other
places in this painting. And now, as I said
before, in order to make a little bit to
keep things balanced, I'm using that same
color, and I'm using a few other places
around our painting. But it's adding a little
bit white to it so it can actually show up over
the darker areas. And using strokes that
are radiating out, following the contours
of the cat shape. So here, again,
it's this muddying. It's got some green in it again. You can see the brush has a lot of different colors
mixed into it. So as I paint, so things will
start to become revealed. So right now when the
paint is very fresh, so it's a lot of that red
and yellow orange color. But as the paint runs
out from midnight brush, and it gets more to the paint that's inside the brush so that green comes
back out again. So if I want, I can wash
it off and I could, you know, come back
to more true color. But I'm liking the
way it mixes in. Like, the green is
a little bit muting the color of the orange gives a little more depth complexity, and it's sort of a cool effect. So I'm leaving it for now. If ever gets to be too much, there's always washing it off. Let's go put a few of
these peachy colors around different areas of the canvas. It's a
really beautiful color. Going for a little bit of
a lighter yellow color. And you can see how since there isn't so much
white in it that it doesn't always cover up whenever I'm going
over a dark area, you can still see the
dark underneath it. So let's get a little more
white so I can mix it in with my brush and get a little
more opaque color. And we'll use that for the eyes, probably the lightest area
that we have in the painting. So having the light area
of the yellow there and we had that very deep purple on
the shadows around the eyes. That's going to make
a very nice contrast that will draw the eye. I don't want that same
yellow other places because I want to be
the lightest area. So we're going to mix a
little bit of green here, and then apply this
maybe around the tongue. I'm mixing a bit of this
orange white mixture. We're pretty close. I mean, if you look at what
we've accomplished so far,
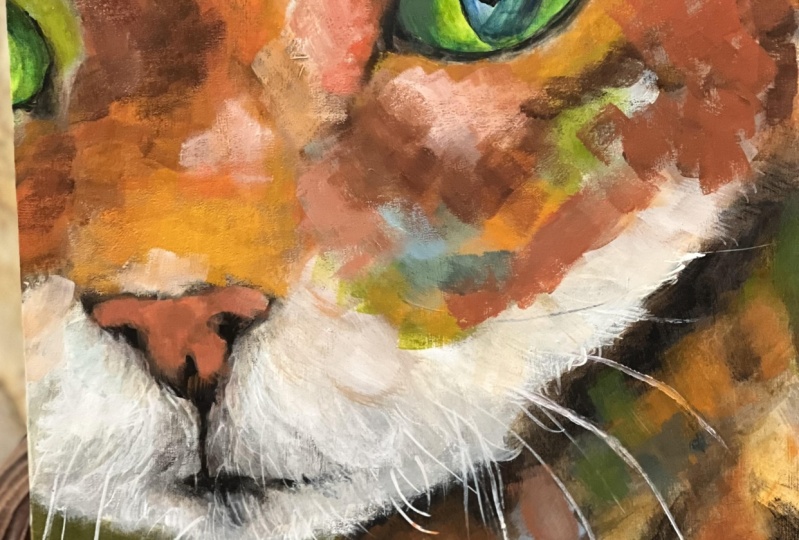
6. Final Details: We have a pretty
good definition of the cat's face, and
you can see the eyes. I just want to add a
little bit more shadow on the underside of
the on the cat's face. So mixing up this deeper purple, and I'll place that down where
we have a little bit more dark to make that shadow. And then also use that
purple for the nose, which is also a very dark
area of our painting. I'm going to try.
Let's use that also. Let's see if we can
use that also for the pupil, which is very dark. So it's not coming out as dark
as I would like over here. It's almost like a
pale twilight color. So let's see if we can add some more pigment,
get some more blue. Then we'll get some red
and mix the red with the blue to get a
dark purply color. See if I can work that around to make it a little
bit more circular. I like the one the right a lot. But that left eye
see what we can do Try to get something a very dark
purple, almost black. So if you mix all
three colors together, so we should go get
something black. Let's try it over here.
It's nice and dark. You can see how
that really draws the eyes towards the cat's eyes. We can mix a little
bit more of that and use that same color for the side of the cat's
nose where there's this more dark shadow or fur. Then also use it for the
nose, a little bit more. And that little area where the nose connects to the mouths that little dark line as well. So that'd be a nice color
to use for that as well. I think we can
also use that dark to add another layer
of shadow around the paw and also
some other areas where it needs a little bit
more dark on the painting. Just where I see
some other parts where his fur is darker, so we can use this
purple for that. We've got to age. I think we've gotten to a stage
now where we have the the blocks of color
basically here and now we're going to add a
little more of fur texture. For that, I'm using
this dark purple and we're going to put
in a little bit of the small short
strokes to represent the areas where the fur is shooting off in
different angles. Trying to be a
little sparing here. Don't want to go overboard
because it's representational. And if you put a few in so the viewer gets the idea
of what's going on here. Now we're going to
mix up a darker blue to put in some of the whiskers. Some of the whiskers are
dark and some are light. So we're gonna have a
combination of both of those. So I'm starting out
for the darker ones. Try and make them as
thin as possible. And we have similar type of lines on the top
of the cat's head. Here, it's not whiskers, though. Here it's representing
the dark area, those thin lines of dark
right on the top of his head. I'm going to clean my
brush and come back so we have a clean brush
so I can start putting in some putting in some colors warmer and not have
that influence from the cool color
here and just add that in a few more areas
where I see that we could maybe fill in over here. Now, I think we can put
in the white whiskers. I'm cleaning my
brush one more time, so we have no influence
of other colors. Just dipping it into the white very gently and now going to tap on the canvas to put
down the white whiskers. I'm going back to re
load my brush with white frequently because I want the white to be very
strong and to do that, I need white on the
tips of the brush. I don't want if the white seeps into the
bristles of the brush, so then it's not going to
be as strong or white. I keep going back to
dip into the white to get it standing right on
the surface of the brush. There are also a few white hairs that come from the
top of the cat, let's go add those
in as well now. And we can use this
white also to put in the specular highlights
that are on the cat's eye. So here, I'm just dipping
into the corner of the brush because the brush
is a little bit too wide. I don't need the whole brush
for the specular highlights. Alright, so looking here, I think the one thing
really I'd like to still fix up here
is the cat's tongue. Right now, we painted it a
little bit on the orange side. And as we saw as I
mentioned before, it is definitely more
more of a pinker color. So let's see if we mix
up a little bit of pink and place that on top of the
orange that we have here. Another thing we can
do is I just think the bottom of the face of the cat is also
a little bit lost. We're going to mix up a
little bit darker color here and then we can apply that to define the
jaw line of the cat. I'm breaking it up a little bit, not putting a consistent,
continuous stroke there. I want to keep it in line with the style that
we have already, where we have lots of
different swatches of color going throughout. But I want to keep these darker so that they sort of
connect together. Then maybe we can
do the same thing on the other side
of the cat's jaw. It's a little more
complicated now because I already put
down the whiskers. So if it's a dark
color, so that's okay. But where it's white, I
don't want to be covering up the white with this
darker draw line color. So I have to be a little
bit more careful about. And then for our last touch, we can also add a
little bit more of these darker fur marks by
underneath the cat's eyes. And then we can also
do something to make the tongue stand out a
little bit more by adding a little bit of a highlight
to the left side of the cat's tongue
with a little bit of this yellowy lemony yellow with a white and yellow mixture. So helps stand out a
little bit as well. I think that really wraps it up. I think we've accomplished
our goal here of reproducing this cat in this more
artistic free style.
7. 07 thank you: Thank you so much for joining
me a skill share class. I had a lot of fun exploring and playing with the acrylic
paints and mixing up your own colors and
coming out with a nice abstract picture
of a cat like this. If you'd like feedback on
your acrylic masterpiece, I'd love to give it. So please remember to upload your painting to the project
and resources section. If you have any comments or
questions about this class or want any specific advice
related to acrylic painting, reach out to me in a
discussion section. You can also let
me know about any other paintings you'd
like to do with me. If you found this class useful, I'd really appreciate
getting your feedback on it. Reading your reviews
is without a doubt the highlight of my
day and gives me so much motivation
to continue to produce the best possible
classes for my students. Lastly, please click
the Follow button so you can follow
me on skill share. And that way, you'll be
the first to know when I launch a new class
or post giveaways.
 Avraham Nacher, Artist & Photographer