Transcripts
1. Welcome + Class Project: Welcome. Do you
aspire to paint with loose competence but sometimes struggle with perfectionism
in your painting. In this class, you will learn three painting methods you can
use to help you loosen up, push past stiff,
grouchy paintings with a focus on painting a
subject based on reality. This class will help you
to loosen up and express yourself with intuition,
gesture, and fun. My name is Kristin chronic
and I am your teacher today as a self-proclaimed
perfectionist, I have to actively let go. In, in this class, you'll learn a few ways that you can do. I had been working artists since 2018 and I paint
nearly every day. My work is represented in both local and regional
galleries and often uses intuitive and
expressive mark-making. When I started to let go of
perfectionism in my work, it transformed my paintings. I also teach art at
a local university. And if there's one thing that lights me up as
much as painting, paying for the care so many artists gave me
early in my journey. By the end of this class, you'll have three methods
of painting you can turn to when you are feeling
stuck by perfectionism. I know firsthand how crippling
perfectionism can feel. I want to share with you a few techniques that
have helped me loosen up. And in turn, I hope
they can bring gesture and fun into
your paintings as well. This class is for
painter of any level. Perfectionism can bog down any painter from beginner,
seasoned professional. If you have never held a brush, this class may not be for you. It is necessary to be at least a little bit familiar with
your chosen medium. You will need the paint
of your choosing. The techniques I share work
best with opaque paints, such as acrylic, gouache or oil. I will be using gouache
for these exercises. You will also need
a wider brush, preferably between
one-half inch in 1 " and a surface to paint on. I will be painting
on nine inch by 12 inch watercolor paper. And that's about the perfect
size for these exercises. First, you will learn a little
bit about perfectionism, as well as a few cues
to watch out for. You can use those
cues to remind you to return to one of these lessons to help you snap out of it. We will work together then on three exercises you
can use to lose snap. These paintings are not meant
to be completed paintings, rather as sketches to
get your hands moving. However, if you've loved
how one turns out, you can totally use it as a finished painting with
or without a few tweaks. That's really who says they
can't be finished paintings. Your class project
will be one of the pieces that you
make in the exercises. You don't need to do all of
them to feel the benefits. So choose your
favorite or all three. I'm so excited to
have you here today. Let's go ahead and get started.
2. About Perfectionism : How do you know if you're
struggling with perfectionism? Something tells me
if you are here, then you may already have a sense that you need help with. It really impacts your
creativity for the better. So let's take a deeper look. Making careful paintings
with attention to detail is not the same
as perfectionism. Perfectionism is a feeling you, as the artist are unable to
meet your own expectations. It's usually coming
from the inside. It can really hinder
your creativity. A few telltale symptoms
or perfectionism include tension,
frustration, dread, avoidance, shame,
and overall just beating yourself up
if not productive. And they usually stops whatever creative ideas you have before they have
a chance to start. One thing that helps
me is to look at painting as a
curious experiment. It can be easy to consider the outcome of the
painting equivalent to our success as artists
or worse as humans. But when you see your
painting does experiments, it's a lot easier to detach yourself emotionally
from the outcome. It's kind of cool. Another very common symptom
of perfectionism and painting is going over the same spot again
and again and again. If you've ever done
this, you know exactly what I'm talking about. The exercises we are about to explore will help break
you out of that rut. But it's also worth
mentioning that there are some non-steady unrelated
things you can do as well. When you begin to feel
that heat buildup. Take a minute just to calm down, breathe, walk away
from the easel. Even if just for a few minutes. It is extremely
hard to fake when you feel frustrated
and overwhelmed. And just that small step can
be a great place to start. Artist's block is another
event that can stem from perfectionism when
you're feeling bogged down beginning
it exactly right. It can be hard to take
any action at all. This class, we won't go into
artist's block in detail. And perfectionism is
not the only factor. But if you feel
you may be in one, these exercises Vegas help you loosen up and enjoy
the making process. There are many valid ways of making art and it
can be helpful to grasp any creative pursuit
is a lifelong journey. Slowing down to just
appreciate the journey and embrace the growth
you've already overcome. Even if that's simply buying
your first set of supplies, It's always a great
idea to celebrate. Next, allow your paintings, just to be paintings. You have to paint and hyper
realism to make great art. They don't have to be exact
or like a photograph. If you are drawn
to paint realism or hyper realism, that is great. But even in those genres, there's space for
letting go a little bit. But there are also a lot of other different styles
of painting that might be just as if not more effective in communicating what you're thinking or feeling. Maybe you find it easier to
communicate with more of an impressionist expression as our abstract style of painting. These styles tend to
celebrate the evidence of the maker's hand with the
brush strokes intact. Take a Pinterest deep dive in some of these
styles the next time you're scrolling and allow yourself just to feel inspired. Finally, trust the process. I will cover a few processes that you can turn
to in this class. But if you already
have a few go-to approach to painting,
lean into it. Head stretched and shake out your arms and gather
your supplies. In the next lessons, we will explore
some fun exercises you can turn to
anytime you need them.
3. Supplies Overview: Before we get started,
I'm going to give you a brief overview of the
supplies that I'll be using. This is not required. You can use whatever
you're comfortable with, but this will give you an
idea of what I'm using. It's that way if you do
have something similar, you can follow along. First, I'm going to be using my favorite brand of
watercolor paper or Fabriano. It's just a big old block
that I have and I just like to use for these
types of projects. I had a cup of water, have
a pencil for later on. I have an older brush. This is by simply Simmons. It's three-quarter inches wide. I haven't found out right now. You can really do it
everyone you want. But for this
exercise, do you want it to be on the thicker ends, so over half an inch
wide if you have one. I'm also going to be
using gouache paint. And I'm going to stick
to the primaries here. I've got a primary
black, primaries, cyan, primary magenta, orange, primary yellow,
and primary white. You can use whatever
paint you'd like. If you'd like to follow
along with acrylics or oils, that would be great if you are used to gouache and you
can use that as well. Also wonderful. You can do these exercises
and watercolor as well. However, I will not
be demonstrating those and they do have a
little bit different approach. If you are a watercolor
artist, That's great. Just know that you
may have to tweak a few things here and they
are based off of the media.
4. Exercise One: Speed Painting With a Twist: For this first exercise, we're going to be doing
a speed painting. Speed painting is
wonderful because it helps us to work on focusing on capturing the essence of the object quickly and
without overthinking it. For this exercise,
I want you to paint the subject of your choice
and less than 10 min, you can go ahead
and set a timer. I will be using my own timer and speeding up my paintings
so you can follow along. For the subject that
you're going to paint. You can choose whatever
you would like. If you are currently
struggling with something, then that could be a
really good opportunity to play with that
particular subject. If not, I will have a couple of options available
for you to download. These will be simple, clean, still-life objects
that range and complexity for whichever
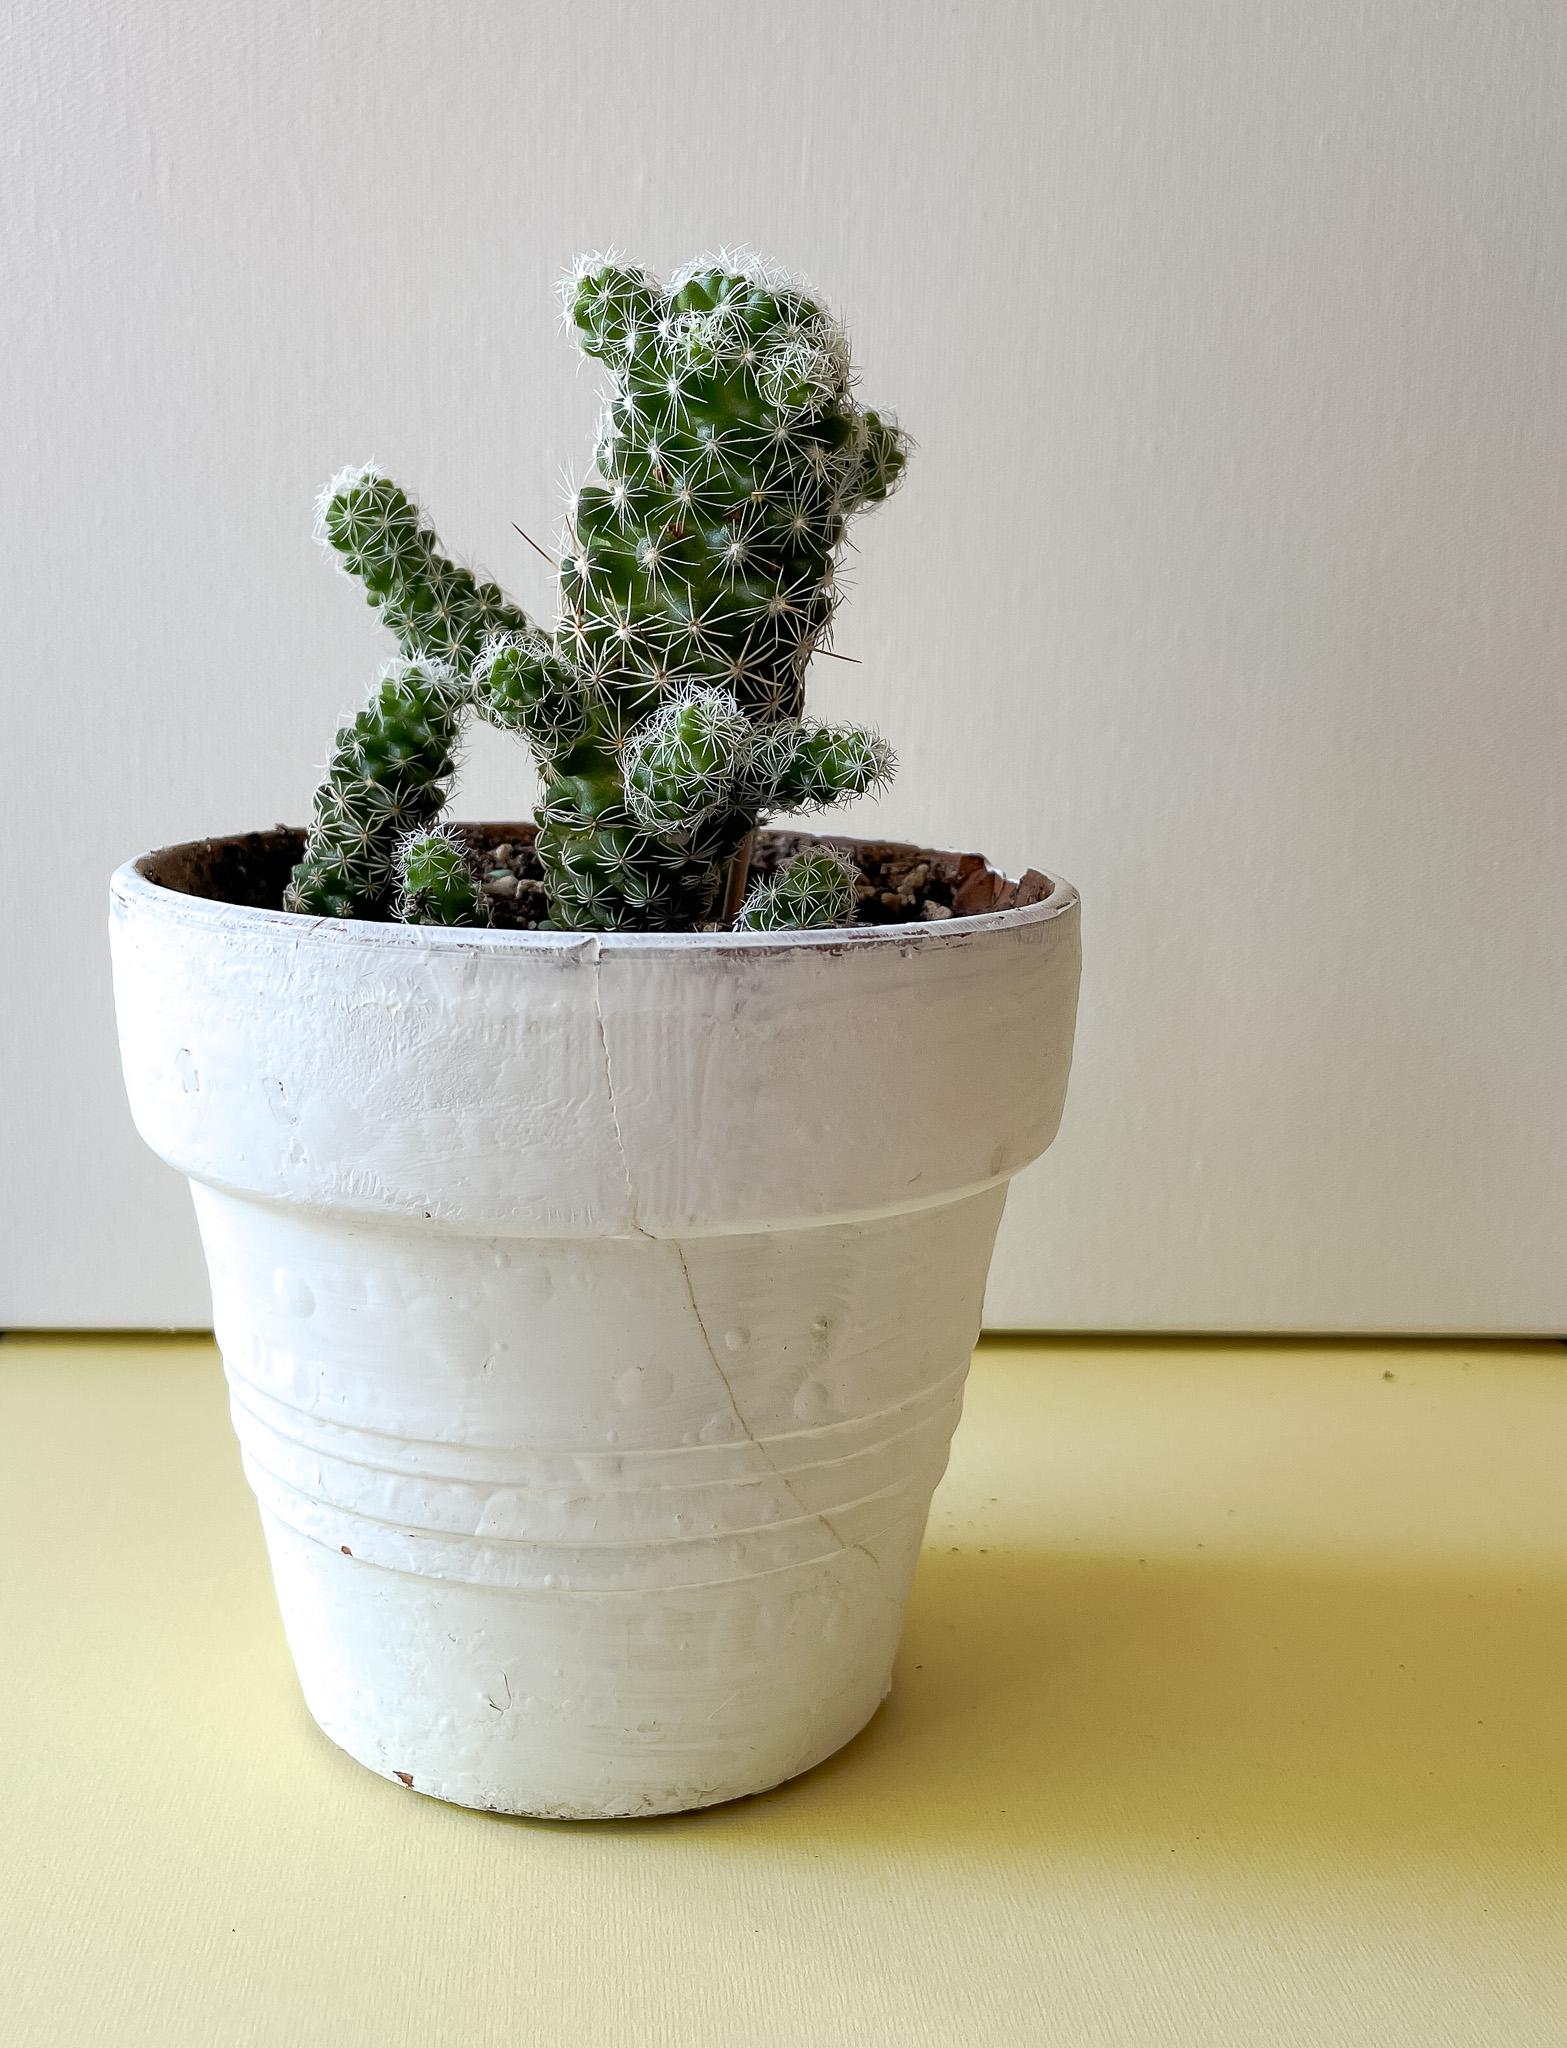
one you feel up to doing. For this first speed painting, I am going to paint this cute little cactus and
a white pot that I have. I'm pretty proud of it. He's spend grilling really
well for about a year. So I thought I would give
him his moment to shine. And as a reminder, whenever
I'm working on these, this is not a class on color and on any specific
painting techniques. So I won't be explaining everything in depth
about what I'm doing. This class isn't
supposed to be teaching you all of those fundamentals. It is just about the
exercise itself. So if you want to follow along, I will be painting
this little cactus with gouache paint in 10 min. I haven't pencil here,
so I'm just gonna kinda sketch them out real quick
just so I can see it. This little white pot. I can just do a few
things here and there. I'm not going to include every
piece as my cactus here. Just, just the
little knobs say I find interesting and
also how we're going to worry about too much
of the sticky things. I'm going to leave out
that that one little guy, there's a couple of
little guys over here. I'm gonna leave the mouth. I'm fine. I'm kinda distracting. So I'm just gonna do this here. Okay? Yeah, don't forget
the cast shadow. I gave them a yellow
yellow background. The background, Here's
your cast shadow. Here's your occlusion shadow
as nice little dark area. And be reading the arch up. Okay, So this is just
the base of my painting. I'm going to put my pencil down and I'm going
to start painting. I'm actually, whenever
I paint in general, I like to go from dark to light. C is this guy strike? I'm going to do a
speed painting. I'm going to work
on dark to light. So I'm first going to do what? The shadows of the cactus. I'm going to start
with the bright green. And then I'm actually going
to dull it down a little bit. A little bit of
black and possibly some orange just to kind of, again, this isn't a
class and mixing color. But I am going to
do a little bit of mixing the way I do
along, that's fine. But you do it the way you do
it and that is just fine. Okay? I like that. Alright, I'm gonna make
some big sweeping marks. It's okay if I cover
up some of my drawing. The reason why haven't you
use a larger brush for this is so that you can't get
too bogged down in details. That's usually one of
the main problems about perfectionism is just getting
lost in all the details. Okay, hold all those
little nugget. That's going to be
my my dark green. I'm gonna go ahead and
go light green in there. That lighter. Speed painting is so
helpful and forcing you to just look and make it
very, very fast decision. I'm just getting in some
of those highlights. This picture I
took was just I've put the cactus on
a piece of paper, piece of scrap paper
about my front door. So it's really simple setup. Okay. Let me keep this really simple. My brush is pretty clean. I'm going to capture
the darks of the soil. Orange and black usually
makes it really nice brown. Some people are
weird about black. I find black, it's just fine. We will have to use it. There's nothing wrong,
there's no bad color. Okay, I'm gonna
simplify this because I don't want to include
all the details, so I'm just keeping
it pretty simple. Pretty simple. How much time do I have? Almost 6 min left? I may not even need 10 min, but if you need more,
that is totally fine. Okay. Now going to get the
shadow side of this pot. It's a white pot. The shadow
sides still has color. So I'm going to
start with white. And I'm going to actually
make it start with a purple color and probably
grade down from there. It's my shadow. I'm adding
a little bit of magenta and cyan to make this like
nice little purple. And I'm probably
just gonna be great. I usually grade on my colors
a little bit the opposite of purple and the color wheel is yellow's a little bit of yellow. Orange. I think I like that. This is going to be my
shadow side of the pot. I will be able to ingest it
a little bit here and there. I'm gonna make a pretty
bold sweeping motion with my brush. You'll be feeling this feeling like simple shapes later on. Then I'm in this way, in what I already mixed, a little bit of white. That water is getting kind
of muddy, but that's okay. And not have to be exact. I'm just going to do my
highlight side of the pot. Then. There's room for it to
be a little bit more. Okay. We've got about 4 min left, so I'm going to do a quick rendition
of the background now. And I chose like a soft
yellow background. So in this movie purple, I'm going to bring up my yellow. It's a bit about like
an orange-ish yellow. So I'm adding some
orange and some white. This is definitely
more of an orange. I think this actually might
be a good cache shadow color. So I have this light orange, My out a little bit of black. Not explaining why I'm
making these decisions, but if you're interested,
you can follow along. So here is this kinda
like brownish color. This is going to
be my cast shadow. I clean my brush, pick up a little bit of
that orange and then bring it over here,
I need more light. My palate usually
gets kinda messy. I just the biggest thing
that I want to make sure I at least like tell a story. I'm not trying to make
it perfect or refined. Okay, this is gonna be
my background color. Gonna go. These big sweeping motions
with this big old brush, CY have pain on my table. Okay. There we go. I'm liking that. I have time. I'm going to
make this look whiter. It's a little bit, a
little bit too purple. There's actually a
cute, I'm saying this is a cute little
reflected light in my picture that is
bouncing up at the top. So she didn't include
that in there. Why have this yellow
and maybe that shadow. Okay. Then the background is
just a white canvas. I am going to, I actually ended up painting even if it's just white and I'm gonna make it echo the white, the purplish light
gray of the pot. I'm not going to worry too
much about this being exact. I just want to kind
of get it in there. That's all we will
have a lot of time. So again, this isn't about this is not about being perfect. It's about training our
hands to enjoy loosening up. The dog hair is like doesn't shed too much but it's like it does
seem like when he sheds. It's always in my stuff. I don't know how it
happens. See how much. I'm not worried about
staying in the lines. For me, a lot of the mixing
happens on the palette. So whenever I lay things down, It's not too, doesn't
have to be perfect. I'm probably almost out of time. So I'm going to keep
layering this n. Then I made that pot a
little bit too purple. So I'm actually just
going to take some white into that purple ish, but may see mostly
make it white. And then just bring out the
highlights a little bit. Really simply. You know, notice I'm
not like painting all the little spines
of the cactus year. I'm almost out of
time. That's okay. Here we are. That is my 10-minute painting.
5. Exercise One: The Twist: Alright, so now that we have
our 10-minute painting, we're going to do part
two of this exercise. This is an idea that I
was introduced to me by entries would she hosts the saggy painter
podcast and it's a wonderful if you care to listen. This is derived from the concept of killing
your darlings. And I believe it's a
William Faulkner idea who would write lots of
words and then destroy them, and then continue
on and do it again. The idea is two things. First, it is to not be
precious with your work. To view your work as is
exploration as curiosity. It's not something that
has to be precious. It can be something
that you're learning. This is one way that's
been really help. The second idea is
that when you are, when you let go of the
work that you make, you will likely do
it better again, you have learned something
that first-time you've done it while you're
painting is still wet. If you're painting in
gouache or acrylic, this may be a quicker process and if you're painting in oil, but I want you to either wipe out or use water to
scrub out your painting. I know it's crazy. Yeah, philosophy to it. And I'll see you back
here in a second. So I am going to take to
some of this muddy water. It doesn't have to be
perfect as not to be clean. And I'm going to put
water all over it. And I'm gonna get
rid of this piece. If you're paying an
oil, you can just use a rag and some solvent
to wipe it out. If you're painting acrylic,
acrylic or gouache, you can do this if your
opinion, watercolor. It might be harder because
the translucent properties, so I might just have you cut off your painting if you're
painting in watercolor, I know crazy, right? Okay, so I have some
water on there, I'm going to wipe it out. You can still see it?
Since I can still see it. I waited a few minutes for that. I'm actually just going to
paint over it with some, some hate them already mixed. Skip a few minutes to dry. So this is my painting that
has been painted over. And the final step in this speed painting
is to do it again. You've already done it once. And so now you have
some stored ideas in your mind about how
you can make this work. You also have a pretty cool
shadow underneath that will allow for some
interesting surprises to come out in your painting. I'm gonna go ahead and
do it again as well. I'm going to let you watch, but this time I'm going
to speed up the video, but it will be submitted
and I will show you the result at the
end. Now your turn. Wipe out your painting, and then do another ten
minute painting on top.
6. Exercise One: Second Speed Painting: Alright, this painting
is mostly dry, so I'm ready to start a new one. The only thing I
have done since I paused the video was get some freshwater because it
was looking kinda crazy. So if you want to follow along with this 10-minute painting, right, time is up. Every habit. A second,
ten minute painting. This time, it was it felt
a little bit different. I had a few things
that I wanted to change from the first
time I painted it. And it was kinda fun to have some of those
shadows underneath. So go ahead and set up
another ten minute timer and do the painting
one more time. I'll see you in
the next exercise.
7. Intro to Exercise Two + Mixing Colors: This next exercise, we're
going to count our strokes. We're gonna do a painting for different times in as little
as strokes as possible. First it's gonna be
20 strokes than 15, then ten and then five. This is where having
a thicker brush would be very helpful. The ketone is also, is to mix a few
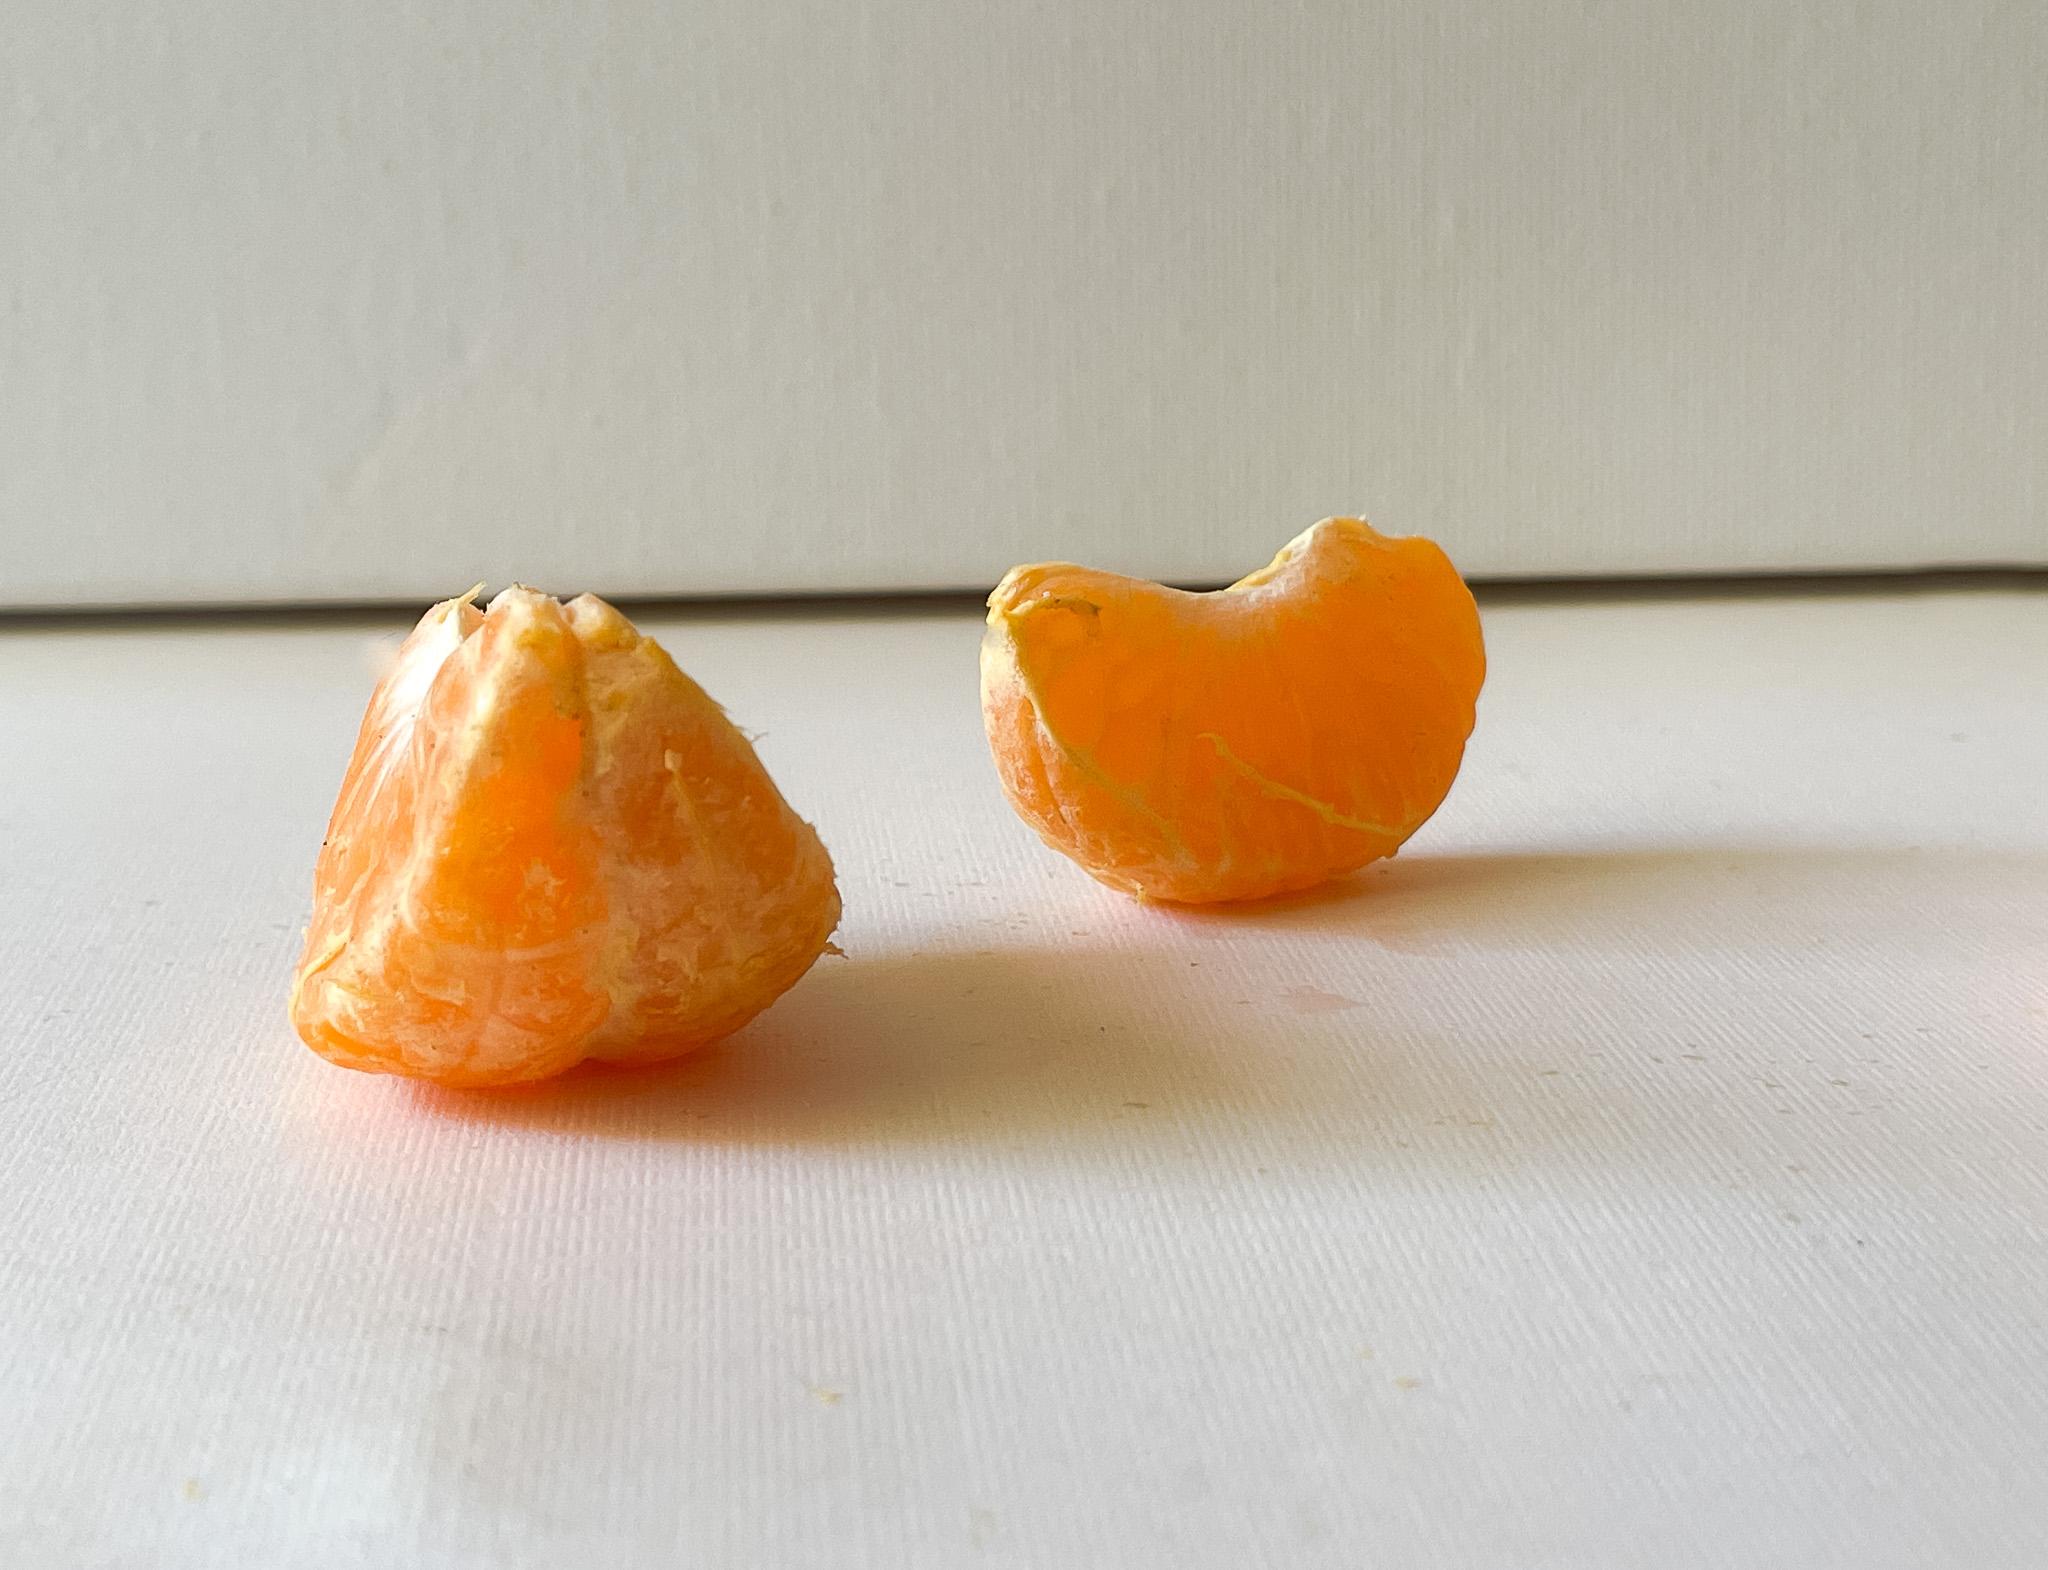
colors ahead of time. For this image, I'm gonna
be using a picture of some oranges that you can
download in this class. If you have your own
method of painting the color orange or mixing the paint that you
would like to for this? Absolutely. Go ahead and do that if you
want to follow along with me, I will be demonstrating it here. This is where having
that palette knife will be a little bit helpful if
you'd like to mix along. The first thing we're going
to do is take our pencil and watercolor paper and divide
it up into four sections. These don't need to be perfect. If you'd like to use a
straight edge you make. The point is just to separate your piece of paper so that we can use
it for this project. I'm just going to
use the straight edge and kind of estimate. It doesn't need to be perfect. This needs to be something
that we can use. That looks about right? I am going to write down the strokes for
each one is to remind me. So this top one
corner, I'm gonna, we're gonna be doing a painting
with 20 strokes than 15, then ten, then five. And that's just to remind me. The next step is going
to be mixing paint. The background here is white. There is a shadow at
the horizon where my floor and background
we're kind of meeting. I'm probably gonna ignore that. I'm probably just going
to paint it white and we're going to mix the
colors that I'm seeing. So again, if you have your
own way of doing this, this is not meant to be a, an intense color mixing class. But if you'd like
to follow along, you absolutely make so remember, I'm using a primary white, I've got primary yellow. I'm going to add
them this orange, obviously orange, oranges, not a primary, it's a mix of magenta and yellow
or red and yellow. But I just find it sometimes
helpful is a shortcut. Put my blue over here. Then my primary magenta. I'm going to hold
off on a black for now unless I can eat it. So if you happen to have a
palette knife, you can use it. If not, you can use a popsicle
stick or even your brush. I don't always love
using the brush because then you get a lot of pain up here in
the bristles that I just find it
hard to work with. So what I'm gonna do here
is just try to condense this orange in my mind into basically like three or
four very simple colors. I'm gonna start with
the darkest first, which is going to be
right at the right where the orange is touching the surface of the paper of
the floor of the ground. It's almost like
a reddish color. So I'm going to take
out some magenta, orange and mix is a super
rich color wheel like that. I'm actually leave
it the way it is. We'll leave it really strong. The next one I'm seeing is the shadow side of the mandarin orange where
there's two stuck together. So this is, again, this is not supposed
to be a class on color and it's not
supposed to be about that. So I'm not gonna go
too much into that, but I'm seeing that
side of the shadow to be a darker orange and the possibly a
little bit grayer. I'm going to bring
out some orange. I still have some
magenta on my knife, so I'm going to mix a little of that and
kind of see where we're at. Tiny bit of magenta. Then it's starting to get this. This is where it
can be kinda funny, but trust the process. I'm at a little bit of blue. So this is a slightly like
dirty version of an orange. So blue is the
opposite of orange and a color wheel that will basically make it a
slightly grayer version. Then I think this might be
a little bit dark as well. So I'm actually going to
add a tiny bit of white, not too much, just enough
to kinda dull it down. I think that's gonna
be about right. So this was following along. We have some orange, a tiny bit of magenta, a tiny bit of blue, and then a little bit
of light to color. The next color I'm
going to mix is the meaty part of the orange with a light
is passing through. So light is really cool things, but it goes through something. It can be, it glows and it
almost as like a richer color. So again, I want this to be
a pretty pure color, orange. And I'm actually
going to mix orange and yellow at first to see where we're at because
it's a lighter orange. And I like that. I might actually do. A little bit more
yellow and just kind of add some drama to this. I really want this to glow. They can sue me a really, really lovely bright orange. And since we only
have a few strokes, we have to be pretty
judicious about what we're going to all the marks
that we're going to make. The next thing I'm
seeing on this orange is the more meaty
parts of the orange that are against the light. So it's going to be basically a wider version of
our yellow orange. I'm just going to
move it over here. I already had some orange on. This is the only thing that Mike was just a little bit of
leftover orange and yellow. That if you're following along and wonder what the
heck I just did, I just didn't do anything. I just added some white to
what was already on my nice It's just a little
bit of orange or yellow and some white. And I think I think I'm gonna
add a little more yellow. This is just me kind
of spit balling. She would've follow along. You may. And you can also. I like that. We'll go with that. Maybe a tiny bit of blue. What happens with the
tiniest, tiniest bit? Like it's a barely
anything at all. See that? Hardly
anything at all. Just a little bit. Dull it
down because I want to make sure that other light
is really glowing. Okay, That's about right. The last thing I want to do on the orange is the white areas. So there is one part that
seems very, very white. I'm not looking at
that. I'm actually looking at the midi. The parts that come
from the rind that have a little bit of a
yellowish orange to them. So this is just some
white and again, this is just some leftover
paint on my palette knife. I need a little more. Let's actually
just going to grab a tiny bit of
orange, just go out. She says wash paint
dries very fast, so I'm happy to work quickly. Okay, that's a
little bit too dark. I'm going to add quite
a bit more white. I actually went to way too much. So I'm just going to
put this to the side for now when I start over and try this again. That's okay. That happens, especially if you haven't mixed a lot
of paint before. It can be really easy to this. This can get, this can get messy and it's normal
to use a lot of painting. So I'm just going to mix extra white into what's
left over here. So really this is just a lot of white and a little
bit of orange. And then I'm going to add
a tiny bit more yellow as well to co-create that may
be part of something good. Then the last thing I'm going to paint is or make is the shadow. So when I'm looking at the cast shadow of the
orange on the surface, it's kind of a
gray shadow color. We've got a little bit
of these darker red, pink areas, and I
think I'm going to take some of that color and
move it in with the shadows. I'm just taking a tiny
bit of magenta up here. I'm going to add in a bit of white and we're going
to start with this magenta white and then I'm
going to go from there. Let me get less what's
going out to the side? There's definitely gonna be obviously an orange
cast to this, but it's not orange. It's just gonna be
reflecting some adding some yellows right now this
is magenta, yellow and white. Little bit more white. And it's got a bit
of a green cast. So I'm going to add blue. This is going to change
pretty drastically. Basically like a muddy color. But once we put it in context, it'll make a lot more sense. This like muddy color. I'm getting a lot of it, some of that sum to the side. And just take a look back. I'm add some more yellow to
it in some more white to it. This is a little
bit of everything, but it was a lot
of nuance to it. I'm paying pretty
close attention to how this color relates
to the other colors. I think I'm going to
like that actually, I think I'm going
to stick with that. Then the last color
will be our white. I find pre-mixed to
be extremely helpful when playing with these ideas. So here we have our palette. We have mixed 123456, we have six colors. And we also have some extra of our primary CEUs just in case. In the next video, I will demonstrate how to make a painting by counting
your brushstrokes. And I will see you there.
8. Exercise Two: Count Your Strokes : This exercise, I'm going to demonstrate counting
your brushstrokes and how you can do this. If you chose to
mix paint with me, then you likely have a
palpate the videos if you, if you don't want
to do it that way and that's totally fine. But I would encourage
you to consider remixing to make this
easier on myself. I think I'm going to
draw out these oranges first just to kinda
give me a baseline. I'm going to look at
some of these shapes. Sometimes when we're, when we're struggling with perfectionism, we're looking more at what we
think we see versus what we actually see in this
exercise is really good in helping us draw. We actually see these
are very basic. I'm just drawing these oranges. And very simple,
simplified forms. See it's really just the shape. And I'm noting where
the orange will be. I like to always simplify
things into simpler shapes. I'm actually going
to basically repeat this drawing three
times, three more times. I'm kind of starting off
by capturing that front of the double slices. And then there's this like
little, I don't know. Maybe it's like a
heart shape almost of where you can see the edge and then it curls up and
it comes back around. So that's gonna be another one. Is that shadow here? It's this again, half-moon. I'm going to speed
up the video and draw this two more times. Alright, so now I
have my drawing down. I'm going to work on these paintings by
counting my strokes. I'm going to go
from dark to light. That's usually how
I like to approach paintings with this
type of materials. So I'm going to get
a little bit of my dark bread already
starting to dry, so we have to move quickly. I'm going to count. I'm seeing this dark red
shadow shape under here. That's 12. So when you're
working like this, you have to really
be careful about the economy of your marks. Every mark you make matters. You have to. I'm gonna pick up this
other dark orange here. What kind of media side? 34 with it, this will
waste and strokes. Six. Now I'm going to
tackle where that oranges really, really dramatic. I'm going to use that
bright orange that we mixed. We're at six. I'm going to mix
another white one here. I'm mixing some of that
shadow and down here, I'm letting me outright income at ten now. I'm going to have to
keep double-checking. The way it does,
quite a bit lighter. Now I'm going to use this other lighter one for this side. 13, 14. Does that count? I
think that counts. You see on this side is another
little, little left edge. And that's kinda back
to this darker one. I'm going to make
that gray that we made into the orange again. 16. There we go. Now, going to lay down the shadows before I
laid on the highlights, I think we're at 16:16 or
17. I haven't double-check. So I'm really done. This highlight are
the cast shadow here. 18, 19, 0 without we're
not going to have anytime for the the white
background, but that's okay. I'm down to the last row or
last two strokes, 18, right? So that's gonna be
this little bit. That little bit. That is a mandarin,
orange and 20 strokes. We're going to take this now. We're going to try to do
it in 15 and it's going to get harder and harder to finish. Once again, this
is not supposed to be this perfect
finished product. It's more to just help you loosen up on what you
think painting could be. That we're going to take
what we learned and we're going to try
it in 15 strokes. I definitely spent way too much time in
those shadows here. I think that's one
thing I'm going to have to have to change. I'm going to start
with I really read under shadows underneath it's called the occlusion shadow. And I'm gonna try to
do this in 15 strokes. Alright, so here's my
orange and 15 stroke. Definitely running out. And it may have been
better to stick to just one little sliver. One thing I'm noticing
here is that I think they either way too dark and
you're losing the forums. This is also a really good
opportunity to refine what you're seeing and to try
to simplify it even more. So, but with ten,
I'm gonna see if I can do it even better. But with just ten strokes. I think I might
change my process. Actually think I might do
the cast shadows first. Maybe don't even
worry about that red. Let's see how that works. Why would this be a lot lighter? Monday, dad's white? I think I'm missing that. No. Alright. That's what that's what
ten strokes looks like. It's starting to get
more and more abstract, but these are actually
beginning so much fun. Alright, I'm gonna do the five steps now, let's
see what we can do. This means a very big
economy of mark-making. And because there are
two objects here, basically I have two
shadows to shapes. And then just that one side. I think I'm going to
have to do it that way. I'm going to have to
flatten them a lot because there's just no way to
get everything in there. So I think what I'm gonna do is stick with the shadows again. I do like this color. I think it's working
for what it is. I'm gonna make a mark
for each shadow. We can absolutely moved up. If you notice, I was moving
my brush in circles, kinda make it fit the shape
and that's totally fine. I'm going to choose I'm going to choose this lighter orange
I was starting to mix. I just realized was
a little bit too dark as I was painting. I'm gonna make my very best to make this orange and one mark my brush a little bit
small for my drawings. So that may be a lesson
learned for next time. Okay, now the same over here. I'm going to use
the corner to kinda like tap it to
make it that edge. And then there we go. Then the only allele
get five strokes. So I think all if anything
else I'm gonna do, I'm ignore that edge
and then just do that one side on the
white, the light side. Let me use this like more muddy, lighter orange that
we've mixed and try to go to orange slices, five strokes. So once again,
obviously this is not meant to be a framed
piece of art. However, you can do this if you're struggling
with perfectionism, you can try this method, tried to convey whatever it
is you're doing and say 15, take a step back
and then look at it and then give yourself maybe five more marks to finish it and then
you call it done. Giving ourselves limitations
can be such a helpful way to manage our wrestling
with perfectionism.
9. Exercise Three: Surrender Control: In this last exercise, we're going to play with
letting go of control by using your non-dominant
hand and allowing ourselves to draw like we
did when we were kids. I have my paint is
still left over from the county
strokes exercise. And I have a fresh
sheet of paper and I clean up my water and
rinse out my brush. So obviously if
you're ambidextrous, this may not be as effective. However, most likely you still have one hand that you're
more comfortable with. And I recommend that you use the one that you're
least comfortable with. This, a really fun way
to start a painting. And it allows for some fun undertones that
maybe are less expected. So I'm right-handed. I'm gonna keep my pencil
and my left hand, and I'm actually going
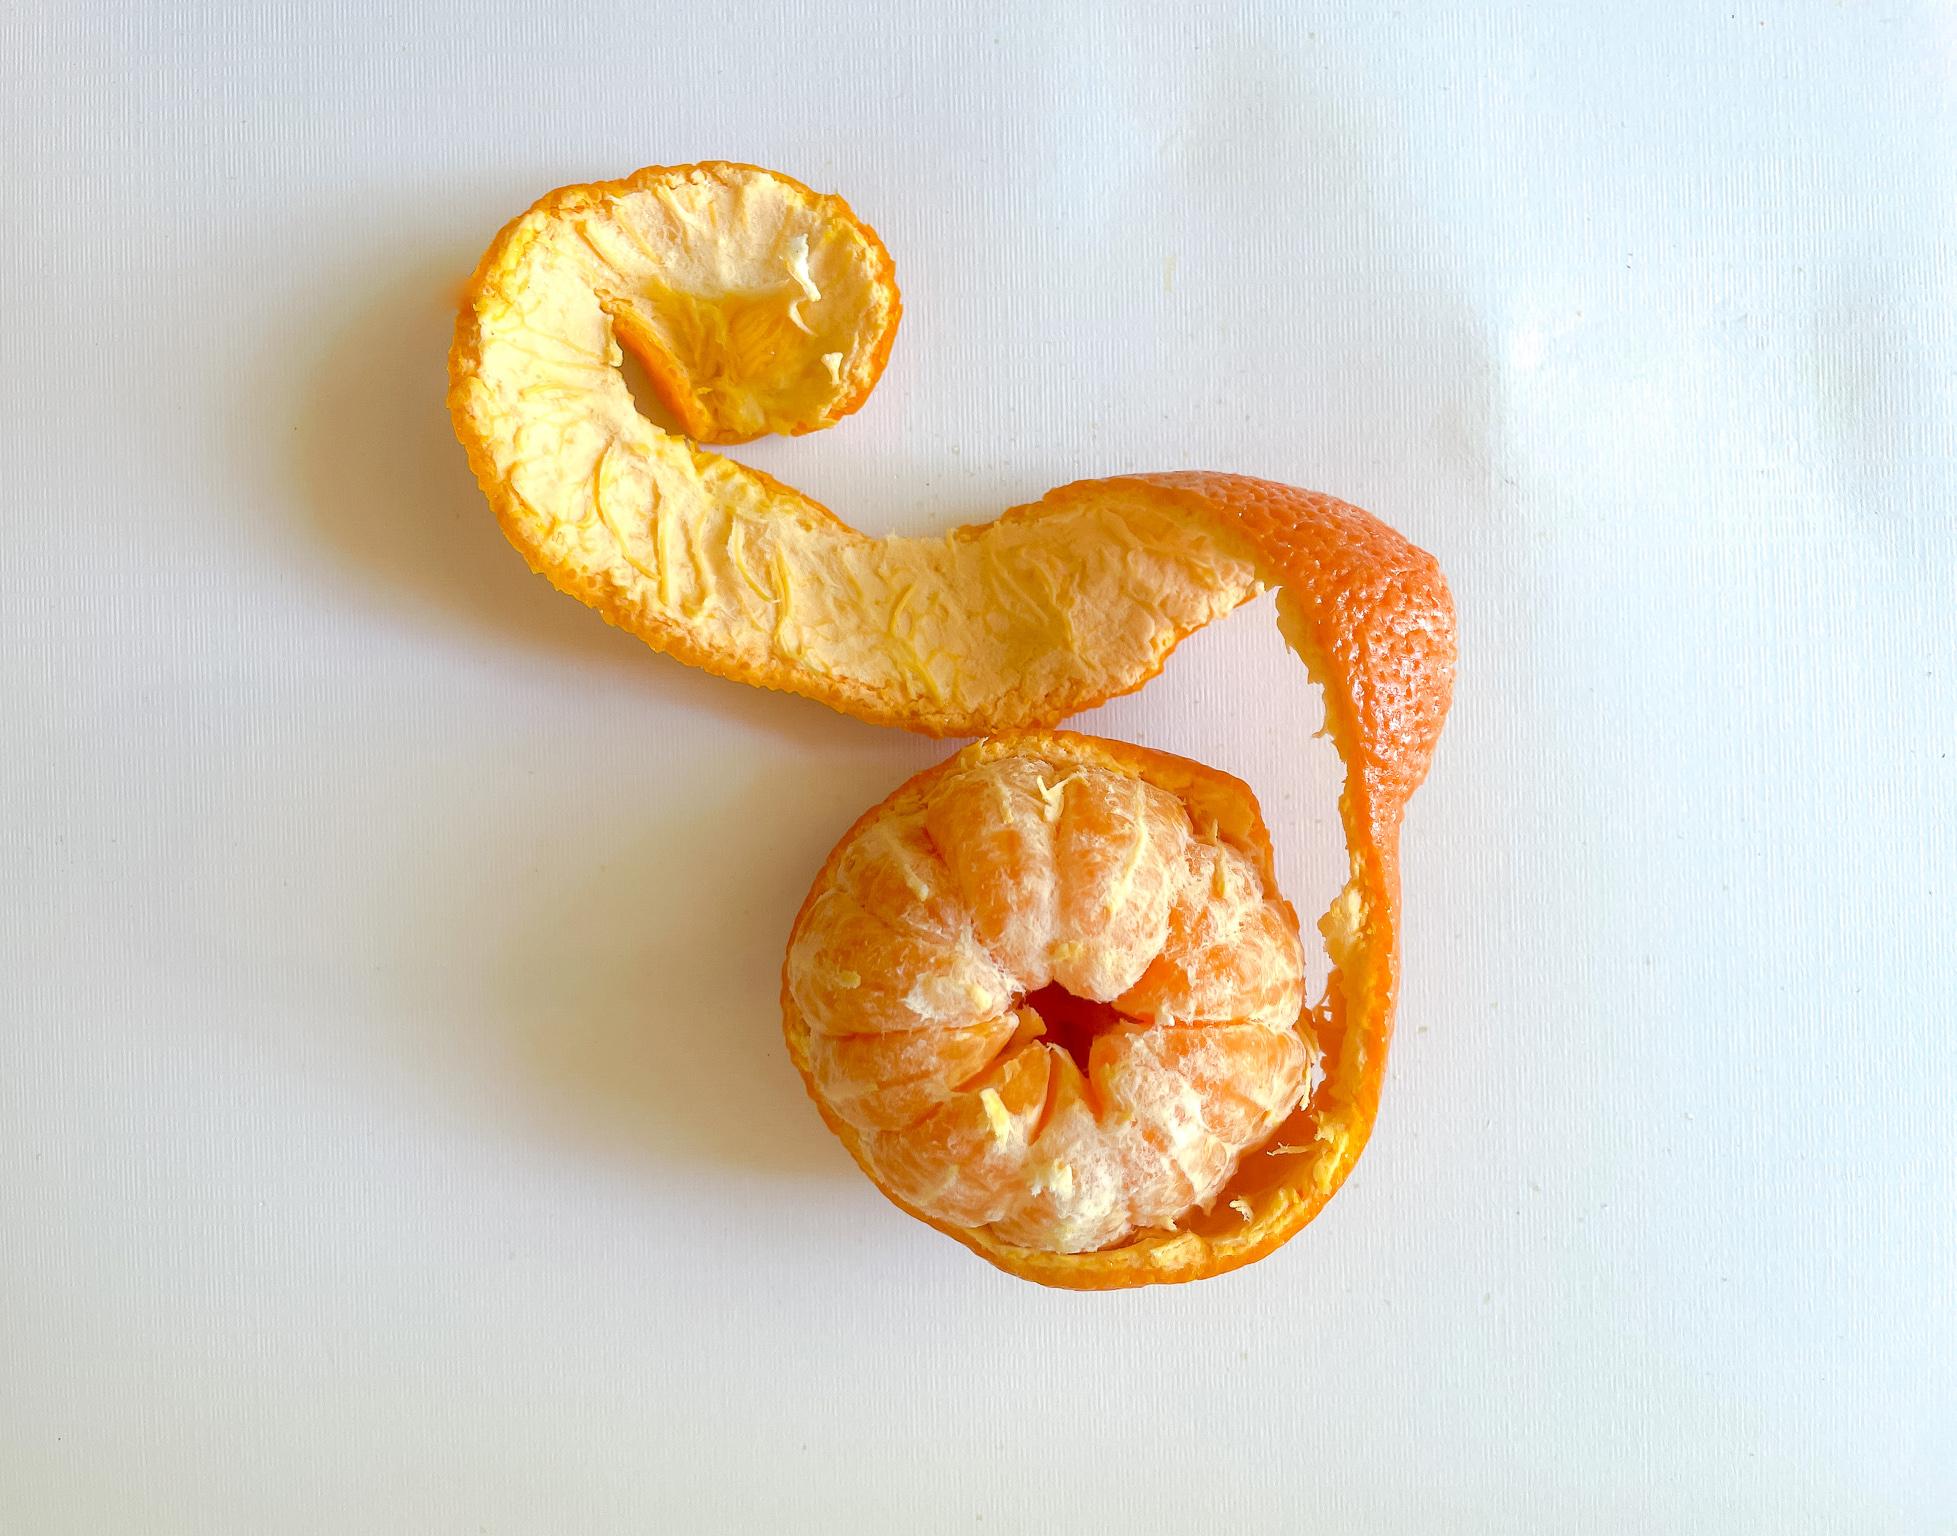
to draw my sketch with my left hand first. I took these fun pictures of my mandarin orange
with the peel. So I'm basically just like
drawing, I'm Andrew orange. I am going to draw that
center area and just kinda hint to the slices
that are coming off. This is like an upward view. Also in my image, the shadow is with
me and my shadows. I'm going to highlight,
just draw my shadow there and then draw
my shadow here. I can just tell that's
where we're looking. And then I'm going
to draw this peel, obviously in with my left hand. So this is not gonna
be a perfect thing. One thing I'm noticing
is helping is instead of putting my hand on the table
and drawing with my wrist, I'm just drawing
with my shoulder, so my hand is actually completely
off my paper right now. Drawn like this
can give such fun. Just marks that are really enjoyable to look
at as well as to make and painting should be fun. So we have our peel and
it's going in a circle. Then we've got our
cast shadow over here, then our other cash
shadow over here. The last thing I'm
gonna do is make some scribbles where I'm
seeing am I clear shadows? So I had already drawn
this out as a shadow. I'm gonna go ahead
and do that again. But then just like, Oh wow, my hand to scribble,
this is so fun. This makes for some really
fun marks underneath that you may be either the
viewer isn't expecting. Again, you can always
refine things later. I'm seeing another really
strong shadow over here. So scribble, scribble, scribble. We'd love to stay in the line. And then we finally have
some shadows over here. Scribble, scribble. Here we go. Then I'm seeing some
shadows here, will be here. Then definitely sound as well, where it turns following along with me and you still
have your paint out as well. I'm going to use what I already mixed because it's
still pretty wet. If you need to go back and re-watch that part
of the video to mix your colors than you absolutely can pause this video and go
back to that right now. So the first thing I'm
going to do again, here I am starting
with my right hand. I'm going to start
darker lights. I'm going to bring up
a really deep red. I just liked that read. I think it's fun
with my left hand. I'm just going to
use my brush pen and make marks will make blobs. I'm seeing where I'm seeing
that red dark shadow. There's a few spots
here and there. But for the most part,
it's going to be really just kinda some of these edges. That's it. Alright. I think that
I'm going to now pick up that more dull, dark orange. This is like a darker orange
with some blue in it. And use that to paint edges. This is pretty thin
gouache because actually it's becoming
pretty translucent. So if you're into watercolor, this might be a good, good
time for you as well. Seeing that also, I'm
going to pick up kind of a middle ground here. I always feel so weird to
be developed and the cap, my families are lefties but I am not seeing a little bit of a
darker orange around here. Right next. We've got this more
medium, brighter orange. I definitely, I'm going to
want some to be a bit lighter. I'm going to pick
up a few spots, even mixing with my left hand. Y'all, this is great. So he doesn't have
been friends ever seen people smile while
they're painting. I'm like That's right.
That's what it should be. We should be smiling.
This is fun. We're painting. You're smashing pigment
around on a paper. I'm just making this a little
bit later. It's great. What a privilege when they bring out some of these
lights over here. Then also definitely
more of a red orange. So I'm going to save
this more yellow orange for this half. It's not, I'm not gonna
I'm not really worried about all the white little
white crusty stuff. I might add that
at the very end. But for now, I'm
just going to use this to kind of suggest. The parts of the orange
that were the tangerine, whatever that is, mandarin
oranges, cuties. Keep TDS. I'm just gonna suggest them
and I'll go back and later. Unlike before, we're not worried about
counting our strokes, but we still don't want to take up too much time energy
making things perfect. Remember that's what
we're trying to work on is just letting things go, allowing the paint to
speak for itself and to just be interesting. Interpretations are subject. They always have to be perfect. And once again, remember, these can always act as
underpinnings for finished work. Use this way to start a
painting and then you can finish it with maybe something a little bit more controlled. Alright, so I want to work
on the rind over here. It's basically like a, it's still, it's a pretty
red version of this orange. I'm going to include this. Just orange and
white and no yellow. So it's just a less
yellow version, maybe even a little
bit more of that pink. I feel so weird mixing
paint with this hand. I'm going to bring that around. Then. I keep wanting
to to switch hands, but I keep I'm going to make a very yellow orange and
just kinda like bring this around and nod to some of these places
where you can still see the rind here. And the next thing I'm gonna do is bring out that like
inside yellow look, that's on the
inside of the peel. So I might need this, this is from before, this is just orange and white. I'm going to add this to this pile like a
white at already have and then probably just
add a little bit more yellow. Just keep it simple
for that first layer. I'm actually going
against what I normally do and going lighter
first, but that's okay. So I've got this like
yellowish color. I'm going to bring it around. And then to that lighter yellow, I'm actually going
to add what we have we mixed for
our cast shadow. That's some water to
that kind of get it going again. It's almost dry. And that's going to be
this is just a little bit lighter than
a cast shadow was before and I'm losing it now. So awesome. Redo it. That's okay. And that's going to add those, that shadow that is
wrapping around. Definitely losing it. I'm gonna have to add,
I'm gonna, I'm gonna use my right hand for a
second just to mix paint. I'm adding a little
blue a little rule. She much bank. That happens. There we go. I already had
it to begin with. I didn't need to
do all that bad. Mixed too much and
then I have it. Here. Is this a
little darker colors? Can believe me, that
shadow more dramatic. Sometimes it's fun to paint like this because you
get some really cool marks that you weren't maybe don't use whenever
you're more control. So would that same shadow color, I'm just going to
add a little bit of white to make it a little bit lighter and maybe add
a tiny bit more blue. This is all arbitrary. This is just new painting, but if you want to follow
along and participate, you may always helps. Sometimes it can just help to watch how somebody else does it. I'm going to use this
just like kind of muddy brown to suggest the cache shadows might be used to making these
really concise marks after that one exercise. So, okay. In this just seeing
the shadow in there, I'm actually going to just
allow the white of the paper to be what the light
is going to look like. So now what I wanna do is make everything just a little
bit wider because it's definitely looking a little
bit too dark for me. And so I'm going to add white to this mix that
we already have made. And maybe this more muddy
orange first to second, that's gonna be mostly white
with a tiny bit of orange. I might just use the corner
of my brush to kind of like suggests that it's
some of those little, you know, crumbly parts. It's dried a little
bit for me so I am able to do this
a few paint thicker, you may need to give it a
little bit more time to dry. These are all the
highlighted areas. So basically when
that lighter oranges, I'm kinda allowing
some of this stuff. To go on and pop up. And same idea in, within
the writing itself. It's definitely a bit more
yellow, more yellow to this. So there's already a
little bit in my brush, so it's like kind
of a muddy color and that's actually
totally fine. I'm just gonna use
that left hand to like not to some of
those highlights, but I'm not trying to
get a really specific, I'm just trying to
make likable inbox my brush and that's it. And then I think, Okay, I'm going to add
some more white on this. This is like some
reflected light back here and just actually
it's too dark. Let's make it just, this is just some
white and that, this is magenta and orange. So it's white,
magenta and orange. And I'm going to like, kind of bring out a little bit of
that texture of the peel, but not too much. Again, not supposed
to be a masterpiece. It's supposed to be an
exercise that is fun. It's more white every year
that I actually want to bring out some of the fleshy
parts back here again. This is gonna be, I'm
gonna bring out some of this shadowy color back in our white and maybe
a tiny bit of blue, like the tiniest, tiniest
little bit of blue. I think that's gonna
be about right. My hands are getting so tired. My left hand is not used
to doing all this work. I think it could use
a little bit more. I eat some of those purple. My left hand is like, you do not only
use me like this. Why are you doing this? Kind of like do the same
thing I was doing in the highlighted areas with this like more gray, muddy gray. It's just that fleshy part. And see my brush and maybe just bring out a
few more pops of a really dramatic orange again. It makes it straightening here. Tiny, tiny, tiny, tiny bit
of magenta, mostly orange. Those are going to let
these colors seeing. Just going to bring it around. Just be fun. Minds. Definitely not a masterpiece
and it doesn't have to be. Then wanted to change
hands and finish it with your dominant hand. You could, we'd have a really interesting
foundation layer that you may not have had if you had started with
a lot of control. I'm not going to
include all the details because I don't want this
to be too long for you, but I think you can kind
of see where it's going. I'm going to finish it off with painting the background again
to use my right hand to clean and then just pick up. My hands are getting so tired. We should set a time
limit to this, like, you know, 15 min or 10 min. I just have this is
just the white with a tiny bit of the color
we used for the shadow. Just because we
already know that it's pretty cohesive to
do it that way. You could do a different
color if you want it. But since I kinda had this
like brownie color shadow, that's what I'm gonna do. I'm gonna go ahead and just use that to kind of like
tie it all together. Wobbly. My left hand is
what's kind of fun. Some water to thin that
the funding that gouache. Again, you can use oil, acrylic gouache for this. You'd probably use watercolor to sticking to more
opaque paints that, That's typically how
I liked to work. I like to kinda layer in that
way versus the other way. But there's no right or wrong. Also, you can kinda see
the scribbles through it. You can leave as
entertain them out. Whichever. Scribbling kind of
just helps you. Loosen up, have some fun. Sometimes you can leave as
little things in there like happy accidents and oh, I'm actually going
to mix that is to kind of soften
up some of these hot like that look
a little too much. The last thing I'm gonna do, just make this a little bit, this darker, burnt orange again, I just wanted to like
clean up some of these edges is
definitely a little bit, I think might be to
read, but that's okay. That's also why we
can do these as warm-ups and you can always go back over it and make it
white what it needs to be. Yeah, that's why I
love opaque paints, because you can go over
them again and again. Sometimes it makes for
some really fun effects. All right, There you have it. Then we have our orange painted with our
non-dominant hand.
10. The Final Step: There is one final thing
that I like to do. Walk away for a period of time, a couple of hours to two to three days is
the sweet spot for me. And then come back to it. This is quite possibly
the best thing you can do after any
painting session, but especially with one
you're struggling with. Walking away gives your
eyes time to rest. And that helps your
brain relax as well. Oftentimes, it is by returning
to a piece and you can see with more clarity
what needs to be done, if anything at all. It's not uncommon to return to a painting and think
it's pretty much done. If you choose to
make adjustments, tried to keep them as simple
and concise as possible. Shopping before
you think you need to will help keep
your paintings fresh. I tried to keep
these adjustments to less than five per
cent of the painting. Now come see how I adjusted one of the paintings
from this exercise. This is just an
example of how you can go back over some of these. So this was my non-dominant
hand painting. I'm just seeing a few
different little areas that I want to clean up
and I don't want to lose the soul of the painting. So I'm just seeing
like the shape of the orange itself
with a little bit off. So I'm going to
clean up that side, but I'm not trying to overdo it. I wanted to still have
the feel of very loose. Like doesn't have to be perfect, doesn't have to be just like your reference or your picture
or whatever you're using. But I am going to use
it just to clean. So I'm just kinda using
a smaller brush here to refine the shape a little
bit that was bothering me. That's all. Just a few things
here and there. So may take so far all I have done to touch
it up is fix the shape. I'm just going to
add a lighter orange around and kind of show
off the perimeter. And then maybe a little bit more of that, like light yellow, orange to define the edge. Anymore. Not too much orange. This is really the
part where you can just kinda be
intuitive about it. But everyone looks good to you. I'm not making too
many marks here. Just a little bit more. I love the foundation. Funding it really fun. And gestural. Most important thing
are you having fun because it'll show up in
your paintings if you are. Alright. That's all.
11. High Fives All Around! : Thank you so much for joining
me in this class truly, I know your studio
time is so valuable and I'm just thrilled to spend a little bit of it with you. I hope you've had fun in
this class playing with ways to loosen up and
just explore paint. In this class, we
talked about how perfectionism can impact
our studio practice, as well as ways to spot it. The first exercise we did was
a speed painting combined with starting over followed
by another speed painting. This is one of my favorite ways to start paintings and it can be a really great reminder
early in the process to trust your hand and
not to worry too much. You can adapt this to any
kind of pain you want to do, varying the speed
duration for the process. You can even adapt
this to watercolor by doing a lot of small
sketches and a sketchbook. Next, we did an exercise
where we counted our strokes and incrementally decreased our available marks. The key to this exercise
was to be very intentional about the color type of marks and the process
that we took. This exercise is so helpful for developing strategy and
competence and your painting. Finally, we intentionally
gave up control by painting with a non-dominant
hand with no time limits. This is also a very fun way
to start a painting as it allows for some
surprising brush marks and you can choose to leave in. You can adapt this by
painting blind as well, by not looking at
your canvas and only your palate and reference photo for a short
period of time. The last step in this
process of tackling perfectionism is to simply walk away and give
it some space. This can vary from minutes to hours to even days and weeks. But when you come back
with a fresh perspective, you may find this piece is further along than you realized. If you choose to make
additional marks, try to keep them concise to preserve the fresh
underpainting. If there's one
thing you can take with you from this class, it's to remember that when
you were making a painting, you have so much space to
include your personality. In any loose painting, you'll inevitably
share a little bit of your handwriting in
your brushstrokes, and that's half the fun of it. Now, go ahead and share one or all three of your paintings from the exercises we did together. I can't wait to see your work.
 Kristin Cronic, paint with curiosity