Origami star decoration // fold your own paper decoration for in the Christmas tree or as a gift | Nellianna Van den Baard | Skillshare
Search

Playback Speed


1.0x


  • 0.5x
  • 0.75x
  • 1x (Normal)
  • 1.25x
  • 1.5x
  • 1.75x
  • 2x

Origami star decoration // fold your own paper decoration for in the Christmas tree or as a gift

teacher avatar Nellianna Van den Baard, Studio Snowpuppe

Watch this class and thousands more

Get unlimited access to every class
Taught by industry leaders & working professionals
Topics include illustration, design, photography, and more

Watch this class and thousands more

Get unlimited access to every class
Taught by industry leaders & working professionals
Topics include illustration, design, photography, and more

Lessons in This Class

    • 1.

      Introduction

      1:45

    • 2.

      Paper and tools

      1:15

    • 3.

      Taking over the template

      4:11

    • 4.

      Pre-folding

      3:13

    • 5.

      Decorating

      1:13

    • 6.

      Making a hole

      0:26

    • 7.

      Glue-ing

      2:26

    • 8.

      Adding the cord

      1:29

    • 9.

      Thank you

      0:42

  • --
  • Beginner level
  • Intermediate level
  • Advanced level
  • All levels

Community Generated

The level is determined by a majority opinion of students who have reviewed this class. The teacher's recommendation is shown until at least 5 student responses are collected.

119

Students

2

Projects

About This Class

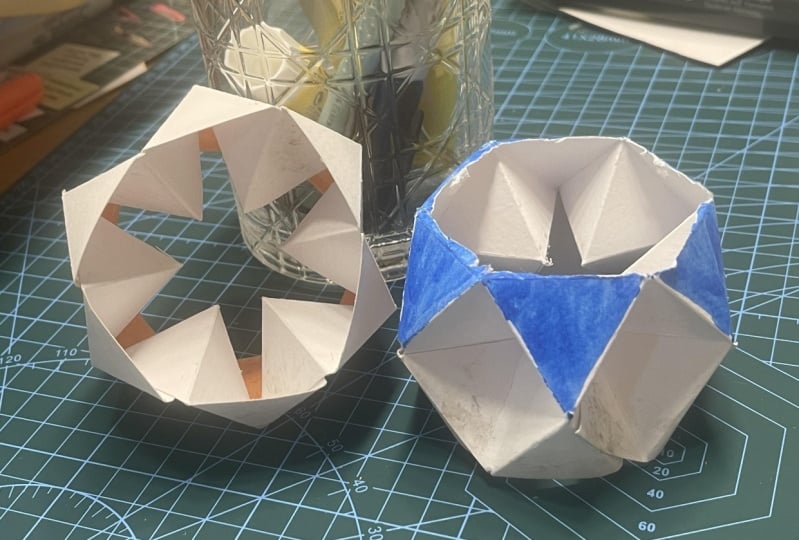
In this step-by-step class you learn how to fold a flat piece of paper into an inspiring star shape. We divide the paper in little triangles. You don’t need a large piece of paper. The perfect way to use your treassured scrap pieces of paper and turn them into a gift or a decoration for your home. You can join me in this video from start to finish. You learn to cut and fold a simple piece of paper in a beautiful star shape. You will be amazed by how you can transform a flat sheet of paper into a three dimensional shape.

You will learn skills and concepts as:

  • How to use and transfer a template
  • Shape a flat piece of paper by cutting, scoring and folding

You can find the template under the tab Project & Resources, only available through your computer, not your phone.

If you have a question you can leave a reply in the discussions and I will come back to you.

Find me on Instagram and don’t forget to tag me if you make these stars.

Happy folding!

Nellianna

Studio Snowpuppe

Meet Your Teacher

Teacher Profile Image

Nellianna Van den Baard

Studio Snowpuppe

Teacher

I love working with paper. The last years I have experimented with many different materials, but I keep coming back to paper. By cutting, scoring, folding the paper and combining traditional techniques like origami with a trial and error mindset. I came up with functional, contemporary designs that bring happiness into your home and may inspire you to be creative.

Find me on Instagram

See full profile

Level: Beginner

Class Ratings

Expectations Met?
    Exceeded!
  • 0%
  • Yes
  • 0%
  • Somewhat
  • 0%
  • Not really
  • 0%

Why Join Skillshare?

Take award-winning Skillshare Original Classes

Each class has short lessons, hands-on projects

Your membership supports Skillshare teachers

Learn From Anywhere

Take classes on the go with the Skillshare app. Stream or download to watch on the plane, the subway, or wherever you learn best.

Transcripts

1. Introduction: My name is Eliana from the Netherlands. I'm a vapor China. And in this Skillshare class we are going to make and these little fun objects, paper objects together like little stars, insights. I hope you enjoyed this class. Since 2010, I make and the same paper lamps. They look like this. This one. You can fold it out and hang. It's Irish hearing. And I are this kind of lamp. You can also use it as a hats, for example. And the other gamete look. The projects I'm going to talk about today also is in, inside of the book, we made a better live into older gamete. There are 2020 or gummy projects insights. Even this star decoration that we are going to make. In the next video, I will share the tools that are used. Let's start folding. 2. Paper and tools: For this project, you need a knife. Scissors, scoring Fen, some fire to burn the edges after broke. Throw some masking tape. To put the template on your paper. And a metal ruler took guts, took out some templates to vaporize your needs as 139 by 120. And maybe meter. Or A4 size is also good. In my other Skillshare class about vapor leaves, I give advice about the thickness of the paper. 3. Taking over the template: First, cut out the templates with some type of base to the template to your piece of paper. It would be with your scoring tool and the rotor you can score to folding that's in the paper. And discard of folding lines in different directions. And action. Change direction. This is the outline after templates. 4. Pre-folding: Now we will prefer scarring lies in both directions. That you can use the edge of the table to press the faults in the paper. You'll get something you are your own or technique. Okay? This is a good group. What do you think? You are ready with three folding when our only triangles left. 5. Decorating : You can decorate your star decoration in many ways. In this project I highlighted to start this inside of the declaration by coloring the star shape of her templates. If you can make a star shapes and nuke true by cutting out the hexagon shape and said freakin pits. You can use a paper that's already been decorated. Or you can draw something on the outsides of your star decoration. I'm excited to see all of your ideas. 6. Making a hole: Do you want to hang your declaration? Adds an extra hole inside the paper. In this hole you can add a little piece of courts. Use a homemaker or sharp stick to make the hole. In another video, I will show you how to add a piece of card to your declaration. 7. Glue-ing: This is the most fun part of making your decoration. On the outside of your piece of paper. At some glued to the triangles, pointing out. Continue until triangles glutes together. You are almost there. Okay. Good. 8. Adding the cord: Bring both ends of the guards to how you maintain the declaration. Besides select up here no better way to overhead and nuts. You can eat each day and that falls in this decoration. 9. Thank you: I hope you had some fun time creating this star decoration. Thank you for taking this Skillshare class. If you have any questions or ideas, let me know and I'd be happy to, to help follow our creative protests as our Instagram page at snow-capped. Please use hashtag snowball. But if you want to share your creation, I hope to see you again in another creative projects.