Transcripts
1. 01 Intro: Hi, and welcome to these new
incredible adventures in the realm of how we create
images and videos with AI. Today we are embarking in
a new amazing journey to the discovery of a
software that is redefining how we
think about GTV. No a studio is
really changing how we create multimedia
content with GTV. We are shifting from
an era where we create images and videos with prompts into a new era where professional
create repeatable, scalable and
consistent workflow. Riccardo Scrocca,
a professional, multimodal designer
based in Rome, Italy. And in the last year,
I've created more than 100,000 images
with Mid Journey, nano banana, GPT image. And now it's time to change how we think about creating images. B in this new era, where the speed is
always accelerating, creating in a way
that is faster, that is more precise is the
key to make the difference. In this journey, I
will show you how to use this new
incredible platform that allow you to create images, videos,
text-to-speech, copy. All in one platform, solving the problem to use many different tools
for each of these tasks. With other studio,
you will be able to create everything you
need for your brand, for your social media, for your content in one platform without shifting from Mjourney for image video, x field for maybe
image or video, StopIt for copy, de labs
for the text-to-speech. In Node Studio, you
will be able to create any type of flows, any type of nodes. And I will help you master
this incredible platform that is really changing the
way we work with Gentiv. So back it up because
in this journey, I will show you everything
you need to know to create amazing content
with Node Studio. We'll see how the interface, how to use the node, the link them to create
amazing workflow. We will see the different nodes you will be using
to create image, to create videos, to create
audio, text-to-speech. And, of course, we will
join everything together. So you will be able to
create for your project a multimedia campaign for any
kind of product or brand. So let's start this
incredible journey together. I'm pretty sure that
you will be blown away on what really you can
achieve with another studio. See you in the first lesson.
2. 02 Project class: Hi, and welcome to
your project class. For this particular class, I choose to challenge you with the creation of a
multimodal brand campaign. Why multimodal brand campaign? Because anyone can create
a cool image randomly. But creating cohent assets
is really another level. The challenge for
this project is to create three
different output. First of all, I
want you to choose and imagine a new
futuristic brand, futuristic snicker or
an energy drink or whatever kind of service or product you
want to represent. And then you have to create
three different output. The first one will
be the hero image, the image that will
represent your brand. This is the main image that will make us understand
what your brand, what your product is about. It has to be very epic, communicative and it will have
to capture the attention. Then I want you to create
few different images, maybe lifestyle images
with the same style. So you can use the extract notes to fix the style of your brand, of your image, the vibes and decline them in a few
different images. And then I challenge
you to create a video out of one
of your image. So you have to animate
any of your image and create a stunning
video for your brand. Lastly, I want you to share
your screenshot of the nodes. I think this will
be very helpful for other students
to get more in the deep of the really
incredible possibility that locks NodezStudio. Without losing any more time, let's jump into the software. In the next video, I will
show you the interface and the very basic elements
of NodezStudio. See you in the next video.
3. 03 Discovering Nodez Navigation & Interface: Hi, and welcome to
this new lesson. In this first lesson, we will see the interface, and I will guide you on how
to use the infinite Canvas or no the studio to start
creating your first nodes. We will see how to
use all the nodes available to start
creating your floes. So without losing any more time, let's go my computer and let's discover this new
incredible software. Are on Nodes studio that is
actually in closed beta. So you can test for free, just requesting
request the access. At this point, we'll be
prompt to insert your email. And then you will have this kind this interface with your
position in the queue. You can create your
image to share to gain some spots in the list
using your referral. Each referral will help
you gather 50 position. When you receive your code, you can create login. You will see this interface with all the nodes you created. Here, you will find the folder to organize
your nodes, your credits, the cost of any of the
different model for image, videos, copy, text to
speech, and so on. This is to change
the color setting. Here, you will find some template created by
the Min and by other users. We will see the next in one of the next lesson how work the templates part
of the website. From here, you will see
the latest nodes you created with a gallery
for each of your nodes. So here you will
see all the images and videos you created
in the different nodes. And these are the image I
created for this class. So we'll see in the next lesson how I created these images. To get started, here, you just have to
click on new nodes, and here is our main interface. We have this infinite Canvas, where you can drag and
drop the elements. You can click on Run LLM. You can add the text prompt, the system prompt, and input. The image and knowledge
for the knowledge. In this way, you are
creating a custom GPT, where this is the brain
where you can choose the model between
Gemini, GPT clot. And these are all the elements that you
need to make it work. So you need some
system instruction, some prompt some images if you want to use them for the
generation and the knowledge. This is very powerful
because in the knowledge, you can upload your
branding file. So here, you will build the knowledge base
for your brand. So this is the way you can create any kind of
copy inside nodes. The image generation is
pretty straightforward. You have the image and model. You will add a prompter, and of course, you can
add input for the images. For the video
generation is the same. You can choose the
video gen nodes, of the test text add an input for the starting
frame, and here we go. You are ready to create
images and video. Of course, you can link together your nodes to create
more complex structure, you can use the brain to create your prompt and you
can use your image as reference for another brain to create different text like this. You can select this your
nodes and with Command C, you can copy and command V. You can paste the nodes
you selected, or you can just
click and shift to select all the nodes you want
to run together or to copy. What you can do, you can
group the nodes this way, just selecting and
clicking on group. This will create
this group that can be useful to organize
your content. You can just click on
the group duplicate, and now you have the same
nodes in the first group into a second one and you
can change the color to visually organize
m. On the left, you have the control
bar where all the option for the
notes you create. Yeah, you can write the
prompt for the prompt notes. You can see the imported images or videos in the support file. You can see the knowledge if you uploaded some kind of text. Markdown. Yeah, you have
all the different notes, you are the input AI, jative nodes, dates
and logic, I tools, image tool, and gallery here, you will find all the images
generated in these notes. As you can see if I opened
any of the other one, here, you will find all the images generated
in these notes. What you can do when you create new create a new
notes from here, you can rename it
You can save it. You can publish and share. With this one, you will
create a template that will be shared with the
community so you can make other users use it. Yeah, you have to say
the name of the nodes, the description, the category. You can add some tag and
your name, and this way, you will share your workflow, your nodes with
all the community. This battle is to run
the selected nodes. Or if you don't click any, you will run all the nodes
with the run feature. Now you are able to start using Node Studio and
in the next lesson, we will start generating some incredible image
for your brand. See you in the next lesson.
4. 04 Discovering Nodez Image generation: Welcome to this new
incredible lesson. In the previous one,
we saw the interface and how it works the
infinite Canvas. In this new lesson, we will start generating image, and we will use the latest model available from
Google and Open eye like Nano Banana Shoe and GPT image to
create standing image. Without losing any more time, let's go on my computer and start make something beautiful. Inside the dashboard, and R is the first workflow I created for this
lesson that is image, and this is the image
I created as a test. You can just click here to see all the image generated
in this Workflow, at the moment, is just one. And from here, you can
download or you can filter depending using the different
information and model. And from here, you can
download everything. So let's jump in straight inside the nodes and
see how these work. Here is a basic simple nodes, but it's very powerful
because from this, you can just start
creating amazing images. Have an image generation. Nodes. We have a text, and we have an import images. The text is where you write what you want
to see in your image. Here you can choose
the different model. Let's start with nano Banana, that is the cheaper one. You can create an
image for ten credits. Let's try a different
aspect ratio and run. Here, what we will see
in a few seconds will be the new image generated
from this prompt. Here, it is. Look how crazy it is a giant tunat flying in
the street of New York. From here, you can
download the late or just scroll among all the
image generated in this node. Here, you can add a gallery, nodes that will show in a better and bigger
way the image created. Let's try something
different here. We can use another prompt so we added a different prompt
with some more details. And here, let's try to change and generate
with nanobandT that is the latest model
released by Google Gemini. Yeah, we can change the aspect
ratio or leave as it is. We can change the resolution. Here, we can arrive. We can have image even
to four K. Of course, creating an image at four K with nano Banana Tu will
cost you more credits. So I suggest you too, if you are on the free trial to choose a lower resolution to just run out of your credits at the very beginning
of your test. Let's run. You can
run from here, you can run directly
here on the nodes or you can run here from
the bar. Let's run. As you can see,
while it is working, you will see this dash dot on the link that are connected
to this generation. Here, we will see the input and here we will see the output. Here it is Look how
amazing is this image. You can see a in the gallery. Okay, let's try
something different now. Let's take a new
image gen. Let's take a new text prompt
and a new Import. Now I will show you how to edit your images that's pretty
easy and straightforward. Let's use one of these. Let's take this one. We can download and
now let's drag and drop our images here
inside the import node. Here it is. As I told you, here you can upload maximum
ten different images. Let's link to the image. By the way, the
color is matching. So prompt this orange
image is violet, and so on videos
are red, and so on. Here, we can say,
change the doughnuts. In the image with an
alien spacecraft. Here, we can choose
any of the model. Let's try with nar banana. Let's use different
aspect ratio. So we can pass 169-916. And here we can run. Now it will create a vertical image
changing this subject, but maintaining all the details
from the previous image. Look, here it is. So as you can see, it's
a cropped image of this. Or let's say, let's do this way. Gallery, here. Interesting. As you can see, the taxi are there. The man on the bottom is there. Of course, it change and crop
the image to make it 916. Let's try to run again, this one, but in this way, just change the subject without changing the aspect
ratio of of this image. Here it is. As you can see, this image is almost
identical to the first one, instead of the giant donuts, we have a giant spacecraft. And as you can see, all the
men are in the same position. The taxi, everything it's
already in the same position. Okay. So now let's
do other thing here. Let's create. So let's
create this image. Run. Here, it is. Look how crazy is
this image Stan lot. Yeah, this we can
remove this and we cannot man we cannot
model M model. Here it is. Let's say we want to use someone
who dressed, maybe. Maybe this one. Let's say we want
to use this one. We can add this in the image, and let's try to
replace the woman in the first image with the
man in the second image. Let's try to change this
man inside this image, run There it is. Look how easy it is to replace a character
inside an image. As you can see, this image is almost identical to this one. Just change the
subject of our image. Okay, great. In this lesson, we started generating
amazing images. But for your brand,
you need more. You need current assets. You need current images. So in the next lesson, we will see how to extract
the style from your image and create many different
assets for your brand. See you in the next lesson.
5. 05 Discovering Nodez Style extraction: Hi, and welcome to another
incredible lesson. Consistency is the
main challenge with gene v. And in this lesson, I will show you how to use the style extract nodes to
transform your images into a current style
description that will help you create any type of mage in your without
losing any more time, let's go my computer and
see how you can achieve perfect result with style nodes. We are back into nodes studio. Let's see how works
the style extract. Let's create a new
nodes and here we can just dragon drop the
style extract nodes. As you can see here, we just have to link an image that could be
generated or imported. Let's take an import. Image. Here we can
upload an image that we want to analyze
and find the style. This could be very useful if you want to create images that have all the same style this
is the image I want to analyze with this happiness
and emotional feeling. I can just drop the image
here and when I run, it will create a style prompt to generate images that are in
the same style. Let's see. Yeah, we can add a
text output so we can see better the output. It is. This is a realistic
photography, medium close up, natural framing, shallow
Depopil, creamy Bugev, trombglighting,
golden hour lighting, sunkisset glow,
subtle lens flare, natural color grading, the
die king texture, and so on. These are all the elements
that can describe the ima. Now, what you can do is to take a merge node you can
take prompt Nodes, let's link this
one and that one. As you can see, at the style, it will be shown here. Let's create a
different image then walking on the
street of new York. As you can see, as I finish
to write my prompt here, rendered the Merged prompt between the subject
and this style. Let's use this for generateing another
image. In this way. Let's choose another banana
that is the cheapest model. Let's say two run. I want to show you why
this can be really, really powerful. Here it is. As you can see, this image here, the color, the style, the lightning is quite
close to this one. Let's try something different. Let's take another image. This one. Here it is. Let's put this here and the
previous one, as you can see. Let's run again and
now we will have a very different style that will be used to
create our image. As you can see, here
already changing the style. Let's run again. Here it is. Look how different is
the style of the image, depending on the
style reference, depending on the style
extractor that we use. That was the second one. When we have styles that we like and we want to
replicate with any image, we just have to change the text prompt with
our request like the dog heating and
ice cream on the sofa. And of course, any image, let's see this one with
this different mode, let's run again and we can have image with all the same style. This could be very important
because this could be the style of our
brand or our client. If we change something at the very beginning
of our notes, and we hit 10, it will generate a new style, and then a new image. So we can automate
this process this way. Look, strange Okay. Here it is. In this lesson, we saw how to create a consistent visual look, but how to get smarter with the prompt to
achieve better results. In the next lesson, I will show you how to use the brain of Gentiv to enhance your prompt
and achieve better results. So see you in the next lesson.
6. 06 Discovering Nodez Llms for better prompts: Okay, so welcome to this
new incredible lesson. In the previous one,
we saw how to extract the style from the image
to create coherent assets. We will do another big jump in this lesson because we will start using the power of Gen
DBI to enhance your prompt. So we will use Gemini
to create sunning, prompt and level up the
quality of your output. So without losing any more time, let's go on my
computer and let's see something crazy
I prepare for you. Yeah, inside our dashboard, now we will create a new nodes, and we will use the power of
AI to enhance our prompt. So let's start very simple with an image generation
node and a prompt. Now, let's connect them. Let's start creating
a simple prompt, a ship cruising
quietly on the ocean. So here, we can choose Nar
banana as our fastest model, and let's create a
16 by nine image. In this way, our
image generation will create an image
that will be nice, but we don't have any
control on the image. We can't change the
time of the day. We can change the type of ship, we can change the type of landscape because in our prompt, we just told the AI to
create an image with very basic information and AI put a lot more work into
creating the image. So if you want to have a complete control over the
way you generate image, you have to write a
longer prompt this is pretty tricky because
not all of us are very expert into
creating the prompt. Here we can use the
model Run LLM as our smart guy knowing how exactly to prompt to
get perfect images. Here we can link our text prompt to the input
port prompt in the Run LLM module and the text output to the prompt into the
image generation model. And here we can add a system prompt that are
basically the instruction. The system prompt is
the instruction we give to AI to do
what we want to do. Here, we can choose
the different model. We can use Gemini Flash or
GPT 5.4 mini. Let's run. So here is cooking our
prompter and here we can run the prompter using the same setting of
our previous image. And let's see the
result. Here, it is. Look how different
is the image we can create if we enhance our
prompt with an LLM module. We can try different things
like we can try with Gemini. Yeah, it will create
a different prompt. Gemini usually create
longer prompt. Let's see the
results. Here it is. In this case, Jamie created an image
very, very beautiful. It took the same kind of
shape in the first image, but it give more atmospheric and enhanced, you know, look. If we run again with
the same prompt, we will have a similar image. But of course, we can change
everything in our prompt. We can change the color palette, the composition, the detail, the aspeto, the atmosphere. With a longer prompt, we have better
control on the image. We can switch back to our
previous prompt from GPT. 5.4 and see the difference
running again another image. As you can see, the GPT
image is more focused on atmosphere on cinematic
representation of the ship. Instead, the Gemini prompter
is more lean into reality. Another way we can
do this is to use the image prompt optimizer
in which we don't have to insert the instruction because it's already optimized the prompt to create
stunning images. And here we can try this
different solution. But you can have a look
at the system prompter. I is very specific. Here, this is the
ovitimized prompt, and this is our image from
the optimized prompt. With this model,
you can't change the AI creating the prompt. It is used by default
to use Jami flash. Look how beautiful
is that image. So in this way, you
really can achieve the perfect control over
your image generations. You have mastered the way to use the brain of Geneve to
create better prompt. You are ready to create
standing images. In the next video,
we will see how to use the power
of nother studio, not only to create
visuals but to create text and copy for your
multimodal brand campaign. See you in the next lesson.
7. 07 Discovering Nodez Creating text and copy: Hi, and welcome to another
interesting lessons. A great campaign start
with a great message. And in this lesson, we see how to create headline and text and copy that connect with your audience using
the brain of Jeni B. So without losing any more time, let's go my computer and see
how you can turn your ideas into captivating text and
copy for your audience. Now we'll see how
powerful it is not a studio to create copy
for any kind of use. Here in the sidebar, we have some interesting
high tools that will help you with the
creation of any kind of copy. Let's drag social copy that is specialized
into creating caption for social cell blog that is specialized for the
creation of blog articles, optimize it for the CEO. Let's use ad copy that will create amazing for your product. Let's use product
descriptions that will create a perfect description for your website or for your
commerce and the last one, the email copy, that will create amazing email for
your newsletter or for any kind of use you want. Let's start from the beginning, we can add a basic
text prompt to any of these create a post
for Instagram. Prompt very easy. Create a blog post
for for my ecommerce. And of course, I will
show you exactly how to use this the correct way. That's link here. And again, So now we are set
up all the model. Of course, we don't
have the product, but we can create it
with a few simple step. And I will show you how powerful is nodes in this scenario. So let's start with image
gen, a simple prompter. And here we can write
product photography. A drink energy can on
a white background. The brand is Tu ta fruta. So let's use nano baanana
to create our product. And I will show you
how powerful is this pork flow. Here it is. Look how amazing is our product, our drink energy
drink Tutta fruta. Now we can use our Run
large language model, putting this as a reference to create all we need
for our copy here, system prompter is that from the Okay, so here we can create with our run large language
model, the brain, the campaign for our product, and then we can decline our strategy into the
different piece of content, piece of copy let's bring this a little higher this here it is. So now, here it is. This is our let's connect with the text output just to
read better this text. Let's do some space
adjustment. Here, it is. So here we have everything
about our strategy. Tata ta, Tutta
fruta, here it is, position, energy drink,
branding strategy, vision, target audience, brand persona, key differentiator, brand
pillars, and so on. Everything really
we need to create an amazing positionment
for the market. Now, we can use this
as knowledge for all our different
piece of content this. So we are linking our rending to the
knowledge input on the different nodes. And here is the magic. Now, with just one click
selecting all these model, we can run them simultaneously
having all what we need. The copy for our Instagram page. Here is two ideas for
the copy the CO blog. So this is the social
copy. This is the blog. This is the advertising. As you can see, for
any of these needs, we can create the
perfect output. This is the mail announcing
the launch of Tutta fruta, Tatta new product
launch annunchment. Here we have some ideas
for the subject line, the preview text, email
body, and here it is. Look, how crazy is this from
this simple basic idea. Really, we can use
node studio to create any type of copy for
any business use. And it's very simple. And of course, we can restart everything just changing
the prompter or the ideas at the beginning and we can
relaunch automatically and regenerate everything with
just the click of one button. And that's really
incredibly powerful. Great. Now we have the text. We already created the visual, and in the next lesson, I will show you how
to combine then to create something unique
for your social media. So see you in the next lesson.
8. 08 Discovering Nodez Product to social media: Hi, and welcome to
another great lesson. Today, we will turn
your images into social media content using
the power of Gentiv. We will see how to use
images and videos to generate ready to use captions for your
social media post. So without losing any more time, let's go on my computer
and see the magic happen. Now we will see how to
create amazing images ready for your social posts
starting from the product. We will use the product we generated in the previous
lesson as starting point. Let's create a new nodes and
here we will use the input. Notes to upload our product. We will use the image
gen and the text to just create amazing lifestyle
images for your product, for your social media create an amazing lifestyle
photography for the product. And energy drink to Tao, we can choose any of our model. Let's try for five, one K, no ban two, and run. As I show you in the
previous lesson, you can create your text prompt
or you can use your LLM, or you can use the
photo prompt to create an incredible prompt
for image generation. You can use this way. This way, and this will run a more complex prompter
for the image generation. Let's link the image to and run. Here it is. Look at how
cool is this image. It's a little bit too big. Probably we can try again if we achieve better
result. Yeah, it is. We have a different one with our Tutta frutta energy
drink on the table. Of course, we can give some more instruction in
the original prompto. I want a sunny summer
image with pun and action. Let's run this again and
let's run this again. We have a different prompt. Let's run the image
model generation. Of course, here, you can use the gallery nodes to see
all the generated images. This is very cool. Of course, we can try to use different model to achieve
different results. Every time we run our
large language model node, we will have a different
prompt so we can try to create different
type of images. This is editable so you can add or you can change
detail as you wish. Let's run again. GPT
Image is very powerful, but it is a little bit slower. Now banana is way faster. Look how amazing is this
image from GPT image to. So cool. Yeah, it
is another one. We can use all these image
to extract the style. It will help you to create a consistent visual style
for all your future images. Like you create a
moodboard and you can decide to create a style that will be useful to create
very consistent images. You can use this in
your actual prompter in your prompter to make
this make better. So let's do this way. Let's try again here. We can inter. Imagine text prompt, here it is. Let's link this. Let's copy this here our prompt and let's run. Here. After this and here it is. So now from here, we can create our content
for social media. We can use social copy, just link the images. Let's at the prompt. As a knowledge, we can connect
the image, and let's run. Oh. Let's see. Here it is. This will give you
two different copy for Instagram ready to be used. They will be perfect as a
caption for your images. You can use this one
with single images too, so it will be more precise to
create the perfect caption. Your product. Great. Now our
static assets are ready, but to achieve the next level, you have to turn your
images into video. In the next lesson, I will show you how to use the
video gen node to animate your image and create cinematic
clip for your brand. See you in the next lesson.
9. 09 Discovering Nodez Video generation: Hi, welcome to another
amazing lesson. We already created our assets, and now it's time to turn
them into incredible videos. Motion is what you need to capture the attention
of your audience. In this lesson, I
will show you how to use the video Gen
node to transform your images into
standing video using the latest render gin available. Without losing any more time, let's go my computer and
start creating some chinema. So we are back in our dashboard, and for this video, I will show you how to create amazing videos starting
with the images, and we will use the workflow we created in the
previous lesson. Let's start from here. And here I will show
you how to transform these amazing
lifestyle images into crazy videos with
the video gen notes. Let's drop this
here and from here, can just link the image generated in the previous
notes with the video gen. In video gen, you can choose
the model you prefer. Each one at different feature, at different price, and from a, you can see that there
are some model that will create video
and audio together. There are some frame
that allow you to use the end frame too. This is very interesting
because you can link your images to the starting
frame to the end frame, and this will create smooth transition between
the two different images. Of course, you can create
your video starting just with the prompt and
node with the image. But in this case, we will
try to animate the image. From here, you can just
create a new text, prompt node, and animate. The image is an atico
for my brand Tutta. So here, we can specify what
kind of movement the camera should do or what type of
anivon we want for our video. So camera push back quickly party. Okay? From here, we can choose this one that
is the cheapest one. We have cheapest
model, and let's run. In a few seconds, we will transform this
image into a video. Of course, we can replicate the same process for all
the images we generated, and we can animate our images
to create stunning visuals, stunning video stunning
advertising for our product. Let's wait. Let's
see here it is. Look, amazing. In a few seconds, we add our video. Let's add a composition
tool so we can see better the generated
video. Here it is. If we generate more videos, we can put them together, creating a real inside
directly, not a studio. And from here, you can
export the edited video. This very easy to create stunning reel for your brand or your product
or your business. So we created some
incredible moving images. Now it's time to add a
new sense, the earring. In fact, in the next video, I will show you how to
turn your text into incredible speech using
the text to speech nodes. See you in the next lesson.
10. 10 Discovering Nodez Text to speech generation: So welcome to another
amazing lesson. To make your video
truly immersive, you need audio.
You need a voice. And today, in this lesson, I will show you how to
transform the text into incredible voices using the text to speech node inside
knowledge studio. So without losing any more time, let's go on my
computer and let's start creating some voice. We are back inside
the dashboard. Now in this new lesson, we'll see how to easily create text to speech
for your video. Essentially, we have the
text to speech nodes that has to be linked to a prompter. It's linked to 11 laps. You can choose the three
different model form the Labs, Vt VT and V 2.5. Vt is the latest one ands the
one that allow you to use the expression
inside the voiceover so you can create voice
that can whisper, can express joy, can
smile, and so on. I will show you
how to use both so let's start with V
that is the standard. Here, you can look for
different types of voice, both male and female, you can change the
stability and similarity. Here, you will have to
write your text And here, you just have to run, and in a few seconds, you will create the
new text to speech. This is a simple
test for text to speech inside Nodes studio. You can create any kind of
audio using our nodes system. From here, if we
want to use the Vt to add more creativity
to the text to speech, we can just let's try Vt and let's choose
a different woman. Then here, we have
to use the tag. Let's insert tag like
whispers and here, we can choose between the three different
stability if creative for more variable voices and more expressive
voices. Let's run. This is a simple test for text to speech inside Node Studio. You can create any kind of
audio using our node system. As you can see, this is
way more expressive and she's whispering at
beginning of the text. This is a simple test
for text to speech, inside node studio
Let's try theft one. Lou This is a simple test for text to speech
inside Nodes Studio. You can create any kind of
audio using our Nodes system. From here, you can download the generated audio
or you can use with the composition
Note that will be your canvas to edit
Video you created. Here. These are all
the audio generated. This is a simple
test. For Tes is a simple test for
text to speech stem. This is a simple
test for text to speech inside Node Studio. So from here, you can compose video and text to
speech to create your real directly inside
Nodes studio. Great. In this lesson, we created some amazing voices
for your videos. In the next lesson, I
will show you how to get faster using some X
and the plate that will really give
you a sprint into the way you create your
contents with node Studio. See you in the next lesson.
11. 11 Discovering Nodez Nodez template gallery: Today we will move faster. I will show you how to
get head in the use of Not Studio using the gallery where you will find
some templates. You will find some
nodes created by the administration
and by other user. So it could be possible for
you to find already set up all the nodes you need
to create your asset. So come with me, I will
show you really how this will change the way you
interact with Not Studio. Okay, so we are back
inside our dashboard and today we will explore
the Nodes gallery, a gallery where you can
find all the templates created by the administrator
and by other user. From the interface, you have
to click on Explore nodes. And here you will find all the nodes created
by the community. You can choose any of these and see clicking on the interface. You see how the nodes is created with all the
elements. The prompt. All the process that will create inside the nodets
here's the title, a short description of the
content of these nodes, the name of the uter
that created that nodes, the number of nodes, how many time has been used, the date of creation, the tag and the nodes that
are used inside this process. From here, you can just
click on use this node, and you will import
it into your account. So now you can edit
any of the prompter. You can upload your image. And basically, you can
use it straight away. You are really good to go. You just have to
upload your images, change what you want to change, and you can start
working at light speed. Here from the list, you
can find all the notes. You can search for the nodes, you can search for
different applications, social media, commerce,
photography, and of course, you will filter the
available notes. You can look for the resins, the most popular, and
what are in evidence. As you can see, there are
already many nodes that you can use to
create your images, to create your videos, to create your content. Like product to lifestyle here, you can create different images with the same prompt asking
to change the format, for example, of the image. This small recap of
how these nodes W. Great. In this lesson, we saw how to get
faster using templates, using the nodes
inside the gallery. This will be a never
ending gallery. Probably you will be able to
find there the right nodes already set up for you just
to input in your worspace. In the next lesson, we will
see how to create and use more complex nodes to create incredible workflow for your brand or your business. See you in the next lesson.
12. 12 Discovering Nodez Complex workflows: Today, we'll explore
how to use and create complex workflow that we create everything you
need for your brand, for your social media content, for your different outcome. Let's go on my computer
and see what you can achieve with nodded Studio. Today we will try to
understand how to use a complex flows with a lot
of nodes like this one, this product to
lifeline to see how easy is work on a project. Let's start this way. Here, we have a brain run LLM. We have some image
generation, import images, different format,
and here we have another different application
with a different prompt. This will help you create stunning images for
product to life size. Let's start using this node. Work complex node. Of course, you can follow the flux from the top left corner to
the right bottom corner. In this case, we start
with this run a AM. This is the system prompt, this is the prompt, and
this is the input image. This will allow you to create stunning
photography images. For your for your brand,
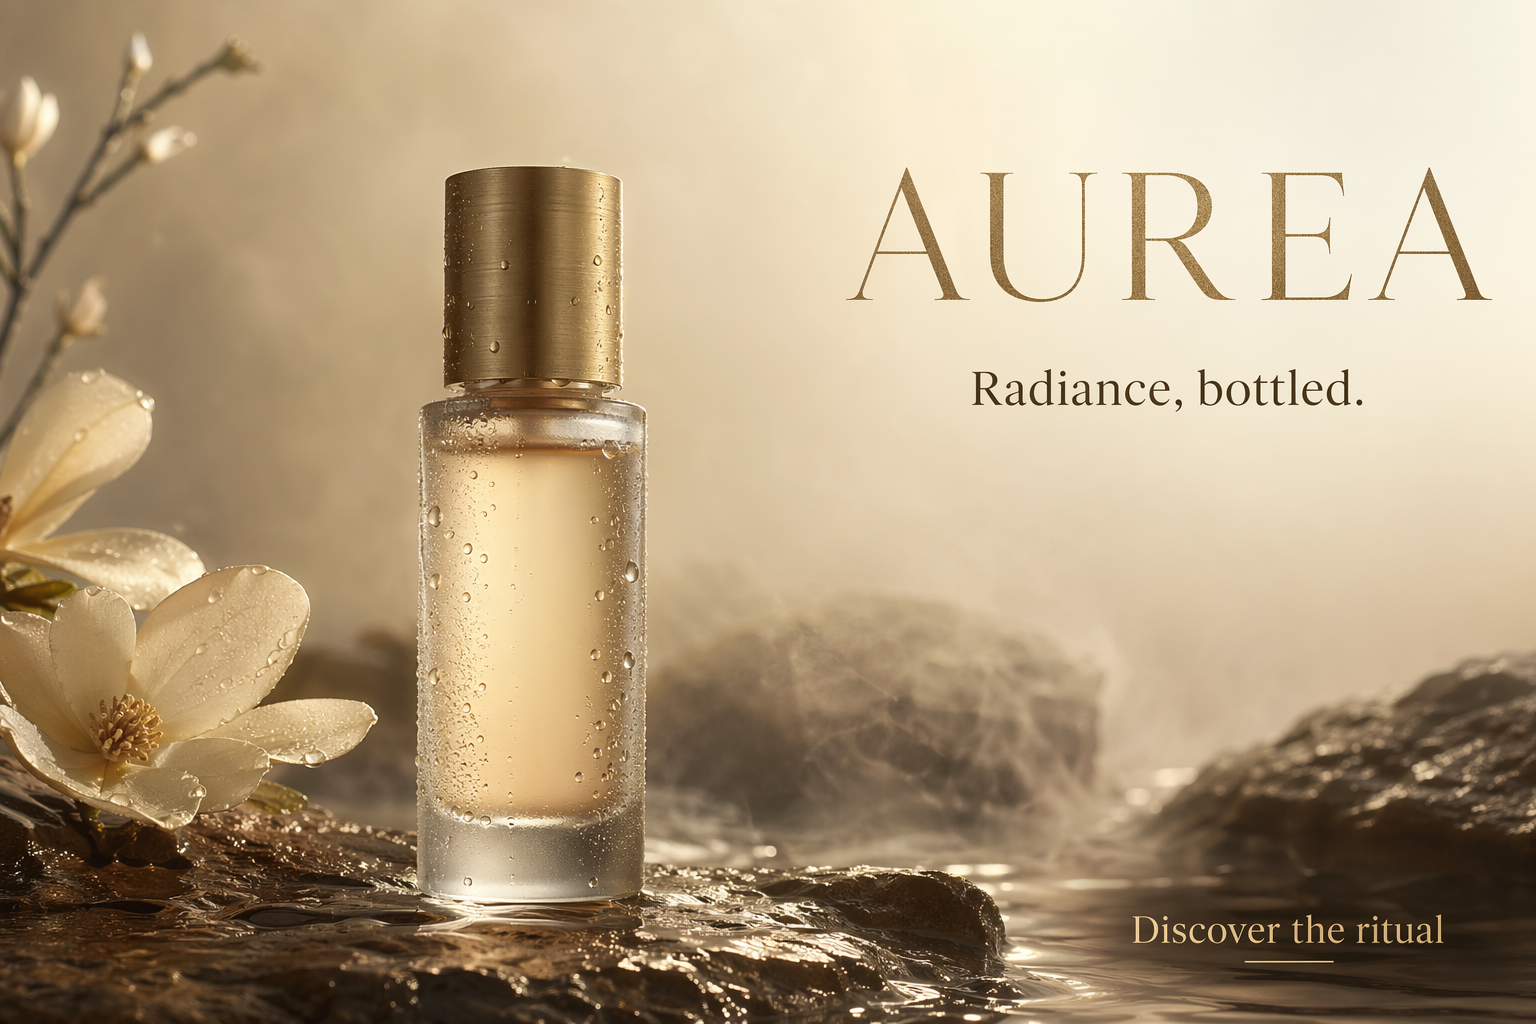
for your product. Okay? So can look for a bottle
of parfon. Let's go Mejor. Okay. Let's take
something interesting, like, maybe this one. I really love this design. Let's copy the prompt and
recreate an image. Here, it is. Okay, so we can use this
one that is very beautiful, super golden. So let's now look. Here it is. Here, what we have to do is to drop
our product here, and the prompter is to help us creating with the
help of our brain, a very realistic prompter for an image of a model
with our product, with our bottle of perfume. So the system prompt
is the instruction on how to work the
custom LLM module, and that's our task. So let's see the result it is. Let's run, in this case,
we have nanobanana. Let's run nano bana
du in three formats Orizontal and nano baa
two in vertical mode. And what we have to do here, we have to link the text
output to the text input. This way and the
image to image input. Here, let's select both
of them and run together. Now they are working in
parallel and this will create two amazing images that we
will see in the gallery nodes. Here. Look how amazing
are our images. This is the horizontal one, and this is the vertical one. Of course, we can run
multiple times to see some variation in
the images we generated. Then what we can do, we can take this one as our
starting point for the copy of a post on Instagram
and we can use this way. Just link the image
to the image. Input to how crazy and
beautiful is this image. It's very realistic. Look at this one
again from here, we can just add the text pnter create the caption for
a post on Instagram. Instagram run. And here this will create the perfect caption
for our Instagram. As you can see, we have
two different proposal between we can choose
the one we like best. The node is able to analyze the image and use it
to create the caption. We can do the same if we want
to create the male copy. You can just link the image to the male copy notes
at the prompt. With maybe the kind of
email we want to write, write an email for our customer with a code for 15% of this discount
on the chase. So this one will
create for us a male You're analyzing our image and fusing it with the
instruction and our prompt. So your golden moments await 15 of special treat for
you, blah, blah. In the body of the email, as you can see here, there is the description of our image. This one, and so on. We have very simple way to iterate and create
different variation for our product for different scopes and
different output. Just drag and drop this here. Let's leave the prompt as it is. And now we will see
two different images created with nana banana Pro. That is another
very quality model for the creation of images. Here it is. Look, how
amazing is the image. And the product is perfect. Of course, we can
choose different model. Each model has a different way
to render the same prompt. I encourage you to try
different one to find the one that suits best for
your idea or your project. It is. How crazy, realistic and beautiful
are these images? Great. Everything is ready, and now you are becoming
a creative architect, ready to take the word by the storm with his
or her contents. Let's move on to the last
lesson to have a wrap up of everything we saw in this class and move on
with the next step. See you in the next lesson.
13. 13 Well done, You made it!: Congratulations. We
arrived at the end of this incredible journey together on the discovery of Node Studio. Now you are a
creative architect. You can build your own workflow
to achieve any result. In this class, we have covered all the building blocks that
will elevate your work. We started from the basic. We created the images using the best model
available for image, we extract the style
from then to create coherent assets and we
turn them into videos. And that's the exciting part. This is just the beginning. Now, you are equipped to use not a studio to create stunning
assets for your brand, for a client, or for
any passion you have. Will be able to
transform your idea, your vision into reality and
share with the word using some of the most powerful
model available. So imagine when you will master the use of Not Studio
and you will be able to automate maybe the creation of a month of content with
just a few hours of To stay updated on all the news new opportunity
and new workflow, you can follow me on
TikTok and Instagram. I'm planning to create new
classes to really help you discover the infinite power
of this amazing tool. You will find here on Skillshare my classes O Mid Journey, that is the standard for Old Gen way to create images with the
prompt and the software. If you haven't updated your
project, please do it. Upload your image, your video, your screenshot because
it will be very helpful. For the other student to see how you get to the
result you achieve. And, of course, I will be very thrilled to
see your progress and to see the magic you
created with Node Studio. So thank you for sharing
this time with me. I enjoyed so much creating this class for you
and hope really this will change the way you use GTV to create
something beautiful. I really look forward
to see you in the next class until
then, keep building, keep exploring because
your creative journey as a creative architect
is this just started. See you in the next video.
 Riccardo Scrocca, Follow me in a crazy new world!