Transcripts
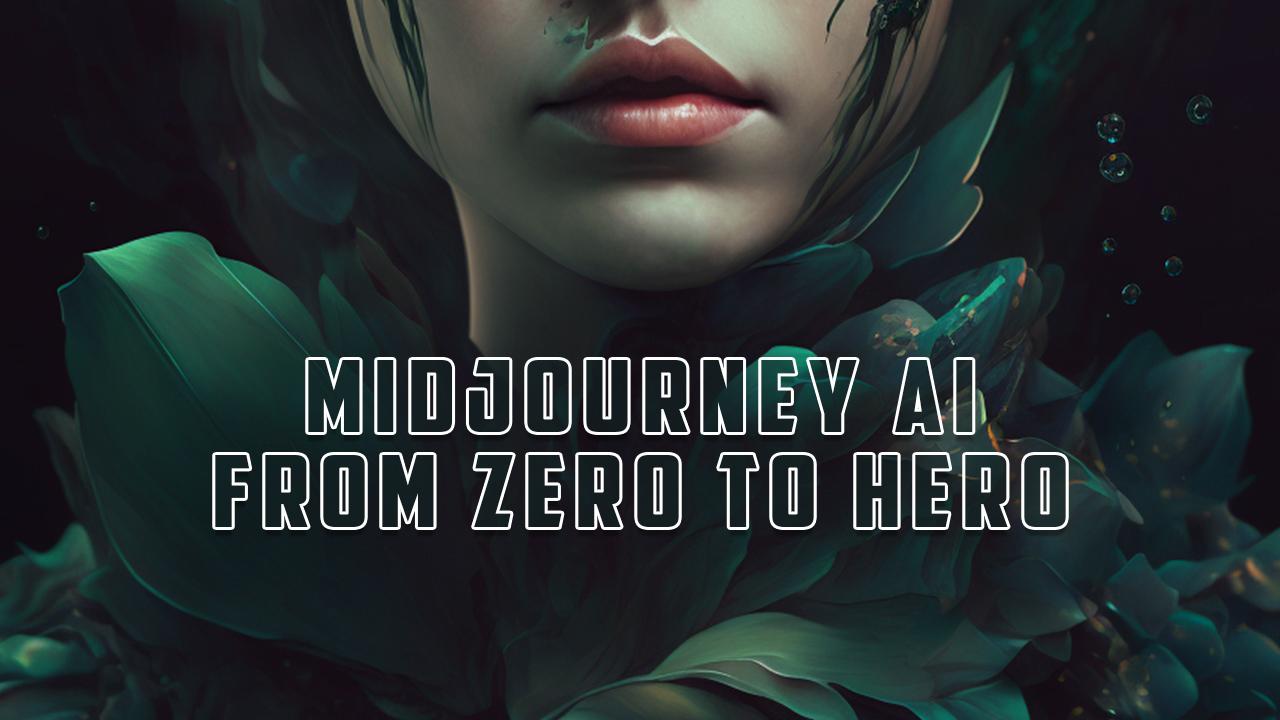
1. Midjourney V5: Create Stunning Poster: Hello and congratulations
for joining me in this incredible
new adventure. Pi is changing the world and is having an incredible impact
in many different sectors. From communication to business. Bashing through the creation
of images and videos. I'm Ricardo's Graca. I'm a professional
multimedia designer, photographer, and video
maker based in Rome, Italy. And in the last month, I've been studying and
researching the AI revolution, creating more than 25 K images with me journey and hundreds of videos on TikTok helping people to discover these
new incredible work. So I created this class to get you all the information
you need to start mastering these
incredible tools and start designing
your own artworks. Having the skill
and knowledge in your background will
be super useful and will open for you new
exciting doors in the future. So let's see how it's structured this class and what you will
learn in the next lessons. But first of all, let me say that this is an advanced class. You will not find the basics
of using the journey. So if you are not familiar with the software, the first time, you learn about creating images, starting with prompt,
I suggest you to attend my previous
class, mean journey 0-0. That will give you
all the foundation to start creating
amazing artworks. This class, It's
all about parser and visualizing
your imagination. In the first lesson, we'll see how to
set up correctly my journey and how to
use mutually p phi, that is the latest
release of new journey, will see difference
between the V4 and V5, because for all the subject
is to choose the b5. But don't worry, in
the second lesson, we'll see the differences
between the V4 and V5. So then it will
be very clear for you which model is the best to choose depending on the type of images you want to create. We will start creating
amazing poster. I've chosen four
different niches. And I will show you
some prompt for each niche that create different types of
pasta in the niches. Then we will see how to use the function describe
that has been released just a few days
ago that allow you to use an image as a
base to ask me journey, to write the prompt for you. To create similar images. You can use the scribe to find inspiration
for your prompt. I will show you
three different tool to upscale your images. In the last lesson, we'll see how to add text
to your images using Figma. So we've covered everything so that you will be able to start from sketch and create your
own design for your poster. Let's start these points
together right away. So see you in the next lesson.
2. Project video: Welcome to your project
video for this class, my goal is to teach
you how to create stunning artwork to became
posted to print for yourself. As you can guess for
the project class, you will have to create one standing artwork
for your poster. So I've chose four different
niches that you will see, examples and prompt
in the lesson. And the niches or
motivational poster, beam touch cluster, pizza, pasta and traveled
both the end you will see in the lesson all
the information you need to start creating your first
unique artworks per poster. And of course, for
the class project, you will share the
results of these words. So I encourage you to share with other students your first unique paths that you can choose them all for
different niches of, you will find
interesting the subject. Of course, you can create many other different
types of pasta. See you in the next video.
3. Welcome to MIdjourney V5: Hi, and welcome to this
incredible lesson. Today we will see how amazing
is that v phi version of me journey that has been
released just a few days ago. Let's go my computer
and see the news. They update about these new
version of mature name. This is nouns of the
new B5 base model. Let's see, which are the
main characteristics. So we had a much
wider stylistic range and more responsive
to prompting. This means that there are much more style to use
with the prompt and that their generation is
more close related to the prompt that is much
higher image quality to four, increase resolution With
improve at the genomic range. More detailed image details, more likely to be correct, less unwanted texts that improve its performance
with AI magic, prompt in support of tile
for seamless styling, support of aspect ratio
greater than two by one, and support the function
for waking image prompt. There are two stacks prompts. So what does this mean? Basically, they improve
a lot the quality of the image they we're
creating with my journey. We then higher resolution. The images that is now is two. For the base quality, there is much more rarely asthma in the images that are really, really close to
be photorealistic with the correct prompt
for the first time, we have hands and feet
with five fingers. So this is really
an amazing leap in the photo realistic
feeling of the images because with the before
version of my journey, we always, always have
some problem with ends because they are too many fingers or
too few in general. Major b5, understand
better the prompts. So try to create images more
related to the prompts. A very interesting feature
that is now available with mature naive B phi is that the images are
already upscale it, so they upscale of the
images is lighting fast. When you receive
your four images, you can use them directly without doing the
upscale because they are already upscale it with a light upscale render to
activate my journey B5. If it's not set as default, you can just type
slash settings. And you can see that there is the new setting for my journey where you
can choose the version. So you can add the five. And now there is no
more possibility to choose the different
kind of upscale. Because for default,
the upscale is applied. Up. Beta is still not working. You have to remember
that now we are on the alpha of the journey, be five, there will be major
changes in the next week. Okay, so let's try
some prompted to start seeing my journey be five
for King slash, imagine. And then now I will
pass the prompt. I've already trialed really, how much powerful is the
b5 about my journey? In this prompt, we have abstract beauty,
professional color grading, soft shadows, knock on trust, clean, sharp focus,
commercial photography. Dash, dash, AR two
by three applied V5. And so here we are. Look how beautiful
are these images. We can open up in the
browser and we will see really how these
images almost perfect. You can see how many
details are in the skin. How really realistic
seem these images, these can really be some
IN retouched photos. They are already at an eye resolution the highest
possible with these images. You can just click on
the envelope to send you the four images. You can have a look. So this is really, really, really amazing and beautiful. We can just drag and drop. So this is our images and
we can zoom in and see how many really subtle detail
in the skin or in the high. If we look for details, we can see the resolution
that is 896 by 1,340%. That is the highest resolution. You can have the images
even with the upscale. If we upscale the same images, we will see that the eyes
revolution is the same. That's the scale at one and
these are the original. So as you can see, the days the same. If we, if we try to load this image and
look for information, we'll see that the
sides is the same. 896, 1344. So in the next lesson, we will see the main difference
be between V4 and V5. We will draw some prompt that I have already used with the V4, V5 to see if the output is different and which
one is the best, depending on the subject
of your artworks. See you in the next lesson.
4. Test Comparison Midjourney V5 vs V4: Hi, and welcome to
this new lesson. Today we will see the
difference between the P5 and the V4 of my journey with
the release of the B phi, there has been a great improvement
in the quality of air, all of the images. But there is two, an increase of the
realities for some types of images probably is better if
you still use the before. Let's go my computer and
see these difference and how to choose the correct model for generating your poster. In this presentation, I will show you what
a comparison test between some images created
in the V5 and in the before. So that you can understand how the new model work and which are the best case use for the
five Ds are my first images. And here we have
the photography. So we are trying to mimic a portrait photography of a young woman lying in
the water pond at sunset. And there are a lot of details about the technical information. The V5, It's a little closer to the photo release
than the before. In fact, as we can see in the upscale version
of the images, the image I created with the V5 as more
details on the skin. It's more realistic
than the V4 image. Looks like. More
an illustration. It's close, but the beef
five eats, for sure. More, more
photo-realistic lookout, how the water
reflection looks real. This is another test about
creating fashion photography, which is my main field. And in this case to wheat
meat journey, we file, we add an incredible upgrade in the photo-realistic
feelings of the image. In fact, with the
midtone before, as we can see better in these upscale at version
of the images, we can see that it's not so realistic in the definition
of details like the skin, like the eyes, like
the flower, instead, the b5 is almost perfect. This image could easily use by, let's say Gucci for
is Florida per farm. Because it's really, really amazing and it seems
really a photograph. The unique detail that
is not correct is the end of the model that
looks little bit strange, but could be really
easy to fix with Photoshop or any other
retouching software. This is another exam
clue on how my journey V5 tends to create
more realistic images. In this case, we have an abstract minimalist portrait of a Geisha, white background, galaxy colors for
k. In this case, the image created with me
journey be five are way more detailed and realistic as you can see in these
upscale it version. Instead, the V4
or more creative, more like an illustration. In general, the B five tend to create more realistic images
than the B for death. For these kinds of images, it's interesting and you can choose the one you like most, depending on their
fat you want to give to the final image. In this case, we have an abstract prompt,
dedicate colorful dream. So we don't ask for photography, but just an illustration. And as you can see, the before is really, really more illustration
type of images. Instead, the D5 tend
to be more realistic. Here is an example
of how the b5 is not performing so well
with the strange requests, like in this case, we wanted the flower punk cut. And as you can see, the mature naive B for
images are way, way, way better than the V five, where they're realistic
style of the image is not working in favor
of the final result. Here, these are really amazing. In this case. There are quite strange. I would not use any of
these four an arc towards. Instead, I will choose for sure one of these
for my artwork, because these are Incredibles. In this case, we
ask it to create a futuristic supercar void. And in this case two, we have some more creative
and stylish images from the before. Instead from the v5, the image are more realistic, but I don't know if there is something strange
because in this case, they looked like some kind of 3D render that don't give
me any emotion at all. Instead, the before
are way more creative, more stylish, way more tolerate. And I really liked the v4
for these kind of images. So again, depending on the
results you want to have, if you want something
more realistic and you are using
human subjects, they VE five can give you more,
more interesting results, more realistic results
than the beat for overall, the quality of details
are way better. But if you want to create
some image that are abstract, that are not personalize it
concept. There are more. On the illustration side. In this case, I suggest you to use the B for, in this lesson, we saw which are the differences between the B5 and the before, and how to choose the correct model depending
on the subject of your image. In the next lesson, we will start creating
some standing poster, and we will see the
first two niche in which creating many different
style of poster. See you in the next lesson.
5. MJ Poster design01: Hi, and welcome to this
new amazing lesson. Today, we will see how to start creating your standing poster. This is the part one of two. And in this lesson, we'll see two different niche
in which you can create. Your poster will see some different style of pasta you can create
for each niche. So without losing any more time, Let's go my computer and start
creating standing posted. The first one is the
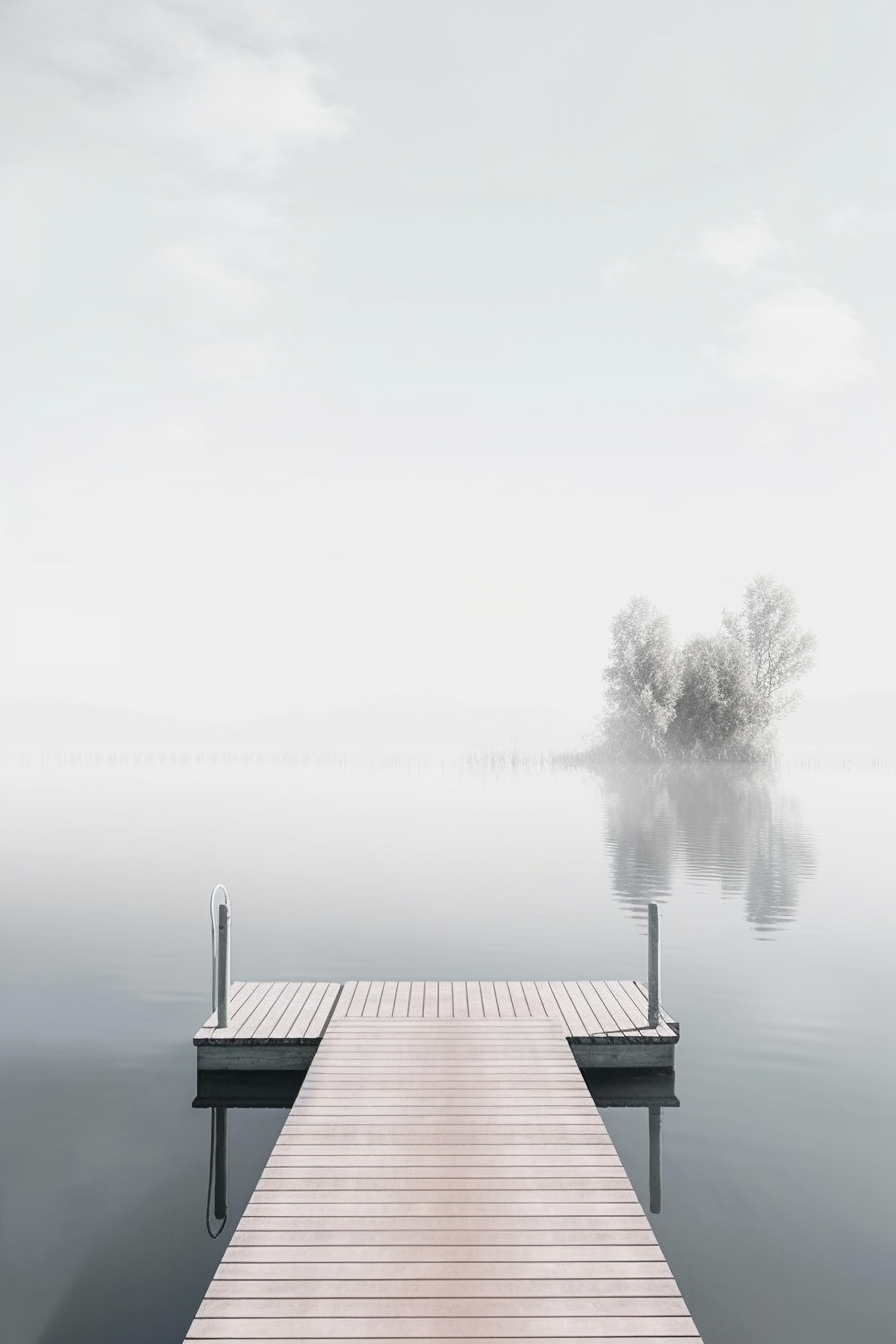
minimalist type of pasta. In this case, we have a
minimalistic landscape, Scandinavian style,
simplicity, clean lines, minimal pastel color palette. And of course, they
made is vertical. Let's see these
first four poster. As you can see here, we are creating some
landscape that are very calm, quiet, minimal. And I really love using these pastel tone because helped develop the correct
mood for the inventories. Of course, we can just
read all this prompt to see some different
images in this style. The second one is more
abstract and is linked to bow start movement at the
beginning of the 20th century. And in this case the prompt is 1923 exhibition by bow wow, retro, Nordic but wow, so retro, more than abstract
geometric proteins. And of course, it's always vertical because
most of the poster, of course our vertical. Let's see it. Yeah, we are. In this case we have
an abstract poster with form, callers movement. It's abstract art. And I really, really love the cows that
they unpredictable results you can have with me
journey that replicate these kind of style
in these amazing way. In this case two, let's do a roll and see what we can have
from this prompt. The third style is pop out, and it's perfect for
being touched poster. And so in this case
we will use pop-art, vintage poster, bright
colors, commercial side. And these are the results. And I think they are
really, really amazing. This is a very
bright poster that will capture the attention
of people hang on a wall. I really liked the
result of these prompt. Again, let's do a revolve and see what we can have
from these poster. Anyway, I will
enclose the poster and the prompt in the
project and resources tab. Let's see our new posters. So this is the Scandinavian
minimalistic style. And as you can see, we can have lovable images. In this case, we journey, generated few different
split on the poster. So you can cut them and just
have more than four bonds. So we just want prompt because
you can just got these in four pieces and you
will have 48910 poster. Okay? So this is the minimal disease, the abstract bow, retro style. Any image is unique. You will not have to. Images that are the
same and disease the third pop-art style poster. Okay, so these are the first three different style for the niche of
being Dutch poster. The second niche we will
look in this lesson. It's the motivational. As you can see, we can
go on Etsy and here we can look for
motivational poster. Here we are. As you can see, there are so many different
kinds of pasta. And I've already chosen three different types of
images we can create with me, journey for amazing, amazing
motivational poster. With this particular
type of poster, it will be very useful
the lesson about using Figma to add some
text to the image. Because in this kind of poster, there is the image and
there is the quote that together do an incredible
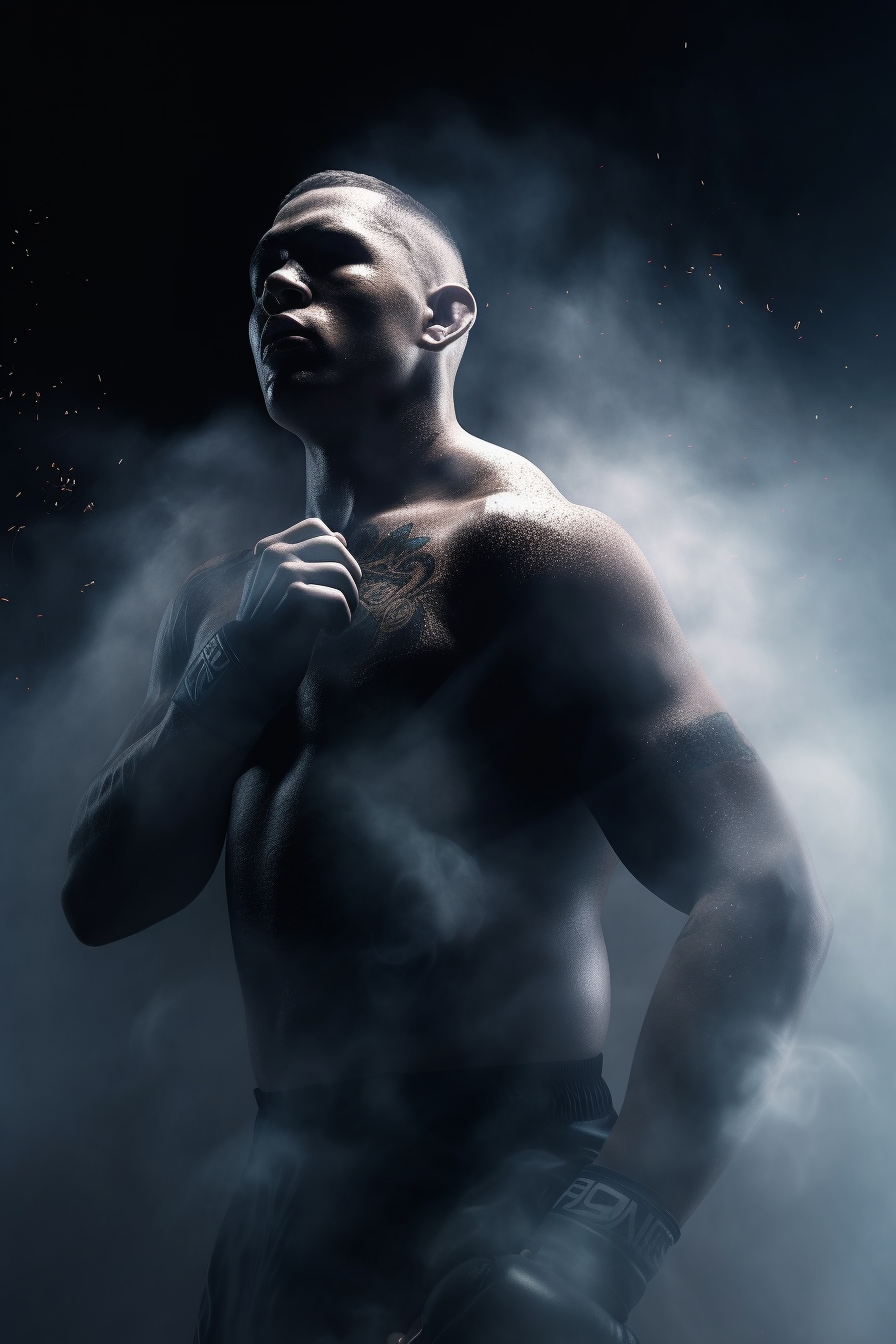
powerful poster. So let's see the free style I've chosen for this category. The first one is
related to mindset, and these four with fighter. Let's copy the
prompter and roll it. So we need phi there. One-fifth, race to the sky, MMA pastor, cinematic lighting, volumetric
smoke, motivational. This is the first. The second type of post-tests
is related to motivation, and it's about animals. So this is a majestic
lion face front side, fields and aggressive gates. Super detail, dynamic
pose photography, eight K poster and roll it. And the third is about
feeling of band shirt. And for these, a particular type of poster that is a
little more abstract, a little more about feeling. We will use v for, so we'll add dash, dash v for because they, V5 is more useful for realistic
images, not abstract. So let's go. So this is our first images. And as you can see, these are perfect for a mindset. Quote, basically, this
kind of poster will be some motivational
poster for athletes, for people who want
a strong mindset. And these are amazing. We will see the
lesson with Figma, how to add some texts to unleash the power of
these kind of images, this layer is incredible. You can see the
quality of my journey. V phi is astonishing. This one is really, really incredible in the details in how much realistic
is this lion? And here too, we
will use a quote, no matter how many times I fall, I will rise again. Again. This is very powerful
quote for motivation. This is epic adventure. Mn, starting is traveled toward a bus landscape made
of high mountains, happy, cinematic, and vertical. These are our boss thirds. In this case, we
will use the quote, It always seems impossible
until it's done. And see how beautiful are
these poster about adventure, about traveling and
facing the impossible. We can just redraw
the first poster. Really how happy
are these images? So in this lesson, I showed you three knee fine, the type of both
you can create for each of the shoe chosen niche, ring, touch, and motivational. In the next lesson, we'll see the other
two niche I choose for this class that our kids and travel and S
for this lesson, we'll see different prompt
and style for each niche. So see you in the next lesson.
6. MJ Poster design 02: Hi and welcome. In this part two of the lesson on how to create
standing poster. In this new lesson, we'll see the two remaining
niche I've chosen for this class that our
kids and travel poster. So let's go directly on my computer and start
create standing poster. We are on this
code and these are the poster I've already created. Let's begin with
some kids poster. And in this case, I choose to ask me journey
to create apartheid on a white background of a cute baby elephant
wearing eyeglasses, smiling, professional color,
soft shadows now counters clean sharp follows
commercial photography and this is my elephant. It's funny to see that
in this case we generate even a strange baby mix
between a baby and an LFO. But the core at once are
very, very beautiful. They're so cute and tender
this baby as five fingers. So it's really
interesting that majority can create now people with five fingers and this is really a big step upwards,
the equality. So in this case, we have a strange result
with this strange baby. Anyway, we can read
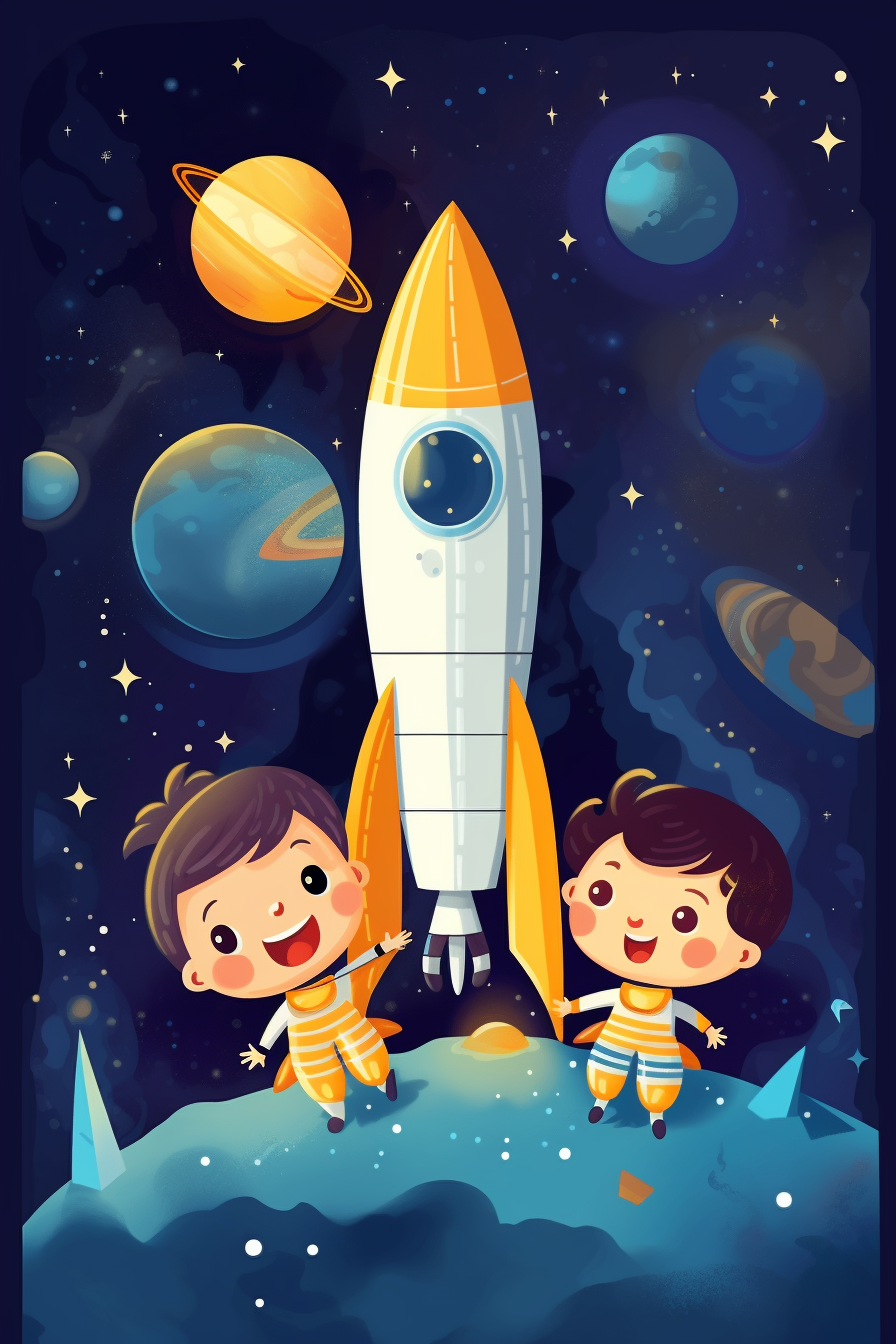
all the prompt and see if it's just a coincidence. The second one prompt
is space adventure. She'd be asked throughout and rocket inspiring cube
Keith's wall art poster. And this is the result and
they are really beautiful, so tender with these kids
smiling rocket routes. So this is very, very interesting poster
to use for boys, to inspire them, make
them think beaker. And this is the first niche. The second niche is
the travel poster. And in this case, so let's roll again
this one too. This case, I asked
my journey to create a realistic view of New
York travel poster, retro style, happiness port. So in this case, I asked you to create realistic
of New York but mix that. We retrofitted charisma, that is a particular style
that I really loved. And that keeps these kind of bright emotional feelings like strange, retrofitted Prisma mix. And as you can see, the image are really beautiful. And in this case, there are some
texts that we have to remove with a software like Photoshop or Figma
because my journey is still not able to create
the correct typography. Let's redraw again these 12. And the last one is an
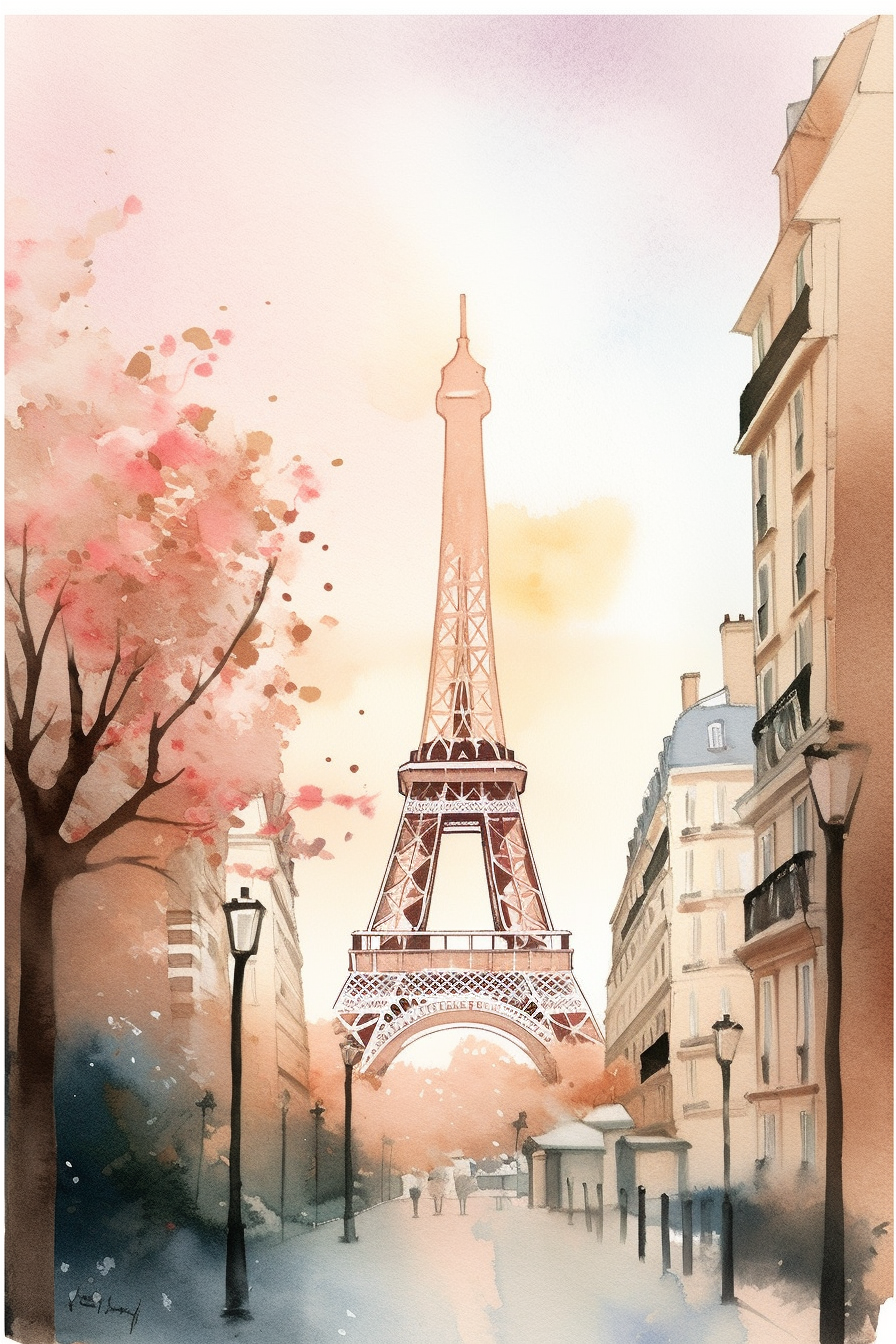
amazing, emotional, inspiring watercolor
Paris travel poster, pastel color, emotion,
cinematic, inspirational. And see that these images are
really, really beautiful. With Paris, with, to refer. I really love the
color of these two. There are very emotional, romantic disease
perfect for Paris, for the travel poster. You can choose any different CD to create a different poster. And we can try this. Just maybe we're rolling, copying the prompt and
change the city just to have the same style but a
different location. A realistic view of, we can say roll and
roll the prompt. We can do the same with Paris, watercolor, Tokyo travel poster. We can leave all the other
words exactly as they are. And we will have
same style poster but with a different city. Okay, So these are the
new for baby elephant. And the first time is
really cute and tender. I really love this one. This so cute AND expression. These are the Astra
routes and look how beautiful our day, this is our new
view of New York. I really love. I really love these images. This is credible. So finally, we have our berries. This is our Rome
posts there with the retro futuristic vibe, smooth. And I really love, I really love this
kind of feelings. You have just to
change the text ER, because it's not
the correct word thing about these images
are really amazing. And this is Tokyo. Here too. You just have to
change the text. But I really, really
love the images that you can create
with these prompts. So we have seen really
amazing images. You can create two, create your own post that I'll see you in the next lesson.
7. Find Infinite Inspiration with /describe: Welcome to this amazing lesson. Today, I will show you a new incredible
function that has been released just a few
days ago on my journey that will help you
finding the words. Finally, desperation, finding the correct prompt
to create standing poster. If you don't have
so much experience with prompt the Crafting. If you don't know how many
words you can use to create your images without
losing any more time. Let's go on my computer and see the incredible power of
the function described. We are on my journey. This is my profile page
where all my creations, this is my main account
and as you can see, I have more than 7,000 jobs. Let's see what is this function? But before going into this
code to use the function, Let's start with the finding an image that can be
inspirational for our post them. So what shall we do? We can go in the Explore tab. And here we can just write
in this research poster, made journey will show us
the poster created by user. So here you can find many,
many interesting images. You can expand the search to see much more poster
created by other users. You can find many
images that can be useful for you to
find inspiration, to find style, to find type
of image you want to create. When you click on
any of these images, you will see the prompt. So in this case, the prompt is Japanese poster with that illustration on it. And UX ui minimalist, we could copy the prompt. And this is one of
the ways we can take inspiration from the
world of other users. Copy the prompter. And of course inside me journey, bright flash emerging
past the prompter. And maybe here, change a little bit the prompt
because it's always a good idea to don't use
directly the prompt as it is, because it's somehow not so towards the one who
created that prompt. So generally, when I want to use a prompt of someone else, Hi, always change it at
something, may be removed, something modified so that it will create my
own unique images. In this case, we can
use Japanese poster, a geisha with that
illustration on it, ui, UX. Minimally, we cannot cinematic
and dash dash to three. That is the vertical
aspect ratio. And let's send the prompt. Okay, So this is one
of the possibilities. And other one is
to just click on any images you find
interesting for style, for subject, for image. And in this case, I choose that images that
I found very interesting. What we will do is
to save this image. I will save the image
on my computer. So you just drag and
drop on the desktop. Then inside my journey. Now, here is coming the poster. Now what you can do is to
just write slash, describe. This is the new commander. Debt are low you to
use other images to ask me journey to give you the prompt to generate
similar image. So in this case, we will click here, and now we have, we have to upload
the image we save on our desktop inside
the skirt and upload my journey will give us back four different prompts that things that can create
similar images. From here, what we
can do is to just choose one of them
or many of them as you wish and create a new image like as
it was an upscale. I'll show you here we are. These are the four
different prompts created by me journey, a poster for the movie for under G in the style
of realistic guy, but the data are entered
in Scott motors, ibis, speed sink, nostalgic
atmosphere, and blah, blah, blah. 400 g field poster in the style of realistic guy
but detailed rendering, iconic American
dynamic brushwork. Now up I brush are
4,000 for movie, movie poster in the style of another description
and another one. At this point, what we can do, we can choose one of the
four prompt and we journey. We generate four
different images starting from that
starting point. E.g. we can upscale the fourth. In this case. Here we can eventually change the
prompt as he posed a remix. And let's submit to show you. This was my first trial
with these images. I choose the third prompt and E gave me back
these four images. And these are the results. As you can see, the image
are really interesting. It's somehow at driving
team at poster. This is amazing. There is something linked
to movie, of course. But we didn't add
the specifications. They are squared. And again, we did the same here. And in this case is creating
four squared images. So if we want to create a
different type of poster, like with the real vertical
dimension of a poster. As you can see, it
creates us for images, for poster, just like
stamps on the wall. So we can try a different one. We can try to use the first one. And this case, at the
end of the forearm, we will add dash, dash a, two by three. And this will create
vertical images. Really all it is running. This is the poster we create
for the, with the Geisha. And as you can see, they are really amazing. These are our gaze sharp
poster and we create them without using any prompt. Beautiful is coming. Our poster. Here we are. These are our four poster. Send us the four
separate images. And as you can see, these are all
really interesting. It took the movie aspect of the prompt because it
creates some posters that are, that could be films. We can just read all and change the description to make it fit with what we want to create. In this case, we
count rate all it every time you hit
the wrong button. It will create for
new prompt that for me journey can
create similar images. It's interesting that the
blue wars are link to Google, where you can find
information about the artist, about the subject. That means journey found. For the prompt.
Let's try this one. As per a test. We can change some finger-like delayed
or this repetition. Rho v poster. And at the end or the
dash, dash a, 23. And set. So in this way, you can have infinite inspiration for the
creation of your art ports. Each of them will be unique. Yeah, we are, these
are our poster. Of course. The more you try, the more it will get wild and
distance from the origin, it will be funny to
experiment and, you know, maybe find something unique
and unexpected salt. In this lesson, we saw how to use the function describe
to take an image and start an incredible journey on the unexploded fields
of creation of images. Using my journey to suggest us unique prompts to
create stunning images. In the next lesson, we'll see how to use different software to upscale
your images so that you can print them at the
right resolution with the even at a bigger sites. See you in the next lesson.
8. Upscale your artworks: Hi and welcome. In this new exciting
lesson today, we'll see how to upscale your images to add them
at the best quality. I will show you
three different way to upscale your images. And we will see in
this lesson the different between the three of them so that you
can choose the one that fits better for you. Let's go on my computer
and see how we can upscale at best our images. So this is the first one. We are inside Photoshop. And in the last a
version of Photoshop, they have included the
natural fit tests that are some AI filters that
really do an amazing job. We have one of our mindset, fighter pasta that
dementia is 896 by 1344. This is not enough for an
high-quality printing. So what we can do is to click
on Filter, node filters. And here it will open all
the new Photoshop Filter. The one we want to use
is the super zoom. Let me just push the image
on this side for a moment. So you have to
download the filter. Let's download the filter. In this case, what you just
have to do to click on the magnifier lens and just
select the multiplier sides. You want to have these
images generally for, because in this way we will
have enough resolution to print our images
at high-quality. While it's loading, I will show you another software disease, really powerful for upscaling. There is a free, this is big jpg.com, but then you have to pay your
subscription to keep using. Let's just drag and drop. The image is way our upscaling. In this case, we can
choose how much we want to upscale the image
we will use for X, because 86.16 X
is just available for paid user and we will leave anything on the same as it is. So let's run the upscale. And the last third method I want to show you to use
for upscale your images. It's a free software
and name it upscale. You can just click on the
link, upscale on guitar. And from here, you can
download the software for MacOS, Linux, or Windows. I've already downloaded it, so I will show you
in few moments. Let's go back to Photoshop. Here we can leave just as it is without any change
in the settings. And let's create a new document. Okay, So now, as you can see, the resolution is 3,584 by 5,376 at 300 DPI resolution. This is perfect for printing. We can zoom in, in the
images and as you can see, all the tails are there. So this is the first one. Then we can use upscale. That is the software I
have already download. And then I just showed you. You just have to
select the image. In this case, let's
select the same images. This one, solvent. We can choose the type of AI
used to make the upscale. In this case, we can
use digital art. We can choose the output folder. In this case, we will
use upscale area. Here is the result. So the dementia, we
will get the images. In this case two, there is a for x upscale
and the resolution will be 3,584 by 5,376. Let's upscale is working. This is ready. Let's download in
the same folder. So now we can import
them into Photoshop and see the difference between
the different apps kinda. Okay, these are the
two other images. This is the one from upscale. Let's copy and paste in the upscale at one
with another filter. And this is the big jpg. Let's copy this one
too and passed here. So here we have the one, we upscale it with. Now that our filter. And this is the one,
the one upscale, upscale, upscale,
we should be JPEG. So as you can see, big JPEG and obscure
are almost the same. Instead, this is the
one upscale it with Photoshop that leaves
some more details. And it's a little bit different the way it gives the
corals and the contrast. You can choose, the one you like most these two other
upscale are a little less detailed in
the fine details. But the results is the same. Very good, so you can choose
the one you like more. So in this lesson, we saw three different way to upscale your images to
earn higher quality. So do you can print them
without any worries. In the next lesson, we see how with Figma, you can add some text to your image to
create your poster. So see you in the next lesson.
9. Add Text with Figma: Hi, and welcome to
another amazing lesson. Today, we'll see
how to use Figma, that is a free software
online to add some text to your images to create stunning motivational poster
for this kind of pasta, you have to add a
quote if you want to create a really powerful image. And for the travel poster, you have to work on the
image because sometimes my journey will add some
text that is not usable. You have to replace it with
a text that has a meaning. So let's go on my computer and
see how work Figma and how you can use it to create
the standing posture. So we are on figma.com. That is an amazing tool
to create graphics, to create a visualisation
of product, to create some interesting cup for your images presentation. And it's completely free. What you have to do is to get started to create an account. I've already created an account, so I will do my login. And now we are inside
our dashboard. These are all the
projects I've created with Figma and disease, our poster, I've already
great one poster. I will show you how to create the same exact poster
with your images, you can just create any
types of pasta you like. With the information I show
you in this class festival, what we have to do is to
upload our image that will be the base for the poster
and we will use the image, we upscale it in the
previous lesson. So you just have to drag and
drop the image and it will, it will be added to the project. The second step is
to create a new x. So you just click here or
click D and write your text. So this is the text and here
you have the properties. From here, you can change
all the information, all the characteristics
of your formed. The sides will say 300. Okay, just as beginning, when you move around the text, it will show you some indication for
positioning correctly. The, the text. Here, you can change the font to try maybe a different, one. Fear is in the mind looking
for something that these, okay, this is powerful tool. So we can use this
one or you can choose the one it's
in your computer. Then we can go and organize
the text as the other poster. We can drag and drop p. We are. We can of course, expand the text so that
match perfectly our page. Adjust the sides a
little bit too much. This is our text. We can adjust the
distance between the different lines
of the tester. Like this. A, B, D, C is already
good starting point. Then, now we can
change the feel. In this case, we
will put the opacity down to zero and we
will add a stroke. The stroke will be
in white collar and we can choose the thickness
of the outline like this. We can add some
shadow. Drop shadow. Clicking here, you
can change and adjust the settings for the shadow. Like this way. Change the blurriness
of the shadow, the position to create
this interesting effect. And of course, we can adjust the position of the
deck step like this. Now, he's quite good. Of course, this is
just a different one. In this case, from the texts, we use Abril fat face 800. So let's add another image. Here we are, That's the one we created for the travel niche. Here. What you have to do is to
cover these Drayton that is not correctly spelled
and create a new one. What you can do here, you can create a new
shape, like a rectangle. Here we are. You can feel
the color of the image, it in this way, it's covered. And now you can add
a new deck step. We can take the
extra, Let's see. We can change the color and chest the core of
finding gold that these already in image
like this, amazing yellow. And so, so we replace
the text that was wrong created with
me journey with the new one that is
perfect for our images. And this one is already ready
to be published online. When you are done with
the poster design, you can just click on all the levels that
form your artwork and group selection or Command G for disease
for the Rome, and this is for the
fighter group selection. This we can call these
Rome pasta pasta. Then we can just
click on the Group and export without any problem. Yeah, that's the preview. We can choose the format. We can live in PNG and disease, the sides we want to
export our poster, we can leave one. Click on Export. And now we are
exporting our both the and that's is our buster. So here we are. We have our standing poster. See you in the next lesson.
10. Well Done, you Made it!: Well done, You've made it. We arrived at the end of
this journey together. And I'm pretty sure
you found many, many interesting information to start your own
creation of pasta. We saw many different types of posts that you can create
in four different niches. And I show you the prompt that I use to create stunning images so that you can start with that and spark your imagination. We journey is really an incredible tool that
you can use to visualize your imagination and create something unique to
share with your friends, to share a line and create your portfolio of
amazing artworks. I hope that you found
this class useful when creating some other advanced at class on different topics. Because with me journey, you can create many
different types of media to share
online for your own, for business, there are really endless possibilities
if you want to be updated and on new projects, new things going on, I suggest you to
start following me. You can find me on
YouTube and TikTok where I share amazing
contents every day. I tried to do my best to be inspirational
for other people. If you found this class useful, I suggest you to
share your project with other students to get
some comments and review. And of course, to improve
the quality of your works. And think about the leaving. A good reviews for this
class that will help me reaching much more people. Well done. You've made it, you are now
ready to start creating your own artworks and share with the world your imagination. See you in the next class.
 Riccardo Scrocca, Follow me in a crazy new world!