Transcripts
1. Introduction: I knit because it
makes me feel good, it makes me feel powerful, and it really does pyramid all aspects of my
life to be able to craft what I want
from beginning to end. I can do it with a garment in the same way I
feel as though I can do it with my own life
and for the world around me. My name is Brandy
Cheyenne Harper. I'm an interdisciplinary artist and knitting guy living
in Brooklyn, New York. My students might
recognize me from Etsy, people might recognize
me from Instagram. You might know my
work from the world, from Barnes and Nobles. I wrote a book that
came out in 2022. I hear a lot of people
say, I've always wanted to learn how
to knit a sweater, but I'm so intimidated. I'm really excited
to teach this class because I feel like once
you make a sweater, you can pretty
much make anything and it's encouraging you
to take the next step, the next level up in
your knitting journey. We begin with this really
incredible knit hem, and then I teach you how to increase for the
regular shaping. We'll go through separating
the sleeves from the body. Then also how to make the body and finish off with this
really beautiful trim. We're just going to
take it step-by-step, section by section. I hope you walk away with a finished sweater that you love that looks cute and encouraged
to make a second one. Once we learn the
individual techniques that make up a sweater, I feel as though, you can make anything you put your mind to after that.
Let's get started.
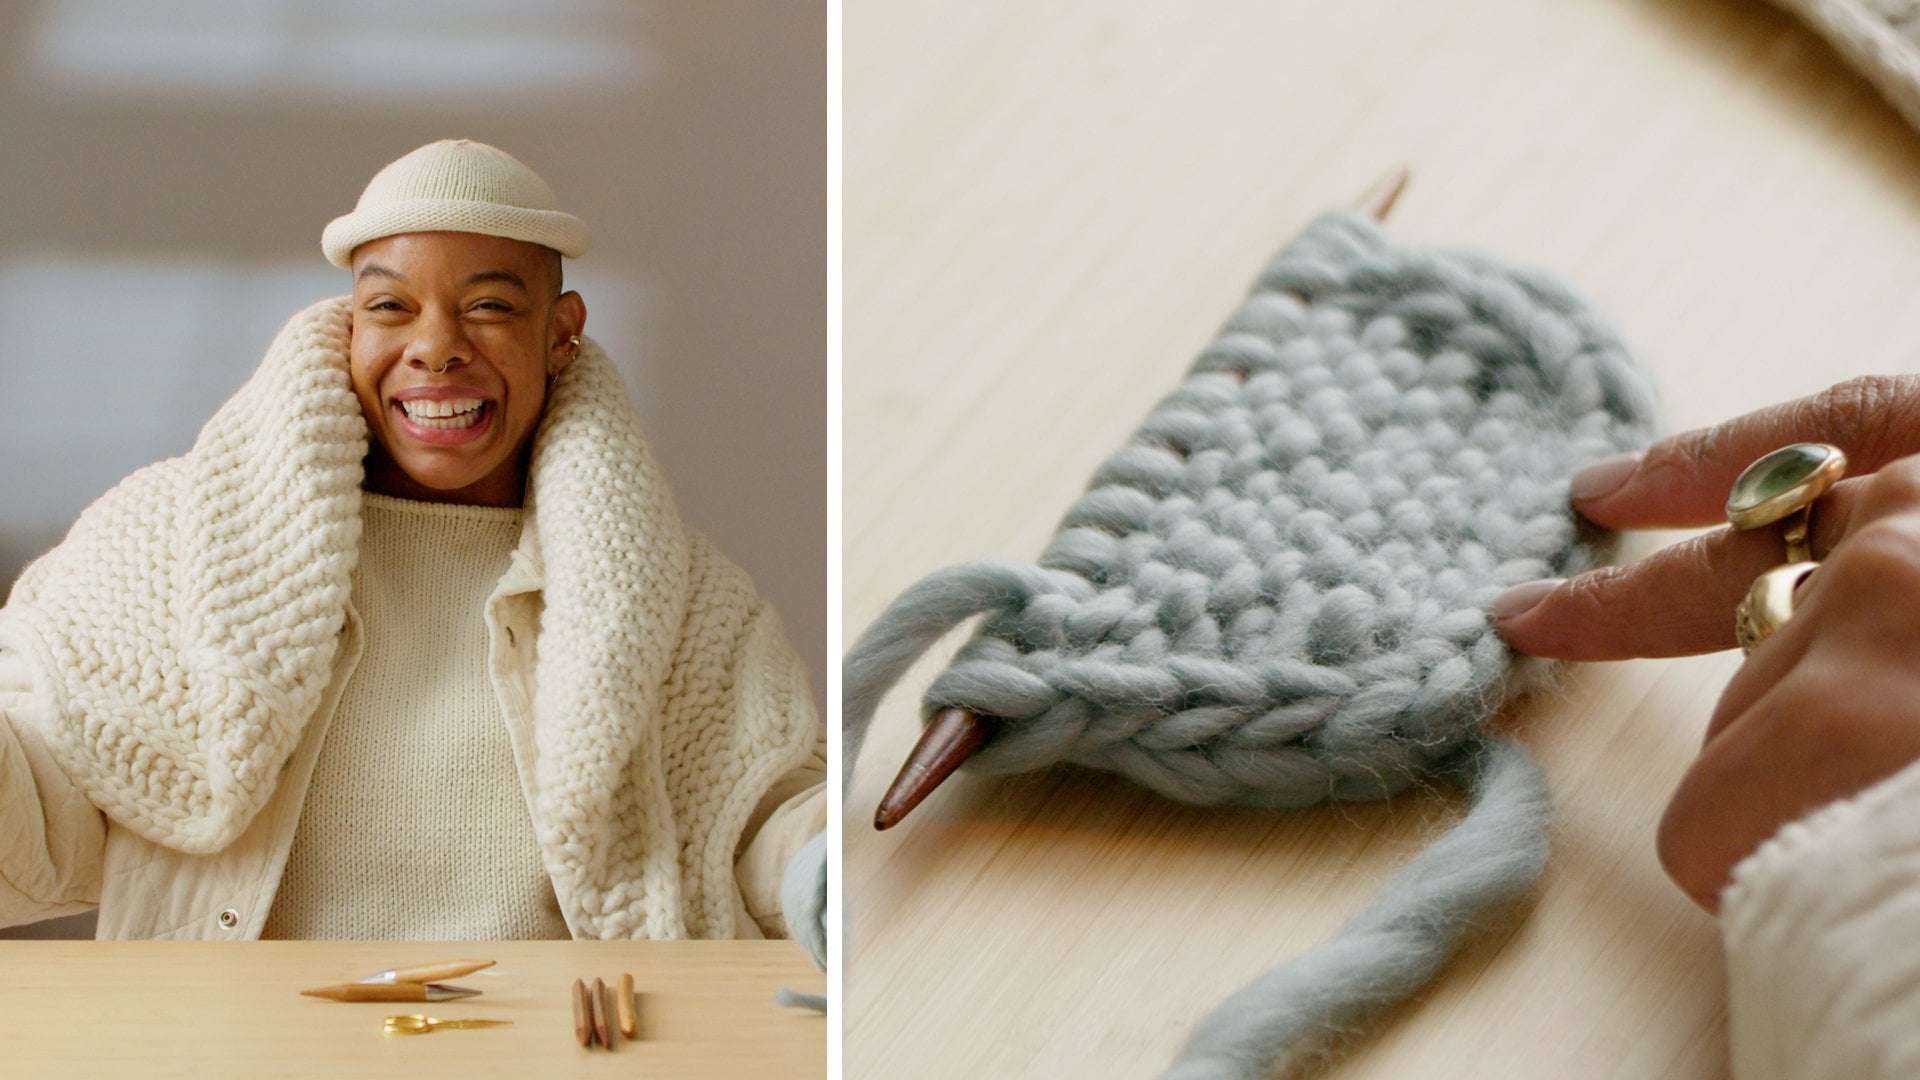
2. Gather Your Materials: My name is Brandi
Cheyenne Harper. I'm an interdisciplinary artist and knitting guide living
in Brooklyn, New York. I knit because it
makes me feel good. It makes me feel powerful. It makes me feel able and capable to create the
wardrobe I want to create. In this class, I'm teaching you step-by-step how to go about creating a sweater
that is just for you and I'm excited
because it's easy. It's easier than it seems. There's a lot of new parts, a lot of new
techniques we have to learn to make a finished
garment, especially a sweater. But once we learned the
individual techniques that make up a sweater, I feel as though you can make anything you put your
mind to after that. We're going to start with
gathering our materials and I'm going to go through everything
you need to get started, and why it's important to have those things
and where there's some wiggle room to completely go in a
different direction. Because you have a
lot of flexibility here, you have options. But what's great about a
class and what's great about a knitting pattern
is that you don't have to figure it
out on your own, it's all here for you. So the pattern is available
in the Resources page. This pattern is to fit a 34
inch to a 60 inch chest, so you should be able to
find a size that works for you and there is some
flexibility here. Know know that about the sizing. If you want to make modifications
to the sweater pattern, I say go for it. And my second class, I'm going to be
talking about how to modify another pattern for your perfect fit and to make changes that are
customized to your body. So if that's something
you're interested in, definitely check out my
second class with Skillshare about customizing
your sweater pattern. Once you get your yarn, I recommend a super
bulky weight yarn. You want to test it. I recommend
US 11 and US 15 needles. You really want to make
sure to test your yarn, try different needle sizes. You want about two stitches
to an inch in order to create this sweater and to
have it look the way I'm wearing it now. Once you pick your yarn, you have to make
sure that you have the right needle
sizes for your yarn. So in the pattern, I recommend you have
two stitches per inch. I'm a relatively even knitter. I don't knit too tight, I don't knit too loose, and so I get about two
stitches to an inch. But if you're a looser knitter, let's say you get really loose, you're going to want to
go down in a needle size. You may need to go to a US 13 to get two
stitches to an inch. If you're a really
tight knitter, you might need to go
up a needle size. You might need to go to a US 17 to get two
stitches to an inch. I recommend a US
15 to get started. If you have it in your stash, go ahead, swatch your yarn. You're going to use
your needle gauge or your tape measuring tool to see if you're getting
two stitches to an inch. If you're too tight, you want to go up a needle size. If you're too loose, you want to go down
in a needle size. It is important, it does
affect your finished garment. It might be that your
sweater is too tight or your sweater is to loose if you don't get
the correct gauge. So I highly recommend you check your gauge before
you get started. You're going to need a
lot of circular needles. I mean, you're going
to need at least four circular needle sizes because we start with the neck
line and that's a much shorter needle size. So we have six units circulars
is what you'll start with. Eventually, we will increase enough stitches to fit both
our arms and our yolk. So we're going to be increasing a number of stitches here. So you're also going to need some longer circular needles
and I recommend size 40 inch long circular needles or 47 inch long circular needles depending on the
size you're making. If you're making one
of the larger sizes like the last three
sizes in the pattern, you're going to want to use a 47 inch long needle because
you're going to have hundreds of stitches
that include both your body and your sleeves. That's something
to keep in mind. I'm using a bunch of supplies from my favorite yarn
company Purl Soho. I have their brass
toolkit, it's gorgeous. I have a little measuring tool for when you want to
check your gauge. I have stitch markers
that also have this beautiful wool
[inaudible] that they carry. There is a bunch of
materials that I have that's in the
materials list, as well as yarn of course, and I recommend a
few in the pattern. I highly recommend reading your pattern from
beginning to end. It really does help your mind understand what is coming next. Even if you don't fully understand or visualize
what is happening, trust me, it really
does help prepare you for your pattern
moving forward. So if you can't visualize
something, that's okay. Let the mind take it in and when your knitting
is in front of you, most things you read in a knitting pattern
does make sense. So now that we have
all of our supplies, we are ready to begin
making the [inaudible], and we're going to begin
with the knitted him.
3. Cast On and Knit in the Round: I have my yarn and I am going
to go ahead and cast on. Casting on is when we put
our stitches on the needle. We're going to begin with
the long tail cast on. Now there are 100 ways
to cast on stitches and this is one of the most
beginner friendly cast ons. Once we cast on our stitches, we're going to knit a few rows and we're going to join our hem. First thing is first, the long tail cast on
requires a long tail. You need about three
times the length of the piece you want to make. Now my neck line is about
18 inches around and that's in the pattern so I'll
need about three times 18. [LAUGHTER] This is about 18, so I need 1, 3 and then I'm going to give myself about 10 inches
more just in case. I always think it's
best to give yourself more tail than less because you can always
cut off the extra, you can never gain 10 inches and you have to start again so just make sure
you have enough tail. Once we have enough tail, I like to keep my
tail in the front, when I'm working long tail
cast on in the round. Knitting in the round is something we're going
to go over next. I'm going to grab
my smaller needles. Just make sure you're using
at least two needles sizes smaller than your
main needle when you're working your knitted hem because there's a
lot of stretch, there's a lot of give and you want the hem
to be much tighter. Here we go. I have
my long tail on the front and I have my
ball yarn to the left and I'm going to take my
circular needle and I'm just going to go ahead and
just put a loop on the needle. Now, I like to work
my long tail cast on without a slipknot and a lot of techniques and
books out there will show you how to create the long tail cast
on what the slipknot. This is how to create the
cast on without a slipknot. The way to do that is I'm just going to hold that
loop on the needle, you'll see it's open
on both sides with my index finger to
keep it nice and taut and then I'm going to take my index finger
and my thumb, and I'll separate one strand with my index
finger and one with my thumb while I'm holding the loop on the
needle with my index finger. I'm going to use the
other three fingers to hold both strands. What you're going
to have is a setup that looks pretty
much like this. If this is very new to you, take your time, if this is not new to
you, have fun watching. Once I have my
loop secured here, I'm going to bring my needle down and I'm going
to cast on a stitch. You go up, your thumb around your index and then there's a little space
here where your thumb is. You're going to
go ahead and just drop your needle down there, drop out your thumb
and I like to get myself set up for my
next stitch right away, and so I'm going to take
my thumb and put it behind my yarn that's
in the front there. When I pull my thumb forward, you'll see that a tightens up that second loop on the needle. Between the first loop I made, and the second loop I made I've have two stitches casted on. I'm going to go ahead and just
do that one more time and all the time you're going to use your index finger and you're going to hold those two stitches taut because it's very
easy to just slip those stitches off the
needle so I'm going to make sure that I secure
them with my index. To get started with
my third stitch, I'm going to set
my hands up again, bring my needle down and I'd like to just touch my palm here because it's a
nice little reminder. If you're new,
it's a good little physical reminder
that you're going up the thumb around the index, down the thumb, drop the thumb, and put the thumb behind the yarn right in front of you and cast
on my third stitch. Now, I'm going to cast off for the size small and
I'm just going to cast on all this design need for that and then we'll be
able to join the round, and that's the next step to learning how to get
started with the knit hem. First thing is I'm
going to go ahead and use my long tail cast on, to cast on the rest
of my stitches and each loop
counts as a stitch. I think I have all the stitches
I need for my cast on. I'm just going to go ahead
and count them ones. It's always great to
count them once or twice. [LAUGHTER] Perfect, I have as many
stitches as I need and you'll see I have this long tail which I don't
need so I'm going to take my scissors and
I'm going to give myself about 8-10
inches of tail. You never I want to cut
your tails too short, because eventually you're
going to weave these and you don't want to unravel
with long-term wear and the wash so you
always want to leave long tails and I'll
show you how to get rid of them later on. Now that we are here, we have all of our
stitches casted on, it's looking really great. Next we're going to
join the rounds. The first thing we want to do is we want to make sure all of our stitches are facing
in the same direction. I'm just going to
go ahead and just make sure they're all facing inward because if they're
twisted and you join the round, it's not going to be a circle, it's going to be twisted
and you're going to have to take it out so just make sure that all your stitches are facing downward in
the same direction. Now we want to place a marker
to mark the beginning of our round and I like to use a contrasting
marker so that you can say oh, this is my beginning. I have Purl Soho
brass stitch markers, I absolutely love them they come in all this beautiful gold. To signify the
beginning of the round, I'm going to use a
smaller stitch marker as a signifier of my beginning. I'm going to place that
on my right-hand needle. To join your round, you're going to take
your working yarn, and what you do,
is you just knit that first stitch like
you normally would. You see how the yarn is
coming from this needle, I'm going to join it to
the left-hand needle. I'm just going to knit
that first stitch and this is what
you're going to see. You're going to see
that you've joined the round really beautiful here I have my tail
here, its tightens up. If it feels a little loosely, don't worry you could tighten it up with your
tail and the ended up afterwards but I've
just joined my round. Next, I'm going to knit even all the way around
for a few rounds, and then I'll show you
how to join that hem. This is really easy,
this is the easy part. Now I'm just going to
go ahead and knit. The first round is
always a little tight, so if you feel like
your yarn is splitting, that's totally normal
just be careful. Then after that I'm going to get three more rounds because I need a total of four round
before I join my hem. The hem is about four rounds, beginning with this first one, and then I'll knit three more. You'll see sometimes
the yarn will split, especially if your
speed knitting. I'm going to show
you what happens to that marker once I get
back to the beginning. A lot of times people will say, oh, is the marker stuck? [LAUGHTER] It's not. I'll show you. Here I am. I'm almost back at my
beginning of my round, I'm going to knit
this last stitch in my rounds and then I'm back
at my beginning marker. I'm just going to go
ahead and just move this marker over to my right hand needle
and keep on going. Now I'm just going to follow
the pattern as instructed. The pattern says to
knit three more rounds and so that's what
I'm going to do. Here we go. We are all set. Next up we're going
to join our hem so that we can have this really beautiful
folded edge here.
4. Knit a Hem: I absolutely love this hem. It's so simple, it's so clean. In this class, it's all about learning how to
knit this happen. Next up, we're going to join our hem so that we can have this really
beautiful folded edge here. I'm going to just call my rows, make sure I have enough rows. This is the first
row that I knit, and then the pattern set
to knit three more rows. When I'm counting my rows, every V counts as a row. I have 1,2,3,4, so I'm all set. I'm
like, okay, great. I'm going to put my
marker down while I join my hem so that it doesn't
fall and I lose it. To join your hem, you're going to join
this bottom edge to these live stitches on the
needle. It's really fun. It may be intimidating
at first because if you don't know how to
pick up stitches, if you've never
done this before. But remember once you
get over this hump, is really pretty much
easy sailing from here. I'm going to slip the first
stitch as if to knit. What that means is, you're going to
put your needle in as if you were going to
knit like you normally would and you're just
going to move it over to the right-hand needle. Then we want to pick up this little loop along
the cast on edge. Where to pick up is pretty easy when you're using
the long tail cast on, because the long
tail cast on creates this really beautiful
defined edge and every loop is a stitch. You just have to identify this loop and this is the
loop you're going to pick up every time to join your cast on edge to your
life stitches on your needle. I have slipped my first stitch. I'm going to pick up
going from behind, going to pick up this loop
that's directly below. You'll see, directly below
the stitch on the needle. I'm going to place it on my left-hand needle
and I'm going to knit it and then you're going to pass that slip stitch over. I've just joined one
of my hand stitches. Now this is what it
looks like, nothing. But that's okay, it's
going to look like something once you've done
three or four or five. I'm going to do that again. I have my yarn, I'm just going to
go ahead and slip my next stitch as if to knit. I'm going to go take
my needle from behind. I'm going to pick up this
last loop below that stitch, the cast on edge. I'm going to put it on my left-hand needle and then I'm going to
knit that stitch. Then I'll pass the slip stitch over and I'm
going to show you a really easier way to do this
and then I'm going to join my citizen and we'll move on to the next section of class. But let me show you
this really quickly. What I'd like to do to speed up this process of joining is, I'll slip my next stitch as if to knit like I
showed you before, and then I'll just
pick up this stitch. Keep it on my right-hand needle. I'll knit it and then I'll
pass this slip stitch over. It's like a little as one
less step for me to do. What I'm going to do is
I'm just going to go ahead and join the rest
of my stitches. There are written
instructions for this technique in the pattern in the resources
section if you need a refresher or if you like
written instructions. Here we go, that's it. That's how it looks
on the other side. I've joined my hem. The
next step in the pattern is to change my needle size
because I was using a US 11. I'm going to change
to my US 15s, these are my bigger
needles that I'm going to be using for the main
body of the sweater. I'm going to go
ahead and change out my needle size by just knitting
with the larger needle. I like this way
because it's quicker and there's nothing
else easier to do. When you're done with
your knitted hem, this is what you're
going to see. You're going to have this
really beautiful rounded edge. I changed my needles from the smaller to the larger
and I just knit one round and so have this really beautiful
transition between my hem and my next
section, which is my yoke. Meet me in the next
class where we're going to be talking
about shaping our yoke and we're
going to learn some really basic increases
in order to do that.
5. Shape Your Yolk: Next we're going to learn
how to shape our yoke. Our yoke is everything
below here and above here. It's this entire
section where you're increasing for your bus
line and for your sleeves. One of the easiest ways to shape a sweater is from the top down. You see we're starting from
the neck and we're going to create what is called
raglan shaping. That is what we have here, these big beautiful blocks here, that is what raglan shaping is. It's when you increase the
same amount of stitches in the body as you do in the
sleeves in the same row. Now, I will say I shaved my sweater a
little differently. Eventually we're going to
stop increasing stitches in the sleeve because
I want us to have a really nice fitted
sleeve and I want to get rid of any
kind of bulk hair. That's something
that I did to modify my raglan shaping as I increased less
stitches in the sleeve, so just keep that in mind. What we need to do is we
need to place markers to mark where we're going to begin increasing to shape the yoke. I have three more markers
that I'm going to need. I have one already marking my beginning of the
round and so I'm going to have these larger
ones marking where I'm going to be increasing
stitches for the yoke. Following my pattern,
I'm going to knit 12 stitches and I'm
going to place a marker. I'm going to go ahead
and place my marker. Then the pattern
says to knit five, 1, 2, 3, 4, 5, and that's for the sleeve, put in place another marker. Knit 12. I'm going to place
my last marker. This row is basically
just setting you up for increasing so you know where to increase and you don't have
to count stitches every row. What is marking here is you
have your beginner marker, and then you have your front. This is your sleeve. This is your back. This is your sleeve. That's what those
markers are marking. The next row is going to
be our first increase row and I'm going to
go ahead and show you the increases
we're going to learn, we're going to learn
two increases. I make one left and
I make one right. These are increases
that mirror each other. You have one that looks like
it's leaning to the left, and one that's looks like
it's leaning to the right, and when they're paired
together, they're symmetrical. I'm going to teach
you that next. The pattern says to knit two and then I'm going to make
my first increase, which is going to be
a make one right. To make one right, you're going to take your
left-hand needle and go behind and pick up this loop that's between
these two stitches. We take our left-hand needle, we go from behind, we pick up that loop onto the needle. This is
what you're going to see. It's going to look
like it's really gaping hole hole here, which is what you want. We want to close that. In order to close that, you're
just going to knit into the front loop of that stitch and you've made one. It's going to look like
it's leaning to the right. The pattern says to
knit two stitches before the next marker. You can see there's
a little pattern happening. We're
going to knit two. We make one, we're going
to knit to two stitches, for the next marker, we're going to make another one. This is how you get that
really beautiful design here. You see there's two stitches
here, two stitches here, and then there's make
ones on each side of it, is how you get that really
beautiful raglan line. To make one left, instead of going from behind, you're going to go in front of the loop between
your two stitches. To close that hole, you're going to knit into
the back of that loop. That is how you
increase your yoke. Here's my make one right. Here's my make one left. They are symmetrical and
facing away from each other, and it's beautiful
is what we want. The pattern says to knit four. You're always just going to
keep your markers going. You're just going to slip
your markers as you go along. The pattern says
just to repeat that again, so here I am. I'm back where I
need to increase. I'm going to make
one right here. Go behind my needle, go behind my loop, pick it up, knit in front of it, the pattern says to knit one,
so I'm going to knit one. Then it says make one left, so I go in front, and then I'll knit
through the back loop. That's pretty much all
you need to know to knit the rest of the yoke. I'm just going to
finish this row off following the pattern as instructed and then I'll
show you maybe a quick way. If you wanted to
speed up your make one right or to speed
up your make one left, which again, is not necessary, but you find a little tips and tricks as you become
more experienced, and this is one of mine, is when I'm making
my make one right, I use my right-hand needle. I'll drop it onto the left-hand needle and then I'll knit in
front of the loop. It's a one extra step that actually feels easier
to me and faster to me. Then I'm going to
knit to two stitches before the next marker. For my make one left, I like to use again my right-hand needle instead of my left-hand needle
and I'll just drop the stitch on my
left-hand needle to knit it. But either way, this is
a very simple increase. You're going to
repeat this increase every other row until you have as many stitches as the pattern
says you're supposed to have and we're good. We're back at our
beginning of our round. I would like to
set my marker down when I'm looking at my
work so I don't lose it. This is what you're
going to see. This is after you increase, you're going to see increases on each side of the two stitches
surrounding your marker. Here's my marker, here
are my two stitches, here are my increases. You're going to see that
every marker increase, increase, marker two, two. Now that you've learned all
the increases that you need, you have your make one right, you have your make one left, you're going to go
ahead and repeat that technique every other row. You can practice
this on the swatch. Take your time, no pressure. You could cast on 20
stitches, [inaudible] a row, and then practice this increase
on your right-side row. You would increase
[inaudible] row, increase [inaudible]
role to practice or just increase on your yoke and
meet me in the next lesson, where I'll show you
how to separate the sleeves from the body
6. Separate Your Sleeves: This is the fun part for me. After you've increased
all your stitches, you can sometimes
have hundreds of stitches that you'll then
separate into your front, your back, and your sleeves. Right now I have at
least 180-200 stitches, so let's separate the
sleeves from the body. The pattern says to
knit the back stitches. I'm just going to go
ahead and do that. I have my beginning
marker and I'm just going to knit
my back stitches. Not every pattern
you work will have specific instructions on how to separate your sleeves from your body and it all
happens in one row. The first step in my
pattern is to knit the back and we're knitting basically
you to our next sleeve. [NOISE] So wonderful. The pattern says to
knit my back stitched which is basically knitting
to my next marker, it'll say knit to
your next marker. Then I'm going to remove that marker because we don't
need to mark that anymore. This was to mark the
increase for the wrangling. We don't need it, so
I'm going to throw that into my little bowl. Then we're going to put our sleeve stitches
on stitch holders. We're going to put them
all stitch holders to hold them to
the side and we'll continue with our
sleeves at another time. You could also use scrap yarn if you don't
have stitch holders. You could also use a
spare circular needle. You just basically want to put these stitches on
hold for later. I have my PROSOCO stitch
holder, just so cute. What I'm going to do
is I'm going to slip my sleeves stitches onto
this stitch holder. What you do is you basically go to slip those
stitches as if to pearl. What that means is
you're going to go down in front of your stitch
as if you were to pearl. The reason why we're
doing that is it makes sure that the
stitches don't twist. If you were to take
them off as if to knit, you would twist your stitches
and then something will look wrong in you're
knitting once you start knitting
your sleeve again. You just want to move your
stitches over as if to pearl and that'll keep them in the orientation they're
supposed to be. I'm just going to
just move them all over really quickly
to my stitch holder. Now, if I was doing this within a knitting needle,
I will do the same thing. I can take a spare
knitting needle and I can move the stitches
over onto the holder. I get that a
tapestry needle with some scrap yarn and I can put the stitches on some scrap yarn, wherever it's easiest and
most accessible to you. You just want to get
them to the side. The most important thing is
to slip them as if to pearl onto whatever holder you're using so that they don't twist. What I love about these
is that you can pretty much use all the space available on these stitch holders and
really squish them together. I've just moved all
my stitches over to my stitch holder and I know because I'm at my next marker. The pattern says to remove it, so I'm going to
remove that mark. I'm going to place this aside because I don't need it anymore. Then I'm going to close
up my stitch holder. If I was using yarn, I can tie a little knot to
make sure they don't come off. Sleeves just sometimes will
fall off their holder. It's a part of the process. It's okay. Just put them back on their holder and begin again. Here I am, my sleeves stitches
are on my holder and I'm going to get my working yarn
that's attached to my back. Because that was the last
place I finished knitting. I'm going to have my
sleeve held to the front. We're going to bring that working yarn to
the front stitches. We're going to knit the front stitches until
we get to our sleeve. Then we're going to
do the same thing. We're going to put those
sleeve stitches onto a holder and we're done. But for now, what
you want to see here is it's going to look a little
loose here, don't worry. I'm going to show you how
to close that gap under the arm when we
pick up the sleeve. But for now, just knit that as tight as possible to join
the back to the front. Then just knit your
front stitches until you get to
your next sleeve. This is what it's going to
look like here, like that. I'm back at my second sleeve
and I'm just going to repeat that section where I remove my marker because I
don't need it anymore. I'm going to slip those sleeves stitches onto
a second stitch marker. [NOISE] I'm back at my
beginning marker here. I'm going to close off
my sleeves stitches, hold my sleeves
stitches to the front. I'm ready to start my next row. Now, I'm just going to slip
my beginning marker over. Once I knit that next stitch, and there we go. We've separated our
sleeves from our body. It's actually so simple to do. Once you do it,
once you're like, that was so easy. You have your body stitches on a circular needle
all around here. You have your asleep stitches
on the stitch holders here. This is how you separate
your sleeves from your body. Definitely take your time. If you are just
watching this lesson, come back when you're ready and revisit this lesson
when it's time. Next up, we're going to
learn how to shape our body. I'm going to teach
you two decreases you need to know to create that really beautiful
shape along the waist.
7. Shape Your Body: Next we are going to
shape our bodies. One thing about this sweater
is that the waist at the bottom is a little smaller than the chest circumference. I decrease just a few stitches so that it could curve in
a little bit because of really beautiful shape
to the body and we're going go over some basic
decreases for the body shaping. It can make a huge difference to the overall shape and style
and fit of your sweater. I'm already at a
place where I have to increase my first row. I'm going to teach you two
beginner friendly decreases. Knit two together, looks like
it's facing to the right and the slip knit pass looks like it's
facing to the left. What you have are these
really beautiful, symmetrical decreases
that are decorative, but also serve a
practical purpose of bringing that waist
in a little bit. Let me go ahead and show you. At this point, I'm at my beginning marker and so
the pattern says to knit two. Again, the placement of the decrease is a
design aesthetic. It also creates a really
beautiful decorative touch. That's why we knit two before
we do any kind of shaping. It's just my own
designs, my own thing. We're going to learn the
slip knit pass first. That is the decrease that looks like it's facing to the left. The first thing you do
is you're going to slip that first stitch from the left-hand needle to the right-hand
needle as if to knit and what that means is you go into the stitch as of to knit, you're just going
to move it over. Then you're going to
knit the next stitch and then you're going
to go ahead and pass the slip stitch over. Now we have our slip
knit past done. Next, I'm going to
follow the pattern. The pattern says to
knit two stitches before the next marker and so that is what I'm going to do. That is just the side marker. The pattern says to
knit to where I need to be to make my next decrease. The next decrease
I'm going to teach you is the knit two together. Here's my side marker. I am forced to stitch
before the marker, so I have these two. Which is my little decorative
touch for stitches between the shaping techniques
and I'm going to go ahead and knit these
two stitches together. You go into two stitches at the same time with the right-hand
needle and then you're going to knit those
two stitches as if they were one like that. Then I'm just going to drop
those two stitches off the needle and tighten
up that decrease. What you're going
to see is you have your slip knit pass
over here facing to the left and you
have your knit two together over here
facing the right. That's what you're going to
do. You're going to repeat that same eighth row
for a certain amount of times depending on the pattern you're following in
terms of the size. I am good. We're going to decrease
force that just every round, every eighth row, any number of times depending
on the size you're making. Go ahead and practice your
decreases on a swatch. You want to practice
units together, your slip knit pass. If you just want to go ahead
and do it on your sweater, do that and meet me in
the next lesson where I'm going to show
you how to finish off with the knitted hymn.
8. Close Your Sleeve Underarm: We have a nice in
progress sweater that has magically gotten done in
the time we film today. Basically because I want to show you a few techniques that happened pretty much at the
end of making this sweater, so that's why we have
another sample here. I'm going to show you how to go about picking up stitches
for your sleeve, closing that gap
in the underarm, and then also how to do that knitted hem that
you're also going to use at the bottom of your body. So the sweater is trimmed
and knitted hem all around. There's a knitted cast on here, and then there's the
knitted bind off here. The knitted hem is also in the body and also in the sleeve. I'm going to show you
how to do that in the sleeve because it's quicker, and then you'll use
the same technique of the knitted hem bind off
in the trim of the body. Once you have your
body completed, you're going to want to pick up stitches for your sleeve and
begin knitting your sleeves. Now, I'm going to knit like
a really short cap sleeve, actually just a little shorter
than what's written in the pattern for the purposes
of our lesson today. But you can make this sleeve
a little longer if you like, you can make it long sleeve, and I talk more about
that in the second class about modifying your pattern. But for now I'm
just going to knit a really short cap sleeve to show you both how to pick up your sleeve and how to
finish the knit him. I have my stitches here on my stitch holder and
you're going to see this. It's going to look
like a gaping hole, it's exactly what
you want to see. But first, I want to take my stitches off my stitch holder and put them on my needle. You open up your stitch
holder or maybe you have it on scrap yarn or maybe you
have it on a knitting needle. You have so many options. But I know I want to
move the stitches onto my six unit circular needles, so I'm going to go ahead
and just take that off of the stitch holder. Again, I flipped them
off as if to purl, so I'm going to slip them
back on as if to purl, and that means down in
front as if I were to purl. It's also known as purlwise
in knitting to make sure that my stitches are not twisted and get them
on my circular needle. This yarn's a beautiful
botanically dyed yarn that I had in my stash. It is no longer available, but it's beautiful
and I was really excited to use it
for the sweater. I have my stitches back
on my circular needle, so there's a lot of space here, which is really scary. [LAUGHTER] That's going to
look terrible under my arm, and I'm going to show
you how to fix that. I'm going to take my working
yarn and I'm going to join this yarn to my
sleeve over here. With a new ball of yarn and
my right side facing me, this is my right
side, the knit side. I am going to join this new ball of yarn and I'm just
going to start knitting. I like to hold my yarn
taunt with my right hand, giving myself about
eight inches of tail, and then I'll just
begin knitting with it, and that looks good to me. I'm going to knit until
I get to my underarm, this huge gap because
that's where we're going to learn how to close up that hole. I know this is going
to sound strange, but we're only going to pick up one stitch in this gusset
to pull it all together, and we're going to
pick up a stitch right into this gap right in
between the gusset, right at the center. We're going to leave those
gaping holes at the side, and I'm going to
show you how to go about getting rid of that by tightening up that area versus adding more
stitches to it. Because you can just
fill this space with stitches and the sleeve
would be too big and the underarm will be too baggy. But to get this
really nice fitted, tight edge under your arm, you want to avoid adding
too many stitches there. I'm just going to add one, and then in the pattern I say, remove any looseness, and I'll show you how
to go about doing that. It takes a little time, I I say, but it's definitely
worth the effort. To pick up that, one
stitch at the gusset, I'm going to just go
right into that top loop, pull some yarn through, and you'll see immediately, it starts to tighten up. Here, you see. Wonderful. I've picked up
that one stitch in my gusset, it's still very holy, but I'll show you how
to fix that in a bit. I'm going to go
ahead and just place my marker for my beginning of my round, and just knit. I'm going to knit one round just to get us in a good place, so you can see how
that underarm comes together and quickly
knit one round around. The pattern says to
knit like four rows, to create the
sleeve I'm wearing, so you're just going
to knit as many rounds as you need to knit. But once your sleeve is joined, you can just knit really simply. If you feel like you
need more space, if you need to work what
is called magic loop, and there's a lot of space, you can pull the
wire out like this, and so you're able to work with a fewer amount of
stitches on your needle. You can use magic
loop if you need to. So way of working on working on circular needle with
fewer stitches. Here we go. I will say, I would really work on this,
perfecting this underarm. Once you're bound off, once you're weaving your ends, this is like a
finishing technique. But I want to show you now
how to go about removing this looseness to give you reassurance that it is possible. One thing to know is
that there are strands underneath your sweater here
that are going to tighten. You'll see when I
pull that tail here, this little area tightens. Just know that that will
tighten and then also, here's another ball of yarn, here, that I joined, and you can see that
tail will tighten. If it makes you feel better knowing that
those might tighten, you can tie those two
together so that they're nice and taunt and you know you don't have
to worry about it. But what you do have to worry about is all
the rest of this. Now, what I like to
do and this is like a really top tip, even if you're an
experienced knitter, for how to knitten
up your underarms, is one of the things that
horrified me when I first learned how to knit
because it was so messy and it would just be
holes and it was annoying. I'm okay with a little hole but not gaping holes like this. What you want to do
and what I like to do, is I'll move this looseness to other areas of my sweater, and then once I wash it
and block the sweater, it just really evens
out and goes away. You're just going to
pull any extra loose, here's another tail
that will tighten, so I can tighten that. This identify all the
tails that could be tightened so you can know where you actually
have to do the work. It looks like I have to
really tighten in here. What I would do is I take my tapestry needle and I'll
pull the looseness out of that area and move it over until the back or the
front or the sleeve, and just gently even it out so it's not all
concentrated in one place. This is how I would do it. This looks a little
loose, but remember, once these little
subtle differences in your stitch pattern will really go away once you
wash and once you block. I'm just going to go
ahead and just tighten up a little bit and just
move any looseness, and the thing about
this is a little scary because you're like, but wait, I'm going to make
other areas loose, and it's possible, but you
just want to take your time. This is the area where you
want to take your time. The finishing is
really what can make your sweater look
really beautiful, is this little extra
attention to detail here. I'm going to go ahead
and then again, the same thing, I'll
tighten that up. You see how this tightened
up there and I'll just keep moving the looseness
into another area. Again, just putting a little bit extra space in between the
neighboring stitches. They can use a little
more space, why not? This why we'll say, we'll
take a little time. I'm going to stop there. I can fuss around with
it a little more later. Now, I'll show you what it
looks like on this side. This is how it looks
underneath the arm. Now, when I look
at this, I'm like, this is bothering me. I could if I wanted to keep on going and pull out some
more looseness out of that, but this doesn't bother me. If this is something
that would bother you, you're going to have
like three or four tails under the arm. You can't take your
tail and just cinch it close and just try and
close up those holes. I try and avoid that to
reduce bulk in my sweaters, but if that's something
that will bother you, use you're leftover tails to really bring underarm together. I will say when it comes to beginning your sleeve and
knitting up that underarm, it does take a little
bit of practice, a little bit of patients. The more you work
on your sweaters, the more you learn different ways of
constructing sweaters, you'll find a method that
really works for you. This is a method that works
for me that I really love, and take your time. Go ahead and start your sleeves, finish your sleeve and meet
me in the next lesson where I'm going to show
you the final piece to tie this sweater off, which is the knit hem bind off.
9. Hem Your Sleeve: I am at the place where I am
ready to join my knit hem. I will say that this leaf
is a little bit shorter. For the purposes of this class, I made the sleeve a little shorter than what's
in the pattern, so just keep that in mind when you're watching this tutorial, when you're watching
this lesson. The first thing we want to
do is basically we want to fold this over and sew these live stitches to the inside of the
sweater like that. We need to cut our seeming yarn and give ourselves
enough sewing tail. You need about three
times the length of the piece you want
to sew together. This sleeve is about
13 inches around, so I want 13 times three, so like this, one, two, three, and I am
going to cut that. This is about how much
tail I need to sew my knit hem bind off. There is a step that is optional
that I don't do anymore. [LAUGHTER] It's
called a lifeline. A lifeline is a visual marker that marks where you
are going to sew, where you're going to do something special in your piece, and you want a visual marker
of where that's going to be. The way you're going to do that, is you turn your
sweater inside out. This is just to mark where
we want to join our hem. You turn your
sweater inside out. We knitted three rounds. So here's one, here's two, here's three for our hem. We want to join this hem
along this fourth round. What we're going to do
is we're going to mark this round with a
contrasting color. You thread your needle,
and this is optional. If you're like, oh, I just
have to sew three rows down, great, that's
what I'll do. You can eyeball it. Great. If not, then you want to place a lifeline and
remove it later. Here's Row 1, here's Row 2, here's Row 3. I want to grab this stitch
here when I'm seaming. I'm just going to place
this lifeline right below it so I can mark where I want to sew. I'm just going to weave in
and out one, two, three, four, and make sure I'm
in the right place. I was not. [LAUGHTER] This is why we mark. Here's my next stitch. I'm just going to go over it
and under my next stitch. This is what you'll see. I will go over over and
under, over and under. Again, you can always
just check this. So one, two, three, four is the knitted hem. Here's my three rows. Here's where I want
to pick up and sew along this line right here. I'm going to quickly just
keep on adding my lifeline, and I'm just weaving in
and out of one stitch. With a more experienced eye, you'll be able to see exactly
where you need to sew, exactly where you
need to pick up. This little extra step
is just for convenience. You don't have to count down
each time to figure out, is this where I'm
supposed to sew it? You'll see what I mean
when we get started. Here we go. I've
added my lifeline. I don't need all this tail, so I'm just going to cut some. I'm going to turn my sweater
back on the right side, and you'll be able to see it. You could totally do this with
the right side facing too, but I like where my
wrong side is facing. We have that inside here. Now this is how you go
about sewing your hem down. You're going to
thread your needle , your tapestry needle. I can remove my marker
now because we're done. I'm going to slip
this first stitch off my needle as if to knit, meaning knit-wise, so that's
as if I were knitting, but just move it over and
don't complete the knit. Then I need to see the next
place for me to pick up. It's a little confusing because I have my little tails here, so you're like, which one is it? You might have to
count the first time. What you're counting is
these individual loops here. You see that's one row, this is another row. Row 1, 2, 3, and I want to pick up
the fourth row down. Next we have to figure out where we want our sewing lines. This is my first row. Right below my needle,
that little lump, that little loop here,
that's a one row. The one right below
it, that's Row 2. The one right below
it, that's Row 3. I want to pick up in Row 4. That's going to be
right around here. It's not right around,
it's exactly there. [LAUGHTER] Then I'll
pull the yarn tie, and it's going to join that live stitch to the back
of the sleeve, which is exactly what we want. We're going to
continue doing that. I'm going to drop
this first stitch off as if to knit, just like that. Then you'll see, I want to
pick up in that next loop, here's the last one. Here is the next
one, right here. You can try it again.
You can say, okay, this is my loop right
below my needle, two, three, four, and you'll see a line at right next to the
one you just came out of. We'll pull it on. I'm going to sew a few times because I
really want you to see it. The one thing you
don't want to pull too tight because then your
sleeve will be too small, so you just gently tug
any tightness out. I'm going to just go,
just so I know that it's not completely too tight. Same thing, drop
it off knit-wise, and then I'm going to
go into my next loop. Now, this is where the lifeline
really comes into place. Where the lifeline
comes together, it's a little harder to see, but you'll see it come
together in a second. Right above my lifeline is
where I want to pick up. Here's my lifeline, I'm
going to pick up right here. But it makes sense for the first couple of stitches
to count down, just make sure
you're in the right place because it doesn't make a difference in the
overall look of your hem. This is what it's
going to look like. It looks really good, really finished, and it compliments the
cast-on very well. I'm just going to
finish this off. I'm going to finish this up and I'll see you in
the next lesson. I'm going to show you how
to bathe your sweater, how to block it, and give it that really
beautiful professional finish that I highly recommend
you do for this sweater.
10. Weave and Block: We're going to learn how to block and we're going to talk a little bit about
what that means. Blocking is the final state
in your knitting process. It's when you dunk your final finished garment in water with some
gentle woolen wash. It will open up the stitches, it will knitten up any
looseness or stop rolling. It'll handle so many issues that happened in your knitting. I absolutely think it's
necessary 100% of the time. So in this lesson, I'm
basically going to show you how to weave and ends and how to block a basic
swatch in part because by the time you get to a
place where you're ready to wash your sweater, it's not a surprise because
you've made a swatch, you've checked your gauge, you've wash the swatch, you know how your gauge
changes as a result, and so you anticipate
what's going to happen when your sweater is
done and you put it in the water and you
lay it flat to dry. This is looping back around
to the beginning where it's so important that
you swatch your yarn, make sure you're
getting the gauge and actually wash the swatch. Now, this is the swatch that I made for us as a little demo. You'll see a few
things happening. You'll see the swatch
naturally curls. That's one of the
issues we want to solve in the washing process. Then knitted hem of the sweater does take care of some of that but stock and
knit stitch rolls, even when you have a nice brand. It will roll just a little bit, and washing will help that. You'll also notice, I'm
pretty a pretty even knitter, but there is some wobblyness in my stitch that I
want to neaten up. It's just not as neat and
nice as I want it to be. The swatch doesn't really
have a nice drape. When you shake it, the
whole thing shakes. Once we wash it, what we're going to see is
it's just going to be very drapey and light and beautiful. It's just a magical process
that I just love so much. Knitting a gauge swatch is the literal first
thing you want to do before you knit anything
but especially a sweater. You want to use the
needles you want to use, the yarn you want to use, and then you want to
check that gauge. But it's always going to
be after you wash it. This is not an accurate
depiction of what your finished piece is
going to be because eventually you're
going to have to wash it and it's going to change. Is going to grow two, sometimes three inches
bigger than this swatch. That's something
to keep in mind. To loop us back around, the way you're finished
sweater turns out, It's going to be
very dependent on this swatch right here and
you blocking it first. I'm going to show you two ways. One way, is to weave in
your ends diagonally. Here's my end, I want to weave in at a diagonal
going in this direction. So the first place
I want to start in the closest place possible. I know that this is
one of my stitches. If you look at the end here, I know that this is
one of my stitches. I'm going to go here. This as close to the
edge as possible. And then from there, work at an angle. I want to go here. The next space would be a similar one, is
going to be here. Once you get yourself
about enter to N, you can go back and forth and the other direction
to really secure it. So I'm going to go back
in the other direction, weave in and out of that space I just
created and here we go. When you look at the other side, you're not going to see
that end woven in at all. It's pretty much invisible. Because when we wash this swatch and where
you wash your sweater, these ends, your
sweater is going to stretch about two to
three inches at least. It happens with every
yarn, with every project. So keep that in mind. I'm not
going to cut it too close. I'm going to cut it
like that and if after I take it out of the wash, I could still see it, I can cut it down a little more. So another way to
weave in your ends, go up and down. We woven in on a diagonal. Then for this swatch,
I'm going to head down closest to my edge. I'm going to go up and down, skipping one little loop here. I'm going to go down. Same thing, I'm
going to do this for about an inch or two. Then I'll go back in
the other direction. Going back into that same
area I just wove, two, three. Just to secure it. So I've woven back-and-forth
in the other direction. I'm going to cut the end, but not too short. Because it might stretch and
I'll lose some of this tail. So I have some tails hanging. I think it's
completely and totally okay if we're going
to ends to hang, this is a handmade garment. No one's expecting it
to look machine that. It's also going to be hidden
insight that sweater, no one's going to see
this and it's nearly invisible on the right side. So now that we have our swatch or even our finished sweater, we're going to have a
nice tub of cool water, just enough water
to fully submerge your garment or your swatch. You could do this in the sink. You could do this in a tub. I have a little basin that I got from a local hardware store. You can use literally
whatever it is you want. Just makes sure
it's clean in that rusting because that can affect
the color of your fabric. I have this really
beautiful sweater soap. It's some water on there. Some really beautiful
sweater soap from Purl Soho. It is coriander seed
and pink grapefruit. This is a no rinse woolen wash, meaning I don't have to
rinse this after I'm done, which is really beautiful and it's very good
for sensitive skin. This is why I love this product
and it lasts for months. I love it. So we're going to
use a little bit of this. I'm just going to put just
enough to sud my water. That's enough. Looks nice.
Then here's my swatch. I'm going to show
you an after of the swatch later just so
you can see the difference. It's just a huge difference. I'm just going to submerge it. Now. all ready, you
can see it's opening. Is like washing your hair. I think a lot of times knitters
will skip this process because they're
really afraid of what this might do [LAUGHTER]. You like but looks fine
on wash. Then I'm like, but it's like not washing
your hair for months. You start to see a
difference. Here we go. This is what I normally do. I'll just keep it moving. Try and get any dirt dust, or grime out of my fabric. You can soak it
if you need to or want to for 5-10 minutes. I'd like to swap my
garments, come back, and then do the rinse, but it's up to you. You could take it
out right away, or you can even soak
it for 10 minutes. Once it is nice and open,
you can see already. It's open, but the drape is
going to be really beautiful. If you're using a woolen wash
that has to be washed out, you're going to run this water clear, add some more water. You're going to put it back
and you're going to rinse it. Hold it over the water. But for this product. I
don't have to do that. That's one of the perks. I could just squeeze out
the water as much as I can. When you're doing this process with a bigger
sweater, same thing. You're just going to take
it section by section. You'll take the sleeves
and you're squeezing. You'll take the trim
and you'll squeeze it. You're trying get as much
water out of it as possible. I also know a lot of
knitters will rafter sweater up in a towel and use that to squeeze
out the water. But whatever you have to do, you just going to squeeze it. What you don't want
to do is ring it. You don't want to ring in
because this will start to stretch and
misform your fabric. If you squeeze it, your baby to get
what out without damaging the final look. Here we go. This is my swatch. I'm going to move this aside. Now, one thing to
keep in mind is that almost every textile get
some kind of processing, some kind of washing process, some finishing that happens
before it goes on market. This is basically what you're
doing for your own sweater. This will dry like this, and it will have this shape. This is where you can really
manipulate your fabric and reshape it in a way that makes sense to you and make
sweater sensitive design. So I could just leave
it dry like this, but it will dry like this. So I'm going to do is I'm
going to knit that up. Same thing applies to any other piece,
we're going to block. This was a sweater.
I would let's use my hand and
knit up the edges. You're going to do this to your swatch too
because this will affect how your fabric looks. Now let's say you realize
that your sweater is too small and you're
like, you know what? I want to add another
introduce width. You could do that by this. Look at how much that stretches. You can stretch it out a little more and make it
a little bigger. But again, we're
going to reshape it. But this is something that
will affect your final gauge, it will affect your
final sweater. This is why you want
to make your swatch. Good. Look how much
it can change during the washing process depending
on how you treat it. So that is our swatch. That is how you block. Block all your projects, makes a huge difference.
11. Final Thoughts: I am so proud of you, you've learned how
to make a sweater. We learned how to cast on to create this really
beautiful knitted hem, two increases to shape our yolk for these beautiful
Rag Linde lines. How to separate our
sleeves from our body. How to shape the body. How to pick up our sleeves
and get rid of the gap under our arm and also how
to do the knitted hem. The final process was learning
how to block and wash our swatch and I'm really excited for you
to make your sweater, make one, make many, grab the pattern, the gayest crew in the class
resources below. I'm excited to see your projects take
in-progress photographs. Take finished
photographs wherever you are in your process. Share your progress in the
project gallery below. Leave a review, and hit me up in
the discussions, ask any questions that you have, and I'm really excited to see your progress and I'll
see you soon. Bye
 Brandi Cheyenne Harper