Transcripts
1. Video Editing Isn't Hard (Intro): My name is Hard, the
Plug. And I've been creating content for
nearly half a decade, and that video went on to reach 13 million views,
that 18 million. A lot of people
believe that editing is difficult, but
it's really not. All you have to do
is focus on making your videos digestible,
easy to consume. We'll be going over
certain things to structure your edits around, like relatability, the three
E's and other concepts. And I'm going to take you
through the entire interface of Premier Pro and turn you
into a speech editor. This class will begin to build the foundation you
need to become a successful content creator in the shortest time possible. And we're going to
establish the idea in your head that
editing does not have to be some sort of gruesome and
unrewarding experience. You're going to
import the footage, edit the footage, and export
the footage. That's it. So if you're ready to claim your success in content
creation, let's hop in.
2. Class Project: So I was told I had to give
you guys a class project. Something that would help
you apply what you learned. So you don't just brain dump
everything. So here it is. Your class project will
serve two purposes. One, you get to practice what
you learned from the class. Two, you'll have a
video to post on your social media to
kick start your journey. You're not limited to any
genre or any type of video. Just create a video around
something that's you, Something that you are
truly passionate about. Whether it's a
photoshoot of log cars, cooking, whatever
you want it to be. Quick recap, Make your video, post it somewhere.
Copy the link. Put it in the projects
and resources down below. And tell us a little
bit about your project. And before we get
into the class, if you want to make friends, find inspiration or
you just want to be a part of a community of
other video creators, go ahead and join my Discord,
the plugged in community. The link will be in
the class description. Don't forget about
that class project. I was told it's supposed
to be very important, so let's start learning, guys.
3. Must Haves In Your Videos: Before we get into
anything technical, we're going to talk
about a couple of things you must have
in your videos. Imagine if there was
a structure that could help your videos resonate with people so deeply that they engage
with their content. Well, there is, and you
want this structure, trust me, because
likes comments, shares, saves, and
most importantly, watch time is what drives
a successful video. The first point is the three s, which is emotion,
entertainment, and education. Now, why do you think
viral videos go viral? It's because they touch
the hearts of the masses. Whether it's happiness, trauma, sadness, regret,
nostalgia, anger. If you can make people
feel something, if you can play into
their emotions, they have to engage
entertainment. Think about it. Anyone can
watch an entertaining video. Go and watch movies
all the time, because they're
usually entertaining. Action mysteries, love stories. If you can make
someone laugh, cry, feel anxious, you can
get them to engage. Now, although education is last, it is just as powerful. Tutorial videos,
financial hacks, DIY videos has its place
in successful content too. Teaching someone
something that they can benefit from will create a bond between you and
them and they will respect you as an
authoritative figure as well. Now all that is wrapped
up in one point. Our second point is relatability and making relatable content. Our aim is to create
an environment that our audience can place
themselves inside of. If you can come up
with ideas that literally everyone
has experienced, you can touch a broad
number of people. Last point is digestible videos. Like I said in Intro,
creating videos that are easy to
consume is paramount. It's really important
to think about what your video is going to look like when your audience is viewing it on their
phone, usually. And what they see
before and after they swipe onto and off
of your video. You're competing with
millions of other creators, whether you like it or not,
so you cannot miss this. Make your videos easy to watch. Do not clutter your videos
with captions and texts, graphics and effects. I
kind of run right there. I'll have some resources in the class with this information, so you can go ahead
and download it in case you need to
reference it later. Let's move on to the lesson two. Could you turn that
light off for me? Thanks. Remember who
you're doing this for? I know. I know. I
know Jesus. Okay.
4. Different Types Of Content: So before we start, okay, one more quick thing I want
to discuss with you guys. I just want to put as much value in this class as possible. Before we get to the
technical stuff, let's talk about the
different types of content. And this comes to like the
ideation of your scripting, recording, editing, and
posting all together. So the whole point of you being
a content creator, right, is you want to create a community
that likes you for you. And this is how you're
going to do it. Audience building, nurture
content, sales content. Now the sales content probably
won't apply to you until you're a little bit deeper into your content
creation career. So let's talk about
audience building. Audience building is your
viral ideas, your big ideas. That's going to bring you a lot of views, a
lot of traffic. Now when I say viral,
I don't mean you have to get millions and
millions of views. 30,000 views, 10,000 views. As long as you're getting
some good traffic through your page,
that is what you want. It makes some big ideas, make it very entertaining, very digestible, like we
said in the last lesson. And the second
type of content is going to take the
traffic you get from your viral videos and convert them into
followers and fans. Nurture content is you building your personal brand right? Getting people to fall in
love with you as a person. They won't do as
well, but they will resonate with the people that you want to stay on your page. So use the audience
building type of content to attract a lot of people
through your page. And then convert them to
stick around with you fall in love with your personality,
with nurture content. A good example for how I do it. My viral videos are that I do, they get millions, hundreds
of thousands of views. And then I post logs, I post my singing videos. Anything that I want people
to know me for, I post that. And I always get
comments like, yo, we don't want to see this,
we want to see your skits. Do not listen to those people. The people that
just want to see. One type of thing that you do is not the people
you want on your page. You want the people that will enjoy anything you post
because they like you, Okay? Okay. I know this is a little
bit far from video editing, but we will get
into it right now. I just want to share that
with you guys because I really do think it'll
help you in your journey. So I hope you use that and
go forward and multiply. Let's get into it, shall we?
5. Data Management: So we're going to start
with data management. And while we go
through this class, I want to help you develop
some good practices that'll prevent you
from losing misplacing, or deleting footage
on accidents. So when you get
back from shooting, you should offload your footage
to a hard drive if able. These lacy drives
are pretty reliable. It's the ones I use or you
can get a cheaper one. Anything that is T SSD is good
for transfer speed anyway. If all you have is a SD
card reader like this, that's fine, Just
edit off of that. I don't recommend you offload your footage on your
computer memory. It'll fill up really quick and it'll start to slow
your computer down. So open your hard drive up
and you're going to create a master folder and
we're going to put a name on here that will
describe what this is, so it's easy to find later. For example, I'm going to
name mine Miami Trip 2023. So you can click through into that master folder and this is where we're going to be
organizing everything. Now since I was there
for multiple days, I'm going to go by day. But if you captured all of
your footage in one day, you can just name your folders what camera you were using. For example, if you
have drone footage, you're going to make
a drone folder. If you have DSLR footage, you're going to make a
DSLR folder and then you can start placing your footage in their respective folders. And if you want to
go even deeper, it might be smart to organize within your folders
with location, car ride, yacht, and villa. That is everything
that we did that day. So I'm going to put
those locations in there so it'll be
very easy to find. Take the footage from the house, put it in the villa. The yacht ride, I'll put it
in yacht in the car ride. I'll put it in the car ride. So when it comes to
data management, all you're doing is making
sure your data is stored in a safe place and it's easy to find when
you go look for it. So let's hop into Premier Pro
and import our footage now.
6. Importing Footage: Two ways to import
footage in Premier Pro. So let's open Premiere Pro. Make sure you create a new
project in Premier Pro that you name it
something that is unique, just like the data management. And you can go ahead and hop in. So make your way down
to this box here and you're going to go
to media browser. Okay, day one of my Miami
trip is on card two. So I can click and drag
that into the new project. And it will bring all of that into your project folder here. Say that you didn't want
everything in that card. You can just click
into the folder, select what you
want, and you can just drag that
over individually. Now the second way to import
footage is probably quicker. You're going to find your
way to this box again, Double click inside of it and your file Explorer
will pop up for you. Now you're just going to
navigate to where you saved it. I'm going to go to card one and you can just press Import. Now if you do a good
job of organizing your files before you import, you won't have to organize
inside of this project folder. But if you do have to, you're just going
to go down here to new bin and click on that. You can make new
folders, rename them, and organizing in
here will be just like organizing inside
of your hard drive. You're just making sure
everything is easy to find. And that's pretty much
it. So that's it. Importing footage is done. Let's talk about keyboard
shortcuts. It's very important.
7. Keyboard Shortcuts: Guys, so we're in premiere
and we're gonna go through the most important
keyboard shortcuts. You don't have to use every
single one that I give you, but these are the
ones that I use to shorten my editing time almost by 50% So we're going to start by going to
the top left corner, and you'll see
Premiere Pro here. And you're going to select
keyboard shortcuts. And this is where you're
going to be assigning certain actions to certain keys. So I've laid out some footage from my Miami trip
and we're going to be using this to show you guys the keyboard
shortcuts what they do. So the Spacebar key is
your pause and play button pressing it once
we'll play your footage. Pressing it again will
pause your footage. The letter V is a default
so you don't have to change it and it's going
to be your select tool. This is how you're able to make selections and move
things around. The plus and minus keys
will zoom in and out of your time line when you
need to make precise cuts, like when you're
editing to a song or you're just trying to
cut clips together. You need to get real close in. Keep in mind when you're
zooming in and out. Wherever you have
this blue line, your cursor here, it's going
to keep that in the middle. If I put it at the end here, it'll zoom into the end. And if I put it at the front, it will zoom in to the front. The delete key will delete anything you have
selected sauce like this. I'll press Delete.
And that's gone. Say you want to get
rid of that clip in the space that's occupying. We're going to go back up to Premier Pro Keyboard shortcuts, and you're going to
type in Ripple Delete into this dialog box here. You'll see Ripple delete at
the top here and right here. Change it to, after you have under shortcut next to Ripple delete,
go ahead and press. Okay. And now if you have
like a clip in the middle you don't want and you
want to get rid of the clip in the space, just press and it will delete everything the blade
tool is defaulted to. If you press, you'll see
your cursor turns into a blade and you can cut your clips just like this if
you want to do that faster. Again, let's go up to the top left Premier Pro
Keyboard shortcuts and you're going to type in
add edit into this box. Now add edit will come up at the top and you're
going to change the shortcut to the letter
E. Go ahead and press okay. And now whatever
you have underneath your blue line here
will be sliced. When you press the
universal undue sequence for something is command Z. Control Z if you're on PC. So if you happen to delete
a clip on accident, you can press command Z.
It'll bring it right back. Now if you want to
redo something, basically undo your
undo command shift Z will redo your undue. Another universal sequence
is the copy and paste. But in this case,
we're going to be copying attributes from
one clip to the next. So if you placed an effect
key, frame, color grade, anything on one clip
and you want it transferred to the next, you
can do that very easily. So I have a nice color grade
on this adjustment layer. I'm just going to press
Command or Control. And then I'm going
to select the clip I want to paste those
attributes to. And I'm going to
press Option Command or Control V. This paste attributes box will
pop up and you can select what you want to bring
over to your next clip. So I'm going to
check all of this. I'll bring the color over. And now you can see
this is color graded. The longer way to do
it is to right click, press copy. Go to your new clip. Right click again.
Paste Attributes, press Okay, that works too.
Just a little bit longer. Alright, next, do this for me. Go up to the top left, Premiere Pro Keyboard,
shortcuts to type in unlink. You'll see unlink
at the top here. Under shortcuts, it's
just say command plus l. Change that to the
letter U for unlinked. I don't know why they
didn't do that anyway. Once you change that
to you press okay. And now you can select
one of your videos, press the letter U, and that will separate
the audio from the video, and you can edit
those separately. This is very useful in
very weird situations, but you will end up
using this one day. And to link them back together, select them both, press U again, and now
it's linked again. You can also use this to link other things together
like these two. Here press U with both of them selected, and
now it's all linked. And you can press again,
it'll unlink all of that. The speed and duration box
is useful in a lot of ways. All you're going to do is
select one of your clips, Command or Control R. And now you can do a ton of things with the
speed of your video. We'll go over this dialogue box later on when we talk
about speed ramping. Nesting clips will help
you with a bunch of things like cleaning
up your time line, applying more than
one effect to a clip, because you can't do
that without nesting. Or if you want to
apply one effect to a broad number of clips. Go to the top left to
premiere Pro, again, keyboard shortcuts, you're
going to type in nest. Now when nest comes up, it should be blank under shortcut. Just type the letter in
for nest. There you go. Press okay. And now you can nest things with the
press of a button. All you have to do
is select something, press the letter in,
and just press, okay. Think of nesting like
flattening your video. And everything
inside of that nest will be affected with
whatever you put on it. Our Romo's done, so
we're going to go back to Premiere Pro in
the top left corner. Keyboard shortcuts, once again, we don't have to
search for these. Track select backward, and
Track select forward tools. Go ahead and change
the Track select backward tool to the letter Q. After you change that,
just press, okay. I don't want to zoom
all the way out and highlight all of this and then start moving
it over like that. Okay, What you can do is
you can press the letter A. Everything behind this
will be moved forward. And if you click the
letter Q, vice versa, everything in front of this
will be moved backwards. Now when it's time to export, you can use the letter to make
an endpoint in the letter. To make an outpoint and pressing command M will pull
up the export menu. Now if you have
red or yellow bars at the top of your
timeline like this, that is telling you that you may experience some dropped frames. Meaning your time line will
lag when playing those areas. And how to remedy that
is to render it out. To do that, create your in and out points with that letter, in that letter and then
go up here to sequence, Come to Render Out, and those yellow and
red bars will start to turn to green if it still lags. After that though, you
may have some graphics or effects that is too heavy
for your computer to handle. I would know because when I was using this as my main computer, literally every time I
exported it would crash. So guys, like I said
in the beginning, I'm not expecting you to use every single shortcut
that I showed you. This is just what I find useful for me and it speeds
up my editing time. So I think you're
ready to edit a video. What do you think?
Let's get into it.
8. Timeline Frame Rate Conversion: Line frame rate conversion. After you import your footage, you might want to convert all of your lips frame rate to the
frame rate of your timeline. A lot of times when
we're out recording, we end up changing our frame
rate for many reasons. Could be to get slow motion
like 120 frames per second, or you just need more
or less light and you've exhausted all
of your other options. Whatever the case may
be, this is very simple. Go to your project
folder where all of your footage is located and you'll see these
icons down here. And these will change the way you view your project folder. And this mode will display
information about each clip. And as you can see
here, you can see what frame rate every clip was recorded at a really
quick pointer, whatever clip you drag
onto your timeline first, the timeline will assume
the settings of that clip. If you wanted to edit a
ten ADP vertical video for Tiktok or a four K horizontal
video for you Tube. I'd recommend keeping
a sample clip where you can find
it so you don't have to enter in the
sequence settings yourself every time you
open a new project. I'll show you what I
mean really quick. We're going to go to file
new sequence, press Ok, and I have a clip to
set the settings I need for my Tiktok videos
on my desktop. This clip all the way down
here, I'm going to import it. And once I drag this onto the timeline, this
message will come up. Make sure this is checked
and never uncheck this. And then change
sequence settings. Now this entire
sequence is set to edit in a vertical video
and vice versa. If I were to go on my hard
drive and load in this one, this is a four K video. It'll ask again, change
sequence settings again and now we're editing
on a four K time line. The only time you need to
convert your footage to another frame rate is when it doesn't match the frame
rate of the time line. And usually if
everything works out, I like to record everything
in 30 frames a second. More specifically 29.97 Judge. But you can see here
all of my clips are 29.97 frames per second. So I don't need to
change anything here. But say you recorded
some stuff in slow mo, 60 frames per second,
120 frames per second. And you want to enter that until your 30 frames per
second time line. This is the proper way to do it. My clips here are all
60 frames per second. You're gonna highlight
those clips. Right click. You're going to go to Modify Interpret Footage. This dialog box will pop up. Go to the top under frame rate and you're going to click assume this frame rate and
you're gonna type in the frame rate of your timeline. So we know it's 29.97 FPS. That is the frame
rate of my timeline. And we're going to press okay. Now that just converted
all of these to 29.97 So as you can
see we play it, it's gonna play it in real
time instead of slow mo. If you want it to be slow mo, we can just slow it back down. So do you guys
remember the speed and duration shortcut
command or Alt R? We're going to lower the
speed of this so we can bring it back to 60
frames per second, in a 30 frames per
second timeline. How do we know what to
slow it down to, though? I'll show you. So open
up your calculator and you're going to go the frame
rate of your time line, which mine is 30 frames per second divided by the
frame rate of the clip, 60 frames per second, and you get 0.5 So we're gonna slow this clip down
to 50% So you have a 24 frames per
second time line and you have 120 frames
per second clip. You want to add
in 24/120 you get 0.2 You would slow it down to 20% I know this can
kind of be confusing, but if it doesn't make
sense to you guys, just let me know and I will try to explain it a
little bit better. But the reason why we
do this is it just makes editing a
lot more smoother. If you have all these
different frame rates clashing together
in one time line, you could experience some
lagging in performance issues. If you have footage
you want to add that's outside of
that frame rate, go ahead and convert
it first and then slow it back down when you
get it into the timeline. You know what?
I'll add a page to the workbook so you guys can references whenever
you feel like it. Next lesson we're
gonna be sifting and cutting through some
footage. Let's get it.
9. Sifting & Cutting: Sifting and cutting through
footage is going to be the first thing we want to
do in our editing process. Just a reminder that we changed these two keyboard shortcuts. E is ad edit and
is ripple delete. If you didn't take
these on and you made your own
shortcuts, that's fine. Just know that Add Edit and
Ripple delete are going to be two actions we use a lot in the sifting and
cutting process. Now you can start
this up two ways. Select one of your clips, drag it up to your source
here, and then drop it there. Make your in and out
points with the letter, and then drag that
onto your timeline. Second way to do this is
to grab all of your clips. Drag them all on the
timeline at once. And now you can sift and cut through everything
at the same time. On your first clip,
you're going to begin to cut out any unnecessary space. We're going to press E over
wherever you want to cut. And then we're going
to select the excess, whatever you want to cut,
which is this clip here. And just press that
will delete that clip and it will collapse everything
back down to the start. And you're going to
continue doing that until you got rid of
everything you don't want. If you were doing a Talking
Head video or an interview, you would get rid of all the bad takes, things of that nature. Anything that will
take away from your video being entertaining, cut it out and guys that
is sifting and cutting. And like I said,
it's probably better to do this in the very
beginning because now we've gathered all of our usable footage and the next lesson we're going to go over some storytelling
techniques using editing.
10. Storytelling Techniques (ARoll BRoll): So what's the best
way to tell a story? See, that's
completely up to you. See, each and every
one of us would tell the same story a different
way using words and visuals. But we can all get familiar with a few editing techniques that can help build
a better story. The foundation of it
all, role and B roll. Now we did discuss what these
two were in the last class. Camera basics for video. If you didn't take
that class, I would highly suggest you do
so after this one. But to be very brief role is your dialogue
your main story, and B roll is your
in between visuals. It's something that we use to piece together different
parts of our story. Videos with only a roll
look something like this. You see me just
talking to you guys, this is a role and earlier in
the data management lesson, when I was telling
you guys it was okay to edit off your SD card, I showed me putting my SD
card in my SD card reader. That's B roll.
Anyway, let's look at some ways to use roll
and B roll together. So if you do want B
roll in your videos, you need to capture B roll. So whatever you're
subject in your video, if it's you, if
it's someone else, whatever they're
saying or doing, you should capture clips of
the performance of that task. Perfect example with my
Miami Log in the beginning. How did I end up in Miami in this huge house with
20 other creators? Well, it's a long story. You see, it's cool
if I say that, but now you have to
visualize me being there. And honestly you just
wouldn't know what that looks like
unless I showed you. So I'll get some
clips of Me in Miami. Clips of the house, clips of all the creators, and
now we have this. How did I end up in Miami in this huge house with
20 other creators? Well, it's a long story. So our goal with using
Row is to eliminate your audience's need to try to piece things together
in their mind. Remember this
quote, remember it. Always write it down
somewhere. Show me. Don't tell me if you have a message you're trying
to get across. If you're telling a story, take the time to record
those in between shots. Those detailed shots of
whatever you're doing. Trust me, it will
make your videos a lot more pleasing to watch. And like I said, the
beginning digestible. Okay. Another way to
use B roll, right? Maybe you want to transition your audience from one part
of the story to the next. Like announcing that you're
about to go somewhere and then showing them clips
of you getting ready. I guess you can call it
like a montage of clips, but stand alone B roll can tell a better story than
A roll and B roll. Sometimes it can
really get your point across without you
having to say anything. It can bring in a
lot of emotion. Check out this
stand alone B roll I've recorded on the Miami trip. You want to speed up and Yeah. You fascinated? I was at that. So that last clip
was a role. It's us talking and laughing
and stuff like that. It's moving the story forward. That B role is just letting you experience our car infomercial. You mix in some standalone
B roll footage, in some nice music like
that, you can get a vibe. So obviously there's going to be more than one editing technique. This is just the first one. I'm not gonna make this
a super long lesson. Our next lesson is going to be key framing. And
I love this one. You're gonna love it too.
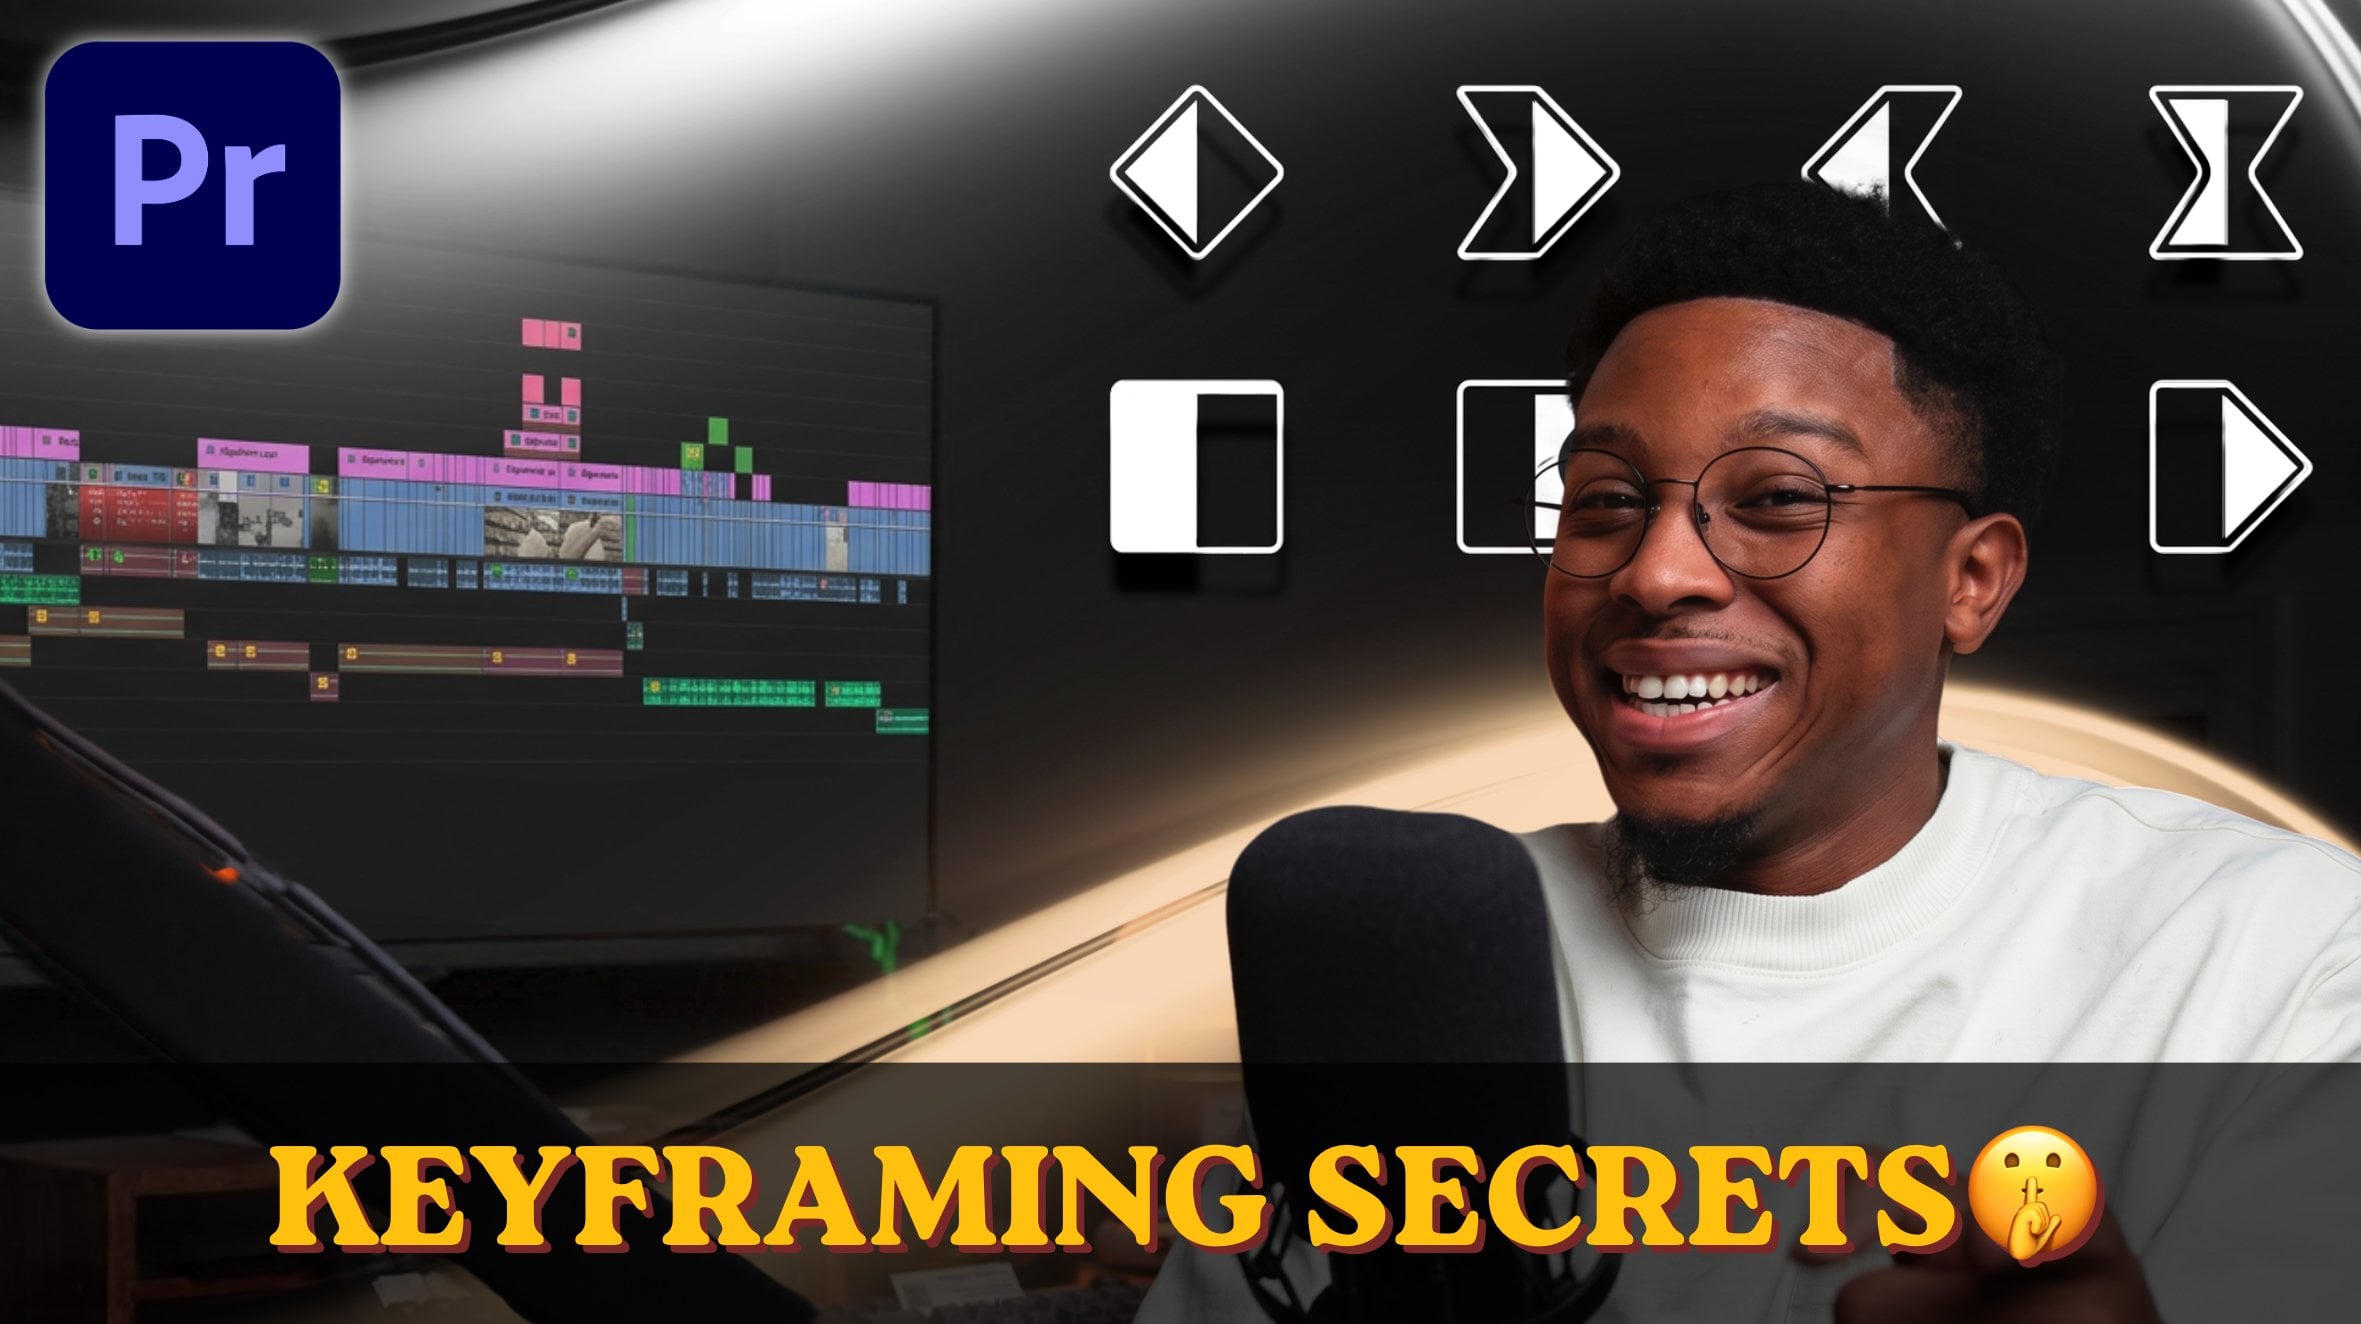
11. Storytelling Techniques (Keyframing): I use keyframing a
lot in premiere pro. It's really good at
emphasizing things or drawing your audience's
eyes to a certain point. And it all goes down right here on the effect controls panel. Keyframing applies to motion, opacity, time, remapping,
and audio levels. And how it works is
you can create in and out points with different
settings on each end. And it can do all
kinds of things. It can make your
video move around, zoom in, zoom out, fade
in, fade out, speed up. And since keyframing
covers a lot of things, we're going to separate
them by group. So we'll start with motion.
These clocks on the side here are how you add and
take away keyframes. So if you click on one of them, it's going to show up over here with this little dot here. And if you click it again, it's going to tell you this action will delete existing key frames.
Do you want to continue? It doesn't matter how many key frames you put on
this time line. If you do it this
way, it'll delete. All of you can scroll
through here and add another one using
this button here. So if you want to delete
one, individually, highlight it and press
Delete and it'll delete it. Now you have two
settings for position. This first one here is going to move your frame left and right. The second one will
move up and down. You're only going to have
one setting here for scale. And all this does is zoom
in and out of your frame. If you click on the
anchor point here, you'll see this blue circle
with a cross in the middle. All the effects you apply on that clip is going to
evolve around that point. So if we rotate this
clip around like this, it'll rotate around the
middle of that clip. Say we were to grab
this anchor point and drag it in the corner. Now when we rotate this, it's going to rotate
around that point. Anti flicker filter will assist you with flickering videos. I never use it, probably never will, but it's
there if you want it. So for a simple pull in shot, you're going to go
to where you want that pull in shot to begin. I'm going to do it at
the start of my clip. And we're going to
go up to scale, because that's what we
used to zoom in and out. And you're going to create
your first keyframe by pressing on this
stopwatch here. You'll see over here,
it's been created. Now you're going
to go to where you want the zoom in to stop. And you're going
to zoom in using the setting beside scale, you can either click and
type in what you want, or you can click
and hold and drag. Now once you enter any number outside what you started with, it is going to create another key frame automatically for you. And now you can see we
have a zooming clip. If you want to pan your
video left to right, up or down, it's the same thing, except if you do it when your video is all the way zoomed out, you're going to run out
of space instantly. So if you want to pan
across your video, you'll need to zoom in
a little bit first. So let's go up to position again and create our first key frame. And then you're going
to slide over to where you want the
effect to stop. Remember the first one
moves right and left, the second one
moves up and down. We're just going to drag over to where we want this thing to end. So we started in
the middle and we moved up into the left,
and it looks like this. You can also use it
to track objects, people's faces or bodies. This is very simple, just zoom into where you want to track. We'll pick this microphone
here she's holding. Now go ahead and
create that keyframe for position. And you
can do this two ways. You can grab your cursor
and scroll forward. Or you can use your
aerial key that points to the right and just scroll
forward like that. I'm going to use
this right here to zoom in here so I can
see a little bit better. So I'm going to scrub
forward a couple frames. And I'm going to keep that
microphone in the center by just moving the
position like this, a couple frames forward. Move it over. And you just keep doing this until the motion is done and now you have this. You see the frame just
follows that microphone. Now, a quicker way to do
this, it's not as efficient, but you can create
one end point at the beginning and
one at the end, it will essentially
do the same thing, but it won't track
it as well as if you follow it along a couple
frames at a time. So I'm going to delete
everything in the middle here. And just leave one at the
beginning, one in the end. And you can see how
this looks right. Doesn't look bad at all, since the microphone is moving
in a straight line. You can definitely
do it this way, it's way quicker, and
it works just as fine. But if you're tracking an
object that's moving like diagonally and like
all over the place, you might want to track it
frame by frame yourself. So I use these
techniques all the time to make things a
lot more interesting, my videos, to emphasize things, and to put a little
bit more power behind certain
things that I say. So play around with those
settings long enough. You'll figure out if it's something you would
like to do on a regular basis or if
it's not even for you. But next we're
going to talk about opacity settings and masking.
12. Storytelling Techniques (Masking & Opacity): All I was gonna tell you
guys, we're gonna be outside. But I wanted to be a surprise. So are you surprised? So keyframing opacity
is very simple. So we're gonna save that
for the end of this lesson. I want to show you
guys how the mask, because you can do
a lot and I mean a lot of cool things with masks. So underneath the
opacity here we have these icons.
These are your mask. This oval mask will
create an oval. And whatever is inside of
this mask will remain. Everything outside
will be invisible. It's not necessarily deleted.
You just can't see it. If you want to turn off
any of your effects, you can just press on the icons here to the left and
it'll turn them off. And on the rectangle in the pin masks do
basically the same thing, but with the pin
mask you'll have to draw out your mask yourself, which gives you more control. Let me drop a color grade on
this footage really quick. What I just did there is I
used an adjustment layer to apply the look I wanted on all the clips
at the same time. We'll go over that when
we go over color grading. So the most common use of
masking is removing objects. First, you're going
to put your camera on a tripod because there
cannot be any camera shake, it will ruin this effect. So you need to record
a blank clip first. Something where your
object is not yet in there and there's no moving
objects in the background. Preferably, you want
to find a place where there's no
movement at all. And as you can see
here, I noticed that the clouds will be moving, so I pointed the
camera downwards. Now you can go ahead
and record your video. So you bring this footage
into premiere and you want to remove this
book bag or any object, really go ahead and go
to your blank footage. And you're gonna drag that
underneath your main footage. Make sure that you
record long enough for it to last the
entire effect. Now we're going to go
up to effect controls and we're going to
select our mask. I'm going to use the
Pintool on this one. Now using this Pintool, I'm going to draw
around my bag here. For the sake of time, we're just going to do this very quickly. And now you have a mask
around your object. All you have to do
is click inverted. And now that video will play. In the bag is gone. Now if you had a moving object, you would do the same thing, except you would click and drag this mask to wherever
your object is moving to. And it will keep that invisible. And a quicker way to
do that is to come up here to track selected
mask forward. And depending on how
defined your object is, it will track that mask
over your object by itself. So make sure you do not cross this line in the middle here. To take it a step
further, you can interact with yourself on camera,
which I love to do. As you can see, it
takes a lot of memory, timing, things of that nature. But you should be able to get better at it as you
put your apps in. So once you got
your clone shots, you're gonna bring
it into Premier. And place one on
top of the other. The one that you place on top, go up to opacity and decrease
it by 50% In this way, you can see how well you did on separating
yourself like here. I can already see my shadow is going to overlap
with my leg here. Now for this cloning effect, we're going to go
for the pin mask again and then make
your way over here. And you're gonna
change this fit to 25% We're gonna be drawing this mask
outside of the frame, so you want enough room
to see what you're doing. And I'll show you guys the other clones that I've
done in the past. You want to draw a rectangle over the side that's on the top. Okay, So you can start
from anywhere you'd like. I'm going to start
here, go down here. I'm just going to draw
a box around that side. And now we're going to go
back and increase the opacity back to 100% Now both of
our halves are there. Now you can change
this 25% back to fit. You're gonna go to mask feather. Drive that up a little
bit and you can see that it starts to feather
it out in the middle. So you can see, like I said,
my shadow is cut off there. Be very careful about everything
when you're doing this. Okay? Moving objects, shadows, things hanging outside
of your clothes. The smallest thing you
can throw this off, just keep that in mind. So we'll finish this lesson off with the keyframing opacity. It works exactly like
everything else. The automatic setting
will be at 100 here. So you can go to anywhere
in your timeline where you want it
to start fading. Go up to opacity, create your first key frame
using the stopwatch. And then go to where you
want to fade to stop. And just drag it all
the way down to zero. And now you play it back. Your
video will fade to black. If you want to do this at
the start of your video, just go to the beginning,
drag it down to 0% Create your key frame. Go to where you want
it to be completely faded in and then drag
it back up to 100. Play it back and it
fades from black guys. That is key framing,
opacity and masking, definitely get some experience masking because it is
a good skill to have. I even did it at
Starbucks later today. Next lesson we're
going to go over speed ramping and match cutting.
Let's get into it.
13. Match Cutting: So let's talk about
match cutting. This is a simple cutting
technique that can help you tell a story in a pretty cool way. And let me show
you how to do it. How it works is you record
two of the same action, but you do something different in one that
you didn't do in the others. It's that simple. The first clip you record is where you're
starting from and the second clip is where you're going to or where you're ending. So say I had a long
day of editing ahead of me and I wanted to
show that on a video. I could record one clip right now of me
sitting down like this is in another clip like
this where I'm all tired. I'm not actually tired,
but you get the point Now, bring that clip onto your
timeline and you're gonna cut that clip right before wherever you want that
transition to happen. And if you have a
second clip, drag that one on and cut it wherever you finish that motion like this is a really
good example of it. I love using it like this.
So guys that is match cutting pretty easy and you can add that to your
list of skills now.
14. Speed Ramping: You've watched enough videos on Youtube about videography
or filmmaking. You've probably already
heard of speed ramping. Speed ramping gives us the
ability to speed up and slow down clips using a system similar to the key
framing we went over. So the most satisfying
speed ramping happens when you have
slow motion footage, but you can speed
ramp normal footage. And I'll show you what I mean. So your clips are
on your timeline. I want you to go to this line right above wherever
your top clips are. Click it, drag it up. Doing this will allow us to see the key frames for
our speed ramping. Now you see these boxes
right here that says effect. We're going to right
click on that and we're going to go to time
remapping and speed, that line that was at the top is going to drop to the bottom. And now this is a
speed ramp line. Go ahead and press the
letter P for a pin tool. So what you want to
do first is figure out where should
I speed this up? Where should I slow
it down? And I wanted to slow down
right about here. So I place my blue line over where I want to make the mark. And I'm going to
just click there. And now this line is
separated at that mark. All you have to do is literally click this line and drag it up. And you can see the clip
has been shortened. We'll play that through,
and you see it's fast in the beginning and
it slows down to end. If you want to go even faster,
just pull it up again. If you want to make it
more of a transition, you can go to this
pointer here we made. And we can click
on the left side and drag it to the right. And you can see that
diagonal starts to show up. And now we played it and
it's a little bit more of a smoother transition
from fast to slow. And now you have this epic
pull out shot of the mansion. And it slows down, it's amazing. So sometimes your drone footage, your camera footage
may be shaky and you want to put a warp
stabilizer on it. So if you use time remapping, you cannot use
warp stabilizer on that same clip unless
you nest the clip. Now we've nested clips before, all you're going to do
is press the letter in. If we did the keyboard
shortcuts, if not, you can just right click and just fine nest and
then just press okay. And now that we
nested this clip, we can go to the effects panel here and we'll type
in warp stabilizer. Okay, you'll find this one and you'll just drag that
onto your footage. Now it's going to say
analyzing and what this does is smoothing out
your shaky footage. So guys, this does not just
apply to drone footage. You can use this on anything. So now let's go over
the match cut effect.
15. Color Correction & Color Grading: Color correction and color
grading. Let's talk about it. So color correcting
and color grading really has its greatest effect. When you shoot in log. You can think as log as,
like a raw image. It's stripped of
all the saturation, but it retains a
ton of information. And you can pull things back to extreme levels and create a
look that's special to you. Now if you're not interested
in doing all that, I understand, you
will probably be shooting in standard mode,
which is what this is. And this is the automatic
mode that will give you that saturation contrast in everything you will want
out of a good looking video without you having to do a
lot of things in editing. But at the very least,
whether you shoot in rog or standard profile, you
will have to color correct. So let's learn how
to do that now. When it comes to log footage, you cannot edit it like this,
you can't see anything. So what you'll have to do is
convert it to seven oh nine, which is a standard profile, basically like this
but for log footage. So in your project folder,
you're going to go down here, go to adjustment layer, and it will auto
load the dimensions of your time line. You
can just press okay. So you can double click on
this adjustment layer down here and we can rename
this wreck seven oh nine. Now we're going to place
this adjustment layer overhead our footage. And these adjustment
layers are great because whatever
you put on them, everything underneath it
will receive those changes. Now we're going to go up
here to window work ****** and color collapse
this basic correction by just pressing it there. And then you're going to go to the Creative tab
now where it says, look, this is where
you're going to search for your conversion lot. Now Higley suggest you to
invest in a conversion lot. Okay. It won't be
that expensive. And it will get you from log to standard in one click.
This is the one I use. I don't know why, but I
named it new, new, new. But when I open it, you see I get a lot of that contrast
in that color back. And if you're shooting
off a standard footage like this, you don't
have to do anything yet. Now the next thing you
want to do is select your clip and go over
to Lumetri scopes. Now this is your
regular wave form. Now you have things
like the vector scope in the histogram. We're not going to
mess with any of that, let's just keep it simple. Let's learn how to read
this. So this wave form is going to read your
video from left to right. The very top of your wave
form here is your highlights. The very bottom is your Blacks. You don't want the
bottom of this to touch or go past zero, And you don't want
the top of this to touch or go past 100. If I raise the exposure
and I go past 100, you can see everything
is too bright now. And if I take the shadows
in the blacks down, you can see all of
this lost information in here is reflected
at the bottom here. And that's why it's
very important to expose properly in the field. So you're going
to be looking for colors that stick out too much. It looks pretty balanced to me, but there is a lot
of red at the top. So we'll go to the
temperature up here, and we're going to cool it
down just a little bit. And we can see the red
begins to subside, and now the magenta is
sticking out at the top here. So let's move over to tint, and we're going to introduce
a little bit more green tint to balance out that magenta. And now you can see at the
top we have a smooth line. And it may not look
like we did a lot, but you can see before and
after on the wave form, we balanced everything out. So guys, that is color
correction and you need to do it with your
standard footage too. So we click over to the standard
footage and you can see this looks way more
crazy than what we had. The first thing we
notice is the highlights are touching 100 this time. Let's go to the
curves tab. And we're going to use this to
balance everything out. So this will act the same way as all of these
sliders here, But you have a lot
more control here. So we need to lower the
brights a little bit, bring that down from 100. And I'm going to
raise the blacks in the shadows a little bit too. And get it away from zero. So you see that thick
layer of red right there. You would think, you
would have to fix that. But it's very important to
use the wave form. Yes. But you also need to use
your eyes sometimes. And my eyes tell me right
now this looks fine. So I have other footage here that I have not color corrected. Let's color corrected, but I
see that magenta at the top. I'm going to balance
that out with the green. Then I'm going to
go to the curves, and I'm just going to
bring these highlights down, away from 100. And I think the
midtones would be used a little bit
less, just like that. And once you balance
one clip out, if you have other clips
that are recorded in the same light
around the same time, you can go ahead and just
copy paste attributes. And we're gonna paste
that lumetri in color. So now all three
of these are color corrected and our standard
footage is color corrected. The standard footage, all you
got to do is color correct. And then really you're
done with that. We can move that out of the way. Now we can color grade. Now a lot of people
buy luts and then they always wonder why the luts
don't work with their footage. It's almost always
because of two things. They did not color
correct their image first and they did not apply
the lut the correct way. So now that we brought this
footage from log to rec seven oh nine and then
we color corrected, now we can put a grade on it. Again, I would find a look
that you already like that someone else has created
and just make it your own. So go ahead and create a new
adjustment layer and then we're going to name that
one grade or color grade, whatever you want to
name and then place that on top of your Rex 709. So if you've color
corrected properly and you converted it to
wreck seven oh nine, this is the funnest part because depending on the lets you have, you can pull out some
really cinematic edits. So we're going to go
back up to window work ****** and color. People will apply
their lut here. And that's not good
because you cannot control the intensity
of the lut there. Okay, close that one
up. Go to creative. Now on the look,
now we're going to search for our lut. I'm
going to use this one. I know it to be nice and
bright, and very vibrant. And I literally bought
this from somebody. So once I open it, look at how great this
footage will look. Boom. Now this will be
closer to your final look. You see how everything just
came together like that. Now obviously it will change
your way form a little bit, so we will have to
go back in and color correct a little bit so we can see those reds are
peaking up again. So we're just going to bring that back down, just like that. And we're starting to lose some information at
the bottom there. So we're going to go to curves. We're just going to
ever so slightly bring up those blacks
in those shadows. So guys, we went from this to this and it's basically
just three steps. Convert to Re seven oh nine. Color correct and
then color gray. Now going to this next clip, you can see how
saturated this is. Now we can go under
here and we can just drive down that intensity
of the lot And you can see with none of it we have basically just our
Re seven oh nine conversion And we can just bring in just a little bit of
it like that and I think that's just enough and because I shot these at the same time, I know that I can just extend this and it will
look just the same. So guys, that is color
correction and color grading. I will leave some options for you guys to purchase some rec, seven oh nine conversions
and some grades. And hopefully you'll
be able to find a look that suits you the best. So next we're going to go
over graphics and effects.
16. Audio Editing: Is audio more
important than video, or is video more
important than audio? That argument is a timeless one, and if you have any
friends that do video, ask them and that will start up a really good conversation
with you guys, I promise. So let's see what we can do
to make audio sound good now. First of all, when
capturing audio, you might want to use
a reliable source, whether it be
wireless microphones, a studio microphone
that you have, or if you have one of those
road shotgun microphones. Please do not use the
scratch audio from your camera because in most situations that's
not going to cut it. But this was the final
clip I recorded in Miami and the audio
has not been edited. We're going to look
at how we can fix it. This guy's crush it
this week. Yeah. I cannot get enough
of this Miami trip. I love these guys. Okay. But do you see how in the corner there
when it was playing, it's going all the
way up to zero? That is terrible and
we need to limit that. Now you usually
want to sit around negative 12 and this is
how you can limit that. We're going to go to the
effects tab here and we're going to type in hard limiter. It will be underneath
amplitude and compression. We're going to click and drag
that on to our audio track. Now we're going to go up
to the effect controls and you'll see the hard limiter has been loaded as
an effect here. Go ahead and go to
the Edit button, and this box will
pop up for you. All we need to worry about
is this first one up here. We're going to click
on this option here and we're going to
type in negative 12. So when we play
this back, you'll notice it won't go
past negative 12. Here we go, guys,
crush it this week. Anything past negative 12 decibels is going to start being too loud to the point where it's almost irritating to listen to. Now, there won't be any in this, but if you do have white
noise in your audio, this is how you're
going to take it out. If you don't know what
I'm talking about when I say white noise, it
sounds like this. You hear that?
That's white noise. Again. We're going to go to the effects tab and
we're going to type in noise underneath noise
reduction in restoration. We're going to
click that and drag it onto our audio clip. Go up to the effect
controls panel, and the noise will be loaded here. Go ahead and go to edit. And we're going to switch
this icon to this one, and this is going to focus
on the lower frequencies. Zero is going to do nothing. 100 is going to do a lot. What you need to
do is see what it sounds like at
different numbers. And depending on what you
captured your audio with, this might be a
little bit too much. Because if you do too much, it'll start to sound like this. So I usually start at 50
to see if it sounds okay. And if it doesn't, I
just begin to walk it back down until
I'm satisfied with the amount of the white
noise that's gone and how the audio still
sounds in the video. Using the D noise can
lower your audio a little bit so you can raise it back up with this game bar here. And obviously in the
effect controls panel, you can edit the
volume here as well. Now you're going to be
key framing audio a lot, especially when it comes to
using music and your videos. Because some part of your videos is just going to be role and then some part of your
videos is going to be a role where you're actually
speaking and talking. So you don't want
the music to be overpowering your main dialogue. So we remember how to key frame. It's going to be the
same way with audio. So right here, I want
the audio to decrease, so I'm going to press
my stopwatch here, create my first key frame. Then I'll go to where I want
the music to stop lowering. And now I'm going to
type in negative 30 DB. We'll play this through
and we'll see the audio lower by itself in
and amongst the. Leave it up tomorrow. You and even tomorrow. So when we all started
actually talking, lower the audio so you can
hear what we're saying. Right. So guys, that
is audio editing. Use the hard limiter in
the D noise and then the audio panel to raise
and lower your audio. So guys, that is how
you edit your audio. Let's move on to
graphics and effects.
17. Effects & Graphics: So let's talk about
effects in graphics. Now down here in
the effects tab, you will have a library of things that are
available to you. In the last lesson, we
use the hard limit, A D. Noise Those
both are effects. There's audio effects, video
effects, and transitions. Now you can go on line and
buy effects transitions, and they will be
loaded into here. And I definitely recommend
you do that because it will put extra
edge on your videos. So this effects
pack are actually free and there's a lot
of free ones out there. And I would suggest
you look for those first before you go buy
some click in here. They'll be labeled what they
are, so let's go into zooms. And I'm just going to drag
and drop that onto my clip. And now at the
beginning of the clip, we'll have a very quick zoom, but you could slow it down
once you load that effect. It will be up here in
your effect controls, you'll see the name of the
effect and what it's doing. So we can click into transform, and that's going to be the
movement portion of this. We can extend that
effect further here. You can change the position of this effect where
it zooms in here, you can zoom in and
out with the scale. It's just like the key framing
of the motion up there. All of those effects
work the same way, you just drag and drop and they'll be placed
onto your clip. Let's do this blur. Now you see we have a blurry transition
there, that is effect. Let's go and talk
about graphics. We're going to go up
to window work ****** and captions and graphics. Your graphics tab will pop up on your right side here and you
can scroll through this. I have bought some graphics. Again, you can buy
graphics. Click on one. You drag and drop it. It's going to load
on your timeline. And now we have a title. We'll be editing them in the
Essential Graphics tab here. So you just click into these and you can move these
graphics around. You can change the text, you can change the colors
of almost everything. There's a lot of customization options when it
comes to graphics, and it can really put
that umph on your videos. Now you might run into
things like Motion Bro, which they are a graphics
platform you can buy from. And their graphics will come
in the form of extensions. You'll go to window extensions and my Motion Bro
extension is right there. And as you can see,
it's a huge library of a bunch of useful things, literally all through this
video, I was using graphics. The Villa one, 12:30
P.M. that's a graphic. All of this right here, the
Instagram, the title graphic. So if you think your videos
could use stuff like this, I will leave some links
for some free graphics, some ones you can pay for
if you have the money. They are definitely
an investment. So guys, that is
effects and graphics. We are finally almost done. Our next and final lesson is
going to be export settings.
18. Export Settings: So you've edited your video
and you want to export. Now what is the best
export settings? Let's talk about
it. If you remember the keyboard shortcut for
exporting, raise your hand. Okay, I'll see. You see a
couple of people command or Alt M will bring you straight
to the exporting panel. So this will be a part
of your data management. You want to be able to
find this video later, so let's give it a good name
that we can find it with Miami Blog 2023 too easy. Now we're gonna pick a location. Where do you want
this to be saved? I usually just put
it on my desktop and then I'll move it to
where I want it to be. But if you already know
where you want it to be, you can just go ahead and find
it here and save it there. And then you're
gonna press Save. So it will automatically
be on match source. If you want to leave
it there, that's fine. That is a good option. The format is going to
be set at 0.264 That is basically the standard
for most platforms you're going to be uploading
to, so keep it there. If you want to save a very
high quality master file, you can come back to later. I would go ahead and put
it in quick time here. So now let's click into video, and this is where you can
down sample if you want to. I recorded this in four K.
If I wanted it in ten ADP, I'll just uncheck this box. I'll click here and I'll
just go to full HD. And now this will
export in ten ADP. If you want it to
remain what it was, just click that check box again. It'll go right back.
I check render at maximum depth and use
maximum render quality. And then for a four K video, I'm going to have a
target of a 40 bit rate. And I have mindset
at VBR, one pass. If you're exporting a vertical
video for social media, I put my bit rate at 15. And guys, that's
it. A lot of people overthink exporting your video. If you're uploading
to social media, you don't want a large file
because it's just gonna be compressed and it's gonna look worse than what you
intended it to be. But you can click something
like high quality ten DP, high quality four
K, depending on what your video is. And
it will be just fine. So after that, you just click
Export. Now you just wait. So guys, that is
export settings. You now have the whole
editing process down. How does that feel? So let's go ahead and wrap this class up with a conclusion.
19. Conclusion: Guys. So we talked about a lot of things
during this class. Everything from
constant ideation, importing and exporting your footage and
everything in between. If you forget any
of these concepts, feel free to come back to the class so you can
go back over it. And you can also
find the workbook I'm going to create
for you guys. It's going to have all the information we
cover in the class, but in written form, not everything but the
most important things. Now I'm hoping that you
guys can use this class as a foundation for
your video editing and your video
career in general. So I want you to keep going, keep building upon what you just learned here and you'll
be a pro in no time. So I have some
words for you guys from me about a
month ago in Miami. I just wanted to include this clip at the
end of the class. I'm on a trip in Miami right now with a bunch of other
content creators. This trip just fell into my lap. And I wanted to give you guys
this class a lot sooner, but I just couldn't
say no, you know, I just wanted to show you guys the byproduct of just trying. Just constantly trying
and constantly pushing. So there's been a lot of
times where I wanted to quit, but look where I am now, you know, and this is just opportunity
meeting preparation. You know, I prepare it
for this moment and I was able to take up
the opportunity. You can kind of see people
in the background and stuff, but hell man, if you would like go ahead and
join the discord. The Plug In community
is going to be a community of other video
creators just like you. You can go there and
get your questions answered. Go there
and just hang out. Meet new friends. The
more people you know, the better in this thing. So let's, let's kill
it. This year, say yes. Don't forget to join the
plugged in community. It's going to be other video
creators like yourself. What do they say? It's not what you know
but who you know. This is very true. And please do not forget about
the class project. You're going to record, edit your video posted
anywhere on social media, drop the link in
the project, some resources, share
it with the class. And finally, if you
did enjoy this class and you feel like
you learned a lot, go ahead and leave
a review for me. Tell me everything
I did right, so I can make these classes
better for you guys. If you happen to miss
my other classes, go ahead and check them out. You might be able to learn something there as you did here. And I wish you God speed
in your endeavors. Piece out and I'll see
you in the next class.
 Kent Hart, Storyteller