Transcripts
1. Introduction : In this class, we're
going to paint five beautiful and
magical mushrooms. This class invites
you to slow down, express your inner creativity by reconnecting with nature, and improve your observation
skills as an artist by examining the intricate details of mushrooms during
this fall season. This is also a chance
to continue to develop your own style of
painting in a relaxed way. Art is a journey, not a destination, so there's endless
possibilities to explore. It's about expressing your
unique perspective and enjoying that particular subject that you've chosen
to paint or draw. Mushrooms are some
of nature's coolest, most intriguing subjects
because they're so small, yet such a variety exists
among their shapes and colors. They last only a short season, and yet they sustain an entire ecosystem right
underneath our feet. And in this class, we'll be
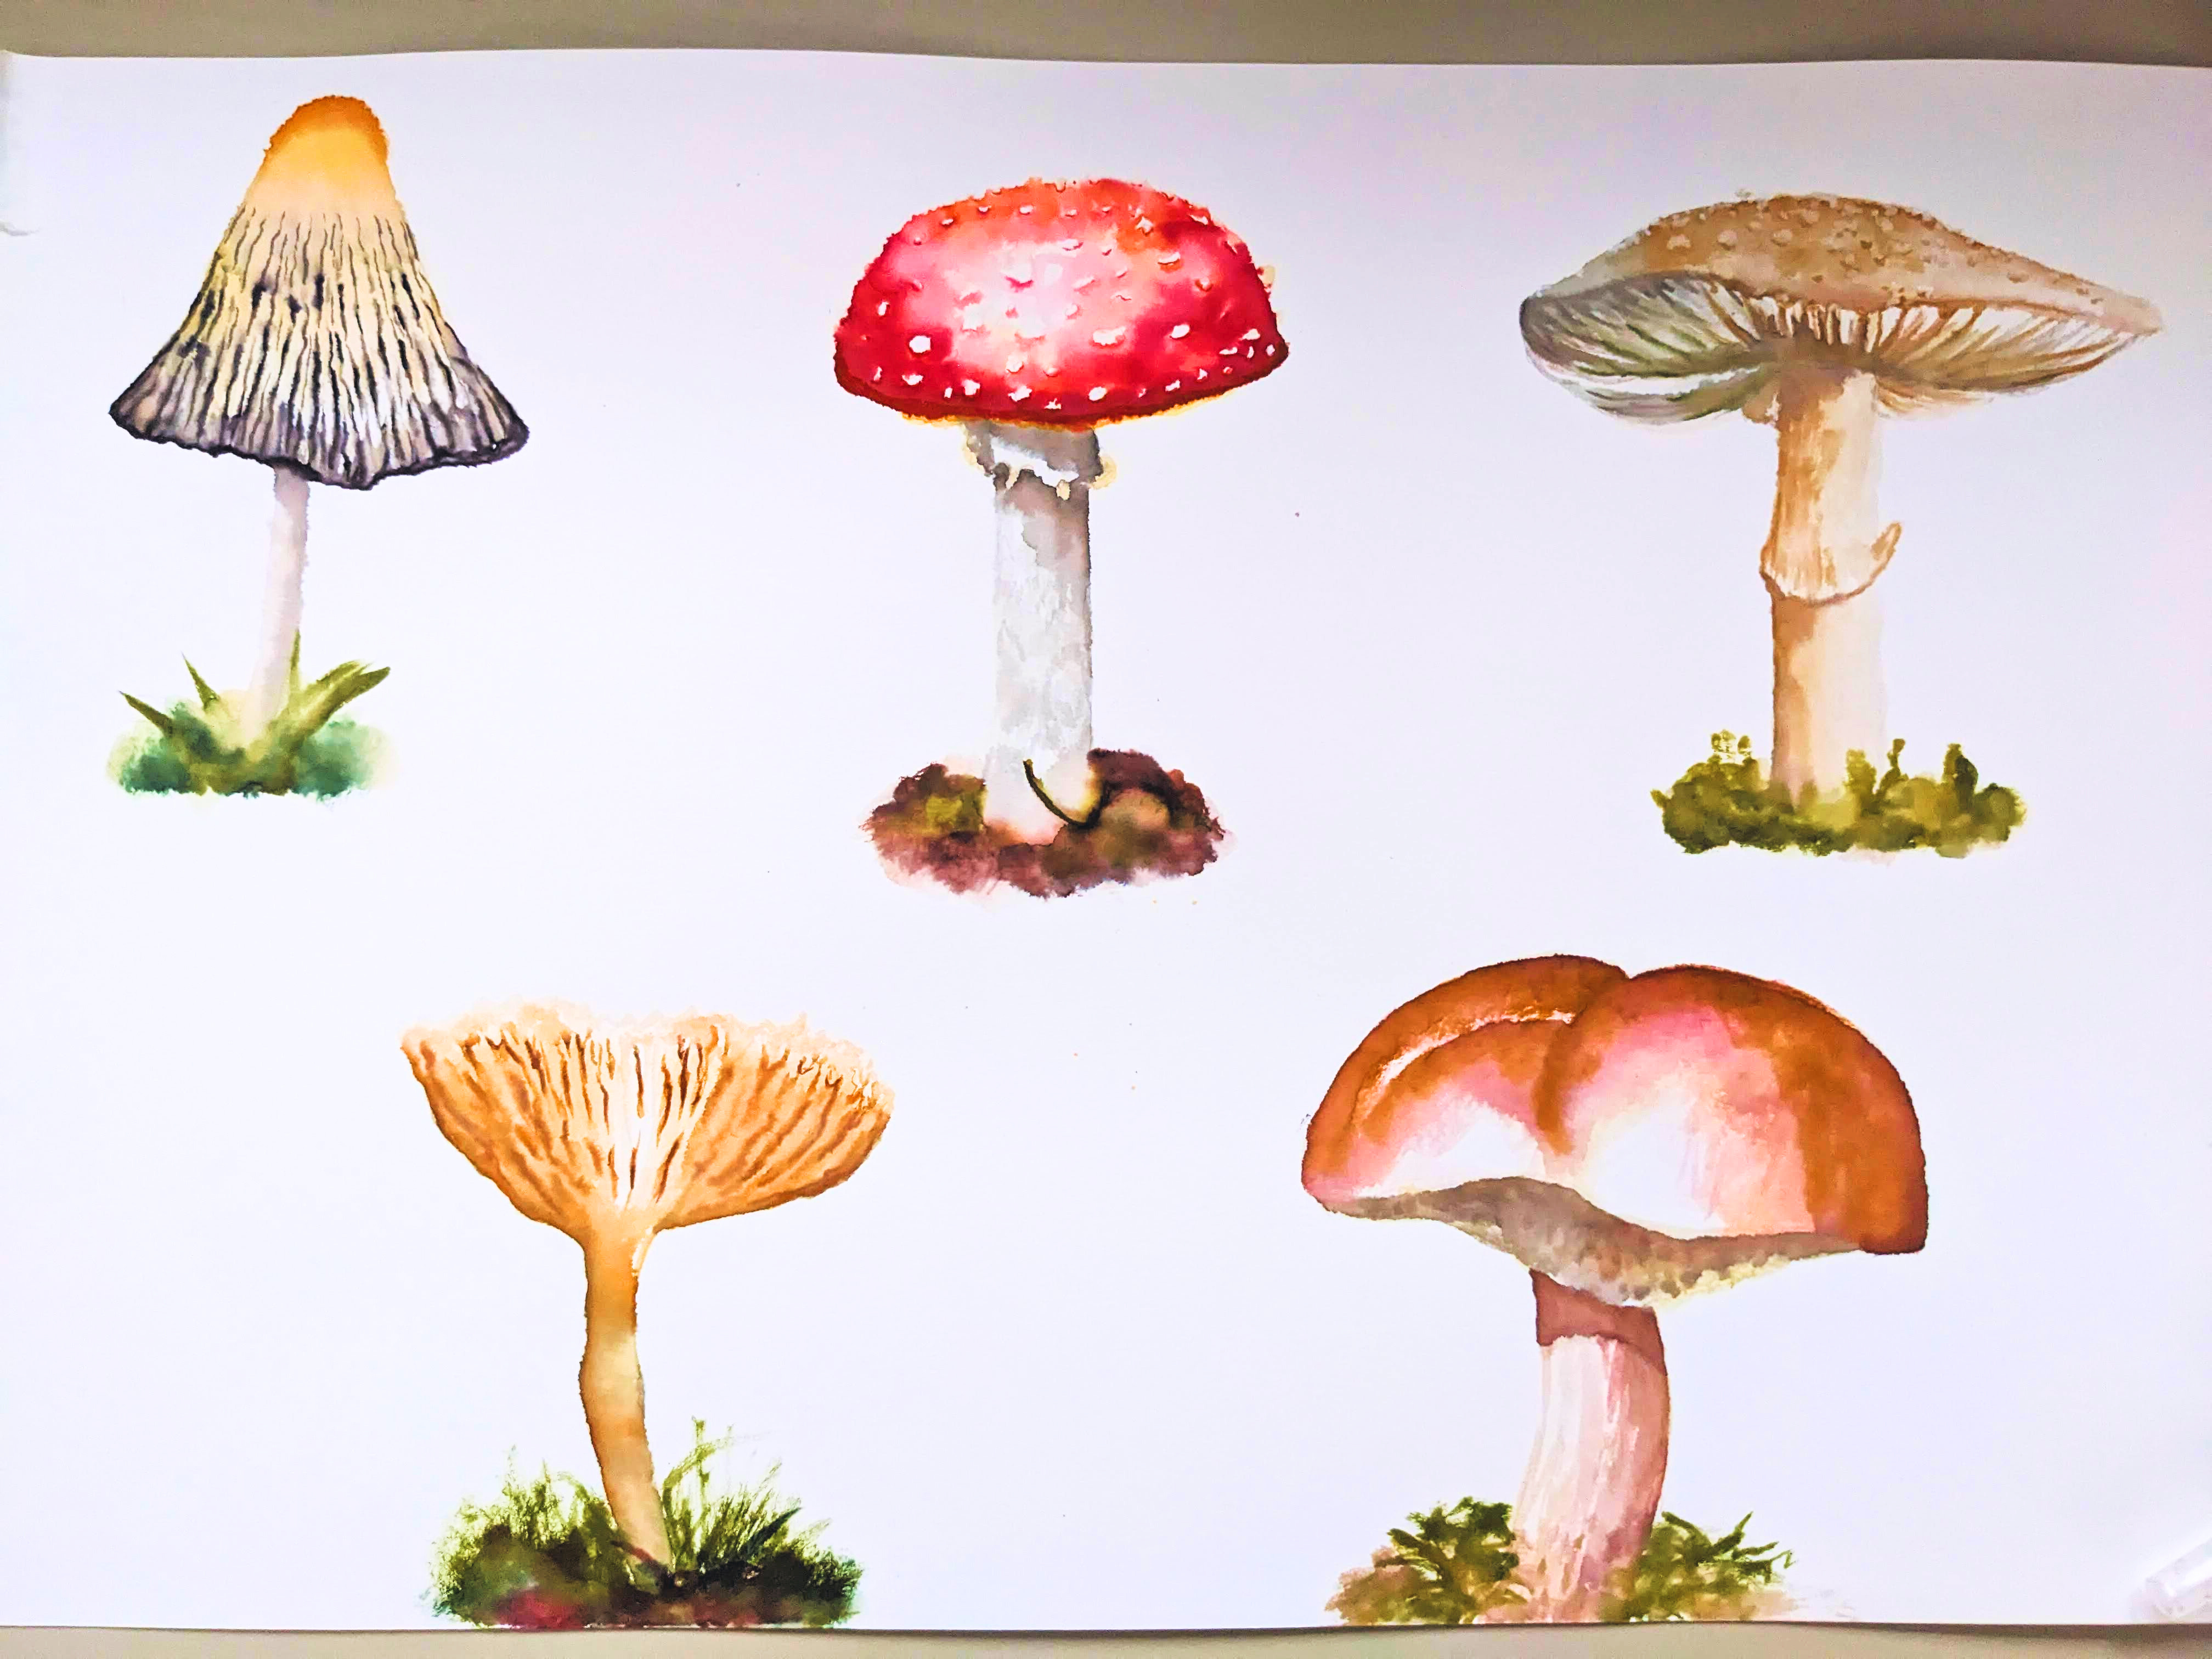
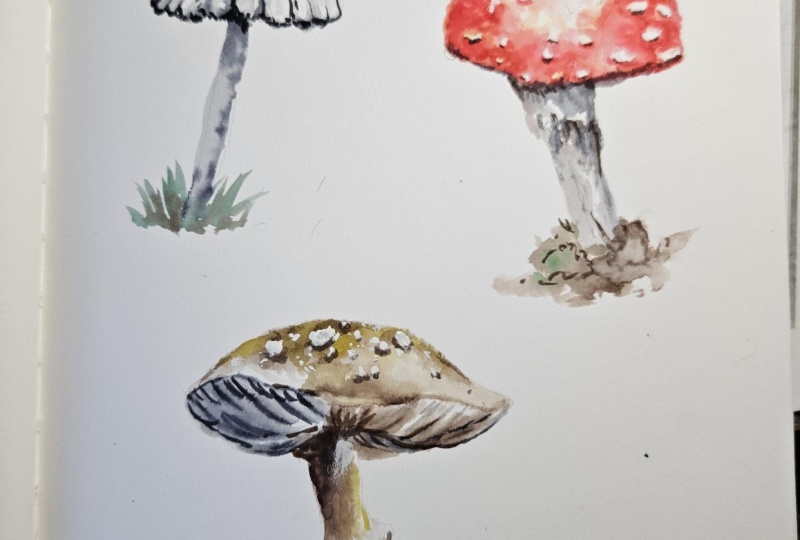
painting five mushrooms, a golden capped mushroom, the fly agaric,
this pearly fungus, a brown cap mushroom, and a yellow trumpet
shaped mushroom. Maybe you've encountered
some cool mushrooms in your own backyard
or on a walk, and if so, I'd invite
you to take pictures of them and follow along with me as we paint
mushrooms together. Whether you're picking
up your brush pens or watercolors for the first
time or the 50th time, this class is really for
anyone who's looking to relax, celebrate the fall season, and create lasting mushroom
inspired memories on paper.
2. Sketching the Outlines: The sketch is the foundation to bring your artwork
illustrations to life. We're going to start
by grabbing an HB or mechanical pencil with an
eraser if you have one and begin sketching out the
first mushroom using light pencil strokes to create the first outline of the
golden capped mushroom. And then we'll move on to the right and do
the fly Garrick, the pearly fungus,
the brown mushroom, and the orange Trumpet
mushroom last. If you chose to take your own reference pictures
to draw mushrooms, maybe from your own backyard, you can still follow along
with me and just make your own observations about each of the mushrooms you've
chosen to paint. I like to observe the
mushrooms, shapes, the cap, and the
stem, the gills, the length of the stalk compared
to the size of the cap, and how each part
relates in proportion. Don't worry about getting
every detail perfect. This is more about capturing the overall essence
of the mushroom. So I like to draw the cap first and then move downwards
towards the stem. Just sketch the basic shapes, keeping your lines
soft and noting the thickness of the stems as they relate to the
width of the caps, take your time here when
adding details like the gills or textured
bumps on the caps. Try to use random
placement and don't copy the exact locations
of every single wart. Otherwise, you're going
to get overwhelmed and it takes the fun out of it. Yeah, for the gill lines, just try to make them follow the directions of the gills in the references, but don't make every line. Don't try to follow
every single line. Just give yourself
enough of a guide to follow for when
you go to paint. And make sure to
keep your strokes light for easy erasing. And once we start to
get into the painting, think about the unique
characteristics of each mushroom. Are they delicate
or bold and big? Are they dense or
soft and squishy? Where are the bumps
and crevices? Are there any textured
flaps, folds, or tears? Are there any cuts in the cap? And if it has any bumps at all, where's the light
coming through? Where does the light
hit the top of the mushroom or the
side of the mushroom? Feel free to pause this
video if you need to or skip straight ahead to the next video if
you're done already, and we're gonna move on to
painting our mushrooms.
3. Choosing your Colors: All right, let's
go over the colors that we're going to
use for our mushrooms. And the first mushroom
I'm going to pick the colors for is this
golden capped mushroom. It might be called Amica cap, but I'm not 100% certain about the scientific
names of these mushrooms. And to get started, I have chosen about
seven or eight colors that I think will work
for this reference. And I know there's two of these mushrooms in the
reference photo, but I'm just painting the
one on the right hand side. So I'm just going to draw
out a little color swatch of each marker and then decide which ones I want to
use for the mushroom. And the colors I've
chosen are an orange, tangerine, ginger,
a deep yellow. There's two light brands
that are pretty similar, so I'm just going to
use one of those, and then a gray and black. And that's it for
the first mushroom. For our second mushroom, the fly Garrick, it has
a lot more colors in it, so we're going to use a
lot more different shades of red and then a yellow for the undertone and tangerine orange from
our previous swatch. You can paint whichever of these three mushrooms you
want to from the reference. I just picked the
small one off to the right it looks like he's popping out and a
little bit more clear. So I'm just going
to do a swatch of each color like
the previous one. And if you examine the mushroom, it doesn't have to be
perfectly matching up. You don't have to get
all the colors that you see just enough
to kind of mimic the values that you want to
create for your own mushroom. And for the stem,
I've chosen a gray and a blue gray and
a hickory brown. But I don't think
I'm going to use the hickory brown because it's a little too dark for this one. Our third mushroom is this
pearly fungus mushroom. It's got nice earthy
toned colors, and I really like how it's got that perspective of the
back part of the mushroom. That'll help us bring out the
three dimensionality of it. So let's just go ahead and paint our color swatches and choose what we see
from our reference. I kind of see some
blue gray on top, which is reflecting maybe
the surroundings or the sky. And there's some green
in there in the shadows, like the gills right
on the left side. And we also have
some light browns, and I'm using this white
acrylic paint marker to do the white bumps
on the top of the cap. So I think we're going to go
with the blues, the gray, one of those browns, maybe two of them, and then the green. But I don't think we'll need that super dark brown
color in there. And for our fourth mushroom, it's this big puffy, brown, beautifully
red hued mushroom. And so we're gonna
need lots of shades of browns and a couple greens, some gray for the stem
on the underside. So let's just draw each
of our color swatches. And I know you might
be working with a different watercolor set
or watercolor markers. So just use whatever colors
you have in your set. And the important thing
is to capture the values, which are the shading and the highlights and the midtones. So I think I'm going
to go with this nice hickory brown color, sienna, another medium brown. And then the greens
and the oranges. Two And finally, for
our last mushroom, this bright orange trumpet
shaped frilly mushroom, where you can really kind of
see the light coming through those transparent
layers of the cap. I'm going to try to use
some of the yellows and oranges for the undertones to help bring the light through, and then I'll use browns and greens and gray for the stem. I've also chosen to
paint the one mushroom that's smackab in the center
of that reference photo. And you can totally just paint
that one or all of them. They sort of look like
a family of mushrooms. It's very cute. And once we're done with that, we're going to start
sketching our mushrooms.
4. Golden Capped Mushroom : To get started with
our first mushroom, I'm going to take my colors
and lightly rub them onto this plastic lid
so that I can put a light wash down first
using the water pen. So I'm squeezing out
a little water from the pen to gently pick up
some of this yellow pigment, and I'm going to apply it
starting from the top of the cap down towards the
gills and the frilly edge, applying a light wash. Then I'm going to add a layer of the ginger colour
right on top. And I'm also going to start
painting the fringe of the mushroom with
the gray marker, just pulling the pigment upwards to do the
soft wavy gills. Hi. And I'm going to take my
black marker here and deepen those crevices and folds within the gills,
just adding shadows. One of the reasons
I use the water pen to pick up pigment so
much instead of using the markers directly
on the paper is because sometimes the paper absorbs the pigment immediately, and it won't blend very well when you go to use the
water pen on top of that. So I find this is a handy trick, depending on the type of
paper that I'm using. Normally, I prefer to use
a different kind of paper, like a master's touch brand. But for this class, I just went with the materials
I had on hand. And sometimes the papers
vary from brand to brand, so they don't always work
too well with these markers. And now that we've
done our base layer and the paper is wet, I'm going to paint
using the markers directly on the paper, just darkening shadows and adding little details
here and there. I find that I do my best
art when I'm releasing myself from the pressure of
making my art look perfect. So when I'm just experimenting, enjoying creating the subject that I'm painting
and the process, that's when I get
into the flow state, and I truly am able to
savor what I'm creating. So just try to
relax and don't put too much pressure on yourself to make an amazing masterpiece. Just have fun with it. For the stem, I'm taking a light wash of
gray and applying it to create the long thin stem
and then adding a second layer on the right side to show where the
stem is in shadow. I'm also adding a little bit
more pigment under the cap. This effect helps create
that three dimensional look. For the grass or the ground where the mushrooms
growing out of. I'm just painting a
random little patch of grass using olive
green and dark green. But you could be
creative and paint whatever type of soil or
background you'd like, whatever sticks out to
you from the reference, you can include,
and that's fine. We don't have any strict
rules here for making this. Paint whatever you'd like
to paint and include. You can use your imagination. Feel free to do a full
backdrop, if you want. I think including a bit of
the surrounding environment helps anchor the mushroom
and give it more context. Alright. We're done
with our mushroom. I like how this turned out, and I'm content
with how it looks. I like those soft
edges on the gills. And now we can move on
to our second mushroom.
5. Fly Agaric Mushroom: Now we'll paint the fly Garrick, a mushroom known for
its bright red caps, speckled with white warts. This particular
fungus is often found in fairy tales and
folklore books. You've probably seen
it in illustrations, and it's one of my favorite
types of mushrooms, so that's why I've chosen to include it in our
painting series. So let's get started and bring this cool mushroom
to life on paper. And to start this painting,
I'm rubbing yellow, bright pink,
tangerine, carmen red, and vermilion onto the lid. And I'm going to gently
dab my water pen into the yellow to create the
first undertone wash. This will also help us in our future layers to
know where we're going. So I'm just basically creating the first layer of
foundation here. And as I start painting the cap, I'm avoiding all of
the white warts that were previously drawn in pencil, and I'm also going
to avoid painting the center of the mushroom
cap where the highlights are. That's kind of where the
sun is hitting the hardest. Next, I'm going to layer on the pink, orange and vermilion, then our red and carmen colors in that order to gradually
build up the layers. Well, initially,
it might not look like this mushroom has
pink or yellow in it. These subtle undertone
colors build up and enhance the
dominant red color. If we only used red shades, it would end up
looking more flat, dull and two dimensional. For the stock and the
flap right under the cap, which I believe it's
called an annulus. I'm just painting
a thin gray wash, and then we can move
on to building up more of the red
layers on the cap. To help the white
warts stand out, I'm just going to add
some light shadows underneath each of the bumps
using vermilion and red. In the reference photo, this mushrooms growing
out of a leafy soil. So I'm going to take some
browns here and greens to create the illusion of wet
soil in a damp forest. This also helps create some context and
ground our mushroom. Do And to finish off our mushroom, I'm going to add
texture to the stock, little lines of gray, and deepening the shadow right underneath the cap
using sienna brown. There, it's really
coming to life now. I just love how it's
looking so vibrant. It's really popping
off the paper. And lastly, I'm going to
blend a touch of Hickory brown with our richest
red colour to add just the darkest part
to the underside of the cap and give it a little bit more three dimensionality. Feel free to add your
own finishing touches to your mushroom and
make it unique, and then we'll move on to our next mushroom
in the series. O.
6. Pearly Fungus: This next mushroom is
our pearly brown fungus, and I've chosen it for its nice, earthy tones and the cool
perspective that it brings, since you can see the back
part of the mushroom. It has good composition
and depth in there. And it's just a fun mushroom. So I'm going to start out
by using a warm gray, a cold gray, blue gray, and then some ginger, which is our orange color, and then sienna for our first
layers on this mushroom. So I'm just going to rub
all those colors into my lid here and start the first washes
with the water pen. And I'm going to start by
painting the stalk lightly on the shadowed left side
with ginger and sienna, and then I'll move upwards to paint the gills and the cap. For the gills, make sure your
brush strokes imitate and follow the direction of the lines to create that
rounded appearance. Your pencil lines should
help guide you here. And don't worry about any pencil lines that are showing through. You can always erase them
later once the paint is dry. Our palette for the gills is
a mix of those gray colors, and I'm also going to
add some greens in there just to vary it and help reflect the surrounding colors of
the blue sky and the grass. And we're going to blend this
all out with the water pen. Make sure you leave spaces
between the gill lines so that the texture shows through where the wavy curves have
light in between, just to show that it's
three dimensional. Also, when you erase your lines, make sure the painting is
fully dry before you do this, or else it will shred the paper. With these markers, they
tend to dry pretty quickly, so we don't have
to wait very long while we're working
on one section. The other part dries,
and you can just go back and forth between the
stack and the cap. He So here I'm just adding texture to the
annulus and the stock, gradually building color layers, as well as showing
where the shadows are. It's important to use
all these colors. It might not look like there's
this many colors in there, but for these mushrooms, they're reflecting
their surroundings. So you're going to see a
little bit of green or maybe a little bit of blue in your mushroom you've chosen. And if you've chosen
a different kind of mushroom, maybe
from your yard, it's probably also going to have some reflecting colors in there that might
not be so obvious. This is also why it's
important to examine your reference photo before
you just dive in and use the basics of
browns and whites and just those colors
that are more obvious. And now I'm just defining and outlining with darker
shades of brown, where the cap ends
and the edge of it starts and where the
stalks shadow is. I'm just adding texture. Good Now we get to use our white
acrylic paint marker to add the white warts on top. This is definitely
the fun part for me. So you just add them randomly, try to group some together, vary the size, and don't make them all spaced
evenly apart. That helps it be more realistic. And you can do some squiggles. They don't all have to be round. In fact, you don't
want them to be round because
they're really kind of shaped like cottage
cheese grains. They're kind of lumpy. Oh Alright. This mushroom seems
to be growing out of a patch of fern like moss. So I'm just using our previous
colors of olive green and pear green to create
some mossy textures. And then we can add some shade beneath our white bumps
using sienna brown. Slightly darker than the
overall color of the cap, and it will help them
appear more raised. Alright, I think that
looks beautiful. I love how the bumps
stick out and the nice textures on the stalk. This one was definitely
a lot of fun to draw.
7. Brown Capped Mushroom : All right. Let's switch gears and paint the next
mushroom in our series. This one is a brown capped, dense and tough looking fungus. It's got a nice earthy vibe and a beautiful reddish
brown hue on top. So let's dive in with our paints and bring those tones to life. To start off, we're going
to need sienna, ginger, deep brown, some
hickory brown and pear yellow to start off
with the first layers. I'm going to layer
in the deepest, darkest colors and then slowly build them up,
working our way down. So I'm starting with the
cap and just layering in through the outline where I'm going with the water pen
to build up the foundation. And as I go, I'm just
working my way around the lightest areas
of the mushroom cap, which are in the sunlight. I refer to those as
the highlighted areas. So I'm just dabbing in
a bit of that ginger, and then I'm going
to add a little bit of sienna and medium brown. And eventually, we'll get
to that rich hickory color. And take your time
here. There's no rush. We want to make sure
we get our undertones painted first before
we start adding in the darker colors. D oh So as you can see, it's taking shape as we
define those kind of bumps on the cap using
a darker marker, just adding in the
values that we have. So after layering on
those first few colors, I'm taking the actual markers and going straight onto
the paper with them, and then I'm going to blend
that out with the water pen. And for the stalk, I'm doing the same color mix using
hickory brown, sienna, and a medium brown to give
it a nice sharp shadow right underneath and then some textured up and down
strokes for depth. You want to follow the
direction of each of the parts in your mushroom. So for the cap, we kind of do a horizontal sweep
with our brush. And for the stack, we will use more of
a vertical strokes. And since the sun seems to be coming from the left
side of the mushroom, you can see the shadows tend to fall on the right
side of the mushroom. So that's where we put
our darkest values. The spongy porous underside
is in shadow, as well. And to create that
color and effect, I'm using the water
pen to stipple a mix of pear green sienna and
regular gray to create that. It just gives it a nice touch. And if you haven't heard
of stippling before, it's just the use of small dots to create
value in a painting. And Alright, to ground our mushroom
in its surroundings, we're going to get a
couple different colors. It looks like it's
growing out of nice fresh looking
ferns or grass. So I'm just going to
take our olive green, pear green, and then
a little brown, and we'll get creative. Just do some squiggly
lines and shapes to mimic that mossy effect
and have fun with it. You can get creative and add a hold background,
if you'd like. I'm also going to touch
up the mushroom a little bit more to deepen
some of those shadows. It's just amazing how you can get so many different
types of textures, depending on how you use your brushes and
your waterpen to create those effects of
grass or ferns and moss. I really like how
this one turned out. It's so big and striking, and the reddish cap really pops out at you
from the paper. And
8. Yellow Trumpet Mushroom : To close out our series
on magical mushrooms, let's take a look
at the last one. So this is a beautiful, almost translucent
orange fungus with soft squishy folds and delicate wavy gills that seem to glow in
the forest light. And that makes it the perfect subject to close out our series. So to start off our
first layers as usual, we're gonna layer ginger, deep yellow, sienna
brown, and medium brown. And we're also going to
use some khaki orange and warm gray with olive
green for the stem. So I'm laying down a light
wash of the ginger and deep yellow with the
water pen just to capture that gentle inner glow
this mushroom is giving off and create our undertones
for the highlights. So I'm avoiding the
center and top edge where the highlights are
going to be most prominent. We'll do those later. I'm also going to pull
some of that pigment down towards the stalk
to do the undertones. Oh We'll let the top dry a little bit while
we work on the stock, adding some browns and
greens and creating that textured look and adding
our shadows and values. Okay, I'm going to erase the top pencil lines now since we have
the base layer down, and we'll fill that
top part in later with a light wash just to
show that it's there. But for now, just
erase what you need to whatever is showing
through your painting. And for the gills, I'm using delicate strokes
of sienna brown, following the natural wavy
pattern to create a sense of movement and softness and just capture that
jelly like texture. I'm not following the exact
lines in the mushroom, just mimicking the pattern. So we have a little
freedom here to draw our own squiggles and break up the lines here and there
to create that effect. And near the top
of the mushroom, I'm just sort of doing
little Y shapes. And as we go, we're
just building up those layers with
our darker colors, ginger and medium brown and sienna and blending them
out with the water pen. I'm going to change the
type of landscape where our little mushroom is and deviate from the
reference photo, just to create some
grassy random strokes of green and some brown dirt
color to place him in a soft, earthy patch of forest ground, almost as if he's just
resting after a gentle rain. And feel free to work
on the background of your own mushroom. We're just adding
finishing touches here. And with that, our final
mushroom is complete. I love how soft and delicate it looks and the quiet forest
charm that it's giving off. Congratulations on
making it to the end.
9. Final Thoughts: Thank you so much for joining me on this mushroom journey, where we painted five
very unique mushrooms. If you enjoyed this class, please write a review
and make sure to upload your own paintings to the class gallery
to inspire others. I'd love to see what you create. And if you have any comments, questions or critiques
for the class, your feedback is
greatly appreciated. I read every comment, so feel free to leave
those either in the class discussion
or the review section. This has been a lot of fun. I hope you were
inspired as we painted these mushrooms and observed nature's more
intriguing wonders. So keep exploring,
keep painting, and I'll see you
in the next class.
 Marker Girl Marie, Artist and Illustrator