Transcripts
1. Bee Buddy Intro: G’day, how's it going? Do you want to get
animating in After Effects, but you're completely overwhelmed
by the possibilities. And find the beast that is After Effects just a
little bit daunting. Mate, do I know those feels. But it’s alright. I got you. I'm Alyssa. I'm an animator,
illustrator, designer. I co-direct a small
production company, and I've been teaching into TAFE and Higher Ed (University) for
about four years. I've been fascinated
by animation and motion graphics
since I was a wee tacker. I've been animating professionally
for around about eight years. My absolute favourite
thing to do is to personify made up stuff. And that's exactly what
we're gonna do together. We are going to
animate a little bee character. So we're going to bring in a little single layer character, and we're going to
animate that bee, bouncing around a cute
little daisy patch. We're going to use this
little bee to explore the transform tools, to really dig deep into the
fundamentals of animation. So this bee, while it is little character
that we're going to add personality
and intention to, This class is all about
simple animation, making the most out of using
a little. From this class, Once you've completed it, you should be able to
jump into After Effects. And firstly, not panic. That's the main goal of this, this is supposed to be fun. It's animation. If it's
not fun, what's the point? So you should be able to
jump in and play around with some layers and get
things moving. So you can work with
your own files, you can start making
collage animation, you can start building more complicated
characters if you want to. You can start looking at the bigger picture of
animation in After Effects This little class
will give you a solid grounding of
where you can go beyond. To start in this
class, you don't need any prior experience with
After Effects at all. This is very much
from the beginning. Some experience with Adobe
is never going to hurt, it will help you create your
own assets if you so choose. But there are no prerequisites
or prior knowledge needed. You need to know how
to use a computer and ideally a bit of copy paste. But that's all you gotta do! If you feel like that's you and you're excited to
animate a little bug, let's get going.
2. What we need: For this project, we're
going to be animating a little bug character
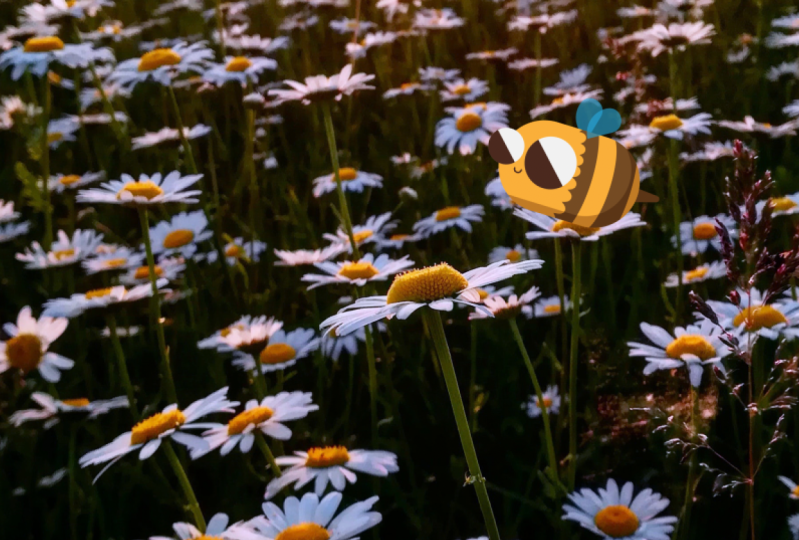
bouncing around the scene. Now I've already created
this scene for you. I've got a background of
some daisies and a little bee that you can animate to
your heart's content. Now, if you would like to create your own assets, absolutely, feel free, be my guest. But you just want to check that some specs
are going to work. So for the background
we'll do 1920 by 1080. A jpeg is perfect for this. The character themselves, I would do a PNG, so you can have a transparent
background because we don't want a big rectangular
box behind them. And roughly 500 by 500 pixels. There's a bit of
give-and-take there, but around about that
you've got options to scale it up and scale it down
without losing any quality. That will do just fine. So feel free to make your
own assets if you like. If, however you want
to jump straight into the animation part, feel free to download
the resources that I've created for you
in the resources tab below. Now this project is all about getting comfortable
with the basics of After Effects and using
the transform tools to their full potential. So it's very scalable. Make sure you're
pushing your skills to wherever you
feel comfortable. My strategy for
learning is always push it so far that you break it and then reign it back in. Don't be afraid to break stuff. The purpose of
this is to be fun. So if you are getting to the
point that it's stressful, reign it back in friends,
reign it back in. There's no pressure on this. It's low stakes we’re just animating a little
buddy bouncing around. Your final project is going
to be a little rendered GIF or video that you can upload into the class
gallery at the very end.
3. Tour of the Kitchen: All righty Rusical gang. Let's have a little
squizzy at old After Effects, shall we? First, I'm gonna give you
a quick overview of what we're looking at. If any of these windows aren't visible on your
screen by default, just be aware that you can
always go and find them. The default for
everybody is slightly different depending
on which version of After Effects are using. But you can always go to Window, and all of your options
are there. For Workspace, if you just want to
start with default, then you'll be nice and safe. So first step, we've got our Project Window that's
over on the left here. Now your Project
Window is basically, I like to think of
it as your pantry. So the pantry is where we
keep all the ingredients, all the elements that we're
going to bring together to create our final,
incredibly delicious cake. Next up, I'm going to show
you the Timeline Window. That's this guy down
the bottom here. And that is where we will
place all of our ingredients, where we'll figure
out our ratios and we'll get the pieces
all laid out together, how we need them for our cake. I like to think of the Timeline
Window as the mixing bowl. So it's not until
the ingredients are put into the mixing bowl, that things can actually
start to happen and we can see things starting to work. Next up is our
Composition Window. This is the big guy, and this is where it
all really happens. Whatever you can see in the Composition Window
or the Comp Window, that is your final render. That is the beautiful cake. That's the good stuff. Now to help get our ingredients
for my mixing bowl, looking good in our Comp
Window or in our cake, we need to use a few utensils. Now that's up the very
top, that's our Toolbar. Now that's what
we're gonna be using like our kitchen utensils. So you got your classic
Selection Tools, you've got some Shape Tools, you've got Text Tools, all sorts of different things that
I'll show you how to use. That is working with all of the ingredients that we've
bought into our Timeline. Next up is the fancy bit. It's where you get a
little bit extra jazzy. That's our Effects Panel. Now, technically it's
the Effects and Presets, but we're going
to keep a simple. It's the Effects. It's all the jazz. I like to think of this
as a mirror glaze, right? So it's awesome when you can add this on top of your
incredible, beautiful cake. But if you've got
a mediocre cake, aint no mirror glaze is
going to fix it. So that's all the extra sparkle and we may look at some of that, but really it's all about
getting a solid sponge. Can't go wrong with
a solid sponge cake. And that's it! That's all the windows and
sections that you need to be aware of at this stage
in After Effects. Now that you know
where everything is, Let's start filling our pantry.
4. Popping to the Shops: First thing we're gonna do
is we're going to bring some ingredients into
our After Effects file, “pop to the shops”, if you will. So we can go File and Import, Import File, crazy stuff. Or, from our Project Window, from our pantry, we
can double-click. Both, do exactly the same thing. Then that will take me
to my folder structure. I can just navigate to my files, the files that we'll be using. I've got these two that
I've created myself. You are absolutely more than
welcome to use your own. Just navigate to those. So I've got the bee and daisies. I'm going to select both
and then hit Import. I don't need to change
any of these settings. I should be importing footage. That, that's all. There's
nothing else going on here. We hit Import. Then we can see two
files in our pantry. If I click on one, I can see the details about it,
which is really nice. Make sure that you've
got the right files. Now they're not in
the cake yet, they're just in our pantry. You've gotta do a few
more things before we can bring them into
our mixing bowl.
5. 05 Prepping Your Cake Tin: Now that we've got some
stuff in our pantry, we want to prepare our cake tin. To make a cake tin. Or a New Composition, we can click this
big old button that says New Composition,
crazy stuff. If you haven't got this button, you can go to Composition,
New Composition. They all do the same thing. But the first time you
open After Effects, you should have this
big old button. Now what we're gonna do is
set a few key settings. Good to keep track of
this as these are the settings you’ll
probably use all of the time. Mine don't change very
often other than either going landscape
or vertical. But we'll go through
them one by one. First thing at the top
is the Composition Name. We’ve got to give it a good name. Hmm, what's a good name? I don't mean like
actually fancy. I mean something that
you're going to remember. That's what's important. So Animated Bee Buddy, that's going to work for me, I'll know what that is. It's different to my bee
boi because that's my asset. This is the Animated Bee Buddy. So next up we've
got our Presets. We're not going to use these at the moment because we want to be putting our settings
in ourselves first so we know what
everything does. But if you have a little
click on there just to see how many
options you've got. There's so many! So if you're ever working
with a client or for broadcast or any
particular project that has specific requirements, using these presets will help
set you up really nicely. But if you're working
on stuff for online, what I personally
prefer to do is type in the dimensions myself and make sure that I've set these top settings correctly
and this will update. So for example, if I
change these figures, you can see that the preset
will automatically change. I'm going to set this to 1920 by 1080 pixels, which
is high-definition. So you can see in your
presets that it's updated to HD, that means high-definition. Then I'm going to
make sure that the frame rate, is set to 25
frames per second. Because ‘Straya, in the US, they use 29.97 or something, other rates as well. There's also 24, there's 30 frames per
seconds, 60 frames... There's lots of different
things that you may use. By default. In Australia, we like to keep it nice and clean and we
will stick with 25. And that's what we'll do for the rest of these videos too. You may find 24 or 25
will do for us. And Square Pixels,
super important. If you are doing stuff for web, square pixels is exactly
what you're after. If you're doing
stuff for broadcast, sometimes you might need
something different. But basically what that means is what you see in your Comp Window is what you're going
to render out. A square, goes in as a square
and comes out as a square. If that is set to
something different, sometimes the way
that things go to broadcast and they get
stretched and distorted. So then you need
to counter that. We don't need to do any of that. We're just keeping a clean. Squares be squares. The other stuff in the bottom, they are the most simple to change and the things you’ll
probably change all the time. Now, that is, the resolution. You do not need to set that, That is just your preview. That’s.. We have full control
over that when we’re in there. Leave it on full
that's fine. Start timecode, when does it start guys? Sometimes After Effects
does make sense. So it's starting
at the beginning. That's what 00:00:00 means. And duration. obviously, how
long does it last? Now, important to note what these little sections
And what they mean, because it can be misleading. So this one is actually hours, minutes, seconds, and this guy, is frames. So it's really important
to remember that the last two figures
are your frames. They're not seconds,
they are frames. And the frames is this base. So that means if I
change this number here to be 24, great!
Ten seconds and 24 frames long. However, if I change it to 25, that will make the duration 11 seconds because it has
a base of 25 frames. So whenever this number hits 25, it rounds up to a second, because it's 25
frames per second. For this comp, we'll
do ten seconds. That should be plenty. The last thing to be aware
of is your background color. The background color means
nothing for the render. It is purely for your preview. I’ll change it so we can see it. So that's particularly if
you've got things that are transparent and you wanna be able to see what
you're working with. But for our case it means
absolutely nothing. But I'll show you what
you can do anyway. So you can click on it to change the colour. do an orange, that’s fine and that will make
the background colour of our composition orange. But as soon as we render, it will still render
black because there's nothing there that
is just for our preview. There's the preview
of that composition. There is no orange
solid background. Just keep that in mind. Then if I hit, OK, we can see that we've
got a new comp. So we can see the orange that
we set as the background. We can see that our
timeline now has figures in it and we
can scrub through, there's nothing there, but
we've got controls now. And we can also
see in our pantry, there is a new object and that is our Animated Bee Buddy comp. It's got a new icon
for compositions. And we've got our
two assets here. So everything is in the
pantry in the same way. So what I like to do
now that I've got my comp, is manage my pantry a little bit, I love a good tupperware moment and make some folders with
this little button down the bottom here. I'm just going to
make two of them. I'm going to click and then
hit Enter to name them. I'm going to have one
called _Assets. and one called _Comps. I'm going to drag and drop
my little bee buddies into assets and my animated
bee boi into. It just keeps everything
nice and tidy. It means that if somebody
else needs to use my file or I come back in six months and I want
to have another go, I can find everything. These parts. These are my real
ingredients and this is all the cakeage
that I've made.
6. Organising your Ingredients: Now that we've got some
stuff in our pantry, we've got our cake
tin ready to go. We can start bringing stuff into a mixing bowl and having a
little, having a little play. Firstly, I'm going
to bring in is my daisies because that's
gonna be my background. So I'm gonna click and drag
that into my timeline. So you can just click
and drag it into either the timeline or
your Comp Window. You’ll notice if you pop
it in the Comp Window, you have control
over where it goes, so that can be handy.
For a background though, I want it to be smack
bang in the middle. So I'm just going to drag
it into my timeline, that is automatically
what it will do. So I've got my daisies
in the bottom there, I'm going to bring the
Bee Boi in as well. I'll bring him into my scene. Then. There's my buddy. So you can bring in one layer
at a time or you can bring them in altogether,
does the same job. But what's important
to know is that After Effects works
in a layering system. So think of it like
pieces of paper. So if I've got my bee character and I've got my background, if the bee is on top, then I can obviously see it. But if the bee's at the
bottom of the layer stack, I can't see it behind
the background. So whatever is bigger,
will hide it. So really do think of it like
stacked pieces of paper. I'm going to make these a
little bit clearer as well. My default has these
layers set to be gray. Yours will probably
be something else. So I'm going to
change these with the little grey box
that's on the left here. You can click on
that and you can change it to whatever you like. I have messed around with mine so that they're
nice and organized. You will have the default After Effects colours, most probably. But you can find
some nice, clear bright colors, whatever
works for you. And I'm gonna make my background green cos, grass or something. And then the bee, I'm
going to make that yellow so I can tell
the difference. And then I'm also going
to lock the daisies. There's a little icon that
has a little padlock on it. If I could take that
on the matching layer, I can no longer click it. And it means I can't
grab it accidentally because I'm gonna
be animating the bee, not the background. So I want to keep that
locked so I don't bump it. Some other handy things
while we're here is this little dot. We can take that per layer. What that does is it solos
whatever layer you’ve selected. If you've got
hundreds of layers, that can be really helpful
just to figure out where something is all focused
on something for a moment. That little solo. And similarly, you can turn
the eyeball off on any layer. In this case, because
we've only got two layers, they are fundamentally
doing the same thing. But if you've got
heaps of layers, you might say how
that can be useful.
7. Position Property: So we're ready to actually start
looking at this properly now. we're gonna look at the properties available
on a particular layer. Now in this case
on our bee boi, I can move my little
guy around the same, just grab him and move
him in the comp window. That's awesome. But nothing's animating.
It's just moving. If I scrub through my
timeline, nothing changes. He's just either
there or it's here. But he's not animating, right? So to animate it, we need to be looking at the properties. So to get to our properties, I'm going to use a
term called twirl. And we're going to twirl down this teeny tiny little arrow. Whenever I say, twirl, you're looking for this
tiny little arrow. There's another one. So we’ve twirled down to our
transform properties. That's where we are right now. In After Effects, the base type of animation you will be doing
is your transform animation. So that's working with these
five key transform tools. We've got anchor point,
position, scale, rotation, opacity. They are the magic five. That's what we'll
call the magic five. Sure. I'm going to show
you one by one what we’re.. what they do,
what they mean. But basically anything that
you see with a stopwatch, that is this little icon here, means you can
activate a property. We're not gonna
do that just yet, but that's, they’re the tools
that can be animated. First up, we're going to look
at the position property. That's the most important one. So first of all, if I grab my bee
and move them around, you can say the
position value changes. You can say those numbers
are just going haywire. So that is one way to
adjust a position value. We can also click and drag
on one of the values. So each one represents
a different axis. So we've got x and y. So x is horizontal,
y is vertical. So clicking and dragging. You can also click. And that will open
up a text box. And you can put in a value. So for example, if I
want it to be perfectly in the corner 0,0, so that's the very beginning. If I want it to be in
the opposing corner. This means that you need to remember the dimensions
of your screen. You have the corner
1920 x 1080. I never do things by that system because I'm not that good at
remembering numbers. I would generally for position, drag it around in the comp
window to whatever looks good. But that's the
position property.
8. Scale Property: The next property
we're going to look at is the scale property. That very similarly to
the position property, you can adjust in a
few different ways. So we can click and drag
on a value to change it. And you'll notice both
values work together. So again, we've got x and y. So horizontal and vertical. As I clicking and dragging
or click and type of value. You'll notice the
scale property, unlike position, has
this little link icon. Now what that means is that by default these
chains are linked. And that means that this value
is the same as this value. They work together, not
necessarily the same, but they work together, right? If I want them to be
different, I can unlink. And then I can
scrub those values independently or click and
type them independently. So that's super handy if you're
doing squash and stretch, which is an animation principle
we'll talk about later. But it's good to
have that control. The other way we can
adjust our scale is with the bounding box itself. So you see these little corners, a little boxes on the corners. And we can just click and
drag to adjust the scale. It will just go whichever which
way it's so pleases, unless you hold Shift and then it
will maintain the proportions. You can see that that's working because in our scale value, we can see that those numbers
are married on either side. If I stop holding Shift, it'll just go nuts. Now, you'll also
notice, actually, if I go backwards, It's also just affecting my scale with the first
value being negative. So to turn something
backwards, we'll flip it. That is by making it a negative scale on whichever
dimension you need to flip. So we wanted it to
be upside down. I'm just doing this by
clicking and dragging. I can also do it by
unlinking and making one value negative.
Does the same thing. I'm just going to reset it. Just a manageable scale for now. I'll just have 60 for
this guy for the moment. But that is the scale property.
9. Wotate and Anchor Point: Next we're going to talk about
two properties in tandem. We're going to talk
about the rotation tool and the anchor point because
I kind of work hand in hand. But first we'll look
at the rotation tool. Now that is this guy here. And we'll notice we
have two values. The first value is, uh,
it represents full loops of the 360 degree
rotation. Bit confusing, bear with me. So we've got full rotations
as the first value. The second value is
up to 360 degrees. So if I click and drag on this, I can see that first of all, my bee is moving
in the Comp Window. And as I keep moving around, it'll get up to 360 and it will take over to one full rotation
and now it’s plus 15 degrees. Okay, and if I keep going, then goes to two and
it'll keep going. So this value is full rotations. How many of those, right? And if I go backwards, I can also do the same. So it'll go to negative
rotations, right? So the first value
is full rotations. The second is between
negative 360 and up to 360. So if you're only doing
little rotations, like a little bit of an uppy
downy kind of moment. You won't need to mess
with this at all. But this is really
helpful if you're doing something that
does full circuits, like a propeller on an
airplane, for example. But it's really important to be aware of the two differences. Because if you start animating and you've accidentally
use this one, as you scrub through, the bee will just be absolutely
haywire like a propeller. So just be aware of those two different tools and as far as how to use them, same as before, we
can click and drag. Or we can click and type. If you know exactly what
degree you want it to be on a 45-degree angle. Great, you can click
and type that. We can also use the Rotate
tool, which is this guy. Up the top, where I can
click and drag. Now the keyboard shortcut
for the rotate tool is W. I like to think of it as W for Wotate So the w for wotate tool. If you want to go back
to my normal selection, is just this guy up here
or V for Selection. I haven't got a funny
pun for that one. Now that will also take us
into the next property, which as I said, works in
tandem with the rotation tool. So that's the anchor point tool. Anchor, Anchor Point
tool is this guy here. Now that represents
the crosshair of where our character
Wotates from. So if I use my wotate tool, I can see it pivots from
the middle there. But if I go up to
this tool up here, or use Y on the keyboard. And that means I can
click and drag on this crosshair and move
it wherever I want. So if I move it to the bottom, then jump back to
my rotate tool. Can say it pivots
from the bum. If I jump back to Y and
I move it to the face, and then jump back
to W for wotate. Pivots from the face. So you can see how that could
be quite handy when you get to rigging in particular. In this case, I'm going to put the anchor point kind of
around the center of gravity, which for a cartoon bee,
we're kinda making it up. But it looks roughly
like it would be a little bit around
the belly area, kind of there-ish. If I rotate that, that feels kind of balanced. If you imagine balancing
the little bee on your fingie. Kind of where he'd pivot from maybe. And that's where I'll
keep it for now. But that is the rotate and
the anchor point tool. So yeah, anchor point, I prefer to use the tool in the toolbar
rather than the values. And I'll show you why
they're a bit mediocre. But you click and
scrub to change them, or type a value
same as anything else. But you can see that your image moves around your anchor point, which is quite cumbersome
to work with sometimes. I prefer to move the anchor point
rather than move the image. So that's why I prefer
using the tool, but you can absolutely use
these figures as well.
10. Opacity Property: The last property to
look at is the opacity. That's least boy,
down the bottom. And that is so straightforward. You can see by default
it's set to 100%. If I scrub that, down to
0 he's invisible. Back up *whistles* Wee-oo wee-oo, that's, that's it.
That's all there is to it. So clicking, scrub,
click and type. If you know exactly the
ghostiness you want, if you want a little ghosty bee, you absolutely
can, be my guest. But that's it. So obviously, that's
going to be handy if we need to keyframe something
fading in and out. Um, it's also really handy
if you want to keyframe, something on and
off, you can have those keyframes really
close together. But that's it. It's a hundy or less. It's all
about percentage.
11. Shortcuts: Something really handy
to know in After Effects is keyboard shortcuts. It just speeds up the process and gets everything flowing. All these transform tools
have a keyboard shortcut associated so you can see them
in your timeline quickly. So at the very beginning I was talking about twirling
down Properties. Sometimes you've got
heaps of properties, you've added effects, you've
got all sorts of extra jazz. So you want to just quickly
open the one property. So to do that, for all the properties, they are the first
letter of the word. (Mostly) We've got Anchor Point is A. Position, is P, Scale is S, Rotation is R and Opacity is T. For Transparency. I don't
know why they didn't do that, but here we are. A, P, S, R, T. And if you need to
have two open so position, you've already got position
open and need scale as well, just to add Shift, as you click. So shift + click will remove
or add just that one property while leaving everything that's already
open, still open. Otherwise you can
always still twirl. Very handy. But those little shortcuts
will save you a lot of time and effort when
you're trying to find a particular property
down the track.
12. Key Framing: So we know the tools, now it's time to actually move our little buddy and animate it. So for this guy, I'm going to start
with position, keep it nice and simple. I want the little buddy
to start out of frame. So I'm going to grab him
and move him out of frame. So I'm going to
start with my little bee buddy outside of the frame. This is where the timeline
gets really important. It's really important
to keep track of your mixing bowl that you're actually putting things in at the right ratios
at the right time. Okay? So the moment, my
little timeline marker is way over the right-hand
side of the screen, I don't want that needs to be at the beginning because I want the bee to come in
from the beginning. So I'm going to move the little
marker to the beginning. Everything that you do
on these properties relates back to where
you are in time. I'm going to
activate a property. That's when I click that little stopwatch we were
talking about before. You can see when you click a stopwatch, it goes blue, I get a little hand on
it, like a time hand, and I get a little diamond here, and here. Lot of stuff happens you guys! I've got, the property
is activated, which means that it's recording. So any changes that
I make from here on, it's going to keep
track of that property. So now I see when I move
my timeline marker across, this little blue dot
is no longer there. It's a little grey dot and
my arrow is available. What that is showing me is whether I'm on a
keyframe or not. Because that's what
this little icon is. This is a keyframe. So while I'm directly above
it with my timeline marker, this will be blue. When I'm not, it's empty and grey. and it has a little arrow that shows me there
is something there. There is a previous
keyframe that I can click on, so I can
get back to it. So just handy to know
those little tools. But now important to animate it, I can move along in time, my little bee starts on
the left of frame, and I move along, say 1 second. We can adjust it later, don't stress about
nailing at the first go. We can just grab our little
bee buddy, move him into fine. And we will see, hopefully, there is a motion path that
is popped out behind. That means our bee is animating. It's animating over time. That line, that first represents where he is
on the first frame, and then it goes to where he is now We can see when we scrub through
that our little bee moves. Now to actually play it, I'll hit the spacebar. Now, if you do not
have a motion path, that means rather than
just moving your bee, you've clicked the
stopwatch again. So it's really important, you only need to activate
the property once. Once it's activated, that's it. You don't need to click
the stopwatch again. In fact, clicking the stopwatch will delete all of
your keyframes. So really important that you
activate, then leave it alone. But super handy if you
want to start again, which I do regularly, so
don't be afraid of that. So I'm just gonna do it again. So I'm going to put my
bee over to the side. I'm going to click the
stopwatch to activate it, move along in time and
bring him into the frame. I'm kinda lining him up with
this little flower here. So, *boonk*, pop him there. If I play that, I feel
like that's too fast. So what I can do, once
I've keyframed, these keyframes can move. They can move along in time. If I want it to be slower, I'll move the keyframes
further apart. If I want it to be faster, I'll move them closer together. I reckon around about
here feels right. The path is super weird. It looks like an escalator,
but we're going to fix that. But it's one step at a time. Now, you might notice
these little dotties, these little motion path dot is important to
be aware of them. We'll play around with
them quite a bit later. But for now, they are a handy tool to know when your thing is
getting faster or slower. Because at the moment we can see they're kinda
close together. But if the time it gets faster, they get really far apart. What those dots represent is where our bee is at each frame. Because this timeline, at
the moment I can see that, that it's got S's,
which means Seconds. If I zoom in. So I'm holding Alt and
use my mouse wheel. Or I can use these little
mountains to zoom in. If I zoom in, I can say they
become Fs, which is Frames. If I zoom all the way in, I can see that each frame, when I scrub through, my little bee is moving to a
different dot on my timeline. That is what those
dots represent, where is the bee, from frame to frame? We've only keyframed
the first and the last. But we've got all these
little indicators along the way that show us what After Effects is
figuring out for us. So it's interpolating. (Write that down for later.) It's interpolating from
one keyframe to the next. We can change how those dots are represented
and how we get from A to B. But for now, keeping it as this is fine
because we just want to figure out overall a general
pace of our little guy. An important thing to be aware
of once you've activated a keyframe is that it is
always recording basically. So if I am at this point in my timeline and
I've moved my bee, that's not going to move
all of the keyframes. I'm just going to move
that one position and create a new keyframe. Which might be what I want, but me personally right now,
that's not what I want. So I can either undo or I
can select that keyframe. So just click and
drag around it, or click it and delete. And then it's gone. So really handy. Nothing is permanent
in After Effects, you can always make changes. So I never feel like you have to nail something the first time. But do be aware of where
you are in the timeline. So if you start nudging
this guy around, just know that that's
going to interpolate. If you would like your character
to stay perfectly still. You can also use this
tool here, to make a new keyframe that is not
creating any new properties, is not moving in
between here and there. But you've got a,
another keyframe that's exactly the
same as this one. So nothing, nothing
is happening there. Which then means I
could move him again. "Shwing" and also remember
at anytime you can grab and move the keyframes all at once or individually,
adjust those times. So it's also those dots that
I was talking about before, it's handy to keep track
of those because I can say this bit
is going to move away faster than this bit.
Because the dots are wildly different
distances apart. So I can grab these
keyframes and move them closer to the same
*blub blub blub blub blub* But for now, I'm just going
to animate the bee coming in. I'm not going to worry
about the going out to yet. I'm just gonna do
one bitty at a time.
13. Motion Paths: Once you've got
something moving, it's time to make it
look... not robotic. So part of that is the
animation principle called Arcs. So things that are organic
or naturally moving don't tend to move in straight lines or
perfectly straight lines. So for example, with this bee, it'll be more natural
if there was a bit of a curve to the motion. So what I'm gonna do
is I'm going to adjust this motion path so that it's
no longer a straight line, I'm going to make it curve. The easiest way to do this is
to jump up to the Pen Tool. This guy here. If you want the
keyboard shortcut, it's G for Pen Tool, and I don't have a good
way to remember it, so I never use the shortcut. But if we click and drag on the path we'll
get some handles. You may already have
some handles depending on how your motion
path is set up. You might have some little dots. You can just grab those, and move them. If you decide,
You know what? I don't want that to
be curly, that's fine. Just click, still with the
pen tool selected, just click on that
point, and that will move those handles. That's
all you need to do. So click and drag to create handles on
points that already exist or just normal
click to remove them. The way that these
handles work is your classic pen tool from
most of the Adobe suite. It kinda works,
if you think of it, this kind of magnetic. So this handle is kinda
dragging this curved line. And the further you pull it, the less kind of responsive
it gets to it because it starts reacting
to another handle. Just a quick Hawt Tip here, If you're finding the pen
tool a little bit tricky, I highly recommend having
a look at this website, bezier.method.ac It's a free online game that is for getting better
at the pen tool. It uses all of the Adobe
keyboard shortcuts so you can use it exactly as you would
in any Adobe program. And then you're tracing shapes. And the more accurate
your shape tracing, the higher your points. So really simple, really
fun and effective way to kind of get the
hang of the Pen tool. But yeah now you get a
more natural flow. I'm going to keep tweaking this, so it looks a little
bit more natural again. I'm just going to make it
come from a bit higher up. Just thinking about where I
want the bee to be coming from, trying to make it, I dunno,
as convincing a story as possible while still
being a giant cartoon bee. Now if you wanted
to, you could have another point up here
or even down here. Once you've got curves on
your path that will kind of continue, they won't automatically be linear paths that we had before. So just bear that in mind. And again, same thing, pen tool, click to
remove if you want. or click and drag to add them. Now the reason we
may not want to have keyframes at every
point is just so we have a bit more control
over the easing, which is going to become
clear down the line. In software that uses tweening, which is After Effects
or Adobe Animate, you want to use the least
amount of keyframes possible. Generally speaking, this is
just a guide, not a rule. And that is because
you want to be ease it smoothly. Easing is what I was talking about with adjusting these
dots along the line, so we can tell After Effects
to interpolate differently. If we've got heaps of keyframes, it just means that it's a
lot harder to get After Effects to figure it
out if you've kind of made it a bit
more complicated. So two is good, and three is
absolutely hunky-dory. In fact, I may even make it do a little bit
of a swoopy moment, that could be fun. And I wouldn't be able to
do that with just two. So just feel free to have a little play around
and see what works. But yet, whatever you do, just try to avoid, there's no need to
make the path curved, with this many keyframes. You should be able to figure that out just
with the pen tool. Let After Effects do the
heavy lifting for you. Just because yeah, it'll
become really difficult down the track to
smooth out that timing.
14. Beezing: Now that I've got a
bit of motion happening, It's all very steadily paced, there's no variation
in the action. And I wanna, I wanna
add a bit of drama. So what I want to show you next is some really simple easing. And that's where we adjust
these dots on the motion path. So I'm going to cut to something else just
to show you how that works. So here we've got four bees, technically doing
all the same thing, but totally differently. So the first and last keyframes are in exactly the same place. So they line up
exactly the same. However, if I go to the middle, they're all at completely
different times. These guys are actually
not too far off. But you can see as
we scrub through, They go at different
paces in between. So if I grab all of them, we can see the differences
on their motion path. But hopefully you can
see what I'm getting at. The very top one is this guy. All the dots are perfectly
evenly distributed. That is linear easing,
that is straightforward, bish bash bosh,
no change done. This guy, you can
see the spaces in the middle are further apart
than the ones on either end. That has got some basic
easing on both keyframes. Now I can see the
difference in my timeline. Top ones, a little
diamond shapes and the ones underneath
on this layer, are little hourglass shapes. That's what your keyframes
look like when they've been eased in and out. These ones, the diamond,
are your linear keyframes. You can see the difference
in your timeline as well, so you get a bit of an
indicator as well as seeing on your motion path that there
is variation in the spaces. What's happening with the
other two is we've got easing at the beginning
and nothing at the end. So you can see it all gets
quite even in the end. And then the bottom
one is the opposite. So they're all quite
close together. Now remember, close together
means that it's slower. So that might be confusing
thinking this is slower here, why is that in front? Why is that basically
coming first? Because to make up the time, if that bit needs to be much slower than it
needs to be much faster over here to allow it
to have space to be slower because it's still gonna be done by the same
amount of time. Now there is no playing with any graph editor at this stage. And you can still get
quite a bit of variation. So as much as we can, I'm going to keep it
simple so you don't have to belly flop into
the graph editor. Easy Ease will get you
a really long way. I'll show you a little bit, but don't be afraid
of just sticking with a linear
keyframe and an Easy Ease, that'll get you miles. Now. How do we actually do it? Great, great question, everyone. Thanks for asking. So if I just hide these guys, for a tickitty boom, and I look
just at my bee boi. So what I can do if I know that I want a
keyframe to be eased, I want it to be slower
around that frame, I can just select the keyframe, either drag and select
or, just click it. Then right-click >
Keyframe Assistant > Easy Ease. That's the option
that we're after. And you'll notice that
the shortcut there is F9 and there we go, I can see him move in the middle
of the motion path there. And a little dotties have
gotten closer together at this end and further
apart of this end. If I play that now,
he should slowly take-off, and then kinda
hits with an impact. So it's not
particularly dramatic. But if you picture
yourself driving a car, you don't start at speed, you gain speed. You start slow and build up. And generally, if
everything's gone well, you'll slow down
to come to a stop. So then in that case, you would have easing on
both ends, if this was a car or if this was a bee
with plans and somewhere to go, you would start off relatively
slow, gain speed, fastest point would
be in the middle, and then come down to a stop. Right? However, if you're a
little bit enthusiastic, might become a
little bit harder. So just to remove the easing, I'm just selecting the keyframe and command clicking
or control clicking. And that will remove the
easing F9 to add easing, control-click to remove
easing, *shwing*, *boonk*. So to remove it again, just control-click and
we're back to linear. So I'm going to jump
back to our other bee buddy for a bit and we'll see
what we can do on this one. So I want to keep it as simple as possible, just using Easy Ease. There are Ease Ins, Ease Outs. I think we can get away with most of the things we
want to do with Easy Ease. I personally don't use
ease in and ease out. I exclusively use Easy Ease and then play with the graph
editor to make my adjustments. Everyone has their own system, so figure out what
works for you. But we're just going
to look at keeping it simple with Easy Ease
and linear keyframes. That's all we're really
going to explore together. So if I want my little buddy to kinda gain speed from the beginning and get, gently
land down on the flower, Then I'll put easing
at the beginning, and then at the landing point. But I don't want this to change, I want that to be kind of constant. It's cute. A nice little settle there. If I wanted the bee to
kinda *boonk* onto the flower, then I need to try
something different. So I might take the
easing of there. And I'll probably want this
to be a bit closer here. So I can see these dots
get further apart, which means that happens faster if I just play that now
what's that gonna do? I've only got easing
at the beginning. Aw there we go. So I can see it gets
a little bit clunky there, it suddenly speeds up. So what I might want to do this is when we get a
little bit curly, I'm going to make this
the height of my ramp up, I guess, I'm trying to think
of the right terminology. This would be the
height of my arc. Then I'm gonna get him
to slow down here. This is going to ruin it for
a second, but bear with me. So the thing about Easy Ease, is that your motion path
will come to a stop. The action stops at that point. It default slows you
down all the way to 0. A little tippitty toe, into the graph editor to show
you what's happening. I'll start back at the
Beezing Comp. So. The Graph Editor, what is it? Where is it? Why do we have to
know what it does? It's this guy here. She's beautiful, but she's scary. Okay, I'm going to click on
my graph editor and we're going to see what we
see. At the moment. I see nothing because I
haven't got any layers selected or any animation
properties. Alrighty. So the graph editor works in speed. So the y-axis is speed
at pixels per second. So right now I can see 0
pixels up to 100 pixels. That's what those
numbers represent. And then the horizontal
axis is time, as the timeline has
always been so far. So if I select one of my bees, in this case the first one, which is my linear keyframe, I can see what's happening here. The bee is constantly moving at approximately just above
600 pixels per second. If I hover over that,
I can see it's 640. Those numbers mean nothing, it is going at a constant speed. Great. Now if I go to the second one, I can see this nice little
arc situation happening, which means down here, as opposed to this first one, where the first
keyframe is up the top, the first one starts down here. So it's starting at
0 pixels per second, and then gaining speed
all the way up to here, dropping back down to
0 pixels per second. So comparatively, perfectly
steady pace, varied pace. And you'll also notice that this one, we said,
what was that? 640 pixels per second was a
steady pace the whole time. This one, the highest speed, is going to be higher
than the linear keyframes. It's 960ish, That's to make the space
for this to go slow. So if you're gonna go slow here, you need to go
comparatively faster in the middle to be able to
get to the end in time. I'm just going to interject on my own video with a little note that, if this is
not the graph that you see, Don't worry, friends,
do not worry. What you may be seeing
instead is something a little bit like this. This might
be what you're seeing instead. This is
the value editor. I like working with the speed editor. Every animator has
their own preference. The speed graph makes more sense to me than
the value graph. So if you would
like to change it, to follow along, you need
to go to this guy, then you'll go to
Edit Speed Graph. Editor Value Graph is
what this guy looks like, and I'm pretty sure
that's the default when you first open
After Effects. If that's where you
are, not a worry! Just switch it on over to the speed graph and you'll
see exactly what I see. So we've got our
linear keyframes. We can see what they are. The Easy Eased keyframes
on both ends, and then we've also
got what it looks like when you go easing
at the beginning, versus easing at the end. I mean, surprise, surprise,
they're the same. Now, the anatomy of
the speed graph, what we've got here, are points on the graph. So you can grab these
little handles. And adjust them and you'll
notice our little bee buddy, the dots at the end there get really close together and
these ones really far away. So this is the end. So this represents this point, this represents this
point. Because I'm making this so shallow. The shallower the path, the slower the action. Which means if this
is really slow to allow time for it, this
has to be really fast. So if I play that through, we'll see him wizz
off and then slow down. That's how you can kinda make
variations to the graph. A really simple way
without playing too deep. And I highly encourage
you just to play, like play to the point that you break it and
then unbreak it, that's how you learn. Don't be afraid of breaking it. It's an animated bee,
it's going to be fine. Now, the other thing that
we can do is we can move them vertically for
their starting speed, or they kinda where the
speed is at that point. This is what we wanna do
on our little bee friend here. So this guy is reaching the point at the
top of the arc and stopping. I don't want him to stop.
I him to slow down, but don't want him to stop. So this is when with
my property selected, I'll jump into my graph
editor, grab this point, see it comes to a full stop? I don't want that,
I don't want that guys! So I'm gonna grab it
and drag it on up. I don't know where.
Just somewhere. Just just higher than it was. I don't have a plan, let's just see what happens. So I'm dragging out
the handles as well, so that it dramatically slows down. Boom. That's nice. It looks heavy. That's the drama I'm here for. So that's what we're doing
with the graph editor. Like, you don't need to play anymore than that at
this early stage. In fact, honestly this
is probably too far. But look we're here guys. Moving your key points off the baseline, off that 0
keyframes per second, that's how you can get
things to stop stopping. If it's all a bit much. I think it looks perfectly
fine with a bit of F9 on it. A little bit of *zjoomp*
and settle. That's nice. That's beautiful. Nothing unconvincing about that. However, I personally, I am gonna go back in
and adjust my easing, so I've got a nice
slow in the middle and a good bit of *OOMPH* at the end, because I personally,
love a bit of drama. But it is entirely up to you to decide on the easing that's
working for your bug. This is the important
thing about easing, is what's the intention? Was the motivation behind
your character's action? Now that character
could be a textbox, that character could be a bee, in this case, obviously. But what drives
them to move there? We're recreating the illusion
of life with animation. Easing that really
helps us do that. So are we moving with emphasis? Are we moving excitedly? Are we sluggish because we are a
bee that's eaten too much honey? Are we peppy? Are we sad?
Are we sombre? All the ways that we can adjust the timing
and easing in After Effects is how we can show that personality
and that intention.
15. Rotating with Mass: Continuing on with our plan
to give our bee intention and kinda mass is what
we're looking at next. So my guy has got quite a bit
of oomph at the end there. I can keep nudging this
until I'm happy, like don't worry about anything being shmicko at any
particular point. It's about doing it in layers and stages and
keeping tweaking it. But what I'm gonna do next, generally my process is
positioned first, then rotation. So that's what I'm gonna do now. I'm going to rotate
my little buddy so that he, well, lines up
with the flower. That's important. But he kinda show some
weight along the way. He's already been to a
flower, he's picked up a lot of stuff and he's going to
show that mass with him. So I'm going to activate
my rotation keyframe. There is no science to this. I'm going to straight
up eyeball this. So I'm going to, in this case, when it's not in my frame, I need to use the bounding
box as my reference. So I'm going to start with thinking about if I'm
carrying a heavy load, it's my top half
that's weighed down. In the case of a bee,
that's your face. Your top half is your face. So I'm going to start with him tilting down a little bit. Then when he finally
gets to the top. And just a little bit past there, that's when he's going to
straighten up a little bit and maybe even a little bit overdo it because
he's coming into land, he's eyeing this off. And then here I'm going to make sure that he's facing right. That's about it. I'm going to nudge him down because I didn't line him up probably in
the first place. And if I play that back... I think that's cool, but I
think I'm going to exaggerate. Yeah that's nice. So again, just a bit of easing. That's alright. Like it
doesn't, it's not done. We've got more to do here gang, but it's coming a long way. So the rotation, look, if I just
take this off again just real quickly, and just see
what that looks like. Super stiff. Without rotation, we don't believe it's really
moving in the air and really got any, any purpose
for being here, like in a really
rude kind of way, might even give him another one. Why don't we give him another
keyframe? Whadda reckon? It's going to start a
bit straighter actually. You don't notice much, it's just this little tip.
That's quite nice. That's good. So again, it's just about playing with it,
seeing what works. Obviously, I have done
this a few times, so I feel pretty confident
about the bee that I'm after and you might not be, and that's absolutely fine. Don't be afraid to experiment. Something that I
find really helpful, when animating characters are trying to personify something, is acting it out. And in this case with a bee, it's a single layer, I can use my hand as a puppet to try and
help figure it out. So how would, my bee move? Would it go straight? Would it dart around?
Would it do like, big curvies? These just animating my hand in the air helps animate
the bee in After Effects.
16. Squash and Stretch: Next up I'm gonna look at my absolute favorite principle of all time, Squash and Stretch It's everything about the
animation principles is based in reality and then
exaggerated to add animationy, kind of drama and
squash and stretch is one of the funneriest
ones to play with I reckon. It's the principle
where things that move fast, get really stretchy and things that impact
all of a sudden, Squash. So if you think of a
tennis ball in the air, it's quite stretchy
and when it hits the ground or hits a
racket, it flattens. That's what we're doing. And depending on how elasticy
you're imagining this bee is, that's how much squash
and stretch we will add. The thing about doing
squash and stretch in After Effects is it's
a little bit mathsy. If you're not a maths fan... On behalf of After Effects, I apologize. However, it
has been very kind and it has, After Effects has got some systems in place so that it can do
equations for you. You don't actually have
to be good at maths. It's okay, It's going to
hold your hand through it. What I need to do first is figure out where
I'm going to put it. Where does it need to
squash and stretch? I think it's pretty steady
pace throughout here. Maybe, honestly this
is quite a fast bit. I can have a bit
of stretch here. So coming into that impact. And then I'll do a
squash right on here. And then I'm going
to settle back. So the thing about
a bouncy squash and stretch is that
you don't go from neutral to fully stretchy
too squishy back to neutral. It's a bit more of
a back-and-forth. If you think of the
bouncing ball and how it will gradually stop bouncing, that's the kind of
thing that we're doing. Now, my process for
adding squash and stretch is to add the keyframes first so that we've got nice
clean numbers to work with. To add squash and stretch, what we're gonna do
is we're going to use the scale property. I'm going to activate
that property, where I want my first
keyframe to be. And I want that to be
right before my impact. And again, this is
just on my bee, you might be doing something different and
you'll have an impact, you'll have a squash and
stretch at a different point. That's totes fine. So I'm going to activate it. That's created a keyframe here. Then I move along, and the impact is going
to be another keyframe. That's what I'm going to
press on this little diamond, this add or remove keyframe. So that's going to
create a new one that's exactly the same
as the previous. Then I'm going to move along
a little bit, add another. Move along, add another. Now when I say a little, I'm looking at
1, 2, 3, 4, 5, 6, 7, 8 frames. I'm going to start animating now that I've
got some basic key frames, they're all set exactly the
same. Nothing's happening. It's 60, 60, 60, 60, 60. But they are there, so
that ,because squash and stretch works with
your x and y values, having clean numbers to begin
with is much easier than having to figure out
the math from where you are, as you progress. So, if I do my squash first, that's gonna be the easiest
to process, I think. So I will unlock
my scale property. And what I want is this first
value is gonna be bigger. I'm going to make it like 62, not much bigger, just
a little bit bigger. A little bit bigger. Maybe I'll make it 64 so it's a bit more obvious while
we're looking at it. Now. The thing with
squash and stretch, particularly in motion graphics, you want to try and maintain mass as much as
possible. To do that, when you're doing
scale is quite simple. Whatever you add to this side, take away from this side. So I've added 4 there. I'm going to take away 4, which means that is 56. And that will be the
same overall volume. So if I just play that, you can already kinda see
what's happening. *Boonk* That's fine. It's gonna be, we're gonna
make it more bouncy than that, but we can kind of
see what it's doing. Now. I'm going to add
a stretch as well. I think I'm a keyframe
or two short. So I need to add another
at the beginning because I want this bit to
be a bit stretchy. So this will be the opposite
of what we just did here. This is squashing. And I want this to be stretchy. So by that principle, I can assume this will be
56 and this will be 64. Because it's literally the
opposite figures of this one. The thing about really
good animation, you don't notice it. You
notice bad animation. If it's good, it just looks right. It's really hard
to see if got it. So it's really about going
through the minutiae of it. But all I reckon
that looks pretty good. Now to get it back to 60, I'm not going to
go straight back. So we've got the first
value is bigger, second value is lower. I'm going to go
straight back to 60. I'm going to, kinda, overshoot. Which means rather than this
going back down just to 60, I'm gonna go a little bit
past where it should, and my difference
originally was 4, so I'm gonna make
a difference 2, so it'd be 58. This one, again differences 2, but
I'm adding this time, 62. So I've got 60. The difference of 4. Difference of 4
on the other side. Difference of 2
on the other side. Back to 60. A little bounce. I'm
going to bump these up because that felt too
far apart for my liking. I'll go up, bung some good
old easing on it. That's the ticket. That's the stuff. *boonk* watch the whole
piece coming together. Done. Oh, she's magic. *bloop*
17. Putting it all together: So now I'm gonna get this
little bee to continue moving on. It's pretty much using
everything we've already done. There's just a couple of
funny things that may happen. I don't want to make sure
you're prepared for before you run off to do
your own buggies. So for example, I want him to sit still for a bit
before he jumps away. So that means the position, I need another keyframe
here, I'm going to hit that. And that is going to make this keyframe the same
as this keyframe. However, those with a keen eye may see that I've got
a handle sticking out. What's that about? And if I scrub back, oh my gosh, what's happening? It shouldn't be moving here. That's because I have a
curved path before it. After Effects is like,
"I know what you want me to do." "You want me to continue
those curves yeah?" " Yu want me to continue the
curve for ya?" No friend. I don't. What you need to
do is grab your pen tool, grab the handle, drag it
back, just get rid of it. Now when I scrub through, it should sit still.
He's squashing and stretching, that's fine. But the position is
no longer moving. That kind of thing,
that'll happen all the time. After Effects
is trying to be helpful. But generally speaking,
it's not that helpful. One thing you can do
to reduce the amount, that's silly thing
happens, is if you go up to Edit > Preferences > General, you will find a little button. This guy, it's the most complicated
phrase I've ever heard. Default spatial interpolation
to linear. Tick it my friends. Tick it.
What that means, default. We know the word default
that is normally, usually, generally, always, start with.
Spatial interpolation, that is your motion
path in space. Not in time, not
how the speed goes, but how it looks in space, how it moves in space. That's what spatial
interpolation is. To, we know the word
to good work everyone. Linear, straight lines. Do you want your lines to be curvy by default or
straight by default. That's what that means. We want them to be
straight by default, straight unless
told otherwise. Because of those points where
we want it to sit still. By default, we want
it to... Default we want it to be straight, so that we can have
it sitting still. Make sure that is ticked. You will still get those
funny buggers sometimes, but generally, you
should be okay. So he's sitting still
and then I'm going to do the position over to this leaf, over to this flower back here. Now in this case, I'm going to scale as we go because that's
in the distance, so I want it to get smaller. Now. I'm not going to
manually do both sides. No no no. No no no no.
I'm going to lock them again and do them together. *bloop* that feels rightish. I'm just going to take
the easing off while I'm testing these out. I'm gonna say that's about right.
Maybe a bit bigger. Yeah. That's alright. Cool. So now, the scale and position
are working together. So it's important to keep
these keyframes together, so I don't stagger them, because he'll
scale down and keep moving, It'll look like a
weird little slide. They've got to stay together
so that they seem uniform. Now I'm going to
do my curved path. Now, I'll adjust the placing a little bit, but I'm going to
make it a little leap up, pop him up a bit, and curve
the path ever so slightly. Cute. Now I want him to
start off slow, ease bit at the top, and then again,
come in with an impact because he's are chonky boi. Right. Now this guy is
causing a little blip and that is because he's
on the baseline again. So I'm going to zoom in a little bitty, grab it and move it up. That's better. Cool. Now, I'm going to
add a bit of weight. So I've done my position, I've done some easing. Now, I'm going to do some
rotation. That's cool. So I've adjusted
my position so the rotation fits. Cool. A bit chonky, so I'm going to ease
my rotations. Clearly, I go in with a plan. Doesn't matter if I've
done it 20 times, I'm just fiddling,
to see what we can get. I'm kinda happy with that. So I've got the same as I've done
before is I've done position, bit of easing, then some
rotation to support that action. The next thing is some
squash and stretch. So it's coming in
quiet impactfully, so I'll definitely
need some of that. Now this is the other
great reason to do your blank keyframes first, because This guy is scaling
from 60% down to 45%. But I need to tweak it
partway through that scale. So by having this scale set first and eased and
matching everything else, then I can pop a
neutral keyframe there, another one is already there. Then my overshoots. And my final, back to 45%. So that I'm going to be adding and subtracting from what
I've already figured out. I don't need to do
any crazy maths because I've already done
the tricky part, really. So, my impact frame unlock again and I'm going
to add to this side, so I'm going to do plus 3 maybe because he's a bit smaller than
it was before, so I don't want it to
be quite as squishy. And that's right, you can put it in an equation. You don't need to know maths, just need to know
your plus symbols. Then I'm going to minus
3 from this side. Amazing. Move along, and this one is
going to be the opposite. But half. So if that one was plus 3, then this will be minus 1.5. Then, plus 1.5. And then a bit of our
old friend, easing. *bloonk* If I play that forward, it's really important to double-check it against your other ones, because sometimes you've
made too wildly different bee leaps. Been there,
done that multiple times. So good to check it still
feels like the same character. I'm happy with that. Now if
I want him to spin around, what I can do is keyframe, his scale. So whenever I'm
doing a new action, will always turn off that
easing because I don't want anything to carry
across that I don't intend. Set one keyframe. And then I'm going to make
this first value because that's my horizontal
a negative. Then if that's
moving quite a bit, which in our little
buddy's case, it is. I'm also going to
pop a keyframe, for the position. You're just going to
snap to the new spot. I'm also going to do
that with rotation. We'll have six keyframes
or very close to each other that's
fine. It's doing it's job. And we're ready to go again! That's our little bee buddy. Then we start doing the
whole process over again. We'll set a keyframe again. Then move along in the timeline. And he's going to *whistles* And there we go! There's our little bee guy,
bouncing about the daisies. Isn't he a little cutie pants?!
18. Your Turn: That's the basics of it gang. So using those transform
tools along with the motion path techniques with the pen tool and getting
it all working together. That's how you can create all sorts of different animation. Have another go at it. Bring a new bug into
the scene and give it a different drive,
a different intention. Maybe it's really tired, maybe it's real hungry. How does that kind of bug move using the tools that
you've already learned? So keep in mind the process
so that you can keep building on the
animation as you go. So first step, anchor points, make sure everything pivots from the right place before
you start animating. Step two, position
getting from A to B, we how does is it, where does it go? Step three is how
does it get there? So motion paths, do we do curved lines are they
straight lines? Are there are few pit
stops along the way? Step four is your timing. Make sure the pacing and spacing between those keyframes
feels about right. Make sure you're pressing
spacebar to play it back, not scrubbing through
because that will give you a different
impression of the timing. Step five is your easing. So a
little bit at Easy Ease, maybe playing with
the graph editor, if you feel ready, see what kind of *oomph* you can add to the action, then rotation, building
on the motion, how does that indicate
the rotation? Position movement will
drive a rotation. If something is
moving really fast, it will rotate a lot afterwards to make up for that action. And then step seven is your
squash and stretch. My ol' favourite. When
it's moving fast, it stretches, when it
impacts it squashes. So make sure you add
those little elements to varying degrees of complexity, entirely up to you
and your animation style.
19. Rendering: Alrighty. You've animated
the thing that's awesome! But at the moment it's still
stuck in After Effects. So we need to render it
on out so we can show our besties and brag about our sweet sweet new skills. So there's two ways you can
render from After Effects. It's directly from
After Effects or using a third party program
called Media Encoder, which comes with After Effects. If you've installed After
Effects, you will have it. So don't worry about
that, but I will show you both so you can see
the differences. And pick your own
personal preference. GUYS! Whoah!
Before we go and render.. We better, we better, save it! Hopefully, you legends have been
saving as you've been going, I have not. So I'm going to jump up to File and Save As and save this file so that I don't
lose all of my hard hard work. And save it - great work! That feels safer. Nice, now it is safe
to render it on out. I'll show you through
After Effects first because that's obvious. Now, with the
composition you want to render open, with it selected. You know, it's selected
because it's got a little blue box around it. You can be in your comp
window or your timeline. Just don't be in
your project window really because it doesn't know
which comp you've got. I've got two in here. It doesn't know what
I'm talking about if I'm just in that window. So just click on your
timeline window is easiest. Go to Composition > Add to
Render Queue or Control M. And that will bring
up our render queue. A couple of key settings we want to make sure
we've got turned on. Certainly, best settings. That's good, that, we
want the best settings. Some of these things are
quite self-explanatory. We can click on that and see
all these different options. But really, it should be
set correctly by default, the frame rate will be set
to what we've told it to be. Best quality is exactly right. Full, great. You get these options so
that you can do quick, like, work in progress renders,
little WIPs. So you can reduce the quality if you've got something
complicated. But we are doing the final
one so we want Best Settings. Then output module. We'll go to click on that. So clicking on the blue text anytime you want to
change something. Now this is where
you decide all of your most important settings. So, from After Effects directly, you will have a list
of options of format. Now, this is one of the
reasons that you will choose either Media Encoder or After Effects because there's
different options available. In this case, what we would be doing would be a Quicktime. Most probably if
we're rendering out a video or an image sequence, we could do an
image sequence from After Effects quite
well as well. I would avoid doing an AVI, it's not particularly
compatible with things, and some of these
are sound files, so I'm not sure why you'd be rockin' sound in After Effects. So what we'll be
doing is a QuickTime. Quicktime is obviously a super fance, high-scale,
high-quality, crisp as heck video format. We don't always
need this though, but it is good to
have it as an option. So in our format options, we can go to video codec. And recently, I needed to
render some Apple ProRes. So whatever you've done recently is what it's going
to have ticked. If I go animation,
nice, clean, simple. That's exactly what we need. I don't need Apple ProRes, it's going to be super huge. So I don't need a
massive file for that. Now, with QuickTime, we
also have the option of rendering things
with the transparency. So if you are doing a logo
animation for example, and you want it to be clear,
have a clear background, you can do RGB and Alpha. So your colour and
your transparent. This guy has got
a big old picture of flowers in the background. So RGB, we'll do us just fine. We've got audio output
options as well. So we don't have any audio, so I'm just going
to turn it off. You don't have to do that. I just like to so that
it's encoded in my file, it knows not to
worry about sound. Then I'll hit OK. Now I'm gonna go into my output. So I click on that text and then I'll navigate
to where I want to save it. Animated Bee Buddy, the name will be set based on the name of your composition. So that's called
Animated Bee Buddy, So your file will
automatically have that name. So you should be doing
here is saving, is setting where it should be saving to, and you can update the name as well. Then when I'm happy
with those settings, I will hit Render. And we'll see it preview And then you get that beautifully
satisfying noise when it works. Now let's go have a
squiz at it shall we?. There he is. Animated Bee Buddy. Lookin' a bit choppy, but that's my playback more
than anything else. But there she is, beautiful. So that is how you can render
out from After Effects. So the other way
to render a video, which is my preference, is to go to composition, add to Adobe Media Encoder Queue, rather than just straight
to the Render Queue. Add to Media Encoder Queue. Now I'm just going to open
up Adobe Media Encoder, which is another program, which is very handy because
it also means that you can keep working in After Effects and render
the same time. Which does mean sometimes
things take longer, but swings and roundabouts. So, here it is. I've got my little
blue text there that tells me this is my comp it's
going to render out. So if I click on that H.264, that will open up
these settings. So similar to before, you've got one area where all
of your main settings are. That's in here. So we've got format
options as before, but you'll notice this
list is a whole lot longer than the one available
in After Effects. So you've got quite a few
different things to work with. I'm going to work
with a H.264 render first. I'm going to
show you two things, but H.264 render is a MP4. So I can see when I set,
pick a setting, pick a format, the
extension changes. This is my MP4. If I go to QuickTime,
it'll say MOV. So I wanna do a H.264
render. That'll be an MP4. I don't know why the
universe decided to make that complicated
terminology, but just remember,
H.264 is an MP4 render. Really handy for online, nice and small size without losing anything
major in you visuals. Your preset, we want it to match the source because we nailed it when we
set up our settings. Match source just means
what you said in the comp. That's what it's gonna do. So that means it's going
to be 25 frames per second 1920 x 1080px. All those things that
we told it to me. If we need something else,
we can do that here. Just know that it's going to re-wrap if you get
what I mean by that. And so really if it's
not matching the source, you want to go back into your
original file and adjust it. So what I tend to do is even though I've
hit Match Source, I want to just scroll down
and make sure everything is hunky-dory that I did indeed, nail it inside my comp. Width, 1920 x1080, sweet,
25 frames per second, perfecto! and square
pixels stunning. If I did need
to change these, I can do that, though it is best
practice to jump back into your comp and
change the settings there. Because otherwise you're
asking Media Encoder to figure it out and it does its best, but it's best isn't
always that great. That's about all we need. H.264. Click on this text here to set where you
want it to go to. By default, it will try and be clever and pop
it in an AME folder. I'm just going to leave
it with the same name. Again, it's named
after the comp. And then we'll go OK And all of these
have been updated. So these three links
will take you to the same place. So you only
need to go into that one as it does the same thing. Then when you are happy
and ready to render, you hit the little play button, which is the Start Queue button. And I can see him
doing his thing. Unfortunately, you don't
get a nice fun sound, but that's, that's
fine. We'll cope. Here he is. *Doonk*. Look at that cutie patooty. Lovely. So now that you've got your MP4, I'll show you one of the main reasons that I will
render from Media Encoder, from everything, for
everything that's online. Look at dat file size. Wildly different. That is flipping huge. So this, MOVs, they are so high-quality, but they are at least a
gigabyte most of the time, even for this 10-second
little thing. Whereas a little MP4, that's 8.16 megabytes, That's beautiful,
That's so manageable. Instagram does not need a MOV. That's fine. You can
get away with MP4s No worries whatsoever. So everything that
I would render for my own stuff is just an MP4. If you're doing stuff
for TV and broadcast, you need to be fancier
than that for suresies, but for just fun stuff, which this is all about, MP4s are yo friends. So Media Encoder
is great for that, nice and small sizes. Now the other thing that you
may want to render is a GIF. Now, Media Encoder
is also great for doing that. When you've
rendered one thing, the other handy dandy
thing is you can just duplicate that render. So Control D to duplicate. And then I can
change the settings. So it's rendering and
referencing the exact same comp. Nothing is different
about that plan, but you can change
what the settings are. So I'll go to format. And this time I'm gonna
go to Animated GIF. Not GIF, I want Animated GIF. Again, Match Source is good. That's great. Animated Bee Buddy, that names fine. What I am going to do though, GIFs set at 1920x1080
are flipping huge. We don't need them
to be that big. GIFs tend to be nice
and small and compact. So I am going to
adjust the size. Now I could do it with presets. I don't want to, I want to have full control over the size. I'm going to untick this little box down under video where it says
Basic Video settings, if I scroll down and we'll
get to width and height. If I adjust that just
to make it a bit more of a manageable size. I dunno, something like that,
think about popping it on an email, or popping it online, it
doesn't need to be huge. So 620 pixels seems fine to me. Again, if it's too
small, we can re-render. No wozzies. But that'll do for this. And I'll hit, OK. And again, I will hit play. And let's see. There he is. And because we've
made it smaller, that's a that's a
reasonable size. We can work with that. We're going to have a
little look-see-do. That ain't too bad.
Now that is pretty much everything you need
to know about the basics of animating in
After Effects. Position, scale, rotation,
animate a cool bee, render it out. upload it into the
project gallery. I'd love to see what you've created!
Well done you guys!
20. Wrap Up: That's it! You've done it. You're basically an animator
now, congratulations! Hopefully this little class
has given you a bit of an insight into the
fundamentals of After Effects, taken away some of the
mystique and the fear of getting stuck into the big beast, that is After Effects. There's loads more tools and projects that we can
explore in After Effects, but hopefully with the help
of Position, Scale, Rotation, you knew besties. You can see a way
forward and creating all sorts of new projects. So keep creating guys.
 Alyssa Smedley, Sharing my hawt tips