Transcripts
1. Introducing Parenting and 2.5D: Hello my friends, back again
with another online class. This time, I'm gonna
be talking today designs and making
it to burn fat, have splitting it
up in 3D space. So it's not 3D is not 2D. 2.5 bits that bit in-between. A picture, a diorama, like a cardboard diagram with little paper bits
split up in space. That's what we're creating
in After Effects. So that's how you can get a
little bit of extra depth, a little bit of added drama. You can get that
parallaxy look where things are moving at
slightly different paces. Makes it more convincing
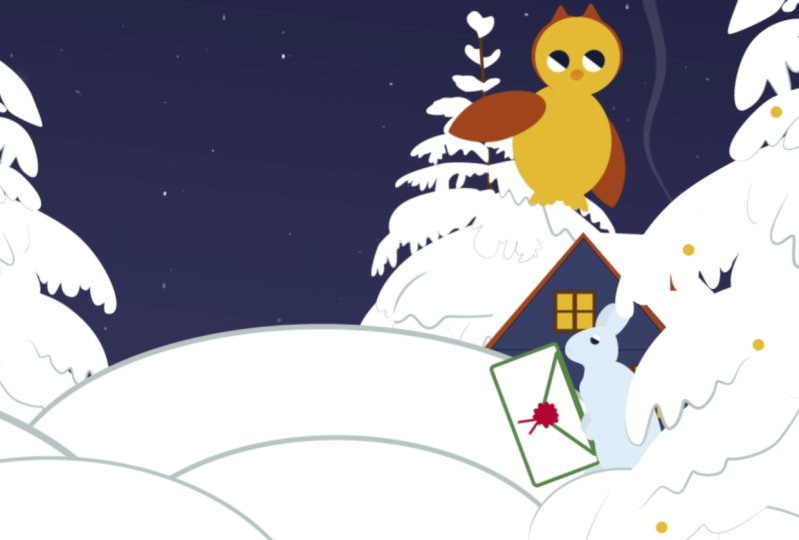
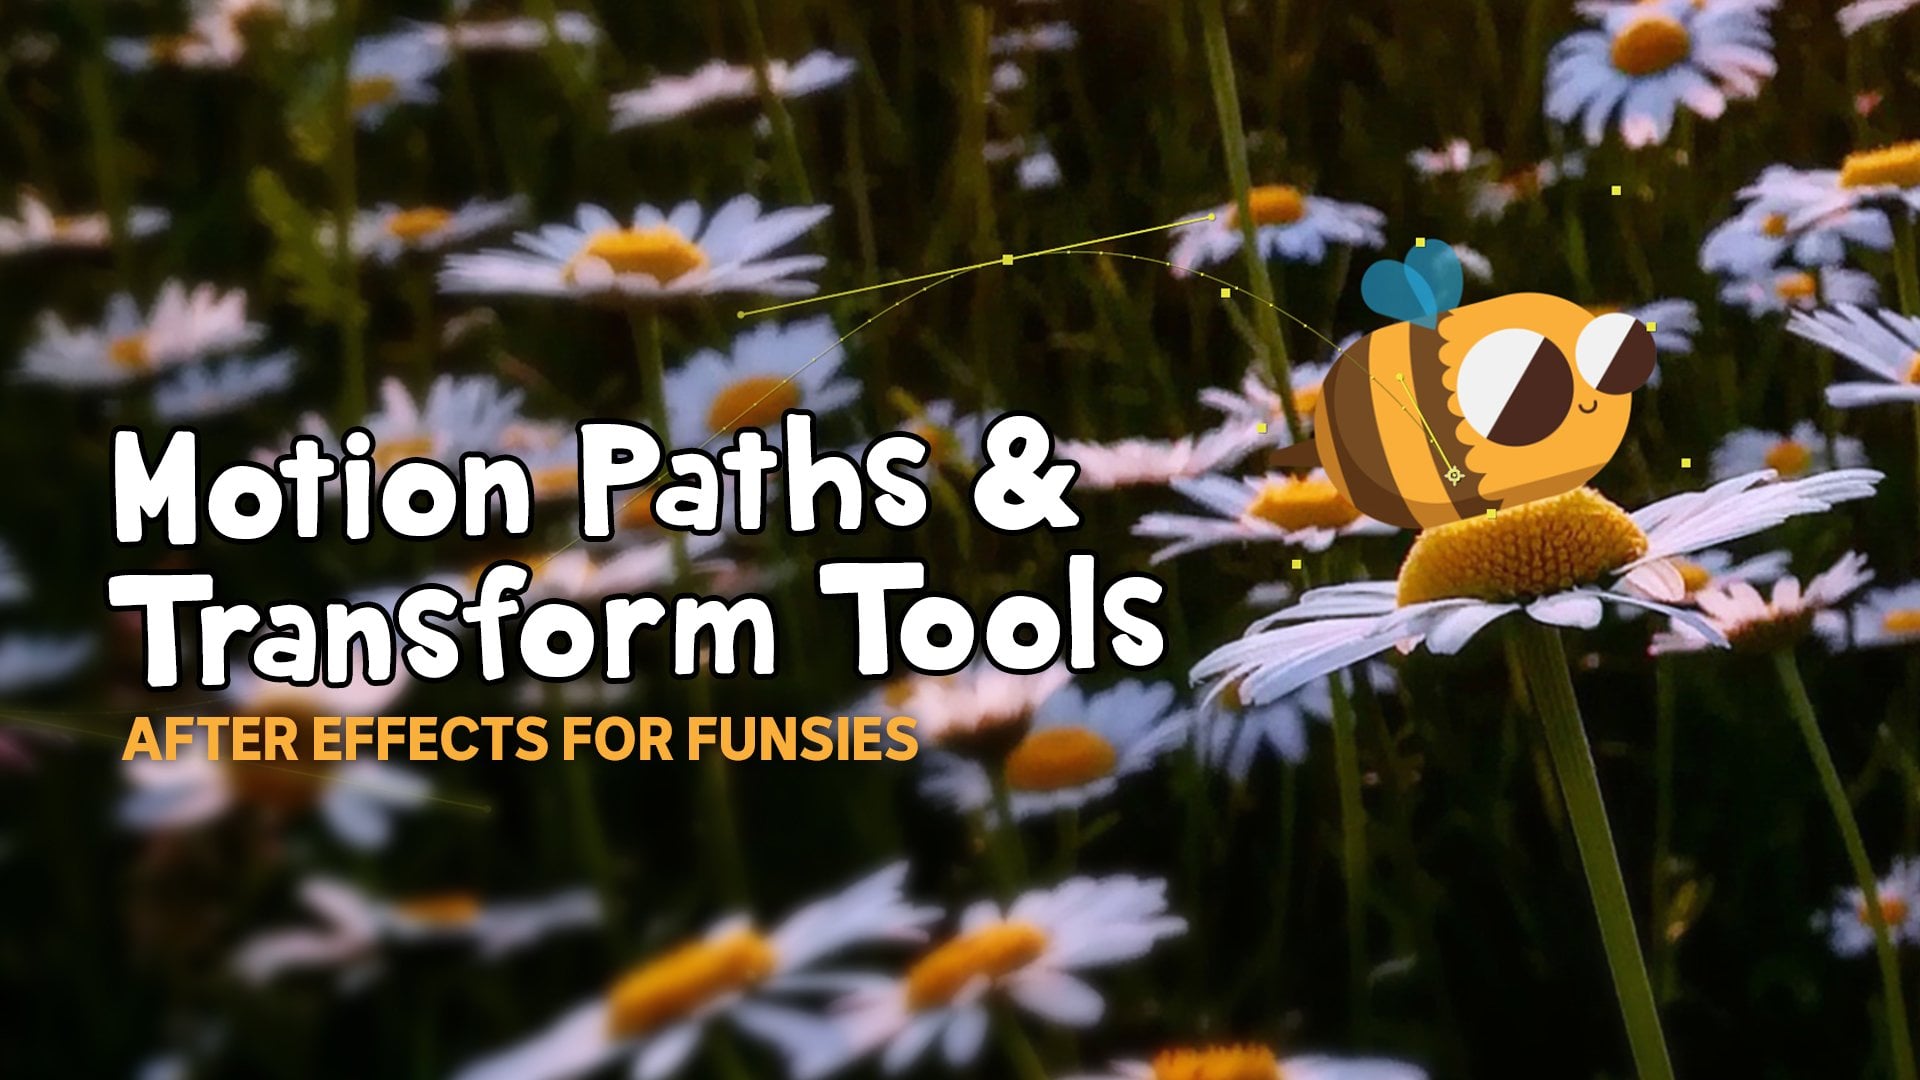
and realistic while still being super stylized and today. So that's what we're gonna
be making together with this little owl friend dropping off the mail to
their squirrel friend. In this process will also have a little toe dip
into some rigging. I said the word Rigging. And it's just going to
be super-duper basic, like it's sticking
one thing to another. It's not full-blown Rigging. It's just a little,
little flavor flies. To get you started. To jump into this class. You want to have a little
bit of experience in After Effects, just
basic transforms. Nothing crazy. If you're feeling like, I'm
not particularly confident. I've got some
earlier classes that I'd recommend you have a go with and particularly the
be, the transforms. That is really all you need to really belly
flop into this one. Together we're going to create a little short animation
that is a 16 by nine ratio animation that shows a to point 5D and that very simple
character set up. So we're going to create that as a big long pan and
then we're going to crop it down to
the right size so you can export out
whatever size you like. That's totally up to you. But what I'm going to
go through these as 16 by nine ratio. So this class is set up to flow on from what we've
already looked at before. You don't have to have
explored all of it in detail, but it's a fine place to do a
little bit of two-point 5D. Just explore a little bit
of a half a dimension and the very beginnings
of any kind of a Rigging. That's the overarching
theme of this, is just to play with a
couple more key features so you can make some more extravagant
things in the future. If that sounds like your
bag, I'll see you in there.
2. The project: To get started in
this little project, I've provided you a
couple of key Files. So the main one is hourly. So that means an
Illustrator file. And you can see that down
below heavily in there, everything's already
split up ready to go. I'll show you exactly how that
set up in the next video, but that's all you
really need to start. After Effects, Of course, I'm using the 2023 version, it using an earlier version. There's nothing that's
gonna be wildly different. Track mattes will be
slightly different, but you can have a look at
one of my previous videos. It'll show you how to approach
that if you're feeling confused and otherwise
ready to get going, what I would encourage you to do is have a play with
your own assets if you're feeling comfy and you really like playing around with
After Effects and you just want another project to
work on and have a look at the file that I've
created so you can see what kind
of pieces we want. Watch through the
first couple of videos and you can see where we're going with it and then
go ahead and make your own. You don't have to use my assets. That's just purely to
get you started so that you can just
barely flux trailing. You don't have to wait to
have time to make something. So I do encourage you to
make your own assets, but you are not obliged
and you do not need to. The main thing to note is that this whole project is about working with depth and
connecting layers. So you want to have
a few paces that you can stick together. So they work together
and move around. It's very, very simple rig. I'm cautious of using
the phrasing rig because it's not
a Rigging class. And it's a lot more
simple than that. The other key thing
is that it's about adding an additional half a
dimension, not a whole one. We're not going 3D. It's still today, but it's 2.5, so that dip in space. So as if it's like
a little paper, paper diorama and we're
splitting things up in space. So you want to make sure
whatever you do end up creating. If you make your own assets, you are creating something
that has depth in it. I think that's all
you need to know. Let's do it
3. The Files: Let's start by having
a quick gander at this Illustrator file. So this is what you'll
all have to download at. And you'll see
everything is split up into individual layers. And everything that's
on a layer is, so it can be animated or set
up to move independently. While the mountains might not move independently
from each other, I want them set on separate
layers so that I can split them up at different
depths in space. With the owl, I also
want to be able to animate the parts
independently. So like the wings can
flap and the eyes can spin all individually, split up the lights. So this is so that
I can import into After Effects my
Illustrator file as is. And it will bring in all
these individual layers. Just like we can in Photoshop. The one thing that is different
is that for some reason, After Effects can't read outside the boundaries of an
artboard in Illustrator, it can in Photoshop. And all of this stuff will be cropped off. That's
not a problem. That just means if we wanted to have the whole
thing and not have any cutoff edges which is made to bring
it into the scene. And then when we open
it up in After Effects, we just move it all
that. That's all. That's all we'd have to do is just an important
feature to be aware of. Cool. The other thing
that I've done here is only created a couple of trays. Because if I want to
create a full forest, I'm going to duplicate a
bunch of the same tree. I don't need it all
inside Illustrator. I can just bring that into. I can bring it in
as he's to After Effects and then
duplicate as I go. That just makes it easier as a process and also
the scale of things. So similarly, like this, Squirrel is not the
same scale is my owl, but I want that whole
tree to be bigger. So what I'll actually do, he's rather than make
a ginormous artboard, I can scale it up
in After Effects. That's the benefit of
creating Victor Files, which what Illustrator does. So that's a bit of the backstory
of why this is set up. How thought let's get
into After Effects. So I'm gonna do is I'm
going to import my file. So I can go File, Import, File, amazing at, or I can double-click
in my project window, or I can hit Control I. Any of those will let
you import your file. Go to the click, the
file that we want. There is a bonus one. What we're not going
to worry about that until much later, if at all, at, but this is what we're
working with with Ali. Now am in my import settings, I want to change it from Footage to Composition
Retain Layer Sizes. Now, just to reminder that the Retain Layer
Sizes is so we've got reasonable-sized
bounding boxes. So that means that Squirrel, the bounding box is that size, not the size of my whole comp. Because for example, if
I wanted to grab this, I couldn't click it
without clicking whatever's on top because it's bounding box will
be the full size. So that's append the bump. Very rarely we have an instance where you just want Composition, Retain Layer Sizes, footage just flattens
everything, just one big image. So we absolutely
don't want that. Then we hit Import. What that will do is
it'll bring your layers. Let's lay out, let me
just tidy that up. It'll bring you layers into After Effects and pop them all in a little folder for you. So we can say the mole. It'll just pop them in
alphabetical order. We don't need to do anything
with this folder at all. We just need to make sure
that it's always there. So after Effects is referencing
this to create this. Now I can see how
sittings up the top tonight as long shot. But what I wanna do when I first import something that
I plan to animate, I'm going to open it up
with a double-click. I'm gonna go to Composition,
Composition Settings. Now, usually after Effects will create the settings based on what ever
you were doing last. So if you've got a
really long comp, it'll be the same duration. In this case, I've gone 6 s. I'm actually going to make
this a little bit longer. So we've got a bit
of buffer 10 s. The duration is the main
thing you'll want to check because that's the kind of thing that's easy to forget. The width and height
should be correct as they come in because we've
made the file correctly. But the frame rate
always double-check that that's what you want. So in Australia will use 24, 25, I'm going to use 25. Will always have squid pixels. Because we want to create the pixels exactly
as we say them. We don't need to distort
them in any weird way. Yeah, one-to-one. Then we go. Okay. So now I'm safe to start
animating, however, because my comp was
a little bit short, I've made it longer. What I need to do
is grab everything. Easy way to do that, control a. And then I want to extend the layers to
the end of this comp. So if I put my marker over there and hit Alt closed
square bracket, that will extend
everything out for us. Now I've got all my layers
all the way to the end. Just while we're here doing a little bit
of file management, I'm gonna do a little bit of labeling because this
is quite hard to read. So what I prefer to do is go into some detail on the
labels just to color them. Just to show you where that is. If you feel so inclined, you can adjust your
own label colors. So they're all here. So by default, after Effects gives you the nastiest colors. It's like *** brown. It's oval, safe on WhatsApp. But you can put in
your own if you like. Obviously, I've spent too
much time doing this. Plus van, the NAM, the letters at the beginning, the letters that have
popped at the beginning. That is, so I can use a keyboard shortcut to quickly select it. So what that looks like
is from the bottom up, I'll kind of group things. So this is my background. So I'll put my son and background together because they are always gonna be together. I'll click on the gray box. And then I can select
from this menu. Now will be in order.
Just go ahead. And I'll do this
with the mountains. I can click on the
keyboard shortcut. So if this one is the first one, this one will be the
second one which is B. If I click B, it
will automatically create that color ABC. Then the trees,
except I'm going to make this one separate because I want that to be
with the squirrel. So then I'll group
those together. Sometimes I forget what
letter I'm up to, and then F. So putting the keyboard
letters in there makes it quicker when you're
doing it a lot. To change the colors. We can obviously go
ashes click manually. All organized, ready to go. So let's dig into it.
4. “Parenting”: Welcome to Parenting
with Alyssa. That's right. I
did say Parenting. So just so you know, I want to flag it up top. I had nothing to
do with the naming of these tools in After Effects, that is completely
Adobe XD fault. So if you have any
issues or concerns with their terrible choice if
rising, take it up with him. Thank you. What I'm talking about
when I say Parenting is this little parent
and link tab here. So this is where we
basically connect layers to each other so that we can work with them on the same comp. In the past, we've
done pre-committing. Just quickly pre-comp this owl, pop it its own own composition and say, I want to move it
around the scene. Show flying, great. But if I wanted to
animate the wings, I have to jump inside there and animate the wings
and then come back out, which is super tedious. Sometimes that flow isn't
quite going to work. It depends on what you're
trying to animate. In this instance. What I think will be better
is if all of the things that we want to animate the
outside in our main comp. But we don't want
to have to animate the body and then the head
moving and then the eyes. That's crazy talk. What we wanna do is
we want to be able to move one thing and
everything goes with it. So that's where
Parenting comes in. After Effects has an inbuilt
child and parents system. That's their terminology. It's a parent and link. As we can see here in our drop-down, currently nothing is
parented to anything. But if we just work
from a top-down, so we've got our beak bit. Now, the big should move
when the head moves. It doesn't need to. There's
nothing in-between there. It's just begun
head. So the beak. What I can do is I
can use my little drop-down and click
and find hit. Or instead of using
the drop-down menu, I can use this little swirl, which is your P clip, which is unfortunately, it's like a little lead that connects a child's to a parent. We want to find our head. We go. You'll say that the little
drop-down box matches up now. So now if I grabbed the owl's
head, it'll goes with it. She's fantastic. I can do a few things
at once so I can grab both eyes and I can
pop them on the head. Fabulous. I will go together. Now the head, this should
be parented to the body. When the body moves, the head goes with bling. Now that's all attached,
which is fabulous. Now I'm going to
leave the feet and the letter for a hot second
because there's a little, little sticker want
to show you for that. But the wings, we
can attach them. Now there's one at
the back as well, so make sure you grab that to
and attach it to the body. Body. That's how owl. We can still grab
everything else individually as we need. Now, basically what
we've created is a very simple rig setup. It's not done yet obviously
with missing a part, but we're creating a very
simplified character rig. But one part of that
process we haven't done, which we'll do, four, which will have to do
to make their feet and the little work is adjust
the anchor points. A great place to look for. This is the wing. Now if I want the wing to flap, I want him to pivot from
this point up here. Whereas at the moment, for just jumped to my
rotation tool with a W, it rotates from the middle. That does not create a flap. To move it. I can use Y on the keyboard
to get my anchor point tool. Drag that up to the corner, then jump back to rotate with W. And they, we go beautiful. So we wanna do that
with all of our layers. So often I will do the anchor points first
and then the Parenting. But the context of the
Parenting needs to make sense before you have
anything else in place. So what we're doing
now is we're gonna go and move all the
anchor points and everything to make sure that
they're in the right place. So I'm going to turn
off the body for a second so I can
see my other wing. I'm going to keep
jumping between anchor point and rotation. Make sure that's all there. Get the body, the head. That's not going to pivot
from between the eyes. It's going to pivot
some way From closer to the neck point. Now this is a very
stylized character, so just have to use your
best, best instincts. The bag as well. Motor safe. Hello. I'm Liz, that to the hidden from
the bottom corner. The hinge. Always do a little
test as you going. Then Undo. Don't try and line it back up because then you won't
have nice, neat, clean figures when
you go to animate, but always test it. So keep jumping between Y and W. So anchor point tool
and rotation tool. Now the body is the next one. This one we want to be
a center of gravity. The center of gravity on owl. Owl. It's kind of the gots. On a person we use like the waste is the
center of gravity. That's the central point, that's where we lead with, generally speaking, on this guy ran a bad day, it
feels a bit rot. Now for the letter, this one, it needs to
be where it's attached. So we're going to that joint. So same with the wing. It's attached at the shoulder. The letter is attached. Quotation marks at the feet. Now it's not connected to
any one particular foot. And this is why we're doing this in a slightly
different order. Because what we want this letter to do
is we want it to be parented to the fate. But unfortunately, you can't have two
parents in After Effects. You can only have one. So it would have to be attached
to 1 ft or the other. And we could attach both
feet to the letter. Then that would have
the same pivot point. But then the letter
wouldn't be able to animate off the fate
would come with it. So what we wanna do
is we want to parent the letter to one of the faint,
doesn't matter which one. I'll use the left foot. Then this one, I'm gonna
put the anchor point of this food in the middle. I'm going to do that with both. Actually, if I hold Control, it will snap to point that
he thinks is interesting, which could be the
edge of another comp or at a, another anchor point. So these two now have
the same anchor point. And I just need to connect
this foot to this foot. Then they work together. So just as long as
we remember that the left foot is owl key foot, we should be all fine and we can still
separate the letter. Now this left foot I'm going
to attach to the body. Then we have a little friend. You can fly about
5. 2.5D Space: Now we're still sitting up here saying we're not
completely there yet. We've got our owl
that is all parented together so we can
move them around in our scene, which is great. But we wanna do a little bit of setting out with their
environment as well. So I said before I was going to duplicate
some of the trace. Something that I think is a
useful thing to do before any duplicating or missing around is setting
the anchor point. So Parenting and anchor
points do them together. I didn't do the anchor points
first. And then parent. In this case, we're doing
a little bit of both. But for the trees,
they, by default, Lanka points in
the middle, which then means if I scale them up, my ground-level moves. So I'm going to grab my anchor point tool and
move that to the ground. That just means when I go
ahead and duplicate as many traces are down well Plays at the already
set up to work. I don't need to I don't
need to think about that. Just a quick little
thing. While I'm here. I'm also going to
parent my scroll to the number one tree so
that they're together. Because I want to make sure that whatever I changing
my scene and adjust my layout and add my extra trees and stuff needs
to stay together. I don't want to
accidentally lose. My squirrel will lose the
tree that was scribbles in. Now to set things
up in 3D space, this is where it
gets super cool, but a bit scary-looking,
but trust me. So what we want to do is to get that
parallax so we can pan across is we're going to grab everything, I
mean everything. So you could do Control
a to give everything or click the top one and
then shift at the bottom. Then there's this little column here where we've got a cube. If I click this, that'll
make everything 3D. Which looks super chaotic and absolutely bonkers and
terrifying. But it's okay. They're just for some
reason they've decided to make the biggest anchor
points of old time. You also have all these
new options here. If I click off, I can see everything looks
exactly the same. Nothing's broken. I'm going
to go up to View new viewer. Then I can bunk
these at the top. Then in this one of them
doesn't matter which one. In one of these. I'm going to change it
from active camera to top. Then I can see what's happening. So that's a bit of a workaround. Unfortunately.
There is now pretty much that's not helpful anymore. But that's fine if you're
working with vertical videos. Fantastic, but long
boys like this. It's pen the bottom. So this is how we can see two
views of what's going on. At the moment.
Everything is my 3D, but in a top view, we can see it's just all in one big line. And that's because
they're all stacked in the same zed space. If I grabbed my
background, for example, and move it back, I can see what's happening. It's moving and getting smaller because it's
moving into the distance. So I'm going to do
that with everything. Because basically
the Parallax effect is created by having space
between each of our layers. Don't worry that everything
is getting small and funny-looking because
we're going to fix that. But first we need to just
distribute these in space. Now I'm not going to move my tree with the screw
in it. All my owl. They're going to stay
in the center of frame and everything else is
going to move around them. This is not a
hard-and-fast rule is just a safer way to do
things. Generally speaking. Now, to see more clearly
what we're doing, I can also change
this to custom view. I can see here what's happening. And again, Adobe is changing a tool so we can't
use it as effectively. So we've got to use our camera
tools as individual tools. So we've got the rotate tool, the move tool, and
the pen Internet. Once upon a time that
they will unified tools, but they are no
longer quite work. Adobe. You can rotate around and
you can see it's kinda like a little paper craft situation. So you can see we split up our layers and you can say what it looks
like on the back. It's just a mirror
image of the original. Just that's a handy
thing to keep in mind. If you want to flip
things, you still can. So cool. But yeah, this is a handy
little tool to see how you've distributed and how the
parallax vibes coming together. As far as I work in view though, I find it very stressful. So I'm going to go
back to my top fuel Now from here, what I'm gonna do is I'm going to
start fixing things. So as I start
splitting things up, I can I'm happy with
the distribution. I can stop fixing the same. My background, for example, it needs to be huge. And all I'm doing is holding
Shift while I scale-out, just dragging from the corner. Now because this is a
big white background, it doesn't matter how big it is. It can be flipping massive. But what I wanna do is
make sure that I've got enough margin
around the edges so that if I do a bit
of a camera rotate, I'm not going to see
any of those gaps. I'm going to make my son bigger, bringing over me and
make my mountain beyond. Just go through one
at a time and make them bigger and
hanging over the edge. So you've got a bit
of room to move. Now, these mountains
are purposely stylized, so that are really doesn't
matter how big or small UGA, it's entirely up to
you if you want. We can always refer back to our original setup and try and match something
close to that. But it really, it's
not flat brushes. It doesn't matter
this semi-circles. I can't grab that one
because it's behind a tree, so I'm just going
to grab it here. That's another handy
thing about multiple. The yeas. With that. Now the trees, I can start
splitting up as well. So I'm going to
move them around, but I'm also going to
scale them up because at the moment there'll be
too small for my scene. So I'm just going to
pump it up with touch. Now, this is the thing, right? We are faking perspective. We're not making
real horizon lines and real mountain distance. There are only really
going this distance. And I tell you what
the sky has a lot further away from that
than that from the tray. In reality, we are playing with both the depth perception like where the thing
is in the same, and also with scale. So we can exaggerate
our perception. So it's a little bit
of force perspective with real perspective, right? So now that I've got one, I can duplicate
this, bring it over. And if I want it to be why in
the distance right in here, now that's the right depth. But that doesn't look
like a tiny train. The distance is way too big, so I'm going to
scale it on down. So as with everything I ever do, there is very little
science to it. It's making it feel rot. Nuance it until it's
bobbing, just write it also once I'm going to
wire up in the foreground, rather than move it 10,000
ft into the foreground to the point where it passes the camera and we
can no longer see it. Again, MUGA scan it up. Now, while I'm here,
I want to show you what's happening here. Now. As you go around and mess with you saying and Get
low working how you like. You'll start to notice
these pixelated bits was sad about we create
a vector files for this reason. Why
is it doing that? Well, After Effects doesn't read it as vector unless you
specifically tell it to. So it should all be
these crisp edges, but it won't be by default. Now, all you have to do,
thankfully, quite simple. There's little tick
box and this is your anti-aliasing
tick, tick box. So if I grabbed this
tree and just take, you can say there
she's crisp edge. Without that on it's going to basically treat it like a JPEG. So we'll get pixelated
if it's too big in time. What we can do on out
because everything's vector, just grab it all
and tick that box. That means everything,
no matter the distance, is going to have a crisp
edge unless told otherwise. That is one of the benefits
of working in vector. You don't have to
decide on the size and the scale of your scene
before you create it. Whereas in bitmap,
absolutely certainly do. So. That's why I could make these assets smaller
than I needed. Another. I can still
safely scale them up without losing quality. So I'm just gonna go ahead and just keep Baffin around with my scene to get it looking
kinda how I want it. I'm going to keep it,
keep track of it in this space as well, so that everything is still being distributed
differently than the old. Sitting on the same level. Because I'm will start to notice all those things move
at the same Rhett, and it will start to
feel unrealistic. Now the other thing
that I've got here that's a bit
funky is this grass. Now, as we can see
in the top view, it's just perfectly vertical, which isn't particularly
convincing. What I can do is I
can rotate it with my WD-40 tight and just
holding on that axes. And then you can see I
can now say it on the top From the Top view rather. So I can put it on a
bit more of an angle, which then means it's
a bit more workable. If I want to rotate my
camera up and down, I'm not going to
see any huge gaps. All of a sudden. This is why
I put like a rough edge on it so that if it does
overlap a tree-based, it doesn't break the illusion
of some kind of ABA Grosse, which I really want
to maintain if I can. I'll just interject here and say that this is potentially a little bit
of a messy way to do it. It works, but it's not optimal. If you would like
to make it simpler. What you could do is just rotate the floor completely to one at so it's like an actual ground and then pop up
below everything. And then you can put
everything wherever you need. That's not going to be a
problem. For some reason. While I was making
this, I decided to make it slightly trickier. I think I'm happy
with that setup. So now that I'm happy, I'm just going to
close this up because I don't need anymore. And we can get ready
to start animating
6. Animation Time!: So one thing to also
note is the comp ratio. This isn't what the company is going to look like
at the very end. I want the video to
be 1920 by ten it, but something that I find
useful is to animate the lung Scene As along Seine
and then crop it later. Because then it means
I don't have to find where the hills
my owl aren't there. I've got to move in. And that should do the
same at the same time. It just makes it a bit easier if you can see
everything in one shot. And why not make things easier? Alright, so my little L friend, I'm going to animate, not fit the head with the body. Moving from here to my squirrel. What I'm gonna do is
I'm gonna go through the exact same process I would
for any other animation. I'm going to block
in the position of their keyframes first where I want my little friend to be. So don't panic that now
that it's a 3D layer, it's got all these
extra options. We're still going to treat
it fundamentally the same. I'm not going to
worry about any of these complicated rotation
stuff at this stage. I'm just going to be looking
at position scale rotation. So rotation is in
this dimension, which is what we've worked
with so far anyway. So I'm going to position first. I'm just going to start out
a frame or behind this tree. Then over time he's
going to come in, say hello to squirrel
friend and drop-off the mail, and then fly it. It's gonna be nasty first, it's always nasty
first task, the point. Play that back, get the pacing. I think that's Spades about rot. Boop. Super weird looking. But my pacing feels
like it's getting it. I'm going to interject
this one for a top tip. If you find that yours, like mine is quite laggy. In previewing, what
you might need to do is give it an old purge
if we go up to Edit, purge all memory and disk. Now what's that? The little green line
that's on your screen here. That is your cache memory
that indicates are, I think I know what
you want me to do. After Effects will retain all of those memories forever and to
decide to get rid of them. So that means every project
you've worked on in After Effects will remain in the cached memory
until you empty it, just in case it so that
when you applying back, you don't have to catch
every single time when things don't
change, it stays there. But every time you
make a change, that has to be read catched, and that just keeps
filling up your folders. So if I go all memory
and disk cache, well that's going to do is
clear out some space for me. 64, that's not that big. Okay. Give it a minute. So just keep in mind
that purging in memory, it's not going to delete
anything important. It will delete your
memory of undoes. So you can't
backspace after this. But it just cleaves
that you cache memory. So I can see now it's all gray. If I let that cash
one time through, it'll probably still
be relatively slow because for some reason my computer shrill
angry with me today. But that will be nice and full and it won't have
64 gb worth of stuff. The most I've ever had is 200 and something that
was pretty proud of that. But yet, do that,
do that regularly. I recommend doing it
at the beginning of each project. Each
day is that work? So I've got my the
other thing we can do to speed up the process
while the Animating, I don't need to see
all the detail. So I'm going to drop
it down to third. Now, it goes a
little bit pixel it, but that's fine because
we don't need to see it. Increased fidelity all the time. As long as we can
see our action. That's hunky-dory with me. So that's not too bad, but it's pretty stiff. Some a position timing is there. I'm going to use my Pen
tool to add some curves. Intrigued on it because organic
things, natural living, things with intention
tend to move on a curve, not on a straight line. Yes. I can add. The other thing is I
want him to scale down. So again, with Viking dimension. So I could have the
character moving from the distance into tiny space. But the easiest thing to do is just animate the
scale I'm just going to make all gets smaller as he gets to our little
scrolling print. So simple. Look at that. That's better off into
the dual students. So I've got the Movement kinda working. Next thing I'm gonna
do is I'm going to add some rotation. So I've got a little bit of
false happening behind it. Now this is just Z rotation. Like I said, I'm going
to ignore these ones. So that's this era. Now, we're just going to
look at z-axis, sharp peak. Sarah, I wanted to start with a little bit
of oomph downwards. So I'm just going to rotate it. I'm going to keyframe. Then move along in time. Look at that. We'll get him coming
in with intention. And then as he gets
close to a little friend and he's going to rotate backup because I called
a slot in the park. And then he's going to
fly off with more force. To have a look how
that looks as a verb. But it's real stiff,
looks really robotic. So now I'm going to start
adding in some easing. Select my keyframes and hit F9. And I'm going to do the same probably on
Smedley keyframes to, but let's just say how it looks. Quotation, OB kit,
I'm happy with that. I'm also going to then animate the head are to open up
the rotation property. And I'm going to start with him a little
focused on our body. So I'm just going
through one little step, one step at a time and try to match it up with
the existing keyframes. And then I know that they
already have easing on it. So if I do that than
they should match. And I'll make it happen
a little bit lighter. So it's not quite as matching. Matching because it's weird. Male, Okay? Yeah. Now, it's not really convincing that the head's
moving for a look. If the eyes aren't moving
to the dead paste it did. Penn State is a
little bit weird. So that's why how I've
done these weird outliers. As I have. Four, again, I'm going to animate
the rotation. I'm going to start
with this little buddy looking ABA friend. Because I can think. Then he's going to
look either at all. Let me looking down different. Then he's gonna look
up before he moves up. Again. E zinc because I'm all
about that lazy daisy. Why more interesting. I'm also going to animate that. I'm the letter by
which I mean food. Because that's
happened. Because it looks a bit weird sticking
out the whole time. So I want to kinda dragging
behind at first because, you know, is it is a fast
flying allow friend. It's not until he gets
bit closer than he purposefully shrinks it up. And then I'm going to
animate this bit too. Even though there won't be
any letter at this point. I'm going to make
it stay there for a hot take because he's like throwing it basically
with these two T's, which means I want him
to hold that n-bit
7. Looping Expressions: Now it's super weird that is going away without
actually flapping its wings. That's fungus. So let's fix that. I'm just going to tab these
away with you on the keyboard and then get to my lock this tree because it's
all up and my grill. With this wing, I'm gonna
go for my rotation again, just the SSID rotation. And I'm just going
to do it he is, so I can actually
see what's happening because otherwise it's
outside the scene. Rotate. I'm starting up. And then Page Down to
move forward ten frames. And then it's going
to have slapped him. And then page up. And I'm going to copy and paste. Now. I'm not really
too fast about the pacing of this at the moment because I want it to loop first. So this is the Keyframing. I want to repeat. My first
and last are the same. I'm going to Alt click
on my stopwatch and go loop bracket, bracket. And then that's going
to go continuously. And now we can see
that's not very good. So I'm going to make it faster. Just grab everything
and move it in. And then I'll easy, ease. So to slot. I want to
look, there we go. That's cute. Here we go. Okay. And now I can move that to
the beginning of my scene. Now I've got this other wing to It's up to you how
you want to do it. I've put there so you've got the option. Currently though. We can't see it. And to see it, we'd have to swing
it upside down. But what I think I actually
want to do is I want to flip it hypertonic. Always do the row
one fast lipid out. So we can do the same thing. So I'm going to copy
this rotation and public he broke except it goes through MY so that's fine. We're going to make
this the opposite. Copy paste them. Now there'll be
switched, really, it just kinda
popular the healer. Let's kid who needs anatomy when you have
an adorable owl, MRR. Now, what is difficult
about the way I've done this is I can't really
see what I'm doing. I wanted to be down more. So basically I'm
just going to grab this chevron over here so I
can adjust it and see how extreme it is while I'm working
on this one to be a bit less because I know
I'm happy with that. I'm just going to
move it in more. Then I can move it back. So you can always
make adjustments with the keyframes wherever
you need them to be. So you can see,
then put it back. Jansky, durable, sweet. So now we've done the bulk
of the owl animation. What I can do next, he starts to look at
this little letter drop
8. Visit From the Postie: Owl letter is going to
drop off from here. I'm just going to keep it on. Basically as soon
as it Let's go from owl L. We need to split the
layer and make new one. I'll show you why. It's fine. Animate the position
going from here to then. Little squeeze release hands. That looks fine at those
keyframes. But in-between. And After still being dragged
along with it, no good. We want to have as soon
as it's been let go, it doesn't need to
be parented anymore. So what I'm gonna
do is I'm going to where I decided that I want the outlet go
right about here. I'm going to go Control Shift D. And that's going to
duplicate and split. So it's making a copy of this
and splitting it rapidly. And they second one
is not going to have any payments at all
free-range out. Then I can animate the
position of this one. Position and rotation. Then to say it stays in place. So I can animate it. Going into the loving hands. Although squirrel friend
and rotation as well. Obviously it's
going to look crap because it's just
a straight line. It's like a little
elevator, weird. But we're getting some way. Then we use our pen tool
as we have before to make the curves more natural
vowel. That didn't work. Let's get rid of that
code at the bottom. That looks silly
because it's coming in with the action of an
owl and I ignored that. Now it still gonna look stiff, but that's okay because
I'm going to add more with our squirrel friend. But that's a quick way to
make something disconnect. Unfortunately, we
can't have this split. Once it's parented,
it's parented. So you've got to
cut up the layers. There are plugins to do this, but just natively
in After Effects, there isn't a clean
way to do it. So cutting the layout
is the best approach. Ding, ding, ding, ding, ding. Little friend. Plopping in acute
9. Sammy the Simplest Squirrel: Now that we've got that,
what I wanna do is I want to animate a
little squirrel friend. We haven't done
anything about him. No good. What I did forget to do at the
very beginning apparently, was adjust these anchor points. So let's go ahead and animate our little school
friend, gliosis mole. I'm going to pump up this. Look all the way. So first thing I'm going
to adjust my anchor point. Now this is why I prefer to do anchor points before
making things 3D. That's because it's just a little bit harder to
control the anchor point. There's just a lot
more going on. So I can always grab the arrows. That's the safest way to move
on to say anything in 3D. Because if I just
grabbed the center, it could be going anywhere. You don't know what
zed space where I'm just using a little arrows
just to move it down to the, but then that means
what I can do. What I want my guy to do is
I want him to bounce up. Let's say if I can do
that a bit more smoother. If I dropped my start down here and he's
going to jump up. Yeah. Let's do it. We're going to start
with him, Dan, he now he's gonna
be inside the tree, but we'll deal with
that in a bit. I want the, again, as always, I want
the action first. I'm going to go P for position. It's going to start
down here and then move forward ten
frames and jump up. And he's going to
overshoot a little bit another ten frames and he's going to sit
down on the edge. Now I can move
where these points, I want a bit more curve in it, so it's not just a
boring straight line. Want to move these
points slightly? I wanted to do a
little bit of a cave, just a tiny, tiny bit
at the top there. At the bottom. By this. But that's fine. Tidying it up. I want the first bit to be quite fast because we're not
going to say it anyways. There's no point spending ages and something we can't see. And then bit of easing in the last bit of that. And now I'm going to do a
little bit of squash and stretch as a bit of a
reaction to the speed. So in this case is already
starting at spade. So he's going to start stretchy. I'm going to do now I'd like to do it roughly
and then clean it up. So whatever I'm taking from one side, I'm
adding to another. So in this guy's, we're
going to round that up. I'll make it 90 and then 110. That's how we can
maintain mess here. And then that's all the way
up until that last point. That's when we're back to our neutral because he's
slowed down, up here. Handy, handy. And then he's going to kind
a little bit of space here. So he's gonna do skinny
against and 95 by wonderful. There's going to impact. So I'm gonna do the opposite. So one of five by 95. Oh please. And then probably the match, but we'll see when
we play it back. Come into syllables. So 98.102, hundred 100. Oh my gosh. Love it. Look at this cute little
squeaking in blink. Happy with that. I can also
add a bit over rotation. So he's going to
start rotated down. At the highest point,
is going to catch up. Then there he's going to
overshoot so to negative two, back to zero. Then A's and offset because
rotation tends to happen. A little bait After
the main action. Well maybe they treat match. That's better. Now, let's say when is always happening because I don't think it's happening in
the right time yet. Don't want him to
be there for ages. Because the owl's eye
focus and it's not until the owl looks other that we
want this guy to pop out. So I'll do this a
little bit further. Yeah. Then I wanted to
jump up and got the mile. But we haven't
finished overdoing it. Don't get too excited. Sorry again. So we
wanted to jump out. But the moment it's like he's just stuck on a
tray the whole time. So you don't want
that when I'm to reveal when he
pops out of there, sorry to do that. We're going to
create a track matte
10. Hidey Holes: So grab your pen tool, make sure you've got
nothing selected. So I like to just click
somewhere in here because you can never grab
anything here. Then I'm just going to
loosely click around this. Not loosely, quite accurately
actually around this. And then crazy chaotic at here because it doesn't really
matter what happens there. But we want to be able to see the right-hand
edge of the Haar. Now this may make no sense
whatsoever for a hot Tiki, but let me show
you what happens. Basically, we want
our little friend to reveal just when
he's inside here. So this bit we want to say because it's still
inside the tree. But this bit I'm going to that's going to
mess up his level. So I don't want do
that or I will do. He's now that I've
got this created on my little screwy friend, what I need to do
is tell it that this shape is my Track Matte. My tab is shut, which is on if I go down here to the little
circle and square, sorry, go down here to my little circle and
square and click that. Now, open up another column. Then I can, with this
one on my track matte, I can select the top layer
or I can use my piglet, which I always love to
pick whip and use them. Then we go, we can
see what's happening. So that's automatically
turn that shape off and it's hidden a little
friend behind it. Now we're doing this. I'm also noticing that
I can't say enough of my Squirrel I won't to
him to pop out more. So I'm just going to
grab those keyframes and now GMAT a
little bit further. It really saves tile and
Zemlya do that whole day. Just gonna put it on half kit. Now, bit boring. So I definitely want him to
jump up and grab the male. So I'm just going to add some
more position keyframes. But I obviously need
to change the path of my little letter. So that happens bit faster. But also a little
screw friend can reach know that much Files, ducks, that looks fully. This is going to work. I think that will. But what I'm gonna do
is when we are close, I'm actually going to switch
out my letter again. Here. I'm going to Control
Shift D, my letter again. This time it's going to be
parented to my squirrel. I'm going to turn off. I need to remove the position keyframes because they keep
moving on, they shouldn't. Now what that means is that it doesn't look like
anything in particular. But it means now when
I animate my Squirrel, doing is little settle back in. My letter will react to it. So I'll do money. That's good to go to the
right way this time. In this case, what we've
got is this letter is going from being parented by
the owl to Parenting by no. 12 then Parenting bus
girl. An age instance. I've got a new
version of the layer. So control shift D is a very handy dandy friend.
Making this happen. Cool. Pretty happy with
that, actually. Playing that all the way. Cute. Tab everything away. Sweet. So we've basically got
Our Scene animated. But what's the point of
the whole big 3D pop? We haven't done
anything with that yet. So let's look at that next.
11. Parallaxing - Option 01: Now for the 3D camera pop, there's quite a few
ways we could do this, but the way that
we've set it up, I'm gonna show you
all three, basically. Because we've
created a big scene. I'll show you that way first. So basically you've
created a little diorama. So we can move that diorama around in other ways
to use a camera. So After Effects has
inbuilt cameras, that hasn't benefits, but also it's clunky sometimes
for no good reason. And we could also use a null. I'll show you all the
options and it will be up to you to choose
which you prefer. Option one though, because
we've made a really long comp. What we can do is get my gay. We can make a new column, which is the length
that we want, which is the size
that we want rather. Ali animated. And then change the
size to 1920 by ten it, nothing else needs to change. Everything else
should be the same. Then what we can do is we
can bring this scene in. Now on its own. Depending does nothing,
there's no 3D situation there. But if we use our
anti-aliasing tool, we'll get our perspective. We can move as an R& because After Effects
is basically reading it as if it is indeed 3D. So then that would mean that
we can animate our position. If we make it 3D, then we have
our full controls as well. So we can do as zooming just
by moving the position. And we can animate the rotation
and everything as well. So if I was to do the
animation on this version, that will be animate the
position moving of a twig. Owl comes in and then
track along to owl. Squirrel friend. That's to let seemed to be here. Then. I will have a bit of a Zoom happening
at the same time. So that's all on position. Now this you can see
where I've goofed. It will be day not to worry. If I jump back into my same. What's happened is the
Track Matte that I created. I didn't make it 3D. So
I need to make it 3D. It's not going to make a
difference in this scene, but when After Effects is
rating it outside here, my main scene,
they're not moving together because I've got
a 2D layer in my 3D scene. So that's all I
just hadn't ticked, making my mask, my Track
Matte rather at 3D. So go back to my
main scene. We go. So if I do F9 on here, I can say there's
holes in the ground, so I'll need to go
in to fix those. Not happy with that landing. I could also if I wanted to add a bit of rotation because, I mean, why not when you spent this much
time making it funky? And that could also mean
that we may be able to just hide the ground issues. So if we just do a
little bit of a this way and we don't have much problem. It's trying to make sure
that don't get moved. My ground issued with sky if you and then I'll F9 that as
well so that action matches. So that feels like
it happens too fast because we've lost out Alabama. They move it over. And I'm not sure but I
liked that rotation at all. I'm going to adjust the easing on this one actually because the owl doesn't
quite catch up to us. So I want to, with this
keyframe selected, I'm gonna come free to jump into my graph editor and
just extended that. It's a little bit
more lift for longer. Davis, as loudly. That feels better. Sorry.
I can make this bigger. So you can actually
say that silly of me. But anyway, it turns out I could have just
made my comp 6 s. But here we go. Whenever Let's go. A couple of little glimpses
of the ground there. So I would want to go back in and extend that a bit further. Maybe rotate it down a bit more. Loops. Isn't doing what I want to do. Let's just do it. Because I can't see the
point that I want to reach. Could still say the gap there. So I'm just going to
make a bigger marries colored BOD. That mountain is going to bug me and that's guy
is not big enough. So I'm going to make
this guy bigger again. And that mountain, Schwinger, e.Schwab. Happy with that. We got happy with that. So that's one way we can do it. Alright, I'm happy with that. So that's one way. I'm just going to name
these so we can keep track. This one is our nested method. So you've got your lung comp inside a confidence
their apps, apps. I'm going to make
a copy of this one with control and duplicate. And I'll call that
animated null. So that's one way. Now let me show
you another option
12. Parallaxing - Option 02: Now, this one, because was the other
one we've just popped into a confidence about size. This one we could just change
the competitors, right? So Control K to open up a, to open up your composition
settings. I'm going to 1920. And then that will
crop it to owl size. We've see what all the
animation in there. Ambulance. However, how do we do all
the moving around bit? Great question,
thanks for asking. This is my preferred method. What we wanna do is
basically we wanna do the same as what we did in
the nested version. We want to move her
diorama around owl, same, but we don't
have anything. We're not going
to keyframed like older mountains,
all the background. So we're going to use the same
system with already have, which is a Parenting system. But I'm going to
make a new layer, new null object that creates an object
in the middle of our OTs, the middle
of our scene. And it is a null object. It is empty, It's not anything, it's just a controller. So now everything that
hasn't already got a parent, I'm going to parent
to something. You can attach that shape
layer to my tree first. Then I'm going to grab everything that
doesn't have a parent. So this letter, this body, pop them, attach them to mono. And then everything below here, it's going to be
connected to my null. So now I have this thing, but moves everything around
exactly the same as before. If I make it 3D, I can also rotate and get those perspectives that
I had in the other two. Now this is potentially easier than the previous
because obviously I can adjust whatever I
need to on the floor, the mountains, whatever as I go because everything's
in the same thing. But if I was to
animate this one, it'll be exactly
the same process. So I'll start with my
position as a hill. And here we are. And position. Now keep in mind that to do
zooms, we're using position. We're not using scale. Because if we scale, we're not gonna get
that funky donkey. Parallaxy lab. We want
to make sure that we're getting all the benefit
of the effort we put in. And I'm going to add
that Y rotation too, so you can see that it's fundamentally the same loop. And again, very easy to lose that halogen is we
absolutely do it this time. I'm also going to add some
easing at the beginning. Cute. However, you'll notice that I'm in any pants and I didn't
think this through. I'm not gonna be able to see my little buddy jumping
out of his whole because it happens before
the cameras in frame. So that was Daft. I really need that to
happen much later. What I can do is just grab those keyframes
and shove them. Didn't notice the first time. But there we go. Doesn't matter how
many times I've done this little activity,
I still give it. That is just with a null. The reason that I like this, it's not particularly
laggy on After Effects. You can certainly handle it, but also it gives us full control over the
scene and what we're rotating around and
all those kinds of controls without much
processing power. And it's just using the same transforms that we always use. We don't have to
learn any new skills. And I'm a big fan of that. So that's one way
13. Parallaxing - Option 03: So the other way we can do it, it's just a little bit more convoluted for no good reason. But let's go through
the steps anyway. Layer, new camera. And we've got H of savings. This is a deep dive
in and overtone, but we're not going to go far. I'm 50 mille is default. That's what we want to use. It's not going to change
any depth dramatically. So if you want to
do like a fisheye lens or that kind of vibe, you can actually play
around with these to get extra depth and distortion. Based on that, I
don't want that. I want it to look realistic
how I've set it up. We can have depth
of field turned on. We can look the Zoom. We can have two nodes. So you have control over the end point and
the main point. I usually just use one point. We can also have created
camera from current view. So that will just create
whatever we've already got set up. There she is. So we'll do that and just shove it ANOVA because it will create
it from wherever we are. And then we've got a camera. So if I open up position, it's focusing on the
depth we've already got. Because that's the
same we built. But now to move it, the position is not quite doing
what we needed to. So what we can do is again, Mike, an owl layer, new null object and parent
the camera to the null. So I like to think of the
camera and the camera person. So the null can now
be owl truck along. And that means that we have, we can add a bit more
rotation in the camera. And the null, we've
just got more controls. Basically, you can rotate
the person and the camera. But also then you have the added benefit of all
these cameras options, which Hello is a lot, there's a lot of
stuff to play with. The depth of field
is the one that everybody gets most
excited about. And that's when we can change the focus depth so that everything that's
out-of-focus is bluesy. Let's talk about cameras. So as I've said, I really don't know what I'm
talking about here, but I know legally DVT, that will hopefully help when you're having a
little play yourself. The truth, key things
to know in After Effects working with
their cameras is for that lack of convincing depth is aperture and focal depth. Aperture is in a
traditional camera. You've got the lens and you've got a little hallway
light comes in. And basically the aperture, the number there is how
big or small that hole is, how much light is letting, how much information can
get into the machine. The big as a whole,
lot more information. But the flatter
the image because we're not focusing in one area. The other part is the
focal focus depth. So when you're using a camera, you can set how far
away you are focusing. So if you're focusing
along distance, that means everything
upfront is really blurry and some Ghazi other way. So that focal depth in After Effects you've got
like a pixel number, and that is how far in depth
you actually want to focus. So if you know that
your objectives 2000 pixels away and that's the thing that
you want to focus on. That's the depth that you want. Now you can see it. Alright, so that's cool. So then if I was to animate it, it'd be the same
kind of process. So at animate my position
of my null moving over to he calmed down. Oh my God, what's happening?
Because it's a tiny object. Rather than moving
a whole scene. It's a bit more finicky, which I'm not a big fan
off, but that's okay. You can see as you move closer, my focus depth is going to
break everything. That's fine. We'll just have to balance
that out as we go. Hopefully, just watching
they struggle with this, you can see why that
particularly love it. Because it's great
when it works, but it rarely works
easily anyway. It's just a bit clunky, but good God, it looks
cool when it works. Go in the wrong way. So the other thing
that you can do is you can parent the focus
onto it a depth. And because we set
everything to be on the same zed space,
that would work. But I find that clunky and honestly quite frankly,
I'm not very good at it. So I don't like this method, but it will be poor form of me not to show
you this option. Because yeah, when you get the focus depth working,
it looks funky. Looks real funky. Comes in and out of focus a
little bit, but that's okay. You can kinda see
what I'm going for. I cross, I just turn this off and then you don't
get any of it. Let's get it looking
like because I want to yeah. So that's the three ways. So we've got nested. Obviously very straightforward, but it's a little bit clunky to fix errors clear to
keep jumping in and out. My absolute five MIGA an owl
and move everything around. Perfect. Then the camera where
you have 10,000 options. But they are complicated. That's it. That's the whole shebang goal. Next up, we'll package it and render it out ready to show off
14. BONUS Franny the Fancy Fsquirrel: So we've got a little
scene Animating and we've got a pretty
basic squirrel. I've actually prepared a, another squirrel, full use. If you would like to do this
bit, it's kind of optional. And it's a little bit at slightly more
complicated than the owl, but it's a good practice
in figuring out how to do a little bit more of
the Rigging like this, sitting up, parenting,
that kind of thing. So I will show you how
I would go about it. And I encourage you to have
a crack and have a play. So I'm going to go up
to File, Import File. I'm going to open
that SQL query one. So I need to remember to Composition Retain
Layer Sizes and then go import deeper. Now if I jump into
my little comp, we are 0s. Just do enough. But there's all these
layers that I've set up. So just like the owl, how we had all these
different layers to create the owl eye, but he's have layers
to create the screw. So I'm gonna go through
the whole process. I'm going to organize my
folders a little bit first, put my layers in my assets. And this is going to be a preComp because it's not
going to be my main scene. I'm not going to render
this out on its own. It's going to be inside Scene. So what I'm gonna do
is go to my squirrel. I'm gonna do a little bit of color labeling so I can
keep track of everything. Because through that, the
arms can go together. The body, everything on the head can be one,
then the other. Cool. Now what I'm gonna do
is I'm going to go through the rigging process
and a bit honestly, a better process than the
first time because we don't have any complicated letters
that we need to drop off. It's just the character as Matt. What I'm gonna do is
I'm going to grab everything with Control a. And then I'm going to open
up my transparency with T, which is called opacity,
but I call it transparency. So I can remember the shortcut. I'm just going to drop
these down to 50%. Doesn't really
matter what value as long as it's slightly
less than 100. Now the reason is, now I can see where things
overlap and it will make it a lot easier to put the anchor points
where I need them today. This is just a temporary setup so that I can I can
see what I'm doing. I'll stop. I don't know. I'll start with the polls. Now what I wanna do here, because I've got
perfectly circular joins. I want the anchor point to be in the middle of that circle. If I jumped to W just to
see what's happening now, that is a broken arm,
that's not good. I'm going to use Y and
jump up a little bit. And then back to WWE to test. It is looking pretty **** good. If you find that it's
popping out at all and you can just go back
to why and adjust it. That's totally fine. And part of process. And then I'll do the
same for this one. So why to get the anchor
point tool and W to test what default
that's just von. These ones are a little
bit harder to test, but that also means they
just don't matter as much because they're going
to blend straight into the body wherever we put them. But we don't want them to
pivot from the middle. So he's still want them to
pivot from wally think the shoulder socket to
match be again, a very stylized characters, so it's best judgment. At the ears. I'm
gonna do the same. I don't want them to
pivot on the head because right there because
the bottom-most again, I'm gonna go back in heel. Won't be the eyeballs will be perfect already because they are circles ready to go. Though it'll automatically
put things in the middle of your layer, which for some is
absolutely fine. Sammy, the notice that
doesn't need to be anywhere else at the tail. Going to put it that
socket as well. We'll do just fine. Now the head, same
as with the owl. We want that to be in the where the neck joint is
because it's transparent. We can see this is where
the head neck bit goes. I can try here. I'm just looking at this edge because that's where it's
really going to show I don't mind if the cheek moves and sticks out. That's fine. But I don't want it to get
that indent if I can avoid it. That's probably as close to the need to get I don't think he's going to tilt that much. Obviously it's going
to break if I do that, but that's already
a broken neck. So it doesn't need
to be perfect. It just needs to be convincing. Something some people do
is when I set things up in Illustrator is
make a guide layer on top and put little crosshairs in the center of each circle. Because it can be
easier to figure out when you to do what the
shapes to work with. And rather than kind of
eyeballing it and testing. I tend to novel them
because I'm lazy and close enough is good
enough for me. For the body. I've just popped it at the
very bottom and that is so that I can do
squash and stretch. Because if I have it in
the center of gravity, that will mean that because
he's jumping up onto a little ledge is
little will pop off. And I want him to stay
perfectly on the edge. So I want to have that
nice night control. So I'm doing that here instead. So really does depend
on your action. But that out because it's
floating through the air. We want that middle point because that's kinda
where he pivots from. This one just because of the
way that the tools work, we want to have the
squash and stretch nice and easy on that base. Then I think that's everything. I'll grab everything again and pump the transparency backup. And then if I hit
U on the keyboard, that will close all
my tabs for me. Now It's up to rigging
and connecting everything together so that they don't move independently. They move together. So we'll work down, I guess we'll go eyeballs. I'm actually going to connect
the eyeballs to the nose. The nose can kinda turn and will in fact
a little head ten. So the eyes will
parent to the snooze. You can do that. Then what we'd do to do
a head turn is we'd move the objects over and then we'd move the E is in
the opposite direction. Let's take a fake,
a little Hinton. So then a snoop needs to
be connected to the head. So do the ears. Ever grabbed the head, would
that should have everything attached to grant smashed it. Then the hand connected to the body and the title
connect to the body. Then we've got left
is the little poles. So I've got Paul connected
to forearm and alpha, right? I've done
that thing again. I do this all the time. A name them interchangeably between the characters left and right and my left and right. This time I've done it for
the characters right, gang. Pull left, or to the body. Forgot the body, everything
should go with it. That great gravity's
effect that down. And it snowed. We Excellent. Now we're ready to animate
our little friend. And that is basically the same process that
we've gone through. Everything else
before. I already know the action that I want him to do because he's done at once. He so I'm going to just
jumping up and bounce them. Now. I have two options. I could bring him into
the scene and animate him and dual the position here. But because I want to have offset animation and
secondary animation, I'm gonna do it all in here because it'll
just be a little bit easier so I can line up
my keyframes together.
15. BONUS Animating with Rigs: So what I'm actually
going to do, I'm going to scale
them down because he's currently massive. Here's the sides of
our whole composition and we don't need
him to be their big, so I'm just going to
scale them down and that will give me room
to do the jumping pop. I'm going to pick a
nice neat number. Seems like a good one. When I say Nate, I mean, if I just scale
down loosey-goosey, I'll have decimals and
that's a hot mess. I don't like doing
math with decimals, if that feels like something. Now this is gonna be
where I want him to end. He's going to start down
here into the overshoots. I'm going to do that
whole process again. Hopefully you guys
feel comfortable jumping in and doing that. I'm just gonna kinda do a bit
of a speed round on getting the basics of the animation
back into this guy. So this animation is around about what we have on this guy. Beginning. That's all we've got.
So what I'm gonna do now is show you how
to make it fancier. This is where we add owl
secondary animation. So primary animation is the
movement of air squirrel. I want to add some blobby bits, some reaction to that movement. So an easy one to start
with would be the tail. Let's go there, shall we? So that these guy
will be rotation. And I'm just keeping
it super simple. It's still just one
big solid layer. I don't need to mess
around with anything else. So it's being dragged behind. And then once we get to
the peak of our action, is going to start
coming back down. So it will be all the way back up to the point of
mental tucked in. And then on the impact, that's when we'll
do EBI back down. It's still not going
crazy because it's a it's got muscle in it. It's not a piece of fabric. And we will keep reacting to it. So there'll be
negative something. Back to a setup. Ease. Let's see just some
basic gaze how that works. That's already keeps Kula might make that drag for
a lot longer. I reckon. That's cute. I can look like little bands, the balloon town, which I
think suits my style there. So this is the other thing is same with the Keyframing
of the main action. It's up to you and your
style, what you think works. There's no real rules on it. There is some solid guides, but they're also much rules. So next up I'm going to animate, I guess I'll just work out. So I'll do the little pause
and do them together. Now because they are
doing the same action, I am just going to
animate them together. That because they're parented. If I just rotate them, they will work beautifully. Going to straighten
them out of it. And then the forearms, because this is all
about the drag spin. The arms are hanging
by the Assad. It's not until
similar to the title. It's just dragging
until we reach the top. And then there'll be
flipped up the other way. We, and this is why this
forum is at the top. Because it needs to be able
to go in front of the face. So that is just
another little insight into why to set up
the way that it is. Then it's kind of
a big impact here. So what are loops is what I'll do is lazy Wyatt and
set it back to zero. Then tuck. That looks about
right. So I'll make that negative over
16 cause again, I love enough to
get the BOL number. This depends half probably
you want it to make. These might be too
many or I settled, but let's just see how it looks. All right. It's adorable. Isn't not the cutest
thing you've ever seen? Beautiful. Now I'm just
keyframing everything. I don't want to worry too
much about upsetting. I already have I don't to worry too
much about offsetting alkene crimes yet, I want to get all
the keyframes in. And if you don't know what
I mean by offsetting, that's fine because
we're not doing it yet. So next up I'm
gonna do the head. Sometimes we will
do the headfirst, but it's not as impactful. So I thought I'll go
obvious things first. We'll do a little
bit of a rotating Tukey's little noodle on there. And as he reaches his peak, miss the make. And then Dan, we're
going to impact. There'll be look, you've ten. If you can hear a lot of
squeaking in these video, that's because my cat
is shuffling around the name box and it's very cute, but probably annoying for you. Not do a set of limbs would be five and then zero
because the head has a lot more control
than the ROM as a that is brilliant. I delighted with that. Next up, I will do the same process they
are dragging first. So we stop, pin down. Then we hate heat, heat opaque, and we wing it back up on lots of vertical earlier actually. Yeah, that's nice. Then that would allow us to Dan 20. I'm gonna go over why Gang? All low. Why? A lot of bounce on these
lobby little cutie pants is every time I'm doing one
of these kinds of animations, I'm trying to learn it up with keyframes and that
have come before. So I don't have to re-engineer
the timing age, Time. It's all based on the
same primary action. So the secondary action
is kinda following suit. That doesn't feel bands enough. Let's do more. Blue. That's better.
Sometimes you gotta go super exaggerated to make it visible little, and that's fine. Now that I've got all
my secondary actions in what I like to do is a bit
of offsetting the moment. It's all kind of bump, bump happening at the same time. So if we're going proper flops, like these polls, for example, I, what I will do is I'll
grab those keyframes. Poor, and I will stagger them. So they happen a little bit
lighter than the forearms. And then the forums. Those and make them happen a little bit lighter
than the body. So basically the body hits, then the forums than
the polls will blip. If you have a chain of reaction that look
even extra floppy. And then I'll do the
same with the hint, makes that a little bit lighter. And the tail is already
kinda doing it. So that's what the ease though, I'm gonna do with them as well. And something FUN. I'm going to make
them happen after the head because it's the
head that they following. So what I will do to add
some extra pizzazz at is I will make the is Pepin at slightly different times and a single brand
that's different. It's not anything crazy, but it gives it a
little bit more of an organic stepped VOD. Big kid. We go. Now I can animate the eyeball is
doing something because at the moment that deadpan stare, it's crepes for I'll start
with the eyes look now. And then they going
to look at as we can. And then once he hits, he can look properly up towards
our little owl friend and a zinc because men do it. Now. Something else that
I just super duper, lazy way to do
things but lazy is effective is why you
should do some blinking. With this kind of style. We can use a bit of
liberty to make it work. So what I'm gonna do
is I'm going to open up my opacity is
less transparency. I'm gonna go to
the very beginning and I'm going to
hit the stopwatch. It set at 100 per cent. Fantastic. Now on this keyframe, I'm going to right-click
and toggle hold keyframe. What that does is it
changes your little icon. It's no longer the
little diamond, all the hourglass, etc. those this is I
keyframed that doesn't Twain want interpellate
between keyframes. It's just when it's
that keyframe, it will be that setting. Then when it hits the
next one, it will change. It won't animate between. So that means on my
little impact here, wish I can make
that down to zero. And say there'll be
a little square. Then I'll move along
two, maybe three frames. I'll do two times
and say, and grab it both again and drag
them back up to 100. So I've got three keyframes. So this one's 100%, 0%, 100% on both eyes. If I play that back,
He's got a little blink. Just want to move it slightly. Little blink because
it happens so fast. I can copy and paste. That can happen again. Because it happened so fast. We don't notice that the
layers are just turning up. It looks for all
intensive purposes, like his little eyelids
closing over it. It's brilliant. Just turn the eyeballs
off ganglions. I'm very chatty way to do blank. Because our little monkey
buttons really want to, Blades is character is real. We, we perceive the
eyes than unevenly
16. BONUS Upgrading Our Scene: Now if I go back to my scene, I need to bring him
in hopes and severe. Watch. I will do. I'll pop up just in my null one. What I can do eels, I want to maintain
the track matte. I want that to be the same. So in our comp, we've got a little
squirrel friend. We've got all these
settings on it. Go the keyframed, you've
got everything set up. And you scene is different
to this main one. So that's a bit annoying,
but that's okay. What we're gonna do is
we're going to bring him in funky minute. You're use. Now while he's there, I'm going to move
my anchor point. So it's gonna be running
these little bump, bump. Just like we had it set
up in the main comp. I'm going to make it 3D. Don't panic, that
has disappeared. Everything's fine. I just need to get it into the right
spot because I've got all this dead space
facts I forgot to my two views is in the
middle of everything. I need him way over here, in the middle of my scene. So because I've moved
my scene around, the default setting isn't
gonna work. That's fine. If I use my little pick
whip, my parent, clip, and hold Shift and
Tab on to this girl. Varies. So what that does have you hold Shift when you
parents happening, it will move it to
them position as well. So that's great. Now, I can unapparent because I don't
actually want it to be parented to the
screw because then it will do all this
animation that I don't want. So I'm going to parent
it to the tree. Why not Parenting to the
train the first place? Because the anchor point for the trays way down here and then needed to pop up
into the tree hole. Whenever I've got that, I can adjust it to
actually fit in my scene because at
the moment is big boy, I don't want it to baby boy. Beep that layer. And if I can at least
Squirrel off, That's great. The only other thing that's
missing is my Track Matte. Now I need it to have the same
track matte and this one. So I'll just do that
in my little tab. Now, what is different is that the animation of the jumping
up happens over here. So I just need to
move that to here. I can do that by selecting the layer and do
open square bracket. Now if I play theories, the Q1, then I just need to do
all of that animation again to get her to jump
up and grab the male. Looking at Abu Dhabi,
it looks durable. So it's a bit of a
tedious process, but sometimes it's
worth it to have blocked in animation a
really simple layers. And then added proper parents
had rigged characters, lighter, super squishy, handle. It depending. We got we've got
a little buddy jumping up. So I'm going to jump
in and do another little speed round animation on him jumping up
to grab the mile. So in this case, I'm going to need to jump
up at this point. So I'll start my little action here and then move on to here. So what I like to do is just
jumped inside the cockpit. Lab noise. I'll hit asterix. That's a handy thing to use. Asterix is how you
can quickly make them aka jump back to my main comp. That's my high point. So I'm going to asterix again. Then inside. So then this is where my key jumping actions
need to happen. So the beginning of the
action, the high point, the land, then it will timeout with what
I've already done. I'm just going to jump
up here to remind us of that process again, just one more time to
really ramp at home. So we want to be looking at the blocking out
the action first. So that's our position keyframe. Where are we going,
what are we doing? So define the action. That is step one, step
to timing and easing. Sometimes just split these up. But when they're keeping it simple like this little
squirrel friend, we're going to do them together. So getting the timing
way to the keyframes happen and how do they get
from a to B with the aging. Then we're looking at
the secondary animation, what things are dictated
by that initial action. So in this case the jump, this is some squash and
stretch that goes with it. All of that is following
that nine action. That's why it's
secondary action. Then any additional Animation, do we want to have the tile? Do we want to have
some blinking? Do we want to have a side
pays on the way out? Like what do we want to have a secondary or as
additional animation? Then finally, funness. Make sure we've got
it in the right spot, but it's all looking as
good as we thought it was. And that will make
sense in context with the whole finished piece. Now there's a little bit
more complicated because we have got the envelope. The envelope doesn't
perfectly match the animation because we've done lots more fancy stuff
inside the comp. If we really wanted
it to blend in. And what we would do is
we will make the split one would bring
that into our comp. And then we compare
it to in their all we'd have this square rule. Rather than Animating inside
this comp, we'd have an app. Yeah, I'm insane and they
would have full control. But because we've kinda
kept them separated, it doesn't feel to me like it's worth going into that detail. I encourage you to have a
play if you feel like it, but I'm actually quite happy
with how that's come across. I think that works
perfectly fine, just as is. And again, it's a super
stylized little thing, so I'm not too fast about it. Now. All that we have left
to do is our agenda
17. Rendering: So go up to, with
our comp selected. I'm just gonna do the one with a null because that's where I've gentle their
squirrel friend stuck. So I'm gonna go up
to Composition, add to Media Encoder
Queue or Control Alt M. My favorite friends. Then we'll go H.264. Perfect, but we always want to double-check that I
settings are correct. So I'm gonna go H.264 with
action and Match Source, which means whatever
settings we put into our comp is how it's
going to render. So it's always good
to double-check. They are what we planned. So 1920 by ten at 25
frames per second, square pixels,
absolute smashed it. If they are not correct, needed to go back to your
comp and change them there because this is
just going to re-wrap it, which could be fine, but can cause glitches. So it's best to have it
set correctly in your cup. Then we'll go click
on the output name. Tell it where to save. Ski down Ski. Then we go play. You can watch it go. It's handy to watch it preview just in case
there's any glitches. Sometimes I've rendered from wrong camera because
when you're working, working away and you've got a top view or something and you've been playing
around with cameras, you might not be rendering
from the camera you expect to. It's good to check the preview. Also even more important, check your final render. That beautiful. She is all done. That's it. Then we can upload
that to the interwebs. If we so choose. We can e-mail our moms with it. We can pop it on the youtubes. The other render format that I thought I'd
show you is we can duplicate this Control D. Simons duplicating
in After Effects. Rather than H.264, we
can do a animated GIF. Now animated gifts from Media
Encoder up, pretty massive. So it's not the best way, but it's a way to make a gift. And what I want to
make sure though, is the source is
not 1920 by 1080. That's massive for
a gift, for video. Absolutely, but for a gift, my God, who's gonna be
looking at that full-screen? Now what? I'm going to make
it much smaller. If I go 100%, we can see how small
is going to be. That feels far more
reasonable to me. It's not a complicated graphic. I think that's absolutely fine. What else can we change? None. We don't have any transparency, so we don't need to
worry about that. In theory, that should
make the Files molar. But look, Adobe does
what it wants to do. Let's say we want to save
it same place because the gift lets us save
it as the same name. So then again, we'll hit play. This for some
reason is obviously always going to take
longer because for some reason we haven't figured out how to do gifts
quickly and well yet. Probably don't need
a Windows machine. I never there you go. So you're saying that that
automatically applied twice because of the gift
that sets up to loop. All right, let's have a look. So we've got our video mp4,
and then we've got a gift. It's not too bad. Again, if we could upload to wherever we want
an email if you want. Obviously it's not
the best quality, but that's not the point. The point is a's of sharing. All done. Now I'd love to see what
you guys have made, whether you using my
assets or your own, please include them
in the project. That'll be flipping awesome. Love to say it. That hopefully you've learnt something we get
18. Wrap Up: We've done it, we've made it, we've exported, we've
done a whole shebang. You've created a
full 2.5D animated scene with a rigged
character, snuck up on you. Very exotic stuff. So I hope
you've learned something. I hope you've found
that an easy way to explore adding a half dimension, not the full thing, but
a little half abdomen. And I'd love to see
what you've created. Please share it in whatever
format you see fit. I'd love to hear from you and yet look forward to working
with you on the next one.
 Alyssa Smedley, Sharing my hawt tips