Transcripts
1. Introduction: [MUSIC] Hello. I'm
Russ Etheridge. Today, we're going to
make some simple pops and bursts in After Effects. I'm a freelance animator and director based in
Brighton in the UK. I've worked in the
animation industry for about 10 years, working on things
like visual effects, motion design, and 2D and
3D character animation. This class is intended to be a first toe dip into
After Effects animation, so I'll be taking you through
everything you need to know to make a simple
graphic style pop, like an After Effects motion
graphics kick-starter. I'll be covering just
the essential parts of After Effects
to get you going, and we'll be specifically
looking at making a simple animation
using Shape Layers. Shape Layers are basically After Effects' vector drawing tools like what you'd find in something
like Adobe Illustrator. I'll be putting a bit
of extra emphasis on the animation side so that the motion looks and
feels really nice, and you'll be following
me through step-by-step. This class is
suitable for people who are completely
new to After Effects. Then at the end, I'll be setting a hands-on class project so that you can try
out your new knowledge to make something unique. We'll be covering a quick intro to the After Effects interface, just the main parts for
your popping purposes, and then an intro
to Shape Layers, the ins and outs of what
they do and how they work. We'll be making one
main pop animation that looks like this. [NOISE] Then once the
pop animation is ready, we'll be adding that to a pre-made balloon
template animation that I've made and is available
in the class materials. Finally, I'll take you
through some variations on the pop animation
that I've made just to give you some
ideas for when it comes for you to make an
original pop of your own. I hope that once you've
completed this class, you have got the grips of
the basics of After Effects, as well as a good
knowledge of Shape Layers and the timeline so
that you can make some satisfying animations
with them. Let's pop. [MUSIC]
2. Class Overview: [NOISE] To sum up the
main objective of this class is we're
going to be using After Effects to create a very simple graphic-style
animation of a pop. We're going to do this by just focusing on the main things
in After Effects that we're going to need
to be able to do this without getting
too bogged down in all the things that
After Effects can do because After Effects
can do a lot of things. Then by the end,
you're going to have this very satisfying
burst animation that's useful in lots of
different situations. Years ago, I saved myself a little pop animation
preset and I keep going back to it and
using it and those are different projects because
it's just such a useful thing. Not just for when things
pop like balloons, but also when things just appear or disappear
on the screen, you can just use a
little burst for that, like graphics, text, icons, even characters,
you can do that, or even just highlighting something that's
happening on the screen. If there's a light blinking, it's useful to have a little
pop animation next to it. So it's useful in tons of
different ways and it's something that is great to
just keep in your back pocket. So let's have a quick rundown of everything that we're going
to be covering in this class. First, we'll be looking at
the After Effects interface, basically what you see when
you first open the program. After that, we'll make
what's called a composition, which is basically where you do all your work
in After Effects. In that composition
or comp for sure, we'll be making a shape layer. I'll take you through what
shape layers are and what they do because that's how we're
going to be making our pop. After that, I'll be
taking you through the various animation tools that we'll need to make
it actually move. We'll have a very quick
look at the graph editor, which is a little bit more of
an advanced tool which you don't often get in beginners
After Effects classes. But in this situation, I think it's going to be
useful to make our pop look really nice. So I
think it's worth it. Once the pop is animated, I'll take you through
how to add it to the balloon template
animation that I've provided so that our
balloons can pop with our beautiful burst motion. Finally, we'll need to export our animation so that we
can actually watch it. I'll take you through
the process of just outputting an MP4
from After Effects. Make sure you watch
through to the last video because I'm going
to be setting you a class project so
that you can apply the knowledge that you've
learned in the class , say something practical. Then you can post your animation in the class project section, and I'll be there grading
them really harshly. Make sure you do a
good job, no pressure. Hopefully, the plan is
all nice and clear. In the next video, I'm just
going to quickly take you through the balloon
template project that I've supplied in the class
materials so that you know what we're going to
make. I'll see you there.
3. A Closer Look at the Class Materials: In this lesson, I'm going
to quickly show you the balloon template
project that's available in the
class materials, although we're not going
to be covering exactly how I made the balloons
in this class. The template is there if you
want to explore it yourself. But I just thought
it'd be way more fun to have something to
put your pops on, rather than just ending the
class with a pop by itself. I thought it would
be useful for you to see what we're going
to be making and also what's included in the
project so that it's in your brains before we get
down to the nitty-gritty. It's not essential
to follow along in this lesson, but if you want to, make sure you go to the
class materials and download BalloonsTEMPLATE.aep. We're going to be using it later anyway, so make
sure you have it. Let's get to it. This is my
After Effects pop template. These are all the
pops that I've made. I'm going to supply the balloons template and I'm going to supply
all the pops that I've made in the class materials, so make sure to check that out. I'm just going to show
you everything that I've made and then
what we're going to make and then I'll start
a completely fresh After Effects project and will
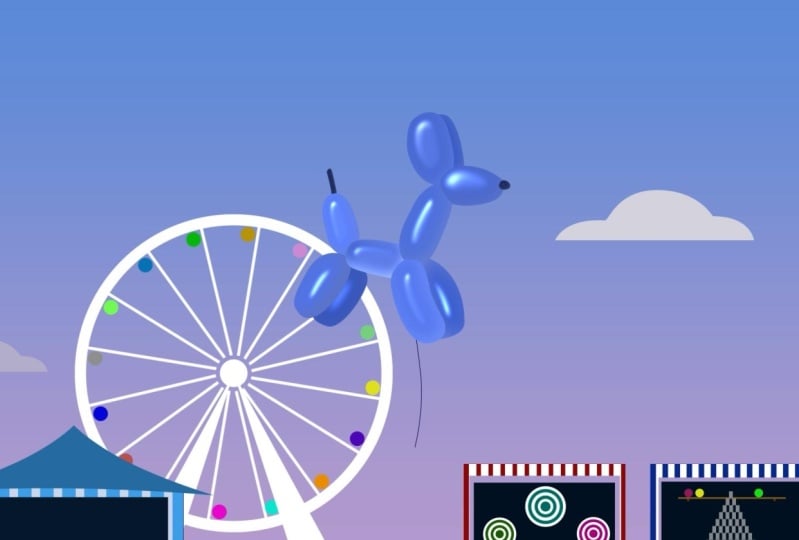
make the pop from scratch. This is the balloons
template, Balloons__00. This is the balloons, so we just hit "Play" on this. These are the balloons popping
with no animation at all. Then this is the pop
that I'm going to go into a lot of
detail on how to make. [NOISE] Then this is all
of it combined together, so this is the balloons and the pop [NOISE]. It makes a very nice clean
motion graphics pop, which might be useful
in a scene like this. Then I'll just quickly show you the other
ones I've made, so this is the second
one, variation on that. [NOISE] This is like sparkles. Then we've got this, I guess, slightly more anime type pop
and then we have balloon 4, its's a bit more like
another fireworks type one, where we got the lines
coming out and then we've got some line sparkles as well. Finally, the fifth one I made, this nice moon-shaped pops, which are a bit more like mini animate explosions as well, with a little bit of line
detail there and I've also colored these ones to
match the balloon color. This one almost looks like the actual material of the
balloon is popping away. With that, I'm going to go into a little bit more detail later with the balloons 2,3,4 and 5. But for now we're
going to focus on the first pop as an
introduction to shape layers. As you can see in here, in pop 1, it's just
one shape layer, everything is just happening
on one shape layer and if I press "U" it will show
me the key frames, so this is quite nice
simple keyframes. If I just show the
balloon's comps slightly, expand this, there's quite a lot
going on in here and there's pretty
comps and things, so feel free to explore
that in your own time. I'm not going to be covering how I animated all this stuff. But it's all pretty
straightforward, so once you've got to
grips with After Effects, go ahead and have a look
at how I've made this, it's all fairly straightforward. The most tricky
thing was getting the wiggling string
underneath the balloons. Everything else is
just a shape layer animated at different speeds
and things like that. Great. That's the balloon
template and ultimately what we'll be integrating
our pops into. In the next lesson,
we'll be looking at the After Effects interface, basically what you see
when you open it up for the first time, so
I'll see you there.
4. After Effects Interface: [BACKGROUND] Hello,
so in this lesson, we're going to be looking
at the After Effects interface and we're going to be focusing on the parts
that we're going to be using to actually make our pop. Like I said earlier,
we're not going to be looking at everything After Effects has to offer because we'd be
here all day long. We'll be just looking
at the essentials just to get you up and running. This is After Effects, so let's start a new project. I'm going to File,
Close Project. When you close a project
in After Effects, it just gives you
a blank project. You can see up here it
says untitled project. I'm on Windows so
if you're on a Mac, things might look
slightly different, but the main interface of After Effects
should be the same. I can't actually
remember when you first open After Effects, what layout you are
presented with. Things in the middle should
be roughly the same, but over on the right-hand side, these panels might look
slightly different, so don't worry if this
slightly different. This is the area in which we're not really going
to be looking at anyway, so don't worry
about that for now. If you want to get it
to look like this, hopefully if you press
"Default "up here, these are the different panel layouts that you can load out. You can even save your own one, I've got a rough space there. But if you press
"Default", hopefully it'll look pretty much like
what I've got here. There's a lot of After Effects. After Effects is a
program that takes a long time to learn
every aspect of it, but you can get
going quite quickly, particularly if you've got
any Photoshop experience, it's very similar in terms
of the layer system, but the layout is
completely different. Obviously this is geared around making video rather than stills. If you don't have Photoshop, After Effects actually does a lot of the things
that Photoshop does. In some ways, it doesn't mean slightly different
ways in After Effects, things happen live so you can
change things more easily. In Photoshop, a lot of
the effects and ways you might make masks and things
like that are irreversible, they're destructive so once you've done something
to a layer, you can't go back
unless you undo. Whereas in After Effects, things tend to be a bit
more live and editable, which makes them
animatable as well. That's the main
difference between After Effects and Photoshop just as a point of
reference for those of you that know of Photoshop. Let's get into the interface. Up right at the top
here is all your tools. The main tools you'll be
using is this selection tool, which you use to
drag things around, click on things and
move things around inside the panel, so we'll
get to that in a minute. The other ones we don't have
to worry too much about. This one is like the pen tool, there is zoom tool the next
few things are to do with 3D. This Anchor Point tool is very useful and then there's
your shape tools, pen tool and text tool, and then these are brush tools and things which we're definitely not
going to get into today, and these ones [inaudible]
These ones are a bit more advanced and they're
a bit more for compositing and
advanced animation, so we're not going to
get on that today. But the main ones we
will be focusing on are the shape tools because we're going to be
making a shape layer. But we're not really
going to be making complicated shapes we're
just making lines, so we're probably
use the pen tool. If you were making
shape like we did with the other pop animations, I think I made some
circles and stuff, so those would be
made using here. We can't do it right now because we haven't got a
composition open. But if you drop this down, you can select some
different shapes. Moving away from the tools
we've got the Project Window. This is another main
window that you'd be using everything that you make in
After Effects appears here. If you import images or
videos, they appear here. If you make a composition
which we'll be doing in a second that appears
here, audio files, etc. Everything goes into
this window here. Then moving down to the timeline once you make a composition, this timeline becomes
active and this is where all your layers will
appear down here and over here is where
your timeline is. You can go from zero
time and then you can play forwards in
time across here. There's various
tools to zoom in and out and use this a bit better. Then in the middle here,
the big window is where you can see all your
things that you're making, so this is your main viewer. It's a little bit confusing
with a blank project, so let's make a
composition and everything should become a bit clearer. That's a super quick rundown of what you see when you
open After Effects. But like I said, the
best way to understand it is probably just
to get started. When the next lesson
we'll be setting up our After Effects project
and we'll be making a composition with all
the settings we need to get started on our pop
animation. I'll see you there.
5. Setting up a New Project: Making a Comp: We had a quick look
at After Effects, but things don't really
come to life until you make a composition
to start working in. Compositions or
comps for sure are where you do all your
work in After Effects. If you're used to
something like Photoshop, where you make a new document and you do all your
work in there, it's the same thing. But in After Effects the
difference is you can have multiple compositions
in one project. What that lets you
do is actually nest compositions inside
each other so you can have one composition
and then you can bring all that work into another
composition as one layer. That's actually the
basis of a lot of powerful stuff that you
can do in After Effects. We'll be touching
on this a little bit later on when we add our pop animation inside
the balloon animation. But for now let's just focus on getting the settings right for a new composition so that we can start
making our pop. To make a new composition, you can either go up
to composition up here and click
"New Composition", or there's a handy button
down at the bottom of the project window which
you can just click. You should be presented
with this window, which is your
composition settings. You need to decide on the size, frame rate, and the length
as the main things. Hopefully, your default
will be standard HD size, which is 1920 by 1080. If it's not that, make it that. The frame rate, we're going to work at 24 frames a second. Set your frame rate to 24
and set your duration to, this is called a time-code,
the way this works, and it's basically just hours, minutes, seconds, and frames. We want this to be fairly short, otherwise you can have a
massive long composition and we're not going to
be really using it. Set this to zero and let's work at 10 seconds because
it's good length, and set this to zero, so it'd
be 10 seconds and 0 frames. Make sure everything is
looking the same as mine. Click "Okay", and we've
got our composition. You can see up here, comp one has appeared in
the project window, and then down here this
is our composition open. It's got nothing in it at the
moment, so it's just blank. We've got a black screen,
which is just nothing in it. This is our comp. This is the HD comp
that we just made. Just to quickly look at
the comp window we've got, this is your zoom. If you want to zoom
into your comp, you can go to 100 percent. We're at 50 percent
at the moment because I'm on fairly small screen, and you can set your
resolution here, which speeds things up. If your computer is
running a bit slowly, it will speed up
your preview time. There's other things
here which are quite more advanced settings. You don't really need to
look at these too much, but I hope you explore
in your own time. This shows you things
that are transparent. This turns your guides on and off your mass and
shape path visibility, which you just went on actually at the moment. Don't
worry too much about that. Then let's turn this one on. I'm going to turn on
Title/Action Safe. What that does is it just
gives you a few guides on top that allow you to make
things a bit more accurately. Because we're going to be making our pop right in the middle, I want it to be quite
accurately in the middle. It's not 100 percent
necessary right now, but I think it's good practice. Make sure, when
you're making things, that you're aware of
where they're going, because it's quite important
when you're animating to be nice and clean and tidy with the things
that you're making. Switch on "Title and Action
Safe" by clicking on this target little button and then turning on
Title Action Safe. Great, so let's just quickly recap what we learned
in this lesson. We clicked on our make
new composition button. Next, we looked at the comp settings window that popped up, and we made sure that we were
working at 1920 by 1080, and that we're working
at 24 frames a second. Then we set our comp
length to 10 seconds. After that, we saw
that a new comp had been added to
the project window and that the timeline
for that comp was added to the
timeline window. Then we had a quick look
at some of the settings that you get around
the comp viewer, including the zoom in and out. Finally, we turned on our action safe guides so that we can
see where the middle is, which is really useful for when we're going to be
making our pop. In the next video,
we're going to actually start making our pop. We're going to start looking at shape layers and what they
do. I'll see you there.
6. Making our First Shape Layer: [NOISE] Welcome back.
In this lesson, we're finally going to get
into our pop animation and for this we're going
to be using shape layers. Shape players are essentially After Effects' answer
to Illustrator, if anybody's familiar
with that program. They are basically a
vector drawing layer, so you can draw your vectors
into this layer type. Lots of tools that are similar to Illustrator in lots of ways, although it's very
much stripped back. But the main difference with
After Effects is that you can animate all the properties. Without any further
explaining, it's better to just have a look
so let's get to it. The next thing we're going
to do is we're going to make a shape layer and
the shape layer is going to be a line so
that we can make our pop. If you think about how
the pop is constructed, it's a ring of lines that are expanding
out from the middle. A lot of the things
in After Effects is figuring out the simplest
ways of doing things. You can obviously make every
single line and animate it. But what we're actually
going to do is a clever way to use shape layers so that you can make
one thing and have it repeat multiple
times in a circle. To make a shape
layer, we're going to click on ''Pen
Tool'' at the top here. We're going to just click on
the screen and make a line. I'm not going to put it
right in the middle, I'm going to offset it slightly because I don't really want the lines emanating
right from the middle because it will
make an ugly star. I want a gap in the middle. You can make it
however you want to, but I don't really want my lines to touch in the middle
so I'm going to make it slightly to the right
and we're going to make a line going off to the right and we want
it to be dead straight. I'm going to click where
I want the line to start, something like that, and I'm
going to hold Shift [NOISE] and I'm going to click where
I want the line to end. I think I'm going to make
burst about that big. Something like
that. There we go. Now we've got a path here. As you can see, it's now made a shape layer in
the composition. It has put this blue block here, which is indicating how
long that shape is on for, and it just makes it for the entire length of
your composition. You can see it goes 0-10
seconds here like we made in the composition settings and it's made Shape Layer 1. When you click off it,
because we haven't added any look to the shape, you can't see it at the moment. Yours might be different. You might be able to see it.
Actually, it has for me. It has made a black stroke. You can see the
shape layer settings at the top of the window here. You can see Fill and Stroke, which are two things you can
apply it to shape layers. It's got no fill, which is
indicated by that red line, and it's got a black stroke, indicated by this black box. The stroke is two pixels wide. Because it's black on black,
we can't see anything. But just to give
you a bit more of an intro to shape layers because it's difficult to see
with one single line, if you create a shape,
you can close it. You can create any line. These are beziers so
if you drag and click, it will create a curved line. If you just click, it will
make a straight line. If you click back on the
first point that you made, it will close the path. If I click on the Settings up here to change it so
you can actually see it. If I click on the ''Fill'' , it will give you a color box. Let's just make it
red for the moment. If you click on the ''Stroke,'' I'm going to make that blue. Actually, let's make
it a bit more visible. I'm going to make it green. Then I'm going to increase
the size of the stroke. This is a shape layer. This is a shape
and I've given it a red fill and it's
got green stroke. The stroke runs along
the actual path and the red fills the
inside of the path. If I click on the
shape that I just made and press this little arrow on the
left of the layer, there's a few options here. It might look a bit
complicated at first, but we don't really need to worry about any of
these for the moment. Let's just roll
down this arrow and then we'll roll down Contents. You get Contents and Transform. Transform is something that comes with every single
layer in After Effects, whereas Contents is
particular to shape layers. We're going to open up
the shape layer contents. Then you get Shape 1 because you can have multiple
shapes within a layer. We'll roll down Shape 1. You can see that it's
got Path 1 because you can have multiple
paths in a shape. If we open that, you can
see the path in there. Then if I roll down Stroke, we can see some stroke settings
as well as a green color. You can also see your
stroke width here, 31, which is the
same as up here. You can also see
that we've added a red fill with some other
fill settings as well. We don't need to worry about
the settings for the moment. It's worth noting that
these settings inside the shape layer are
the main settings for that shape layer. You can change the shape layer settings
using these ones up here, but these ones are more for
creating new shape layers. These are the settings that if I made another
shape layer now, it would take these settings. But if you want to change your shape layer
that you've made, it's probably better to use the settings inside
just in case. Because once you start having multiple shapes with different
settings inside one layer, this one doesn't really
change it anymore. I think it might change
all of the shapes and it's maybe not what
you want to do. I'm going to delete that second one for
the moment and we're going to focus back on
this line that I made. Let's roll out this shape layer, roll out Contents and shape. We're going to go into
the stroke settings, rolling down Stroke, and I'm going to change this to white. Under Color, we're going to change the black to
white so we can actually see what we're
doing and just make it bigger so that we can
show that we're doing it. I'm going to change
this to maybe four so that's like
a nice thin line. I'm going to change the Line Cap from Butt Cap to Round Cap. Make it clear and then increase the stroke width so you
can see what it's doing. That's actually rounded now. Whereas before, butt cap is flat and then we can round cap. [inaudible] that
back down to four. Before we go any further, I'm
going to save my projects. I'm going to File,
Save As, Save. I've just imported something just for myself for reference. This is just for me making it. In this window, you can have folders. [NOISE] If you click
on this button down here, you can make folders. This is just for organization. Let's say I wanted
my comp in there, you can put it into the folder. This is just an
organizational thing. This is just my other
balloons just for reference so that I can
see what I'm doing. Maybe a good idea as well is
to rename our comp to pop. If you click on your pomp
and if you press ''Enter'', [NOISE] you can rename that. I'm going to call this Pop_01. If you right-click, you
can also rename it here. I'm also going to
rename the shape layer. If you press ''Enter''
on the shape layer, that will let you
rename it, and I'm just going to call that Pop. Cool. I'm just going to make the stroke width a
little bit bigger. It's going to be stroke 11. Gets thicker, so it's
a bit more visible. Just to quickly note as well that when you make
a new shape layer, it puts it right in the middle. This dot here is called
an anchor point, which is maybe familiar
from what I said earlier because there's an
anchor point moving tool here. But it puts it right in the
middle of the composition. I want my pop to radiate
around from the middle. Keeping everything locked
to the middle like this is really useful for when
you're positioning it later. Because later on we can just drag this whole composition
to the middle of the balloon and it will pop
exactly where you place it. Even if you can't see
the actual pop itself, you'll know where the middle
of the composition is. It's just much easier to keep everything nice and
tidy and in the middle. What we want is we just want a stroke on the path, so
we don't want the fill. If you'll fill is on, you probably can't see it if you've drawn a
perfectly straight line. But if it's on, it's
best to turn it off. You can use [NOISE]
these eyes here to turn all of these things on and
off, including the layer. If I turn the layer on and off, you can see that it just
completely disappears. You can turn the
stroke on enough, but we want the fill-off, In fact, I'm just
going to delete the fill because we
don't need it at all. Either hide it or click on the fill and press "Backspace"
and then it will just go. We didn't need that.
Great. Let's quickly recap what we covered
in this lesson. First, we found our Pen tool, which is located at the top of the window in After Effects
where the tools are. We clicked in the
Comp Viewer so that you can start drawing
in your shape layer. A very good thing to
remember is if you hold down shift while you're
drawing your points, it will either snap
to the horizontal or the vertical depending
on how close you are. I think it might do
diagonal. I'm not sure. You have to test
that out. But it's a very handy shortcut
to keep in mind. After that, I showed you a
little bit more about drawing shape layers using the pen tool and how you can close them if you go back to
the first point. Also about how styling work. There's some tools
at the top where you can set your style
for the shape layer, strokes, and fills color. Then also you can open
the shape layer to change those which are
the main settings. We probably should
have done that before actually drawing our pop, but hopefully it all
clicks into place. After that, we went back to the first line that we'd
drawn and rolled out the shape player settings
so that we could give it a thin round cap stroke, which is the style that
we want for the pop. I also went and deleted the fill style inside
the shape layer. It's not totally necessary to remove that because you
can't see it anyway, but it's nice to keep
things clean because it's just adding a lot of settings
that we're not using. For the pop, just for now, we're just going to be
using the stroke. I also touched on the
anchor point of the layer, which is something that's not really necessary to
worry about now. As long as you've followed me and made your pop in
the middle of the comp, everything will be totally fine. But if you did want
to know a bit more, it's basically the
point around which everything moves when
you animate a layer. If you move position, but especially if you
rotate something, so if you rotate a layer, it will rotate around
its anchor point. It's just something to keep
in mind, but like I said, we don't need to worry
about it right now. Amazing. In the next
lesson we're going to look at animating
our shape layer. We're going to make the
motion look super sleek and satisfying.
I'll see you there.
7. Animation: Setting our First Keyframes: Time for my personal favorite
bit, making things move. In this lesson, we'll
be adding an effect called trim paths
to our shape layer. This is basically so you can animate the stroke
along the path. We'll then be looking at setting some keyframes for animation. We're going to touch very
lightly on the graph editor. Let's go. Great. We've got our path and we've got
our stroke on our path. Now we need to animate it. The best way to animate the stroke during the motion
that we want starting from nothing expanding and shrinking again is something
called trim paths. You can actually trim the stroke along the path
to a desired length. To do that, we're
going to add here. Up here are some
special properties that you can add to shape layers, all kinds of fun things. You don't really need to worry about any of these right now, apart from trim paths, we're going to add
another one later, but we'll get to
that in a minute. And trim paths goes down
here below the shape. It automatically
adds it in here, but you can add
it anywhere else. You can drag it
around if you put it anywhere in here, we'll
do the same thing, maybe above it, so
as long as it's below path thing that's
a good place for it. I'm going to expand up trim paths and then you
get some options in here. It's a fairly simple one. You get start percentage, end percentage, and
then you get an offset. You can ignore the
other two options, offset and trim multiple shapes. We're just going to be
animating the start and end to animate a property
in After Effects. You may have seen these stopwatches all
around everywhere. These are all the properties
that you can animate. By default, all the animation for all the properties are off. If you want to
animate a property, you need to click
on the stopwatch. If we turn on animation
for start and end, you can see that they've
turned blue and we've got a few more things
that have appeared. These two things here that have appeared are called keyframes. They basically hold the
value of these properties. This one is currently at 100 percent and this one is
currently at zero percent. If you set more keyframes with different values
further along in time, then these properties
will animate accordingly. This play head will
show you what's happening in this composition
at any given time. It's exactly like YouTube
or any other video playing so far that you might have used this shows you where you
are in the timeline. If I move forward a bit
and I change these values, so let's trim the end. If we trim the end, you can see that our
line is getting shorter. We go down to zero, and then if I go back to the
start and press play, if I just press space bar, they will animate to that
keyframe down to nothing. It goes from 100. If
you look over here, It's showing you what the
number is across time, so we drag it and it goes
all the way down to zero. That's basically
how the animation works in After Effects. What we want is, let's just fiddle with the buttons
until we've understood. What we want to do is I'm
going to drag the end down. We go down to the
bottom. Then we want it to start down here. I want it to expand
out like that. Then we want it to collapse again like this using the start. We want the end to go 0-100 and then we want
to start to go 0-100. That way we'll get a nice line moving from left to
right out of the center. I'm going to delete
these keyframes here. Sorry. It was worth
noting that once you've turned these properties
on for animation, any changes that you make, it will make a new keyframe. If I move along,
changes the property, you'll keep making keyframes. It automatically put a keyframe when you change the property. You can also both select these by dragging and selecting multiple ones and
move them around. You can also copy
and paste them. If I do Control C or Command
C on a Mac moving forward, paste it, it will then paste whatever value that keyframe holds, it will paste it here. Have a play around,
get your head around manipulating
these keyframes. We want to start with start on zero and we want to start
with the end on zero as well. We want zero-zero. You
can see that the stroke is essentially at the
left-hand side of this. Then we're going to move
forward a little bit. Then I want the end to be at 100 percent so that we have
the line moving this way. Then I want to start
to be at 100 percent. We have the end,
the left-hand side of the line moving to
the right as well. Then when we see this
animation, nothing happens. That's because they're both
moving at the same rate. You can't see these
values are the same. If these are the same,
then it means nothing. Maybe I'm confusing
a little bit, but you'll see what I mean
when we make the next chain. We want the end to
move across first and then we want to start to
move across afterwards. Now we get this line
moving across like this. If we move the start
behind the end. If you press play on that, you get this nice
beam running across. Our next goal is to make
this look really nice. We want it to start off really fast and then slow down
like an explosion. We want it to go
fast and then slow. To do that we're going
to do some easing. Great, so let's just quickly recap what we learned
in this lesson. First, we added a trim path
effect to our shape player, which can be found
in the Add menu. It's a special property of a shape layer so that we
can animate our path. We then went through
using the stopwatch, which can be found on the left-hand side of most of the properties in After Effects. Once this stopwatch is on it, we'll set a keyframe at the time where the play
head is in the timeline. If you move the play head
forwards or backwards from that time and then
change the property. It will set another keyframe with the value that
you changed it to. This is how all animation
works in After Effects. We then adjusted the
timing that we've made on the animation,
on the trim paths. Great. The animation we have currently won't cut it as a pop. The motion is a bit
too linear and boring. In the next lesson,
we're going to add some easing. I'll see you there.
8. Animation: Making the Easing Really Nice: Welcome back. We've
got the line moving, but the emotion is quite
linear at the moment. In this lesson we're going
to concentrate on making the line feel like it's going
to be something exploding. To do this, we're going to
add a little bit of easing and we could just add
the default easing, but I think it's going to need a little bit of extra love. To just add that extra oomph that the explosion
is going to need, we're going to use
the graph editor. Just a quick heads
up that I mentioned earlier is that the graph
editor is a little bit more of an advanced
tool that you wouldn't normally get in a
beginners class like this. But quite frankly, if you don't use the graph
editor in this situation, I think the animation
is going to look a little bit chunky. I'm going to insist, and it's going to
be a little bit of special sauce that will make our animation look really slick. But don't worry, if you
follow my steps closely, hopefully you won't get lost. Easing is the way you control how something
moves over time. Setting key-frames like this is telling the computer how far to move something over a certain time and easing
is how something moves. What you basically
have control over is the speed over that time is the best way to
describe it. For example. if you want it to go
slow and then quickly, or do you want it to go
quickly and then slow, or you can go slow, fast, slow. You can do any combination in between and you
can adjust that, you can fine tune that
to whatever you want. That's how you control the way something moves
between two points. Let's quickly break out
here for the moment because easing is quite a tricky
thing to explain. If you fully understand it, I think it's going to be really good because it's basically the fundamental way to
make animation look nice. I'm going to make a
little graphic to hopefully explain
it a bit better. On the left here we've
got three graphs and what you have on
the vertical axis of the graphs is the speed and what we have running
along the bottom is the time. Over here we can see
the different types of easing that I've applied
to these three balloons. The top we have a
constant speed. In the middle we have
the default easing. This is what After Effects
calls and easy ease. At the bottom we have
an exaggerated ease, which is what I want to do using the graph
editor with you guys. You can see the effect
that it has on the motion. If you just look at
the blue balloon, you can see how it moves
across and it just very robotically in a
completely constant speed, goes back and forwards. The middle balloon slows down towards the ends of its motion. It does go down to zero, but looks fairly
constant in the middle. It speeds up and slows down
in a very smooth motion. Then the bottom one is
really exaggerated. You can see by the graph it goes really slow
and then there's a bit in the middle
where it goes really quick and then it goes
down to really slow again. You can see it moves slowly
and then whips across. That's basically different
types of easing and you can completely adjust this
curve to do whatever you want. You can have it be constant and then go really
slow or you can have it go really fast at the start
and then go down really slow and a whole combination
of all things in-between. When you combine that
with the movement going into places, or whatever that's how you build up all different types of
complicated animation. Applying that to the pop, you can see that the
easing I've got on it is very fast at the start and then it slows
down towards the end. Ignoring the length of the line at the minute
because that's just different part of the animation. If you just look at the
front of the lines, you can see that it
is moving really quickly at the start
and then slows down. The reason we want that is because that's how
things explode. If you're imagining explosion, you get something
moving very quickly at the start and then because
of air resistance, that thing slows down. You can control the easing of something to match
reality in a way. Even though this is a
really graphic pop, we still want it to feel natural and to make things natural, you have to apply a certain
amount of physics to it. You don't need to know it,
obviously because this is just animation and its
graphics and stuff, so it doesn't have to
be physically accurate, but using your
experience of the world, you can just apply that to
anything that's moving. Obviously, when something pops, it will be moving really
fast at the start and then because the air around
it slows it down. The bigger the explosion, the more exaggerated that is, so the more exaggerated
the easing would be. A really powerful explosion
would be super-fast at the start and then
it will just get really slow towards the end. There will be this
very slow drift. Hopefully that explains a
little bit more about easing and why we're animating
the pop in this way. I'm going to zoom
in a little bit. I'm going to grab
this top bar here, shows you the amount of the timeline that
you're zoomed into. The moment it goes
all the way along, which means we're
fully zoomed out. This is the entire timeline
that we're looking at. If you grab the right-hand
blue little knob there, you can bring it in and that zooms in so that we can
really see what we're doing. We want to focus on
this area and because the pops is going
to be quite quick, that's all we need to see. What I'm going to do is
if you go to Frame 7, on the top left here you can see the current time
of the play heads. If you move forwards,
it will count up. I want to go to Frame 7 because I think that's how long the pop should be because going
to be really quick. I'm going to grab these
top two keyframes, the start key frames and I'm
going to move them over. They're just one frame
after the end keyframes. Then I'm going to drag the N2 by box selecting again
and I'm going to drag the bottom one to Frame 7 and the other
one will be on Frame 8. Make sure these N2 are selected and I'm
going to right-click. I'm going to go to
keyframe assistant and I'm going to
click easy, ease. You can see that the
shortcut there is F9. Now you can see that these
two have changed shape. They've changed so
this hourglass shape and that means
that's an easy ease. An easy ease is basically slow. What we've got at the moment are these diamond ones and
these ones are linear. They will go at a constant rate and the
eased ones will go slow. Now what we've got is
a free press play. Let's get rid of
our action safe. If we click on
this target button again and toggle that
off, press play. Now we've got fast and
then it slows at the end. The easy ease is a default ease. You can make it even slower than that and the way to make it even slower is by using
the graph editor. The graph editor, admittedly is probably the most advanced thing we're going
to look at today. It's an advanced way of
controlling the ease. In my opinion, we're not going to make it
look very good if we just use regular easy ease
because to me it looks quite robotic and what I want is
really satisfying fast pops, it's really fast at the start and then very slow at the end. The way we're going
to do that is to increase the amount
that we're easing. We're going to click
this button at the top of your timeline is called the graph editor
when you hover over it and we get this graph view. If you just click it and you don't have anything selected, there will be nothing in there, so you've got to
select something. If we select our start and then you hold
shift and pressed end, then we can see both lines here. Now they're here in the graph. We can zoom in a
little bit more here. There's two different
views in the graph editor. Your one should be
the speed graph. If it's not on the speed graph, switch it to it now. The other mode is
the value graph. We're only going to look
at the speed graph today. I don't want to confuse
you too much by talking about the
difference between these because it's quite complicated and it's quite
difficult to explain. But just know that the speed graph is the one that you need. Make sure you click on
this button down here, which is this little square with a menu thing, edit speed graph. Then you should see this.
These are two lines. One represents a start and
alone represents the end. These squares are our keyframes. Make sure you're on the, let's go to our selection tool. If you're on a different tool, make sure on the selection tool, so that we're selecting these. When you box select them, it will give you these handles
which show its influence. The speed graph shows us how fast something is moving
on a particular frame. You can see these ones at the
left, they're moving fast. These numbers are meaningless. I never really looked
at the numbers 342 percent per second.
It's meaningless. The other one is zero
percent per second, so that's a bit more
easy to understand. This is coming to
a stop at the end. Basically, from
this point onwards, the line is not moving at all. It's moving zero
percent per second, whereas at the beginning
it's moving very fast. It's moving 300
percent per second. This line shows you
that change over time. It's slowing down
towards the end. But don't worry too
much about that, that's technically how it works. What we want to do is we
just want it to go really fast at the start
and then we want to go really slow at the end. We're going to box select these two end keyframes and
then I'm going to hold shift. Make sure your magnet
is on down here. This makes mixed
things snap together. Snap two things. Just make sure that's on
before you do anything. Again, make sure these
two are selected. We're going to drag to
the left these two little points and it should make
change the shape of your graph. I'm doing this while
holding shift by the way, I'm just
going to undo that, undo again, hold shift, and drag these dots to the left. Now we've got really fast at the start and then it goes
really slowly towards the end. It goes up to 1,400
percent a second. That's quick. now if
we press spacebar, now it looks like a
real laser light. Just to be able to loop
this a bit easier if you pick gray bar
below the zoom bar, this is your preview range. If you grab the left-hand side, which we can see here, you
can move it left and right. If you zoom all the way out, you can see the other bar here is the full length
of the timeline. We're just going to pull
this in to zoom in again, so that we're just previewing this little section so that we can see it
over and over again. If you if you press space bar and you're outside
of your preview range, it will just carry on if you're inside your preview
ranges it should loop. Make sure when you're
previewing things, if you just drag the
play head to zero, then press Spacebar,
it'll be fine. Now we can see it
over and over again. That's looking really nice.
It's really nice and simple. That looks very
satisfying, amazing. Hopefully that will make sense. you now have a very snappy line that zips across the screen. Let's quickly recap what
we covered in this lesson. Hopefully, I've successfully
explained what easing is. It might be obvious
to some people, but I think if you're
completely new to animation, it might be a bit of
a tricky concept. I think it was worth spending
a bit of extra time on and we can now apply that
principle to our pop animation. After that, we selected
the end keyframes and added what's called an After
Effects and easy ease. This is just the default
amount of ease that slows the movement down towards
the selected keyframes. We then looked at the graph
editor to adjust our ease. The aim was to pull out the
default ease so that you get a really fast movement going down to a
very slow movement. This will give it a
really nice snapy pop. Don't worry too much if
you didn't manage to do this and it was
a bit confusing, you can just add the default ease and that would
be totally fine. But I think if you put this extra effort in
and you did manage to follow me, hopefully
it will pay off. Great. The next
thing we need to do is make an entire ring of lines. There's a really handy tool inside shape players
to help us do this. In the next lesson, I'm going to be taking
you through how to set that up.
I'll see you there.
9. Adding the Repeater: Finishing the Pop: The last thing we
need to do to finish our pop animation is repeat
the motion in a circle. There's a really
handy tool inside shape layers that lets you do this exact thing and it's appropriately called a repeater. Let's add that now. But we've
only got one line and we want an entire circle of lines. To do that, we're
going to need to add another shape
layer property. We're going to go to Add here where we found our
trim paths and click on this [NOISE] and then we're going
to add a repeater. Click on "Repeater"
and that will appear down below
your shape layer. I like to keep everything
inside the shapes, so out of just
practice I'm going to put it below the trim paths. Open that up, and then we've
got some more options here. This allows you to
copy whatever is above it and you can move the copies. Let's move forward a little bit so we can actually see our line and you can see maybe it's
doing something here. We've got three copies
at the moment, 1,2,3. If you roll down the transform
in the repeater here. Let me just make sure
that's not confusing. If I close everything, Shape, open the repeater and then open the transform
inside the repeater. Transform repeater,
you don't want the transform shape or the
transform at the bottom. You want to transform
repeater, open that up. You can see here it's moving
100 in the x dimension. For all positions, unless you're working in
3D, it's x and y, and x is horizontal
and y is vertical. We want those to be
actually both be zero. This is like the default
repeater offset so just make that 100,
0 in position. Now they're just three on top of each other that's why you
can only see one again. But what we want is rotation. We want to rotate our
copies all around. We want it to just make
a complete circle. We might need to do a
little bit of maths. You basically need to
choose how many you want and then divide
that number by 360. I hope everybody remembers their middle school mathematics. I think I'm going to make eight, so I'm going to type in eight. I'm not going to get the
calculator out because there is a very handy
thing in After Effects, you can actually do maths
inside these little boxes. I'm going to click
on the 22 here, which I've randomly scrolled
to and I'm going to type in 360 divided by 845 degrees. Maybe some of you who are better at math than me knew
that off by heart. [LAUGHTER] But I find
this really handy. You can type any
number in there so let's say we wanted 50 copies. I go to 360 divided by
50 and there you go. You got a perfect circle then. [NOISE] Maybe you want
something like that, but I'm going to go
for a nice eight, so it's 360 divided by 8. There we go. Now I'm going
to hit Play on that. There we go. That's
the pop done. Amazing, well done
for getting this far. That's definitely the hard
bit over with and hopefully you've got some nice pop animation that's
similar to mine. Let's have a quick recap of what we went through
in this lesson. After the animation was done, I then took you through adding another special property to the shape layer
called a repeater, which makes it so
that you can repeat the same shape over
and over again. If you did it around the
rotation axis in the middle, then you should have
a ring of pops now. I then showed you how you can do basic mathematics inside
number properties, inside After Effects. This works on any property
where there is a number. You can just click on the number in After Effects and you can do a bit of math in there to
give you the correct result. We then applied that
to repeater circle. I wanted eight repeaters, so I just typed in 360
divided by 8 and that gave us the degree of separation
for each repeated animation. Great, so we're nearly there. The next thing to do
is to use our pop for something and for
that we're going to be going back to our
balloons template and adding it into the animation,
I'll see you there.
10. Adding the Pop to the Balloons aka Compositing: Hello. In this lesson, we're going to be taking our pop animation
that we've done, and we're going to be
adding it to the balloon template that I
showed you earlier. If you haven't
downloaded it yet, then go now to the class
materials section where you can download
BalloonsTEMPLATE.aep. What we're actually doing in this lesson is
called compositing, so that's when you
take multiple assets, whether it's animation,
text, or footage, or whatever it is, then you can combine them into one thing. In our case, it's going to
be the pop animation and the balloon animation
and we're going to composite them
into one thing. Let's get to it. Your project should look something like this. You should have a pop
composition up there and your pop animation shape layer will be inside that composition. Now what we're going
to do is just import my balloons template project. You can import an entire
After Effects project into your current project.
Let's just do that now. So in your class materials you should have a project
named Balloons Template. If you right-click here
in your project window, go to "import file". Go to class materials
and download it if you haven't
done it already. Go to the folder where
you saved it and you should have
BalloonsTEMPLATE.aep, which is an entire
After Effects project. You double-clicked on that
in "Explorer" or "Finder", it would just open
up After Effects. This After Effects project where we're going to import
the entire thing. Click "Import", and then it
should come in as a folder, BalloonsTEMPLATE.aep, and
inside is the entire project. Then the next thing
we're going to do is open that folder
if you haven't already and double-click
on Balloons Template. This should open
up this project. I'm just going to click on this. At the moment, I'm
at 50 percent Zoom, yours might be different. I'm going to do fit up
to 100 percent so that I can resize this window here by dragging on this line that divides the different
sections of After Effects up. I'm just going to pull
this up so that we can see a little bit more of the
composition down here and this just shrinks if you've got it fit
up to 100 percent. Just to have a quick overview
of what we're looking at, this is all the animation that's happening in
the balloon comp. I'm not going to go
into it too much, but explore it at your own pace. If you drag the play head along, you can see the balloons come up and they just pop like that. Hopefully you're not
overwhelmed by this. This is just a few things
that are different happening, the balloons come up and you
can see as they disappear, I'm just turning the layer off here by dragging the layer out points so that they
just turn off at different times for
the three balloons. Then you can see my
mountain layers there and the cloud layers and then there's background
color there, we're not actually
using the clouds. You can turn those
on if you want to, but I'm going
to leave them off. This is super simple all
we're going to do is we're going to drag
the pop composition that we made previously
and we're going to drag it in and the first one is going to go below
layer number four. I want them to go
underneath the balloons, so I'm going to drag
that into here. Now you can see Pop
01 has appeared here and the way
we've animated it, so you've now got
multiple competitions at the top of your
composition window. You can go back to
your pop animation. If you want to go
back to your pop, you can just click on
these tabs here and we've animated the pop right at the beginning of
the composition. The balloons pop
later on completion. Obviously there's a pop
right in the middle here, and as you scroll along the
balloons pop a bit later on. What we need to do is we
need to drag our pop along. You may have your
masks turned off, so we need to turn
those back on. This button here, toggle mask and shape path visibility is, should be on that way you can see what you're clicking on. When you click on something, you can see what it clicking on in the
actual competition. When I click on this one, balloonMAIN01 it's
the middle one. Actually let's do that
one first so we can drag our Pop and just
put it underneath here. It doesn't really matter
where we put this, as long as it's
below the balloons, I just want to be right below the one
that's actually popping, so you know what
you're looking at. I'm going to drag along to where the red balloon pops
this frame here. I'm just going to drag this pop composition to the
point at which it pops. Now the red balloon goes off, and then the pop
animation happens. If we step through
the frames very slowly the balloon disappears, then there's a blank frame and then the first frame
of the animation happens. If you followed me exactly,
you should have this. Doesn't really
matter if you don't, because basically all we need
to do is just do it by eye. Basically I want when the first frame that
there's no balloon, I want to be the first frame of pop so I need to just
drag it back one frame. We go to this frame here, drag it back one frame and
now we should have balloon, then pop on the next frame,
and then it just pops. Also, you might notice that it's not where the balloon is. That's the other thing we
need to do is we need to move this composition so that it's right underneath
the balloon. Because we know that the pop was in the middle
of our composition, so this anchor point here tells us the middle of the
composition, this is the middle. If we go back and turn our
title action safe on again, you can see that that anchor point is
right in the middle. Let's turn that off for now, so we just need to drag this
anchor point lychee with the make sure you've got the
selection tool selected, and make sure you've got
your Pop 01 composition selected and just move it to
the middle of the balloon. Doesn't matter, it
doesn't have to be exact, but just do it by eye and
now when you step through, balloon will pop
and then we've got a nice satisfying graphic
pop, let me play it. Perfect. Now we just need to do the same
for the other two. You can either drag
the Pop here again, or you can just
duplicate this one. To duplicate you do control
D or Command D on a Mac. Click on your Pop and do, I'm using a PC, so I'm
just going to be Control D. I'm going to make two. Now we've got three pops now and I'm going
to drag this one down underneath the balloon 03, and I'm going to drag this one down underneath balloon 02. Then we know that
it's one frame off so I'm going to drag this. This is lining up and there's one frame back and the same. This is lining up with
this but one frame back and then we just need
to get the positions right. Balloon 03 is the blue one so I'm going to click on
the pop that's underneath the balloon 03 and I'm
going to move that to here middle of the blue one I'm going to just check that
works, that's fine. Then I'm going to
scroll ahead to when the yellow one
pops and I'm going to move the one that
makes sure that that's underneath balloon 02, we selected this pop and just move that
to the yellow one. We play that got 1, 2, 3. Perfect. The only other thing
that we might want to do, so this is basically done now. But all these pops
are the same size and then balloons have slight
variation in size. These two are smaller
than the red one. I'm going to leave
the red one as it is, and I'm just going to scale down the pops for the
yellow and blue ones. I'm going to click on the
blue one, go to the pop, click on a layer and press
"S" you'll get scale. The other way to get
that is just to roll it down, roll down the layer, roll down transform
and then you've got anchor point position
scale rotation similar to what we've
got in the shape layers, but this is much simpler
because it's just for a layer, there's no other options
other than transform options and the scale here is what we're looking at,
what we're interested in. If I just scroll along to
where we can see the pop, you can see if you click
and drag on these numbers, you can scale it
down, up and down. I'm going to go with
something about 60 percent. See how that looks. Maybe a bit bigger than 60
percent, maybe 80 percent. Yeah 80 percent looks good, so I'm going to close that. I'm going to open the
one for the yellow one and I think that can be
about 80 percent as well. Let's have a look at that. Yeah, there we go. That's nice. Very nice. We can try
our preview range, so if you want to just test the bit that you're working on, you can move this
two handles here, which is your preview range. Then you can press
"Spacebar" within this range and it will
loop around and around. If you double-click
it, it will pop back to the full length of the
timeline and then make sure you save this control
S. Congratulations, you have now
successfully completed a beautiful popping
balloon animation. Let's quickly recap
the steps we went through to composite
our animation. First, we imported the BalloonsTEMPLATE.aep project into a pop
animation project. I then gave you a very
general overview of how the balloon animation was put together inside
the balloon comp. After that, we dragged our pop comp into
the balloon comp. We then shifted the pop
animation along in the timeline so that the pop starts exactly
when the balloon pops. We then position the pop in the middle of the
balloon so that it looks like it's actually coming from the balloon
when it bursts. Then we repeated the same step for the other two balloons. Finally we scaled the
left and right pops down a little bit to
match the reduced scale of those balloons. Amazing. We've now completed our popping balloon animation, but it's still inside
After Effects. In the next lesson, we're going to be
going through how to export an MP4 of your
animation. I'll see you there.
11. Exporting an MP4: So we're finished, but there's one last important step to do. If you actually want anyone
to see your animation, we're going to have to get
it out of After Effects. For this, we're going to be
rendering our animation as an MP4 using Adobe
Media Encoder. That's actually a
separate program which is installed alongside After Effects, so
you should have it. It's not complicated and
we can launch it all from inside After Effects,
so let's get to it. So we're done with
our animation, the last thing we need to do is export it so you
can show everybody. Otherwise, what's
the point? You don't want to have to open
up After Effects every time you want to show someone something
you've worked on. Let's export this animation. Make sure you've got your
balloons projects selected, balloons template, if that's
the one you want to export. Then you just go up to
Composition up here and we're going to add it to the
Adobe Media Encoder Queue. Just click on ''Composition'' go to add to Adobe
Media Encoder Queue. Just to give you a little bit of background history of what's
going on After Effects. Basically we want
to put an MP4 out. Hopefully you've
heard of an MP4, which is the most common
video format currently. We want that After
Effects use to export MP4s and then
it went through a big long period
where it didn't export MP4s and now it does
export MP4s again. If you're using an
After Effects version, which is in that middle bit
where you can't export MP4, which is probably pretty likely. Because they've only recently
added it and they've taken away. Cut a long story short. Let's use Media Encoder because that should be fine
for everybody. So what would happen? What should have
happened is you should have clicked on composition at Adobe Media Encoder Queue and Adobe Media Encoder should have opened if you didn't
have it open already. Switch to Adobe Media
Encoder if you're not on it. So it should be down here
on your applications bar, or if you're on a Mac,
it'll be also down there. Your balloons template or whatever your
composition is called, should've appeared in
the render queue here. My default is H264,
which is what we want. That's what an MP4 codec is. If it's not that you
can use this drop-down here and make sure
you're on H264. Then the default should be Match Source-High
bitrate but if it's not, click on this drop-down and
do Match Source-High bitrate. Then you just need to choose an export location where
you want to save it. Save, and then you
just need to press this little green play button up here and that will
render your video. Hopefully this won't
take very long. When it's done, it
should say, Status Done here and give you a
little green tick, and your beautiful pop
animation is ready to view. Finally, we can show your
friends, your dad, your grand, and one billion strangers online your beautiful animation
and bask in their praise. It wasn't a long one this, but let's quickly
recap our steps so you can solidify
it in your mind. First, make sure that the composition you
want to render is selected either in the timeline window or in the project window. Then go up to composition
at the very top of the After Effects
window and go down to add to Adobe
Media Encoder Queue. Media Encoder should open, and then with a little
bit of waiting, probably your composition should appear in the render queue. Then make sure you're
outputting an H264, which is the Render
codec for an MP4, and set your output settings to Match Source-High bitrate, and then select the folder
where you want the MP4 to go. After that, you can just press
the green play button at the top right of
Media Encoder window and everything should
start rendering. Amazing, so you've now
finished your animation and you've now outputted
file ready to share. In the next video, I'm
going to be taking you through the other example pop animations that I made that I showed you at the
beginning of this class. Then in the video
after that, I'm going to be sending you some homework so that you can apply your knowledge to
something practical. Make sure you watch
till the end. I just want it to
stick in your minds rather than just watching it, doing following me, and then you've finished.
I'll see you there.
12. Pop Variations Walkthrough: Hey guys. Before I set you the project to go off
and do by yourself, I thought it'd be useful
to take you through the other example
pop animations that I made that are available in the class materials as
a bit of inspiration. Let's open up all the
POPS.AEP project file, which is available to download below. I'll take
you through it now. When you open this up, it should have a folder in
here called Comps. Then I've got 0, 1, 2, 3, 4, 5 balloons and 1, 2, 3, 4, 5 pops. The pops are the
actual pop animations. This is where I'm going
to be taking you through. Balloons 1, 2, 3, 4, 5 is just the same thing
with the pops. Competent. I'm going
to keep this brief because it's more of just an inspiration
thing and you can explore it on your own. But I'm just going to
go through each one and just briefly explain how I
approached the animation. So the number one is
the one that we made. The number two is the
one with sparkles. So this one is actually quite a bit different from
the one that we made. I made this big sparkle shape, which I just made
out of a polystar, which is one of the different
shape types you can make. It didn't take you
through that before. I was just showing you the pen
tool to make shape layers. But you can also use this shape tool to
make shape layers. Then the rectangle,
rounded rectangle, circles, and polygon tool, and a star tool. The polystar is what I used, instead of coming up with
a path in the shape layer, it comes up with a shape. This would be rectangle or ellipse or whatever
you've chosen. I chose the star. The star has all these
different options. So you can determine
the number of points. So you can change the
number of points here. You can do the roundness, which is how I made this inverted diamond shape
now to roundness. You can have a fiddle with that. It's quite fun. The first
frame is this single pop. I'll just hide these things
so we can see it better. Then I just made a
different shape layer for every single star that animates. The big one just shrinks down. Then you get this ring of
flushing stars afterwards. If I press U, select
all my layers, and press U, you can
see the animation. I mean, I guess all of these are there going
to be the same, but I've just arranged
them in a circle. Let's just select one. I've offset them randomly
as well so that you get this random sparkle
variation to the animation. But I'm essentially
animating the scale up and down and
also the position. So the position, if I
bring my guides back, you can see they just go
from the middle outwards. They slow down. I've used an
easing to slow that down. Then they just drift down. The way I've done
the drift down as I've parented all of
these to an unknown. That's another
thing that you can do in After Effects,
which is really powerful. I took all of these
and I made a null, which I won't get into too much, but it's just basically
a nothing layer. It just got positioning
information and I use the parent tool here
just to connect them all. Sorry if I'm going over
this quickly, otherwise, I don't want to get
this to be too bloated. It's going to be
really complicated for me to explain
every little bit. But essentially that's
how I did the drift down. You could have just done it by animating the vertical
position of all of these, but it was much
quicker for me to just do one vertical position. You can see this red box moving down and they all drift
down with that red box. You can do that using
this parenting thing. So you can just select which
one you want it to follow. The layer will just
follow the animation on that one. That's
basically how it works. Pop theory is the circle
that starts off as a circle and then you have another circle inside
that animates inwards. There's a few different
ways of doing that is just figure
out how I did this. Actually, I'll start
with these four lines. The four lines that come out
is the same as pop one only I've to use four of them to
create this target shape. That's the same as pop one. Then the new thing is this
big circle in the middle. I animated that using
the stroke width. That's good, we're doing it. It's just an ellipse path and another shape that
you can select up here using the ellipse tool. I drew a circle, and the circle size, which you can control here
just gets bigger over time. That does our ease out. Then the stroke width goes from really
thick to really thin. It looks, the stroke
width is just so thick, it looks like a circle, and then it gets thinner
as the circle expands. Number four is the sparkles one. This has got a few more
elements going on here. I've got this circle in the
middle that just shrinks, which I think is this layer. That just goes down over
two frames and disappears. This is also pop one again. This is the same as
we've done on pop one. I think I've just made
it a bit smaller. You can solo layers if you
click this button and then you can just see this one layer that I've got selected
by clicking that button. Then if you click it
again, it goes back. It's just for again of
our pop number one. I've actually got two of them. There's another one
around here somewhere. I've named these layers,
apologies for that. This one, Yeah, if you
open up the transform, you can go to
rotation and you can see that I've rotated
it by 45 degrees. That's allowed me to
have to offset in time. Drag this along a little bit so that they don't go
off at the same time. They go off slightly
one after the other. You get this full pattern and then another full pattern on the diagonal, so they're
slightly offset. So it's the same as before. It's eight the same as pop one, but I've offset them. I did that by duplicating
the making one with four, duplicating it, and
rotating it so that I can have eight. But they just got off
at different times. Then I've actually
got smaller ones. So these smaller ones
are also pop one again, but I've made them
again smaller. I've just lined them up
with the ends of the lines. It looks like they come out
from the middle and then each one splits again
into another little pop. And then I've just
offset them again. This is the same technique
just over and over again, but just different sizes, and I've timed them differently. Then you get this
nice fireworks thing. Then pop five is a
different technique. I actually have, we've
got the little bit of the end of pop one.
I'm using pop one. Again, this is a really
good technique because I'm using it lots of times
in these different pops. It's just a really short one. So you get this nice
burst impression. Then this circle, I'm using a completely
different technique to the other circle because
I wanted it to be offset. So there's no way you can
do that with a stroke. The easier way is to have one circle that's
getting bigger. Then you have another circle that's cutting out
the first circle. You can do that using these
Track Matte settings. This might look different
depending on which version of aspects you've got because
they've recently changed this. But essentially what you can
do is you have one circle. So this is a shape
layer one that I've gotten in the
middle with this circle, and then I've got
another circle. You can see that I've
moved it slightly to the top-right and then offset the animation
slightly so that you see the first one first and
then the second one expands afterwards. Then I've used the
track matte so that it cuts out the circle. Then the interesting
thing that I've done with this one is
when I copped it, I then colored the pops to match the balloon color so that
you can see the blue one, the yellow one, and
the red one all have the pop slightly colored. The way I did that
is within effect, we didn't cover any effect
so far in this tutorial, which is ironic considering the name of the program
is After Effects, but we actually just
looked at shape layers. But if you click on a layer and go to this probably closed if you're using the
default After Effects. But if you go to Window at
the top here and go down to Effects Controls.
Underneath Composition. They'll be effects
controls for that layer. It should open this
panel here next to the your project tab will
open it Effects Controls tab. When you open it, it will
look blank like this. The effect that I've used, there's loads of
effects in here. If you've used Photoshop,
these are basically like filters and you go down and there's a whole bunch
of things here that you can probably take
another tutorial to do about the effect that I used is essentially just
called phenol. So you go to Generate, you right-click on
your effects controls to go to Generate and
you click on Fill. And then that will give you, it will just fill that
layer with a color. The default is red.
I'm just going to undo that so that it
goes back to my blue. But essentially you can
either pick the color. I used a slightly
faded blue and then that's how I made all
these a different color. I also actually rotated the pop so they're all slightly
different to each other. Otherwise, they would
all just look identical. But the key to this was
doing the change in this composition rather than
the actual pop composition. Because if you
colored it in here, then you'd go to your balloons and they would
all be the same color. But you could actually use
the fill on top of that. But there's no point. There's no point coloring it in the comp if
you're just going to use a different color
in the balloons color. There you go. That's
a quick overview of how I made these different Pops. I hope that's given you
a bit of inspiration for when you make your own pop. Great. Hopefully,
that's given you a little insight into
what's possible with the pop animations
and also how it changes the feel of the
overall finished animation. When the balloons
pop and disappear, it gives them a
completely different look and vibe when they actually pop. In the next video, I'm
going to be sending you a little bit of homework so that you can apply the
knowledge that you've learned in this class
to something practical. We'll also be doing
a little bit of a wrap-up. I hope
you'll join me there.
13. Class Project and Wrap Up: Congratulations, well done
for completing this class on creating a graphic
pop in After Effects. A massive thank you to everybody who made it
through to this last video. I hope you found it useful. If this is your first
step into After Effects, I wish you the best of
luck going forward. Hopefully you've successfully
made your own pop. Now, you're going to
get your homework. Basically what I want you
to do is make your own pop. I have two separate levels for the class project if you
want to see it like that. Either you can just
make your own pop and apply it to my
balloon animation. But better yet would be to make your own scene with something
that either pops or even appears or whatever
you want it to do as long as it's
something appropriate for these pop line animation
or any other popping, bursting animation
that you can think of. You can either use my
example, pop animations, as inspiration or come up with an entirely new
method of your own. Either way, whatever you make, please post it in the
class projects section. You can post a class
project by clicking the green button that says Create Project below this video. As we're making animations, you'll need to post the video, so the best way to do that is to upload it to something
like YouTube first and then when you go to
the create a project form, you can just paste your
link to the video in there. I'll be grading your pop
animations really harshly, so make sure they're good. If you have any questions or if the class is unclear
in some way, then you can chat in the
discussions amongst yourselves. I'm sure you can help each other out but I'm usually
around in there too. I hope that's all clear. I can't wait to see
what you come up with. Amazing, so I hope you've all found that useful
and I hope it's given you a bit of a leg up into After Effects if you're
just starting out. I hope you've also seen a
little bit of the power of creating animated
graphics with shape layers. If you're looking
for what to do next, I would recommend
my class called, a beginner's guide to creating a hand-drawn look in
Adobe After Effects. I'd say that's the
perfect next step. I've had a little bit of
feedback on that class saying it's more intermediate
then for beginners. But I would say it's a bit more for serious beginners, if
you want to call it that. It's quite tricky getting
those categories, beginner, intermediate,
advanced, because it's quite subjective. But I think this
next class that I'm recommending is going to
give you a good idea. It's how to create a hand-drawn
look in After Effects, but I think it's a
really good way to see the power of animating with shape layers because I go into
a lot more depth, it's a bit longer and we look at some of the more
advanced options as well. But I do go through it step-by-step right
from beginning, so anybody should be
able to follow it. I think it's a good
follow-up to this class. Once again, I'm Russ
Etheridge you can follow me on social
media @russ_ether and don't forget to check out my free content
over my YouTube channel. If you like this class and
you found that useful, or if you've got some feedback, then please leave a review. It's all much appreciated. Thanks again, and I hope to
see you next time [MUSIC].
 Russ Etheridge, Animator, Designer and Director