Transcripts
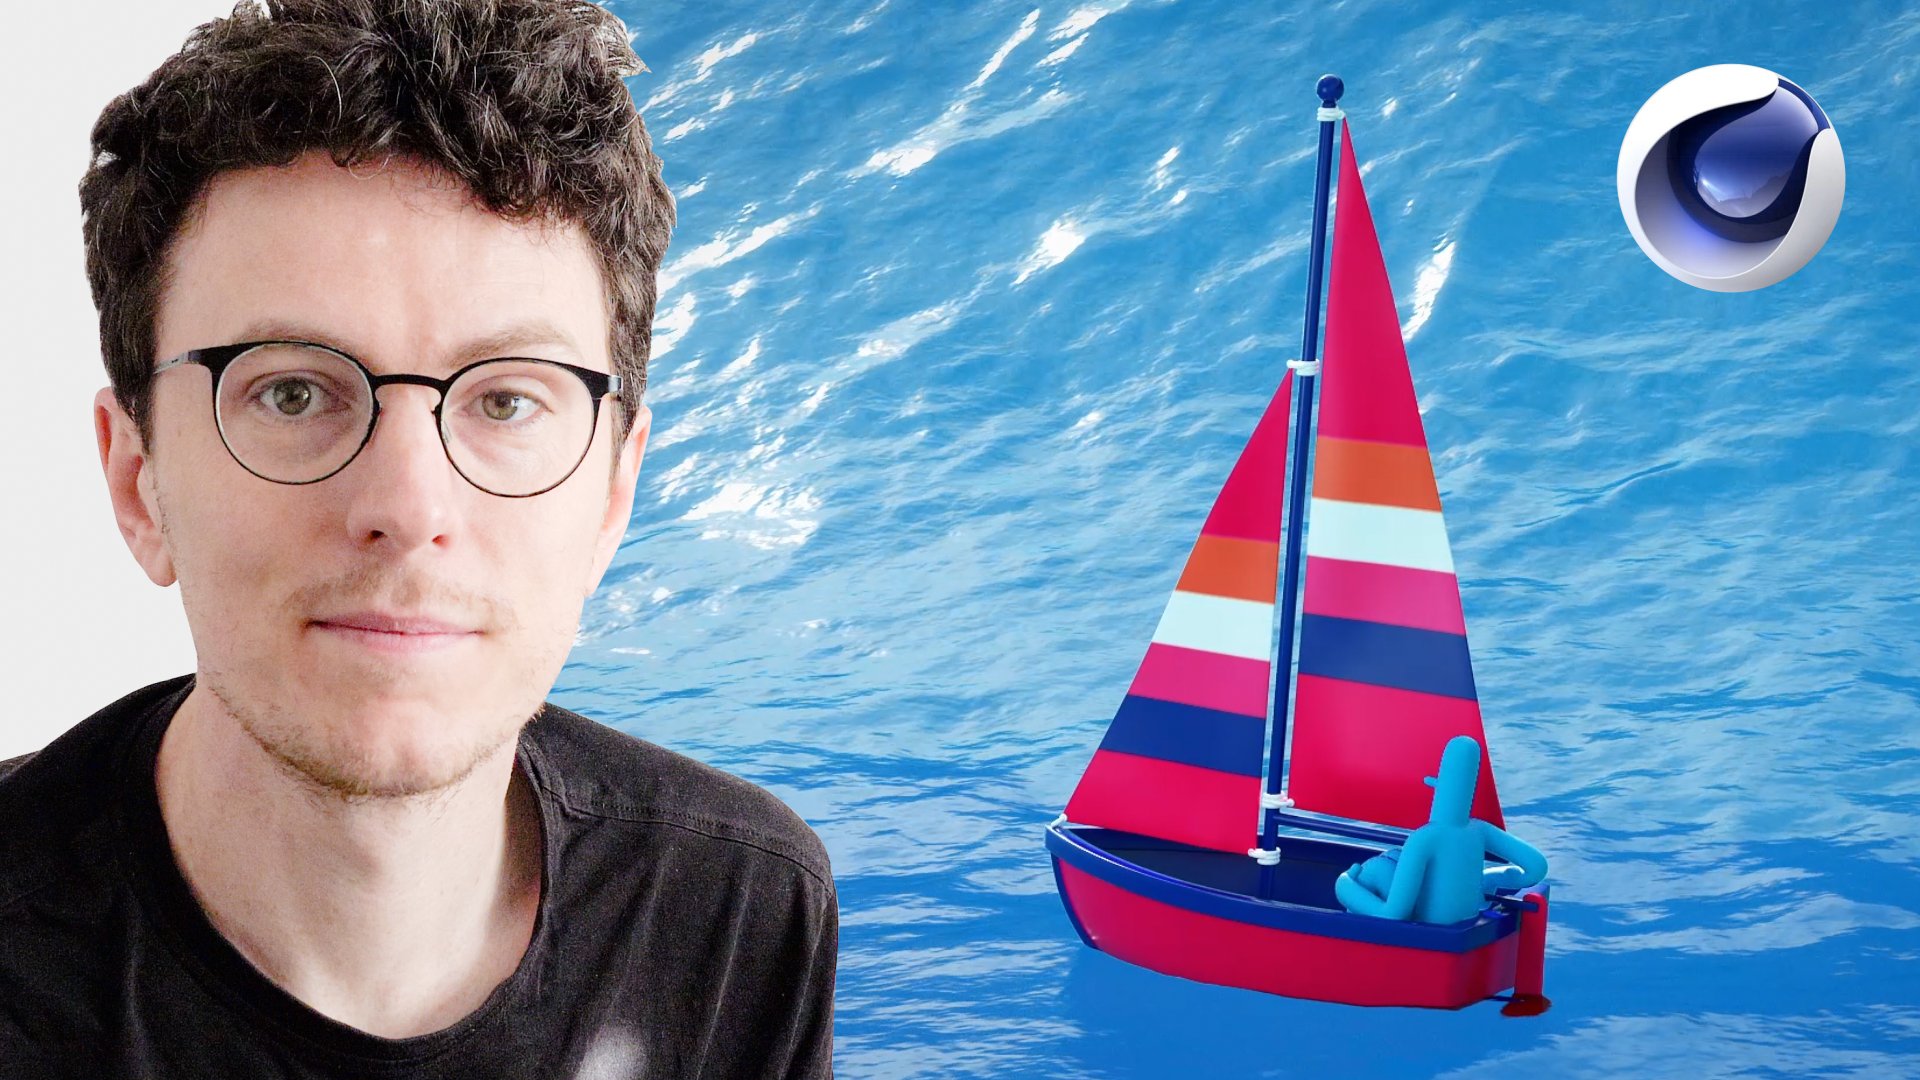
1. Introduction: Rigging bikes is super fun. With a couple of really simple controls, you can get very satisfying movements. Hello, I'm Russ Etheridge and today we're going to rig a bike. This is my second rigging class. In the first-class, we rigged a full character. In this class, we're going to attach that character to a bike. I'm a freelance animator and director based Brighton in the UK. I've worked professionally for over 10 years in animation, producing, visual effects, motion design, 2D and 3D character animation. Rigging is one of those areas that people feel least confident in. It's definitely one of the biggest hurdles when you're trying to get into 3D character animation. It took me a long time to get into it, but once I did, it changed the way I work on pretty much every project. This class is really a follow-up to my previous class, how to read your first character in Cinema 4D. I'd really recommend doing that class first, but if you're here just to learn how to rig a bike, then everything is provided for you in the class materials to help you follow along. Let's quickly go over what we'll be covering. First will be setting up the bike model with basic controls so that we can turn the handlebars, make the wheels spin and turn the main cock. After that, we'll be doing a bit of an intro into how to use MoGraph and Xpresso together, to create a really satisfying bike chain that moves automatically when you spin the main cock. Finally, we'll be taking our character rig that we made in the last class and attaching it to the bike, ready for riding. But don't worry if you haven't taken that class. The character rig is provided for you in the class materials. There will also be a bonus class attached to this video of my animation process for making this bike animation. I'm going to be posting that over on YouTube. Make sure that you're subscribed to me over there. The links are in the description. I hope that once you completed this course, you'll not only be able to rig your own bike for animation, but you'll have gained some extra knowledge to help you with all areas of animation prep. Let's get pedaling.
2. Class Overview: Here we go. Hopefully, you've completed my last class which is the full character rig. If you have, then this one should be a walk in the park. It's the perfect way to demonstrate how rigs can be adapted for different purposes and hopefully, we'll learn some new techniques along the way. To just give you a quick class overview in the first lesson, we're just going to take a quick look at the bike model and then we'll add in some useful animation controllers so that we know which part of the bike we're going to be animating with. Then we're going to make sure it's all ready before bringing in the character rig. Following that, we're going to be dedicating a whole lesson to setting up a bike chain. We're going to be using MoGraph Cloners to clone the bike chain links along a spline and then we're going to be using a bit of Xpresso to link the rotation of the main cog to the spinning of the bike chain. Xpresso is an incredibly powerful tool in rigging and hopefully, it's going to give you a bit of a taste into more advanced rigging techniques. Then we'll just go through and attach the character that we made previously to a bike rig. One final note that I should mention probably in every video is that I'm using R21 of Cinema 4D, which is Version 21. The latest version at this current time as I'm making the video is R25. I know that there's a lot of UI differences on this current version, so hopefully, I'm going to be up to date for the next video. Your buttons may differ. They might be called something else or they might be in a slightly different place. If we could all help each other out, that would be amazing. If you spot a difference, please leave a little note inside the Skillshare play bar. That would be perfect because anybody watching through, we'll be able to just see there's a difference here and somebody's already spotted it. That'll be amazing, power to the community. Also, like I said before, there's a bonus video of my animation process for the demonstration video that you've seen at the beginning. That's going to be over on my YouTube channel. Make sure you're subscribed over there if you want to see extra content like that. With our plan all nice and clear, let's get cracking. In the next video, we're going to be looking at and prepping our bike model. I'll see you there.
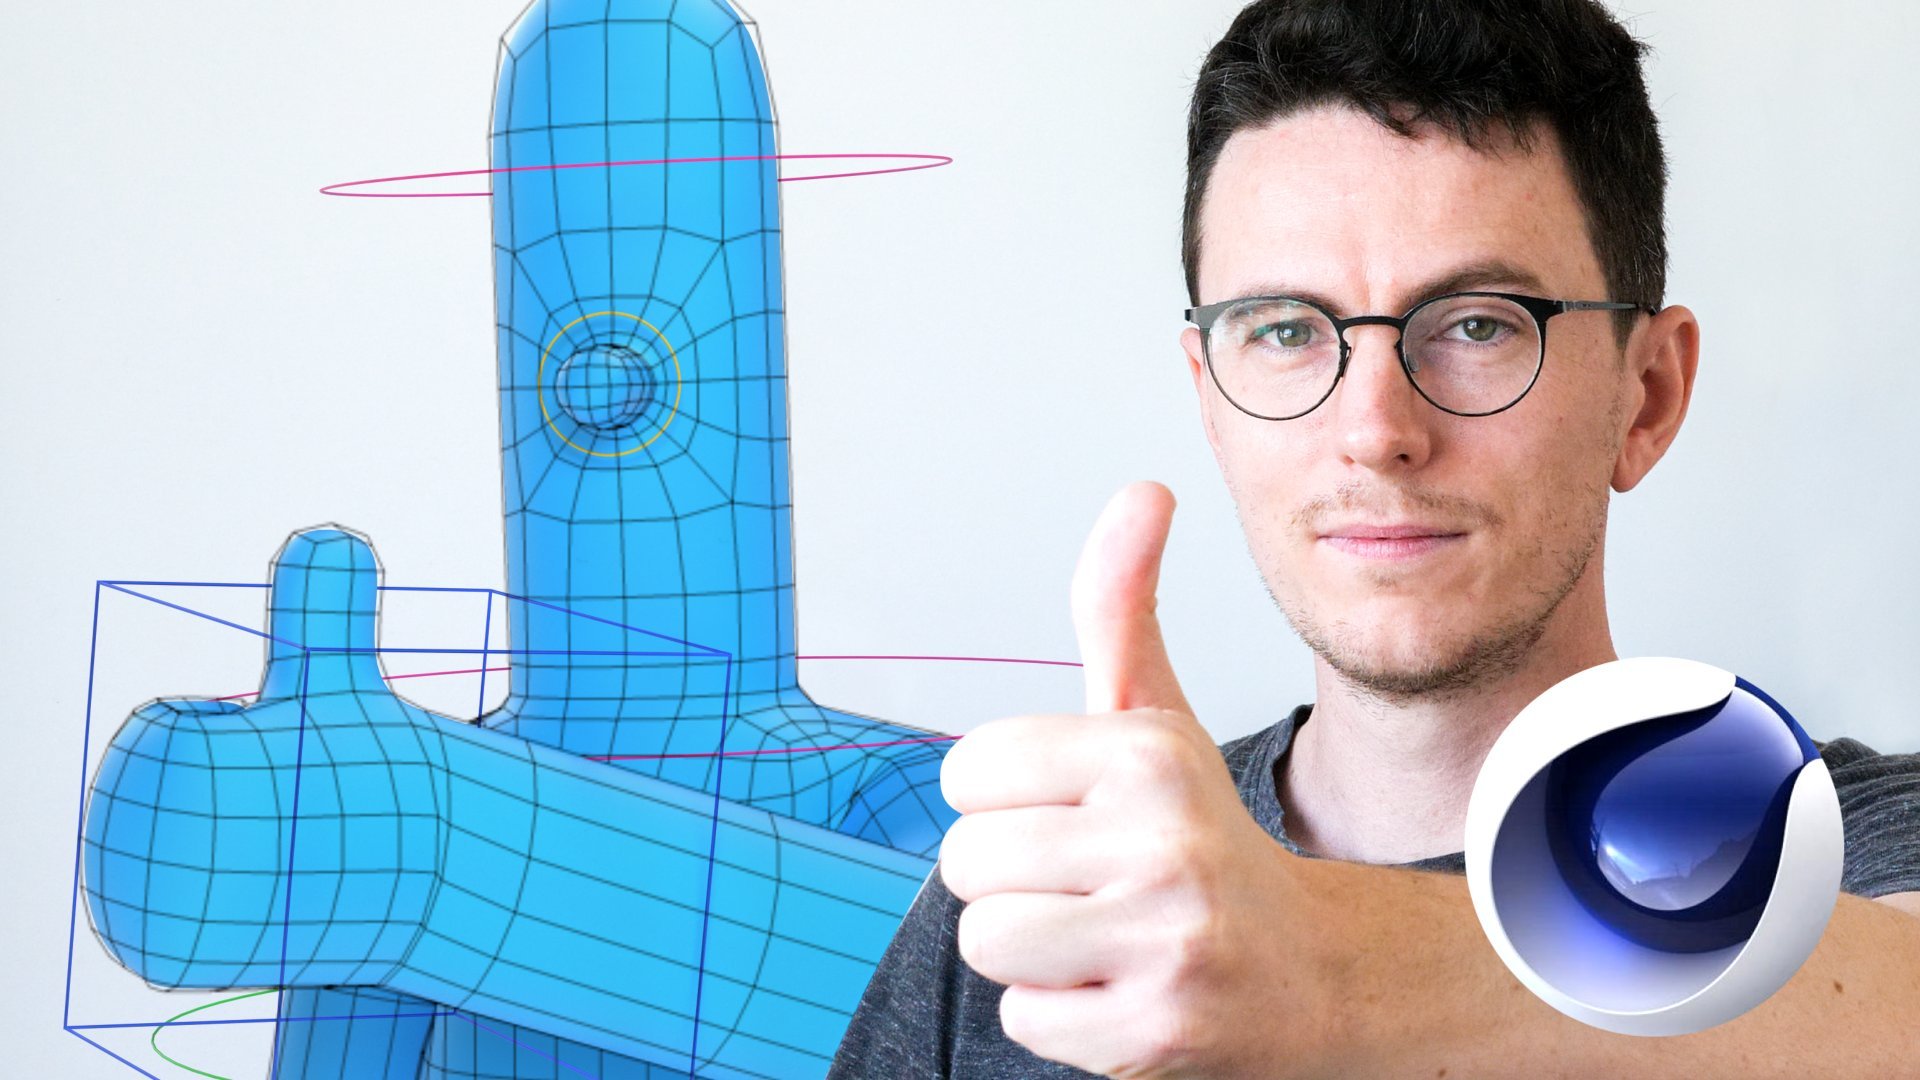
3. Bike Rig Basics and Prepare Controllers: This lesson is going to be pretty straightforward if you're already a bit familiar with Cinema 4D or if you've been taking my previous classes. We're going to be taking a quick look at the bike model. I'm going to give you a bit of an overview of how I modeled it, and how it's structured, and how I prepped it for ready for animation. Then we're going to be adding some animation nulls so that we know which parts of the bike we're going to be animating with. Make sure you've downloaded the bikemodel.c4d project file from the class materials. Let's open it up and take a look. Great. This is how the bike model should come in when you open it. I have done all the modeling for you. There's some interesting bits here and there. Yeah, just go through at your own pace and have a look at how I've modeled it. It's got some existing structure in there that I haven't just put all the objects next to each other on the object manager, it's not a big mess, I've actually tidied up a little bit. But I'm assuming if you've already done my first rigging class, then you should be able to do at least that by yourself. I won't be going through that. Let's just open up the now and I'll just do a little bit of a tour of the bike so that you know where things are, what I've done already. If you open up bike master, you should have a bike in there, and then inside bike is two nulls, one is the pedal cog controller, which we'll get to later. But this will essentially be where the rotation of the pedals is animated. At the moment, obviously, nothing's right there, we think is just inside the controller null. The other one is bike main where the rest of the main part of the bike is. If you open up pedal cog, you can just see in here, we've got two pedals, the crank and the middle cog. It's pretty simple in there. Then inside bike main, we've got pedal cog, which is actually later on we'll be making the chain that goes around these cogs. This now here is where we are going to be doing the chain control. But at the moment it's just got the molds in there, and I've actually, if you can see, I've made a spline in the shape that the chain will follow, and I've put the wheels in correct nulls as well. This is what you'll be animating to make the wheel spin. We got the frame front, handlebars main. This is the main part of the rig that I just wanted to show in this video, this is basically these handlebars turning. There's nothing fancy. It's just inside a null which is aligned with this object in the middle. I'm not going to go through setting that up because it's just null. Then inside there we've got all of the front handlebar stuff. Obviously, you can see that it's separate from the frame because this part will be rotating inside there, so I didn't want that to turn. That's in there. Then we've got the front wheel in there as well, which is in SI null. That will spin like this using this null, seats in the inside null just to be tidy, and then we've just got these. That's pretty much it. That's the tour of the model. It's pretty straightforward. It's just a bunch of objects. For the rest of this video, we'll just go through and set up some of the controllers, and we'll add some colors in here so it's a bit clearer to see. This is easy stuff as well, but I wanted to point out where the controllers will go. This is the main part of the rig, and you can see why I've structured it like this. We'll go through and just add the controller so you know which ones of these nulls we're going to be animating and which ones you don't have to worry about. Let's do that. What we'll do is we'll go through and we'll switch on all these controllers. I've set them up already. I think all I have to do is go through and switch them on. If you're using the same model, it probably will work for you as well because they're already set up, so we just need to go into and turn them on. But if you're working with your own bike model or something like that, you can just follow and match my structure. Then I'll go through and explain how each of these controllers are meant to animate the bike. I think the best way to do this is probably to just click on the top master and go to view, and we'll go to folding, unfold all. That will literally open up every single thing in the bike model. It's a little bit confusing looking at it like this, but I will go down through it from the top and I'll just explain which ones to turn on. The first one we'll need is the bike character master. If we open up object and you go to click on the Now go to Object inside the null properties and go to Star, and then we just need to go to Basic, turn display color to on, and I've made this one orange. Then I can color, I can set things at top here, turn that to display color and that will make the icon change the color as well. Mine are already turned on, yours are probably turned on as well, but if you're making this from scratch, then you'll need to switch those on manually. Next one down is bike. We're going to go to object and I'm going to switch this on to rectangle, and I'm going to go to Basic, and I'm going to put display color on. Just want to point out, you can have this any way you want. These are just the way that I've set them up. But these are all the controllers that we're actually using for animation. I'm just going to go through and turn them on, and then we'll go back through and I'll explain what they do. Next one is the pedal cog controller. This one will be red and this is going to be also be a star because it's nice and clear on the cog there, and it also looks like a cog. Then if we just scroll down a little bit and we go to handlebars and the bars main, and this is going to be a sphere and we'll switch the color on them, that will be green. Yeah, this is called handlebars control. I think this is an old one, so we don't necessarily need that one. Yeah, we don't need handlebars controller. Then, okay, that's basically it. Let's just go and go to folding, fold all, so it would collapse this back in, and then everything inside will collapse as well. I'll just go through and show you what these do. The bike character master will be just a big container. If you are moving the entire rig, it will move everything. The bike character master will also eventually contain the character. That's why I call it bike character master. Then inside that is the bike master, I'm just going to call this bike. This bike controller will control the rocking backwards and forwards this way of the bike, so the character as it rides the bike will be rocking the bike back and forth like this. Bikes don't really tend to do this and also they don't do this and this unless you're jumping through the air, I suppose, but you can probably not do that. I mean, you won't be animating any of these with this null. If the character was doing a jump through the air, then you'd probably animate it using the pipe character master. Now, potentially, the pedal cog controller will be turning these cogs. We'll get to this. This will be a separate video. It will be a separate video where we break the pedals and the chain, but for the moment it just turns the middle cog and everything inside it. Then finally obviously, handlebars main rotates this, so that's nice and clear to see. The character's hands would be attached to these handles and then when you turn this, the hands will move with it. It's quite an interesting animation setup because a lot of the characters actually controlled via parts of the bike, which I guess is a bit counter-intuitive because in your head, you think the character's hands will turn the handlebars. But if you think about how the character's hands normally animate, you have two controllers and you don't want to be animating the character's hands in a curve to match the rotation of this. You don't want to attach this to the hands, which obviously you control a bike like that in real life, but it's much easier if you think about it to control both character's hands via the handlebars like this. Same thing for the legs. The character's feet will actually be attached to these pedals. Then to make the character's legs turn the pedals, you'd just be spinning this round and round and round. Great, so that's all looking really good. We now have a few handy controllers for the main movements that the bike is going to make when animating. Let's quickly recap what we covered in this lesson. We opened up the bike model that I previously made and had a good rummage around. I took you through the main parts of the bike model and showed you the nulls, which are going to be important for animation. I also talked about how I grouped things within the structure so that it makes sense. We then went through and made nice visible controllers so that it's clear which nulls we should be animating with. Great. In the next video, we're going to dedicate a whole lesson to setting up a really satisfying bike chain. I'll see you there.
4. Bike Chain Rig with Xpresso & Mograph: Hello. The bike is pretty much ready to receive the character. One detail which would be nice to add is a functioning bike chain, or at least visually functioning, that happens automatically when we spin the main cog of the bike. This is going to be really fun. It's a very simple setup, but it's going to be pretty clever. We'll be using a bit of XPresso and we're going to combine it with a MoGraph Cloner so that it spins automatically when we turn the main cog of the bike. XPresso is where everything gets really exciting because the possibilities are pretty much endless. If you don't know what it is, it's basically a node-based programming tool. You don't need to do any coding or anything. It's just drag and drop, and things come in as nodes, which are these little boxes with different properties and you link them together. If you're familiar with after-effects expressions, this is the Cinema 4D equivalent, and in my opinion, it's a lot better and easier to use. Don't worry, it's not going to be too complicated or anything, we're just going to be doing something simple. It's going to be using probably about three nodes, something like that. But hopefully, this is going to show you the power of XPresso. For this lesson, you're going to need the chain link models. If you go into the class materials and download BikeChainLinks.c4d, you should be good to go. Let's switch over to Cinema 4D and start setting this up. Great. We have the simple part of the bike rigs set up, pedals turning, got the wheels turning, got the handlebars turning, everything in a nice structure. That's good. We're missing a bike chain. Currently this bike would just not work at all. It would be a really sad failure. It's definitely going to need a chain and I'll show you how to do that. We're going use a little bit of XPresso and we're going to use some MoGraph, as in like a MoGraph Cloner. We're going to clone the chain pieces onto this spline that I've already got there modeled for you. It's just a regular spline. If we open up Bike.main, we've got the chain path. Bike.main, pedalCog null, and there should be a chain path in there that I've already modeled for you. It doesn't really matter how this is structured. As long as it's in that shape, it doesn't have to move or animate anything, it just sits there, so that's fine. Go over to your chain pieces. You should have downloaded that already from the class materials. In that file, you should have two chain pieces. We've got chain link even and chain link odd. This is just a really simple model. This is pretty much the structure of real chains. They fit together like this in reality. This odd one is the linking point and the even ones is the only ones you really see. I just quite liked how this went together and in real life, so they duplicate up like that, I would say fairly realistic looking bike chain as you go along. This would stand up very well given the right material and that thing if you're making something photo-realistic. We don't need to align these. Let's just leave both objects in the middle of the scene for now, the cloner will do the positioning. We just need to basically to give to the cloner. Copy this, Control C or Apple C. Then we go to Window and change back to wherever your bike is, and then hit "Paste, Control V". They're in the middle there. Then we need to add a cloner. If you don't have this layout here, you can go to MoGraph tab at the top and hit "Cloner". In here, the MoGraph stuff is also in this handy-quick menu there. Now we've got a cloner. Drop both chain links into the cloner and now we should be able to instance this, so this probably going really high. We don't need to play with this area is working, if it's on linear mode, if you make it one. This is how far the cloner is making its clones apart from each other. We've got two clones at the moment. If we increase the count, you can see them going up there and then if I twiddle this y-axis, then you can see it working there. It probably would make more sense if I twiddle the z-axis because then it will go off in the correct direction. But even this we don't need, so we're not going to use linear mode. This doesn't make any sense really for us. You can just ignore these options. We're going to go to Object mode. We're going to put our chain path with your cloner selectors and object mode. There's a box in here expecting an object. We put in chain path, the chain path spline and you can see, is we've now got some chain pieces around there. That's all good, but it's still not looking quite right. I didn't want distribution mode, we want yet, but let's just increase this and see how it's looking. That's probably going to work and be 45. Let me know that obviously that's facing the wrong direction. Really handy tip with this, I've already made it. You might have this in here, maybe you don't, but there's a chain path instance which is hidden. If I unhide that, you can see that there's another spline just along the x-axis a little bit. This is a instance of the spline object that we've already got there, just to show you how to make that, if I delete that instance for a moment. Click on the "Chain Path" and go to up here where the subdivision surfaces, you can click on an instance object. It will just make an instance of whatever you've got selected. In this case, it was our chain path spline. It will just put it in exactly the same place with exactly the same access point. If you just drag this instance out this way a little bit, this is a really handy way to make. If you're attaching stuff to splines, things that attach to splines need to know which way they're pointing and really common way of doing that is with a rail spline. If you go back to your cloner and drop in the chain path instance into the rail, it now points all the clones at the rail. This is just to make sure there's no flipping going on, it's just two-dimensional cloning. Then all we have to do is rotate the clones into the correct orientation. If we go into Transform in the Cloner, we can rotate B and we can just rotate at 90 degrees. These are actually looking a bit big to me, so we can scale them down a little bit. We can do that inside the objects as well. If we put in a scale of 0.5, so that should be half the size, and then we need to add a few more. Let me just increase the count until the chains line up with each other. That's looking really nice. Then that rail is a little bit distracting, so I'm just going to hide that for a moment. Before I hide that, I just want to show you what's really good about having the instance rather than just duplicating the path. If you just duplicated the path and then you decided you wanted to change the shape of the path, you wanted to maybe tweak it so that it went up or maybe you are adding gears down here and you needed it to go down like that, then as you can see when I move the main spline, the rail spline changes shape as well. That's just really good. If you're animating a spline or if you're doing anything, you don't have to do the animation and then duplicate it and use it as a rail. You can just use an instance and it will automatically update. Let's just hide that for a moment because we don't need to see it. Let's drop the cloner and I'm going to rename this to chain cloner. Let's drop that into this pedalCog null as well because this is where all our chain stuff is going to be. Hopefully you can see where I'm going with this because there's actually a really handy inside the chain cloner object. You can change the offset, and the offset turns the chain or spins the clone around splines. We can just use this to animate chain spinning around and round. But what we don't want to be doing is animating this cog and then having to manually animate this separately because you're never going to be able to get it looking right and you're going to be animating this in loads of different ways, tweaking it backwards or forwards. Then thankfully there's a way around this a much easier way and automatic way of linking these things together. We're going to use a bit of XPresso. This is totally necessary because we couldn't put the chain inside the pedal cog because this would happen. This is just completely wrong. That's not going to work. We need a way to link the rotation of this to somehow control the offset inside the cloner. We need to link a rotation of completely separate objects to some random parameter inside a cloner object, and the way we do this is with XPresso. It doesn't really matter where an XPresso tag goes, but just make it. I'm going to make it on top of the chain cloner just because that's what we're controlling, so we know that that's got something to do with that. If we put it on some null somewhere, it won't make any sense when you try and figure out how to use this scene again in six months time. When you make an XPresso tag, a little editor comes up. This is an XPresso editor is called node-based programming. You don't have to do any coding. You just bring in nodes and you connect them up with in and out ports. You connect things with lines and the things that you connect has a flow. It flows from left to right. You control different things like that and you can link things together and you can do all logic stuff. It's exactly like programming, but it's all visual. Creative people tend to be visual people. This is very handy for creative people basically and I really like it. The way we get the rotation of the pedalCog controller to control the offset inside the cloner is, obviously need both those objects in here, so you can literally grab the null and drop it into the expression editor and now we've got a pedalCog controller node, and we need the cloner as well, so we're going to drop that in here. Now I've got chain cloner in there as well. Just a quick overview here. This is your editing plane. I'm not going to go into these things over here, but basically the zoo action nodes that you can bring in and you can do all different stuff. There's some presets and Amish I've never used. Then the blue, if you click on these blue and red corners, it gives you options for these nodes. The blue ones are all input ports and the red ones are all output ports. The reason I've put the know on the left and the cloner on the right is because we're going to output the rotation of the pedalCog and we're going to input it into the offset of the chain cloner. We need to make sure which rotation we're actually changing. I'll just move this up the way for a second. We want the P rotation and something that's zero. We want the P rotation because that's what we're going to be actually animating null node. Click on red could have basic properties on a node basic properties. Coordinates, rotation, rotation P. There we go. Now we've got an output node. If you click on this, little dark next rotation you can see that it wants to connect somewhere. We need to give it something to connect to. We could try it for a moment. If you click on sheet, drag it over to the blue corner, this will bring up all the input options. We want the object properties, and we want the object properties and inside we wanted offset. This is what happens when you plug the rotation directly into the offset. We're going to have to do something a little bit more complicated than this. There is only one extra node but, at the moment this is not going to work. Probably we'll see what it does. Yeah, so it works. Definitely works. It's changing the percentage. What it does is it just maps the rotation in degrees and it has some incentive value for that and it's converting it to a percentage along the way somehow, but it's a bit random. When I'm rotating this way now, it looks like it's rotating the wrong way. It moves when it moves, but it's not moving correctly basically is what I'm saying. It's unplugged that, what we need is we need a way to adapt these values into the percentage value inside offset. We do that using a thing called a range mapper. We want to map the range of these values onto the range of these values. If you just right-click anywhere inside this express own Window, you'll get a load of new null. How to make a new nodes or got a new node and we go to express. These are all the standard nodes and we want to go to calculate and we want a range mapper. I'll just put this in the middle between these two. Now we can just go ahead and plug the rotation into the input of the range mapper and we can plug the output into the offset of the cloner. Now if you click on the range mapper, we've got some options over here in the attributes menu. On the infrared range we want degree, because rotations are in degrees. On the output we want percent. If you look down below in parameter, it's now made with given SI units. The way this works is it takes the input values of whatever you're putting into it, and it just maps them to the output values. At the moment when our rotation of the null equals zero, the output percentage will be zero. When the rotation of the null is at 360 degrees, the output value will be 100 percent. Full rotation of the null is now equaling basically a full rotation of the cog chain. We're not going to do this 100 percent mathematically correct. You can go in and do that if you want. It doesn't bother me that these don't 100 percent mechanically work, because no one's going to be looking at it as far as I'm concerned. We need to make it a bit closer, but it doesn't need to be 100 accurate is what I'm saying. To change this, obviously, so the chain's going too quickly. When we reach 360 degrees, we don't want it to be at 100 percent, because a full rotation of the cog is not equaling a full rotation of the chain. We could start off by trying 50. That is looking pretty close to me. I think that sells. We could probably just leave it at that, I think. What I'm looking at is this corner here. Is this thing rotating at the same speed as this corner? Because if it's slipping, it slips a little bit. Yes, it's still going a little bit fast. So we could make it a little bit more accurate. I would be happy with that accuracy, but just because this is a tutorial, again, trying to get as close as possible, I think everybody would be more satisfied if it was a bit closer. I think that's fine, 40 percent, that looks pretty good. We're basically done. We can close the XPresso window now, the chain is working fine, very satisfying now. So when you rotate the cog, the chain goes around and around. The only thing is we need to make the back cog rotate. I'm not going to make it so that the chain actually rotates the wheel. We could very easily do that. The only thing is when it comes to animating the way the character's legs are driving these pedals, I don't want that to control the actual wheel. Because if we made it do that, the wheel would be going, stop and start. What we're animating here might not be a constant speed. I want the wheel to be connecting with the ground. That's more important. I want the ground to be driving the wheel. Or like, the wheel animation needs to look accurate with the speed that the character's going. This is the way I think is going to make the most sense visually. What we really need to do is the same thing again on this back cog. We need to find our BackCog, yes, and PedalCog, BackCog is where the back one is. We just need to do the same again. So we need to make another XPresso node. You can actually do this in one XPresso node, but I think it makes more sense to have a separate one, just to keep it simpler. You know when you go into back cog, you know it's connected to some XPresso, and the XPresso node is right there, rather than something random placed in the project. Oh, yeah, I just want to quickly point out. If you go to Cloner, you can actually see where things are connected with XPresso. If you go to the Offset down here, if you look down here, it's got a square animation thing. It's just telling you that XPresso is controlling that value. If we go to our PedalCogCONTROLLER coordinates, it's got a little output thing there. Output of zero if you're animating this because it's outputting, it's not being controlled by anything else, so it's fine. It's just a little visual thing to tell you what's going on with this value. Great. Let's go to our BackCog and the XPresso. To bring up the XPresso thing, this is maybe not the most obvious thing that you double-click on this tag to bring up the XPresso window. We basically want the same thing, again, we want the PedalCogCONTROLLER, and we want the coordinates rotation, p-rotation. We want a New Node, XPresso, Calculate, Range Mapper, again, and we want the BackCog node and just check the access that we want on there, and we want the h-axis. Go to Coordinates, Rotation, Rotation H, and we can plug these into each other. This is going to be a bit more straightforward because they're both degrees. If we do input range for that degree and output range to degree, where it's not going to be one-to-one, because this is a smaller cog. Let's just have a look what it's doing in the moment. It's not looking too bad, it's just turning too slowly, because it's a small cog. So the small cog needs to turn faster. Probably going to be about double. You can actually in here you can do calculations. So you don't have to do it in your head. I mean, doubling is pretty straightforward calculation. For some people, not me. So it's 360 you can do times two, and it will give you the correct figure. That's looking pretty good to me. I mean, you're definitely never going to know someone because a small cog is less noticeable than the front cog. Pretty much 100 percent. That's fine. Oh, yeah, that's a really key point as well. If this spline is not on uniform, the distribution of the chain clones might not be accurate. If I made this natural, yeah, the spacing between these is not even, because it puts more subdivisions around the curves when you're on natural mode, so you want to definitely to be on uniform, and then we go slightly with, we got a doubling up number of clones on 91. For some reason we were getting one doubling up. Yeah, I guess you can fiddle with the settings, to fix the jiggling of the chain links. If you put this number, I can just double it. It's not really going to slow things down very much. It just makes these positions more accurate, and that's fine. It's probably never going to be perfect going a really really tight corner like that. Basically, this is obviously made up of loads of lines. So the subdivisions make a smoother curve. Great. We're basically done with that. We can just close that. When we come to animate the legs sending the pedals, we don't even have to think about this whole system, it's just going to work automatically. So it's working great. Amazing. Sometimes it's the simplest details which really make an animation. I hope I've sold you on the power of XPresso as well. Let's have a quick recap of what we covered in this lesson. First we copied our chain link models into our bike scene. We then put those chain links into a MoGraph Cloner and set the Cloner to Object mode. We then located our chain spline and dropped it into the object reference box inside the Cloner. Remember to set your spline to uniform in the intermediate points box. This way in Cinema 4Ds knows to space your clones evenly along the spline. I then went through a really useful way of creating spline rails using Instance Objects. If you create an instance of the main spline rather than just copying it, it makes it really handy because then it's dynamic. If you change the main spline and the instance one will change in the same way. Rails are really useful ways of orienting objects that are attached to the splines so that they're oriented in the correct way. Sometimes Cinema 4D gets confused and things will flip over halfway through that thing. Rails are really good to use in terms of making sure that your things are aligned correctly and instances of those splines are really useful to use as the rails. With the chain cloned correctly on the spine, we then made an espresso tag and dropped in our cog controller and cloner object into the XPresso box, so that we can link them together. We then made a Range Mapper node, so that we could convert the values that are coming from the main cog controller, which is in degrees, and convert them into a percentage for the offset inside the cloner object that is used to drive the rotation of the clones, turning around the spine. Finally, we use the same XPresso technique to make sure that the back cog is turning correctly with the chain as well. Great. So that's our bike all setup. I'm ready to go. In the next lesson, we're going to be attaching the character to the bike. I'll see you there.
5. Attaching Character to Bike and Finalise Rig: We're finally ready to put our character on the bike. For this, we're going to need our character rig. If you followed me from the beginning of this journey, go and dig up your character now, if not, then I've provided a full character rig in the class materials. If you go to FullCharacterRig.c4d, you should be ready to go. Just a quick heads up, I did this lesson in two takes, so there might be some minor differences between what I'm showing you on screen and what you've got in your own c4d project. If you get confused, please send me a message. I've really tried my best to make it make sense or if you figure out the problem and you think you can help others please pen a note in Skillshare timeline. With that, let's get to it. I think that's pretty much it. We're ready to bring the character in. Let's go over to the full character rig and just copy the character master now and then we'll pop this into bike rig. We've got our bike there and we've got a character here. They should be the right size, hopefully, if everything has gone to plan. Actually looks like we probably will have to scale it. I forgot that I didn't actually do it very accurately, so that's fine. We can just scan the bike, I don't think that's going to be a problem. I'm going to turn this bike no color on, maybe red. Obviously, our bike's facing the wrong way. That's fine. We're going to turn the bike around. The one thing I do know about bikes is that you should set the seat to be at the same level as your hips. The bike needs to be a little bit smaller and the seat needs to be lowered a little bit. Let's try doing that. If I click on my bike and click on object mode, to hold down the neck on object mode and pressing "T" for scale. I'm going to scale that bike down, maybe to around there. I don't want it to get too small, I want to stay fairly large, so maybe we can keep around there. Let's move this seat down a bit. We just move it down around there. The main distance we worried about is we want that leg to be more or less straight, slightly bent when the pedal is at the bottom. If we just roughly put the characters high up to where he'll be sitting on the seat, and then we can rotate the cog around. That's fine. His knees will be slightly bent at the bottom there. I think I'll move the character master up to here. Let's just plot the characters bottom on the seat and we'll see slightly off-center. Must subtract the bike stand. Great. Now we need to pose the character really, the leg controllers needs to go inside the pedal cog controller. I think maybe we'll put the bike above the character because all the animation is going to be inside the bike. I'm going to jump in here and quickly recap the character rig. Full disclosure, I did this in to take so apologies if there are some minor differences, I think in the tutorial that you're currently watching, there's no bike character master knoll, there's just the bike now. If you're scaling stuff to make things match, make sure you're scaling well. If you can scale either one of them, make sure you're not scaling the character inside or whatever. I'm scaling the bike knoll and the bike character master is got a scale of one. Apologies if there's some minor differences, but let's look inside the character master. We built this in my last class. Hopefully, you've completed that class. If not, then that's fine. You should be able to complete this class without having done the full reading class. But I would really recommend it. If you're learning to rig a bike, I would definitely recommend learn to rig your character as well because obviously you're not going to be able to put a character that's not rigged on top of a bike is not going to work. But just as a refresher, let's open up the character master. Inside the master now we've got character rignal and we've also got character mesh knoll in the mesh that's where were the geometry is, and inside the rig is where all the controllers are. The main ones you need to be focusing on are these two, they should be at the top of your character rig hierarchy. Like I said, this is done in two takes. I think these poles will be next to the ankle joints. You'll see I'll move them initially and then I unmove them. But just give you a heads up that there inside the hip now, possibly in the one that you've got and the other ones we're going to move. If you're account is final. Inside here will be the risk controls which also be using to attach to the handlebars. There you go. I would maybe take a minute to try out these other controllers just to see what they do. If you're going to be animating yourself, then you know how to animate this character, but it just play with everything that's got a color on it, is something that you can control, so go for it. Before we put the feet up on the pedals, we need to prepare them a little bit. I'm going to open up the petal cog controller. At the moment, if I rotate this, the pedals are inside there. We're going to take these pedals, these two, and move them outside the pedal cog controller. I'm going to put the protocol control above. If I collapse that, we can see pedal cog controller inside bike and these two pedals and bike main are outside. When we rotate the pedal cog controller, the pedals don't move. This is because we need to be able to animate these separately. We need to attach them to the cog for position but not rotation. I'm going to put these inside another layer of knoll because we are going to be putting the feet inside with them. This knoll is the container for the pedal geometry. I'm just going to press "Alt G", and I'm going to name this our pedal link. I'm going to do the same for the left one, so "Alt G," and that's going to be L pedal link. All of these need to go into the cog controller. When we move the cog controller, the legs go around. Maybe the poles can stay outside because we don't actually want them spinning around, they'll go crazy. We want them staying on foot. Let's plug the feet on where we need them. Let's move the right foot up to here and over to here, something like that. I guess we just want the pedal in the middle of the foot and the foot in the middle of the pedal. Let's move the pole because this knee would be pointing outwards a little bit. Let's move to the right pole. To something like that. Maybe like maybe like halfway between unnecessary nature scope and more space so the knee never crosses over and then lets do the same on the other foot. We'll move this one to the middle of this pedal, something like that. We'll move the left pole to the similar halfway point there. I think the pedals might be a little bit wide. I'll adjust that later. That's an aesthetic thing. They'll probably be some changes to this for the final animation which you have already seen. There's something we need to fix here and that is, that these feed are locked to the rotation of the pedals, which is something we don't want. This right pedal link and left pedal link knolls. This is actually where the foot controllers need to go. Right ankle joint and the left ankle joint in the left one. We need to link this to the cog controller, but we want them to turn. We want them to take the position of that rotation, but we don't want them to rotate. We want them to take the position if that makes sense to when we turn this around. Well, we don't want it to stay a 100 percent flat. We want to be able to animate them, but we don't want them to take that rotation, so we don't want the feet turning over with them. The way to do that is to make two knolls. You need to make two knolls in the middle of these cranks to make sure these are perfectly in the middle. We need to make a knoll for the left one and we'll make another knoll for the right one, so put that in there and hit PSR 0. We've got the pedal link and we got the L pedal link. We need to drop these nulls with nothing inside them into the pedal cog controller. These two nulls will rotate with that controller, and all we need to do is link these nulls to these nulls, so link the actual nulls that contain the pedals and the feet controllers to these nulls inside the pedal cog controller, but we want it to take the position but not the rotation. The way that we do that with two PSR constraints again, so we'll go to rigging and put constraints. We got some constraint tags on these pedal links, so I switch on PSR. But in PSR, we want the position but not rotation. So it defaults to following the target's position and rotation, but we want rotation off and just position. R pedal link needs the R pedal link null inside there, and left pedal link needs the left pedal link in there. Now if everything is going correctly when we rotate this, our feet should turn, and our feet are staying straight. Obviously, to be able to animate these, because your foot will move backward and forwards when you're actually pedaling. We can just animate that using the B rotation on these pedaling controls. We could set up another null inside, which actually I was going to say that we can just animate the pedaling controller for that. I just want to do a quick recap of what we just went through because it is a little bit complicated, and I just want to make sure everybody is with me. What we did is we separated out these pedals from the pedal cog controller. The pedal geometry, if I move this around, you'll see what I'm talking about. We've separated that from the pedal cog, and then we put those two petals inside their own nulls. We called link nulls, and then we made two more nulls inside the pedal cog controllers. These two nulls up here will turn around with the pedal cog controller so that will spin, and these nulls will give us the position of where we want the pedals. These pedals that are outside that controller, we can then link the position to the nulls that are inside using these two PSR constraints. If I go into the PSR constraint, the R pedal link here is linked inside this PSR constraint here. Maybe we could have named this something slightly different, but it's fine. Then inside each one of these nulls is our foot controller, and also the pedal geometry. When we rotate our pedal link here because the rotation is not linked, it's fine to animate, it will give us the foot angle. That's basically it. I hope you have some kind of layout like this, and I hope this is working for you because this is a really powerful setup for animating a character cycling alike. That's basically done. Our feet are done. All you need to animate for all the leg animation to be taken care of is the B rotation on here and P rotation on the pedal cog controller. Let us now pause the top half of the body. We can grab the hip controller. This is going to be simpler than the feet. We just need to put these hand controllers inside the handlebars pretty much, but let's just get our character most the way there. Otherwise, the hands are going to have to be stretched out. I'm just going to curve him over a bit and turn his head up, so we might need some smoothing there. Maybe he's a bit too curve over. Probably going to be a bit more relaxed, leisurely cycle ride. He's not doing the Tour de France. Basically, we can just free-hand this. We could just drop these and then zero them out, so we can get it perfect, but we don't really need to do that. We could just put them in roughly the right place, so just manipulate the hands to be in the right place here. I'm guessing he'd be gripping it like that. We need to bend these fingers over. We make controllers for the fingers which is something you set and you could do if you are doing a lot of finger animation like hand gestures. You could even set up a system of sliders, which would allow you to, for instance, make fists while controlling just one slider. You only animate one thing, and it controls the whole hand. Normal humans have five fingers rather than just one giant one. Yeah, we need to go into character rig and find our joints, left finger base. I take that round and get mid and grab the left thumb base, covers around a little bit gripping the handlebar more. From here, that looks really nice. We do the same on the right hand. It's really nice. Obviously, if we move the body now like this, the hand still goes with it. Likewise, if I moved the handlebars, the hands don't go with it while I'm in these handlebars. I'll just make this a sphere so that we can see that there's a controller there. Great. We need to grab those hand controllers, and we should probably move the poles because they're looking a bit it too far back to me as well. Let's grab the shoulder polls and just bring them round. Something like that. I guess we can make him a bit more relaxed by bringing these elbows down a little bit. We just grab these two wrists, left and right wrist goals for the IK, and we drag them up and into the handlebars main. So they're just in these handlebars now. When we turn the handlebars, he's actually turning them. Amazing. That's basically it. If we close all of this, we might want to put everything into a new null because you want a null at the top of everything. Because now, you're like, which null am I animating to make the character actually ride the bike along? We need a bike character master null, which we can then put an even bigger display at the bottom. Let's make it something crazy like a star. We are going to make a big star like this, and then we just draw both of those in there. Now when we move this, everything moves along. There we go. I think that's basically it. I'll start animating for my final video. You guys can play around with animation. I'm sure if you've managed to get this far in terms of rigging a bit of animation isn't going to scare you, but well done if you've got here. This is quite a complicated rig. I'm actually really looking forward to animating this. Hold on a sec. One last thing. Now the character is on a bike, there's something glaringly obvious missing, and that's his helmet. Let's switch the helmet back on, and it's in the wrong place. One thing that I didn't do was I rig the helmet to the head. Obviously, I just skinning deformer and bind the helmet to the rig because it's only going to be controlled by the actual head joint, and this is a bit of a quick and dirty method. Probably the smart thing to do is to add a PSR constraint and link it and stuff, but I'm just going to drop the strain in the neck because it's just way simpler. I'm going to make sure it's aligned correctly, so I'm not going to hit "PSR Reset" because I flipped it around too weirdly. I'm just going to hit 90 on there. Y would probably be zero. When we move the helmet controller, it moves along with it. There we go. Safety first, guys. Amazing. Congratulations, you now have a fully animatable character on a bike. Let's quickly recap some of the main steps. First, we brought our character rig into our bike project, and we made sure that they were the same scale. We did that by scaling the bike until the top of the bike seat was level with the character's hip. Interesting though, I think this is how you're supposed to do it in real life too. I'm not a bike expert or anything, but this is how I set up my bike seat, and it seems to work for me. We then rearrange the pedals inside the bike hierarchy so that we could attach them to the bike cog following position but not following its rotation. We attach the petals to the cog using PSR constraints with the scale and rotation turned off. That way, they'll follow the position and obviously not the scale and rotation. We then put the character's feet controllers inside with the pedals so that when we turn the main cog, it looks like the character is actually pedaling the bike. We then post the rest of the character putting his hands on the handlebars, and then we put the hand controllers in with the handlebars controllers so that when we turn the handlebar controller, it looks like the character is actually steering the bike. We then made sure the rest of the character hierarchy is in one master null with the bike hierarchy. That way, we can control them both together. Finally, we put the character's helmet on, a very important safety step. Great. Like I mentioned before, I made a brief bonus video which covers my animation process that goes along with this class, and I've posted that on my YouTube channel. If you're interested in looking at that, then check it out. The link is in the description. In the next video, we'll have a bit of a debrief and wrap things up, so I'll see you there.
6. Class Debrief: Congratulations. Well done for completing this class on how to rig a bike and how to attach a character to it. A massive thank you to everybody who's watched through to this last video. I hope you found it useful and learned a thing or two. Let's take a moment to quickly recap all the main steps that we covered in this class. First, we took a look at the bike model and made sure all the nulls and the hierarchy were set up for animation. We then added some really handy visible controllers, so knew which nulls we're going to be animating with. We then looked at how we can use Mograph and Xpresso to create a really effective and satisfying bike chain to go on our bike rig. After that, we set up the pedals with constraints so that they could easily follow the cog without rotating by themselves. That way, we can animate the rotation on them independently. Finally, we put the character's hand controllers and feet controllers on the handlebars and pedals so that when we animate those parts of the bike, it looks like the character is controlling it. Amazing. I hope you go away with an extra portion of rigging knowledge, and I hope that you're able to see the complex nature of rigging with a bit more clarity. Please post your own results. I'd really like to see anything that you've made, even if it's just screenshots of your finished rig or if you've embellished the rig with some things that I didn't cover in the class, or even if you've managed to animate something, I'd really love to see it. So please, post it in the Project section of the Skillshare class. Please let me know in the discussions if I've missed anything or something's not clear. I'm always on there, and I'm happy to help. Once again, I'm Russ Etheridge. You can follow me on social media @russ_ether. I'm on Twitter and Instagram. Also, don't forget to check out my new YouTube channel, which I've mentioned a few times. The links are in the description. I'll be posting all kinds of stuff over there, and including the bonus video that goes along with this class where I cover my animation process. Thanks again, and I hope to see you next time.
 Russ Etheridge, Animator, Designer and Director