Transcripts
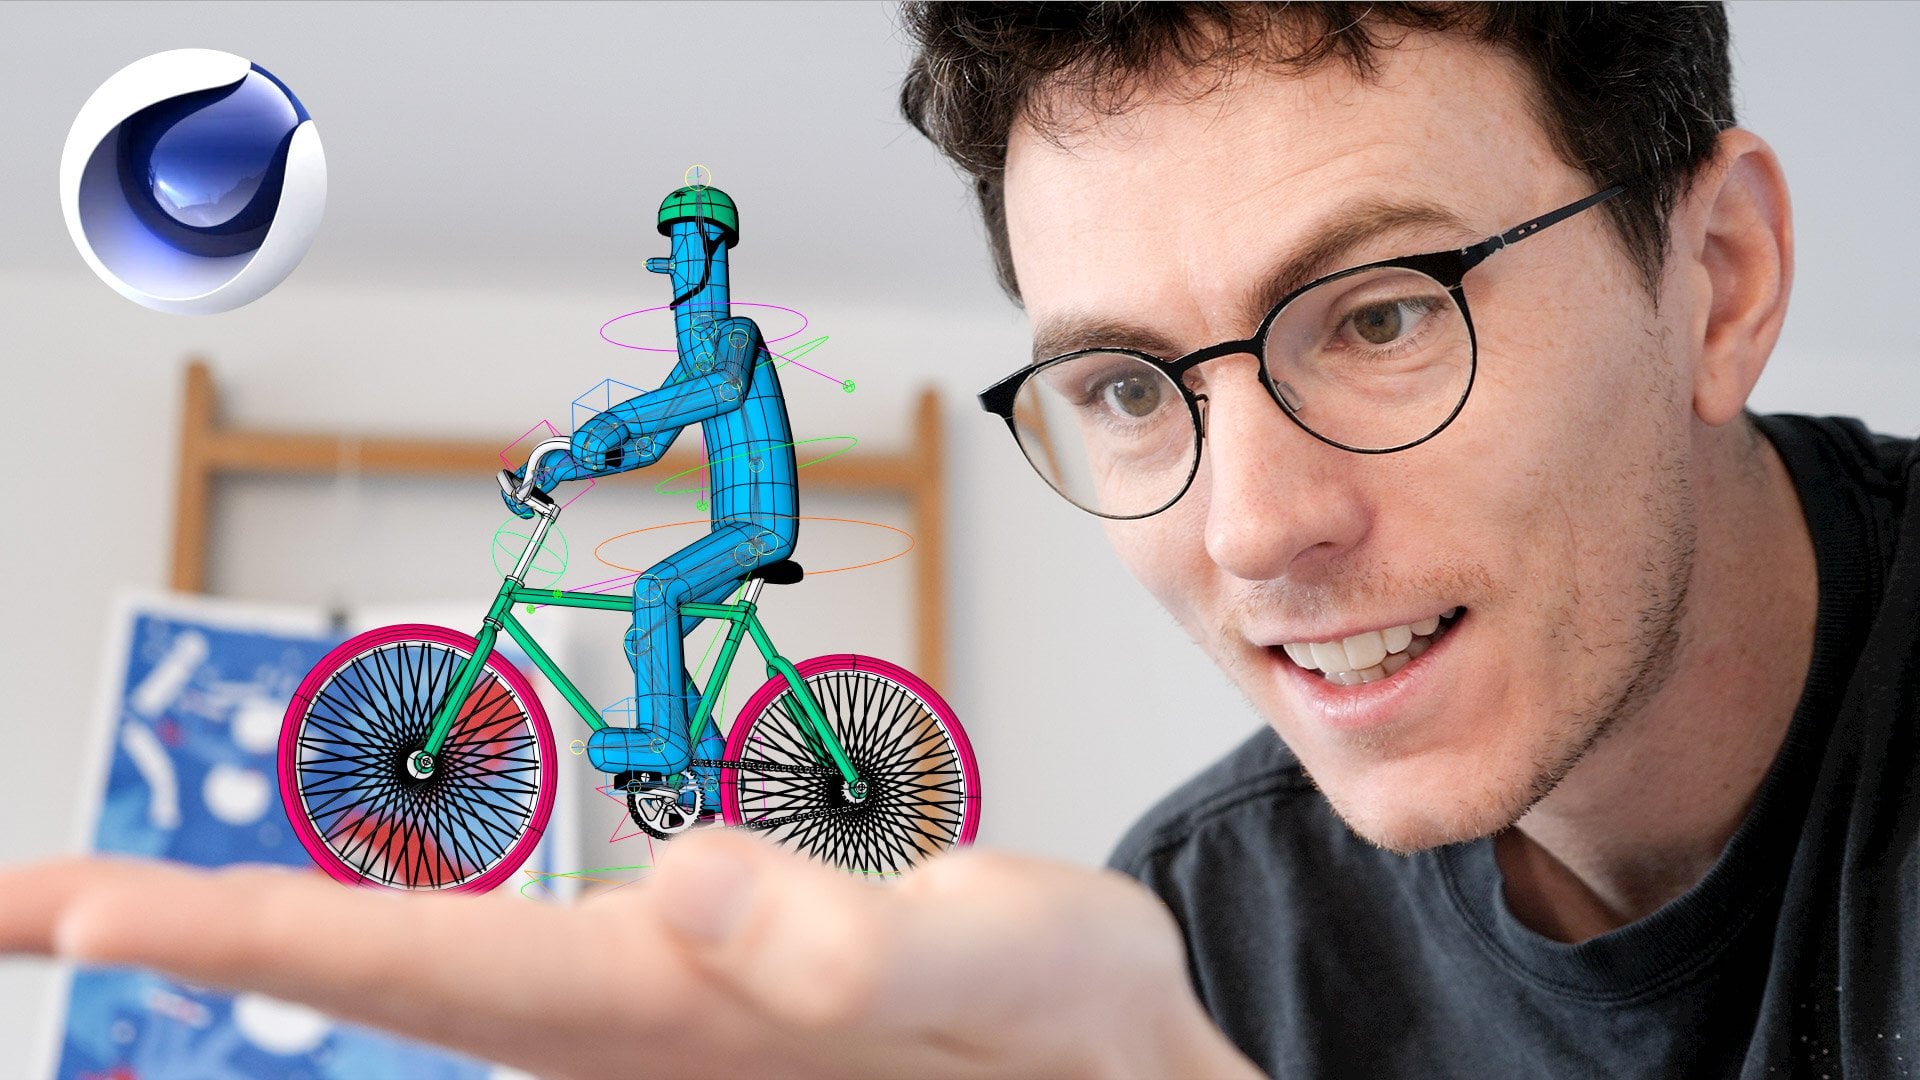
1. Introduction: Rigging is definitely a bit tricky. However, if you can get a handle on it, then you'll have some serious 3D animation power at your fingertips. Hello. I'm Russ Etheridge, and today we're going to have a closer look at the rigging tools in cinema 4D. By the end of the class, you'll be able to set up your own character rig for posing an animation. I'm a freelance animator based in Brighton in the UK. I've been working professionally for about 10 years producing visual facts, 2D and 3D character animation. Rigging is one of those areas that people feel least confident, and it's definitely one of the biggest hurdles getting into 3D character animation. It took me a long time to get into it, but once I did, it really changed the way I worked on almost every project. It's also a great next step for those who have recently completed my previous class, modeling in Cinema 4D. Last time we posed the character using modeling techniques which isn't ideal. This time, we'll be doing it the right way. Let's quickly go over what we'll be covering in this class. I'll be giving you an introduction to joints, how they work, and how they're used, then I'll be doing an introduction to waiting, which is basically the method of attaching mesh to your joints. After all those introductions to the different areas, we'll be ready to make a full character rig. It's going to be a simple character, but it will be fully animatable. For this, we'll be using my character from the modeling class, the boat character as a base. This will actually be the first of a two-part class. In this class, we'll be focusing just on the character and getting a full character rig going. In the second class, we'll be attaching that character to a fight Greek. Keep your eyes peeled because the second class will be coming up really soon. You can either follow me here on Skillshare or you can follow me on social media. All the links are in my profile page. I also just wanted to point out that there's going to be a couple of bonus videos that go along with this class and I'm going to be posting all that bonus content on my new YouTube channel. Make sure that you'll subscribed to me over there. I hope that once you've completed this course, you'll have the skills to get a character model ready for animation, as well as the basic knowledge to rig anything that needs to get moving. Let's get to it.
2. Class Overview: Prepare yourselves. Rigging is one of the most technical things you can do in 3D and it's also a bit of a rabbit hole. There's a point at which rigging basically becomes programming for the super rigging specialists. But don't worry, we're not going to be going that deep, we're just going to be doing a simple bipeds, human-shaped character. We're not going to be doing a face where you go anything fancy. But it'll be good for getting limb's going and for generally rigging anything that needs to move in 3D. I think it's useful just to quickly state what rigging is just in case anybody out there is not a 100 percent clear. I think on the simplest level, rigging is setting where something rotates from. You have an object, does it rotate from the middle like this or does it rotate from the side like this? Then what is attached to what? You have two objects. This one is attached to this one. When this one moves like this, this one moves as well, follows it. I think that's basically it. Rigging is just building on that. The other thing to note is that there's a lot of jargon in this class, so there might be some terms that you're unfamiliar with. As I go along, I'm going to be saying things like binding, skinning, joints, bones, weights, IK, FK, and so on. But don't worry, it might be a little bit intimidating, but I'll try my best to explain everything as clearly as possible as we progress. Let me just give you a quick overview of all the steps that we'll be covering in this class. Rather than jumping straight in the deep-end and rigging a full character from scratch, the first thing we're going to do is just look at joints themselves, what they are, what they do, how they work, how to make them, etc. Then to do that, we'll just be making just a single leg. Following that, I'll go through applying IK or inverse kinematics to your leg joints. In 3D, IK is essential for leg animation. It basically gives you easy control over the relation between the foot, the knee, and the hip. But we'll be covering that in more detail when we get to that selection. Then we'll be going through binding or attaching some mesh to your leg joints. You might hear the terms binding or skinning. They'd be just mean the same thing. It's just the process of attaching objects to joints. That will give you a really nice solid introduction to all the rigging tools. We'll then apply what we've learned to a full character. Don't worry, I'm going to be supplying all the models for the rigs at every stage in the class materials so that you can just focus on the rigging. But it would be incredible if you guys make your own character models and rig those. Anything you make, please share it in the class projects. I'd really love to see everything you make. We'll be using the character that I made during the modeling class for this. I think it's quite a good crash test dummy in terms of learning a lot of aspects of 3D character animation just because it's got really simple geometry and also it's basically got the bare minimum in terms of joints. Just to quickly mention again, this class will be part of a two-part course with the ultimate aim of rigging character riding a bike. I felt like this class would be good just as a standalone class because it's rigging the character for general animation, and then in the next class, we're going to be looking at rigging the bike itself, and then how to attach this character to the bike. We're going to be using a few more advanced rigging techniques to achieve that, but the end result is going to be super satisfying. One final note that I think I should mention in every class is that I'm using R21. That's my version of Cinema 4D. I know it's a couple of versions behind now, but hopefully all the buttons will be mostly the same. But I know that there are some differences in the buttons. If you notice anything, what would be fantastic if you could just pin a little note to the play bar, there's a pin button in the play bar down on the Skillshare play bar, if you could just pin that at the point where you find the difference and write a little note of how it's different to your version, that would be amazing because then everybody benefits from it, so thanks for that. With our plan all nice and clear, let's get cracking. In the next video, we're going to be looking at some joints and arranging them into a really simple leg week. I'll see you there.
3. Intro to Joints and IK: Here we go. In this class, we'll just be focusing on creating some joints using the joints tool. I'm going to be explaining what the difference between FK and IK is, that's forward kinematics and inverse kinematics and why we need them and what they're used for. We're going to be creating a simple leg, just the ankle, the knee, and the hip. We won't be worrying about toes or anything. I'll show you how to add IK to that leg. We'll also be adding some simple null controllers to the leg so that it's already nice and easy to use. Just another quick note is that in Cinema 4D, they're called joints. If you're familiar with other animation software that does rigging they're probably called bones. But joints, bones are the same thing. Personally, I think joints makes a little bit more sense because joints is where the action happens via Cinema 4D that scientists call it joints. There used to be called bones, but now they're called joints. Anyway. We'll get there in the end either way. Welcome back to Cinema 4D. The first thing we're going to do is just make some joints and I'll quickly explain what they are. Then I'll go on to show you just some really super simple IK setup, how it works. We'll be doing that on some characters legs. Let's get to it. We go up to the character menu up here, and I'm going to select the joint tool. This lets you just draw joins. You can't really do anything without holding down a button. It doesn't really do anything when you click, which is a bit counter-intuitive. I don't really get why they've made it like that. But basically you have to hold down Control and then you can start drawing joints or Command on a Mac. You can see just clicking randomly, it makes a whole chain of joints and they appear here in your object menu like this, all nested underneath each other. It creates an FK rig. I'm going to be explaining these terms quite a lot throughout this class, but FK and IK are just two opposites of the same setup, FK just means forward kinematics, regular parent hierarchy. If I select any one of these going up the hierarchy, if I select the first one, it will control all of them. If I select one in the middle, it will control everything below that one. If I can select the end, it will just control the end on. FK, forward kinematics, it just works forward. IK, inverse kinematics, it works in the inverse way. You grab the end ones and it will control everything above it. Things that are attached at both ends. When you push them closer together, the ones in the middle react. I'll be explaining that as we go along. I just wanted to quickly explain what a joint is since we're going to be making so many joints. Excuse me if I occasionally refer to them as bones, that's what they used to be called. This bit in the middle is the bone. The nodes here are actually the joints. Essentially, joints are very similar to nulls, but they've got a few more bits and bobs going on. Nulls are a bit more general purpose. They're just used for absolutely everything as containers, whereas joints are really more specifically for making things animate particularly characters. If I click on one of these joints, you can see in the attributes menu that there's actually lots more going on here than inside a null, if I click on this route at the top, you can see here that's just a regular null, it's just got a few options here. It's basically just display in position. Whereas the joint has lots more properties, the main ones we're going to be using in object mode here, there's a few options here. This bone is which way the bone is pointing. If I select the axis, it just points in wherever the axis is pointing. If I select to child, it goes points directly to the next joint, which is really the main reason you're going to be using it. From parent it points to the parent backed up to the parent. I don't know really why you'd be using the stuff, but obviously, you can get pretty advanced in rigging and joints. Personally, I've never used these functions but they're there. Then you can choose which axis along which the joint is pointing. If I select axis here and then change it to X, yeah, it will point along its X axis and Y will point along the y-axis. Pretty straightforward. Things button is really useful. We'll be using this later, so when you click a line, so for example, if I move this joint using the axis towards us, click my access to all move this around. It moves inside the rig. Children aren't following it because I've got the access tool turned on and then I go back into object I switch this back to child which is default. If I move this around, you'll see what I'm doing. It will change the direction, but you can see here the axes aren't moving. Axes on updating to where the point to where the bone is pointing. You can fix that by clicking this button here, Align. That will realign your axes to point along the bone, which is what we'll be getting into later once you start rigging and you need to adjust the rig, you'll need to move joints around like things to get them placed better. Then once you've done that, you have to click ''Align'' to make sure that your axes are aligned. Otherwise, you'll get some really funny rotation going on in these joints and they won't really work properly. The last one is length, so you can actually change the distance to the child using things. This is also really useful for when you're adjusting your rig. You can change the length of the legs if you need to adjust your model, if you need to adjust the characters, you can do that from inside the joint. You don't have to grab the child and move it. That's a really useful functionality inside joints as well. I'm just going to get rid of that for the moment and we're going to make a leg. To do that, I'm going to switch to my side view. Characters should be made with their backs pointing along the Z-axis. That's like the standard way to make any object in Cinema 4D, your front view is here. It's also up, so Y is vertical, X is horizontal, and Z is going off into the distance. I would definitely recommend building any object, including characters with the Z axis as the characters back, if that makes sense. I'm going to grab my joint tool again. I'm going to switch to the right view and I'm just going to hold down control and on the star at the top where the hip is, and we want to work downwards towards the toe. I'm going to draw a hip joint. Click where the hip is and then I'm going to click where I want my knee. Do that. Then click where I want my ankle, which just be there. I'm going to click, for the tip of the toe, roughly there. I'd like to briefly step in here and try and explain to camera first what the difference between IK and FK is so that when we start talking about them, you have a bit more of a clear idea, hopefully. FK or forward kinematics is basically the default hierarchy when you attach one object to the other. In Cinema 4D, when you have one object and then you have another object in the object hierarchy tree. That object follows the one above it, and then you have another one, and that one follows the one above that one, and so on and so on and so on down the chain. FK just means forward kinematics is a complicated name for just one thing following the next thing, following the next thing in a very intuitive way. IK or inverse kinematics, on the other hand, is a little bit more complicated and requires a few more steps to set up in Cinema 4D. Probably the best way to explain it is to actually see it in action when you have the hip and the foot in FK, in ford kinematics. That's just the default way that it comes out when we've built the leg. When you move the hip, the whole leg moves. When you move the knee, the foot and the shin move. When you move the ankle, the foot moves. Inverse kinematics will be set up so that we have the hip at one end and the foot at the other end. Maybe not like this, maybe like this. What it allows you to do is move the hip and the foot stays still. You can move the hip wherever you want. The foot will stay locked in its position and the knee moves accordingly. Everything in-between the two ends of an IK chain will be independently controllable. You move the foot wherever you want, and the hip will stay in the same position. Imagine you moved the foot in an FK rig. The knee would just be staying in the same place and the foot will just be moving around and that shin will be changing length. But like I said, it makes a lot of sense when you actually see it in action and it takes a few steps to set up. Let's do that now. What we need to do is we want an IK chain, but we want it from the ankle. If you could create an IK chain for the entire length of this. But it's going to be much better to have IK just for the knee and then having more or less an FK control for the foot. That way you have full control over the foot rotation. When you lift the ankle up and down, the knee will bend. To do that, we need to click on ''Joint 2'' as you go through and name these because it's going to be a bit easier. But let's start with the right leg. I'm going to call this our hip. Let's keep joint. Otherwise it will get confusing once you start modeling. Then I'll click on this one and I'm going to call it, knee point. This one will be a ankle 2. Now that we've named all of these, what we're going to do is click on the ankle and then hold "Shift" and click on "Root". That will select obviously everything from the ankle to the top where the hip is. Then we're going to click on "Character" and let's click on "Create IK chain". Well, that's clear it is in the IK tank. There are a few options in here. I won't go into lots of details in here right now. Most of it is pretty much automatic you don't really need to do much, but we'll have a look at that in a sec. The other thing that's created is a null, which is the target for the end of the IK chain. If you grab that now, you'll move control or E and move your ankle around, you can see now, we've got some lovely IK action on the knee. There we got it. There's a couple of problems that we need to sort out, one of them being, if you lift your ankle up like this, the toe points down in the directions of keeping in line with the shin, so we need to sort that out. The other thing is, this is actually the 3D animation. At the moment we've got no control over which direction the knee points. Let's do that first because that's relatively easy. We're going to click on the IK tag and you click "Add pole". What that does is it gives you an extra null in the object manager. The knee now uses that pole as a target. If I drag this around, put it in front of the rig, somewhere around here you can see the knee now points at it. If I go to 3D view, move the x-axis, the knee follows that around. The next thing I'm going to do is select the IK joint goal, which is our ankle control. I'm going to change the look of it. Because it's just a null it just appears in the object manager as a dot. Actually, we want that to be a bit more visible, a bit more easy to select. The way we do that is you click on the null and then you go to object in the null attributes and change this to, let's go with a cube down here, and it defaults to being very small and it orientates the camera so it looks like a square, but actually it's a cube, you're just looking at it straight on. If you change that to any one of these x, y, that's fine, It's good. The other thing that's really handy as well, which I'll show you, is to change the display color. If we switched this in the basic tab up here, if you go to On, on the display color and then pick any color; the other thing you can do also is to change the icon in the object manager. If you swivel down this little triangle here, go to Icon Color and do switch that to display color, it will just be the same as the way it displays it in the viewpoint. What would be really nice is to have control over the toe that's linked to the rotation of this ankle goal because that's really what you want to do. You want to be able to move this around and I want to be able to angle the toe using the rotation of this IK goal. All the animation for the rig is pretty much controlled by this one null. To do that, I'm going to click on my "Toe Joint" and I'm going to go to Tags, and I'm going to go to Rigging Tags and click on "Constraint". The Constraint Tag has lots of different options. It's a really powerful tag and it's basically the main tag when you're rigging. IK Tag's pretty important but it just controls IK and there's lots more tagging than IK. I'm going to click on this, nothing's out yet so it's not doing anything at the moment. I'm going to click on "PSR" and go to PSR in here, and I'm going to drop the ankle joint goal into the target for the PSR. PSR stands for position scale and rotation. Actually sorry, that's wrong. That's not right. We should put this on the ankle joint. The ankle joint target should be this, and we can get rid of the P. The position of the ankle is already being controlled by this, we just want the rotation as well. Now when we move this around, you can see the toe doesn't rotate automatically with the leg like it did before. It takes the rotation from the joint goal. Great. That's pretty much done. There are just a few more bits of peptide I'd like to do before getting to the next class. I think this is quite useful. It's a bit more like cleaning it up and just putting it in nulls and stuff so let's quickly do that now. This is to prep it more like it would actually be in a rig. At the moment it's just a bunch of loose nulls in the object manager, but we'll prep it so that it's a bit more like a character even though it's just a rig. Let's just quickly make this pole something more visible than a dot. Let's make that a small sphere, 10 centimeters, that's fine, and display color on and that's green. Then I'm just going to drop this joint goal down to the bottom and create a new null. I'm going to call this hip and I'm going to drop the R. Root into the hip. I need to change the axis. Rather than taking the root up, I'm just going to lift this up using the access tool just around to the top of the leg. That's roughly where the hip would be. It doesn't need to be exact. You could make it exact. This is a special color. This is basically if you have two legs and a full character rig. The hip will be the main starting animation point. The things that would be unrigged would be the hip and the two ankles. They'd be inside a master null so we'll arrange it like that for this example. I'm going to switch the display color on and make this orange I think. Then I make this nice big circle, x, z, I make a nice big circle here. Now, if I move this up and down to next, so often move this up and down and you can see this is how you would actually move the character's body around. The last thing I'm going to do is create one last null. I'm going to name this character and I'm going to draw all of this inside the character null. To have just a quick rundown of all our controls that we've made, I've got the character null, which is our master null that will move the entire leg, then I've got the hip null which moves the body, that held the body, and I've got the ankle joint which moves the foot and rotates the foot and I've got the pole which controls the knee direction. Amazing. That's basically finished leg rig, and we've done a little bit of prep for the next video, so we are ready to go when we bring in some mesh. Amazing. Every time I add IK to a joint it's like magic. Just seeing that little actuating thing, it's just so satisfying. Let's just recap what we went through. We used the joint tool to really quickly draw some joints for the leg hierarchy. We used the really handy Create IK chain function to quickly add some IK between our ankle and our hip. We made a poll so that we can control the knee direction. We had a look at the Constraint tag and we added PSR constraint so that we have full control over the ankle joint. We made some really nice big, visible, and colorful null controllers so that we can see where all the controllers are for the rig. Finally, we arranged all the different parts of the rig or all the objects in the object manager into a good, clean hierarchy ready to be added to a full character later on. Great. That's actually a really big step forwards into the world of rigging. The only thing at the moment is you hit Render and there will be absolutely nothing there. We need to start looking at the other side of the rigging, which is actually attaching objects to the joints. In the next class, we are going to be looking at weighting, and it's weighting, spelled W-E-I-G-H-T-I-N-G not the other waiting, like waiting around. It's weight in something, like a weight. In the next class, we're going to be looking at that and touching some geometry to Allegory. I'll see you there.
4. Intro to Binding and Weights: Now that we have a fully functioning leg, we need to actually attach a leg to it. At the moment, we've just got the essence of a leg. To do this, we're going to need a leg, which you can actually download from the class materials. If you look in the class materials and you find JustALeg.c4d, that's going to be the model that we're going to attach to our IK leg. We'll be doing some binding, it means the same as attaching, and we're going to be adjusting the weights of that attachment. What that means is you can actually control the amount that each point is controlled by a certain joint. For example, making sure that when you move the ankle joint, only the foot moves, rather than, for example, when you move the wrist joint, the foot moves, which believe it or not is possible and it's literally as messy as it sounds. Let's get to it. Before we start rigging an entire character, I think it's a good idea to take what we've done with the rigging of the legs and actually do some weighting. Because when you add weights to a character to attach an actual mesh to the bones is probably the most common way of doing character rigging, and it's a really important part. On one side you have all the joints, and on the other side you have attaching our character to those joints. I think the best way to do this is to grab one of our legs, and we're going to another scene with, it's going to be this one. It's just a single leg, it's part of the main character. Just grabbed one of the legs from the main character here. I think this will be a good mesh to attach our legs to, because it's nice and simple. Then when we do the full character next, it's going to be the same thing, but obviously we're going to be doing the full character. Just hit "Copy" on the leg. Go to window, you can change the project by going to window if you've got multiple projects open. Go to where you're doing your leg rig and paste, hit control V. There we go. You can't see it. It's really small. There it is. In this situation where one thing is bigger than the other, and one thing is a rig, it's actually quite difficult to scale rig sometimes, or it can be. You can select the main now, go to object mode here. Then when you scale this, it will scale everything correctly. But I don't really like doing this, mainly because if you've got a really complicated rig with lots of things going on, it might actually cause problems, because sometimes scaling the master now won't scale certain tags, or there might be something going on. It probably won't scale things if you've got an expressor going on, which often happens if you've got a complicated rig going on. In this situation where it's a clean, clear cut difference between scaling a rig or scaling some mesh, definitely scale the mesh, because the mesh just scales really easily. This object, scale mode. If you go to coordinates, and you click on a node and you scale it, you can see the actual scale is changing in there. This is how you would animate scale as well. If you've ever tried to animate scale in this mode, you'd know it wouldn't work, because if I scale that down, this stays as one, so there's actually no numbers changing. It seems like Cinema 4D is actually better at scaling rigs than it used to be, but just to be on the safe side, it's just generally much easier to scale mesh. Grab your mesh and just scale it up to roughly match your rig leg. It's also worth mentioning that this scale is way too big. I've made this too big for some reason. I might do a scale down version for the actual class materials. I'm not sure yet. Actually now that I'm thinking about it, the character that we're going to use is an actual scale. The leg is eight meters height, a little bit on the large side. That's all right for this like rig demonstration. Great. The next thing we need to do is obviously we need to make this match. Move the leg forward a little bit like this. There needs to be a little bit of a bend here. Every time I've tried to make it completely straight leg, it gets a bit confused, because it doesn't know which way the knee's pointing. I know that this points in the right direction, but I'm not 100 percent sure why, but it just likes to have a little unnatural bend in the legs. I'm just going to put the hips slightly off-center, and the knee will be slightly off-center the other way. I'm going to put the ankle right in the middle here, in the middle by eye, essentially. We'll just rotate this up so that the toe matches the toe points. What I'm trying to do is get these joints to be on a subdivision, it's much easier if you're on one subdivision. Because then if you want to do some more smoothing from the whites, like if it's looking a bit too rigid or it's not bending correctly, you can always add another subdivision either side and then try your weighting again to see if that fixes it. We need to shorten these legs here. We need to shorten these two joints so that they fit into the character. To do that, we'll just go into the hip joint and make this shorter using the length thing in the object type. Then we can make this shorter as well. Basically I'm aiming for here. We're going to have to do a little bit of modeling on this knee anyway, because there's just one subdivision, and we need to add a couple more, otherwise it's not going to bend correctly. I think that's good in terms of the joint layout. Let's just make sure our IK is working correctly. That's looking good. Now that our rig is matching the mesh, let's skin the mesh on to the rig. The first thing I'm going to do, because I know for sure that we'll need to do this, there can be a little bit backwards and forwards I think. I'm going to move this subdivision of the leg down a bit. I've gone into the leg and I'm changing the points over here using the points tool. I'm going to move this down to this subdivision to match exactly where the knee joint is. What I really want is probably two subdivisions here. Then I'll show a good way to model the back of the leg, because this knee only bends in one direction, to get a more clean bend there's a little special technique that I learned. Because you can be presented with a lot of issues. There's a lot of ways around making these inadvertent commas perfect bends. You can get really in-depth with these things. There's little plug-ins. There's also, you can do shape morphs so that the actual shape of the mesh changes as the knee bends, which I'm not going to get into in this class, because this is more of an introduction to rigging. But I will show you this very simple technique. I'm just going to get my loop cut, and I'm going to put a cut above this joint, and a cut below this joint. If we go into modeling tools and grab Weld. Make sure you've got Only select visible elements turned on, so that we don't start selecting through the model. But essentially we want three cuts on the front of the knee. You can see the front of the knee here. We want three cuts there, because that's the bit that's going to be stretching as the knee bends. On the back, it's going to be compressing, so we want less subdivisions on the back. If you put three cuts in, and then you join the back ones together. It will look like this. If we select these two and weld them together, select these two and weld them together. These two and weld them together. That looks good. Then we just need to join these two together. It's like a big polygon and a triangle here, we want that so we'd be symmetrical. If we get just a line cut tool and create a cut there, and another one here. Now we have three subdivisions along the front of the leg where the knee is going to be stretching. We've got two subdivisions along the back. Compress here and it will stretch here. That will be good. You'll see after we've weighted it, or like you'll see it in action. Let's get to it. Now this is all laid out. We've got our mesh ready to go, ready to be attached to the joints. Cinema 4D has got quite a good automatic tool for skinning objects. It attempts to do a automatic weight. You might as well always do this. I don't think there's a reason to start completely from scratch, because it's just sets everything up for you. The way bind works is you click on the mesh that you're going to attach to the joints. You click on the mesh first, and then you click on all the joints that you want to attach it to. We want all of these. I'm holding down Control, and which would be Command on a Mac, you hold a leg, and then click on all these joints. Then you go to Character Bind, to show you what's happened, it's created a weight tag on the leg, and it's created a skin deformer inside the mesh. There's a few options in the skin deformer which I might point out in a minute. But if you click on your weight tag, it's got all the joints in there. Once we open up the weight manager and stuff you can actually see how it's weighting. But for the moment, now that we've attached everything, we might as well just see what kind of job it's done. Just grab your ankle joint goal and just bend it. There you go. We've got a working leg already, in a sense, moving on. That works, but you can immediately see an issue here, like when you bend the knee like this, when you bend the knee, but it's again [inaudible]. When you bend the knee you can see that it just squashes into nothing. It doesn't look right when you do that. That's the issue with this automatic binding. This is always an issue actually, this is like one of the main problems with weighting, and doing this stuff, and why it's complicated, is because you can get there super quickly obviously, we've just done that automatically, but to get there and then to look good is another thing, and we've got another issue on the ankle here, so maybe we do need to add the subdivision. Let's undo that. The process of weighting is often a little bit of backwards and forwards, so you could try weighting this leg and then you decide that it's not working out exactly how you need and you need to change the model a little bit. Really you need to start the weighting again from scratch, which is fine, because that's why the bind tool is quite good. It just gets you half the way there, you don't have to set anything up, it just throws in some automatic weights that you can then go and edit yourself. But to get rid of the weighting that you've got at the moment, you can just click on the skin, delete that, and click on this white tag, and delete that. Then we're back to the beginning again. I'm going to add that subdivision in because I think maybe we do need it. I'm just going to grab leg again and just do a little cut. I'm not going to do the trick here because this joint actually bends in both directions. This is only for really a joint which bends in one direction, which is a knee. Let's do this again quickly. We just grab our leg, grab all the joints, go to Character and do bind Yes, it's gone wrong there. I think I had a selection going on. I had actually had some points selected over here, and it's only bound to those points. Make sure you're in object mode over here. Let's try that again. Grab the leg and all these joints, to Character and Bind. I should have that leg bound. There we go. We've bound our leg to the joints, and we've got the skin set up, and we've got the weight tag. To actually edit this, there's a couple of ways of doing it. If you go to Character, you can see in here we've got the weight tool, which is essentially a paintbrush. This is to go in and do the nuanced stuff. But I really recommend looking at the weight manager first because this is how you can really accurately set up your weights so that they're all super nice and clean. Bring the weight manager up, and you can see that the leg has gone black. This is because it's going to show you the weighting visually. If you go to the joints tab in here, and you click on your different joints, you can see the influence of those joints. Obviously, our goal here is to attach the mesh to the joints. How do we do that? Well, you can obviously just literally attach these points directly to the joints. If every single point was only attached to one joint, then it would just look too rigid. But how would you split it? This point would be attached to this joint, but then this point needs to be attached to both of them. That's where weighting comes in. Let's say we want these joints here in the middle, a half attached to this joint and half attached to this joint, then you have a 50 percent weighting to one joint and a 50 percent weighting to another joint. Then it gets a lot more complicated when you get areas which are bending in multiple places. For example, up in the crotch area of the character has got two legs, has the spine, bottom of the spine. You can imagine that you'll need to be splitting the weighting of that point, individual points, say up here, this one might need to be a little bit influenced by the left leg, a little bit influenced by the right leg, and a little bit influenced by the spine. In the Weights Manager, you can see here once you've clicked on these joints, if I hover over, you can see it actually tells you with this little box what the weighting is for a particular point. On this point here that I'm hovering over, it's currently got 89.57 percent to the hip joint, which is this one up here, and it's got 11.97 percentage to the knee joint, which is this one here. The other thing I want to say quickly is this auto normalize. If you have this unchecked, all kinds of problems will happen. There's no really reason to switch that off, but there might be situations where you need to do it. I'm not sure exactly why, and I've never really needed to switch off. Essentially, what this does is when you're doing your weighting, it makes sure that every single point has a total of 100 percent. You can see the top line here, it says leg 63, that's like the leg mesh, point number 63, has 100 percent weighting. That's what it needs to be. Every single point needs 100 percent weighting. If it's less than 100 percent, you'll start moving the character along, and the points that don't have 100 percent weighting will be lagging behind. I can actually show you that now. What I'm going to do is I'm actually going to select these points in the middle, these just the knee ones, so that we can see what's going on. I'll select these. What I'm going to do is I'm going to subtract 50 percent or 51 percent, and I'm going to turn auto normalize off, and then apply that to the selected. You can see here it's gone a bit dark, it's gone black. Now you can see that the leg has only got 38 percent weighting and so on. Now we're going to have some major problems as soon as we start animating. If I grab the ankle goal and move this up, you can see the knee is not following anything. It's not 100 percent. Let's say you have 99 percent, it might look absolutely fine when you're just moving the joints around testing it. Grab the character rig now and just move the whole thing. You can see it just gets worse and worse and worse the further you get from its origin. That's why we need 100 percent weighting on every single point, and that's why this auto normalize checkbox on is so important. Maybe the least intuitive thing is that we've got four joints here, so you've got one at the end, and there's no influence on this. If you were to wait this toe joint, if you were to grab all these points here and attach them to this point, it would have the same effect as being attached to this joint, because this joint is following that one at the moment. That makes sense. To do this correctly, I mean, you can see here there's actually a bit of influence. These reds here, there shouldn't really be any red here, but there is. This is why the automatic one is a bit wrong, I think. It makes it too smooth. You can see these numbers actually. When you hover over, you can see the influence all in percentages. These numbers are really random and we want them to get started anyway, bank on the money. For example, this line here should be 100 percent weighted to the hip. This one will be 50,50, and this one will be 100% weighted to the knee. If we click on our leg, and we just use the point tool here to select the points that we want to change. I'm going to use live selection, that will be fine. Obviously, if you've got really complicated model, then you're going to have to be using the loop selections and over different selections things, but we should be able to do this in the side view. I'm going to switch to garage shading with lines, so that we can see the colors properly. I'm going to grab the selection tool and I'm going to turn any visible elements off, so we're selecting all the way through the model. These ones have a 6.09 percent weighted to the knee. We don't want these to move with the knee too. We want these 100 percent to the hip. This is what I'm saying about this automatic thing. You can imagine if your model is really complicated, it's going to be doing all kinds of weird cross influence that you don't want. We need to remove that and to do that, so let's select the points we want to change. Then we go to Commands here, and we go to Mode. We want to do Add, and we want strength 100 percent. We want to add 100 percent of influence of our chosen join. Oh, yes. Actually, we need the joints visible here as well, because we want to be able to select the joints. If you hold down Shift when you run the Commands tab and click on "Joints" as well, now you can see both tabs at the same time. That's a really useful tool, which actually I haven't mentioned in previous classes. But this is really good. If you want to see attributes of something or at the same time, you can hit "Shift" and it will just open up all these tabs below each other. It's a really nice feature Cinema 4D. At the moment they're all selected. We want just the hip. Make sure we've got the points selected that we want to do at 100 percent applied to the selected points. If you apply all, it would do the whole leg. Just apply to this selection, and now we've got 100 percent on the hip joint. Next up, let's deal with this knee. This is a little bit more tricky, but still pretty straightforward. We want this line of points. Make sure you've just got this line selected. We also want this to be 100 percent to the hip. Let's Apply Selected there and the middle line, these points. We want this 50,50 split between the hip and the knee because it's going to be half influenced by each. We can do that by selecting both and then add 100 percent, we Apply Selected, and got 50, 50. Now this bottom row here on the knee will be 100 percent weighted to the knee. We just want the knee selected over here at 100 percent, apply to our selection. This line we want 100 percent weighted to the knee as well, and also this line we want 100 percent weighted to the knee. This line here we might want it smooth eventually, but for the moment, let's just do 100 percent. This next line here will be 50 percent to the knee and 50 percent to the foot. You can see where I'm going with this and then everything this side of the ankle will be 100 percent to the ankle. Now that we've done that, we've got all our points, either 100 percent or 50 percent weighted to something and we've got smoothing on because this is such a simple model, this might look all right, so let's have a look. If it's not looking good, then we can change it. That's much better. You see how cleanly the knee goes. It's intersecting here. But for this character, that's perfect because everything stays perfectly in line with each other, and the ankle looks pretty good. It's fine. We're not going to be doing this crazy angle too much, so we could add a little bit of smoothing there. You can smooth stuff with the weight tool, but it's a little bit haphazard with the weight tool because it's literally like paintings, you're doing things by eye. But you can smooth things in the Weight Manager much more accurately. If you select all these points, possibly all the back here, and then maybe these ones at the front here, and clicking on "Smooth". So mode, smooth, maybe 100 percent or let's creep up on it a little bit, because I don't want to go crazy, and just do Apply Selected. See how these numbers are now eight percent, 90 percent. What you can do is get that problem area and then go into the weights. Yeah, you want to be able to keep your original pose. There's probably a better way of doing this, but I just use a sure-fire method of doing this, and that's just by setting a key frame on the first frame. If you just select your ankle joint goal, because that's the only thing that's moving in the scene, and you select "Position" and "Rotation" and hit the "Key frame", then I'll keep this key frame from moving. Then when you move it over here and you change it, it will just pop back to zero. Put your rig into that extreme pose that's causing the problem, and then go in and try smoothing it. This is where using the weight tool is really good. Select your weight tool, select "Weight" there, and then you click on your "Weight Tool" and make sure you got that selected. Then you can click on here and go Smooth. You can turn the strength down, maybe let's turn it down a little bit to 21 percent. Then you can basically just paint. In this extreme pose, you can just try and smooth this pose out. I'm going to turn this off because there's some intersections going on. But you can just paint it away with the smoothing. Smoothing is not the thing that's going to fix every problem. For example, I've got maximum smoothing. There's a lot of modes here, but maybe if I'm selecting "Add", maybe we can go knee. We can add a bit of a knee to this. Then we also want to make sure it doesn't look weird when you turn it the other way. I mean, that's going to be all right. That's actually really good. That's fine. There's some options in the Skin tag here. If you go to Object properties, there's a few different options. If you change the type from linear to one of these other two, maybe spherical, it will change the way the deformations are happening and blended, which is normally the one I choose. It's like a combination of two things. If this was becoming a problem, we could have another look at this as well. It's possible we could actually make this joint, see where we changed the model here? If we put that on this face instead of this face, I think we would have fixed that a bit better. But there's actually a good point that I've just brought up is that if I wanted to change that now, I'd have to redo all the weights, because the actual mesh structure would change. If I took out this point, there'd be a different number of points and the weights would be completely wrong, so we'd have to start from scratch. But this was a good little started to get weighting basically. There you go. Great stuff. Now we have a fully functioning leg rig with leg attached to it. I'm not sure what kind of character would be just one leg, but I'm sure if you attached maybe your head to the top of the leg, you can make something fun. Let's quickly recap the main steps that we went through. We brought in our leg model into the same scene as our leg joints and made sure that they were roughly the same scale. We then adjusted the joints inside the leg to make sure that they were aligned correctly with the model, and preferably you want the joint to be on a subdivision in the model, so that the joint lines up with a cup basically. We then made some adjustments to the leg model to get ready for bindings. I showed you how to on particularly on the knee joint like single direction joints that you have, one area that's got more subdivisions than the other. We then used the bind function to automatically add the skinning modifier and the whites tag, and it gets us most of the way that prepares the object to start weighting properly. We then went through the whole object using the weights manager and made sure that all the weights are set up really cleanly ready for smoothing. Finally, we smoothed out some of the weird kinks that appeared in the model when we tried to bending it in certain ways. We did that by painting directly on the model with the weights tool. There's always a little bit backwards and forwards between the modeling and the binding phase. As you saw towards the end, there probably was a little bit of an improvement we could have made around the knee where some of the faces were intersecting. But to do that, we'd have to start again from scratch with the entire weighting process. It's working fine is what we need at the moment. I think we'll just leave it like that. That's pretty much the fundamentals of character rigging and binding. From here on, it's just a matter of building on what we know already. In the next class, we're going to take what we've learned already and we're going to start building a full character rig. I'll see you there.
5. Building a Character Rig: Hello, welcome back. So far we've learned how
to rig and bind a leg. Believe it or not, that's
pretty much all you need to know to rig and bind a full character because your body's made of five
separate legs or something. Well, maybe not quite, but
we'd be doing the whole thing. We're going to be
doing the head, the arms, the legs, and there's a few
really handy tools to help us in that process. Then we're going to be making
a bunch more controllers so that the character
is easy to animate. Then we'll be making sure that our hierarchies are all nice and clean, ready for animation. For this section,
you going to need your own character model. Or if you're following along
with the class materials, if you go in and find
FullCharacter.c4d, that's going to be the
model that we're going to be rigging and then
later binding. Great, we've got
our boat character here from my last
class on modeling. I've added a little helmet in, changing him from
boating to cycling. It's worth mentioning
that characters should come in as a T-pose. If you're modeling a
new character to rig, it's best to model
them in this T-pose. I would also recommend having the arms as straight
as possible, the leg straight down, the feet straight out forwards. If you've got feet pointing diagonally outwards or a bit more of a natural pose, this is going to
make rigging of that look a little bit
more difficult. If your character
doesn't allow for it, then obviously you can have
to accommodate with your rig. Unlike what I've done
here, you'll see later on, but I come into a little bit
of a problem with the hands, with palms facing
forwards like this, it's better to have the
palms facing the ground. But because this character was modeled like this originally, I'm not going to adapt it now. We're just going
to roll with it. It's fine for other poses. But because the character walks, cycles, the hands are down. When a character is
just standing in a natural pose with their
hands by their side, it means the hands have to twist to get down to the sides. Whereas if the palms
are facing down, then it would just
go straight down, and you'd get less
distortion on the character. Make sure your characters
are in a T-Pose like this when you
want to rig it because it's just by far
the easiest pose to rig. Just a quick update. After receiving some
feedback on the class, some people have been
requesting that I provide the character model
with the hands face down. There you go. If you go into the
class materials and look for
FullCharacter_handsFaceDown.c4d, then you can find this
character in there for you. The rest of the
tutorial is going to be with the hands
facing forwards. Like I was saying before,
I would definitely recommend creating characters
with hands facing down. Just so happened, I
didn't do it on this. I mean, there might be
situations where you can't remodel a character
into that pose, then you have to rig
it the other way. There are other ways around it, more advanced rigging techniques that we're not going to
cover in this class, but it's there if you want to try rigging it the correct way. I should point out as
well that I did make one change from the
modeling tutorials. I didn't attach the head when
we were doing the modeling and I've now attached the hair just to make the
rigging much simpler. Otherwise, we'd have to
rig, it's still simple. We would just have
to treat the head differently to the
rest of the body, but it's quite nice
that the character is all in one mesh. Great. I'm thinking
I'm going to start on the leg and we'll just
set that up again. We've got our leg going. Just come back into the file
from the last class where we made a leg and obviously the character that we're going to be
binding has two legs. So let's quickly
make a second leg. There is actually a mirroring
tool to mirror rigs. It's exactly for
this purpose where you have done the left or right and you want to
just duplicate it over to the opposite left or right. It's here, it's in
the mirror tool here. I'll go over that later when I'm covering
it in the arms, for the moment, let's
just copy and paste this, and then I just move this over. All we really need to do is
grab the root, our pole, and our joint goal
and just going to move it over to here. I'm just going to make
this minus 75 exactly. The root pole minus 75 and the ankle minus 75.
I'll grab all three. I'm going to hold
down Control and just drag. There
is our duplicate. The benefit of using the
mirror tool is that it will rename all
of these for you. There is actually a naming tool. There is actually a quick way to rename all these Rs to Ls. If you go to Window, Customization, Customize
Commands, I think, type naming tool, I'm
just going to drag this onto my bar page just
temporarily so that it's there. Then when I click on this,
down in the attributes menu, you get all these options. With our root selected, I'm going to apply to, I think maybe just
select all of them. Say yes, select all of these. Just hold Shift on
all these ones that have R and then click
on the naming tool. Then I'm going to
replace R with L, in that case, R to L replace, and then it replaces
all the names there. Then what we have to do
is drop L root into there and then these two
guys into here, and then we obviously
just want plus 75. Then actually yes, so
we need to reattach. This PSR, it's still
pointing at our ankles, we need to make sure
L ankle is there. You need to change the PSR and then in IK you also need to drop L ankle. That's fine. I just made these a
while. There we go. Then in the IK, you also need to put the
pole in as well as L repo. The last thing you
need to do is change the color of the L ankle. I'm going to make this nice blue just to contrast
with and I think. There we go, ready to go.
Just double-check these are working perfect.
We're ready to go. Now just bring in your
character into the scene or copy this into the character seen whichever way, it
doesn't really matter. I'm just going to paste
the character in. Let's say last time I made the mesh bigger to
match the leg rig, but this time I don't
want to do that. The main reason being this
character is actual size, this character is to scale. As in he is 125
centimeters tall, which I just guess is
quite a short person. I like to work in
everything true to scale because I know I
actually made a mistake. I probably should have
done the first lecture tutorial to scale as well, but I just did it to the size that was
default to the viewer, which is not the
best thing to do. Actually, I'm going
to try scaling down the rig so we can see
how that works actually, which might be useful to see. I don't want to change the
size of everything else, I really need the rig to fit
into the rest of the scene. Let's try scaling this down. I'm going to scale this
so that the hips match, bigger, and we want the
hips to be maybe there. Then maybe we can add
another subdivision here because he's going to
be bending over the bike. We want this area to be correct. Again, we need a sort
bend in the knee. I'm going to line
up the hip with this intersection of
subdivisions there. Obviously, we need to reset
the position of these feet. Let's get this ankle down. We want the same Y and
Z of these ankles. So copy and paste the Y, copy and paste the Z, and
copy and paste this angle. Now our legs are
perfectly symmetrical. Then we need to change
our knee lengths again. I select right hip and left hip. We only want a
really slight bend. We want to bend, but not too much of a bend. You want to make sure before you do anything that
they're dead straight, especially in a
character like this. If your legs have funny angle
and your other character and you can't for whatever reason have
them start off straight, then you might have
to rig it like that, but rigging them 100 percent straight like this
I think is better. Another thing about
IK is I never get these funny numbers here. I turned to just not
think about them because maybe we should be zeroing off these numbers
here, this 0.053. I mean, to me,
that's really messy, and I don't really
know why it happens. I think it's probably some automatic maths
thing going on. I never know whether
it's a good idea to zero these out or not because
when I don't zero out, everything works out fine. Maybe in certain
situations it won't be, but I'm just not going
to touch them for now. We don't really need to
worry about that because I think it'll be fine
without doing it, amazing. Those are our legs done already. Now we just have to
build on what we've already got to make
the rest of the body. I think next we'll do the spine. We need it to run from the hip upwards because
everything is following the hip. The hip is the main
point in a character. Let's start by putting
in our spine joints. If we go to side
view, once again, select your joint tool and hold down Control or Command on Mac, basically one where
these hips are, but it's going to be in
the middle of the body rather than on top of the legs. These are actually coming in at a different scale because
I've scaled down the legs. Well, I don't know.
Basically what I'm thinking is we're going to
have a mixture of scales. There's going to be
some joints in here which have been scaled down inside that null and
we're going to have some joints that
aren't scaled down. I'm not sure about mixing those two in one rig because I
haven't done that before. But let's see what happens. Worse comes to worse
after redo it all. You guys won't even know because I'll just
edit that bit out. It'll be fine for you but painful for me, but
let's see him it goes. I'm going to make
another joint here. I think I should maybe make
these ones a bit straighter. I think I'll add in a natural
curve like in the legs, but I don't think we need to because this is going to be FK. We're going to have this
and that's the base of the neck and come with
these around a little bit. Then we just need
one for the head. Yeah, we don't need a neck
joint. It's nice and simple. It's going to the
top of the head, so I'm just going to position these a bit more accurately now. This is an IK, so we can't do that clever knee-length trick
like we were doing before. It's probably better to
position them down the chain. Make this one the
correct length first. That looks good for the body. At this point, you could decide whether to animate the nose or not because we
could add a little bone there for the nose. Let me name these first. This is going to
be and then we'll drag this into our hip. Know that these are body bands I should probably
call these body joints. Obviously, I've put this joint
in the middle of the body. We will just need to put this subdivision a bit
closer to the neck. The next thing we need to
do is take these IK arms. These ones, because these going to be gripping the handlebars, we actually need him to be able to completely close his hands. We're going to need to
do fingers basically. We were imagining this
is one giant finger. I'm going to obviously do a shoulder and elbow
joint and wrist joint. Then we're going to do one for the thumb and we'll
add some subdivisions here and make one giant finger probably with one
joint in the middle. Oh, yeah, let's do
his nose as well. Let's quickly do his nose first. Select the joint tool
and hold down Control, and this too, one,
T. That would be enough and then we'll just
drop that into the neck and call that nose. There we go. This is
basically rigged already now. This is just going
to follow the next and let me move the neck. The nose will follow
the head movement. Sorry to backtrack a little bit, but I think we need
another joint here in the spine so that we can
attach the shoulders. To do that, I'm going to
add in another joint here. I'm going to go to character, I'm going to joint, I'm going to put it inside spine top because it's now and we're going to
call this spine mid. This one will be spine top. We're going to move that to
the location we want it now, which will be maybe around here. Then I'm going to
drop the neck into this one, that's better. I guess we could even
these out actually, maybe this should be in the
middle between these two. This a bit more than even curve, that would
probably be better. Let's move that one down. Just take spine top out
of this hierarchy for the moment and move
spine mid down to here, which will be about halfway. Then I'll just drop spine
top back into spine mid. Let me explain verbally
what I did just then. Because I want to move this joint and I don't want to
move all this stuff above it. If I move this, it will obviously move
everything out of whack and wipe all my nose and everything
that I've just done. I just took all the
joints above it out of that hierarchy and then you can do
whatever you want. I took spine top out of spine
mid and then I could move spine mid around
without affecting the nose and
everything probably. If I go into this spine that I adjusted and then we
select "Spine mid". See how it's very
slightly misaligned. If we click "Align" maybe we might see a difference,
but let's see. We did see a difference. Now that's realigned at Z axis
perfectly along the joint, which is what we really need. Go "Character, Joint tool". I'm just going to deselect
everything so that I just make some new hierarchy
of everything. Then I'm going to hold down
control and I'm going to do shoulder joint here
and elbow here, and the wrist here. Then I'm going to do the
bottom of the finger, which would be about there. Then I'm going to do the
middle of the finger, which would be about there. Actually, you know what? I think you can
use the axis tool. Yeah, you can, that's good. We didn't have to pull
this out, actually. We didn't have to pull
out the middle joint. I could have just done that. Let me just check. Yeah, you could've just
used the axis tool. I'm sorry. See the Z should
actually run along the joint. If you do realign your joints and they go
and the axis has gone out, you need to click
the "Align" button. I'm just going to move
the root to be in the middle of the shoulder
because that's what we need. If we move that up to here, in the middle, that
one's good, actually. We're all good
now. Now we've got the fun job of renaming
all these joints. Don't forget your left and right and make
sure to get them. This should be characters at
right and characters left. Don't make the mistake of
many animators naming them screen left and
screen right because then when you go like
this, it's so wrong. We just need to
do one more which will be only two
joints for that. Inside the wrist and let's just make it your joint
and then I'll just move this to the base
of the thumb and then we'll make a thumb tip. I'm going to need to align
these as well because these along and said
default to the world. We need to hit line on there. This one just do its thing, just follows its
parent, I guess. Great, that's right arm
basically finished. It's just we need to grab all of these joints
that we've just made and drop them into
the spine top joint. I think it's spine top.
Yeah, that's right. It would've been fine
if we were doing FK, but IK has a preferred way of working and I'm not totally
sure how to adjust it. I'm going to hedge on the side of making sure that IK is happy rather than adjusting
the IK system to match what we've made, I think it would be easier
to do this way round. I'm going to move
the finger above the thumb based because it's got two joints
inside the wrist, it's got the finger
base and the thumb base as you want the finger
base to be the preferred. Hopefully, when we next
make the IK chain, it will align the
goal along this axis because this joint would be the preferred joint if I give
it a preferred bend. Move this back a little
bit towards the middle. We've still got a
little bit of a bend in there already before
we add the IK chain. Every time you move this stuff, it puts the axis out of
alignment so you need to go into these joints and
click "Align" so that they're all pointing
correctly again. That's the last little
fiddle I'm going to do. Now, I'm going to once
again create the IK chain. I'm just going to
click wrist and hold Shift and select my shoulder. You start at the
end of the chain and then you hold Shift, and click on the back of the chain and
everything-in-between should be selected and then you can create IK chain like that. I think everything's now
working nicely if I move this, it bends very nicely backwards. Let's change this
to a cube again. Select "Goal" and select "Cube," and change the axis
so that it's properly 3D. Let's make this five. Like the foot, I'm
keeping the left and right colors the same
icon settings, display color. I'm not totally sure
where I'm going to put this in the hierarchy yet. Actually, this should
probably be above. I'm going to select these
leg controllers and I'm going to put them above
here, just below the hip. I'm going to put the wrist goal, I'm just going to put it inside
character for the moment. As you know, it
would be following the hip so potentially, I would put it in
there and maybe this should be outside the hip. Let's see. The hip
goes up and down. It doesn't work, oh, it's because I've
got my axis tool on and maybe the wrist
goal goes inside. If I move the hip around, it moves the wrist goal
and everything above. But I don't want it to
move my ankle joints because they need to be moving
independently of the hip. If I put these inside the
hip and then move my hip, it moves the feet
around so that's no good. These
needs to come out. When you move the hip,
we've got the arms moving and when you
move the wrist goal, that moves, and then
when we move the feet, the knees move, and
everything's inside the character now so when
we move the character now the whole thing
moves, there we go. That's a really nice clean hierarchy that
we've got going on there. Nice, I've got a display
now on this body. Sorry, a display tag. I'll just show you how
to make that. You go click on "Body," go to "Tags", and go to "Render Tags"
and click on "Display." Then you can click "Use." I'm going to switch
this two lines. No matter what you've got,
display version up here, you can put a display tag on an object and have it different to whatever you've
got selected here. But at the moment, if you rotate your wrist goal,
nothing happens. Obviously, when we rotate this, we want to rotate the hand, so we need to click
on the "Wrist", go to "Tags" and
do rigging tags, and add a constraint. Click on "PSR" because we
want to position scale and rotation 100 percent
linked to that now, just go to the "PSR" tab, which has appeared, and drag
wrist goal into target. If everything is correct, nothing should have happened. If something
happened, then that's bad because something's
not correct. Probably if it's not correct, if the thumb base was
above the finger base, then it would've
picked this rotation to create the goal and your wrist goal would have been pointing the
wrong direction. Now after we've connected the wrist goal to the wrist
using the constraint tag, when you rotate it,
it rotates the hand. Sorry, there is one more
step that we missed. We didn't create the
pole for the elbow. Click on the "IK" tag
on your shoulder, and click "Add pole," and
that should have added a pole down here. Just
going to move that out. I'm going to put it
near the wrist because these are controls that we need. Then I'm going to move
it out to the back, just pointing in
the same direction as the rotation of the moment. Check that it's still pointing
correctly, that is good. Make an object and I'm
going to go to sphere. I'm just going to
make a really small little green sphere,
make these green. Also make the display icon color green. This is
looking really good. I think everything is in order. I hope that you've
managed to follow all that is pretty fiddly. This is why I wanted to start with just a leg first rather than leaping straight
into a full character. But we still got
one step to do and that's to duplicate
what we've done on the right arm and put
it over onto the left arm. We need to click on the right
shoulder and we want to duplicate the right shoulder
and the wrist goal. Hold down Control or
Command on a Mac. We want the right shoulder, the right wrist goal, and
the right shoulder pole. If we then go to "Character" and go to "Mirror tool," we can
grab all of these things. I'm going to hold down Shift and click on "Direction
naming and tool." We want origin world, coordinates world, that's fine. We want the x-axis to
be mirrored and we want the mirror from the minus of the x-axis and we're
mirroring it to the plus axis on the x-axis. Then we want to match
with the naming. We want to match the case
and we want to replace all the Rs with Ls, because we're going
from right to left. We want it to copy the children so that it copies everything
below the shoulder. I think that we should
be good if we do that. Let's hit "Mirror"
and see what happens. We can always undo it and
do it again, that's fine. Well, it looks correct, but does it work correctly
is the question. The axis is pointing
differently. That should be okay and
if we drag this, yes, it is pointing in the
correct direction, then the only other
thing I'm going to do is change this to blue
and there we go. That is our rig done. I think everything
is actually linked, the hierarchy is
in correct order. Let's take a little break
there and when we come back, we'll bind the mesh to the rig. Amazing, that is a big
job out of the way, we have a fully functioning
character rig ready to go. All we need to do now is
attach the mesh to the rig. Let's quickly go over some of the key points while
making this rig. Firstly, it's really
good to make sure that you're working to
real-life scale. I think that's the best thing to do generally,
as you could see, there was a bit of a
problem because I'd made the original leg rig was
at just screen scale. It came in really big
compared to our character. I think it's good
in the long run. You can see this workaround of scaling the object up
or scaling the mesh down because it's a
really common thing when you're working on
different projects, particularly when you're
working with different people because people tend just
to work in different ways. It's good to know that that problem exists and
how to work around it. Then we went through and made all the joints for the
rest of the character, like the spine and the
arms and everything. Using the axis tool to move
the joints around and then clicking on the
align tool inside the joints made adjusting
the rig at toggle. Building one side of
the character and then using the mirror
tool is the best way to copy over arms and legs when you're working with
symmetrical characters. Also, it's a really
good idea to keep testing the functionality
of your rig as you go along
because it's quite easy just to start
making something, assuming it's going to be fine, and then realizing it's not working and having to redo it. Although that said
it is quite easy to rearrange objects
inside the hierarchy, so it's best not
to worry to much. But yeah, like I said, just
keep testing as you go along. Plus quite often you
don't really know exactly what you're going to need
until you start animating. It's good to keep that in mind that you're probably going
to be coming back and making tweaks later
on which we'll be doing at the
end of the class. Great, this is a
perfect place to start attaching our
mesh to the joints. In the next class we
are going to be binding and weighting our character.
I'll see you then.
6. Binding a Full Character: We're doing well. This is the final stretch. We have a fully functioning character rig. Now it's time to attach the character. Same thing as before, we'll do an automatic binding using the Bind tool, and then we'll just go through and make it all really clean using the Weights Manager. Let's not hang around. Let's get to it. Great. We're back in our scene. The body is in there already and the rig is pretty much ready to go, or ready to be bound. If you've got this display tag on, just turn it off for a moment. I'm just going to show you the model in a little bit more detail. I'm going to turn the smoothing off and just point out a few things. Like in the leg, I've already prepped the model for adding joints, done this little trick that we did on the knee in the leg weighting class. Elbows are the same as legs. So I've added more subdivisions at the back compared to the front so that it can bend forwards nice and easily. Got the correct number of subdivisions around the shoulder and the wrist. Basically, you need to pay special attention to everything where something's going to be bending. All the joints basically need to have special attention to the mesh. This might be a little bit of trial and error as well, like you saw when we were doing the leg. I had a couple of guys at the ankle, to get the ankle bit better. This probably isn't the most ideal way of doing the ankle, but I think it works for what we need on this character, and the knee as well. This actually moved this split forwards. When we did the leg, we had it on this phase, I think, where it splits up. But actually, I think it's better when forwards because then we don't get this one inserting itself, so it's a bit cleaner. We're ready to go. Let's get to it. What we need to do is click on our body, and then we need to click on all the joints. This is exactly the same process as we did on the leg in the Introduction to Weights video. Basically, click on all and make sure we've got all the joints in there. I opened up all of these. Make sure none of these are closed, and in fact, double-check that you've got them all open. If you start like this with these knolls rolled up, you can go to "View", "Folding", and "Unfold Selected", and that will unfold everything, click on the bottom one, and I'm going to hold Shift and click on the top one, SpineBase, and then I'm going to hold Control and click on the character's body, the actual mesh object. Then I'm going to go to "Character", and I'm going to go to "Bind". Hopefully, we've got our skin and our weight tag set up for us. Let's just click on the weight tag. Check these joints. Yeah, that's fine. As she has put a few knolls in there, we don't need those, so we can just get rid of these, just to make it a bit simpler, just roll these up. Otherwise it's just going to be too much to see inside our object view. I'm quickly just going to test to make sure our thing has actually bound to these joints. Even though that's totally wrong, that's fine. I'm going to foot one here. Obviously, totally wrong, but it's fine. But we're going to completely undo these automatic weights. I go to "Character", "Manager", and "Weight Manager". Now we can click on our body. When we do, we should be able to see the automatic weighting that's happened here. It assigns colors to each joint. If you click on your Joints tab in the Weight Manager, you can see the colors in here. SpineBase is red, and you can see the inference of red there. Mostly when you hover over, you can see all the percentages that it's applied. Actually, let's start at the head. For the head, basically we just want this one joint, which is the neck joint, and we want the whole head to be parented to this neck joint, apart from the nose because we've got one more joint there. I'm going to go to my front view, and I'm going to change the display to "Gouraud Shading Lines" so I can see the colors. I go to point mode, make sure I've got my body selected, make sure "Only select visible elements" is off. I'm just going to select all the points in the head, and I'm going to make sure my neck is selected, bring up these commands as well. I've got commands and joints visible, and I'm going to ''Mode'', ''Add'', and I'm going to ''Apply Selected''. Now all of these are 100 percent weighted to the neck. The next one I'm going to do is the nose. I'm going to click on ''NoseBase''. I'm going to do this from the side, and I'm going to select all these, ''Add'', ''Apply Selected'', 100 percent, test that quickly, go back to my perspective view, grab my neck, there we go, and grab my nose. Well, not my nose, but the character's nose. Amazing. Let's just carry on going down to the body. Probably do the arm, but basically, in this first part of the process, anything that's clearly halfway. For example, anything that's halfway between two joints like right on the joint line, that one should be 50/50 to those joints, and anything that is on one joint should be 100 percent. This is the way we start because it makes a really clean mesh which then can be smoothed. The next one I'm going to do is the SpineTop. If you hover over, you can see which joint you're on, spine, top, and neck. Actually, I'm going to click ''SpineTop'' and ''Neck'' at the same time. This line here should be 50/50 to the neck and spine top. I'm going to select these points down here. Make sure that I'm getting the back ones. Always make sure you've got the back ones. Make sure you got "Only select visible elements" off if you're doing it like this. You want to select this line here, and I'm going to do SpineTop and neck at 100 percent. That should be 50/50 SpineTop and neck, yes. Then all the rest of these, this one is not quite on that joint, but it's quite clearly should belong to both of these. Maybe that joint should actually be there, but it's not, it's okay because these are going to be really smooth down anyway. I'm going to select this one and do SpineMid. All these ones in the middle here will be, so this would be 100 percent to the SpineTop, these ones and this were here, 50/50 SpineTops, SpineMid. This is a tricky one. It would be 50 percent shoulder, 50 percent SpineTop. But it might need some SpineMid on the armpit there. I'm just going to do 50 percent to that and then actually on this one, I'm going to do split between three, SpineTop, SpineMid, and RShoulder. We've got 30 percent of all of them. I think they'll be right. I'm just going to do the same on this side as well. See, this is the benefit of mirroring it. Make sure you do not doing, r you doing l. This is where the smoothing is going to be important because this is probably going to be a blend as well. I'm just going to do these 100 percent for the moment. Then we can work out these afterwards. These ones will be 100 percent shoulder and then this middle one here will be 50 percent shoulder 50 percent elbow, this line here will be 100 percent elbow along with this one. Then we get into the hands. This line here, and this line here will be 100 percent to the wrist and the bottom row, this one and this one. All of these will be 100 percent to the wrist. I should have my Selection tools. I'm just going to grab these Selection tools, pop these out. If you open one of these windows and you click on that bar at the top or you let go on that bar on the top. When you hold down and you click on that bit, it will pop it out into its own, things are permanently. Now use these loops, selections, and grab these two loops and apply that thumb should be right thumb base. We just finish off our hands, so what we've got next is the right finger base. We want this line and this line to be 100 percent to the base. Then we want this line and the rest of the hand weighted to our finger mid, amazing. Let's just check, make sure we're doing that right. Because it's quite easy actually to accidentally weight these to the left instead of right when you're not doing mirroring. Here we go. This is looking much better already than before. Let's turn the smoothing on for extra satisfying test. There we go. It's already looking pretty good. We might not have to do smoothing. I think we probably should do a little bit of smoothing. Once you've done this first level of binding, you can probably start animating because the rig will be ready to go. It won't look super smooth and slick, but at least you can get it moving, no problem. Then after you started animating, that's when you're going to be pulling the character in all these different poses. If you're rigging for someone who's going to animate, you don't know what they're going to do in terms of poses. It's quite difficult to predict in terms of what the weighting should be. Because you can weight it in one particular way, but then the animator might pull the character in some weird unexpected pose. There's going to be a little of bit backwards and forwards between animation and binding in that respect. Because we're not doing mirroring, we're going to go ahead and do the left arm. I might fast-forward this section. Let's give that a test. Very nice. I didn't test the finger. Let me test the fingers now. Great. We've just got the torso and the legs to do. Let's carry on there. This line here will be 50 percent SpineMid and 50 percent SpineBase. This one will be a 100 percent SpineBase, as will this one. This is starting to where we get complicated. Maybe these ones will need a bit of smoothing in that line there because we're going to be starting to get influenced by the hips here. This row here, up to here, like these ones will probably going to be 50 percent this left hip and 50 percent SpineBase. This section in the middle is going to be probably a mixture of all three of these joint. Select "SpineBase," and "RHip," and then do the other side as well. This is going to be 50 percent SpineBase and 50 percent LHip. These ones in the middle. Looks like this would probably be the same for the moment, is going to be 33 percent LHip, RHip, and SpineBase. Make sure it's selected. It's good. I just selected these. These ones shouldn't have SpineBase in them. This row here will be 100 percent the tops of the legs. I select this loop. That should be 100 percent to the top of the leg. That's RHip joint a 100 percent, and this one will be left hip joint, a 100 percent. This one will be a 100 percent RHip. This one will be a 100 percent RKnee. This mini row in the middle is 50 percent hip, 50 percent knee. It's very closest, so when you look at your line, yeah, it's a bit confusing. But I'm just going to use loop selections here. This will be 100 percent RKnee. We went into a lot of smoothing in the leg one, which we're going to have to redo. This one is a 100 percent knee for the moment, and then this one is 50 percent knee, 50 percent ankle. This one is a 100 percent ankle, and so is the rest of the foot, so we can just select the rest of the foot. Make sure you don't select the other foot though. In fact, I'm just going to do Fill Selection here. If you've got your point selected, if you hold down Control and click the "Edges," that way you get an edge, and then if you click on "Fill Selection," you can fill everything in that side of the edge. I just want do that because I'm really cautious not to select anything on the other foot. If you've got any influence on a joint on this side to the other side, we'll see when we move this leg, parts of this leg are going to start being drawn backwards and forwards by that movement, which is the worst thing. It's just not my work tool. With this selected, I'm now going to hold down Control, and click on my points again. If we apply that. Let's go back and make sure we've got this leg done correctly. There we go. We should be in a good place right now with everything. Let's give it a quick test. Select my hips. We've got knees working nicely. The legs are working nicely. Let's try one of these on the foot. Here we go. We see we've got this thing which might be we will need to smooth out a little bit. Then we're going to try the arms again. It's looking good. Try the SpineMid. There we go. Looking good. Then just try the head. It's looking good. Finally, the nose. Amazing. In the next video, even though we've got to a really good place with this, it's pretty much done. It's all ready to go. You could animate, well, like this probably pretty well. There's a few bits missing, couple of controllers missing that we should have maybe before. But once the binding is all done and it's good to do a final pass over your rig. Then after that, obviously, you'll want to change it maybe when you start animating. But for the moment, let's just do a final part of this, add those few missing controllers, see how it goes and maybe take it for a test drive. Congratulations, you've made a fully functioning rigged character ready for all sorts of animation. If you've recently completed my modeling for C4D class, then this is the perfect time where you can go back and actually pose the character really easily into the boat. Hopefully, you can see why I didn't go into rigging the character in that class because it would have been a bit of a long explanation. Let's just once again recap the main steps. The first thing which actually we didn't really cover, I suppose in this class, if you've modeled a new character ready for rigging, is to go through and prep it for binding. That means going through and making sure all the joints are clean, making sure you've got enough subdivisions on the joints so that when they deform, they'll bend correctly, that sort of thing. That's really important to do before you start. Like I said before in a previous video, there might be a bit of backwards and forwards at this stage. While you start binding and testing it, and realizing that you need another subdivision, you might have to back to modeling and redo the weighting and stuff. But that's why it's good to use this automatic binding thing and then going through and making really clean weights. It's just like a systematic process. Then once you're happy with the model and with the first level of binding, then you can go through and smooth stuff out to make it look really nice. Seeing our model was ready to go, we clicked on our model and then selected all our joints and hit "Bind," so that we get our automatic weights. Then we went through and made sure that all the weights were either a 100 percent or 50 percent, and in some cases, split between more joints, so that it's all nice and clean and ready for smoothing. We didn't actually really do much smoothing on that character because it was pretty clean. It looks pretty good like that. We might have to do a bit of smoothing when we come to doing some animation, or maybe when we attach the character of the bike in the next class, but we'll do that as it comes. Amazing. We're pretty much done. There's actually a few final tweaks that I want to do on the rig that maybe we could have done earlier. But like I said, it's all a development process. I just want to do a final pass on the rig. It's just going to be a matter of adding a few controllers that I missed, that kind of thing and making sure it's all completely ready for animation. Then after that, I'll probably do a quick test animation. I'll see you in the next video.
7. Rigging Final Touches: Final stretch. As with everything, like I've said a few times, there is a bit of a backward and forwards, so before I do any type of animation this week, I just want to go back and make sure that everything's ready to go. The real test will be when we actually start animating, but I can see already that there's a few things I'm going to need, so let's go and do that now. Great. There's just a couple of things missing from this rig at the moment. We should have added them before, but I didn't notice. It's just a couple of simple things; we need a couple of controllers for the spine and one for the neck, so you can control the head. Then it will just be a matter of rearranging rig to serve the purpose that we want to serve. At the moment, I've been building this towards the next class, which will be the bike rig, so the character will be perfectly set up for attaching to a bike. But I'll also quickly show you how it would be set up just to be used for general purpose such as walks, cycles and a character just moving around. Let's get to it. Let's quickly add those extra controllers in that one. I want one for the middle of the spine. You can literally animate directly on the joints, but it's much better to have a controller null outside, so that you can, well for one, see it. You can actually see where it's going. Secondly, you can just have it separate from the rig so you don't digging through the hierarchy. There's a lot of benefits to it. Let's add that in now. You drop the null inside the thing you're going to attach to it, if that makes sense, and hit PSR reset. There is PSR reset over there now, didn't use to be, but I like it here because I've just always had it there. I'm going to call this spine mid controller. I'm going to make a circle axis x, y, make it bigger, green, I think. We could display color on. Then I'm going to drop this just below the hip, hold Control, and drag my spine mid controller and drop it on the spine top. I'm going to hit PSR reset on there. Now we've got another one place and I'm going to name that spine top controller. The last one we need is one for the head. I'm going to once again copy this and put it in PSR reset. I might make this a slightly different color because it's in a legal assigned in the neck controller, so make this purple. I'm just going to attach these with PSR constraints, so we need a PSR constraint on spine mid, spine top, and neck. I'm going to select two of those in one go. Go to Rigging, Constraint. Now, let's just put plain old constraint tag on those. Hit "PSR". We've got PSR control over all of these and several stand spine mid. Grab the spine mid controller drop that into the target. Spine top drops on top into the target and finally, neck and drop around head controller into that target. Now we've got PSR control over this, but we do need to maintain our hierarchy a little bit. These things aren't going to follow each other correctly now, so I'll move that. Obviously, we want the head to move. We need to drop spine top into spine mid and head controller into spine top. These would potentially go inside, and these poles as well. All the stuff would go inside the spine top controller, so that when you rotate this, the hands go as well. I'll leave that in there for a moment. One last thing for this, is to put the character mesh and character rig into one null. They're both named character at the moment, which is no good. Let's just call this character rig and this one will be character mesh. Then I'm going to create one new null and just call this one character master, and I'm going to give this a special color, so I can turn this on. Maybe this one can be green as well, so stand out from the blue and these red set button. Turn Icon color to display color, and I'm just going to drop these based in there. I'm just going to make a different shape to the character rig base. This is going to be a circle, I guess. It's fine just to differentiate it. Let's make it a bit smaller. I'm just going to make this character rig one a bit smaller as well. One last thing, I just noticed if you draw the hip and the ankles at the moment, the legs turned backwards, and that's because the polls aren't in the right place there. The polls shouldn't be in the character rig null or it should be probably under the hip, so that when you move the hip around, these two poles at the front follow the hip thing that makes sense because that way they're in front of the knees all the time. Great. that's pretty much it. It's ready to go. I'd really like to give it a quick test drive, so I think I'm going to do a walk cycle in the next video. We'll zip through it. It will just be a time-lapse, I'm not going to explain my animation process because this is more of a rigging class and I'm definitely going to do a classroom, especially for animation at some point, so we'll get into that then. I just want to point out these IK arms, they're going to be really good if the character is gesturing a lot or doing lots of refined movements with their hands. I think for the walk cycle, we're probably going to take out the IK and switch it to FK, just because I think if you're just doing a really quick walk cycle or having swing arms using IK. I don't know, we'll see. I think I'm going to change it when I start animating because it'll be easier to tell what I'm going to need IK of. There's definitely a way, if you're doing a bit more of an advanced, for you to switch between IK and FK, that would be the best thing. But I think for this one, I'm just going to delete the IK and have it as FK because I'm only going to do a walk cycle and then that's it. It's not doing anything else, I'm not going to be switching between doing things which IK would be useful for versus FK would be useful for. Great. Let's save this because this is an excellent rig to start any scene, but you can then adapt it for your needs and everything. In the next video, we'll give it a test, so I'll see you there. We're done, so well done guys. It's all looking really nice, clean, and tidy, and I can't wait to give it a try. Let's just do a quick recap on some of these final tweaks. The main thing is I wanted to add some extra controllers to the spine joints. There was the spine and the neck which we're actually missing null controllers. It's actually okay to animate directly on the joints sometimes, but if you're making a really nice clean rig and it's going to be wrapped up in a nice package and easy for it to pass over to an animator to animate. You really want controllers for all the main joints and preferably nice big visible nulls with bright colors. We then arranged the controllers into a good layout for general animation. In part 2 of this class we'll be putting the character on a bike, which will mean we'll need to do a different arrangement. It just depends on what purpose the character is going to be used for, which will determine the arrangement of the controllers. Finally, we put the character rig and the mesh and everything, all into one null, and made it a nice little control at the bottom. It's just so that the whole thing comes in one nice, neat little package. Amazing. Well, the last thing to do is actually to give this rig bit of a test drive. I mean, how unsatisfying would it be to watch this entire tutorial and not see the rig move at all. It's like doing a class on building a hammer, making the hammer all perfect. Showing you the hammer but not actually hitting anything with it, so let's do it now. In the next video, I'll be doing a quick walk cycle to test out this lovely new rig. I'm not going to be actually explaining my animation process, it's going to be a bit more of a time-lapse situation, but I will point out any changes to the rig if I make any. I really encourage you to do some of your own animations to test out the rigs that you've made. I will be doing an animation class definitely, that's going to be a future class coming up, where I'll actually dive into my animation process and animation techniques. But that will be a little bit further down the line, so I'll see you there.
8. Bonus: Test Animation: All right. Time to test out this rig. As I was saying, this isn't going to be much of an animation tutorial. I'm going to be definitely doing a full in-depth animation class in the future, so look out for that. For now, please enjoy this little time-lapse of me making a walk cycle. I'll see you on the other side. Let's do a quick test. I'm going to do a walk cycle, I think, and we'll see where we end up. I'll just carry on and point out anything that I change if there's any interesting bits. I'm still completely undecided about the arms, whether I'm going to do IK or FK. I might try IK, and if it's going badly, I'll switch to FK, so we'll see. I'm just going to point out, if you don't see the animation timeline, it's because I normally work with two screens. I just find that really easy to work, especially when I'm animating. I think I'm going to stop animating there. Generally, it worked out really well. I didn't make any changes to the rig. The layout that we did at the end of the finalizing the rig section worked really nicely. The character is a very nondescript character, very blobby, but yeah, quite cartoony. The walk has turned out quite cartoony in that way. I record all of these tutorials at 60 frames a second, so everything I make has to be 60 or 30. I don't really like animating at 30, particularly. For some reason when I'm working at 30 frames a second, the normal layer of the poses that I make, I make the spacing one frame longer and the walk looks too slow and I make the spacing one frame short and it looks too quick. I animated it and then in Cinema 4D, I just stretched the keyframes out until it look like a normal length and then I had to rejig everything to make it smoother again. But yeah, generally nothing really wrong. There is one issue that I found with the rig and that is if I go to lines mode, you'll see that the wrist is really twisted and that's because when I originally modeled this character, the hands were facing palms forward. Go back to the T-pose. See how the characters palms are facing forward. They actually should be facing down. The character object is a really good reference for how you should lay out your character when you're building and rigging. On this character, I forgot to do that. I just modeled the hands the wrong way round. It's not a major issue. It's just when characters tend to stand around with their arms down by the sides a lot and if you have the hands facing downwards, you get less distortion in that pose and that pose is the most common pose there is. It's not a huge issue and actually we probably could have rigged it with a bit of smoothing and a bit of twisting, we could've added a twist bone in there. That might have been better. But other than that, yeah, I'm really happy with this. I might do a quick render. We'll see. Well, that worked out really nicely. I did manage to do a quick test render of the finished walk cycle, which you should be seeing right about now. Like I said, I'll be doing a full in-depth animation class sometime in the future. But for now, I hope you guys have been enjoying testing other rigs that you've made, and if you've got anything to show or to share, I'd really love to see it. If you've got any test animations, that's amazing, or even if you've got screenshots of your finished rigs, I'd really like to see it. Whatever you've got, please share it in the class projects. In the next video, we'll just be doing a quick debrief of the entire class and we'll just wrap things up. I'll see you there.
9. Class Debrief: Congratulations. Well done for completing this overview of character rigging in Cinema 4D. A massive thank you to everybody who's made it through till this last video. I really hope that you found this class useful and that you've learned a thing or two. Let's take a moment to recap all of the main steps in creating a full character rig. Firstly, it's a good idea to make sure that any character you're going to rig is in a T-pose. That's arms straight out. It's also a good idea to make sure that the legs are straight, the knees are straight, and the feet are straight because it will just make rigging that much easier. Also, unlike what we did with our character, its better that the hands are palm down rather than palms forward, just because it reduces the amount of distortion when the character is in a relaxed arms down pose. Sorry. No one's perfect, but it's a good thing to keep in mind. Then you should make sure that your model is prepped and ready to be bound. By that, I mean, making sure that the subdivisions are in the right place and that there's enough subdivisions for that particular deformation to happen. For example, on our knee, where knees bend, they don't bend beyond straight in one direction, and they only bend in one direction to have more subdivisions around the back. Sorry, I'm using my elbow. This isn't my knee by the way. For example, an elbow is the same. You have more subdivisions around the back of the elbow where you get stretching, and you have less around the front where you get the joint compressing. When the model is ready to go, you can then start building your joints around it. Make sure that the joints are all lining up with the subdivisions in your model, and then you can go ahead and add IK and controllers when necessary. When you're happy with your joints, it's time to bind your character to them. Then you can use the bind function in Cinema 4D to give you some automatic weights along with a weight tag and a skinning deformer. It just gives you a good headstart. Then it's a good idea to go into the Weights Manager and make sure that all the points are really cleanly bound to their nearest joints. For example, 100 percent weighting on things that you know are definitely going to move with a particular joint, or maybe 50/50, where points are in between two joints. Sometimes it gets more complicated, so make sure they're all really cleanly bound. After you've got really cleanly bound meshed, then you can go through and maybe pull the character into different poses and paint with the Weight Tool to smooth out any problem areas that you might be getting when the mesh is deforming. Then it's time to do one quick final pass on your rig to make sure it's all ready for animation. Finally, it's always good to keep in mind that once the rig starts being animated, either by you or maybe an animator that you're working with, that there could be final tweaks because you never know there's always some unexpected poses that the character is going to be put into. That means there could be some extra smoothing to do on the weighting or maybe even if it's particularly bad, rearranging the rig in some kind of way. Amazing. I hope you guys found that useful, and I hope that you go away with some fully fledged rigging knowledge, either ready to rig a character or anything else that needs to move. I hope that you can now do that with a bit more confidence. Please post your own results. I'd really love to see anything that you've been working on, whether it's a rig for the preset character that I've provided with the class materials, or even better, one of your own characters that you've rigged using my techniques. Seeing what you've done with the techniques that I'm teaching in these classes is basically what it's all about. So go for it. Let me know in the discussions if you've got any questions, or I've missed something, or if there's any problems that you're having during the rigging process. I'd love to hear it. I'm always about to answer your questions. Once again, I'm Russ Etheridge. You can follow me on social media at Russ_Ether. I'm usually on Twitter and Instagram. Don't forget to follow me on my new YouTube channel. That's where I'm going to be posting bonus content that doesn't really fit into the main part of classes, and maybe other bits and bobs of different things I'm working on. All the links are either down below in the description or they're in my Skillshare profile, so check those out there. I look forward to seeing you next time.
 Russ Etheridge, Animator, Designer and Director