Transcripts
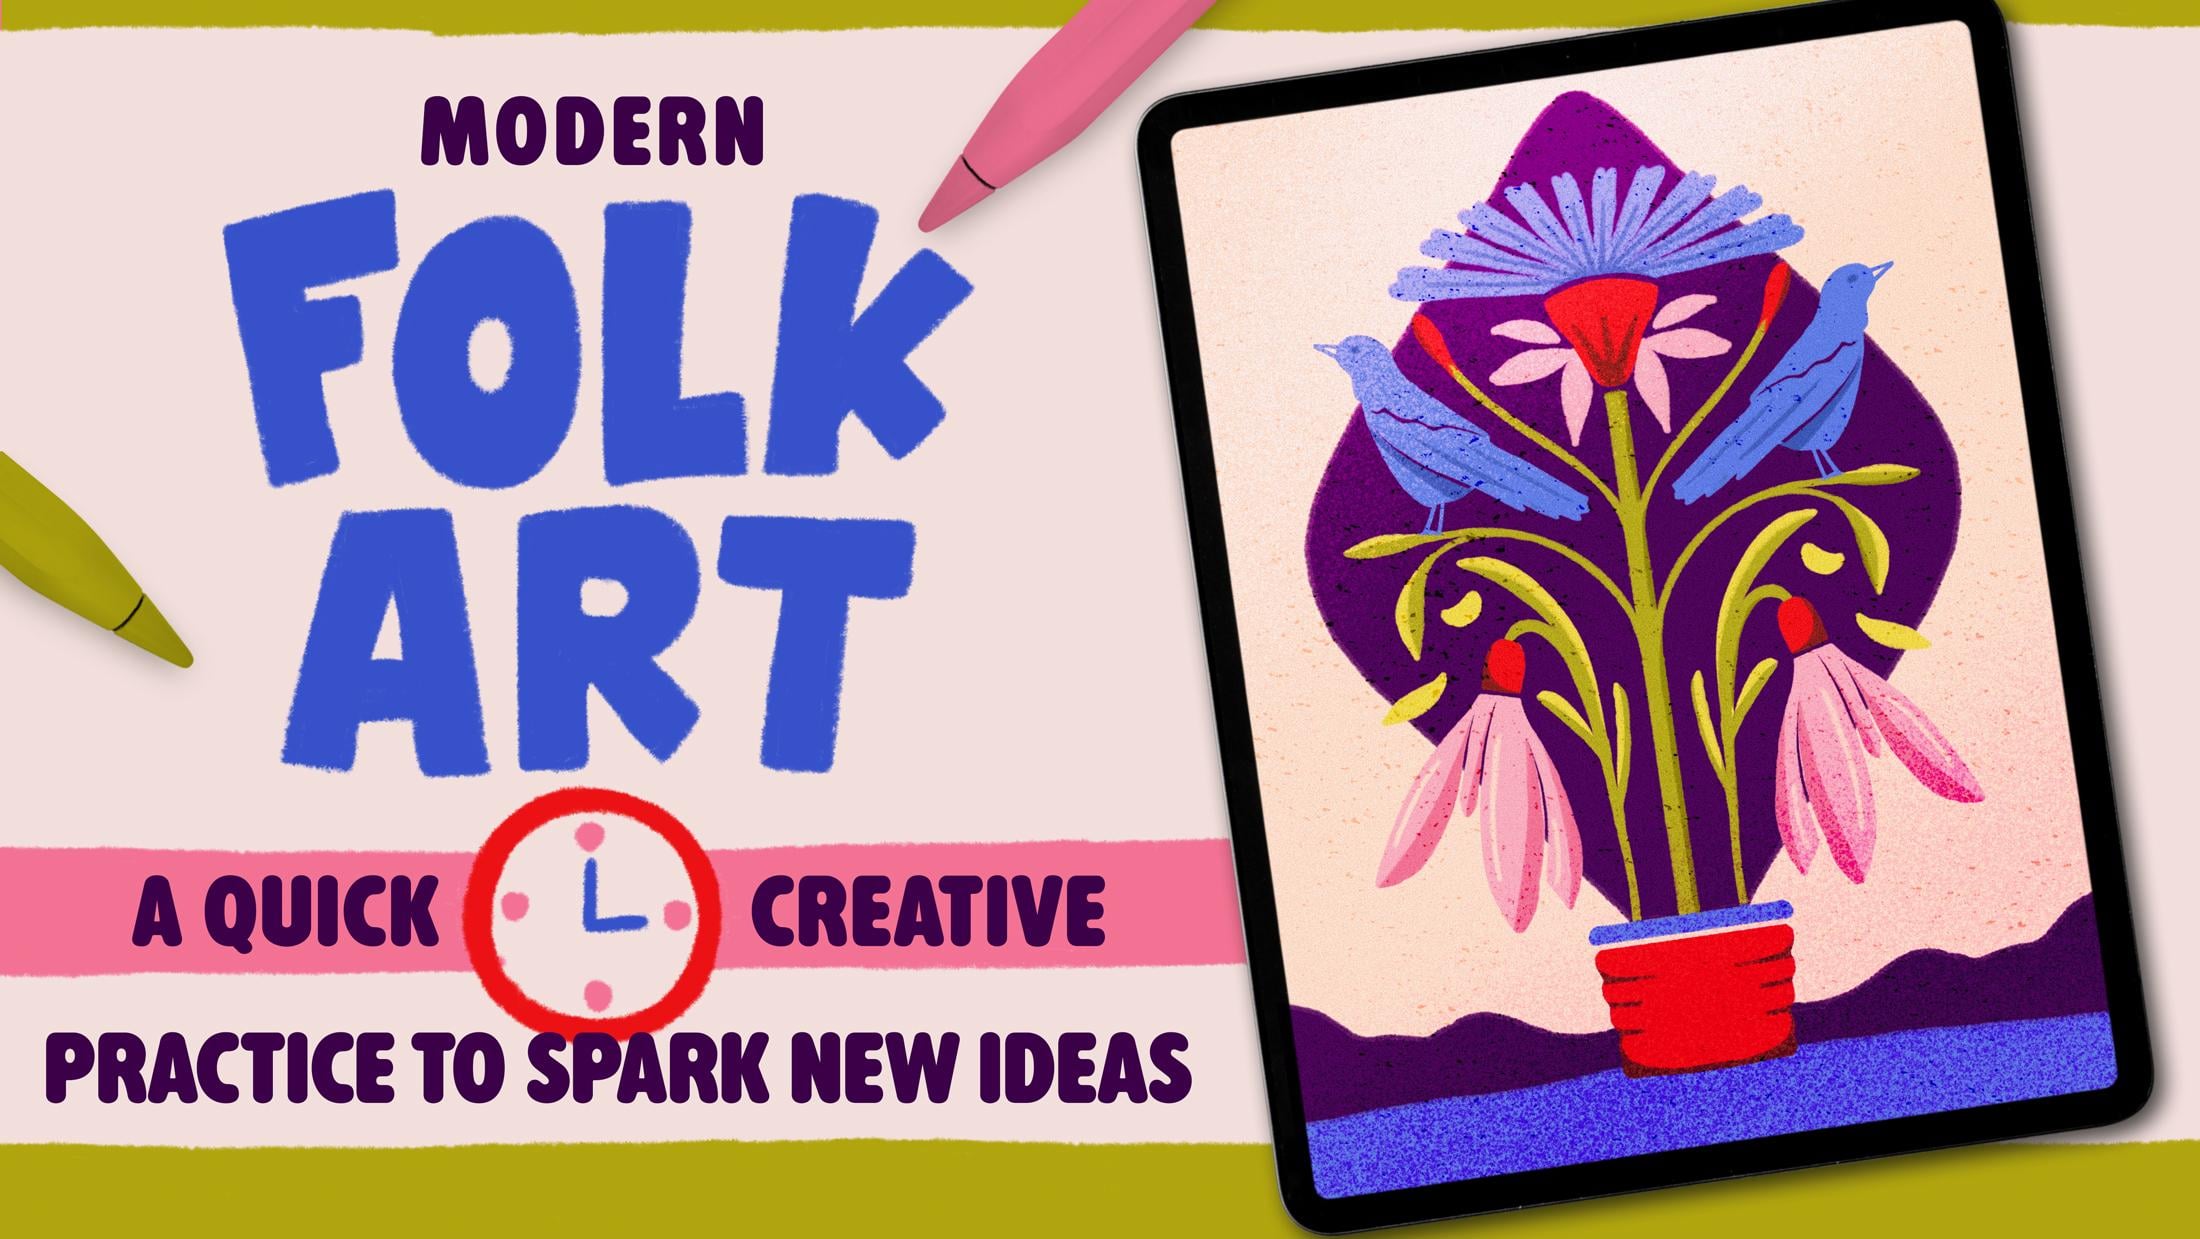
1. Welcome to Class!: Hey, everyone, in
this short class, we're going to make a fast, modern fox art poster using three shapes we find
outside. In your on street. You don't have to go
outside if it's raining, but I would really encourage
you to do so if you can. I'm Jimbo from Shao Bem, and I'm a lettering artist
and an illustrator. I've worked with hundreds
of brands in the past, and for the last five years, I've been teaching
creatives just like you, how to make colorful art, mostly lettering and
illustration in Procreate. This class, you will
need your phone camera and a digital tablet. I'll be using
Procreate on the iPad, but you can absolutely draw these motives
with just a pencil, paper, or in any software
that you're using. The workflow is going
to be very simple. Just go outside,
take three photos, simplify them using
simple shapes, compose, add some
color, and export. You can finish this in one sitting like literally
with your morning coffee, and once you learn it, you can repeat it forever.
See you inside.
2. Today's Class - What do you need?: Project is to upload
one finished poster, and if you want to also
upload the three photos of the different elements you used because that's
the fun part. We are building a tiny visual
library from real life. I thought that we could even exchange our photos and repeat the process whenever we need a fast challenge to
boost our creativity. If you share your pictures, I'll definitely pick some
of your elements and turn them into new posters that I'll share with you in
the next few weeks, and I would love for
you to do the same. Okay, so we will need an iPad plus Procreate
or any drawing app, pencil or paper, a phone camera, optional my folk palette and brushes that I've
prepared for you. I picked a few brushes
from my set on the road are made from European street
textures while traveling, and they perfectly match today's theme. So go
download them now. By the way, this class is not just about drawing
pretty things, but actually going outside
your neighborhood and trying to find things that
are in your environment. So yeah, now that I'm out,
let me show you what I found.
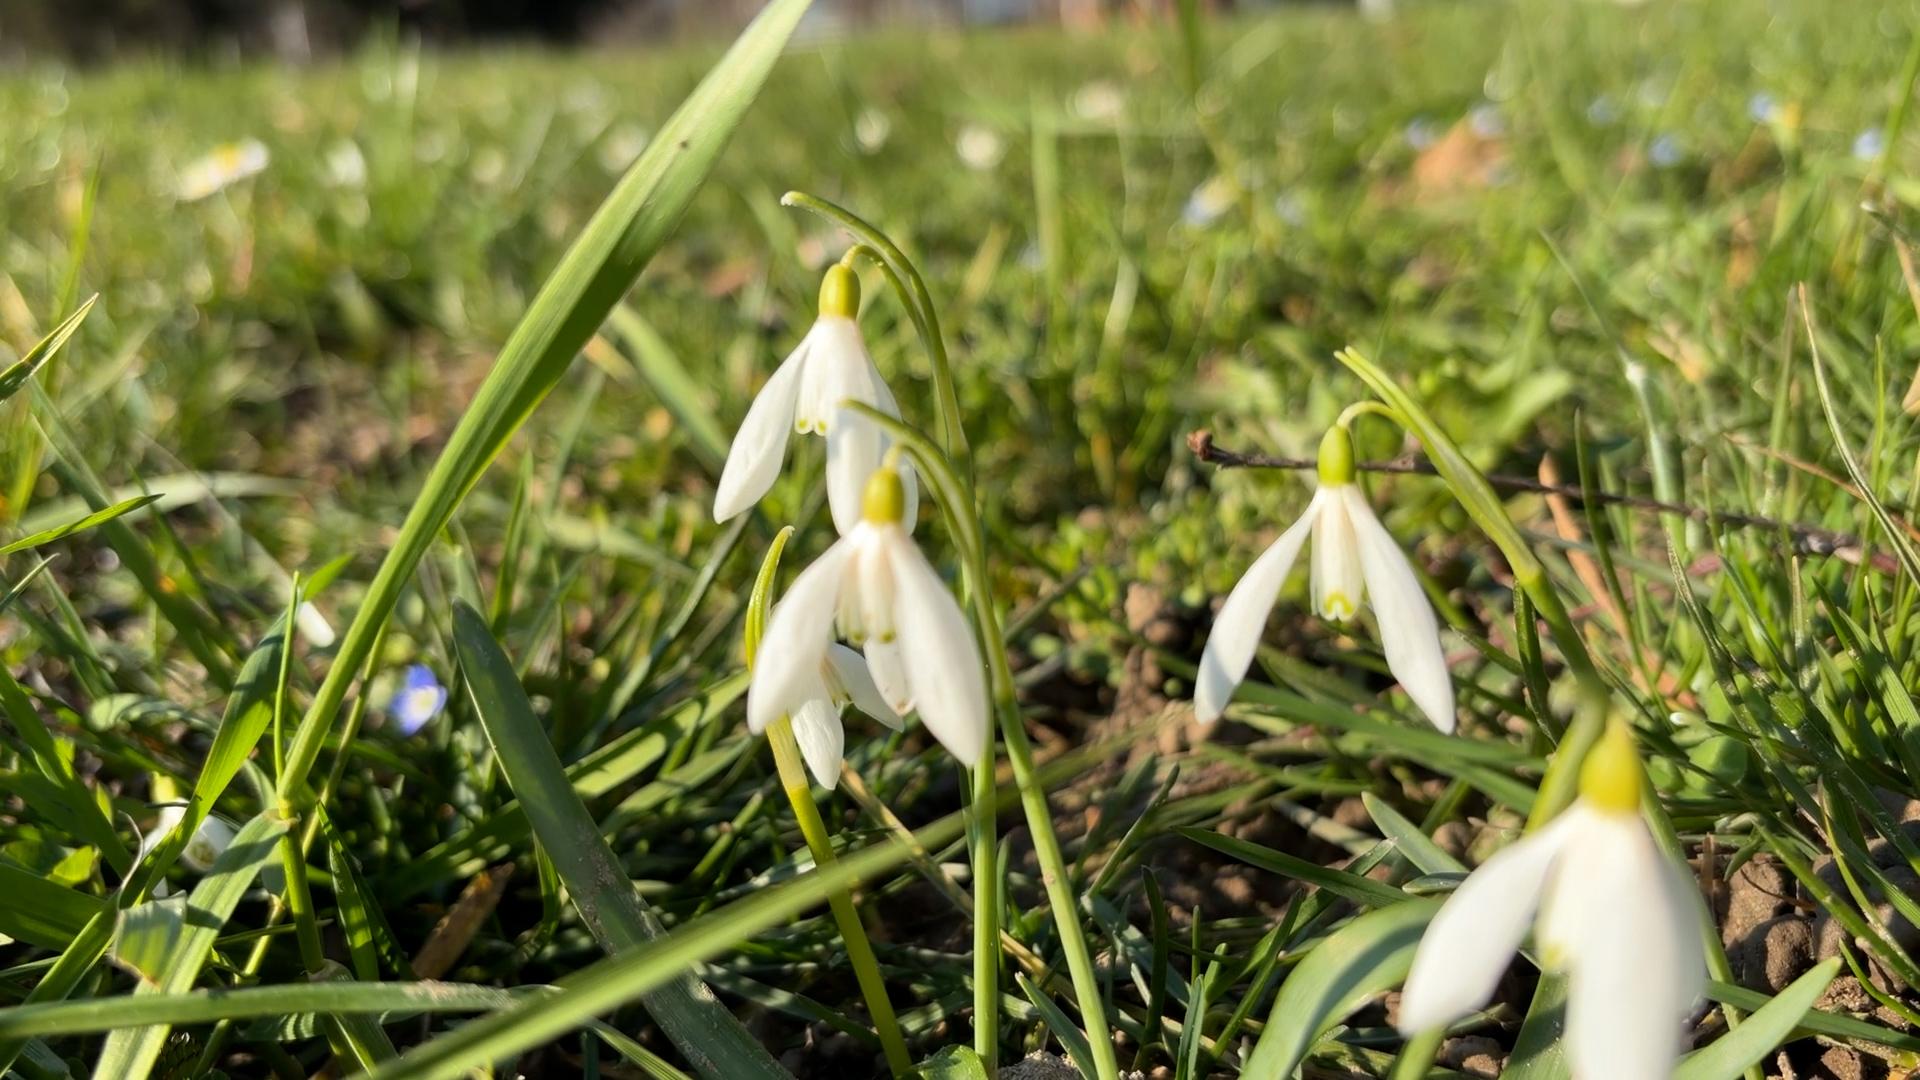
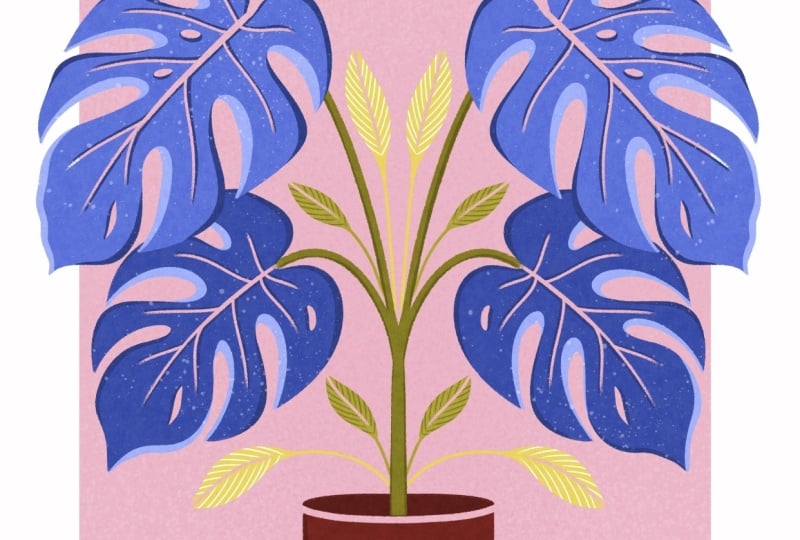
3. Let's go Outside - The 3 Find Rule: Okay, so here's the rule
to make things easier. Just pick three things. It can actually be anything. Well, probably not anything. Okay, so for my poster, I'm choosing three things
that I found here in Zagreb, Croatia right before
spring comes. A snowdrop, a tiny
droopy flower. I'm seeing a bunch of
these here in Zagreb, and I've never
drawn them before. Dandelion, honestly,
just because it looks pretty
dandelion, Dandelion. And finally, a crow
because crows are basically the mascots of the
city, I feel at this point. I see them all the time,
and they're super loud. Once I even saw a guy fostering a baby
crow back in Spain, and a year later, he was carrying it around
on his shoulder. It was really cool, actually. Is, I really want
you to do the same. Just go outside,
breathe some fresh air. Believe me, that
that really helps your overall motivation
and creativity. And just collect shapes
that make sense. It can be your
neighborhood, can be your favorite coffee
spot, whatever it is. The point here is to collect things that actually come
from your real life.
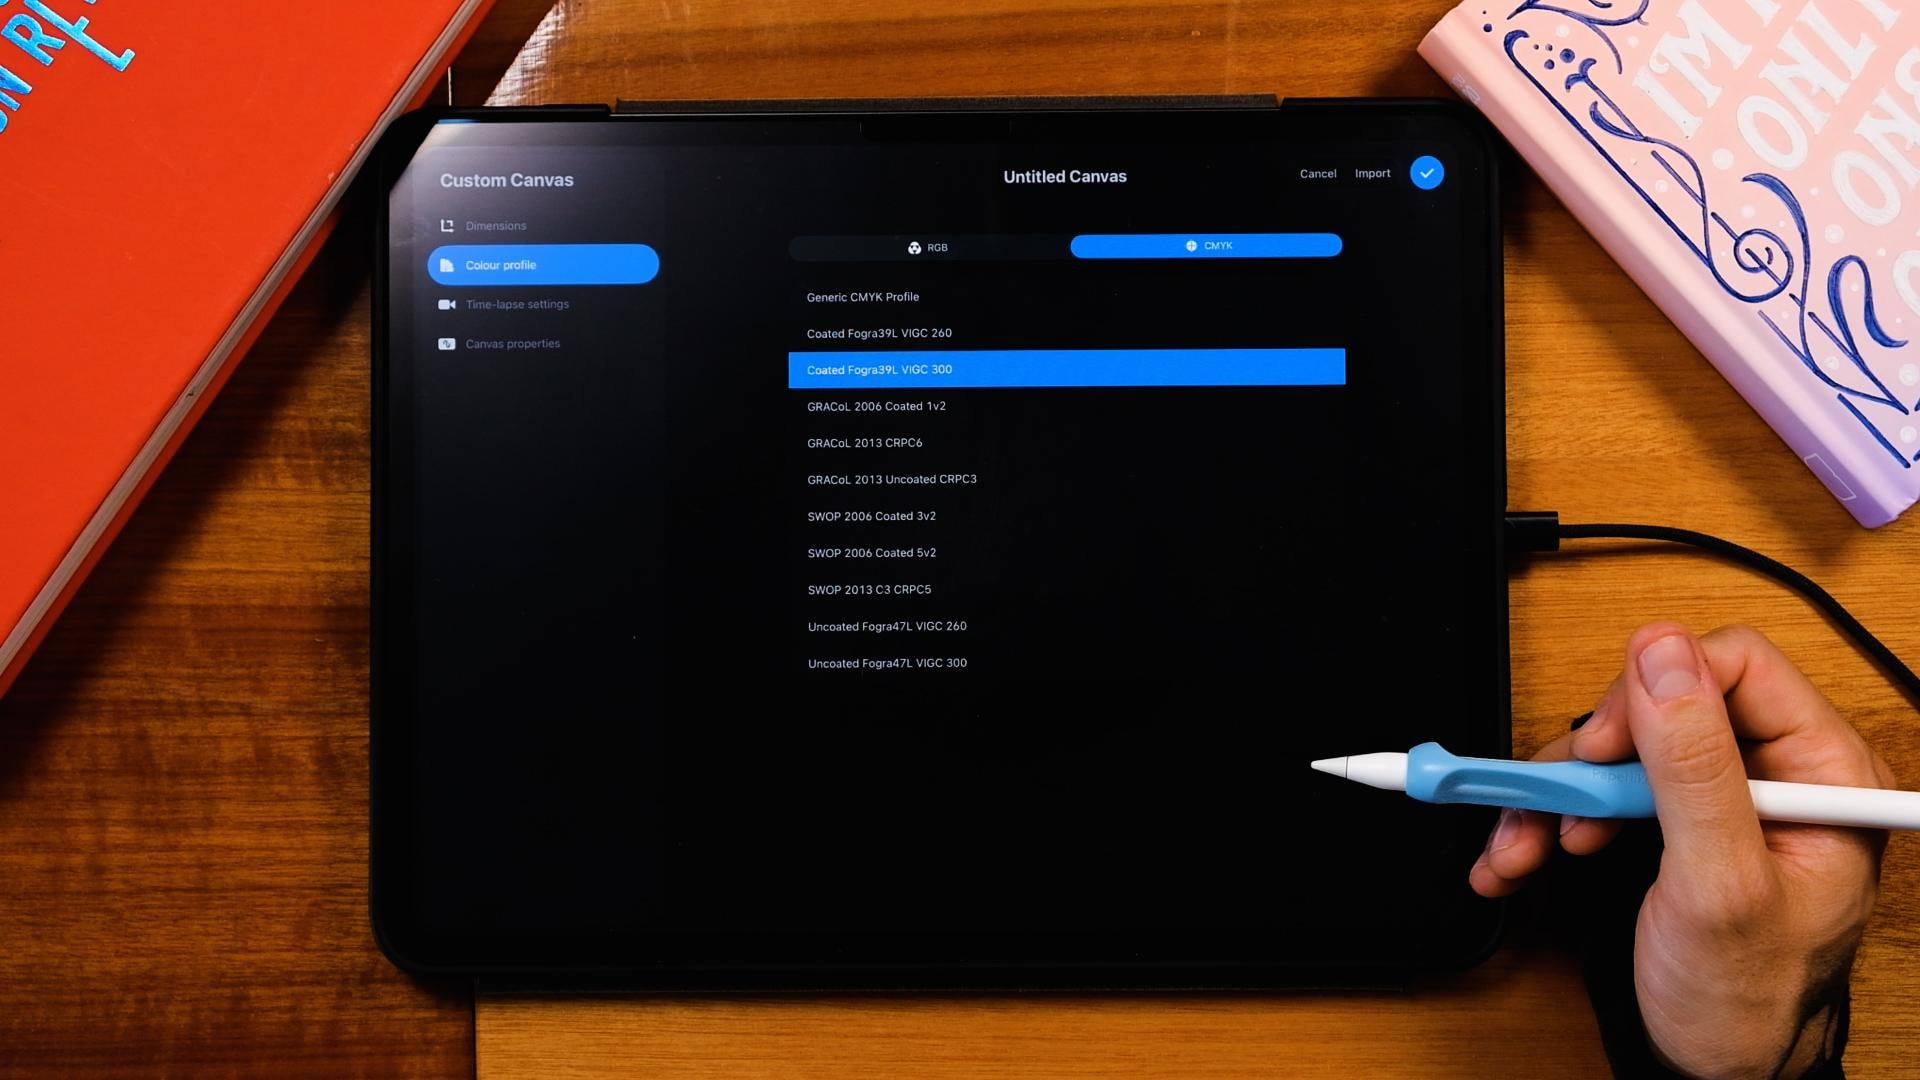
4. Setup in Procreate: Let's open Procreate,
and the first thing that I'm going to do is
to set up our canvas. So go to the Plus
button, tap again. Now since I'm in Europe, I'm
going to choose centimeters, but obviously, you can
use inches or pixels. That's completely fine.
So I'm going to go with 21 times 29.7. So that's going to be an A four, and for DPI, minimum 300 just in case you
want to print it. Now, depending on how
you want to print it, you can go to color profile, and you can choose
an RGB or a CMYK. For now, I'm going to go with
RGB because if I print it, it's going to be a digital print with a laser printer, probably. And that always gives me nice
colors if I do it in RGB. But if you want to do it with some other printing technique, a little bit more complicated
or with another printer, you should choose CMYK, and that depends also on your printer that
you're going to use. So the generic would
be good for most. It's going to go with RGB. So the first thing
I'm going to do is to import my three photos, which are actually screenshots from my videos that
I showed you before. So I'm just going to go
to my photo gallery. I have them here. I'm going to select
the three of them. And then without lifting my
finger off of the screen, I'm just going to do that. Then with my other hand, just gonna do this, select Procreate and
then drop it in. Okay, so now I'm going
to organize them. So let's go to the first photo. I'm gonna put it somewhere. I think I'm going to get
probably this one right here. So I'm just going to rotate it. And then I'm going to crop
it. And for cropping it, I'm just going to move it here, then move it again, and
then move it again down. You see, and that's a
very easy way to crop it. Just go to make it smaller. Make sure that the
uniform is selected, so you don't with the free form, you would distort it a bit,
and we don't want that. So uniform, let's place
it somewhere here. Now the second one is
going to be the crow, and I think I'm going to
use this one right here. So I'm just gonna, again,
crop it like that. I actually just gonna make it a bit bigger and
place it somewhere here. And then for the dandelion, I'm just going to do the same. Something like this. Gonna bring it on
top and then crop the upper part and
bring it down again. Good. So we've got
our main elements. Now I'm just going
to pinch all of it together and then tap on the end and bring
the opacity down.
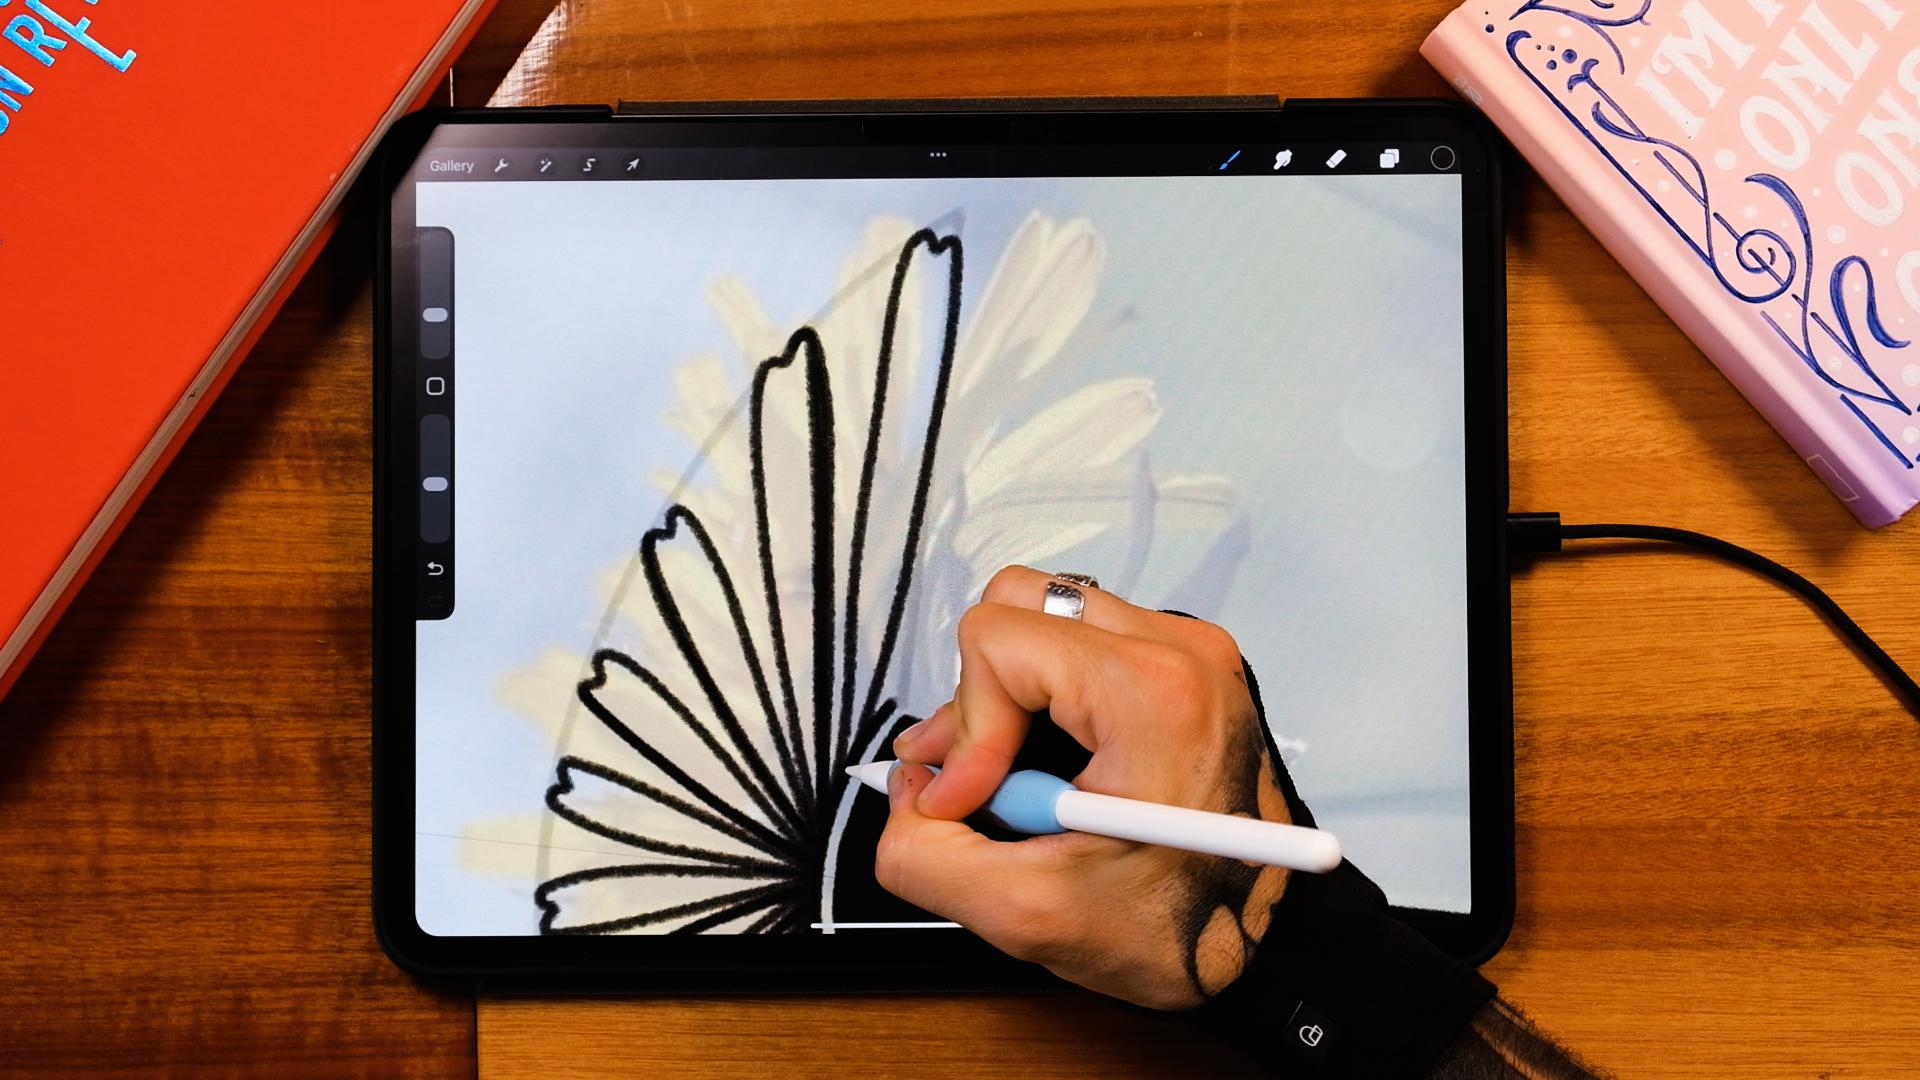
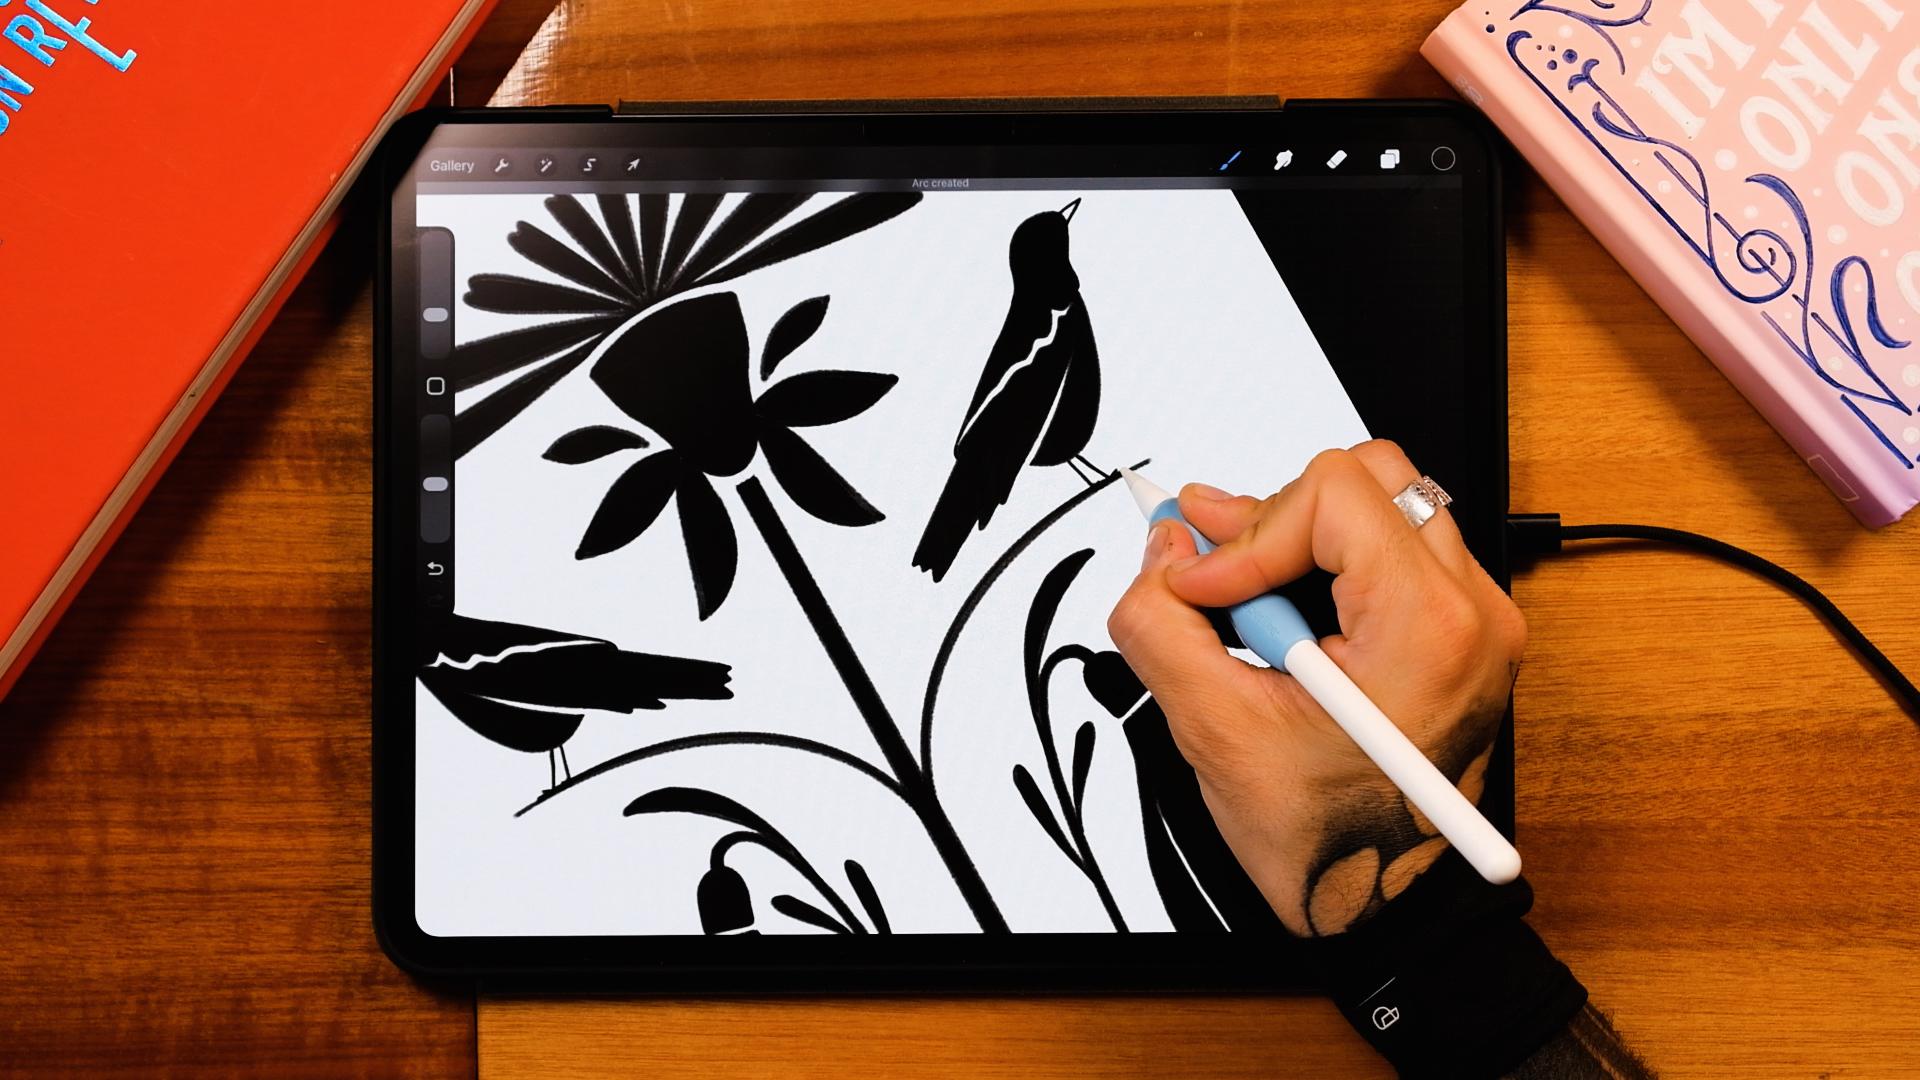
5. Simplifying Motifs: Now, I'm going to create a new layer and I'm going
to start with my elements. Now, the first element
that I want to do is that one right
here, the Dandelion. So I'm going to start
mirroring some things. Go to actions Canvas
drawing guide, Edit drawing guide, symmetry. It's going to be by
default vertical one. And then I'm just going
to bring this down here. And put it right there
in the center. Good. Now, on this new layer, you're going to see that it's gonna be with drawing assist. Go with black color in the color palette that
you downloaded today. And then open the brushes
that I've given you. So they're taken from my
brush set on the road. I thought like, since I'm getting all this
inspiration in the streets, I think on the road was the
perfect brush set to use, and I'm giving you three
of these brushes from it. So I'm going to go
to the moss pencil. And I'm going to start with
the first Illustration. So I'm going to try to capture these elements in a
minimalistic way, and you can see
that the three of them have a very
clear silhouette, which is something that
I really encourage. And let's try to simplify this. So I'm just going to start
doing a shape like that. And then something like this. Drop a color in. Just make
sure that it's solid. Great. Now here, I'm
just gonna continue this And then with the eraser, I'm just going to erase
some parts as well. Just want to also leave
some blank spaces, so it's not all black. Now here I'm just going
to do a line like that. And I'm going to start
doing some petals. Now, for this, I'm just
going to edit it better. I'm going to create a new layer. I'm gonna tap on it, making it a drawing assist, bring
the opacity down. And here I'm just going to do
something like this. Great. And now with this
shape, I'm going to use that curve to actually
make some of the petals. So I'm just gonna
start doing from here, something like this.
Let's do it again. You can see that
I'm following a bit the flour, but not completely. But it's good to have
it in the background because I know more or less how the petals look
like. I'm gonna do two more. So one here. And finally, one here. You can see that I'm not
being super careful. Great. Now, maybe you
can select them as well. And make them with a free form tool, make
them a bit smaller. Then maybe a bit more
up. Something like this. And we have our shape. Now, here you can do a couple of these
leaves, for example. So from here, you could
do one leaf. Like that. And then maybe like one from
here, something like this. And then maybe one Great. Let's paint
everything inside, so I'm just going to bring
the color black here, move left and right,
something like that, and then continue filling and just fill everything inside. And we will be done
with our first shape. Now, let's go to the crow. Now I'm going to just turn
off the drawing guide, and I'm going to erase this
semicircle that I did, and on a new layer, I'm
just going to do the crow. Something very
easy. So I'm going to do the shape
of the head here, something like this,
then the beak. Again, you don't need to
know how to draw a crow. So now from here,
I'm just going to go down. Gonna stop here. And then I'm going
to do the tail. So for the tail, you see, I'm not gonna complicate
my life here, so I'm gonna do
something like this. Great. Perfect. So now I'm
gonna bring this line up. Gonna leave also
some negative space. So I'm just gonna do this line. There. And then I'm gonna leave, like, a little
negative space inside. There. Perfect. Now from here, I'm gonna do this belly part. Gonna do something like this. And little Leg here, I
don't know how they call. Are they called
leg? Probably not. But anyways, whatever it is. Like that. It's gonna do
a negative part here. So just so it looks a little
bit more interesting. And drop a color in. And we
have our second element. Now let's go to the
little flower here. So on a new layer, I'm just going to do this part right here. That's gonna cut. Sow here like that. Now I'm just gonna do a line.
It goes down here. Again, doesn't have
to be super exact. There. Okay. Perfect.
Now let's do this part. So the first one I'm
gonna do is the left petal, something like that. Now here, I'm also
cutting it here, just so it looks a
bit more interesting. Now I'm gonna do
the second petal. There. The third one. And here I'm also gonna leave some negative space,
like the shadow. So I'm just gonna
do this. From here, really close to the line there. And I'm gonna do the same here. Perfect. Now I'm going to do
maybe this leaf here. I think that's gonna look cool. So let's something
very easy here. I'm actually thinking of
giving you these photos as well just in case
you're home and you cannot get out.
For some reason. You can also use my photos. So I'm just gonna
do one leaf here. You can see that I'm
not really paying attention much and
one here inside. Great. Let's paint
everything in black, so drop it here and
then continue filling. And boom, we got it. Perfect. Okay, so now we
have the three elements. Let's do the composition.
6. Compose the Poster: Going to turn this off. I'm going to erase
these pictures. I don't need them anymore.
Then I'm going to go to actions drawing assist,
and this is off center. So I'm just going to go
to Edit drawing assist. And then here in options, I just tap horizontal
and then vertigo again, it's going to be
placed in the middle. Tap on the blue button, and let's start our
illustration here. Now, I'm going to add
another element, actually. So I'm going to
create a new layer, make it into a drawing assist. And here, I'm just going to
do a little vase really easy. So from here, I'm just
going to do this. Little semicircles here. I'm just gonna join it, tap
with my left and do the same. Here, drop a color in. Perfect. Now I'm gonna do a line here. And the vase is gonna be
one of those vases that I have home that I like that it's kind of like curved here. It has, like, this cool effect. Great. Drop a color
in. And we got it. Now, I'm going to start
playing with the flour first. So I'm just going
to bring it up here and I'm going to
turn the snapping on because now I
want to center it. And then we center
it in the middle, you're going to see
this yellow line. So that's what I
want. Gonna make it maybe a bit bigger.
Put it somewhere here. And then I'm just going to erase this a little bit so
it's not that thick. And then I'm going to just put two lines. Going to
bring them down here. And then just gonna drop
a color inside. Nice. Okay, so we've got
something already. Now I'm going to
put the snowdrops. So I'm going to put this
somewhere around here, maybe a bit smaller. Like that. Here, I'm going to do the
composition on the left, and then I'm going
to be mirroring stuff to the right. So I'm
going to get the bird. Gonna go to flip
horizontal ones, make it smaller, and I'm just going to put
it somewhere here. Gonna put the snapping off just so I can rotate it without any problems and place
it somewhere here. Now I'm just going to bring this flower a little
bit more down. Like this. Yeah. Perfect. Okay. So now that we have this, I'm just going to pinch
these two elements. I go to duplicate them, snapping on, flip horizontal, bring to the right side, and try to center it
as much as possible. I think something
like that will do. And now I'm just going to
pinch all of it together. Since this is a quick practice, I think this is going
to be even better. Now, let's create a
new layer, tap on it, try and assist, and I'm going
to do a few more elements. So here I'm going to do a
line that goes like that. Gonna make it a bit thicker. And then here it's
gonna be just, like, a very easy
leaf like that, and another one that
kind of falls here. Again, really easy shapes. Let's color it in Perfect. And now we can add maybe, like, one here as well, like this. And then this will be just
a little bit more rounded. Again, you can do whatever
you want in here. You could also get
more photos from your environment and
just make it better. But now you're going to see that this practice will train
your muscle memory, and you actually now know how to draw these three elements
or the ones you chose. So I think if you keep
doing this once a week, at least, you're going to
create a routine practice, and it's going to help you a lot in order to create
illustrations, especially in those times that you don't feel
super motivated. Now, let me, for example, do one more here, just so I think this could look better. And maybe one here. And if you've taken
any of my classes, you know that I'm
a perfectionist, then I would just add more and more and more,
but that's not the point. Okay, so now you will see
that this pencil is not super solid sometimes because
it's a sketching pencil. So I'm just going to
pinch all of it together and duplicate it just
so it becomes darker. And let's move on
to the covers now.
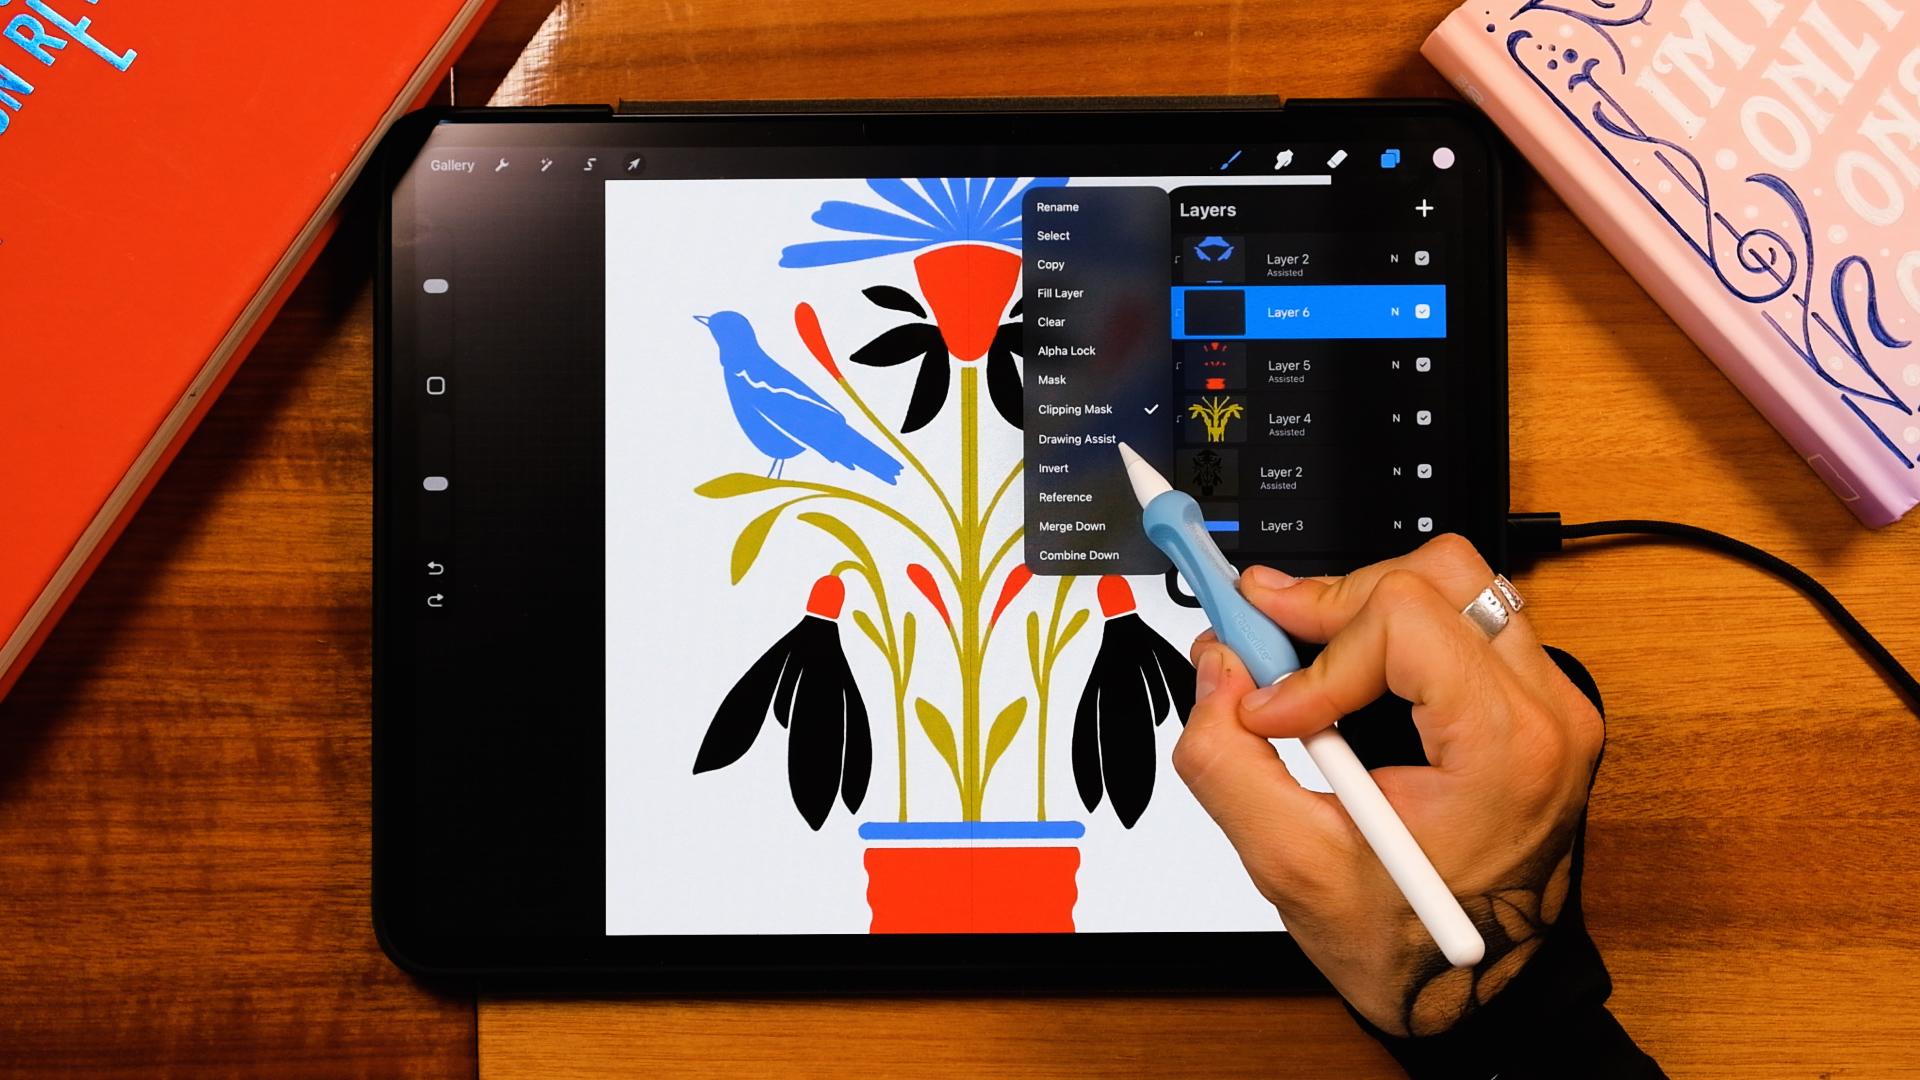
7. Color System: So for the color
system, I wanted to do something a little
bit more simple. But I think I'm just
going to maybe, like, put a couple colors more
than I previously thought. So I'm just going to use this color palette
that I'm giving you, and the system normally would
be a little bit different. So for me, I would divide maybe the different elements in different layers, and
then I would paint those. But since we are doing
a fast practice, I don't want to
have 1,000 layers. That's why I just
have one layer for my illustration and then I'm
going to create another one, and then I'm going to tap, and I'm going to make
it a clipping mask. Now, I'm going to do this
for every color that I use. Now, the first color that
I will use is the blue. So I'm going to go here
to this blue here. Now, this layer should
also be drawing a sits. So every time we paint,
both of them some color. So I'm just going to
make this bigger, and I'm going to start painting,
for example, the birds. And the whole point
of these colors is to balance them out across
the whole composition. So let's say don't just use blue on top and then
another color down. But every time that
you do a color, so let's say we have
this blue here, maybe I could do this
part right here. Great. And then maybe
even the petals. There. Awesome. Again, you could just leave
the illustration like this because it looks
pretty cool as it is. But let's add more colors, Sha so now, I'm going
to create a new layer, and I think I'm just gonna
do a line as well with the blue color somewhere
here like this. Throw a color in. And this one
will go to the background. Yeah. Now, this looks better. Okay, now let's go and
create a new layer in between my main shape
and my blue color. And I'm going to
go ahead and get something kind of
close to the blue. So the green, I think
I'm just going to go with this one right
here and I'm going to start painting this florals. So I'm just going
to do until here. And here's the same. Yeah, making it into a drawing
assist I keep forgetting. Now, this is gonna be all green. And you see that
now since the blue is on top, even if I paint here, nothing is gonna happen,
which is perfect, if you want to go fast,
just like I'm doing it. Great. What else? Now, this is gonna be, this
is gonna be green, as well. And then this Nice. Okay. So now another color. I think on top of the green, and I'm going to go
with the color red. And with this red, I'm just
going to do maybe the vase, again, tap, make it
a drawing assist. And let's paint this.
Perfect. Now we're going to do this part here. And then maybe this one And this one. Great. This one, too. Awesome. Now, let's go to
the layers panel, and we create another one and it's going to
be for the pinks. Make the layer assisted, and let's start painting. You can just do the outside
and then drop a color in. Awesome. And now,
finally, this right here. And we are done with
the color system. Now, a couple of things
that we could do, create a new layer, bring
it to the background. And now, for example,
with this purple, I'm just going to do some kind of a diamond shape
on the background. So tap, make it a
drawing assist. And then here I'm just going
to do something like this. Make sure you close the shape
and just drop a color in. Let's make it smaller thing. Something like this. Yeah. And then maybe a
little bit higher like that. I like this. This looks
like a bulb, actually. Well, surprise
surprise, you see? It kind of looks like a bulb. Okay. Awesome. Now I'm going to go to
the background color, and I'm going to add
this color right here, so it's not purely white. And we could leave the
illustration as it is. But I want to give
you an extra episode. So let's go for the shadows, the lights, and maybe
a couple textures. It's gonna take us a
couple minutes more.
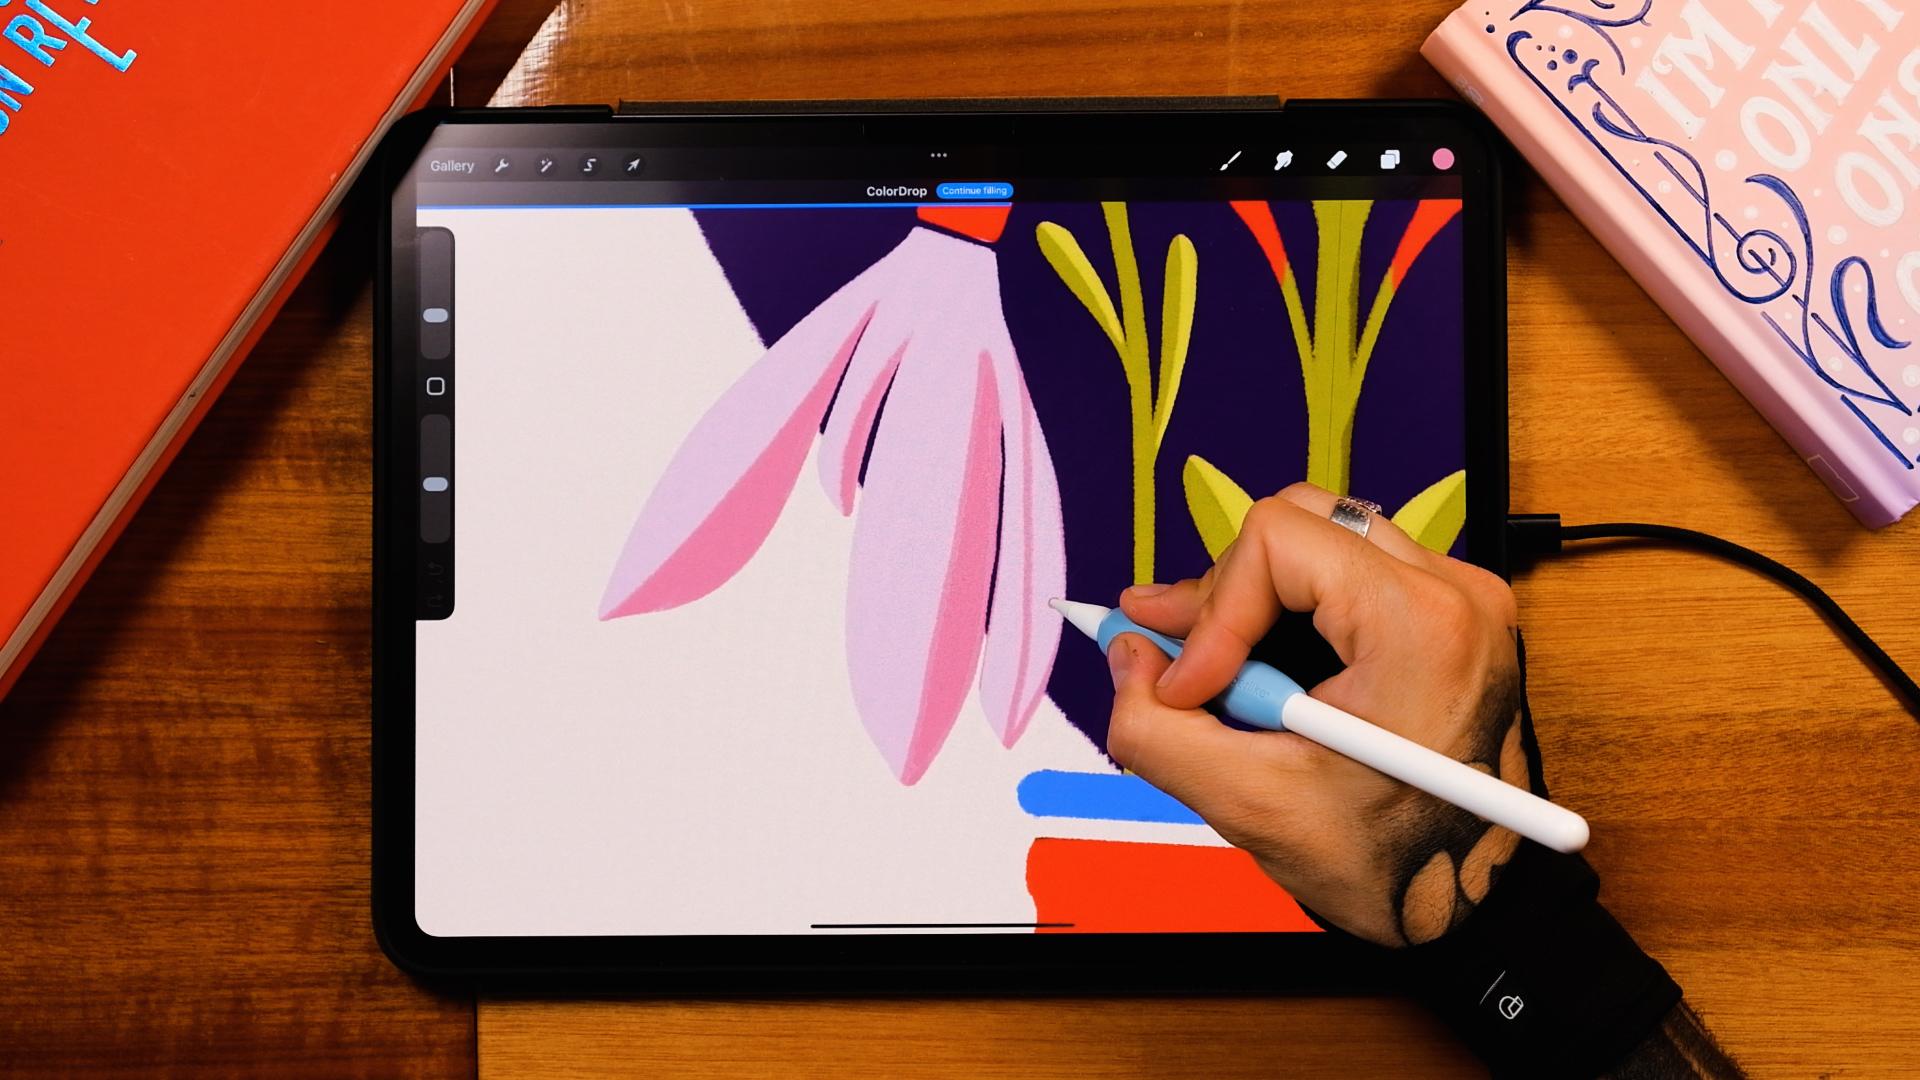
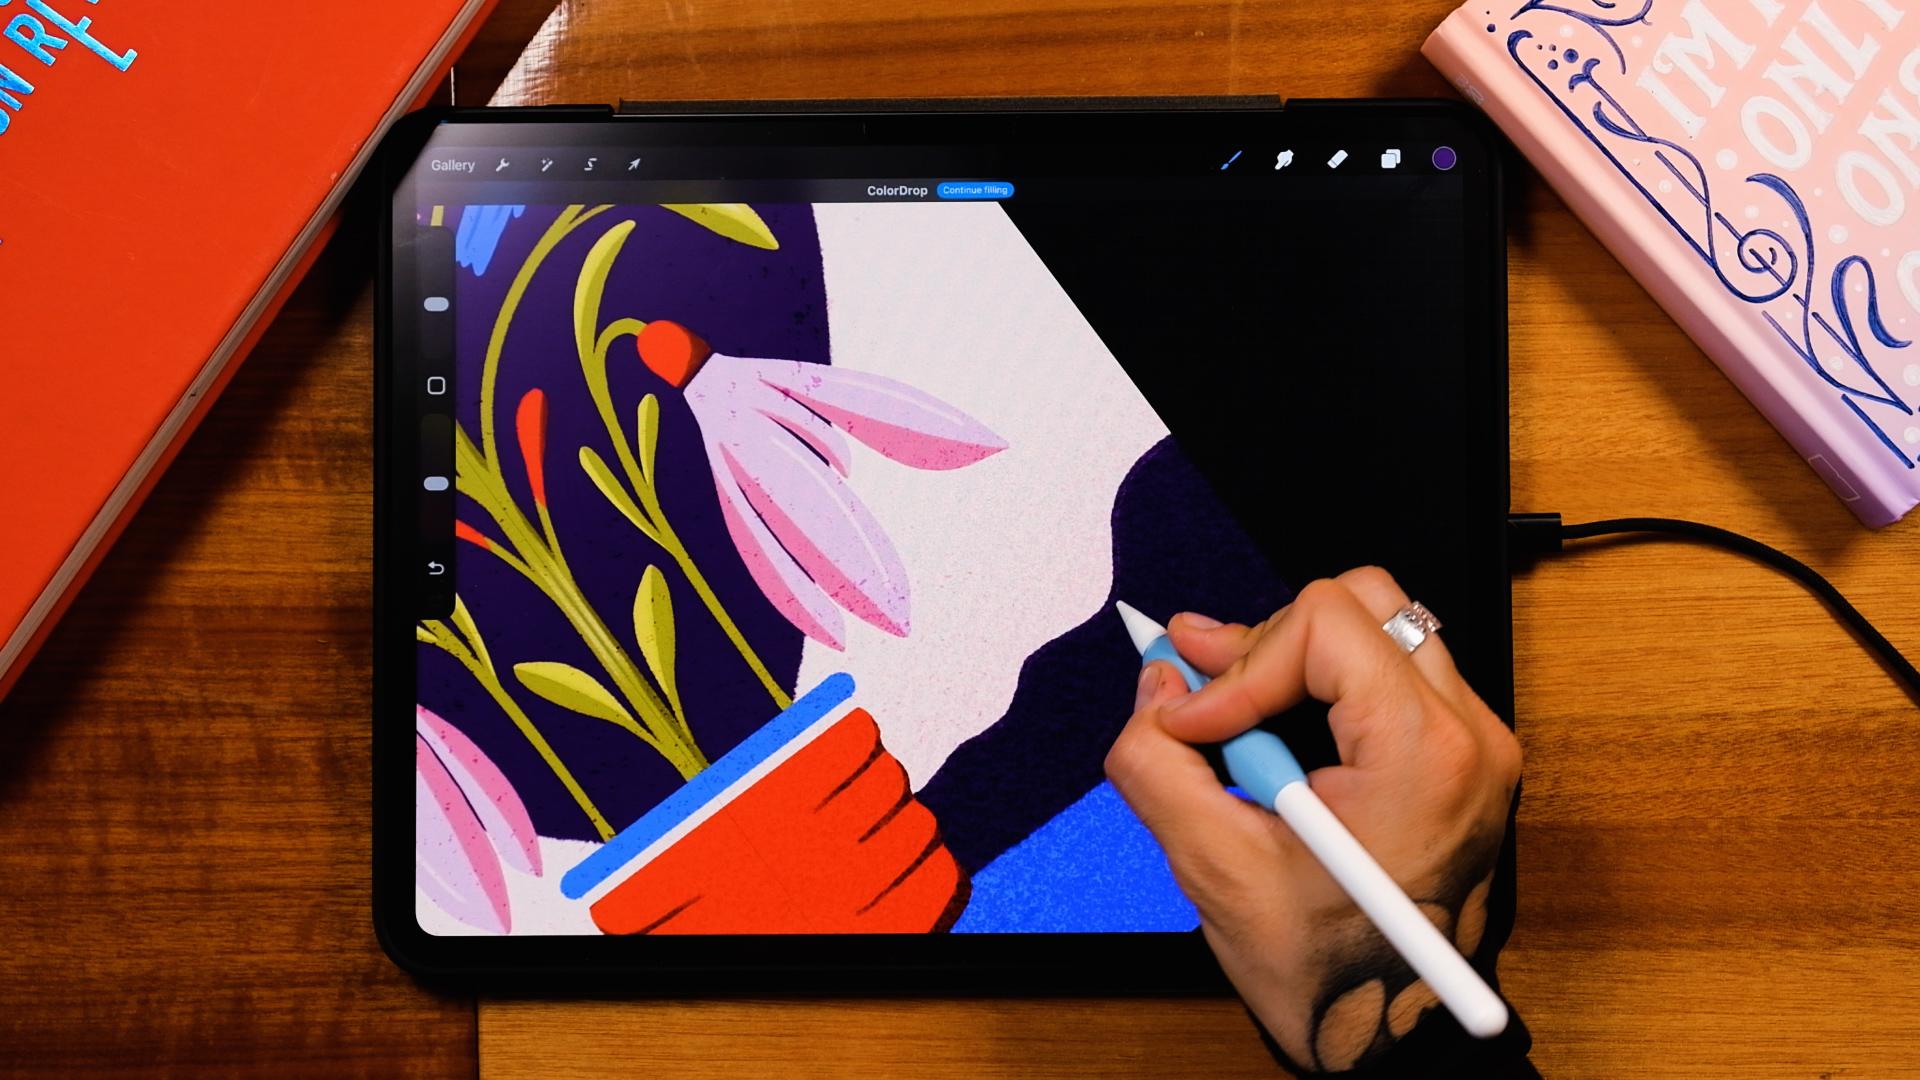
8. Shadows, Lights & Textures: Great. So now I'm
just going to start adding shadows and that I think I'm going to
do in the same layer. So I'm going to go on
top of everything else, tap on the plast button, and then make it a clipping mask and also
a drawing assist. Now I'm going to go with let's start with this darker blue, and I'm just going to
do some tiny details. I'm just going to do
something here. Let's say. Now on the birds, I
can do maybe, like, a few lines, something
like this, maybe one here. Then maybe one here
as an extra shadow, even the eye right there. That's enough. Then
let's go to the greens. And with this darker green, I'm going to add Well, no, actually, I'm going to
add lights, so it is yellow. I'm just going to do
something in here. There. Yeah, it's
gonna look nice. Perfect. Now I'm here. And here. Okay, now, I'm gonna create another layer just so I can add some shadows
without mirroring. So I'm just going to do a little shadow here, for example. So I'm gonna have for
these shadows and lights, two layers, one that's gonna be mirroring and the other
one that won't be. And then finally here. Yeah, that's enough. Now, to the mirroring
one, let's add some pink. So I'm just gonna do this. And then maybe up here as well. Just a bit. M Great. Now let's go to the vase with the dark color here
with the dark red, and just add some
tiny shadows here. So maybe it could be,
like, something like this. But again, just you can improvise in this part because I'm just doing the same here. Awesome. Maybe a couple more. And then finally One here. Maybe a couple lines. So some lines here and there. Not here, but maybe.
Yeah, just maybe here. No, you know what?
That would be it. Now, for the texture, let's go to create a new layer on top of everything
else, tap on the end. Let's make it into overlay. And I'm going to go
and select maybe like this purple color and go to
the dirty wall shader first. And I'm just going to add
a little bit of texture. The size are about like
40 something percent and just add a little
bit of texture here. It's going to give you a
little bit of this grain. You can see it here.
Can zoom in as well, and just add a bit
more if you want. But I'm not gonna overdo it just a little bit. Just a little bit. There. Okay, nice. Now, another layer also overlaying and this one is
gonna be the powdery, too. And then here I'm gonna add some shadows down
and some lights up. So I'm just gonna add
some extra shadows here. With a light color, maybe with this one or maybe with
a complete white, I can just add some light. Let's see with the pink.
Maybe with the pink, it's going to be a little
bit less aggressive. Great. I think I'm missing
one layer, actually, so I'm going to create
a layer at the bottom. And then with the
moss pencil and the purple color, I'm
going to tap on the layer, make it also a
drawing ist and then here I'm going to
add some mountains, something like that
in the background. Yeah, let's say. I can also see
these little hills from my window here in Zagreb. So I think this would
feel about right? Great. And now you can see this very grainy texture here
that I love. We're done. Now let's go to actions, turn off the drawing guide,
now go to ED, copy canvas, go on top of everything else, three fingers down the screen, paste, and now go to
adjustments, noise. And I'm just going to add a
little bit of noise here. Just a bit. Great. And we have our
illustration. Done.
9. See You in the Next Class!: And that's it. Now
it's your turn. Upload your finished poster
to the class project. And also, if you can, upload the three photos that
you took outside. I would love to see what you found and also
where you found it. And also, please tell me in the project description if this was helpful and if it took you
into that making stuff mode. Also, I feel that if you ever
feel stuck in the future, you can come back to this class, scroll through your
classmates photos, pick three elements, and
make another quick poster. It's such a simple
way to get back into that creation mode
so you can jump into your bigger projects
with way more momentum. Now, if this part something and you want a longer class
to keep you going, you can check out my
Skillshare classes. Since we play with
flowers today, maybe my floral class
is a perfect next step. But honestly, before
you being anything, go make another
quick poster or go tackle that dig project
that you never finished. But this time with
way more momentum. I'll see you in the
next class. Bye.
 Jimbo Bernaus - Shoutbam, Letterer & Designer