Transcripts
1. Welcome & Introduction: Dan making gifts. Maybe your plant lover with
a black thumb like mine. Have you wanted to
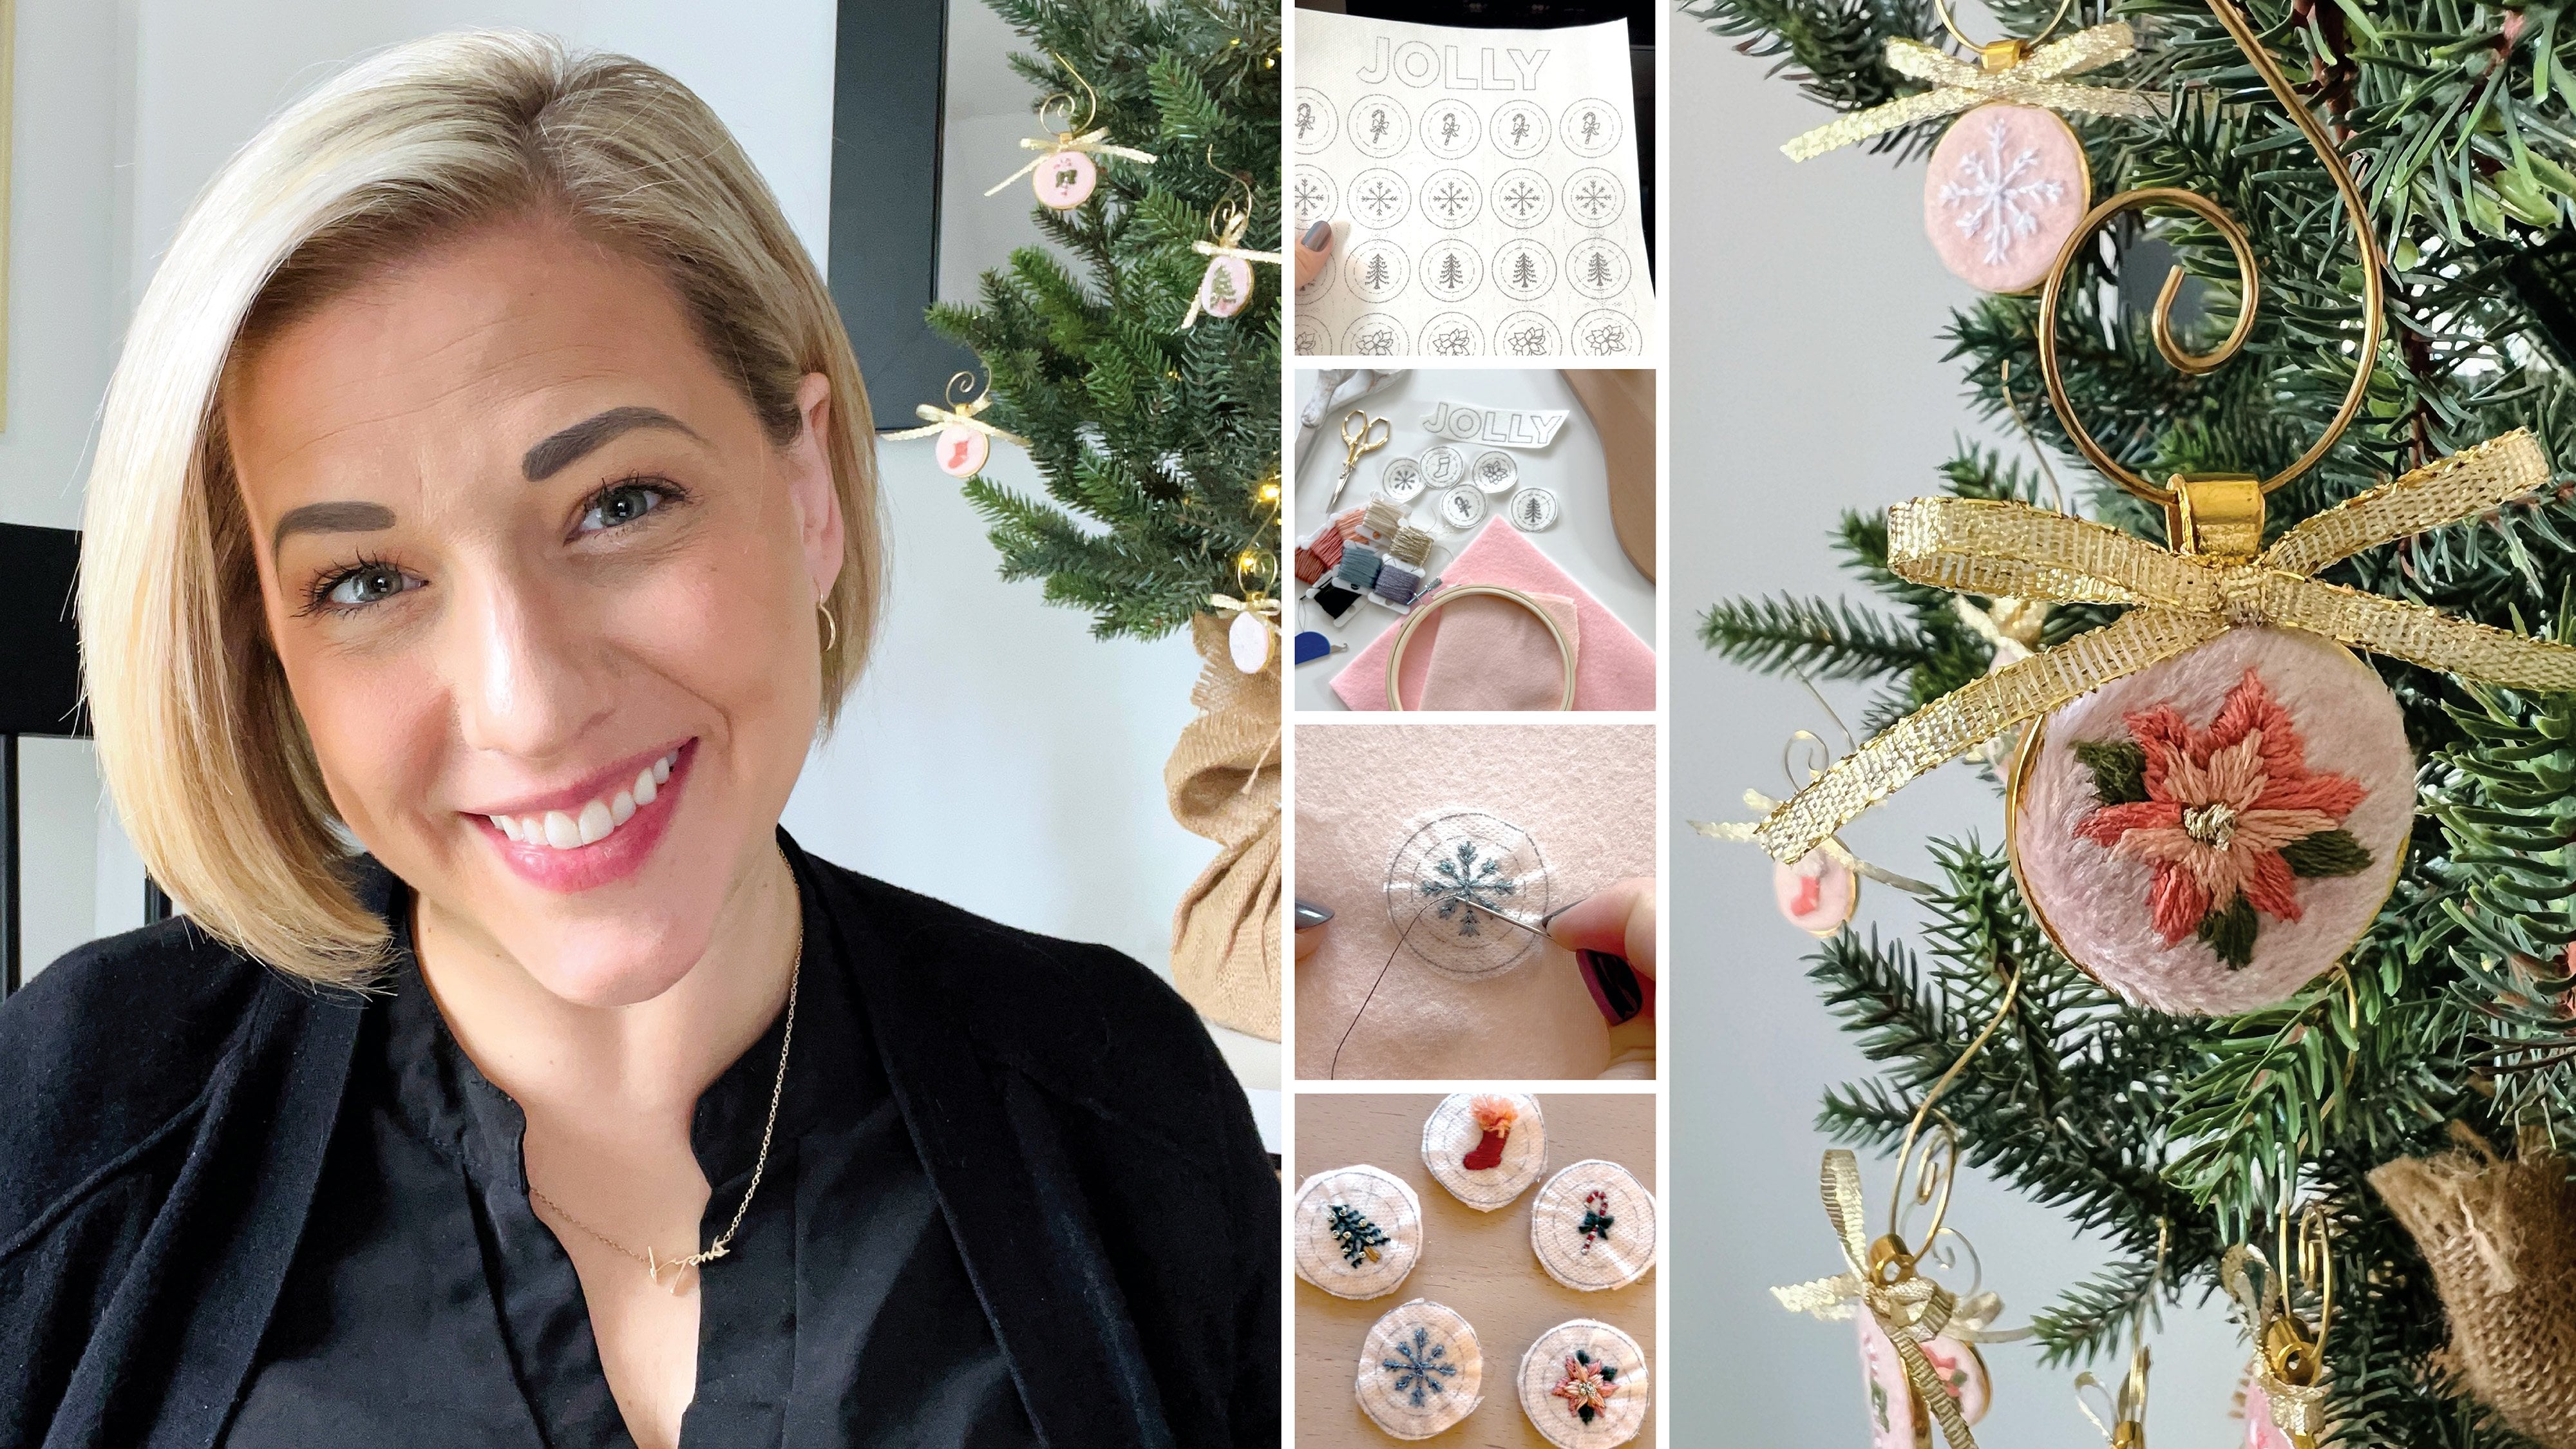
try embroidery, but didn't know where to start? If any of this sounds familiar, then this class is for you. Hi, I'm Kathleen Lyons. I'm an artist and
digital marketer based in Nationale, Tennessee. I graduated from Aubin
University with a BA in art, and I started my career as a graphic designer in
2009 outside of Chicago. Today, I spend my 95
as a digital marketer, and I spend all of my nights and weekends pursuing
my creative career. I sell my work on print on demand sites such
as Society six, red bubble, spoon flower, as well as my own Etsy shop. I primarily focus
on hand lettering, illustration and surface design, and all of these skills
have just seamlessly transferred into my
embroidery practice. My dirty into embroidery
actually started when I was pregnant with my second
child, our daughter Ella. We had a ton of gender
neutral clothes from my son, but I wanted to find a way
to make them uniquely hers. It turned out to be super
easy and so satisfying to take something super gray and turn it into something
sweet and girly. The inspiration from
this class actually came from a friend
of mine as she had recently moved and I brought her a house plant as a
gift as acoman gift, which is ironic because
I have two black thumbs, and I have yet to be able
to keep a plant alive. But she kept calling
it a love fn. She's like, Oh, your
love for is still alive, which was a great throw
back to the movie, how to lose a guy in ten days. So classing how to stitch
a plant in ten days, and we're going to create this
three D embroidered plant. Whether you're new
to or embroidery or it's been a long time love. This class is a bond way. I create something cute and
fresh for you or a friend. You'll follow me as I show you
step by step how to create a three D embroidered
house plant from supplies to suggested stitches and
patterns for you to use or for more advanced stitchers
blank templates for you to create
your own design. The lessons are
designed for all levels with beginners and
intermediate stitches in mind. If you're more
experienced, you'll be able to jump ahead to the project lessons or even just start free handing and
creating your own designs. Okay. So what are we waiting
for? Let's get stitching. I'll see you on the next lesson.
2. Class Project: Class project time
for this class, it's going to be super easy. You project is going to be to
embroider your house plant, your three D plant with either the provided
pattern or feel free, design your own, go
free hand and then share an image of the finished
piece with the class. For this class, you're going
to need several materials, including piece of
fabric or a printer, if you're going to be
using the peel and stick stabilizer, but again, if you prefer to go free hand, grab a heat erasable
marker, I go to town. You'll need an embroideery
hoop, scissors, embroidery needles and flaws, as well as craft wire, a three H pat and plant foam. There are suggestions
for each of these provided in your
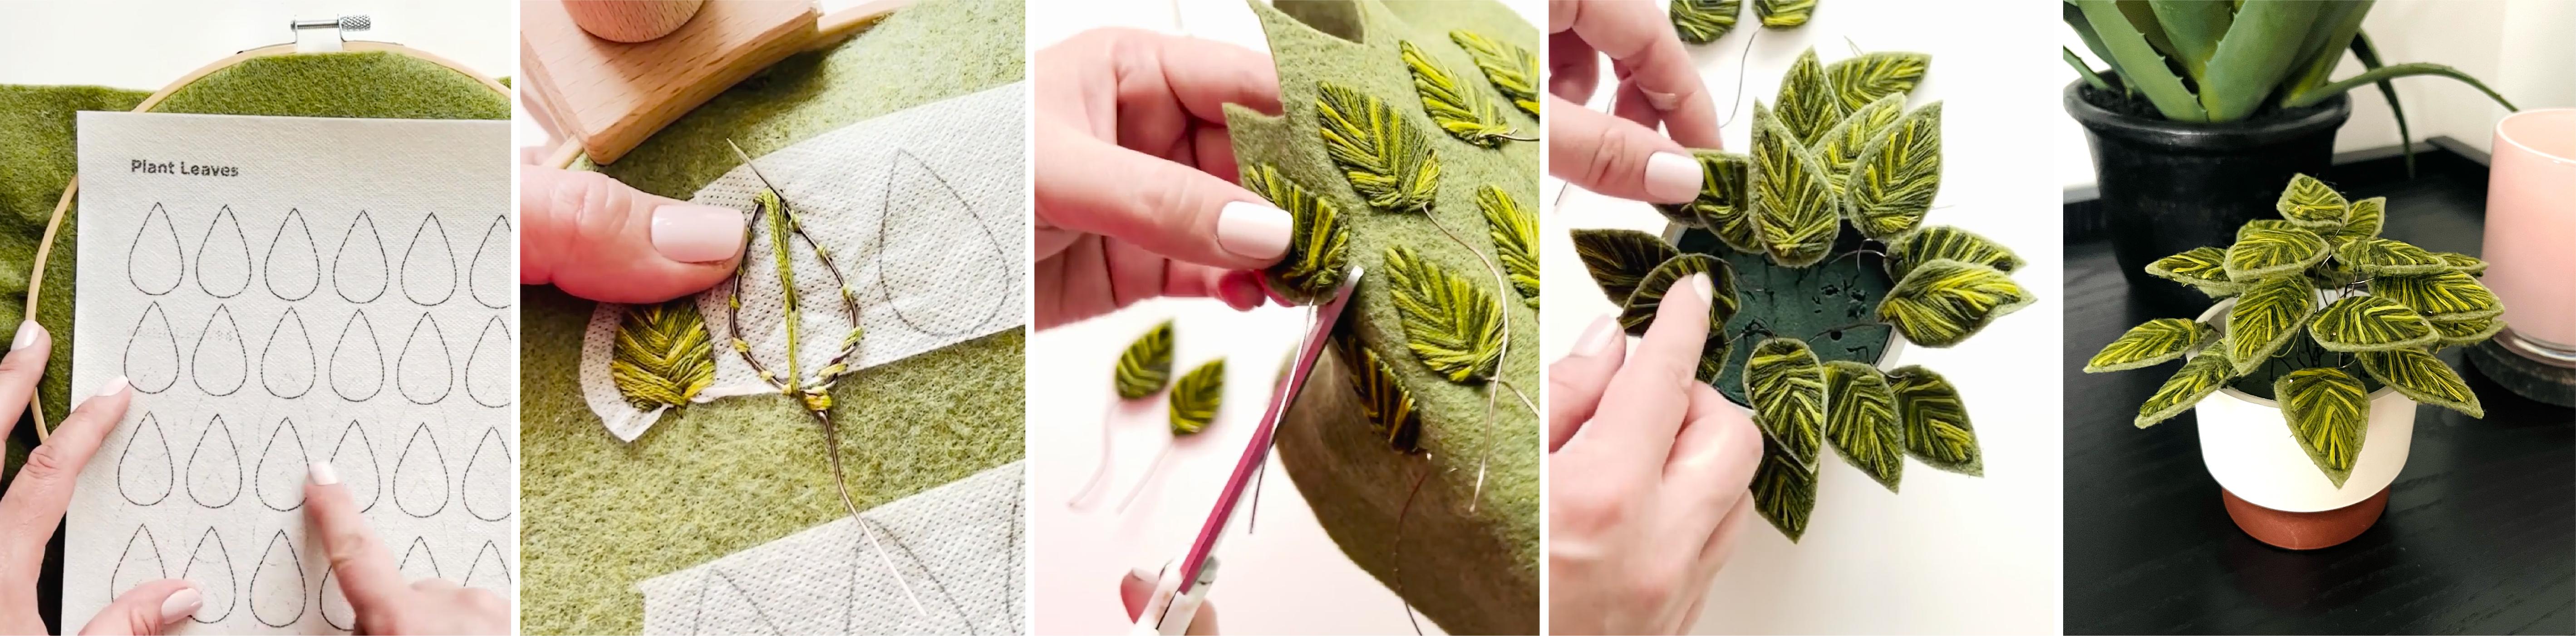
project resources. Talking project steps
will simply use a pattern from the project
resources or create your own. Apply the pattern to your
piece of fabric or felt and burn the piece of your unique selection of
colors and stitches. This is where you can get
really creative and funky. Cut and arrange your
foam to fit your pot. If you're using what's
given in the resources, no cutting required. You
just drop it right in. Lastly, we'll insert the
leaves into the foam and then just arrange and spruce up the plant
to your liking. Finally, be sure to
share your work by uploading an image to
the project section. Feel free to include
any behind the shots, if you'd like to
share those as well, or if you're gifting it, be wonderful to see it
with your friend. If you have any
questions or more tips, please feel free to reach out. I'm happy to help
and can't wait to see where all these fun
funky plants end up. I'll see you in the next lesson. Okay.
3. Supply Recommendations: This lesson, we're
going to be talking through supply recommendations. Recommendations with links are available in your
project resources. But remember, this is
ultimately your creation, mix and match and find
things that work for you. I'll do a quick walk
through of each of the pieces that I'll be
using during this class. Number one, as a piece of felt. Super easy. They're cheap. They come in lots of
different colors. You go to the craft store, they have all different textures. There's different weights. You can also just use fabric. Choose what works best for you. Then I'll be using my favorite
peel and stick stabilizer. This is again, linked in your project resources to
print the pattern provided. I will have some with
guidelines and then also some of that are
blank for those of you who want to do
your own design. Then again, if you
want to go free hand, I'll link these as well. These are my favorite
little erasable pens. Feel free to make this yours and use the method
that works best for you. For this class, you also
need an embroidery hoop. I recommend using something
a little bit bigger and that way you can do when
you put your fabric, you can do more leaves at once versus having a very small. You could do it with
a three inch as well, but I would recommend the
larger hoop for this one. You'll also need scissors. Any scissors will do,
I have these link. These are my favorite
little embrodery scissors. I take them with me everywhere. Then you'll also need
embroideery needles. Pick the one that
is right for you. DMC has lots of them when you go to the store to
get your floss, if you're using floss or yarn, be sure to pick the
needles that work for the fabric and thread that you've chosen to use
for the project. One of the most important
pieces will be your wire. This is what's going
to give our plant its shape and be able
to manipulate that. But we want to make
sure that it's appropriate to the
fabric that we're using. Mine is a little bit thicker. I have this linked in
the project resources because it's going to
be holding up felt. If you're doing a
lightweight fabric, a smaller wire may be okay. Just make sure as
you're getting those, it's going to support the fabric and thread that you've chosen. Lastly, to assemble our plant, we will need plant foam. There's three inch
plant foam and then I have a three inch pot linked. This will keep it
nice and small. I'll just have to
push it right on in. We'll have to cut this one
and it's the perfect size. Your desk. But again, feel free to make adjustments. This is ultimately
your creation. Happy shopping. I'll see
you in the next lesson.
4. Hoop Set-Up: In this lesson, we'll be
talking about hoop setup. We'll be setting up our
hoop for the project. Again, I highly recommend using a larger hoop for
this particular project, so you can do multiple
leaves at one time. It definitely helps
expedite the process. Let's jump in, so I can show you a quick demo of setting up
the fabric in the hoop. In this lesson, we're
going to be working on getting our fabric
into our hoop. It's really simple.
We're going to. We're going to loosen this
so that our inner ring out. And then we're going to put the fabric over that inner ring. Again, because we're not
keeping this in the hoop, it really doesn't matter
if you have it centered. I'm going to try to use as much of the fabric as I possibly can. I'm going to loosen
this all the way. I'm just going to slide this
over top of my inner hoop. Okay. My felt is pretty thick, so I'm going to go ahead
and make that tot. Just tight mess
as much as I can. Now, if I were leaving
this in the hoop, it would look terrible
because you see this isn't full But since we're going to be cutting this out,
it really doesn't matter. As long as you have your fabric in the hoop and
it's nice and top, we'll be able to apply our
pattern and get stitching. I'll also be using an
embroidery stand off and on, but it's totally optional. It can be a huge help
if you're working for long periods of
time. Key takeaways. Setting up the hoop is easy for this project. No need to center. A large hoop will
allow you to work on more leaves at one time
and expedite the process. An embroidery stand is optional, but it can be a big help. I'll see you in the next lesson.
5. Stabilizer Application: In this listen, we'll be talking through our stabilizer
application. We're reviewing how to print and apply the stabilizer
to the fabric. You're welcome to
use the pattern from the project resources or create your own using
the blank version. And again, always welcome to go free hand with your
heat erasable markers. So we're jumping back
in with our hoop. We've got our
fabric in our hoop, and now I have printed my
pattern from the resources. My printer did a
little funky here. I'm going to see how
many of these fit in my hoop and it looks
like quite a few of them. I'm just going to size this out. I'm going to go for this
section right here. So I really can just cut crest. One more. I think this is big
enough for me to work with. So instead of just doing a few, I can actually get quite
a few of these on here. This will help expedite
as you're going through, you don't have
quite as many times to adjust your
fabric in your food. I cut those out.
You can feel free. If you want to get more
frugal with your fabric, you can cut these and
probably put them closer. But when I'm
arranging the wires, I don't mind if these are
a little bit further out. I may actually put these into
strips thinking about that. Because your wires
will become a little bit tangly once you get
a few of them going. Let's cut these a little
bit further apart. Okay. So now that I have these, I can simply peel this off
and apply it on to my fabric. Put this guy in the
top. P this one. Put this lower. I'm going to put this guy
right in the middle. Now, we're set up to stitch. Key takeaways. Be sure to use the technique
that works for you. Feel free to simply draw on your fabric or use the
provided patterns. If you're using the pattern, be sure to double
check which way the stabilizer should be
facing for your printer. Using a large hoop
can help expedite by allowing you to do
multiple leaves at one time. Let's get stitching. I'll
see in the next lesson.
6. Learn the Stitches: And this lesson, I'll show
you step by step how to complete each of the stitches we'll be using for this project. The stitches combined
with your threads and things that you choose
is really what's going to make yours
pop and be different. It's going to be uniquely yours. Guides with the stitch
examples and diagrams are also available under the project and
resources section, along with the sample pattern. Let's get stitching.
We're going to start. We're actually going
to move left to right. It may not seem that way because this looks
the most complicated, but this is actually
going to be our easiest, and it's going to
get a little more complicated as we get over
to the right hand side. First things first, we're
going to come through. We make this giant
straight stitch. Again, this is going to be our easiest one. This is
a straight stitch. You just come up
through the fabric, and then back down
through the fabric. That is it? That's
the whole stitch. That's a straight stitch.
Now you're just going to go through and keep a
straight stitch. I may outline this
with a backstitch. To keep it truly a
straight stitch, you could just cut this
and leave the edge raw and fill in
with these little they can sometimes be called seed stitches too. Just fill in. You can draw in on
the blank leaves and create your own
straight stitch pattern. There's a lot of flexibility with this one and
it's super easy. We have our first one done here. Again, feel free to mix this up. I think this would
look really cool with just a satin stitch on one side and then some of
the seed stitches. We've outlined it
with the back stitch, which is what we're
going to move on to the second sampler leaf here. I'm going to start with
that straight stitch again, come up through the back and then just straight back down. Then I'm going to go
right back in that hole I already made from
my very first stitch. Then I'm going to follow
that all along here. I'm just going to
keep making about the same size coming up through the back and then back down in that last hole that I created
with my previous stitch. So I have my outline done, and I'm realizing now that
I actually meant to do this as a backstitch,
all the way down. But that's what's going to
make it uniquely yours. When you mix up things, you do straight stitches
with backstitch or satin or some of
the stem stitches, that's what's going to make it uniquely yours,
that combination. Now we are going to move
into this blank one. This is where we're going
to do our satin stitch, which is a great one for filler. It's super easy.
Again, this one, I think would be really cool
if you're doing a contrast, like say you had a
green felt with white. This is going to work better if you do more of a tone on tone. I think this is
actually what I'll be using is the satin stitch and using it green felt
with a green floss. But again, I'm going
to come up here. I always like to
divide my shapes. But essentially the
satin stitch is a lot of straight stitches that run parallel to each other. Come up through the back
and straight back down. On an I do one side at a time. So what I'm going to do
is come up as close as I can to that first stitch while I'm making
my way down the outline. And I'm going to come
back right over here. So these are all
going to run parallel and just fill in this shape. Back. I've refreted this. And actually, I'm using a
different color so that you can see the contrast
from the two sides. I also decided to use four
strands instead of six. So if you're working
with embroidery floss, there are six strands. So I mentioned
splitting the thread, and now I feel like I need
to show you because I think this is the perfect
candidate for adding CTL. I'm going to move
this all the way. There are six strands in here and you can actually
split this apart. I think I'm going
to just take three. I'm going to split it
in half and just pull. I want to split this
the contrasting color. I also think hot pink orange
would look really cool here, like get more of that
chaple leaf vibe. But I just grabbed the thread
from our first leaf here. I'm going to go and split
this down the middle. And then I could
leave it there, and that still gives it
a lot more variety. Or I could go ahead and
add in smother veins. Come back through here and
start our fish filling. So we're going to start
our leaf by dividing it with a big straight stitch. And then I'm going
to start. I'd like to divide this one too. So I'm going to come back up
similar to a satin stitch. I'm going to come back up
really, really close to this. I'm just going to go
on the opposite side. And you can play with
us and see how you like to divide yours up. I'm going to come back
up the other side and do just the opposite down here
and cross that center line. I'm just going to repeat
that going back and forth down the leaf. So as promised, this is going
to be our hardest stitch. I struggle with this still, this may be more appropriate for our intermediate and advanced. I'm going to start with
this center shape. I'm going to do a straight
stitch. S stitch. Come back through and try to do about half of what
this size was. I'm going to do that for
this whole layer here. Because I've done this
long, long, then, when I come back through, I can do just the same short
stitch over and over again. So we're back on this
last sampler stitch. And I think this one is a little bit hard to read
with the dark Fred. I'm going to try to do it
a little more exaggerated just to help visualize
how this works. So you can see some
of the long short and then it's creating this
layered brick effect. So again, the tighter one, I actually didn't
love as much as I like some of this
looser work here. I'm going to try one more time. We finally finish
these stitches. This last one, I think
you can see a little bit better that brick effect. But this one again,
take liberties. I mean, it doesn't have to
be a perfect layered brick. Just mix up your sizes if
you like this textured look. Then again, look at how
different these are. From our straight stitch, stem stitch to our back stitch, satin, fish bone,
and this brick. They all give different flavors. So think about that
as you're deciding which one you'd like
to do for your plant. Because all of these are
going to look different, even though this is obviously the same person stitching these, they look wildly
different because of the stitches because
of the colors. Th through that,
keep practicing and I'll see you back here
to start our plants. Key takeaways. Guides
with stitch examples and diagrams are available under the project and
resource section. Play with each
filler variation to find the stitch that you
like best for your plant. Remember, perfection
isn't necessary. Be sure to practice,
but sometimes the mistakes we make give
our work its unique style. I'll see you in the next lesson.
7. Stitch the Leaves: In this lesson, we'll begin
stitching our plants. So we'll go leaf by leaf. A long as I show you how to get this embroidered plant
started. Let's get stitching. We're back and ready
to stitch our leaves. I have chosen this bra floss. It's a DMC. You can get
this at a craft store. This number right
here, this 4066. That's how you can identify it. So if you want to
get the same one, that's what you'll
be looking for. I have decided I'm going to do the fish phone that we went over in the patterned sampler. I'm going to come up
through the back here. I'm going to start with
a straight stitch. From here, I'm going to come about three quarters of the way down to go on the other
side of my center line. And I'm going to
go, like I said, about three quarters
of the way down, and I'm going to
land on the other side of my center line. Push that back then I'm going
to come on the other side. And then again,
match this and come on the other side
of the center line. We finished this first leaf, and this is actually going to be good practice because what we
actually need is our wire. Let's take it a step back. I'm going to measure this out. What I've found that's been
working for the size and the fabric that I'm using
is about quarter inches. It gives me enough
of a stem to work with but not having
too much extra. I'm just going to
lay that across here, these don't
need to be exact. You can always trim them later. I would just try not to get
them too short or too long. There. You should be able to cut your wire with just like a normal pair of scissors. I'm going to outline this. I'm going to create my stem. These are super
pliable, you should be able to bend this
around pretty easily. Then I'm going to work
that around my outline. This is my tip top. I'm going to use my nail
to help create that shape. And then Make sure I have some overlap to
be able to twist this. Now, I like to be able
to cover this twist. If you don't mind it,
you could also have the twist coming down the stem, play around with
it a little bit, see what feels right to you. Again, this is all of these little details
and tweaks are going to make your plan,
especially yours. This one is a little
bit big for my pattern. I'm going to try
this one more time. I'm going to try to get
it a little bit smaller. That's pretty close. You could twist this
around down the stem. I am still going to twist
this up into the leaf. I like to hide it
a little bit more. Now we're ready to
attach this to our felt. I'm going to come usually
start at the top. You can really start anywhere. You're just going to basically
straight running stitch around this to secure
the wire to your fabric. They don't have to be
super close together, but enough that you are able
to secure that without it. Being too wobbly so as
you're working to fill it, it's not moving around on you. I'm going to finish coming
around the rest of this leaf before filling it in the
way that we did here. We have our wire secured here. Now we can start filling in. Again, I start at the
top and divide M leaf. That's a little off center,
but that's okay because I'm going to be doing more
of that fish bone style, and so it's going to
go back and forth. I'm going to come up
through the top again. Side. I'm just going to
continue going down and making my fishbone
pattern here with my stitch. Depending on what
stitch you've done, you can fill in with your satin stitch
or do a backstitch. You can even just do some secure your wire and
do some seed stitches. However you want to
make this come alive. Now, keep in mind when you are selecting your thread
and your stitches. If you are going
to do one that has less thread work that
you're not going to cover. So I wasn't too
concerned with how I outlined this because I
know I'm going to cover it. But if you're doing something
with less thread work, just be mindful of the colors and wire color that
you're selecting. Okay, so I'm going to
need to re thread, and then I will meet you
back to wrap this one up. But he's looking pretty good. Okay. So now I have that filled in
as far as my pattern goes, I'm just know if you
can even see this. There's just a little
bit sticking out here. I want to try to cover
some of this wire. I have my first one done here, but I wanted to show you I
have another one in progress. Just to keep in
mind. I have a few of these getting a walk here, a variety, but I think that'll actually make the plant
look even better. But as you start adding, you're going to start getting
these wires in the way. So be cognizant when you're
placing your patterns. This way, I try to
do windows here, so my wire will come in between these and these I can even fold. And then I actually because you can work around your hoop. I have these upside down so that the wires will
be going the other way. Just be mindful
as you're setting up that as you get going, you're going to depth
with a bunch of wires. I'm going to keep working on
these and I will meet you back here once we're ready to
cut out an assembler plan. Key takeaways. Choose a color
palette that speaks to you. Keep in mind the stitch
length is totally up to you. Mix it up or keep it consistent
for a cohesive feel. Feel free to shake up
your color choices and stitches to help
make your work unique. I'll see you on the next lesson.
8. Assemble the Plant: And this lesson, we're
rearranging our plan. Yes. We're almost there. Start by dropping your foam
into the bottom of the pot. If you've purchased the two on the suggested list, you're done. No cutting necessary. Once the foam is in the pot, we're simply going to begin
arranging the leaves. You can see, I have a
few of these started. I have my first row cut out and I'm going to
continue cutting these. So I'm using a pair of fabric scissors and please be
mindful. I did nick myself. Be careful, they're very sharp, but I'm just going through and I'm leaving just a little bit of the border of the felt
outline my leaves, and it helps cover any of those loose threads you
may have on the back. If you have some
unwieldy threads. Go ahead and just put a glue dot and glue it to the back of it. But I think overall between
the felt It's not too bad. So pretty quick, quick and
easy to cut those out. One by one, and then once
I have them all cut out, I will meet you back here
to assemble the plan. Okay. Okay. So I have all of
these divided out now, and actually, it turned
out pretty even. I had a six that were seven that were medium
and seven that were. So I've got 20 here and I'm
going to start you have your foam putting the
foam into the pot. So I'm going to start and this is going to take
some playing around, but I'm going to
start with my bottom. So my leaves. I just put them
in. Try to do this evenly across the bottom and then know that I will fill in as I move up into each layer. Okay. So I've got that base layer. Pretty well spaced and I
understand a keep building. Now that you can bend these two and give your
leaves some shape. I'm going to get a little
more creative with that. I'm going to make sure that
this is a little bit taller than my last group. I'm actually having
better luck if I bend it at the top. And
then put it in. Oh. So that's filling
in pretty nicely, and I've got one more set to go. We've got just a couple here. Don't be afraid to go back
if you're not liking how something's sitting or you think there should be
a different layer. Go back through and just
massage as much as you need until you're totally
happy with the final look. Here we go. All right. This is all time. Key takeaways. If you're
looking for ease, grab the foam and pot listed in the suggested materials,
no cutting necessary. Once you place the
foam, take your time, arrange in the les, and
be sure to create layers. If you need to cut
the wire, go for it. Having layers gives your plant
more depth and remember, this is ultimately your
creation, so have fun. I'll see you in the next lesson.
9. Final Thoughts: How we do. Hamming gifts
are cost effective and fun and they really show the loves in our
lives that we care. It's also a great way to express
self love and self care, Broder is expressive and fun. Get creative and think of ways to create new
patterns to make pieces that are uniquely you or reflect the recipient
of your gifts. Be sure to post your
final pieces in the project section
and keep on stitching. If you share on social, please use the
hashtag arts stitches so we can follow and
support each other online. Please also review and
follow me on Skillshare. I'd love to hear
your feedback and have the opportunity
to engage with you. I'll see you all the next class.
 Kat Lyons, Artist + Educator + Entrepreneur