Transcripts
1. Introduction to course: Do want to start your 3D path, make it your main income and be the best artists
in the industry. And of course, you
are looking for the best blender
course to start off. Maybe you're on your
way already and want to create something more
advanced but not too complex. Well, if yes, then go ahead
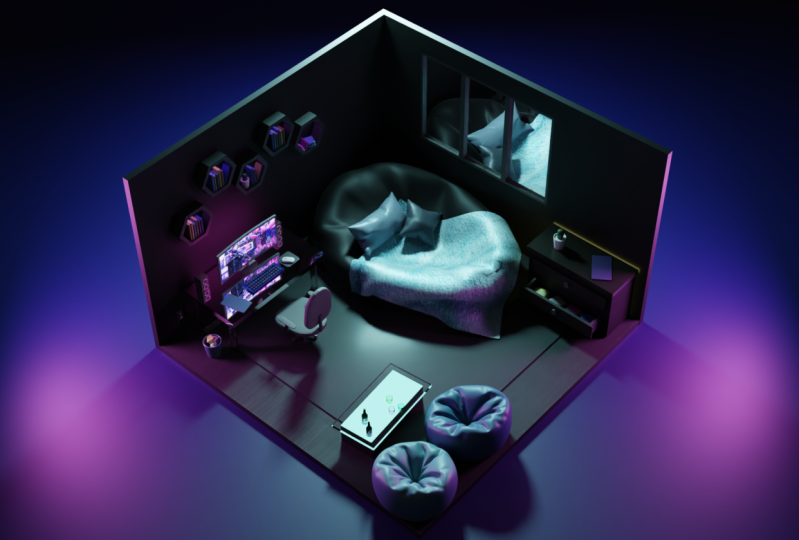
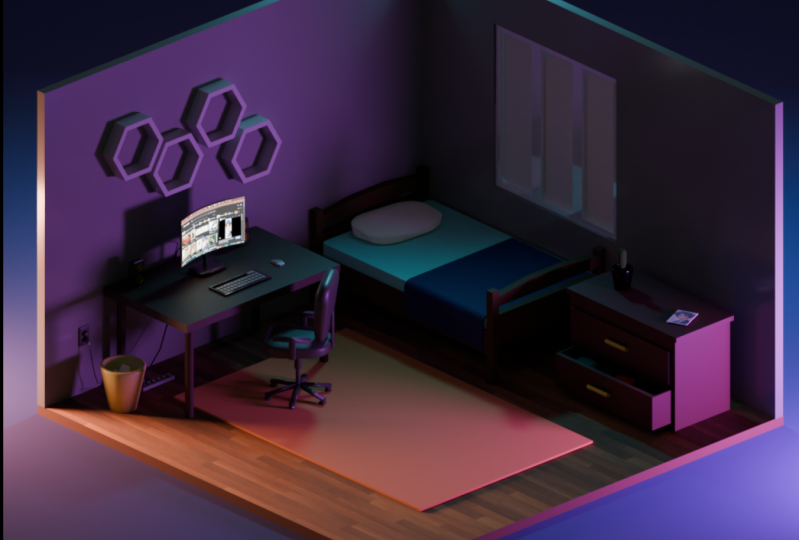
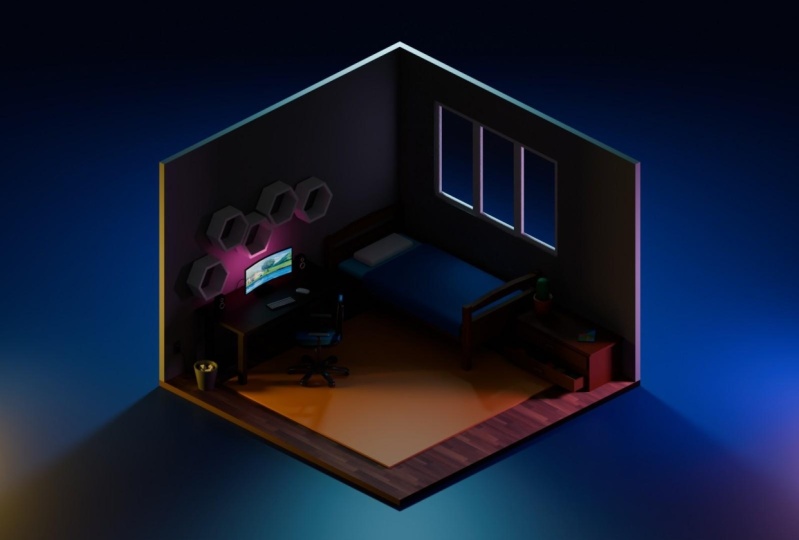
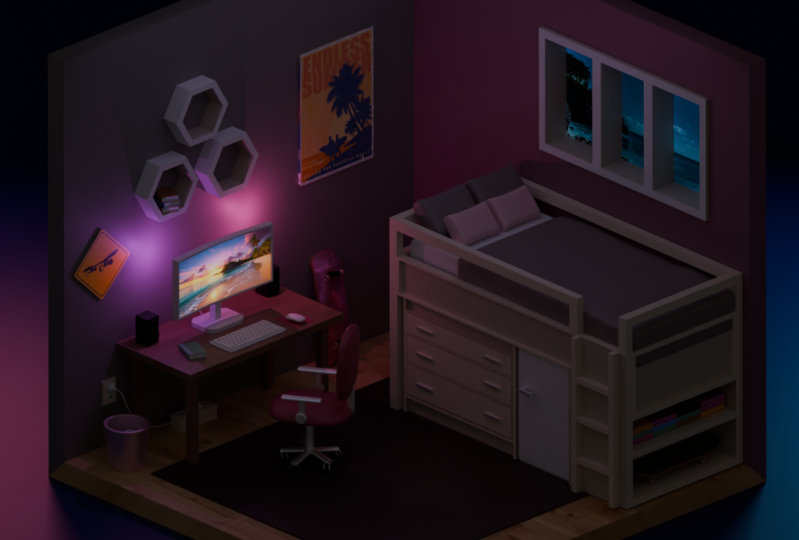
and enroll in this course. We're way together will
create this low poly room. Firstly, we will start with a basic introduction to
the blender interface, and I will show you how
things are said there. After we will move to
our modelling section, where we begin to
model our room, starting with primitive shapes. In modelling, we
will learn how to model different
things such as cable, mouse and keyboard, blankets. We've closed and drove her
and many other things. In the texturing part will
add colors to our models. Also, I'll show you how to add PBR materials and how to make our objects glow by
adding emission materials in the last part will be setting a default
three-point light. And I will show you some
basic Render Settings. And in the end of this course, you will have your
own low poly room. See you in the course.
2. Introduction to Blender basics: When you first open Blender, you will see this
window pop out. You can press somewhere here, or you can press here. And you'll see
this kind of view. Firstly, I want to say that you don't need to learn a roofing, what is here and how it works. You don't know,
you don't need to know all of the
options in blender. You will need to know some basic stuff
that I'll show you. So we have this default scene. This is our camera, this is our cube, and this is our light. You may see it here. This is the layer layout, how to navigate in this space. So if you're on your
computer with your mouse, you need to press the middle
button and then rotate your mouse and you
will move your view. If you want to go some
book somewhere else, you may press Shift and
the middle button and you can go and move around. It. It's super-easy. So how to zoom in? Jazz, the scroll your
mouse and you're zooming. Okay, So this is the
basics how to navigate. So let's delete e.g. this light. You can press X and it will, it will delete it. Or we can go and press the right button and
press Delete here. Also, let's delete this camera. We have our cube. How to move it? You need to press G
button and it will move. You can click the right button and it will go to
previous place. If we want to move it
and live it somewhere, you need to press G and press the left mouse
click and it will move. So how to transform our object? So right now we're
in object mode. And if we want to
edit our object, we need to go to edit mode. As we're in edit mode, you may see that these
small points up here, we can select those. And e.g. if we press G, we can move these points. Press right-click to live
it in the place it was. You can move your edges. I mean, you can
move this vertices. These things are
called vertices. And if we want to move our edge like two
vertices, we can press, Shift and press and
select two edges, and then we can
move it right here. We can change our
selection mode. Like this is a Vertex
Selection Mode. This one is edge selection
mode and face selection mode. Super-easy. Edge mode. Let us to move our edges. And face mode lets us to
you to move our faces. So basically we know how
to transform our object, but how to make some
modification in it. E.g. if we want to add, if we want to make it taller, we need to press G
and we can move it. But if we will move it
to right, like this, it will look super straight. Control Z two under our mood. And the way, if we want to move it straight accordingly
to our axis, right here we have
axis and x axis, and the z isn't showing, but it's, it's in
going through the sky. So if we want to
move and select and connect our movement
to one of this axis, we need to press e.g. if we want to connect
it to the z-axis, we need to press Z
and we can move it. If we want to snap it to x, we can do it. This is the red one, and this is the red one. We're on x-axis. Let's modification are cubes. So let's press G, Z and go and leave it right here
and it's super straight. So e.g. we want to
delete this phase. We're in edit mode. Like if we will be
in object mode, we can do anything. Go to Edit Mode and
press e.g. S. Button. And as button is for the scale, we can scale it and make
this kind of shape. We're going to go and delete this one and add press Shift a, and this window will pop out. So go to mash and we can
select anything like that. Select cylinder, and
afterwards select it. It, it appears in metal. And we can go to this
options and we can increase or decrease
our number of vertices. Let's make a triangle form. E.g. we want to select
this edge and extruded, press E for Extrude. Snap it to some axis, but you don't need to do it. If you will. Press your right mouse, you will have two edges
on the same place. Because Let's see. You need to delete it, delete edges, and
it will delete. Right now we're like you see, we have still vertices right here that we need to delete two. So let's try a different form, like girl and add a monkey. So we have our monkey. And this window pops out and
we can play with the size, play with their location. And okay. You may press Alt
G If you want to. Move your object to the
place it was spawned. Because this one, this
is the 3D cursor. And if we will press
Shift and right-click, we can move our 3D cursor and
you want to place it back. You need to press Shift and C, and it will go back. Okay, so basically, what
is use the 3D cursor for? It is used for many things, but let's start from the
most common use of it, which is a place where
our objects up here, like I've just added
UV sphere right here. Because this one yellow dot, this is origin of our object. And we can change it, but we don't need
to do it right now. What I want, I want to place this sphere right in the
center of this object. So if I want to place the 3D cursor right in the
middle of our monkey hat. I need to press Shift S and
press cursor to select it. And the 3D cursor is right here. And if I go here and
press and select our sphere and press Shift
S for selection to coarser. Our UV sphere will be right in the middle of our 3D cursor. So if we want to like height our objects so we can press H and it
will be Haydn right here. We can press the button
and it will appear. If we want to unhide
all of our objects, we can press Alt H and it
will be visible again. You can press your right-click. Shade Smooth. It will become super smooth. If we press shade out to smooth. It will become like this. If we go to this panel, go to Normals and
increase this one, you may see that our sharp
edges are disappearing. If you're using an older version than 3.3 won't have this option because Shade Smooth allo
allows us to do auto smooth, like it will automatically
select this one. Because if we Will Shade Smooth, it will happen like this. And if you want to
have smoother result, you need to press
and select this. So this was a fast introduction
in Blender interface. And later when we will start modelling are
low-power Lee room. I'll show you how
things are done in blender on the practice. So see you in the next lesson.
3. Modeling Walls, Floor, Bed and Table: Hello everyone. Let's get started on
modelling are low poly room. So firstly, we can press a, you can see all the numbers keys that I'm pressing right
here on the left corner. So press a and then
X to delete it. Afterwards successfully
deleted, let's press Shift a and add that plane. So this window will be closed. But if you press here
and it will pop out, and right here you can, you can add any number we want to increase or
decrease your plane size. So let's enter five and
it's going to be 5 m. And so basically we have our
plane after Let's press tap. Tap is switching from
object mode to edit mode and press E and extrude it. Right here. In the top corner we
can see the amount of the height of our plane
that we're extruding. Let's do it. E.g. 10 cm centimeters because
0.10 m and centimeters. So for us to be easier, we can go to our numpad, enter 0.1, and we will have exactly ten centimeter
height of our plane. Next we're going to add the wall so we need to press
on our object. If we deselect it
and press shift D, then right-click mouse button, and we will have two planes to our grounds in one
place, G4, move it. And our X 90. You see in the left corner, I'm entering numbers
and I can delete it. I can add any number I want to. So 90. Let's go to this section
and snap to vertex. So when will press vertex, snap with closest and this it, so basically what this gives us, it gives us the
opportunity to snap our object to the
closest of the vertices. If you see we have
vertices here, here, here, and we can snap our other
vertices, two vertices. I'll show how to do it. Press G and snap it like this. So we see Xi are
overlapping to fix it. But as GI press Z to
snap it to z axis, and then we can press
control and snap it. We're snapping it with control because press Control
and then you can snap it. Height of our wall is too big. So let's switch right
here to face mode. To be easier, you
can switch between those with number 12 or three. So one is four vertices through our four edges and
three are four faces. So let's choose this face. We're going to go and
the Crusades, some work. Here. Doesn't matter
what sizes are those wild because we are creating
not some engineer thing, we're creating only our image. So that is not so
important for us to do so. Let's duplicate this wall
by pressing Shift D, living in the same place
are rotated z to snap it to our z-axis and control the
rotate and do it 90 degree. You can see all the rotation, all the sizes in the
top left corner. And let's leave it like
this and then press G and snap it to this wall and you see it's snapping
with the closest, so the closest vertices
where it is is here. So it's snapping. Not the way we need
to suppress g, y and go here then press
left mouse button, pressed G, Y, and now it
should be, snap it correctly. So as we see, we have some Some problems here. So press Tab, press face mode, press G, press Y, and Control to snap
it to this vertices. It will be much easier for you after you gone to model for some while to orientate
in those sole access. And you will have your own workflow and it will be much faster
than it is right now. So don't worry about it. You're doing really good job. So we have our room
with four walls, so we're doing good. After Let's add table. Yeah, let's start from table. So we're going to
add the label right here in this corner and press Shift a and add cube. Let's add a cube so our
coop is 2 m high long. Yeah, and we can
decrease it by pressing Shift and press the left
mouse button holding it. And we can play with
the size like this. So let's, I'm just showing you for you if you want
to do it your way, but let's do it. 1 m e.g. g. And press S, press Z to snap
it to z axis and scale it, I mean to Z axis and do
something like this. So again, as snap it to the
y-axis and there's something similar like this
that they bill is too high for us as Z, S and Z. And do it thicker g, x and move it to the wall. But don't overdo it and live. I don't know some
gap if you want to look at more natural, maybe in the end, we'll
add some lights there. Let's add some legs
for our table. Let's again start from
cubed z and press S, and then you can press Shift Z, the snap it to y and x-axis. And we can do something
similar to this. If you want to be more
precise on the scaling, you can press Shift and it will, right now, you can press
Shift and it will give you much more options to control your scaling. Aids too fat. Let's do it again. Okay, and let's snap it here. Good. The table will need to be the legs will need
to be somewhere here. E.g. I. Have one leg. We can add another one by
duplicating it right here. Then we have two x. And we can put those here
by pressing Shift D, snapping it to y-axis
and adding it here. So basically we have
our table down. It is super-simple, super-easy. Your first object down. Yeah, I'll get faster
by, by the way, the table is too big or it is. Okay. Let's make some room for debate. I want to place the battery here so it's not a problem for us to redo it super fast somewhere here. So let's start with bar bat. So the same we can
go and add a cube, scale it, move it. We can snap it to the wall by pressing G x and snapping
tool one of our vertices. Again. Now we can
change the size of it. So let's get done. Let's do it. Something like this. After. After. We can then go to Edit mode, press this wall,
press Shift S, and Press cursor to select it. So our core server
that was here, now it's here and this
is our Poverty Point. Where are all the
objects are spawning? So exit aided molten
shift they the cube. And you see right now it
this morning right here. If you can't purchase phase that is connected
within 22 faces, you can go to, you can press Z and
move to wireframe. And now you will see this
kind of view and press it and you can move it and
go back to Solid View. Okay, We need to have
some legs for our bet. Let's add some. Actually we can just press a small press shift D
control and snap it to here. More formulaic, higher. Snap it by z. This vertice. It will be on the same
level right here. If you don't know
what I'm doing, I'm explaining right
now and let's get it more for the bed size. You see, I'm snapping
really fast because I could do and find some
like this is great, not this is bad and
the fastest way is to just snap it the
closest vertices. So the other side. You see that my bet
is to bake this bars. I mean, so let's
select this part and press and snap it to this. We can copy this
one and scale it. Okay, so let's do
it a little bit. Interesting. Now, press
Tab, press Control R. You will see that this
yellow line appeared. So if you will move, your mom will bottom. We will have more of them. So let's add the two. Press the left button and
you can move it right now, if you want to leave
it in the center, press the right
button of the mouse. And you see I'm pressing
here so you can see it. So let's go to face mode. And I'm switching by this. If you're for both. And press G and Z and scale it. I mean let's kill
it, but move it to the z-axis a little bit. Right now, we can duplicate it. Press Shift and select all of them by pressing Shift
and press shift D and X, X to move it right here. And you can press
Control and snap it to your though the bet. So we can adjust it a little bit just for our bed to
be because right now, if you will see
we're in the wall. And it is to this overlapping, so we don't want that. There is g x k, it's too high probably. Let's move it a little bit. Cure. Like Yeah, let's
add them at trusts. Let's copy this one
and ship the z g, z control snippet
here somewhere. And now we can scale it. You see that origin
point is right here. So if we will scale it, it will be scaling in this part. So you can press right click Set Origin
and origin to geometry. And the origin point
will be in the center. S Shift Z. Let's add a pillow.
And the cube. Sheriff S Shift Z. Just snap it to the axis, I mean y and x. Let's form some pillow. We can choose two of
the sides plus S, press Y, and move it like this. Let's set the origin
to the geometry. We can right now press Control
a and apply the scale. It is really important before
were babbling something because sometimes
our bevel is blank, not correctly because
of our object size. So go to tap, press a, and let's press Control B and C. We'll have our bevel options. So if we want to increase
the size of our edges, you can rotate your mouse wheel. So I'll do something like this. We will open this spark. You'll see that we
can add the segments. Or Bill, I'm living
free and we have a bunch of other different
options that are not important for us right now. We have our pillow for
Bill to be smoothly. We will go to right-click and **** out or
small will have nice pillow. So let's add some blankets. Of course, you selected
just for us to be there to, to spawn objects. Here. Scale it, scale it to z, shift as shift Z, scale it as x, scale it. As y, scale it. We can do something
interesting here. We can go and be easier. Let's just make a
duplicate the plane, press the face mode. Select this face,
press shift D, z. Right here. We'll duplicate it
into edit mode. And right now it is one
object to separate it, press right-click button
and separate selection. Right now, those are
two different objects. So let's delete this one. Go for this one, and move it a little bit here. Press E and move it
a little bit here. Select this edge and see the scale of the
Bible is supplying. I'm not correctly
because of our scale. So exit the edit mode, press Control a and
apply the scale. And right now, who will try
to press Control B are bevel, we'll add correctly so we can
increase it a little bit. And we have, are looking good. So I'm alright now
this is a plane. So to extrude it, we can we can press Tab, press a to select all go to face and go to solidify faces. Right now, if you see
we're defining it. We can go to other side or this side and leave it like something like this
after we can go and shades. For this part, it is done. Next part we will proceed
with modelling things. Saying the next part.
4. Modeling Carpet, Drawer, Chair: Hi, Welcome back to second part of modelling are low poly room. So let's proceed. Select our ground plane shifts
as cursor to select it, shifts the Z, snap
it with Control. Shift Z. Scale it a little bit. We'll do a carpet,
something like this. It is through high edit mode. Select malt, face, select mode, select our top phase, G, z, snap it to the z-axis and
move it a little bit. We have our carpet. Okay, let's add the shelves
right here in this corner. So shift they add cubed. Cheesy. Scale is a little bit G.
Snap it to our vertices. In case you forgot how
to snap two vertices, you need to open this panel. Snap to a vertex and snap with closest affect mood. That's it. So like tar, face, g, x. Move it a bit. Okay, I think I'll bet is
a little bit too long. So that's not a problem for us. Select those with
holding Shift and press Slash just to see
only these objects. So we'll press it
again, we'll get back. Let's still go back to our
view and select our blanket. You can press Shift and
select all of them like this. Or you can press on one side and press
Control and press here, you'll select all
of them like this. So we can select faces from
all of our free objects. So let's select them. We've holding Shift and well
that's repeated. Control. Select Shift, select this face and
shift select this face. So now we can exit
our slash mode and press G and
move it just a bit. Now, select those and
move those with snapping. Here. Now we have much more
space for our shelves. I think those are
gonna be not shelves, but some bedside table, just a small one. Something like this. And we have our cube. We can go to Edit Mode ship d, z. Copy this phase. Right-click Separate selection. We have separated, we have origin here. And as I said, if we're going to
try to scale it, it will scale to
this orange point. This is origin point. You see it's scaling
to that point. If we'll go right-click
set origin, origin to geometry right now it will scale to this geometry. E for Extrude. G z. Snap it as shift Z, make it a little bit bigger. It looks like it looks
more like a bedside table. Now we can add shelves
here. How we can do it. Perez. How we can do it.
Go to Edit mode, press on this side, shift as halted course
are to select it. Exit, add the cube, scale it, make it smaller. I think the corporate
is still too big. Let's go something like this. Return for this r cube
as scale on the x. And right now we were having something
similar to the shelf. Secondly, we can
duplicate it by pressing Shift D, moving kit here. And we can make it much more interesting rather than
leaving like it is right now. And we can press here g, y, and we're gonna make it open. So let's make it longer. Going to see our wireframe mode. Pressing car face selection
like this one. G, y. Move it right here. Exiting car wireframe mode. But still I think that we
need to redo it a little bit. So I can go to Edit mode, press and select this bar, or maybe no prose, the top one, and
move it up a bit. So we're going to go and
copy this one again. Duplicate it. I mean, Zhe Xie. Move it here, snap it, press this one and go here. We'll have something like this. Let's scale it a little bit
on the x axis. Right now. How to make it deep? Simple edit mold. Like this face, press I on your keyboard and you see if we are not
applying our scale, our options are
working correctly. It should work. So exit the edit mode, control a, apply the scale. Right now, if we're gonna press, I will do differently. So Let's do like this. And then E to extrude. And let's extrude
it to the bottom. And bam, you have a
pre-opened shelf. Okay? Alright, now we can
add some handles right here. Let's add a cube, scale it, move it, snap it. Because we have here vertices. Select our phase G. And let's make some
kind of handle. We can make this kind of
handle. Me more interesting. We can go and press and select our edge
mode or press here are go to number two
on your keyboard. Press this edge G and
move it a little bit. So we'll have some
interesting handled. So let's duplicate
it right here. We can go and set
origin to geometry. Now we can go and press shift
has cursor to select it. And right now there
are 3D cursor. Our spinal nerve point will
be in our origin point. And let's set origin, origin to jump to right here. Press shift D, leave
it in the same place, Shift S and selection
to coarser. And right now it will be
move it in the center, but still it's hide it. So let's press G, Y, move it here, press again Gy, snap
it to our vertices. So it would be a line. Okay, So we have done our bedside table and we
can add a chair right here. So let's add the chair
and start to Ghana from, from select all carpets
Shift S cursor to select it. And shift a and a cube
will start from cube, scale it, scale to the z. Let's lose some
interesting forms. Like we can select this face, has SY, move it here,
apply the scale. And let's press Control Alt to select are all of the edges. We can do it manually
by pressing shift, but faster is to press
Shift and Control Alt. And it will select all of them. So Control B, bevel, it. And let's do something like this. They're going to close it. If you will. Do to manage it will overlap. I'll leave it like this. And also we can press and select this face and this face and also control B and
bevel it a little bit. And now we can
shade auto smooth. And we have our seat dawn. So our origin point is in the center of it and we can press Shift S and
corso to select it. It will be easier for us to
add objects in the center. Now I'll show you how
to add a cylinder. This really big, we can decrease our number
of vertices to 16. Has scale it, move it, and press Edit mode. Select this face and go here. Next, we want to add
that back for our chair. So how we can do it, we can duplicate this object or we can create another one. Let's try to copy this one. If it, if it don't work, we'll create a new one. Shift D, Z, R, and R for rotation. And let's step it to y-axis. Press Control and look in the
top corner, your rotation. So it's -90 degrees
along global. Why? And let's press S x as y, i mean, and scale it
a little bit, GZ. Move it. Okay, don't like it a little bit so we can press our edge selection mode. Press Alt and select this. And press Alt and Shift
and select this one. And we can move it a little bit. We can move those
also like this. Okay? We can go on our non path
and press number three, we can go to Edit mode, press Z, go to Wireframe, go to
vertices selection mode, and select all the vertices, press G and move it a bit. Also, we can press S
and scale those Sunday. Okay. Returned to
our solid view. Also, it can switch right
here betweens though, between those views, we can rotate it a bit our y. And let's add a cylinder hole. So right here, we
can duplicate it. Control Shift D, love it. Big. S, Shift Z as X As Shift Z. To make it a little bit bigger. And move it like this. We can go right-click,
Shade, auto small. Really have our
back so we can add our arms right here
by doing the same. **** D, duplicating, hit our Z. Move it 90 degrees, g, x. Moving somewhere like here. Go to Edit Mode. Select all of these vertices. Move it like right here. Let's add the top part of it. We can press shift this course
are to select it and Qp, because it really big. You can change this
size right here like point free until year for 2 cm and it will spawn
all the time for 2 cm. So as scalable as x move it controls
applied the scale. Control a, select
all of the edges, control B to bevel it, and we can bevel those sites also make it wider a little bit. She'd also small. Okay. There you have it. Let's copy those. Firstly, let's align
them much more properly. Somewhere here. You can mirror those by one technique that
I will show you. Press our seat, Shift
S cursor to select it. And right now press those. Go to this part, go to predict coarser. And now press shift D, leave it in the same
place by pressing quite mouse control M
and control Control M, Antwi until it will
copy along this center. We have our handles and try
it now we can add the wheels. But still I think that I'll add some circles right
here and we'll, we'll look at other rotated. Right now we're scaling how long the 3D cursor now and change it to medium point. Scale it. ****, oh, too small. And now we can copy this as
we did previously, go here. Whereas 3D cursor should be
live it in the same place. Control M, Y. Now it's mirror it. And change this to medium point. Go and cheat auto
smooth this part. And let's go and create our
wheels. So how to do it? We can copy this part
should be sheer. Scale it a bit. Like a, scale it to x and r and make it 85
degrees like this. Go and move it, tire. Move it somewhere. Okay. We'll leave it somewhere
here in the center. Now how to make
them like around? So go here and Shift
S cursor to select it again and go to go again
here, press pretty cursor. Right now, if we're
going to rotate it, it will snap it
to the z-axis and now it will rotate
along our 3D cursor. So Shift D, R, Let's make it 180 degrees. Select those. Shift D are the Z, 60 degrees. And repeat it by pressing Shift D R. And again, 60 degrees. I think it's too big. So that's not scary
thing to redo it. Select all of them
by pressing Shift a, go and go and choose median point as z and
scale it a little bit. So right now we're
going to add our wills. Go to Edit Mode, select this phase shift
as courser to select it. And I'm cylinder Scale, it rotated 90 degrees. G. Z. Scale it a little bit more. Rotate it 60 degrees, like this. Auto smooth, and give it
a little bit of tweaks. We can do much more interesting
wheels by pressing I, moving kid here, pressing Alt E and extrude
faces along normals. And you will move it here. So let's copy our
will to other sites. Cursor to select it. Go to free the coarser
and shoot the rotate Z. 60 degrees. Again. 60 degrees should be
again, 60 degrees. Again. One more time.
There you have it. You have a modelling, a chair. All left to do is add some small details as
monitors and other stuff. So see you in the next part.
5. Modeling Monitor and other gadgets: Welcome back to our
first part of modelling. So last time we ended
on modeling this chair. So slight thing that we need
to do is to make it smaller. Go here, choose median point
as scale it, Z movie tire. Whereas this, this,
and this mode here, those accordingly the same. So right now we'll need to move this chair
somewhere right here. So we need to adjust this part. Select all of them. I can press Control G
to make it one object. Right now, if we're
going to move it, we're going to move
it like one object, set origin to geometry. Now we can leave
it somewhere here. Let's add some shelves
and this wall. So shift they add a cylinder
but make it six vertices. Scale it, scale it again
and rotate it like this. Move it to the wall. It's quite big. Make it smaller again. Control, snap it to this wall. Right now what we
can do is slash, tap, select faces, this
face and this one for us. Right now, press F pre and
look for breach edge loops. Right now we have
some kind of shelf. You can duplicate it. And it's snapping the nearest
so deniers this shear. So to avoid it, press Tab Control a, g, y and it's connecting here. But I want to add
it somewhere here. So duplicate it one more time. It's somewhere here. And one more somewhere here. Maybe. Namely like this. Yeah, that's good. So
but still it's too big. So select all of them. And she snap it to the wall. Okay. So let's add our
trash bin right here. So how to do it? Shift has cursor to our carpet
and add a cylinder again. Clades add some 16
vertices, make it smaller. Snap it to the
floor, move it here. Scale it again, snap
it to the floor again. Go to wireframe,
select this side. Scale-up. Go to solid view. Whereas the top one, I here scale it. She'd hold or small. If we want, we can make
some bevel right here. Let's apply the scale. Here we have our trash bin
and let's add the trash. There are bin, select our band Shift S course
are the selected shift a, add a UV sphere, scale it, move it. Step, select all m a distance. And here we can move and
make some like papers, e.g. Control D, rotated somehow. Make it look realistic paper. I mean, not realistic, but
something similar to paper. Okay, our bin is full. Right now, let's add a monitor. Shift this cursor
to select that. Match the cube. Move it, scale it, scale it, scale it. Let's try to make it curved. Tap control are one
of the loop cuts. Right? Now. Control V to
add more of them like this. And g, x, something like this. And again, Alt click Shift, Alt click, Control, B. Scale, control, be some loop cuts and
****. Oh, too small. Hey, we can more closer
ones right now we can press M distance
just a little bit. And now it's more. So what I had here, I had some thing that I
didn't like on shading. And what I did, I just select those
two edges, S, Y, move it as close as I could, press M, merge by distance, and now it's not. So. Yeah, let's proceed. The cube, origin to Geometry. Select all the edges. Control B. Select Face. Sheet oldest. Make it a little bit bigger. Right now, cursor to selection. And the cube again. Scale it. Make us stand for our
monitor. Scale it. Okay, let's make it
a little bit wider. We have hard edges here
that I don't like, so we can suppress all of them. Again, bevel them a little bit. It's super smooth. I like it. Just roughing. And let's go to wireframe. Select this. Scale it a
bit more for monitor here. So yeah, we have
done our monitor. Congratulations, you're
doing really good job if you are watching
till this part. You're not giving up
your learning Blender. It will pay off in the future. You're doing really good job. I mean it. So, yeah, let's add our
speakers here on the table. Let's do them super
simple, like those boxes. And select our phase shift as
scores from the selection. Add Cylinder. You
added cylinder, but you don't see anything
because it's too big. And we can add some
like six vertices. Scale it, scale it, rotate it. Scale it again. Like okay, scaling again here, duplicate it. Scale it again. Here. You can select those. Apply the scale I extrude. I'll see you can right now
press S and press S Here also. Have some speaker. So let's duplicate it. Let's join it. And our table cursor
to select it, to mirror it on this side, go, press pretty cursor
like this one, Shift D, right-click mouse button and
leave it in the same place, Control M. And why? Now we have our speakers done. Let's add a keyboard. But if something's
working not correctly, you need to change your
pivot point to medium point. So add a cube, scale it, scale it. Adding a keyboard. Okay, we can move
forward monitor. Here. We're doing our keyboard. So how to add our keyboard? Keys? Simple and the cube? Scale it, flat it more and snap it to our pink. And let's go here. Like this. Okay, so if you don't want to copy all of them like
doing this and this, you can do it, can go to this part. Here is a modifiers. So you'll often use it, but it will be later. So firstly, we're going to
learn modifier properties. So add a modifier. We have a lot of modifiers here, but all we need is array. So we see that we
added this option, lets us turn on and
turn off our modifiers. So as we see, we added one more of them. So let's press zero here. At -1.2 on the y. We need not minus plus. We can increase it a little bit. 1.4 tau. We can increase the
count right here. We'll have our keyboard. We can duplicate this one and also the modifier
will duplicate. We can duplicate that again. And again. We can apply by pressing here or we can
press Control eight. Here's a shortcut. Right now. We can know press
L to select all of them. And let's delete x and you
can press X to delete faces. Okay, So let's press L, copy it, snap it, move it here, and snap to this one. So this is our space button. We can tweak it a little bit. And yeah, we can model really
specific and real keyboard, but we don't get to
do it right now. We're gonna do the fast way. So yeah, we added keyboard. And we can also, we can do like this. So here we have our
keyboard, non solo. Them, control a visual
journey through to mesh. It will apply all of the modifiers we
have right now here. So pros here Control J, and we have our keyboard
done. For this part. It is the end. In the next
part we'll add more details and we'll be ending
our model part. Then we're gonna go to
our texturing part. So stay tuned and see you
in the next tutorial.
6. Modeling Power Socket, Bin, Plants, Clothes: Hello. So today we'll model
more details to our room. So let's get started with
modelling as socket. Let's add a cube, scale it, move it, align them to our all, and scale it along x axis. Scale it along y-axis. Select this face, bevel it. Firstly apply the scale, the next bevel it cursor to select
it at a cylinder, make it six vertices.
Scale it again. Rotated it. Again, scale it. Sometimes
you can be lost in modelling. So if you want to, you can go over here and
choose Color random. So you will see our different objects with different colors.
It might help you. But I will use material color just in case
you wanted to change it. Let's Bruce, I extruded cursor to select
the cube, scale it From one to have
it in the center. We can select all of them. Go to our slash, press one on number pad like a prion number pad to
go to the side view. And right now we can, we don't see this bar, so we can turn on our
wireframe right here. So you will see all
the lines right now. So let's try to align
it in the center. So we can turn off. Next, we can press
Control J to join all the objects and
duplicate our second, like this exit our slash mode. We have our socket. So let's add some more buyers. And a cube. Scale it. Snap it, move it. Let's copy one of these. Rotated by 90 degrees. Rotated by 90 degrees
again. Snap it. And you can press
Shift R to repeat it. Okay, so let's add a wire here, cursor to select it. And let's select
our vertices mode. Select this verges C
Control D to duplicate it, e to extrude it along y. So that's second point. Press separate selection. Right now we have edge set
origin, origin to geometry. And now we can compress
selection to coarser and we can extrude it again. Move it a bit on x-axis
and extrude the z-axis, move it along x axis. Just try to align it. Some words here. And now we need to add a clock. So we can transform
this one to our plaque. Daily dose. So this one, move it, scale it. Okay, Let's do battle. But we need to apply the scale. And now our edge extrude
it again and we can. Press cursor to select it. Right now, select this
one, selection to coarser. And right now what we can do, we can add some bevel
to our vertices. So we need to press
Control Shift B to add more of them by
moving your mouse wheel. And right now we can go
right here, press object, convert our edge to curve, go right here. Object data properties. Look for geometry
and look for that. Yeah, so make a wire. Okay, see, it's quite
bad with the kink. So let's adjust it. To adjust it, Let's go and turn on our
proportional editing. Right now. Press G and
move your wheel mouse. You'll see something like this. So you're editing
commonly in this circle. So let's go to slash mode number but seven to go to top view. And to move it. Tried to adjust it manually like this and go
shoot, hold us more. We have done our wire. Congratulations. Let's now add that wire from the monitor so
we can copy this one. Rotated by 90 degrees. We can go right here, press cursor to select it. Press this one and
selection to cursor. Okay, we can rotate
it Part two degrees. We can delete this one
and align it here. So again, we need to add
a wire to our monitor. Has the same row right here. Control D to copy one of
the vertices, separate it, press on the vertices, hit E to extrude. This part goes to
selection to coarser, and now we can extrude
our wire more. So let's do it. One more vertices here. Let's make it realistic. The virus are laying on the ground always
because they are heavy. And add more. Somewhere here. We will not see it. So we can leave it like this, but still we need to
connect the dorm monitor. Move it here. And forward. You can I don't know here, but still we won't
see that parcel. We can skip the modelling
right here because we'll do a render from this
point of view somewhere. So again, let's go
apply the scale. Okay, so let's probably
delete this one by pressing here outer
merge vertices and double G and move it here. Turn off this. Right now let's apply
the scale and Control B. Now it's working fine. They're not the clamp overlap. Let's see, those are
overlapping so we can fix that by selecting all of them, press M and merge at the
center. Now it's good. Again. Object to convert the
curve geometry. In this one. We'll leave it there and
do something like this. We can adjust it again. Like this and shade oldest moon. Okay, so next let's
add our mouse. Press on the table
shipped as coercion to select the cube size. Bowing one. Snap it right here with a bit. Make some form of the mouse. Next, let's add some
pre glucose, e.g. move them along x-axis. Old. Select this bar. Again. Apply the scale and press
a Control V to bevel it. Firstly, let's add a
loop cut right here. And go to our vertices. Wireframe mode, select all
of those top vertices here, and move them on bed right here. Also, we can add one
look at here and select also love swans
and move it a bit. So yeah, separately the scale. Press a, Control B for bevel
it and bevel it like this. So she told us know, and we have some
form of the mouse, maybe it's too long so we
can adjust it like this. We can add a mouse
selection to coarser. Had some simple cube that we can apply the scale and
bevel it a bit. So she told us more. Yeah, Derek, have a mouse. Let's join them. And
let's rotate them along. Z. Move it like to be some way, not just leaving it
straight but making some. Let's do also with the keyboard. Just rotate it along the z axis. Yeah, There you have it. So secondly, let's some, what we can add more. Let's add some, maybe
some cactuses right here. Cursor to select that. Had a cylinder. Let's increase it to 16. Scale. It will get align it. Go to Edit Mode, wireframe mode, Face
Selection Mode. Select the bottom, face, scale it a bit, and go to Solid View. Select the top one, press E to extrude it. As control a scale. Select those edges by
pressing Alt and select it. Select it. And yeah, let's do some level like this. She told us more, we
have our pot down. So let's plant a cactus there. Select this face
closer to select it. One more cylinder. G alignment door 104 vertices. Move it a bit. So we can add some forms by adding
a loop cut here, moving it here,
scaling it up a bit. And we can extrude
it again and apply the scale and the
bevel it like this. So we have our cactus
shaped or too small. I think we can adjust taught
actors little bit more. Make it smaller. There we have it. We can move it and place
it somewhere here. We can add some books. Those are real simple
by adding cube, snapping it, scale it
by pressing Shift Z. We can do some books
or magazines, e.g. so let's do some
kind of magazines. E.g. we can add the little
cards here with one more here. What will be needed for
our texturing part later? And that's sad some
things to our driver. So let's add cubes. That will be some part
of closest, I think. Snappy. More of it. I'm glad to scale,
beat to bevel it. Like those. Shadow to smooth, move it. We can make it
smaller, more small. Let's replicate it. Sounds like this. So we have some objects there. Let's see how it looks
from the W. It looks nice. You can deform it a bit
by going to sculpt mode, selecting one of these brushes, like go and select
some, I don't know, maybe this brush and press
your left-click. Modern. You see, say if want
to change object, we need to go to object mode. Select this one, and again go to sculpt mode and do the same. Go to object mode, and then repeat that same
process or to other things. Object mode. It's called looks
more realistic. So yeah, the last thing, What we'll add a window, and we'll be finishing
with our modelling part. How to add a window,
go press Shift. They had a cube, scale, it make it bigger. Like this. I think maybe we need to do some kind of a window. I came a real good
bigger like this. Okay, So how we
can cut the wall? It's really simple. All we need to do is firstly, you need to do it with bulk. Do go here, or you can press N. This window will pop out. In edit mode, will have a
bowl tool to turn it on. You need to go to
File, mean to Edit, go to Preferences, and go to Add-ons and look for wool, go. And you'll need to
select them, turn it on. So yeah. Secondly, you need
to press Shift, select the wall and you need
to press Control Minus. Or you can select here
by pressing difference. After all you need to do
is, yeah, you're done it. We have a cloud and
we need to fill it Alt and select the
Empress somewhere here. If you'll select here, and it will select this
part of the wing of sowing. It's like this or
this doesn't matter. Plus F, go Press separate, like the ln e to extrude. Snap it right here. We can make some edges
look at more realistic. So we'll add free to look guides by
pressing control are setting them in the
center. Like those. Those are as I press I to make it individual
will have this window. And all we need
to do is press X, f will delete it. And next we can, we can press and select
bridge edge loops. Sorry, yeah, select those again. Type and bridge edge loops and repeated right
here by pressing F3. So all we need to do
is to add a plane, rotate it, move it, scale it. So yep. So we're finished with
our modelling part. Congratulations if you
reach it this part. So in the next part we'll
start coloring our room, so it will be more interesting. So stay tuned.
7. Texturing Carpet, Table, Walls. Adding PBR Texutres. Adding Images as Textures: Welcome to our texturing part. So let's get started. Firstly, let's install
add-on or for camera. Go to Edit Preferences. Go to Add-ons and press Install. Select this file and
click install add-on. After. You will see
here, models insulated. And it will appear here. If it doesn't get appearing, search for ISO camp
and enable it. After, press N and look
for your ISO camp. And right now you can
switch between your views. Will use game. Iso can press G, Z to move it more here. Yeah, have right now
our camera would make we've made a lot of cameras so we
need to delay those. Personal will have only one. Great. So to enter camera view, you need to press on
your numpad zero. And here you'll see she'll
render it now. It's like this. So let's start texturing. So press somewhere here and
open next second window. Go to shader editor. Close this one and press. Okay, Let's start from
the carpet. For S mu. Right here we can write
carpet. Right now. We can go to our base color and choose what
color we want to. I'll probably make
some orange carpet like this one. Also here. We can work on our roughness, on our metallic and other stuff. Right now we can we can add
a little bit of roughness. We have our carpet. Let's start with
texturing car bed. So select all of them
by pressing Shift. Control G. Select
the bottom part, Control J. Click on New. Let's name it bad.
To base color. To look for some brown color. We can add more roughness. Specular will work. So yeah. Let's
start texturing it. Now. Go with the walls. Let's make some gray walls. Basically, we'll now we
don't need to go into all those things because
we can only add the color. Select all of them. Knew shelves. Okay. I'm thinking all living some. We can decrease our roughness and the render view we can see how our image
will look like. So go to Render properties, click on cycles and go here, right in the view port two. And right here. It
can be lagging. If you have a slow computer. To exit it, go to
material preview. Let's continue so we
can join our table also can add table. Table. I think we can separate those and make
them different color. To make those different color. Press here, then it will
be second material. So med table, draw worse. Those darker. Okay. If you want to select any color from your project to compress here, can make a darker color. I'm thinking right now, maybe we should change those. Make those days. We can also, by the way, we can not we
can do it in the other way. So we have here our slots
and we can press plus here, and we can go NAT
table and assign it. And it will reassigned
and this object will have do materials and we can
go with unlimited materials. Go to Edit mode. And
let's make our monitor. The press I once again need
to extrude. Can separate it. And I can press Control
a to address the scale. Press new money, door, image. Search for image,
texture, the base color. Now let's open this one. And if you'll see the image isn't in the correct
way we want to. So we will need to go to
UV editor for a step a. And once again, so you unwrap
R to rotate it 90 degrees. Move it here. You can also assign your
movement to any off axis. We have here an x-axis. I'm snapping into
x-axis as the scale it. Back to our shader editor. And also we need to
change this one. So X to delete it, search for an emission color. Let's connect the color
and emission to surface. And what that gives us. If we go to rendered view, our image is glowing. Really cool. Let's proceed. So let's do the monitor. Make it dark. We can
increase the roughness bit. Maybe add some metallic. Also the speakers joining them. We can give the same
material as for the monitor Control plus, or you can press L
to select those. And plus Create new
speaker inside. Let's leave it white. Assign it. Let's go here and press Assign. Let's make metal parts black. So press here and assign. Okay, keyboard. Let's make it this color. And go to Selection Tool. And you can select
manually by pressing L. Or you can do other way, just pressing L on the main part of the keyboard
and then press Control I. And it's all select the inverse. So nu t. Let's make those white. Or maybe we can name it white, k. K. Let's do our mouse. We can do it white. Because there often is
a bit rather metallic. Just to make it shiny. Select this by pressing L new. And that's sad, I'm
monitor material to it. Assign the k, We're
doing really good. So let's make the cables
control to join them. And then monitor
material will be black. Some silver. Also, we can copy our
material by pressing here on material you
want to have here. So this bar should
glow in orange. Control L link materials when they were all
linked materials here. Let's add the white
material sign. We can copy it by pressing
this one firstly and then shifting press
all the others and press L. Link materials. Browse this one. So
this should be orange and I'll link materials. We need to manually add the
white things right here. Sign. Maybe we can. That doesn't work. So yeah, we can do we can only copy it. Will be much faster. Make the circuits monitor color. Also, we can try to she told
us smooth hip not okay, it doesn't work because we
have two sharp edges here. The fix that we can go for us, hold Shift and press
hold shift by recycling car edges and add more bell shaped auto
smooth and it works. Let's make it the same
sheath of smooth. Okay? Let's go with
far, far lower. So let's separate the top part. Separate. So now we're
gonna add our materials. Those free. Okay, we're
gonna import that by one. And right now, don't be afraid. It's easy to do color, the base color, glow, so we need to go
to the roughness. And for normal. For the gloss, we need
to select one color. Search for normal map. Normal to normal,
color to color. Okay, So how to
adjust our image? Door floor? Simple,
go to the UV editor. Select this one if
it's normal map. The purple one, purple one is
the normal map. Edit mode. A. Unwrap, a scale it, press on the numpad, free. You will scale it. You can also click
R to rotate it. If you're wanting
to me this side, I will leave this side. Also for this part we can
we can copy material. Here, press you Rob qp
projection. We can scale it. There's something like this. So this is it for this part. See you in the next part.
8. Texturing Chair, Clothes, Adding the Glass Material: Welcome back to our course
and let's proceed texturing. We're almost done. Only few things are
left to texture. So let's proceed
with our trust me. Go to the shader editor. Let's go with metal. So let's use some silver color. Increase the metallic
roughness circuit. Let's not make it too much. And also we can make those
the same link materials. We will have four
handles, the scene. The trash can be trash. Some white papers. Now so we can leave
those material. Okay, let's go very far. Chair. Let's hide, is you can hide this
and unhide this by pressing N. So we have our
Cheryl's of one object. So go to Edit Mode. I'll, I'll, I'll know. Let's select all of them also. This one or this one Clark. Those ones and this one plastic Black Sea. The roughness can give us
some really glossy effect. So I think that plastic
is somewhere here. Let's go very far. Material part. Then. Chair material. Material, black. Let's go with some black color. Let's make some
difference between those. Would be reasonable. Yeah. And also we can add some e.g. like this one, separate
the selection press Slash. And right now we can
select this bar to see. And select this one and press J. Do the same here. And do the same here. What this gives us an opportunity
to select all of them. Like you can go to wireframe mode or as hold it and select
those two material. Select this bar. Ands. Right
now we can add one more. Chair. Blue. We can add and blue color, like assign it here. Let's make it sound more
dark color like this, e.g. something like this. Also
we can add this one here. Also we can go to slash mode, connect those vertices
and those swan. This one, this one. Hold Shift, select Alt Shift. Also we have some gaps here. Were selected Foley
and material. Chair blue sign, except that
control J to join it. Yep. We're now on our chair. Let's go very far
better right now. So the pillow can
be white or white. White is submitted of
glossy because we've done our sockets at my
keyboard and mouse. So why doesn't go? They can remove your material by pressing here. Add a new one. That light. I did some some white to color. This one is too harsh, I think. So. Let's apply the
scale a, control me. Just the she'd go to small friend that make it blue. Light blue. Blanket can be blanket. This song thing. I don't know. Let's try doing something. We're thinking about blue. Now this one, a little bit. More roughness. Also here we can
add more roughness. The pillow, more roughness. Let's go with for
window, window frame. Let's make it white. Nucleus raphe Magnus and
a little bit of metallic. Just leave it for now. And let's proceed
with our close. So red, blue. Marine. Hello. For dose, we can rank materials. Magazine. Magazine, silver. Car magazine. Dark silver. Decrease or roughness to make it a glossy out a bit metallic. Right now we can add
some colors like red. Like we can press double G, move it just to make some, I don't know where I can
select those and join them. Just to make some
space to color it. Yellow. We're doing it randomly. What has to be marine. So
when you delete one of them, to delete one of them, I'm
going to exit the edit mode. To add some text. We
can add some text. Make it interesting
cursor to select that. Select and add a text. Added magazine. Scale it, rotate it, move it somewhere here. Along the Z-axis just
to avoid overlapping. Right now, control a
visual geometry to mesh. We can make cutter no
white pectus part. The roughness. Okay, let's now go to the
window glass material. So how to do the glass
material? Follow me. So let's delete this one. Had a glass beads and
connect it to the surface. Now we'll have our class, but it's not transparent, how to make it transparent. So we need to go to the
scene and go to the film. Make it transparent glass. Now it's working
just transparency. So basically we have
done our texturing part. So now if we're going to press zero and go to the render view, we'll see this image, but before render we
need to add the lights. So in the next part, we'll be adding the lights.
9. Setting up 3 Point Light, Adding the Camera, Rendering final image: Hello and welcome to our
last part of our tutorial. So in this part we'll add some lights and we'll
render our final image. So let's get started. Firstly, let's go to our render
properties and choose EV. As a render engine will work in EV and after we'll switch the cycles and
render it in cycles, probably many of you
have not good computer. If you are having good computer, you can work in cycles. And if you're working in cycles, be sure to select GPU compute. So let's go to rendered
view and we'll see our scene without any lights
besides our monitor lights. So let's press Shift
a and let's start from adding a plane to scale it. 15. Shift a and add light area, and move it somewhere here. Be sure to choose 3D cursor. Right now, we can go to our
object data properties. You can see this only one
your selected, your lights. So if I'll go here,
I won't see it. So I need to be sure that I'm
selecting car light here. I'll increase the
power to 1,500. Okay, maybe it's too much. I can increase it
to 500 plus our x, 45 plus r z, and move it somewhere here
just to be at that age. So it will be -135 degrees along global z will have
this kind of light. So let's open one more window, go to the shader editor, close it by pressing N. And let's add some
color to our plane. So I'll be adding some blue, maybe some dark blue. This. And let's select our
eye can see, it's here. And let's select our light and maybe make
some, I don't know, some light blue color, e.g. like this one. And after we want to add
two more lights will be doing three-point
light. Basically, I think. So. Press shift D, duplicate it, our Z, move it to
this point somewhere. Like can do 90 degree, yeah, and then press R x, x one more time and
leave it somewhere here. Also, we can make this
1,200.50, maybe 200. And let's change the
color to some purple, like some purple
color like this one. It can go with maybe some
pinky, little bit pinky. And let's duplicate our allied to the other
side by pressing Shift D and rotating it by
180 degrees -180 degrees. And let's add some warm
color, some orange, just to make that feeling
of like there's a light in some other room will give
us really good effect. And yeah, Almost We're
done before lightning. We can look how it looks in cycles by going to render properties and
switching two cycles. If you're having lags, you can press Control B and select only the area
you want to render. Your rendering it right here. So those are your
samples and you can increase and
decrease your samples. Right here. It is
viewport samples, and this is render samples. So in the render samples, you can increase
it or decrease it. And it all depends on how
much sample is do you have, what quality of images you have? I don't recommend you
going above 5% well, because it will take
awhile to you to render. So yeah, if you want
to exit this Modu, need to press Control Alt
V and Q will exceed this. So yeah, our image looking good, I'm thinking to add some light
between monitor and wall. So let's go to EV
go to our monitors, select our monitor,
press Slash on your numpad, and you can. Go and press and select
all of them. After. Let's go here. Click blast and add
the new material. New material, delete the
principal BDSM by pressing X. Add em mission connected
to the surface. Let's add some pink color, like maybe some pinky color, and increase the number of free. And don't forget to assign it. So there you have it. Go to slash mouth again. And that's pretty much
everything that I wanted to do. Let's look how it
will look in cycles. Now, I'm thinking maybe a
should decrease it to two. Also before rendering,
don't forget to click on denies
mucus if you want, denies you will
have this kind of pixels noise and all
the other stuff. If you're, if you will have it, you need to increase
your samples. And also click denies. Also right here on
the color management, you can add the medium contrast, or you can add
medium high contrast to make your image
more saturated. And yet, That's it. So you can go to cycles, GPU compute, and
you can increase. And when you're ready, you can go to Render,
click Render Image. And it will render your image. After your image is surrendered, you'll see this one
and you can close. You can go to this bar rendering and go to render a result, and you'll see your
render a damage done. Save our image. All we need
to do is go click Image, Save As Type your
finished image. You can choose your format. You can choose your color
and all the other stuff. You can leave it by default
and click Save Image. Congratulations on
finishing the course. I'm really glad that
I was helpful to you. I want to say that I'm
really proud if you don't this part and you finish the
whole course completely. Also, I want you to know
the value of this program. It can help you to find
chop anywhere remotely. You can create stuff,
everything you want. The blender has more
potential than you think. And I want to wish you
good luck on learning this program and see you
in the next tutorials. Bye.
 Daniel Bogdanovic, 3D Artist