Transcripts
1. Intro: Ever wanted to create your
own game ready model? Maybe you want to start
your game developer career as an Fred artist. My name is Daniel and I've been working in a game studio
for two years now. And you know what, I've
started just like you, by watching someone else
tutorial on the Internet. Tutorial. After
tutorial, I was able to create my own assets and
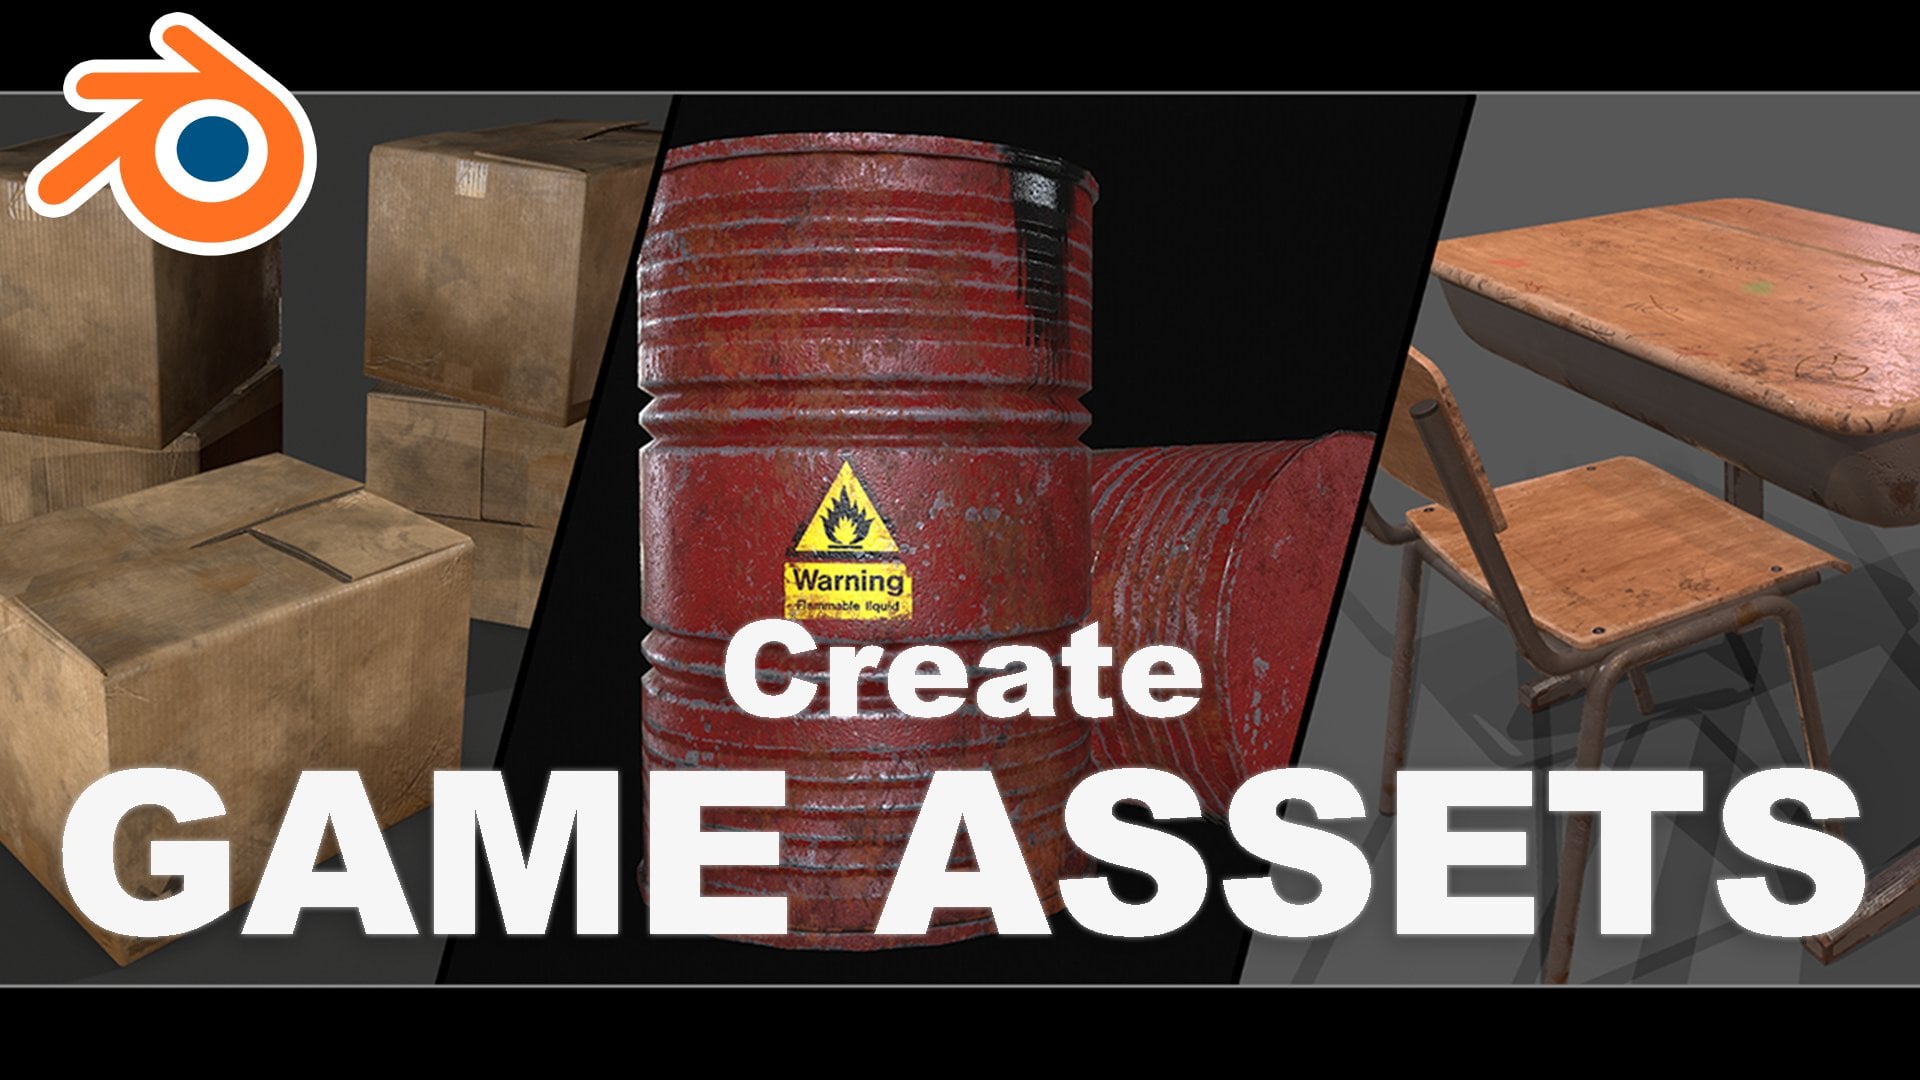
I've built a portfolio. And in the end I've got the job. In this class, we'll go
through as creation pipeline. First we'll start
with references Hy, poly modeling, Low
poly modeling, UV and wrap exporting, Importing it to substance
painter, baking it, texturing it, and exporting
textures and models. By the end of this
class, we'll know how to properly create Game Acid, how to import it to game engines such as Unity or Unreal Engine. This class is for students with no experience or basic knowledge of blender and
substance painter. Since for Newbies we'll have
additional classes where we're going to go through navigation in both
of the programs. Each lesson is around
10 minutes long and it's easy to follow
up in our busy lives. After finishing this course, you will be able to
post your project to project section and receive
some feedback from me. So let's get started.
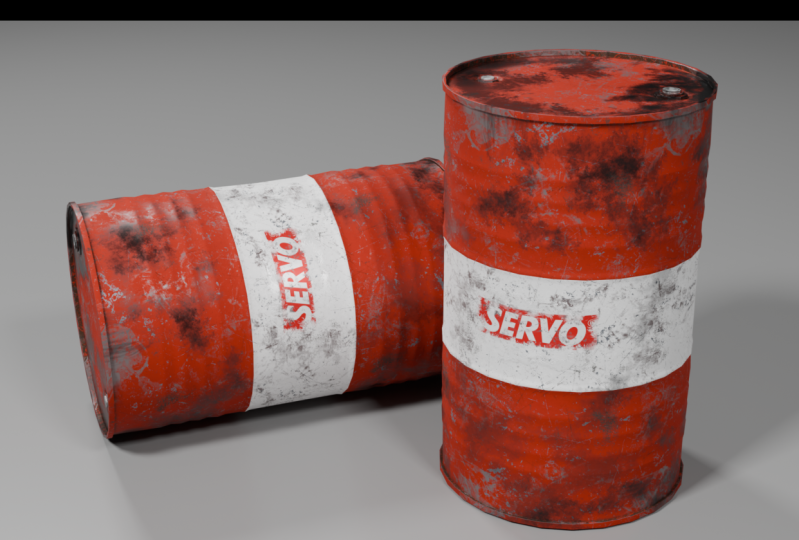
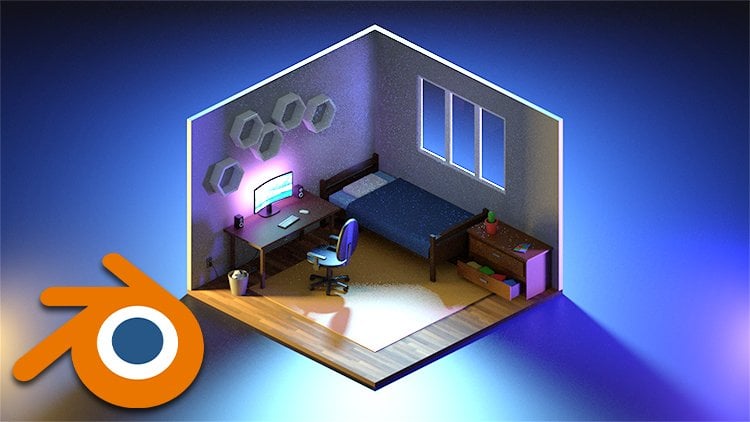
2. Your Project: The final project for
this class will be a high quality render
of our metal barrel. I strongly recommend you
not to skip this part because you have an opportunity to receive some
feedback from me. By this way, we'll receive two times more value out
of this class. Let's go.
3. Basic Intro to Blender: Basic Introduction to Blender. Welcome. First thing you need to know that you don't
need to know everything. Few things you need
to know that we'll cover in this course is that
you need to know modeling, UV en wrap exporting, that's all you don't
need to know about animation and other stuff. Blender is a huge
program where we can create probably anything, but we just keep
with simple things. First you see this image window. You can press somewhere
here and you will see we have our cube
camera and light. You can see them here. Basically, we have
three dimensional space here. We have a cube. And first question, how to
navigate is middle mouse. And you can rotate along your center if you
want to go somewhere, right, left, top
down, I don't know. You press Shift and
plays middle mouth. And you can rotate and navigate. How to select everything
a X to delete everything. We have a three
dimensional space. Right now it's empty, we
don't have any objects. How to add an object
by pressing shift a, pressing mesh and adding a cube. And how to enter edit mode. Edit mode, we're in
object mode right now. We go to Edit mode. We have vertices,
edges and phases. Basically those are vertices
two vertices have one edge, like one line and four
vertices or more have a phase. We can switch and select edges. We can go and select phases. If we want to modify it a bit, we press, we're
going to move it. But if we want to snap it to
any of Xs we have here axis, x axis, and y axis. You lock it to axis. Want to snap it And
lock it to X axis. You press X over Ext press. You can extrude your
object and press here. You can switch 1-3
on your keyboard. One is four vertices, two is four edges, and three is four phases. We can press this
phase and you can press and extrude it out. To move it, we press
and you can move it. Move it somewhere here. Yeah, we have sin
collection here. If we want to
duplicate our object, we press she and we
can move it here. Simple thing we can do is
we can create cylinder. Because we're going to
create today cylinder. We go and we want to
add more or less edges. Add cylinder and here we have vertices radius and other stuff. We can toggle it, but we can
toggle it only when we're adding objects after we
can not get back to date. Yeah, if we're going
to reduce it to five, we're going to have
a star shape, six, we're going to
have seven basics. Okay. Also we have a modifier
sections and other section. It looks super huge right now if you're first
time open blender. But trust me, just follow my steps and you will
learn by intuition. Let's model something simple. For example, a chair. We're going to add a cube. We're going to press to
scale it. We're scaling it. You see right here on the
right, it's changing. After you scale it
in object mode, please be sure to press
control a and apply the scale. Because if you didn't do it, your modifiers that are here, we're going to get
to those later in the modeling section
will not work properly. So if something is not working, please be sure to
apply the scale. Press Z, make it thicker, press go somewhere here, go to edit mode by pressing Tab and go to phase selection
mode and select this phase. We can do loop cuts by pressing control and we'll have
loop cut in the middle. We can press mouse left
button and toggle it. Press control B to bevel it
and we can make it like this. Repeat it for this one, we want to keep your
edge loop in the center, Press right click and it
will snap to the center. Okay? Now select this
edges and move it. Please be careful when you're modeling and you're
letting it down like this. You'll have faces on the faces, you don't want to do it, your model will be wrong. Just if you're doing extrusion, please be sure to cancel
it by pressing control Z. Because if you're
doing like this, pressing right click mouse while you're having bases
on the faces, now you don't have, okay, extrude somewhere to middle. If you want to go to front view, you press one, you'll
have front view. You can press Z and
move it somewhere here. Okay, we have something
similar to IT, a table, and we have our model, but we are doing a chair. Press those and extrude it here. I don't just, we're
making a simple model. Nothing's too special here. If we want to have two chairs, we press shift x x axis here. If you want to rotate
it, press snap axis. And rotate all axis, that's it. I don't know if we'll
miss something. I'll explain in the
further section. Let's get to
modeling our barrel.
4. PureRef For References: Before modeling, I
want to share with you super helpful program that
is called Pure Reefs Program where you can keep
your all references in one place and use it
when you're modeling or creating something
so you can get it in prereef.com I've
already gathered some reference images here. As you can see, Pef
looks like this window. You can navigate by clicking middle mouse button and move it. If you want to zoom in, you're scrolling
into scrolling out. If you want to change window, you just keep it on this
and it's really easy. You can snap it
to be all on top, as on bottom, you
won't see it now. But if you go back to A on top, all on top, it doesn't matter
how many programs you use. You don't need to press Click. I'll share this Puy file in the project files
so you can have it. Or if you wish, you can find your own references
and put it here. Just press copy image. And importing, for example, we have a barrel,
press copy image. We press control V and
we have our image. We can scale it, rotate
it, and delete it. We want to, let's go to
model section right now.
5. Modeling HighPoly: Hello and welcome to
a modeling part where we're going to start modeling
our high poly model. After this section,
we'll start modeling low poly model after I'll explain the
differences between them. We have our references here. We're going to put
it here somewhere. We're going to report person. You're going to find him
in the project files. Let's rotate him. Okay,
we have our human scale. I'm reporting him
just for knowing how long white our
barrel should be. Let's add a cylinder and
make it 26. It's too big. Also to be more detailed, we need to go to tap edit
mode and add edge leg. Here we could know what are the measurements of our
model. Let's scale it. And here I have length of
the metal barrel 94571. Let's start with just add, press J and edge here
it's meter wide, you need to do it 571. Now the link is
meters step to z, x is 940, okay. We have our barrel right
click, shade autos, move. We have our model here. I'll put it here. After we're going to
put our model in half, just delete this edge
by pressing control X. Add the lot in the middle. Go to the bottom, press here, press control plus X
and press delete faces. Now we have half of our
barrel. Why we're doing it? Because we're adding
a modifier here. Press modifier
step, add modifier. And add the mirror modifier. The select this one. And select this one. Everything we're
going to do here, it's going to be mirrored there. Let's start modeling
or just pre step, press control R and move it
somewhere here by tuition. Press three on your Numpad
to Face Selection model. Let's click old and Extrude
Faces Alok normals. Press Shift and move
your mouse to the top. We have edges. Now
press on this one, press Extrude, so here. Now add a modifier. Add a Bevel modifier, make amount of 0.007 Let's
make three segments. Okay? Add also a
subdivision modifier. Where subdivision surface, we can leave it like
this one, okay? Just be sure to have
your scale control a apply it because
modifiers can not work. Go to one on pad and control Z. Move to the top and adjust somewhere here
just to be on the floor. Okay, Next what
we're going to do is we're going to see the
references, how it looks. Okay? Some barrels
have only two lines, some of them have this rips
or something similar to it. I'll be stopping by this
one tal R, make a look cut. Move it somewhere here. We can turn off our edge
length by pressing here. Move our edge loop by pressing Z a little bit higher
somewhere here. And add a look cut here
after press Partl R and make four look cuts and control to bevel them and make
this one after. Select this one by
pressing old shift. This one. This one and this one. Old move This, select all of them and control again to have something
similar to this. We have three ribs, but
I think it's too high. So we'll adjust it
a bit by pressing, snapping it to Z and move
it a little bit lower. Okay, we have our barrel
looking, think ready. But if you see, we have also here a rip. I'll be making a
rip out of this. Adding more loop cuts is
just rotating your mouse. Well, press this one. Move a bit and
control bit to Bl. Be sure to have
only two loop cuts. You can add segments here
and lower segments here. Okay, now I like it. After we need to
add the top here, we need to add this
one and this one. Basically, we can apply our mirror modifier
because we're finished. We don't need to have mirror on the bottom because
barrel don't have it. To apply the modifier you
can go here and apply it shortcut for a
faster way control a. In the next part
we'll add our caps to this model in the next one.
6. Modeling HighPoly Details: Hello and welcome to the second part of modeling
our high poly model. Let's go here, Press tab, press three under Numpad
to go to selection mode. Select this phone chip S and Corso to select after
our Gorcer will be here. It's of spam point. For our models, we
can do another way. Press tap Shift. Move it higher. Right click, separate selection, go to object mode, select this one, set
origin to geometry. If origin is here, isn't in the way it should be. They're going to be scaling by origin point set origin
origin to geometry. Now we're going to scale
it in that good way. Let's go to the top view. Click hold, middle mouse pot to the top seven
on the mousepad. The top view, scale it and move it somewhere
here, also duplicated. And move it here. We're going to do
this edge on the top. Go back here to the slapping snap to vertex and look for
the same options here. Press control and slap
it to the vertices. Really helpful
self times for me. Tap A extruded to the top. To the bottom. Okay, now we need to have a
little bit of enabled Adds, go to file, add this a bit, Go to Add, go to
Preferences, and click here. Adds, we need to add bolt. You need to have
it selected here. Be sure to delete all of the modifiers from here
and also from here. Press shift, click
here to select both of them and press control
here and control A. Be sure to have your mouse
on the modifier control A. It will be added. You can delete this part. Select the top one
control to let faces, we don't have anything here. Let's select edges
by pressing old and clicking on the edges old and shift and clicking
on these edges. Now we have cut here and
we're going to extrude it. To extrude it to the lower, we can turn off subdivision
for a while, Z, move it here and to scale here, we don't see anything because
we need to add Ble Shift. Click, click here, control to
add a little bit of Pbble. Now we have a nice thing here. We can turn on the subdivision. It doesn't work
because we have face with separate vertices that
we need to connect to fix it. We'll fix it later. For now, just turn
off the subdivision and do the same
process for this part, but make it smaller. To make it smaller by
press go on your Numpad, press 0.5 Z, Snap it
to the vertices here, and to do the same by
a extruded to the top. Move it a bit down so
we could go through shift control control A. Delete this part here. Control and delete it. Let's extruded to the. Okay, now we can add
scale a little bit more. We can add Able here as we
did for the previous one. As I see it's a bit to the
corner my, in the center. I don't like it, so press here. Cato, select your link to
this y and move it here. Okay, it's looking better. Okay, what we now
need to do is to. Do it by hand. I think it will be better connect this vertices
to this vertice. You can press this base, this face at this pace and just press triangulate faces
and it will be fixed. Now we can turn on the
subdivision surface and everything is
working. Fight. Okay. Turn off it for a while
and go to the this part. Shift course selected
controlled A and a cylinder. Make it a, A eight vertices. Go to the top view
where scale it here. You can go here and
turn on wire frame. You can make capacity to see
everything, what's going on. Okay, now let's
union this shift A, right left click,
partial control A. We see it's already divided, now we need to make it
smaller a bit like this. Shifts selected I
to move it here. Now we want to press
Vertices control shift B. Do it like this, now a
circle in the middle, but if we want to have a
circle we need to go here. Added preferences and
turn loop. Turn on this. After press click loops, circle, now we'll circle. Now we need to push
the vertices here, so it would be a good mesh
here at merge vertices. It will do that
if we're going to put two vertices in one side. Control click it will merge. Automatically. Control here, control, snap, Control, snap. The same for everyone. Now go to face selection mode and
extrude it to the top. Okay, now we're going
to add this part, but we don't going to
do it super detailed, just make Plc
separate selection, set origin here, A extruded to the top turn off subdivision
and this one modifier, whereas here, make it a
bit wider and go here, C will be here. Now we can copy modifiers
that I've deleted, control L, copy modifiers and
it will be like this one. But I don't like
too many segments. What can you do? I
need to add a look cut here and the look
cut in the middle. Please turn off the
auto merge because with a small distance it's
merging, it's working. Turn on subdivision subdivision and do something
similar to this part. We're going to add virtual A
by selecting the edges left. Click Cultural, D, Y here. Separate selection, set
origin as to scale. Turn off the subdivision here. Turn off the subdivision on the main cylinder and
turn on the level. Now peas the lower just
to fill the faces. To fill the faces on the top GC, them bate higher scale
to make it smaller. Shift left click cultural
plus control a lead. This part, we have
it in the center. What we can do okay, Plus go to the top view seven and Y and move it to the
center somewhere here. Okay. Lastly is the top face
shift coserve to select it, the cylinder four
vertices, scale it, make it smaller more. If you want to scale
by only x and y axis, you can press shift z and
you can scale by two axis. On shift, click control, copy modifiers, turn
on the subdivision, press this pon control B. You need to apply the
scale control L scale. And now you see it's working. Be sure to a scale
here and here, forgetting it sometimes turn on the bevel we can press
top will be move it, add manually by hand shift. Auto smooth. You can
toggle auto smooth here, make it bigger, light 40. It will be automatically auto smooth shift to get
our three decors back. And now we have
finished barrel in the next part will be reducing our hypolylowolyC
in the next one.
7. Modeling LowPoly: Welcome. In this
video we're going to make our low poly model. From high poly model, we have three separate objects. Here we have a
human scale model. We can press X and delete this. We don't need it anymore now. Just press left click. Slided here, M, press New
collection and call this high. No, press ****, right
click, New collection. Let's call this lobe. As you see, we have two
collections here. We have high. For now, we're going
to high and we're going to work on our low model. What we need to do is we need to turn off the subdivision, turn off the edges, bevels, turn off
them everywhere. Now we have our model here and we're going
to reduce things. Now. We're going to
reduce edges here. Statistics, now you see
we have 4,000 triangles. This model, it's a bit too high. If we're going to press this
one, we're going to hide it. If you don't see
the check boxes, you can enable it here and here. Back to high, we have high. Our high is 26,000
which is high. I'll explain it a bit later. Turn off, get back to the low, open it and reduce some edges. Go to edge selection
mode. Select this edge. Select this edge by holding
shift A, select this, this, this in this X deletsphone also. And do the same for the other. Just select the top edge. In delitos, I will see
from 4,002 700 from four, which is good, but
we can reduce more. Let's go here and reduce
also the parts. The parts. Let's go to the side
press press control. Click here, which
going to select all of the edges by cylinder. Go to selection, Check the select and press
Control X edges by pressing shift holding Shift, selecting all of the
edges aren't needed. No control X, it will leave a couple
of them, which is good. Go again here. Old control, old select, check, er, the select vertices. We have vertices here, go to enable this part. G, double click
and move it here. Okay, we pass too much here. We can delete these
two edges and we can press Hold Shift
and select all of them. If you want to isolate
you press the Numpad, it will be much easier. And just select as control X auto smooth
and make it higher, her delete this edge. Go to wire frame, back to solid. I think it is good. We have around 2000
and now we just press mode shift this
triangulate faces here. This one, This one, this one, and this one. Triangle. What I'm selecting, I'll show you the other
way I'm selecting. Gods can do it the other way. I can see it visually. You can miss something. Select all by trait faces by selection and equal
to greater than four. And it will show all of
the angles in your scene. All you can do is press right
click, triangled faces. It won't show anything more. Press for this one, hit this one face, delete, because we don't see it. It's additional polygons
we want to get rid of. Press here, triangled faces
here, triangled faces. Delete the bottom
part. We're done. So we've reduced
all of the things. Best thing to do is
select sharp edges. This right click mark sharp. Yeah, our barrel
is looking good. Okay. In the next
part we're UV unwrap our low poly model.
See you there by.
8. UV Unwrap: Welcome to UV and wrap section where we're going to
unwrap this barrel. Firstly, what I'm doing going here and moving and
adding a second window. And choosing here UV editor. What is UV and wrap? Long story short, UV and wrap is a process when you're taking your freed model and
unwrapping it into the plane, you'll have your texture here. Let's create the
texture and go here. Generated UV grid. Okay, basically we have, we have texture and now we're
going to wrap our barrel. Select your barrel to tap. Let's start UVL wrapping. Basically, the best UVL
wrap is when you're filling whole space with your object. You don't need to leave
like here, for example, too much free space because
it costs a lot of density. When you unwrap your model
to the maximum of this map, you'll get the maximum
quality of the object, your proper or whatever it is. I'll show you how
it works because it's hard to understand
by the words. Let's start UV unwrapping. How to UV unwrap. Firstly, we've got to
unwrap the biggest part. Create a seam here,
red click marking. It cuts our object to the Sam. Make seams do the same here. Now if we're going to press, we'll have here
something appear. Press and wrap. See, it's wrapping incorrectly
because we need to have seen in the middle. Go and press here control, and here mark now, and wrap. Now we're having
this unwrapped pink to see how our texture
looks on the object. Go to Material Preview. Now you don't see
anything because we need to assign the
material Ad shader editor, new Go and price image texture. Connect to base color and
select here UV texture. See, now we have
our texture good. The fastest way to strain out
our UV is to have adding, just press to grid by shape. I'll leave it in
the project files. Scale it a bit to
make a full screen. Go on your screen
and press control L. Now we can zoom it
and make it bigger. Okay, Like this, we have
unwrapped our middle part. Now it's left to
unwrap the other ones. Let's get the top part.
Let's see what happens. Will rest here and create a seam here around Mark. Now if we're going to rest, select here by pressing L, we're going to see we have this, but it's not unwrapped. Press a wrap. We'll have this thing
I think is good. If you want to see if
your UV is stretching, scroll down here and press here. Display stretch angle. It will display if
something is stretching. For example, the colorful is UV. The more it stretches a, get back to this part. Let's also create cheer lean from this part and
this mark seam. Now if we're going
to press again and we'll have a straight
line which is better, we can leave it so here. Now for the top,
let's go and select this part mark seam and
also control old here. And mark. Now if we're going to
press here and try to our think it will rap like this without
any bigger stretch. We can leave it somewhere here. Also do the same for this part, actually on really
small objects, you won't going to
see too much thing. You can skip this process. On the bigger parts, you
can see it more visible. Okay, last thing to
unwrap this thing. Rap Let's check it. Okay, we have this part, let's go to the bottom and
repeat it by yourself. Try to do for this, the lower part, the same UV
wrap logic as we did before. Or you can wait for me, and
now I'll do it together. But I strongly
recommend you to post this video and do
it by yourself. Let's create a cat here, Mark. Seem Okay, Rob. Okay, something in that good. Okay, I have a problem here. Clear seam to clear the seam. Paint, select here,
marker. Now it's good. Okay, everything king, We have everything here. Firstly, what we need
to do is fill our, give space to the
maximum. Let's press L. Mop here, L mold
it somewhere here. Place those here. We can turn off the
stretch now and try to use maximum here. Let's put those here, here, and this part here. These two parts. We're
going to move here. Yeah, in the end you should
have this kind of UV unwrap. Your object is unwrap. We forgot that we have two
things that are small. We're going to unwrap
those together. Let's select both Press control, press shift on the barrel, control, L link materials. Now we need to adjust the
same textile density. We can make those a bit smaller because we need to have the same text if you want to check
your textile density. I'm also going to add
textile density checker. For example, let's
press and calculate, calculate textile density, okay? We have 3.4 for this 2.8 the higher textile
density is there quality, it will have 0.72 0.8
They're the same. I think it's good
for the barrel. And this go to mode
pressing where it seems. Mark. Seem up. We can press on this object. I'll go to your UV square, set to greet by
shaped and make it smaller will make much smaller. Now do the same for
disple the top part. Select the edges, mark Sam. Select edge, mark
seam, and cut it. Un, select this part
to grid by shape. Now press all of them A, move them here, now here. And scale those and
make them smaller. This, and put the
power somewhere here. We can make it more detailed by Make it higher,
make it bigger. Try to play with your
UV and see how it goes. I think something
like this is okay. We have fully up our model. Next thing. We'll export it in the next
section. See there.
9. Exporting: Welcome to exporting section where we're going to
export our objects. So basically we need to
select all of them low poly. We don't need to unwrap Hi poly. Go to file export, press FBX. Here, press selected
objects, Apply scaling FBX. All the, select this one, this one and name it. Metal barrel export. Have exported your low poly. Now go to Hide object, press H, you can
press also here. Turn on your holy
select, all of them. Press File Export FBX and right. Same options for this one. And press export Epix. Turn on your substance
painter. Go to file. Click a new select file and
press our low poly or file. Press four K Resolution and check out on
Wrap if it's here. And press Ok. We have
our model imported. That's it in the next part. We're going to bake our
model in the next part.
10. Basic Intro to SubstancePainter: Hello to substance
painter introduction. And when we are opening our substance
painter for the first time, for the second time, we're
always going to see this view. Don't worry if you see another window layout just
to keep the same for us. Just go to window and
Verity and it should reset. We're going to put this here. Go to reset I, it is
going to be back. Let's add a model here and you'll find this model
in project files select. Okay, here we see left window, it's a free D window, and it's here on the right, it's D, it's like
how it will look on our texture Here
we have materials, here we have layers. Here we have three
textures that we can have and how to navigate. Used, left click, rotate, middle mouse to move, shift click to rotate, the sun, the light, how to paint
similar to Photoshop. If you know what is Photoshop, then it's going to be
much easier for you. Then you're going to need to understand a couple of things. Basically, on the
left, in libraries, we have materials here, smart materials here,
we can adjust those. We have masks, we have filters, brushes, Alpha Granges, textures and environments
that we can change, but we'll stick with this one. For example, let's look for smart material plastic,
just right here. Let's add plastic work here. Our head will be plastic.
We're on the head. If we're going to move the body, we'll have another layer. So we can add, for example, at, for base we can
use this plastic. Getting to the head, we'll stick with the head. Now how we can adjust it. We've added our smart
material here and we can unfold our folder and we
can see many layers here. You need to navigate to
paint color and press here. I'll move myself here. You need to go down and you'll see many things that
you can adjust. For example, base color, let's change to T. Metallic roughness is changing
though and the height. We have color paint
here some mask we can clear mask to remove mask
and we won't get it. Now we have only red color with some small small dots
that aren't visible. To paint on it. You can add new layer, for example, a paint layer. You can go and stick with white. And you can paint here, let's paint a smile. But we see it, we're painting at the same time on this side. Because if we want to stick
only with two texture, we can go and draw only here. It will draw on the
left side also. For example, you draw
this smile mask. Some things, for example, you want to change
something like the color can do that because
you already painted here. But we're going to do other way. And I'll show you
how to change color. For example, let's add layer. Click Add the black mask. Now we have fill layer and
we can change it to blue. We can press on the black mask. This is our gray scale down. We're going to paint with white. And we're going to
unmask the color that is under the black
mask, for example. Now we're going to paint or smile on the top, for example. If we want to change
the color now, we can change everything from roughness to height
and so on color. We can change it right
now and it will change. I strongly recommend
you to use black masks, white masks, and other
filters to work. Not much to say it's pretty easy to navigate
in substance painter. Maybe last thing I want to show you is here we have a brush, here we have a
eraser, for example, erase something from
this white layer that we've painted
from this one. You can just erase it like this. Okay, what else? We have a protection
tool that we're going to use later on applying
the stickers. Also, if you want to stick
to some of the sides, you can press old shift and left click and move your mouse
how you want to do it. Yeah, that's the basics
of substance painter. I hope it's understandable. Can always ask in the comments. See you in the next lesson.
11. Baking: Let's get started. Navigate to our
Texture set settings. Scroll out here and
click on Bake Mesh Maps. Okay, we have our baking
settings output size. Please be sure to have
four key and press here and import our
high poly model. We see that we have our
model on model here. We can adjust the sizes, make sure to not
have the red spots, and overlapping other spots
can make it a little bigger. And we'll see how
this part will go and how it's going to be baked. If something, we can switch the caps and move it to the side so we could bake it separately. And after move it back. Okay, everything seems okay. Bake selected textures. We return to painting
mode, see what we have. Okay, everything seems okay. We have only this part
doesn't take good. Okay, I did a mistake. You see it's not baking because my low poly UV and wrap
is out of the texture. I'll fix it. Okay. I think I'll show you
how I'm fixing it. I'm getting back to
file, select all panes. Get back to our Velect
part and move it closer. Here it's Go to file Export Pegs and click
on the low export bags. Now let's get back to
our substance painter. Click on new file, select Low. The same settings this card and we're going
to do it again. Bake mesh maps the same. Now we have baked our model without any things
we don't want to have. So in the next part we
will start text sink. See in the next part.
12. Texturing: Hello to texturing part. Let's get back to
our references. Open Pi, half our barrel here. Okay, I will move my head a little bit higher
and make it smaller. I'll think that I'll
make small color this. Let's go and look for heel
and smart materials panel. We can choose which one we have. I'm going to choose
this one to get back to layers. Move it lower. Move it here, we
can delete this. Now we have our barrel
looking more like barrel to control the light shift
click move. Okay. Now we're going to
control the duplicated. And we're going to go to
our middle part here. And go to base color. And change the base color
to something white. But we don't want to
have all of white, We want to have this part. Let's do it here. Press at black mask. Now we're going to
go to polygon Fil. Please be sure to select
polygon film here, press on your object. We can also do it
here, for example. Like this, it will be much more quicker looking similar. Getting back to brush paint. Now we can make holder
for it there and name it. Okay, we base. Now let's adjust
bit of this parts. If you want to
adjust your edges, steel painted the red
one. Go to paint. Click on white mask. Go to mask under the ambient occlusion
options in the parts. I want to change
the color a bit. I want to make it
brighter, not too bright. Let's add some dust
to our barrel quick. And add a new fielder. Go under the smart pask. Create the black mask here. Move our dust mask to this one. We have something, but
we need to adjust it. Lets the balance a bit. To contrast more,
we need to play. We can play tiling. We can make it smaller. We can play with color. Let's use something
sandy, dusty. We can play metallic. Other stuff, but we need
to do the roughness to and make the roughness on. Turn this on, the color
the metallic in a bit. It's okay. We can add
a couple of them here, use dirt splashes and make it
again something like this. We can make it less, we can do it a bit of wet color. Look good. The color is okay. Can turn, turn out the normals. Yeah, so make it a bit
like oily even more. Now, let's paint our top part. Make a Ni folder for it, name it the splash,
and move it there. I strongly recommend you to keep everything organized
because it's much more easier if you're working on a much bigger
projects and you want to control your layers. And you have thousands, hundreds of layers
and do thousands, maybe, no, but hundreds of
layers and you don't know. Which one does. Now we're
going to paint the cap. Try to remember how to separate object and paint
only on the object. For example, if I'm adding
a new material here, all of the barrel is
metallic aluminum. How we can separately
do only the cap part? Aluminium. We've did it with white part on our barrel.
Try to remember it. Try to do it by yourself. Post this video after you can see if you did it good
way as we did it before. If not, if you don't
remember how we did, we can proceed together. Right now, a black mask. Go to mesh fields here. Mesh field because we have
three different meshes here, we have 12 and the
barrel itself, it's much faster than selecting polygons by one and this one, let's make it this
plastic one again, let's look for plastic, plastic, dirt, plastic dust. I think this one is okay. Move it here again. Let's add a black
mask getting back. Okay, so basically
we have done it, but I want to adjust
a couple of things, make some splashes to
look it more realistic. You can play by yourself and look what you're
going to get. So as you see here, our TD mask and
how it looks like. We can also paint here if
we want to paint something. For example, let's
add feel black mask. And if we want to
paint something, we can also paint here. So now we're going
to paint some oil. Because we have oiled
here, it's all oily. We're not going to do that oily, but I'll try to do
something less. So let's make base
color some dark. See how it paints? Okay, key light to this part. Black mask allows us to make
black color, white color. Just to control
the layers better. Now we can adjust the roughness, metalness here. Turn out those. Let's select cool
brush, for example. We can take this dirt
and paint it well. This control click to
make this part smaller. You can also just your
gree skills here. Just pain how you like. Some were more somewhere or less the basic soft so we spare has something here. Play with brushes,
Look how it goes. I think something like
this looks really nice. In the next part, we'll add
a sticker and I'll show you how you can make stickers
and add them to your model. See in the sticker part.
13. Bonus (Applying the sticker): Welcome to our sticker part where we're going
to add stickers. First of all, we go to
file import resources, we're going to find
stickers and project files, add resources,
stickers and stickers. Alpha texture and Alpha
import resources, project. Okay, once we have our
stickers imported, go to create new layer. On clicking brush, go to
projection mode here. Now under the base
color stickers, click right click to move scale. If you want to snap
to the front view, you press hold,
left click, shift. It will adjust to your view
by moving mouse front view. Let's move it and add
it somewhere here. Make it maybe this size. And under the, you can slightly increase it to re, will be okay. And now you can paint
and how to make it without the white background. Click all black mask. The black mask, we do the
same good projection. Click our alpha move
here and just paint all. We'll have our sticker ready, so we go to brush
and look how it looks. I think it's okay. Now, the stickers too new, we can put it here
and it will be here. See it's more realistic. Now what we can do, more automated, more old, go here, here and
let's paint a bit. So we go to like this, for example, and how
we can paint on black. And delete A all the past, which Russ will choose. Think dishonest, working
good can just risky here. Look for other brushes. Yeah, we have our sticker. Do we have textured? All of our barrel? Another lesson, we'll export it, so stay tuned and
see you in the next.
14. Why High and Low Poly?: Hello. In this lesson
I'll explain why are we making Hi poly and then
converting it to low poly. Since game engines, for example, Unity, can't run really
high poly model. Because hy polymodels
sometimes can reach to millions of polygons. If you're sculpting something, what is the option to have
a game model that looks really good and is fully
optimized to run in game engine. Here's an example.
On the left side, the cube, the low
poly and the hypoly. On the right we
see the same cube, low poly and high poly. But the difference between
them, they look the same. But the difference
between them is that one of them is low poly
and is fully optimized. And second one is high poly. Longter, short baking gives us the information of
the high poly mesh and transfer it to low poly mesh and it's
saved all into the texture. The texture is the key. That's basically
why we're doing it. Thank you and see
you in the next one.
15. Importing to Unity Engine: Welcome to lesson
where we're going to export for textures to Unity. Let's go to File Export Text. We have Output templates, here we have it, Universal
Render Pipeline, Metallic. We're going
to use this one. Get back to settings, Go to Universal Render Pipeline, save it in your folder, select folder, click
Export, any of them. Now let's go to Unity. Click and create a
new project, project. When need to wait a bit. We have seen here, let's go and under the
assets create new folder. Let's name it metal, open it, create new folder x. Create a new again
and name it Textures. I can drop our textures here, Low poly and drag. And drop to Px, Drag
and drop it here. Move it here, go and
create a material, lean meat barrel, material. Open it, click here. Textures albedo to albedo, normal to normal, fixtal, metallic smoothness
and drop here, get back metal barrel, we need to drag and
drop it also here and here we have our barrel
imported to unit calls that. The next part I'll
show you how to render your object so we could put it into any website showcase or anything you want
to see you there.
16. Importing to UnrealEngine 5: Hello, In this part we'll export our textures
to Unreal Engine. We have our file file export. Textures can go to settings, and we have output templates which we can adjust
by ourselves. How we would like to go to settings and look for real back, choose your directory
pol, Just click export. Now we have our
textures fully textured here all it's left to do
is to import it to oil. Let's do it all under the games. Click on third person
metal barrel Crete. Okay, we have our sing, let's go to move here
and go to content. We can create new folder, metal barrel, open it, create folder,
name it, textures, create second one, name x, import low click, converene, converse unit, import all. Okay, now let's go to
textures, import those here. Back to Bax, open the material, you can delete this one to your textures,
select all of them. Track and drop here RGB
to base color space, color map, normal map to
normal. We have this one. This one has information of three layers as you see here is occlusion
roughness and metallic. We're going to
connect them as RGB. R is going to be occlusion, go to ambient occlusion, green roughness and
metallic will be blue. Select safe can close it. Go back, go to FBX, select all of them.
Track and drop. You have it, can click, move it, jump around it. You have your ready
object in Unreal. Here's it. In the last lesson, we'll learn how to make
a nice surrender for our ready model so we
could upload it and present wherever we
want to see you.
17. Bonus ( Rendering your model for portfolio ): Hello and welcome to render part where we're going to render our object or barrel in Blender. How we can import our
materials to blender. We can go to our material that is Checker material
and delete this part. After we go to Edit Preferences
and look for Not Angular, enable it, go back to our Material tab,
Rest Control Shift. Navigate to our
textures and you can use Pole, which you like. Unity or Real. I'll choose click here. It will automatically apply all the textures for
here. You don't need to. Now as we have our
model and blender, now we need to light it. Let's think how we can do it. Also build up, you don't
need to do anything. It's called tree
lighting and enable it. Now for example, we can press
on our Object Converge. Can press on our
object, shift A, go to light, and click
on three point light. Okay, we have camera, we have three lights. If we're going to go
right now to render, check that it's going to be render it, it's
going to be black. Let's add some base energy and you'll see that our
barrel is light. Press zero on your numpad. Going go to camera
modes to view. Camera to view is one and now we can rotate
your camera as you wish. Let's pick this angle, close it By pressing N, we're in Render It mode. We can also add plane scale it. Okay. And you see we
have some half edges. Press unclick this middle mouse. Let's fix those. How to fix those? Simple. Just go here, Press on Data and make the size for
2 meters, for example. And do the same for all of them. It's still visible. So we can make pre,
the bigger light, the smaller shadow we have zero and we don't have that
harsh shadows anymore. Also, we can play
with our light. For example, for the back, we can reduce it a bit 80. The light can also reduce
it in the key light. It's good for fired 80, for example, can
make it for 800. We can make this 200. Let's play a bit. Okay,
now go to camera. Let's suggest angle in this
one, that's good enough. Go to camera settings and
you can switch to cycles. If you have a strong computer, if you have an EV, you can stay with V. I'll switch to cycles, go to Render, and make
it, for example, 512. Let's add the material for
the floor, make it darker. I think I'll switch to
before now and make it I don't know plates how
you feel, how you like it. Okay. I think it's okay. I'm going to play it
here with metallic, spectacular roughness
and other settings. Okay. And after
switch to cycles and you can press Render and
can render your image. We're back. We have rendered this
image which looks really nice and we can do
a couple of more. Just go to Image Save, add a new folder renders
and call this one. You can say Spiny Save
Images can close this. I think that we can make the smaller amount
of samples smaller. For example, 256 will be enough. What we can do else we can. Make a variations
of our barrels. So switch to, for now,
Capp Copy Apparel. And now we can go to Edit. Press one to select
vertices on your numpad. It will enable
proportional editing. It can scroll down your mouse to make it smaller and bigger and make interesting Shift Z, select and hold it. Just to make variations
like the barrel is old enough and
it has some damage. Don't do that too much, Just things will be enough. The smaller your circle is, the smaller you're doing it. We have one good one, smashed a bit, **** again, and make one of them
really harsh example this too much the side again. So we have three barrels. We add those and we can make select all of
them to the center, a empty, select all of them
and control parent to empty. It's going to be a parent. Go to camera and from Target
chose empty for all of them. Now camera to new, we have our barrel variations
that looks really nice. I think this side view is good. Let's repeat the process,
switch to cycles. After it will be rendered,
I'll get back to you. Okay, we're back and we can save this and name it to Okay. The renders are done and
they're looking really nice. Last one small thing
that I want to cover for your portfolio to
be more level up. Sometimes you see that we
have of wire framed renders, for example, like
this one, that harsh. But we can see the material
and the mesh itself. Let's do it quickly. Let's go to our material, to our shader settings. Basically, we need to add wire frame and the
shader mix shader. Okay, let's connect back
to shaders on to this one. So this one, it's too big. Let's make it smaller. For example, 00.1 Turn
off our wire frame. Yeah, it's good,
but it's too big. I think we can make it smaller, 0.85 we can live it white color. Now we can make a second
render it, switch to cycles. Let's render one more image. He's finished it,
so let's see if go to our renders and we can
do the same for this part. And you see we have a
wire framed render now. So that will be
it for this part. I think it's the last
part of all the lessons. But see you in the
next lesson where we're going to recap
everything that we've learned. See you there.
18. Outro: Congratulations on
finishing this class. I hope it was an
interesting journey. You have finished your barrel, applauded it to project gallery, and received some feedback from me if you
didn't do it still, I strongly recommend
you to do it. I want to say thank you
for choosing this class. And also I want to
remind you to leave our review so I could know what future content
you want to see from me. Just a short recap of what
we've learned in this class. So now we know how to
use puri for references. How to create our high pol
model, low poly model. What are the differences
between them? How to VN wrapper model, how to export it imported
to substance painter, bake it, texture it, export it to any of
our game engines, Unity or Unreal Engine. Best way to publish
your knowledge is to start creating your net asset. It can be something different, such as Hammer Street, Light, or even a simple brick. Best way to publish your
knowledge is to start creating your next
asset By this workload, it can be any hammer, a brick, or anything
you can imagine. Also, please subscribe to my Youtube channel
so we can get in touch for further content
or interesting classes. Thank you and see you
in the next one by.
 Daniel Bogdanovic, 3D Artist