Transcripts
1. Intro: Hi, My name's Rob. I work in a small Web design and development company that that company I design websites. So what I'll do is all work with a client to get an idea of what they're looking for. Then I'll create a mock up based on what they want, and then I'll go back and forth with them on the mock up, tweaking it until we get it to where the client wants. And then I turned over to our team of developers and stay with the project as a project manager to bring the design toe life. So in this course, what I'm going to cover is an introduction to designing websites. Specifically, we're going to design a home page and then also an introduction to using Adobe X D. So for people that have been designing websites for a while, hopefully you can get something from the introduction to Dobie X'd. If you're not familiar with that program, and for people that have no experience, this should be enough to get you started designing websites in Adobe X'd. So I'm excited about this course, and I hope that you all enjoy it. Let's get started
2. Video Labels: So I set up these glasses so that, like, I sort of touched on an intro. I want the courts to be useful to people who have experienced designing websites and people that are also new to it. So to make it so that people with that already have experience don't go through, uh, things that they already know so that they can just jump to the videos that are focused on X d. I label all those videos X'd skill. So if you're an experienced designer and you just want to learn a little bit about X d, I recommend you just jump to those and, uh, would be great if you complete the projects, and I think that will help you remember this stuff. But I don't think you probably need to go through all the design videos. And if your new I'd recommend you go through the whole thing and definitely do the project , because you can help it during the project will just help you to learn everything. And also you can use it to help start your portfolio.
3. XD in the Ecosystem: There are a lot of design tools out there, and I just want given overview of where X'd fits on. Most designed tools. Do one of two things you either use them to design. Ah, mock up or use them to prototype your mock ups that you've made another program. X D does both both things in one program that's fairly unique. Teoh within the existing design tools on another thing about X'd, where it fits within a dhobi system. Until X'd ago, we didn't really have something that was that was tailored for designing websites. A lot of people used photo shop for designing websites, but photo shop is a tool built for editing photos. So there were a ton of things he didn't even there. It was kind of kind of clunky. It requires a lot more. A lot more powerful computer than X'd does so X'd has just tailored just for designing websites and APS. So because of that, it's a lot more streamlined. You can move a lot faster, and then, yeah, I like X d. Let's get let's get started learning about it
4. Prototyping: we're gonna cover how to make a prototype in in this series how to make a prototype in next D. We're not actually gonna build out a full one, but you should will teach you the concepts so that you could build out of four prototype if you wanted to. However, we're not going to cover how to test your prototype. That would be a whole nother video. Siri's. So we're just not gonna include that in this. We're covering enough already. One thing before we show you how to create a prototype in X'd that I wanted to touch on is sort of the reasoning behind prototypes. Just so you have some background if you're not familiar with that. So the reason you pro type of website is because it's it's time consuming and costly to code. Ah, website. So, in order to limit your risk before you make that full investment, encoding the website. You can create a prototype a lot more quickly, uh, and cheaply, then can code a website so people will build the prototype, and then they'll do some user testing and then they'll make sure, either either they'll confirm that their design is gonna work and they're set, they coat it or more likely, we'll probably discover a few issues. They'll fix those issues in the prototype test again and keep cycling through like that until they have they resolved as many issues as they think they reasonably can with the prototype and then they'll go on to development. So prototyping is just a way to basically reduce risks. And, um, make sure that what you're building is actually gonna work for what she wanted, Teoh.
5. Prototype Uses: prototyping is basically building a quick version of the website so that you can test it before you put all the money in coating it. Now that's what X D is designed to do with its prototyping future feature to build those prototypes. But I've discovered that you can also use prototypes to sort of so your clients on ideas or toe or to get projects through the RFP process. So sometimes what we'll do is rather than let's say, there's an RFP that calls for ah, you know, a few mock up. So rather than just sending the sending in images with our proposal, what I'll do is all I'll create prototypes in X d and then send links to those to the clients. Will go, go, go over how to do that in a later video. But basically the clients click those links and they can scroll through, and maybe they can click on a few things, and I think that, you know that can really help to really help clients to understand your vision. It's a lot easier to show people things that it is to write things out and try to get people understand them through your writing, so I think that adobes X'd features useful for prototyping. But I think it's also useful for for explaining your ideas and concepts to clients.
6. Inspiration & Process: So when I'm designing a website, the first thing that I dio is I talked to the client, and I usually ask them to give me, um, 3 to 4 websites that they like, that they like the look and feel of. And from there I'll review those sites and then also look, browse on my own for sites that I think sort of fall within that area. And then on Lee, just all taking notes. I don't actually start sketching things out on after. I feel like I've got a good idea of what the client likes, that I kind of start thinking about how how I can take that and fitted into their needs. At that point, I start sketching, and when im sketching, I don't look directly at the sites that the clients gave me or sites that I found while I was browsing. I do that because it just helps me to make sure that I'm creating something new, that I'm not copying, something that I'm not copying. Some site that client likes because I mean first, you know, you don't want to steal other people's work, and secondly, I mean, even though the clients like that site. They probably don't want it to look. They really don't want their site to look exactly like that site they want. They're paying you to make something unique. So I find that it helps me to do that if I don't actually have the site pulled up when im sketching because you know my memories in perfect. And even if I try, I can't just recreated without having it right in front of me. So that's what I do. After I get some inspiration, I start sketching out what I like, and then I go over to X d and I start marking up.
7. Sketching: all right. So, like I said, uh, I start by getting sites from the clients and looking at those sites. And then I also do some browsing on my own to find similar sites. And the whole time that I'm doing that, I'm thinking in my mind how I can apply ideas and concepts in these sites to the client sites. And I try to do that in, ah, a sort of different way than they're being done on those sites. So once I have some ideas, I go to my notebook and I start I start sketching things out. I usually use pen. That helps me to move along quickly and not get too obsessed with the details, because it's not really productive when you're sketching most of the time. You want to say that until you gettinto X'd and start doing actual mock up. So I thought we just do a few quick sketches here so you can just sort of see an example of what I do. So I usually start by doing doing the first the first section that shows above the fold. So I like to draw. Uh, this is when I roughly the ratio of the the first section above the fold. And then I put in some lines to represent the menu items and then I'll just do a circle for the logo. And then we have a big call to action so that I want to make sure that's clear. And then I wanna have a button for people to click if they like our call to action and we need to have some way to break up, break up the next section. So it might just be a straight line. But, you know, it might be a curved line, so I'll just go ahead and through a curved in line in there for now. And then I'll start. I'll move on down to the next section. So I like to work in sections kind of. Just tell us me with, uh, thinking to make sure I'm covering everything and then also, uh, it helps me not to get overwhelmed. Makes sure that I covered everything that I need. Teoh. So then this section, we're gonna sort of extend the Kirby line on this section is gonna be four people that weren't convinced yet by this section. Maybe they were a little nervous about how things were going. We're gonna happen. So we're gonna explain to them how things happen in this next section gonna explain to them the process. So we're gonna do it by steps, so there's gonna be a box for Step one and then these lines are gonna represent text explaining Step one, put in air over here. So after you step when you go to step two and then you step three and then you're done and hopefully you really want toe you convinced at this point, So maybe make will put another call action button here. Maybe not. We'll see. That might be a little overkill, uh, when he was going to the next section on. And I think it's a good idea toe to show the people behind the sites. So we're gonna put the clients photo over here. Maybe maybe it's not the clients photo. It might be like a great travel destination that's gonna inspire people. And this is going to be about it's gonna be about the client and about their service. So put some lines, text in there and then really hoping that by this point people are convinced they want to sign up for this. So we're gonna put the sign up, form itself here. So this is for their name. And then we're gonna have their email and then a submit button on. Then we'll have a footer. We're not gonna detail that out right now, but we want to make sure we remember to put a foot or in so that down there on. And so that's sort of what I my process No, before I actually go over to x d will normally do is do, like, probably five or six like this, just experimenting with different ideas. I find that doing with pen and paper. I could move a lot faster than I can, even in next D and also just sort of helps my ideas to flow more quickly and smoothly. So I like Teoh get some concepts and then once I've got some concepts, I'll pick a couple that I think I like. And then I'll go over to X de and mocked them up. And you can see I kept these pretty small And the reason I did that is because I find that , like, using pen, it just helps me to move faster if I make it bigger than I get tempted to and say, Just drawing lines here. You know, I start writing out what each menu item is gonna be, and then maybe I start trying to, like, actually draw out the logo and, you know, drop buttons and putting tax and write out the call to action. And that stuff's not really necessary at this stage. In my process, at least I just want to come up with concepts, ideas. It's sort of like bringing storing for me, and then I'm gonna get into more detail when I go into X'd. All right, so that's roughly how I do it. Like I said, I do a few more of these before I went next. D. So what I recommend that you do now is do I mean, I would say 3 to 5 concepts, so you want everyone to be different. Um, so you have different things, Teoh think about and then pick. Pick your favorite and take that and use that as the basis is as we learn how toe mock things up next D. So go ahead and do some sketches, upload them to the projects area and then move on to the next videos
8. Choosing a Project: the project we're gonna do through this course is making a home page of a website. What I'm gonna do my I'm just gonna create a fictional client on my fictional client. They have a travel travel site, and what they do is they you contact them, it's and they create a travel experience for you. So let's say you want to have a tropical vacation. You know, you tell them your budget, you tell them what sort of food you like and don't like, uh, on and when you're gonna go in that sort of thing. So it's sort of it's like a travel travel agent slash concierge. So that's gonna be the concept behind the website that I'm going to do on. Like I said, this is just made up. So I'm just gonna have fun with it and hopefully all enjoy it. Um, as far as is coming up with something for your project out recommend doing something similar, maybe you just have an idea. You sort of want test it out and make something up, make it up for fun. Or maybe you have a friend who has who has an idea, and you wanna mock it up for them. Or maybe you know of a website that you like, But you think the design could be improved on? Take that, take that site and then redesign it for this project or last idea that I would sort of throw out there is maybe have a website that you really like the design of you, really like how it's set up. And then maybe you just want to play off that maybe you want Apply that to another industry . Or maybe you wanna play off that another way. So those are some ideas that I have to get you started on coming up with the project on your own. Eso. Why don't you go ahead and conflict project and then go ahead and upload some notes about what you plan to do to the projects area and then move on in the next video
9. Uploading Projects: So the project for this class is gonna be to design a the home page of a website. So we're not gonna do all the pages because that's just gonna That's a little too much for the scope of this video. It's gonna take you a while, so we're just gonna do the home page, and I would encourage you to to start on the home page as soon as we start on the X D videos as soon as we As soon as we start sketching, I would encourage you to do what I dio in your own way after you watch my video. So that way you're doing it step by step, and then as you as you create things, please upload them to the project space. I think that's gonna help you get more feedback on your work as you go. And then I think it's also gonna help you to actually do it instead of waiting till the end . And then you're like, Oh, my gosh, I got all these things. I don't remember what I'm supposed to do. If you do one of the time, I think there'll be more manageable. And then it also help you to learn it better. She'll be doing it while it's still fresh in your mind. So I recommend after half you watch each video where there's something some skill that you can take action on, that you take action on it and then that you uploaded a ZA project. And then we can see your whole process as you go from picking colors to sketching early mock ups, toe finalize mock ups and prototyping. So, uh, that's my thoughts on projects. I'm looking forward to what you all create. Let's get started.
10. Getting XD: So the first step in using X D is, of course, and selling it on your computer. Uh, I'm mostly just gonna leave that to you. I'm not really an expert at doing that. I don't know what kind of computer you have and that sort of thing, but I will say that if you don't have it already, you probably don't need to sign up for a paid version of Adobe CC right now. You can probably just get a free trial for, like, I think, the week or 14 days and then see if this is something you're really into, or I don't know if this will still be going on. But when this video was made, uh oh. We was offering a free, free X'd use You didn't have to pay. So hopefully they will still be going on. You want to pay, So go ahead and get an X D installed. If you don't already have it installed, and then we'll move on. Teoh. The first video on how to use X'd
11. XD Interface: All right. So here, we've got the first screen that you see when you open. Next de ah, fair amount going on here. You got your recent files over here. You've got you I kits That will go over later. You gotta tutorials and resource is. But what we really need now is we just need to pick a size for a first art board. Um, so they've got iPhone iPad, and then they've got sort of a standard desktop size 1920 by 10. 80. And then you can make your own size as well. For this, we're gonna start with the 1920 by 10. 80. So you just click that and then it's gonna pull that up here, and I'll give you a quick overview of how everything is laid out here. So on the left side, you got your tools. Ah, you also have your assets panel. We'll go over this later. This is symbols, character styles. And then this button is for your layers. Um, you can click it again to close that out and then show you the right side will make a shape here, and then you can see when I made that shape. These all became clickable, so you could do a lot of things over here. Like alignments entering. Um, you can change the dimensions. You can change the color. Uh, so this is sort of on the nutshell. This is your tool area. And then this is your what you can do with your tools and what you can do with shape you've selected over here. And then this is the menu the where you can get a new document, open one, hold documents, save export, etcetera. And then what we're gonna do quickly here, we're gonna zoom out, we're gonna make a copy of this, and we're gonna make this a different coming on. The reason we're doing this is so that I can show you the prototype area. So to get to the prototype area, you need to have at least two art boards. So now we just go over here and click prototype. It's like I said the next day you can both design and prototype. This is where you do your design. And then this is where you do your prototype so you can see we still have our same art boards. They look exactly the same. They're in the same place. But we lost a lot of tools over here, and we lost our whole panel over here. That's because the prototype area we don't need those things. So here we can just go connect, and then we'll go over this later. But there's a lot of options on how you want to transition, and then also just connect this one back. All right, so we prototype these things. So the view, your prototype and you can also do this in the design mode, you click preview, and now you can see they're connected. Clifton to go back and forth. Eso that's just a quick overview of, uh, X'd interface.
12. XD Skill: Navigation: All right, So now that we know have an overview of the interface, we're gonna talk about how you can navigate in your X'd documents, so there's a lot of different ways you can navigate. I'm just going to show you my favorites quickly here. Ah, so if you're on a track bad, you can use your fingers books. Use your fingers to zoom in and out like that. You can also hold control on a PC command on the Mac and while you're holding controller Command, you had minus two Z amount plus to zoom in. So I'm holding control minus plus seemingly in and out. Then you can select the shape and say You want to work on this shape what I'll do a lot of the time. Um, there's all had control, command, hold control, command, then hit three. And it's gonna fill that shape within my screen. And you can see right now about 120% which I would rather be at, um, 100% because that's what the design is supposed to look like. A 100% 7 all hit control one. No, I'm not 100%. And now I can design, so I use, ah, control or command three toe pull up whatever object into my screen. Then I use control or command one to get to 100%. Another useful key shortcut here is control or command zero. And that's gonna pull up all your art board so that you can view all your art boards at once. So the main zoom ones that I like then you can also hold space and that lets you move around. Your screen can drag through. So that's no, that's how you can get around in Adobe X'd. At least that's how I do. Um, let's move on to the next video.
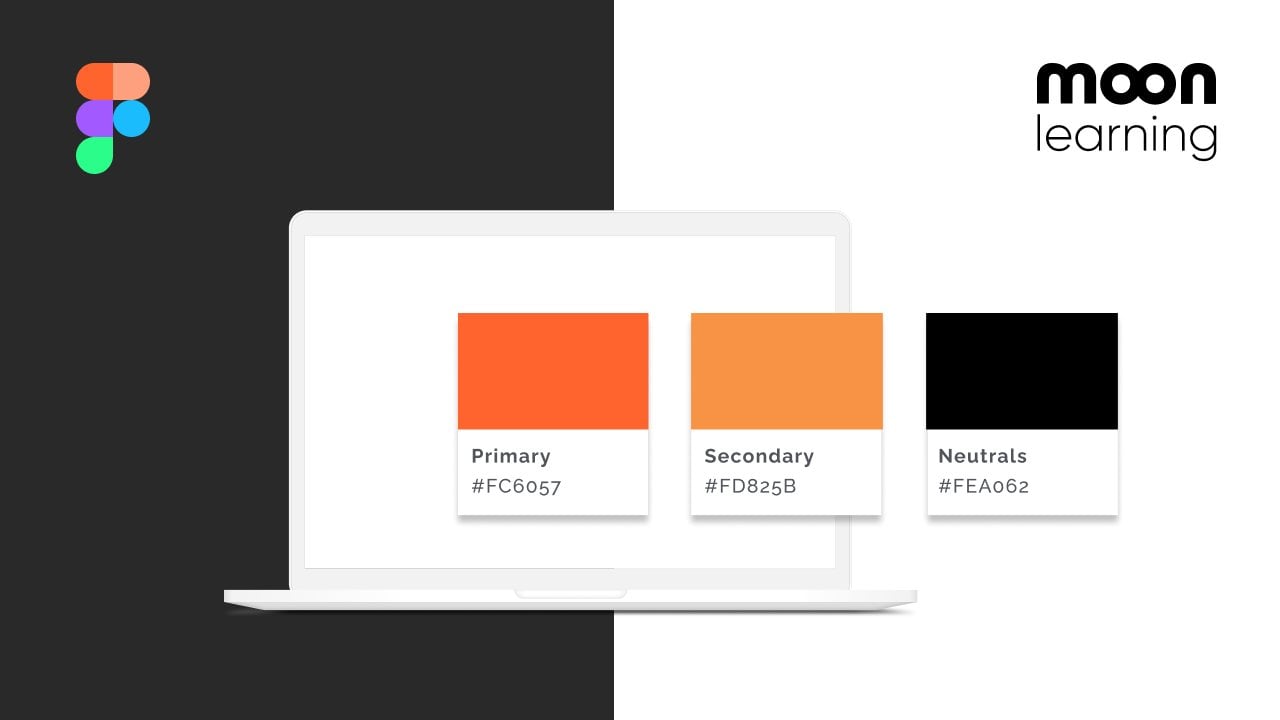
13. XD Skill: Adding Colors: Okay, so here we've got our palette that I said I want to go with for this ah project. So I'm going to right click and copy image, and then I'm going to go over text D. And I mean ah, paste this image down here and there's a few ways you can use this palette. I'll show you an easy way. You can just paste it on to another art board. And then let's say this is our board you're working on. You select your shape that you wanna color, and then you can just use your eyedropper tool. You're eyedropper, tool and pick, and it will change the color of the shape. So you just keep doing You can do it that way. Or what I like to dio is, um, I like to put the all the colors into ecstasies built in little palate here, So I find that's a little faster, especially when you end up with a bunch of art board. You don't have to drag your palate everywhere, and you don't have to zoom in and out a bunch to get to it. You can just go right here. It's already there, so I already put this medium pink in. So I'll go ahead and hit. Plus, and then you can see it shows up, and then Dad and other colors will just use the eyedropper tool. And every time I go in here, make sure to hit. Plus, I got that in. Is it again? Wait, that someone already did. I think do that one. All right, So now you see, we've got all five colors, and if you want, you can drag them around and arrange them like they are in your palate, so they look nice, but it's up to you s Oh, that's how you can pull in your colors to X'd. So now I've shown you how toe, how to come up with a palette at least one way and also how to bring it into X D. So why don't you all go ahead and choose a palette and then upload your palate Teoh to your share projects area so that you can get some feedback on it and then once you've uploaded it, go ahead and pull it into X D, and then we'll move on to the next next lesson.
14. XD Skill: Adding Photos: All right, so now we've got our colors imported. Hopefully, you also have imported your colors. We're gonna start building out the site so we don't need the square. So I'm just gonna hit until lead to get rid of that square. And, uh um, like I mentioned when I was sketching, we're gonna lead out with a sort of hero area with a banner area with a call to action. And so in that area, we want to make that attractive and draw people in right away so that they're likely to stay on our website and browse it. So one thing that I like to that I find could be useful for that is if you find a nice image that's relevant to your site and you make that is ah, a big background. So, um, the next step, if you're following along, would be to find an image to find images. I like to unspool ash a lot on splash dot com. Let's just look at that, uh, really quickly. Here. So this is unspool ash weaken type search. So my sights sort of a travel theme, so I kind of like the idea of a beach so you can see a typed in beach. And I've got all kinds of cool photos. If I find one that I like, you just click download and save the photo. Um, but I already went, went ahead and browse through this and found several that I liked. So let's take a look here. So after I find the photos, as you can see, I like to compress them. Ah, the reason I do that is because it helps toe keep the file size of my my ex d file sizes down a little bit. I don't have the most powerful computer. So sometimes when those file sizes get too large, it will start to slow down X d. And it's also just kind of Ah, good idea. You know, if you don't need a huge file, why use it? Um, then I also like to resize the files, so I'm designing it 1920 pixels wide. So for the most part, I'm not gonna use in image. That's much wire than 1920 s. Oh, that's also another way to save to save, um, space and keep your file sizes down. So let's see. I really like this image so I'm gonna make this my backgrounds. There's a lot of ways to bring images into X D. Probably my favorite way is, um, just drag and drop them from the explore. So here we go. We can just drag this and drop it right in, and then once we have it, we can use our selector tool and drag it around, and then you can see it's got these little dots. Click on those dots. You can change the size and something That's kind of nice about X'd. That's different from some photo manipulation products like Photo Shop. Is it anywhere you drag drag on the side? Or if you drag on a corner, it's going to keep the the portions of the photo? Um, so, like in photo shop, if you start dragging on the side without holding down anything else, it's getting the photos gonna get distorted. But as you can see, Annex D doesn't do that because, you know, most of the time when you're building a website, you don't want a distorted photo, so we'll just go ahead, hadn't played with us a little bit. Get it where we think we wanted to make a little crop a little more like that. And then once you see still selected, you can got that dot in that blue border. So once I un selected, then you can see it's only gonna show on my art board. So why don't you all go ahead and spend some time finding some photos you think you're gonna like, and then compress and resize him and bring him in tow X'd and then also upload them to your project area so that we can give feedback and and see See your progression as you build out the site s. So in the next video, we'll just keep building the site and and learning more things about X'd.
15. XD Skill: Shapes: All right. So for my design, I'm going to use shapes as, ah sort of, ah, visual interest feature. So I'm going to talk about how to create shapes in this video. So there's two ah shapes you can easily make in X'd that rectangles. He's in the rectangle tool and the ellipse. You can just click it on the side or you just e and then that's gonna pull switch you to the Ellipse tool are for the rectangle tool so you can drag about around. You can see if I drag It is just making any kind of shape. Um, for mine I'm gonna make perfect circles. So to make a perfect circle you hold down the shift key while you're dragging and then it's gonna keep the shape in a perfect circle And then, if I hit, are to bring back the rectangle tool and drag him dragging And then I'm gonna hold down shift and you can see the same thing works with the rectangle tool only it creates perfect squares when you hold the shift key. So we've got my square. Once you've got your square, you can go over to appear into the appearance area, and you can play around with how it looks so you can increase or decrease the opacity, which will make it more or less see through with rectangles. You can manipulate the border radius, manipulate the corners, so if you want to do it with all you select, um, this icon and then you can click here and you can use your arrow keys tojust go up and down like that. Or you could also enter a number. Say you wanted to do make them really rounded 90. If you want to go one by one, you click the little dotted icon different radius, reach corner on. Then you can see over here the ah, in the icon. Whichever one you're editing is highlighted blue, so we'll just make this one bigger so you can see that in action 1 80 I'm just typing with number keys and enter, and then it makes that corner more rounded. And then for the fill, click this. And as we saw earlier, you can, um, rooms. Actually, as we saw earlier, you can also, instead of clicking that you can just use the eyedropper tool and select a color. From there, we've already got these nice colors pulled in here so we can use these. Just click through and it's gonna change to whatever color you pick. And then if you want a slightly different shade, you can play around with that. Drag this around toe, you know, add more or less black, more or less white. Um, if you want, just appear color over here, and then if you want to change colors completely and go over here, um and then this will set the opacity. This is another way to set the opacity. The kind of the thing you can do with this is you can set no past you like, and then you can it plus, and it's gonna save that down here. And then you can reapply that in other areas. We're not gonna do that right now, though, so I can drag that off. It's going to remove it from my palate. So that's how you change the fill color. And then the border color has the same the same set up. You can play with the colors just like you can, um, for the fill, and then you can also adjust the size of the border so we can make it a say if we enter in 15. The numbers keyboard and that had enter. You can see the border gets a lot bigger, a lot thicker. You could give the border a dash, so we gave a little dash there. And then you can set the gap between the border but between the border dash, and then you can see at a 20. So the gap got a lot bigger between those dashes, Um, and then you can also play around with the shape of the dash and that kind of thing. Make it rounded. You can give the shape of drop shadow. Cover that more later. But you just check that box and then you can put a background blurring here, blew out the background of what it was underneath the shape. Then you can see there's an additional controls for the background blur. So that's how you create and manipulate shapes. That's the basics on the next young and add some shapes to my mock up. So let's get let's move on
16. Adding Shapes: All right, so now that we know how to make shapes, I'm going to show you how I'm going to use them in this mock up. So I really like this image. And I think we could just leave this image as it is and just, um, put our texts are called action text year and, you know, prayer. Look over here and be done with it. But uhm, I'm going to use some shapes and put those shapes over the image to sort of add another element. And then I'm going to use the shapes and carry that throughout the design askew. Go further down the page so that that's order will hopefully bring the everything together . So I really like the way this this boat creates an ark. And so I think I'm gonna use circles. It's my shape. So I'm gonna go over here, select the circle, could also do that just by hitting any and then hold down shift so it makes a perfect circle, and then this drag out. I want to start with a big one. Use this big one. What's gonna hold down shift to keep the perfect circle and use this big one for my call to action. So if you grab the selection tool could move around like that. Um and then I don't want borders on the something uncheck the border. And then so you don't have to keep going back and forth like this. I mean, it's pretty easy if you use V for the selection tool, Andy for the Ellipse tool to go back and forth. Ah, but another thing you can do is you can select and then go to the selection tool by hitting V and then hold down Ault or its equivalent on the Mac and then drag while you're holding all and make a copy of the shape, and then you can hold down shift to keep the perfect circle. I want only circles to be different sizes. So I know that I'm you need another one up here for the menu so that you can easily see the menu. Um, so let's make that one a little smaller and then I mean often, drag toe, get in there, circle going on. This is gonna be where I'm gonna put the logo. Put that one over here, make that one a little bigger. But make it come off the screen a little bit. Don't drag going to put another one down here. And then I think I also wanna have one that you that isn't cut off where you can see the whole thing holding shift to keep the perfect circle still and make this one pretty small thing. We're gonna put that one here for right now and I'll play around positioning. Ah, more. But that's how we'll get started. So now I've got all these shapes. Now I want to give them a color. So I'm just gonna go one by one, select and then going here. And I think I mean to make most of the what's gonna be the main color of the site this magenta pink color. So just click it with shape selected, and then you can see it applies that Phil to the shape like Well, like we discussed, um and then I feel like these circles air taking up a lot of they're covering a lot of the image, and I want I don't want them to cover it so much, so I'm going to give them some, I mean, a change. Change the opacity. So that you can see. See the image underneath of it. And the cool thing about this is we can change the opacity here, find something we like. Say we want a little more than say, like, we like it around like 75. So we like 75 so that I can just click plus, and then it's gonna add that exact setting in here, and then I can go select my next shape, and then I don't have to play with the capacity again. It's automatically applied that capacity. Um, another way. You can do that? Yes. Let's just finish these up. Say, I'm making them all this color, except I want this one to be the green. So I'm gonna make that when the green and I'm gonna give it, click in there and then using my number number keypad hit, enter, and then it's 75. But let's say that, you know, I decided, actually, I think I want the opacity to be a little a little, um, lower, so I'm gonna put it down 38. So I set that on this one instead of ah, copying, copping that down here. Another thing. Another way. You can do that if you click that and then control, um, see to copy it and and then right click here and paste appearance, and then it's gonna not change the shape at all, but it's just gonna pace the style. Um, so that's another way you can do it. But I like in 75 actually. So we're gonna leave it at 75. So that's how you can do your shapes. Um, why don't you all go ahead and see if maybe your image looks good the way it is and just want to leave it? You don't want to put any shapes, but if you decide you want to put some shapes or and on, the other thing you do is you can put some lines over over it. Add some interest, but play around with it and decided what you want to do. And then once you're satisfied, uploaded to your projects area so we can continue to see your progression. All right, and so we'll move on to the next video
17. Fonts: So this video is is not really about choosing funds, but before we go into the design. I just wanted to mention a few things about fonts just so that you have a rough So you have some some basis to go off of in just a few recommendations. First of all, I would say that I really like using Google funds, so I would recommend using Google fonts because they're free and they work well and they got a lot of good funds out there on if you're just getting started, it it's really the way to go, I would say over investing in, um, like a paid fun. So I recommend Google fonts, and then when they're thing, I recommend that you limit yourself to one or two fonts when you're starting out. It's, uh, it might be tempting to try to Adam. You know, a different phone for buttons, a different fund for headings, different front for your menu. Ah, different fund for subheadings and so on. But that is gonna be really hard to do, and I think it's just it's very likely to not work out well, so I would just choose either one fund and use a bunch of different weights and sizes t to show your hierarchy or maybe two fonts. Maybe you do one for headings, menu buttons, and then you have one for your paragraph text. Ah, so those are the things that I those are my thoughts on funds. Don't overdo it with too many, and I recommend Google funds, and now we can talk about how to how to use fonts and X'd.
18. XD Skill: Text: all rights this video, we're gonna cover how to add text. Um, before I get started doing that, though, I just want to show you about locking. Just Ah, you can see now this outline is gray To do that, I locked it, so I just unlocked it toe lock something. You select it and then hit control or command l And then you can see it turns gray, and now you can select it, but you can't move it. So the unlock it you selected again, control. Well, now it's unlocked. I can move it, but I want to keep it locked while I'm messing around. So I'm gonna hit control l. Lockett, and we got kind of a lot going on here, so I'm just gonna draw it's white rectangle over to show adding tax to make a little easier . See, So add tax, you select the text tool or you hit tea, and then you can just start typing. Ah, So after you're done typing, you click off it and then you can see you have options over here to change your ah, here and what you just typed so you can scroll through and choose a different phone. If you want. Say you want to do honest walled and then will increase the size to make a little easier to see. I'm just using the numbers on my keypad and I typed in 60 then hit Enter gets bigger and then I'm gonna click V to switch the selection tool so I can drag it into the center and you can see that it's ah, it's, um, helping me with these smart guides to show me where I am and when it's centered. Ah, so right there, it's senators you can see and then to show you a few other things, we're gonna switch to a different fun. If you know the funds name, you can start typing it and then a lot of populate. And when you see the one you want, you just hit Enter, Pull it up. Um and now you can see when I did that. Merryweather, I've got a bunch different font waiting options so can switch the option, make it light or, if you want to go dark, make it black. I'm really bold fun, and then you can send her. That's not really gonna, um, do anything until you started typing again. Um and then this is in nice feature of X D. Right now it's set so that the text is just going to take up the amount of space that it naturally does. Um, so if I were to start typing again, just keeps growing, and I've got it left line so you can see how it's going to the left s. So I'm gonna click so that it's off there and drag it back. And now it's selected so I can edit it still. And now I'm going to click this, and that converts it so that now the text will stay in an area. So now I can give this text in area and it's going to stay in that area so I can drag it. Let's let's say I wanted Teoh, um, make it like this. Then I can just drag it. And now all the text that I type is going to stay in this area. And let's say that I want to center center and then to edit this. I double clicking here, click at the end, and now I can just start typing, and no matter what I type, it's going to stay within. Ah, that area that I mean And the nice thing about X'd is you can easily switch back and forth . So say I decided later on that, um I wanted Teoh go back to this way where it just takes up the space. It naturally does, and there are no constraints on it. I can just do that by clicking this. So that's something that's really nice here. He can change the space between the letters A letter spacing eso Sometimes this is nice. You're doing all caps to put some extra letter spacing in. We'll just put in some extra spacing now so you can see. And then here you can change the spacing between the lines. Eso Let's just make it bigger so we can see that. And then, um here you can change the space between paragraphs. So that's those are the main things you can do with the text itself. In addition to those things, you can also change. The appearance of the text could change the opacity. It's like you can with shapes. Phil. Change failed to whatever you want. Um, you can give it a border and then, like you can with shapes you can increase or decrease the size of the border. Taping a number hit. Enter, um, give a drop shadow. Give it ah, background blur eso those The main things you can do with text eso No, In the next video, I'm gonna add some text the mock up.
19. Add Text to the Mockup: All right, so now we're gonna add some text to our mock up. First thing we do is add a nice big call to action. So we're gonna get our text tool, and then you start typing. We're gonna call, we're gonna say, um, take the trip of a lifetime, maybe of your life. All right, so we got our text, and now I just want to show you something. See, the cursor is still there and nothing selected. So if I come over here and I try to change the font right now, I've got on Lata, which is a Google fund. So let's say I was gonna switch back to Merryweather. Had enter. You can see nothing happened. That's because the cursor is still here and nothing selected. So if I actually want to change what's in what I've typed that I have to go to a selection tool It v what's actually when you're typing you can't it be gotta go over here, get the selection tool. Then you can see that blue border shows around the outside of what you typed. And now if you come over here, hit Merryweather and then enter, its gonna change your fun, but I like Ah, this fund. So we're gonna go with that for now. Um, you can see I've got a pretty big I want it to be nice and big for this called action. I want to be really clear. And I'm also going to do a cut out with it, so I wanted to be really bold. Let me make sure this is the eso I think of. Yes, I've got the the most bold, um, falling available for this family. And I'm gonna make it into a text area so that I can change the space it's taking up. It's there we go. Then. I want this to go over this, and we're gonna leave that for there like that for now. Um, it's kind of strange from my last baby. I'm just gonna take that out, Hit zero, enter. And now we don't worry about extra spacing. When I do return. Now, I'm gonna add in the name of this company. Ah, so that's the name my client's company. And as you can see, I clicked off, clicked out of the areas the blue boxes on knowing added it. I don't want it quite as big as the call to action. So I'm gonna go over here and drop it down. Let's try 36. That's a little too small. We try 48 so I like that pretty well. And I want to put this in here, and actually, my client didn't. Doesn't have a logo yet, but I'm just gonna do something really quick for them. So I got my lips tool, and then I'm gonna hold down Ault and shift. When you hold down, all that makes it. So did when you started creating your shape. It goes from the center. So we're gonna do one circle for the background like that. Um, I'm gonna take off the border. I'm gonna give it one of the colors. Maybe we're gonna give it slight color. It's like green. And now you can see it's covering it. Um, so I'm gonna move the shape back to do that, you hold down control or command on a Mac, and then you get the bracket key that moves. It moves the layer down ones, and then you can see it again. All right. Tsunami to make a second circle for this. You make got ahold shift while I'm doing that. So it stays a circle and make a little smaller. One dragged us over. So it's not covering the entire thing. Take off the border. We're gonna give this Ah, slight pink color and then selected controller command racket and then push it down. And I guess this is the open bracket that I'm using toe, um, to move the layer down to move it up, you use the clothes back. You like that? All right, so we've got that. We've got our background image, and I'm gonna play with us a little more. But, uh, why don't you all go ahead and start adding your call to action and maybe do a quick little logo where you don't really need a logo if you want, You could just type in the name of year your ah company that you're making the site for, and then upload that and move on to the next video
20. XD Skill: Merging & Converting Text to Outlines: All right. So this video, we're gonna cover converting text toe outlines and then also emerging shapes. So to merge shapes, we'll grab a shape here, and then we're gonna start making it from the center. So to do that, you hold on Ault or option on the Mac and shift to keep it a perfect circle. And then you start dragging and you can see it's going from the center. Um, and then if we go over here and we don't hold all we just told that I mean dragon, it comes out to the side. So we're gonna make these two shapes, um, then hit V to switch to the selection tool. And then we're going to select both to do that and you select Ah, you hold shift. Ah, well, clicking both. And then you can come over here with both selected, and you can do these different merge options. This will merge them together, which is what we're gonna do. But you could also do something subtract that's gonna take out the front object control Z will undo that, and then you can take out the part where they overlap and then you can Onley Um inside the last one left the part, weaken her over. And where they overlap, this one will take out where they overlap. So you can see it. Remove the part where they're overlapping s. So that's how you can manipulate shapes. Let me undo that last one. We're gonna merge that, and then you can see we've emerged the shape. The cool thing about X d is some other programs, like illustrator. Sometimes when you use some of these features, it's ah, it's destructive. So you say emerge the shape I wouldn't be able to go back, but in x d. I can if you hold down control. Ah, then you can just click. Some holding control would be command on a Mac. I can just click, and then I can see the shape is just where it is and they're still merged. There's still fully edible, though I can make it smaller. Larger, you know, do whatever I want. Um, and they're still emerged, but they're still full weaken. I can still control them. And if I wanted toe on, merge them, I could just come up here and then they're separate shapes again. So it's really nice about x d You don't have to worry about emerging destroying things. So something we're gonna do in for the mock up is we're gonna convert our text outlines or pass, and then we're going Teoh merging with the shape. So I'm just gonna go over how to change text to a pass. So you selected, go to path, convert to path, and now it's no longer text. It's ah, it's a shape or path. So you see him double clicking, and then it just brings up the anchor points. It doesn't bring up the cursor where I could type again. So that is something that is destructive you. Once you do that, the only way to go back is toe. Undo it. You can't. There's no magic button to click and make it text again. It's gonna be a little careful that you have your text just how you want it before you do that. All right, so in the next video, I'm gonna show you how I'm going to use these techniques in the mock up
21. XD Skill: Cutout Text: All right, So now what we're gonna do is his merge are called action with our with the circle. So I think that will be kind of a cool effect, because you'll be able to see through the text to the image. But, um, like I mentioned, once you convert your text of paths, you can't go back and and edited as, ah, as, um, tax. So you want to be sure you have it? How you how you want it before you do that. So one thing I've been thinking about is this toe look good. I think I'd rather have something that's a little, um, a little thicker, a little heavier. So I think I'm gonna actually switch the font that I'm using here from Lado Teoh are Chievo . So start typing it and then hit. Enter. And now you can see that's a thicker, heavier font. I might have to take the size down to get it to fit where I want. That's what it's significantly thicker. Ah, so I'm also gonna change this just so things go together. I recommend not going too crazy with fonts when you're especially when you're starting, so you can either just stick with one and then use different foreign weights like black and light and combine them that way. Or maybe you want to use to. You can just Google font pairings if you want, or you can sort of play around usually want to try to find to that, um, I guess there's a lot of things about fun pairing, but a easy way to do it. It's fine to that Look a lot different, but still look nice together. It's easy into trouble if you have to look really similar. Um, that was kind of like, Why are you paying these two? Why don't you just use one? So anyways Ah, just a little off. Ah, a little off track on the fonts. So we converted this one Tar Chievo. And I think this is this text is a little too long for what I what? I want to get in here. So I'm gonna change it to say, take your dream trip. It's like a little smaller. And then I'm gonna put it in here. You can see Ondo. He's got the alignment. Two goals. And also I wanna think I want to send you this. That's gonna look better inside this circle, and so I'm gonna line it into the center of the circle. And once I have it, where I where I think I wanted to be, then I'm going to right click and go towpath, convert to path and now you can see it's no longer text. It's ah, shape. It's a path by double Click it. I can't type. It just brings up the anchor points. So that's what I wanted to dio Um, so now we're going to merge the, ah, this shape that we made from the text with the circle behind it. So I select the circle by clicking it. Then I hold shift and select the text that's likes both at once. And then we can go up here. We can merge it, but what we want to do is subtract, so we want to subtract the text from this shape. So we click that, and now you can see it's like there's a cut out for the text. Um, so now that we've done that, let's move this around. Ah, we might have to just the background image so that we can see what the text says so do that . And, um, something that I'm thinking about here is maybe we want to put a little a little overlay over this so that, um So that this areas a little darker. Ah, but actually, I think that this will be okay. We might come back and do that later. But for now, we've merged the text, and you can see it's kind of a cool cut out effect. Ah, with our call the action. So in the next video, we're gonna keep building out the mock up.
22. Buttons and Menu: So in this video we're gonna add a button that people can click right below the call to action. And then we're also gonna add a hamburger menu. We're gonna build an ad. Both those things. You can also go toe you. I kid, um, get you Iike, it's goto a wire frame one and click that and take some steps and then you can pull a button in from there. But they're pretty simple to make, so we'll just show you how to make them here to make the button, I go to the rectangle tool and then I drag it and trying it out. And like I said, this is something we want to be designing something like this when probably should done it with the text, also at 100% to make sure it's not huge. So I mean, hit control one. Zoom in and then I'm gonna move to see my button, and you can see it 100%. That is a big button, so I'm gonna drop down the size. I mean, drop down the height 48. So now I can start to see OK, this is a little too big and usually for my buttons. I'm going to use a text size around 18. So it's type in, um, go places could see him using these. Ah, alignment tools to see when it's centered. Uh, and then I don't really like the border. So I'm gonna take the border off. You can see right now it's the edges air totally square. I don't usually like to use totally square edges if you wanna square. Look, I would put at least, you know, 2 to 5, um, on the border radius so that you can see that kind of just, um, cleans it up. Makes it look a little more professional. Little more. Ah, like you put some effort into a supposed to just leaving them square. But for this one, since we got so many circles, I'm gonna go with totally rounded edges. So we've got that, um And I think, um, if you go, if you really want to get into buttons, you can go and look up material design Google's ah handbook. And then Apple also has some nice materials on how they recommend doing buttons. He could go there if you want to get the exact spacing to use for buttons, but we're just going to sort of go with something that I personally like, um, and all right, so there we go. I got that centered. And then I mean, click both of the east using holding down shift, and I want to group them together so that I don't have to keep dragging them separately or selecting that once. So do that. Hold down, control or command on a Mac and then hit G. And now it groups them and now liken moving around something a center within this. And then let's ah, zoom out, Controller Command minus. And now let's take a whole lot. Look, this whole thing selected control three. And now, you know, I think I like I like the way That looks pretty well, um, well, I'm thinking about I think this is a little too big. I've decided I'm gonna drop this down to 36 and I'm also gonna bring this down, Alton and shift to Dragon wallet. Staying centred. All right, so I think that's a little better. I just want to do that when I was thinking about it. So now we're going to the menu next, so we're gonna do a hamburger menu which we're gonna put over here. So again, this is probably something. We want to do it 100%. So I'm just gonna make some rectangles like V for the selection tool and then hold down Ault or option on the Mac. Wait a second, actually. Afford you that I want around these corners out. So I mean and delete that one. Click this and we're gonna make those corners totally rounded like we did, and they would also remove the border. So there we go and then hold down Alter option on the Mac, and then you can see where you can't see very well. I mean, dragged these over. You're seeking to see so you can see the numbers showing That's the space between two eso. We want equal space between these And if you hold down Ault, you can see the space between them. So we're gonna hold down all and drag again. And now you can see the space is equal between all three. So that's what we want. Then we're gonna hold down shift to select all once controlled G to group them. Then we drag that over here. We wanted to be in our, um, a little area up here. All right, So you know what? Looking at this, I think this is a little too thick, so I'm gonna go back in and control three, so I could see it. Control one, get 200% then control shift G willen group it so I can play with ease, and then they're all selected still. So I'm gonna just drop down the height of their little thinner. Think that was a little too thick. All right, there we go. So you don't shift. Select them all control G group them again, All right? And then you know what, actually want to control shift g un group them, make this instead of just having these all be, ah, same with Zoom in here. And then I'm gonna just thes I want them to be the same height. So that one changed. So I'm gonna make them so that they're a little staggered. Troll one, Get back. 200% over here. Select our board control three so I can see my whole art board. So I'm gonna keep playing with that. But that's how you can make a buttons and and a hamburger menu. So I'll just let you all go ahead and add those jeer mock ups and then upload your progress . We want to keep uploading the progress after every video, just cause that that's gonna help you to get feedback. Hopefully from your classmates, other people doing this. And then it's also going to just help things to stick as you learn them. So go ahead and add those things to your mock up, uploaded and then come into the next video.
23. General Cleanup: All right. So at this point, I wanted to just do a little cleanup. Um, you know, you don't really need to watch this video, but I just sort of thought I'd show it to you if you're interested to see how things change , How how? I decided to change things. So, you know, I'm looking at this, and I feel like for some reason, I don't really like these colors. I think because of the capacity we gave this looks a lot different than those wounds. And then, since this is their main color, I'd really like to have their main color closer their logo. So I decided I'm gonna change these colors up. Gonna make this the dark. I'm gonna go ahead and make this will. The text whites, you can see it. And then I'm gonna make this into that that green color. But I wanted to give it a little past city here, Give it quite a bit of a past. Me then. I mean, just sort of drank this around. No, no, I sort of want this to look a little like, make you think of a global least. So, um, now that I have this color in here kind of feel like this one. Maybe I don't need this one anymore. So get rid of that one. Um, and then downshift to select all three of these many things control g to group them, then I mean, a sort of pumps. They started lining things up a little, so I want on the line the top of, um, the menu to the top of that low over there. But let's group the logo first. And get that where we wanted before we spend too much time doing that s are gonna put the logo there, not see. Yeah, I think that Yeah, we believe the logo there. Let's make sure got this top of those two aligned. And then if you hold down the old key for, um, option on the Mac, you can see the distance away from things. So we want to get this to the same distance away from the edge of the art board as the logo . Um, so do that. I need toe change this around because right now this is over flowing the airport, so it's not letting me see how far away it is. Um, so I'm gonna unlock this quickly. Mumps. And then I'm just gonna drag this in here. No, I can see how far away that says If I hold down the option on the Mac, probably can't see that, but it's 110. I'm going over here. See how far away this is? It is that way I would have to really resize that. So instead of re sizing it, what I'm gonna do is I'm gonna do a little math. I know. My, uh my whole can't. My whole art board is 1920. So if I wanted to be 110 from each side that I need to subtract 220 from 1920. So this draw rectangle in here, and then we'll make the rectangle 1920 and then you can go on, enter minus to 20 and then hit. Enter in automatically do that for you. Then we want to center this so that we can use it to align these things. So we click while it selected, we click center, and then we go back to our selection tool. Then I'm going to use my arrow keys. I need to group this to do this. So I'm gonna hold down shift, select all the parts that make up our logo, Then use the arrow keys to bring it over till I get that, um, auto a line showing that I'm at the edge of the rectangle on both sides. And then I'm done with this rectangle that lead it. Um, and then I think I'm gonna make hold down shift, select all these, make this into a group controlled G, and bring this in a little bit more. And then while I've got this, I think I'm gonna play around with this just a little bit. All right? So I think I like thinking, like where that is a little better. All right, so that's just something you want to do periodically. Sort of step back from where you are and make adjustments. Um, so you like the way things are looking better? All right. So let's continue working on our mock ups. If you want to take a moment right now, toe sort of redefine and rework your mock up, then upload that to the projects area. That'd be great. But if you're feeling good about it, that just keep on continuing onward. One other thing before we go, he can see this is untitled, edited. I haven't saved it yet, so you always want to save your work. You can cope here, save. And then we're gonna call this mock up, hit, Enter, save it. And now you can see it's called Mock up. And there's nothing saying that it was edited. So it's all everything's been saved. If I were to go in here and, um, change the size of this, it says edited, so there's unsafe changes. So to do that, to save them, I could just take control s or command on the Mac s, and then it's going to save those changes. All right, So I might play with this little more button. That's enough. Just so you have the idea of how how I'm doing things. All right, so let's keep on, keep on making the Markham
24. Intro to global styles: all right. I just want to talk a little bit about, um, colors are global colors, character styles and symbols before recover them in extra just so that you understand the concept behind them. Uh, when you're designing websites air abs, you're going to end up with potentially, you know, hundreds of different art wards and those art boards air going toe. Repeat a lot of the same things, like your buttons. Maybe you have a submit button on the floor and that's gonna be on, like, you know, 20 of your, uh, 20 year mock ups on your you're gonna use the same colors throughout your your project. You're going to use the same, um, fonts and font sizes and that sort of thing throughout your project. So what character styles and global colors and symbols allow you to do is rather than let's say, you've got this button and you think when you're starting out, you think it's perfect, so use it all through your site. But then you show it to the client that clients like, you know, uh, sorry, I really don't like this. Ah, thank you. Normally, you have to go through and you have to find and change every single one of those. So first it's a pain to find them all on. And then, second, it's It's time consuming to change them all. But with symbols. If you use symbols than you can take that button and you can edit it. You just find it in one place. You make the edits, and then those that its air applied to the buttons throughout the throughout all your designs. So that's going to save you a ton of time and the character styles and global colors. They're sort of a similar concept. Uh, say, say, you got this green that you really like and you make your whole your whole set up mock ups using that green. And then it turns out, you know the client doesn't like that green. So instead of having to go find all those instances of the green and change them one by one , you can just go to your your global color palette. Change one there, and it's going apply it all across all of your art boards and the same thing with characters with character styles. You could just change it, change the character style once in your character styles panel. It's gonna apply across all your art boards. So basically symbols, character styles and global colors are sort of time saving measures for this project. It's probably not gonna be necessary just building one home page. But there's a really important concept and something that you should really try to use once you whenever you're designing full websites.
25. XD Skill: Assets, Colors, and Character Styles: All right, So now that we've got ah gutter site well underway here, I think it's good time to go over. Ah, the assets area. So you find that over here, click it and then you can expand it. And there's three main parts to this colors, character styles and symbols. So we'll go over each of those starting with colors. So basically what all these do is they allow you to quickly change something throughout every item in your document. So I mean right now Ah, this It's not very hard to go in and change. You know, all three circles that you have that are this Ah, this color that would take you, like less than a minute, probably. But say you're you're doing like, a full scale prototype of in ah app or something and you've got, like, 50 year ah, 100 or more art boards. If you need to change, you know, you need to change this color in ah 100 places. That's going to take you a long time. So that's where the idea behind these these things is that you can change something. Change it over here once, and it changes it everywhere in your document, so to set him up, Um, when you got a bunch of things ah, already in place, you can just select them all. And then you see these plus buttons become active. Just click plus, and then it pulls in all the colors that you have so far, you can see that there's a couple that we added over in our fill area that are not here yet because we haven't used them yet. But this should be everything that we've used so far. And so now just to demonstrate, let's say that we did want to change this. Ah, pink. So you just right click here and then edit. And then let's say we want to change it to, ah one to change it to like, uh, a black or like a gray. Do that. And as you can see, it changed all all three of those just with changing at once. But we don't actually want to do that. We're gonna undo that. All right, so that's how that's. The idea behind colors and then character styles is similar. I'll just keep, um, everything selected in this case. We only have, uh, to care to, um Eric Areas with text. Remember that they were converted this to a path, so this isn't going to show up. So you go ahead and click that and we get our too. So these air both, um, plateau on. Actually, I meant to make these Ah, our chievo. So let's go ahead and change those now. So just like with colors, you just click, edit and then and make that are Chiba. And then it changed. It changed that one. Um and then also I noticed this was left over from when I was showing it up before. I don't actually want to have it set to that. If if I was going to reuse this style somewhere else, I wouldn't want it like that. So we'll just make that 48 all right? And then we're also gonna change this one, and then you can see now our linemen screwed up on this button. So I hold down Control. This is group. So I would hold down control to select this within the group, and then I'm gonna make this a little bit bigger. And then I'm gonna hit control three to zoom in so I can see in York and see a little better. And then we're gonna recent in this There we go. Got it re centered. All right, so now we're gonna hit control. I want to go back to 100% and then we're gonna So you had a bit more. Um, so that's how you use character styles. And now, symbols. It's a little bit different symbols. Ah, you're gonna more going to use it for things like your header. Things like buttons. Um, things like this logo that you want to keep the same across multiple art boards or across multiple places within one art board. So, for example, say we're going to use this, Uh, let me zoom in a little bit here. So we're gonna use this button. Let me un select going in. Ah, that's right. I forgot. Group this entire things. Let's just go ahead and control shift G toe on group that. So Aiken, make this button a symbol. So now this button is group to Comptel because I can't click on that. It's only selecting the whole thing. So that's that some groups, so we group it and then we click Plus, and now we've made a symbol. So now weaken Dio Ah, anywhere else we want to use that symbol. You just drag it off and put it where we want to put it and you can see me zoom in a little bit. Here you can see this instead of having the normal blue when something's a similar symbol, it has the green outline so soon back out. And, uh, let's just imagine that we had this this button in, like, 30 different places, or maybe even more, and we decided we wanted to change the way we wanted. Change the little. So to do that, I click hold control to get ah, um, shape part of the button. Now let's say I wanted to make it on this sort of minty green color. So I go like that and then let's say I want to change the text conceit changed the background of this button to so we can change the text to, let's say one. Make it like that. So as you can see, um, in this particular project, these aren't gonna These aren't really necessary. They're not going to save you a lot of time, but honestly, you're probably it's probably be very rare that you have a project that's just one home page. So I recommend using these often usually what I like to do with these this sort of get get things set up, you know, get around where I am right now, maybe a little further, and then go in and set these up once I Because at this point, I'm gonna have an idea of how what I'm going to use throughout the rest of the document. I actually don't set these up right away, because early on, I'm likely to change things. So I don't wanna have to worry about changing these and putting in styles that, you know, I actually not gonna need. That's just gonna confuse me. So I wait until I'm I've got something that I'm feeling, you know, decent about. And then I start setting these up. But once you get once you get a little ways into your project I really recommend using these cause they can save you a lot of time. Ah, down the road. If you set them up early.
26. XD Skill: The Pen Tool: Now what we're gonna do is go over the pen tool. So as you can see, with pretty much fold up filled up this area of our designs were gonna make this a little bit bigger When cool thing about X d is you can go over here. And if you use the star as, ah, you can multiply. So let's make double this double the website on a double bill with Let's double the height . Ah, so I'm gonna go on, do that and then I'm gonna do ah star for times to it enter and then it ah, doubles the height you can see And I've got this other airport in here, so I'm going to drag that out of the way and we're gonna want to just, you know, just quickly put a square over this so we can demonstrate the pento. So the pen tool, like I said, ah, it's pretty intuitive unless you're usedto illustrators and tool in It's a little different from that, but still not too hard. So if you get the pen tool, you can either selected from the tool panel here, or you can just hit p ah, and then once you've got it. If you hold down your mouths and while you're holding it, if you pull it out like that, you're gonna start with a curve. And wherever this this, um, little handle was going, that's the direction year your line is going to go in, that's going to start in. So we have a pointing over here. You can see when we when I release the mouse. Ah, the lines going over here. But because it's a curved line, I can drag it over here. That's gonna create a curve. But it's always the curve is always starting in that direction. So then I just click once without holding down. Then the next line is gonna be straight. If I want the line to be at, ah only going 45 degree angles around the circle like this, I hold down shift, and then so this line's gonna be at zero degrees, and then I click again and I've got a straight line. Now, if I click and hold, then I get another curved line. And as you can see, um, this last handle is gonna be where the line is pointing so you can just go like that if you click and hold makes a curve, just click once makes a straight line, and you can, you know, do whatever you want. Go wild. And then once you're done with your shape, you come back to the starting point and you can see it fills it in. And now you've got a full shape. So it edit this. You can use your direct selection toe. Um, so if you double click an anchor point like this, it's going to convert it to If it was a curve, it's going to convert it to, ah, straight a right angle corner. If it was ah ah. If it was not occur in double click it, it's gonna make it a curve. Um, if you hold, if you drag these handles, you can see how it how it, um, changes the curve. You bring them in close, it's gonna be less of a curve you bring in on. It's gonna be like a wider, bigger curve in turn it and see how it how it changes the curve. Um, now, if you want a as you can see, it's moving both handles in unison here. So if you want to just move one handle. Hold down, Ault or, um, option on the Mac, and then you can drag just one. And now you'll see this one separated, too. So to get them back, if you wanted to be you and Eunice and again, you got to go and double click and, um, DoubleClick again to get into curve back. Eso Then once you've got your shape however you wanted, then you can come over to appearance and just like other shapes the ellipsis and the rectangles that we went over earlier. You can give them a fill and you can also play with the the border if you want. So you want to give it a dash, Give it a dash of 10. Gap of 10 Can't really see that. Let me Let's go a little darker here and make this a little bigger. All right. So, as you can see, I was actually selecting the, uh the shape that I used as the background. So it was doing what I was thinking would be happening to this on this eso. If you wanted to change this, then you can come in here will make this little darker. So you can see it and then a little thicker. And I kind of like these rounded, rounded edges. So we'll come in and give it a dash of three, and then it automatically is a gap of three. But we can make it, Ah, bigger gap if we want and that what you can actually see. Let's make it even a little bigger. Trump's all rights. Then you can see how how it has the dotted border now and then. If you want to go in right now, you can see that it's selecting the whole shape so I can drag and manipulate it like that. But if I want to go back and manipulate the actual act anchor points, I just double click and then I'm back. Like I Waas and Aiken do all the things that we went over earlier. One other quick thing to show you is you don't have to draw complete shapes with the pen tool. You can just draw, say, you just want to draw like a curved line like that, and then that's all you want. So you just did escape. And then that your shape, um, like I said, we can do do the same, um, border here. So let's say that we got that that one. We really like the way this came out. For whatever reason, let's get the Pento again. We're gonna do another line here and you can see escape ended. And then I want Let's say I wanted to have this these to be the same. So an easy way to do that is select this control or command, see to copy it and then select this one right click and paste appearance and then you can see nearly match. So that's sort of a quick overview of the pen tool in X'd on the next video. We're gonna go over how we can use it for this mock up.
27. The Pen Tool in Action: All right. So what we're gonna do next is ah, we're gonna put in the area the next area of our page where we sorted convinced people. Like I said when I was doing my sketch. The ideas First people come here. If they already know they want to do it, um, then they will just click this button and get started on a sign up form. But, you know, most people are gonna need a little more convincing than that's on this next area. We're gonna give a quick overview of the steps they have to go through. So if we click this, you can see this. You can sort of see this dotted line. This dotted line represents what is called above the fold the content, that's ah, People will see when they first come to the page. And then when they scroll down, they're going to see more. So when they first come here, they're going to see just this part. And then as they scroll down, they're going to see more. Ah, one thing that I'd like to do while I'm working on things is click play from time to time because I don't automatically set it up at the break point and then you can scroll and sort of get a better idea of how how things were going and how it's gonna look in them. Browse here. Okay, so I'm gonna go ahead. And just so I have an idea of where this Ah, where the started line is a better idea. I'm gonna put in a square rectangle, remove the border, so it's just wait. And now in this area, I'm gonna quickly, well, relatively quickly put in the steps we're gonna dio to convince people. So, like I said, once I get past the the main area like to keep ah, smaller whipped. If you keep it really wide, it's gonna be hard for people to read. And you can never really know how wide your device is gonna be, too. So just start to look weird, especially at high resolutions. If you don't set a max with so we're gonna make ours 13 100 there's another way you can do this and I'll show you later that, um, X'd built in. But I'd like to just use a rectangle. It's quick and easy. So I make my set. Whatever might Max with this here. 1300. Center it and then I'm just gonna line the edge of everything to that. So I'm making the lips. I mean, hold down shift so it stays. Ah, perfect circle. And now I mean hit control three. So I can zoom in and focus on it for a minute. Take off the border, give it go with this later, fill in the slider color, and then I'm gonna start typing here. We're gonna put in one. This is the first step, and then I'm gonna make a text area so that my next is gonna be my header and make sure everything stays within my circle. So that's why did the text area. So it's going to tell us how you travel. That's step one. And then I'll just adjust my little text area to fit the space and in a head or select the selection tool. Well, don't drink this down. And, uh um, hit control or command all a rather to select all delete that I have some placeholder text that I just pulled from the internet. If you go just Google Latin generator, you should find plenty. Oops. Looks like I lost that some point. Let me go get it again. So here's where I got mine. Just go on DCAA Penis, paste it in and click off so that you can change this. Let's make this smaller than the heading. We're gonna make it 18 and then I don't want that. That's too much space between the lines for me, son. And drop that down to 21 and I don't want to be bold like that. So if you see the regular, I don't know why, but I was not a big fan of the regular for our Chievo. So I'm gonna switch this over toe Merryweather on a Then we're gonna say that's gonna be three lines. If you have the actual text, it's always better to use it right now. My client hasn't given me the text, so I don't have the text him just gonna use, um, placeholder text, but always better if you have it to use the rial text. So then I'm gonna get the alignment, how I want it here. So 30 from the top. And then if you hold down all option on a Mac, you can see the space between things so There's eight between that and 16 between. That s Oh, I like that pretty well. Let me make sure this is centered. Just waiting for her adobe to tell me it's centered. There we go. On. This one is also sending because you can see how all three of those lines it means these two are aligned perfectly. So if the one sending the other one must be two, and then I'm going to go in here Well, downshift, select everything and look at it. And looking at it, I think I actually I want to move it down just a little bit in here. So a little more equal space talked about him and then shift control g to group it. And so you can see I did all this. And before I put in any more circles in the reason I did that is so that I don't have toe, you know, redo my text and spacing for everyone can hold down all tore option on the Mac and then drag it. And then I could just hit, uh, home down control and then going at it, whatever I need to. And so there's 12 down on drag was gonna do three. All right. So I think you know what? Actually, maybe we should do for cause I think I want the last one to be sort of, you know, boom. You've accomplished it. So this last one, I think we're gonna make a little bigger. So holding down shift, so it stays a perfect circle, But I'm gonna do the next. I also wanna hold down, shift and all so that it goes from the center, make this one a little bigger. Then I'm gonna make this one that's mint green. So it stands out, and then so you can actually see it Go in and change the color of the text. All right, so I'm going to make sure that this is aligned with that. So now I've got everything in my max width, and then I want to move these around, adjust them a little bit. I don't want to be evenly spaced. I want to be kind of, you know, little random. Almost. I also don't want them to overlap with this big circle, which is gonna come back in later. All right, so that's good enough. Maybe I'll play that a little more later, but it's good enough for now. So then we're gonna grab the pen tool P, and then I'm gonna do some curved lines connecting these. And I just want things to be kind of, you know, fun and organics on. Just mess around with them No one's done. So when it's done, I had escaped to get out. So you come to step one and then this line guide you step to and I want to make this line a little thicker So it stands out a bit more. He's an arrow keys Maybe on think it even thicker, like about four. Then I like the rounded cap so you can see it rounded on the end Kind of Maybe you can't see that zoom in You can see out Rounded on end When I did the rounded can't versus the square like the rounded I'm gonna give us a dash to start with five and see how that looks So I think that looks pretty solid but I need more of a gap. So let's try 15. Let's Ah, got 100% and see how that looks. That looks pretty solid. All right, so now let me hit p to get back to the pen tool. Then I'm gonna draw another line connecting with the next one. Hmm. All right. Let me back up there and do that one, I think. Didn't really like the way that care was going. All right, escape out of that was done. Back to the pentacle. P, it's one. Come up. Um, it's nothing personal and pointing there, but that's OK. And boom. Alright, escape to get out of that. So now I want this style on all the other ones. So quick Way to do that. It's just control. See? Then you select this one. Control Ault V that's gonna paste the appearance. You can also right click based appearance. And you can also get the max shortcut. If you do that. Siemens Cannon Uh, command option v Esso, then there we go. We've got of those amounts. We can see this this whole thing. So I've got sort of our additional steps that are coming convinced people to sign up for our serious. We got those laid out. So in the next video, I'm gonna create a shape that's gonna sort of link these two sections. So it's not just this. Ah, harsh straight line that ends it. So there's some connection between this main area and then the next area. And I'm also gonna probably tweak these a little, but we got enough for now. All right, so let's move on to the next video.
28. Adding a Curved Shape: It's like I said. Now we're gonna make a shape that's gonna hopefully connect these two sections together bit . So let's get rid of this. I don't need this right now. I can always put it back later if I want. And let's get rid of this also, so I can see what I'm working with. I've got that locked. That's good. Sign a select all these. I want to move these all up. I'm using my arrow key to move them up a little and looking at this in the circle, I'm really think I made a circle a little too big, So I'm gonna hit hold control committed on the Mac. Why? Going here So that I can adjust. Listen, I mean, hold down shift enought and just make this a little smaller, moving up a little bit too. All right? Say we go. And now I'm gonna hit P to get the pen tool, and I'm gonna make this shape. I think I kind of wanted to follow this island kind of follow this circle in that way, when we come down to the bottom of this, it's not gonna be We're not just gonna come to a sharp end like that. So that's what I'm gonna do to try toe. But the's link these two So holding it down. So I start with the curve and then pull it down again. So I stayed with a curve. I want to keep all the ah, all the points occurred. I don't like that when I mean, undo that. You want to go a little lower here. I don't exactly follow it. And I want to be perfectly spaced. So show me. I mean, go back a bit more so you can do it like this. Ah, were you undoing? If you don't like things where you can just sort of putting something rough and then go back and play with your anchor points after you got a rough idea of what your what you want to do? All right. So move us in here and I care. Go off screen a little, bring it back. No. Like I said, we don't want to have one of my goals is to avoid that right ending. So I'm gonna cover that whole thing up, bring it over here and then off off screen. I mean, do another curve. So that we just bring that picture back in. I'm gonna Lincoln that I mean a DoubleClick DoubleClick again. Get that curve back. I'm gonna pull this off the screen a little bit. No, I'm gonna remove the border cause I don't want imported. I'm gonna put in a Phil. No, it's covering it because I made that most recently, so I'm gonna hold down. Ah, control or command on a Mac open bracket to move that down so down in the layers so that I can see what I did. So, actually, I like that pretty well. Um, I might zoom in a little bit and take a look at this double click on this so that I could get to the anchor points. I don't really want anything. That's kind of a sharp. So I'm gonna try to go in and play with these little to smooth them out. But, uh, basically, this is this is pretty much done. I'll play with us a bit more. You need to watch that, though. So now why don't you go in and create whatever you're gonna do in your next section after you after your ah main hero landing section. Go ahead and create that, save it and then upload it to your project area so that we can continue to see how your iterating your project
29. XD Skill: Masking Images: All right, so this time we're gonna cover how to mask an image with a shape. So that would be like when you want to make an image that's a square you want to turn to a circle so you can just use a shape to do that. So I'll hit E for the Ellipse tool and then I'm gonna hold down shift so it stays a perfect circle and drag it out control three to zoom in on it so you can see better. And then first I'll show you the easiest way to do this. You just go in and grab your image you want to use and then you drag it over And when the shape becomes blue like that, release your mouths on their it iss adobes done it for you. They've resize the image, how they think it should be and you're all set. If I hit be for my selection tool, then you can see I can drag this and everything staying connected As I resize the shape, it also resize the image. If I go over here, I can remove the border. If I double click Ah, I can change the size of the image like that make it smaller, larger Now. One thing that I can't do when I dragged from the file and drop in like that. You'll see I'm double clicking on this shape, but I'm unable to select it, so that's a limitation. When you do it this way, you cannot independently change the size of the sheep. There forever linked eso. Now I'll go ahead and delete this and I'll show you another way That gives you a little more control rights this time hit the P for the pen tool. We're just gonna make us abstract, random shape here. All right, so there's our shape on a grabber images again. This time, though, I'm not gonna drag it into the image. I mean, drag it off the image, at least my mouth's. And this is a larger image. My computer's feeling a little overloaded, but eventually even just gonna load there bigger than I need, though, so I'm gonna go over here, enter 500 for the whip, concede that Locke is there. So when I hit enter, resize is proportionally. And now I've I want a mask, this image with this shape. So I've got the image selected and hold down shift. Select the shape it controls. Shift em. I'm asked it another way to do that. And let's undo do what we just did. If you right click, unmask. So now the mask is gone. So another way to do it and holding down shift again to select both the shape in the image . Then right click Ah and mask with shape. Now you can see if I double click this. The first thing that gets selected is the shape itself. Now I can change the shape, and it's completely independent of the image. Then, if I click again now, I have access to the shape. So doing it this way gives you a little more flexibility than just dragging and dropping directly into the shape.
30. Adding a Circular Image: All right. So I'm gonna show you how I am going to use that masking technique that we covered in ah, in this project. So we started trying to convince the clients, or rather, we started trying to convince the clients customers that they should consider this service . So we've got our steps here that hopefully will help along those lines. And now we're gonna just a give people an idea of who's behind the site and sort of try to build trust. We're going to talk more about who is behind the site within about section. So since this is a hypothetical client, I'm just going to use my own image here. I got the Ellipse tool here. I'm gonna hold down shift to make a perfect circle. I'm gonna hold control or command on a Mac three zoom into that shape so I can see it easily. And now I'm gonna go grab my image. So just the photo I have of myself. And instead of dropping it into the shape, I'm gonna drop it on my canvas. Like I said, I will give me more control. I've got my image selected. Hold down, shift like my shape control shift. M. And I'm asked it double, click, click again to get my image. And this is a slightly difficult image to work with when I'm trying to put in a circle because my face is so close to the edge. So I don't really have any space to work with over here. So probably in real life, I want to choose a different image. But we're just gonna go with this for now. All right, so there we go up a mast my, my face I'm gonna zoom out a little bit and then hit E to grab the ellipse to again Hold down, shift dry Got another circle And this circle is gonna be for the about me text. I'm gonna hold down Control Command on the Mac It Ah, um open bracket to push it behind. I'm gonna remove the border. Give it a fill. We'll go with this like green for now. Move this up a little bit. I don't really want to be totally center in, but I don't want to be Just want to find the right the right place for it. All right? And I had tea for my text tool and I'm just gonna type in about me. No writing me. Grab area here, make a text area by dragging, saying that's probably get will play without a little. And I've already copied and pasted some placeholder text from, ah, online tool. So I'm gonna pace that in. So clearly I need to readjust the sizing of this text. So I'm gonna go over here. Ah, we're gonna actually choose the size first. Let's make this. Let's go see what we did up here. I'd like to be consistent, so I'm gonna go to be get my selection tool. So let's see. All right, so it's just control. Copy, control. See to copy. And then we're gonna do the paste appearance so we can copy that style in there. All right, so we got some placeholder text here. Now I want to center this within the circle, so I'm going to move my mouse around until it tells me that's centred like that. Another way to center. Ah, select both shapes. And then it should center with the larger one. I think that's already centered. So all set there. And I think that's probably a little more text than I need some you drop it down, we're gonna make it like two paragraphs and then drank it down a little bit. I also think this circle have made is to too big given the amount of text I have. So I mean, uh, drop that down to select everything, trying it over a little bit. So I'm just playing with this to get it where where I wanted to be. Um, So that's basically what you do, how you could incorporate ah, masking with shape into your design. So why don't you think about if there's some way that you want incorporate? I'm asking with shapes into your design, go ahead and do that, upload it, and then get feedback and then move on to the next video.
31. XD Skill: Gradients: All right, So in this video, we're gonna go over how to make a Grady int. Um, as those of you who have been watching will notice I played around quite a bit with how I had my about me section, and what I want to do is I want to sort of link these two sections in some some way. Ah, I'm not sure this is a great idea, but we'll see how it goes. So what I'm gonna do is hit p for the pen tool. I'm gonna drown another shape. Remember? I drew the shape up at the top. I'm just drawing out. Ah, random organic shape here. All right. I'll probably come back and refine this later, but for now, I think that will do. All right, So I mean it. Instead of filling this with the color, I'm gonna fill it with a Grady int. First. I'm going to remove the border. Check Phil, click on this, and then you can see right now it's set the solid color. So it's showing a solid white. I'm gonna goto linear ingredient. And now you can see it's converted to a Grady int. This is the ah white color. The white color shows here. So if I drag this over than the white color is gonna start there and then what's? Let's go back into that? My drag this end, the great color is gonna go over there, which is what I want, but I want to change these colors. So first I'll click the white one. You can see now it's on the white. So to change that color, I just come down here and select one of my colors from that area. And then if I want to change that gray, I can go like that. So now I've got this Grady Int Ah, and that's that's all there is to make ingredients. It's pretty straightforward. I'm going to go ahead and play around with us a little bit. But ah, there's nothing that more that you need to learn to. Ah, create your own greetings. Ah, one thing I will mention is you can also do a radio ingredient which will be from the center, sort of ah, circle based radiant. So everything radio radiates from the center. I don't use those often. I usually use the linear great and greedy in ah so That's Grady incident Nutshell. Go ahead and think about how and if you want, apply that to your design. And if you do, go ahead and set it up and then upload so we can continue to see your progress.
32. Adding a Contact Form: All right, so at this point, we're just gonna finish up the mock up here. I'm gonna go ahead and add in a contact form. So in a start, buying double clicking on my canvas and then dragging it down So I have some more space to work with, and then I kind of want to stick with Oh, yeah. As you can see, I change the shape of bed. I just thought that that looked a little better than what I had. So I played with that a little bit. Um, And looking at this, I think I might want to just move this up just a little. So I get a little more overlap between these two things, and it kind of connects the two sections in a way, um, so now I'll go down here and we'll start on the contact form, so hold down shift. Ah, start with a perfect circle. Um, but I want to do some kind of shape just because I think it's gonna fit better. And then it's also sort of more it's gonna go better with these other organic in perfect shapes I've made. So I'm gonna hit V to get the selection tool that I'm gonna click on the shape against that , I get the anchor points, and then I can just drag the anchor point wherever I want. And this is just another way to make make your own shape. I'm just gonna play around this a little bit, Zach. Something at another anchor point there. So we'll just play around with this till we get something that I think work well for the contact for Maybe I want to have a little overlap again just to keep things linked. And since I came off the screen over here, um, not one. Maybe I wanna come off the screen over here, so I just sort of play around the shape until I think it's where I wanted to be. All right. I think that'll work. Go up here and just grab this. And I hold down on drag this down here, control close bracket to bring it up, and now it's gonna double click in so I can change this to contact. So like I talked about before Ah, people have one opportunity. Teoh, sign up here. If they hit the go places button and then hopefully if they don't do that. They go through here, they read about the process than they come down here. And they, uh, read more about the person behind the project, and then they're gonna come down here, and then they're going to to actually do the Sinem. So now don't go in. I'm gonna create a rectangle for the sign up form. And this is one area where he really have to be kind of careful again. Kind of like with when you're sitting here, your font sizes. I'm zoomed out to 50. So I mean, to me, this looks OK, but I know just from experience that I really wanted a lot. Ah, a lot shorter. So I'm gonna go over here and hit 48 enter. And if you zoom in to 100 you can see that at 100% 48 works pretty well. So I'm gonna line this with the contact form and then I want around the ends here so that they match those buttons that we have. So I'm just gonna click in and then hold down my arrow key on my keyboard until I get the rounded edge. And it's always a good idea to put what the form is four above above the form itself rather than it in the form you can do both. If you want, you could do an example in the form and then put what it's for above. But you always wanna have it there because people will, once they click in what was in the example or what it was, four disappears. And there they might forget. Um, so you always want to put label above the form. So we're gonna make this email. My text is white, that's why you can't see it. So we're gonna go ahead and change it to a color that we can see when we go with this dark purple. And I think I'm also gonna instead of using Merryweather, I think I'm going to use Ah Chivo here. I'm gonna go black. I like that. I'm gonna make this small exits just a form label on. We're gonna drop it down to 12. Might be too small, but we can always play with that later. And then I like to sort of Aliant where that curve starts. That's what I'm on that I do want a little larger. I think that 16 All right? Yeah. And I think I'm gonna fill this. Fill this form field in. Make this. Let's make it this. I think that'll be easy. Then we can do white lettering in there, and so you want to get it set. How you want your ah, fields toe Look before you go and ah, make another one. So then once you got it said, then select both hold down on and then duplicate. And then you can put in another field here if you want. So we could make we could make this one name, and then this one's email. Ah, and then I'm looking at this, and I think that's a little too I got these two wide, So I want to keep in the same with us, like both the same time drank this in. And then I'm gonna bring in this button. Dobie is telling me about this great new feature. All right, so I'm gonna drag in my symbol button that created before, and I'm gonna lie in with the edge of that. All right? And so now I've got a really basic contact form. We're gonna obviously need to play with this a bit more, so I'm gonna continue to work on this
33. Creating a Menu: Okay. So, like I said, I spent some more time working on the contact area here, have, like, radiant to it. And then I changed around the colors of the entry forms and the buttons. So I made a lot of changes, basically, And I also added in a simple footer down here sticking with the circle theme. Uh, and there's just gonna be three menu items. So now what we're gonna do is we're gonna go back up, and as I go back up, you'll see I've made some other changes to the design along the way. Um, just sort of cleaned it up a bit, and I might clean up a bit more before before I call it done. But now what we're gonna do is make the menu, and to do that, we're gonna go. We've already got our hamburger icon over here that represents the menu. But now we're gonna make it. What? The menu will look like what people click on it. So we're gonna grab by rectangle Tool on drank got out of it. Ah. Then I'm going to remove the border, drop shadow on and around the corners a little bit. Here, try four. So you in a little bit more. We can see that. Switch to the direct selection toe and then click off so we can see Gonna drop shadow, slightly rounded corners. Okay. No, I'm going. Teoh, grab the text tool on. We're gonna make our menu. So I've already forgotten what I put the bottoms. We'll have to check again. I think it's amount and then direct selection tool Paul drag to copy it. Contact on what is the last one again? Let's go back down long. Yeah. Okay. All right. So we got that. And now we're gonna choose a bond that we've used here. So probably either are what we use for the buttons or something similar. So I mean, select that, and I'm going to copy it. Then I'm gonna select all these right click and paste appearance. You can see they turned white. So obviously you can't see white on the white menu background, So we're gonna switch that up to this dark purple. And given that there's so few of these and all the space, I mean, we'll probably make this box a little smaller. What? We're still going to need some space, so I think I'm gonna make thes bigger. Let's try 30. All right. Well, nice will even go 36. So make sure you get those all 36. All right? There we go. And next thing we're gonna do downsize this little bits. I'm seeing that we don't really need it that big. Then we also need a way to close this menu out. Maken X grabbed the line toe hold down shift so it makes a perfect 45 degree angle. Then I'm gonna make increase the size of it. Let's try for around the edges. Here on. We're gonna make the color. They're purple as well. Rex. Selection tool, the There we go. And now home. Down, all again, copier. Then we're gonna rotate it 45 degrees, actually being rotated 90 degrees and then we're gonna align it with this other one. No, I've got X for people so they can close out the menu when they're done with what they need . And put that up here in this corner. I'm center these within this and hold down shift to select everything. I'm go over here and it should center on the larger object. So those I centered, de select all downshift and then de select the rectangle in the background actually going to be select everything. I'm going to space these out a little bit more since we have so much space here and then I want to make sure there's evenly spaced. I'm gonna select them all on and over here to distribute vertical space evenly. Looks like I already did that. So we're all set. Ah, so that's a very simple menu that we made there, so probably in this up a little bit. But if you want, I want to go ahead and set that up. And then what we're gonna do is we're gonna use this in the next video to do a little basic prototyping.
34. XD Skill: Menu Prototype: we made a menu, and in this video we're going to add some motion to it so that when users click on the hamburger, this menu comes in. So part of that is, I want to make sure this X is roughly where the hamburger menu is. So do that. I'm gonna give reduce the opacity on this, that I can see what's underneath. And then I'm gonna hold down shift to select both these lines on the X. And while I have done this, I'm gonna hit control G to group them. I don't want to keep doing that. And then I'm gonna roughly align this so it's roughly over the hamburger menu. And now that I've done that, bring this back up. But I want to play around. I mean, this doesn't have to press. Were just using this for an example. But I just wanna just can't help but move this up a little and downside this a little. All right, So now toe prototype this. We need to get this on its own art board. So we want to make the airport the same size as this menu is. So it's 5 56 by 5 80 sorting that Zoom out here grabber art board tool trying a shape to get started. Then we're gonna type in 5 56 by 5 80 it enter on our words, same size. And now we're gonna select everything we have over here. And we're just gonna drying this over the art board on moving around, using my arrow keys to move it now and then. If Dobie is going to tell you when it's a line, let me just zoom in so you can see a little better. You can see up in the upper corner here. It's telling me how far it is from the top dartboard. So I wanted to be had I wanted to be perfectly aligned like that. And you can see when I hit that perfect alignment it has the, um, cross that comes in to indicate that to you, and we're gonna do one more step. This isn't necessary, but I think it can be helpful for prototyping just to make this target a little easier for people to hit, we're gonna put ah shape right over it. But we're gonna remove the border and remove the films that you can see the X coming through. Still. All right, so now we're all set toe toe, handsome. Motion to this. Ah, to do that, we need to go over the prototyping tab, and you can see when I clicked prototype, this whole menu disappeared. And also, we have a lot fewer options over here. That's because this is focused on prototyping, so there's a lot we don't need. They just Adobe has wisely limited to what you need. And what we want to have happen is we want something that happened when people click this. So we're gonna click this and then tell Adobe what we want, um, this click to be connected to drag it over to this art board. And then once we have it on the art board, we release it, and it's going to give us these options for what we want to have happen. The default is transition, but we're gonna do an overlay here, and then you can also see we have some options for the destination. Our board, our word one, and then animation dissolve. We're gonna want I kind of wanna have this slide in, um, a hard time remembering, uh, if I wanted to slide left or right, We're gonna go a slide right and see how that goes. And then you can also set the duration How long that little animation takes. So just to make it easier to see will make it, uh, 0.8 seconds. And now we're gonna click play so we can test this out and see how it works. So we click that, and as you can see, that's coming in the wrong side. It's not a line correctly s So we got to go back in here and play with this a little more. So let's click on this again. And one thing I failed to do and this is when you do the overlay gives you that that green version of the art bored and you want to drag that into place for where you wanted to show up. So we dragged it into place there, and now you can see that's where it's gonna come when people click this. And like I said, I noticed that I actually have it just slide right. But I really wanted to slide left. So you go ahead and make it slide left. And then another thing. We're gonna do while we're here is after that comes in what's gonna happen when people click this. We wanted to come back to this art board. So now we have both animation set up. Uh uh, opening and the closing. All right. And so now we're gonna click play, don't see what we've done here. Can see that it opened up in the menu because that's what I had ah, selected when I click play. So we actually want to click this. So it opens up, opens up our web website, and then we click here that slides in, click here, it slides off. So that's Ah, simple little animation. Ah, a little prototype animation. Um And so in the next year, we're gonna show how you can share that with your clients.
35. XD Sharing Prototypes : Okay, So hopefully after the last video, if you all are following along, you went ahead and made some sort of clickable part of your designer. Maybe you build out even more advanced prototype eso in this video. We're going over how to share your prototypes. Because if people don't have X d, which the average person won't, then they won't be able to see what you've done unless you create ah, length that ah don't be allows you to create so that they can access and interact with prototype. And like I said in the other video a lot of time, I don't necessarily use this prototype feature for prototypes. I use it to share things with clients. So that's kind of how I'm going to discuss that, um, for this video, so to share. Ah, we go over here to the share area like this, and we're gonna say published prototype and I've already shared this once so I can click update where I can create new link. I'll just great click update, and then it's gonna take a little while to load up. And one other thing I want to mention while we're waiting for this toe complete. It's update is that it's on Lee, if you have prototypes something but not everything in ah workspace, it's only going to show what you've what you've connected. So in this workspace, it only connected the menu and this main art board that we've been working on. So what if I had control zero? You can see I've got a whole bunch on their stuff in here so I could control three to zoom back in. But you'll see in a moment that it only is going to show in the link the things that are connected. So now we'll go out. And I have already opened this up and another and, uh, browsing. This is just chrome. And I just pasted the Lincoln here. Uh, sometimes it will take a little while for the link to load. So that's something I often tell my clients when I'm sharing with them that, you know, just be patient. We've got a lot. This is a big project, and I got a lot going on here, So just be patient for the link toe load on. Then you can see you can just scroll normally once you have your mouse over this just like being on a website. Basically, come over here and make it larger, and then you can click escape to get out of that view, they also your clients have the option to make comments here. That could be a useful feature. So let's say, wanted to make this. Let's pretend on the client. I can drag a pin over here, put it on this button, say something like ID like this a little bigger. And then that comet's gonna show up and then I can reply to it. Um, okay, I'll work on it. And you can also alert people mentioning users. I'm the only one that this has been shared with, So I'm the only option. Do that? Um, that's just another feature. And now I'll show you the, um, she had a prototype that will work, so if you click anywhere, you can see that it's highlighting the part that's been made clickable. So we come over here and we click this and it comes in just like it did on we're next day using the play button. Ah, so that's that's a quick introduction to how you would share something you've prototype with either your client or users that you're gonna be testing it with. Um, so in the next video, we're gonna talk about how toe export your art boards as images, cause that when I do it, I usually when I'm sharing with clients, I usually export as images. And then I also create these links just to give the clients options. So why don't you all go ahead and create links and then upload them so we can see the prototyping work you've done on your mock up?
36. XD Skill: Exporting: So in the last video, we talked about how the share with links, and that's useful when you want a prototype. And honestly, when I'm sharing with my clients, I usually recommend that they use the links. I think it gives them a better idea of what it's really gonna look like. They can sort of scrolling and they can scroll, and it will look like it does in a browser. But I also usually share images just so that they have those as well. So the first thing I do when I'm in the shares, I double click in here and change the name already. Did that change this name, the home page, And then you just take control E command off Mac, and you can select your destination. We'll just put documents, select folder, and you can also change the format. If you want. I usually go with PNG, and I'm not actually gonna export this, cause I don't really have any clients, and I'm gonna share it with at the moment. But if I were, I just click export, and that would export it to this folder. And then you can go and use in urging need to from that folder. Ah, so that's basically it for this home page. Um, to wrap up your project on recommend going through and and spending some time or finding what you've done and then upload everything that you've done to the skill share project area. And, you know, I'm really looking forward to seeing what you come up with in the next few videos. We're just gonna cover some tips that didn't really make sense for for this project. But that should be useful to you down the line as you continue. Ah, designing websites.
37. XD Skill: Repeat Grid: So one of the coolest features that X D has is this guy on grid system that lets you repeat , um, something. And then you can make changes toe all the items in your group at once so it can save you a lot of time. If, ah, that's the type of mark up you need to make. So, as an example, I just created this card. Maybe I didn't have a place for this on my home page, but maybe I'd have a place for it somewhere else on a some page or something. And let's say that I wanted to have a bunch of cards, said I just one. So what I do is I go ahead and set up the card. It's everything that I wanted and needed. And then once I had it set up, I'd select all the items in it. And then I come over here like repeat grid, and you can see that it changed in green, and then you. If you drag on this, you can see it's going to repeat that shape over and over, and then you can adjust the space between the shapes by hovering over here, and then just dragging in and out, and that you can also and the shapes like this. Um, so there's a some things you can do with this. Sorry groups. You could move it as an object. If you want to bring in the center of the page, then you can also add it the text individually Here, um, so you can go ahead and change all these however you like, But then you can also change them together. Certain things change individually. Certain things will change together so you can change the color of this. So you wanted to change the color that button. You can quickly just come in here and click that little update them all right away. So that's a big time saver. And then you can also take the spacing like think that maybe this is a little too close to the image so I can use my arrow key and bring that down a little bit and you can see it's applying across all the items in this, uh, group. Another cool thing you can do is you can take a bunch of images and drop the mannitol automatically. Repeat those images throughout the grid, so you have to go one by one to change the image. So I'll just show you an example of that coming here. And I've got a bunch of images, so select them on. No, dragged them into here. It's gonna say copy. And then when you come in here, you can see that it updated so that those images air all throughout these cards I made. So that's the repeat grade feature for the for certain layouts and mock ups. It's gonna be a big and useful time saver recently in a project where it was showing a bunch of ah faces. And I use this feature and saved me a ton of time. Um, so I recommend that you knew. Go ahead and try this out and get familiar with it so that you'll know how to use it. Uh, when you need Teoh
38. XD Skill: Paste in Place: Okay, So another cool thing that X'd has built in is this automatic paste in place. So, for example, let's say that we've this is gonna be our header he circles and menu and, um, logo. So I'm holding down shift to select them all. And I hit control c Too cocky. And of course, we're gonna want the header to be the same across all our a mock up. So let's say we come over here. Everyone had that here select art board and then paste it in, and it's gonna paste it in exactly the same position as, Ah, it was on the originals. That could be very useful feature. So usually what I do with the header is, um ah, group it and then I'll make it a symbol. And then it's easy rather than dragging it from the symbols panel. What I usually do is like just copy it from an Arc ward and then go over to another report and then paste it in. Of course, the one exception to this working is if you are bored, they're different sizes. It's not gonna be able to paste and exactly the same place on the art boards. It's not then clever at this point, but still it's a really useful feature, another nice time saver that I like.
39. XD Skill: Prototyping II: Okay. So even this is though, this isn't really a video about prototyping. We're just gonna cover a little bit more, um, on prototyping just because that's such an important feature of X D. So I'm just gonna go over how you would connect art boards if you were designing multiple pages on a website. So let's say that we have This is our home page, of course. And then we have a sub page eso you go places and then you click this button and it's going to bring you to some options of different trips. You can go on. So to do that, we click the button and then we're gonna drag this air over to the airport, want connected to you release, and then you can set the different transitions. So we're gonna go with the regular transition and animation. None think that's the most natural from navigating between Quinn pages. And then we're gonna have the logo go back to the home page. I always like to have a way to get back in the prototypes, so I'll just show you what that looks like. So you come overhearing click go places and it's gonna pull up that screen that some page and then you click back. It's time to go back to the home page. Another interesting feature that Adobe X'd has built in is the fixed position in positioning when scrolling. So that would be, for example, let's say the one that had a little options always chat as the user scrolled through our site. So I did this quickly, and then what you do to make it a little scroll, it will have a fixed position and stay. Um, stay in the view port. As you scroll, you just select everything. I made this into a group and then hi checked ficc fixed position when scrolling. And then, if you click play, you can see how that will look on the prototype. Just days in places you scroll down the page. That's not cool feature. That's just Ah, short intro. Like I said, this video syriza is not really focused on prototyping, but I wanted to give you just a little more so that, uh, you know, you have something to go on and you can begin to build out prototypes
40. Conclusion: Okay, so that's the end of this course. I hope that you all enjoyed. I hope that you all learned something from it. Uh, I'm excited to see your projects. I can't wait to see you upload them. So thank you for your time. And I look forward to seeing what you've created.
 Rob Willey, UI and UX Designer