Transcripts
1. Welcome: Welcome to the mixing in FL Studio using
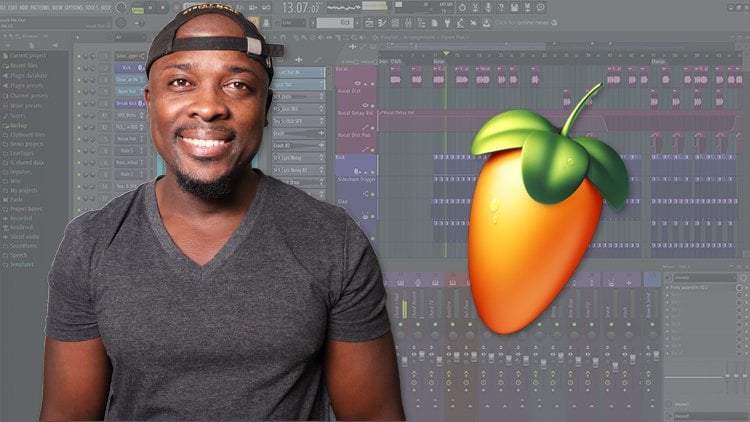
store plugin class. My name is sub l September
and I'm a music producer, makes engineering colon creator. I've been making music but
close to a decade now. I've produced tracks which
are the Netflix SAB. See, I've created this
class for beginners. That's why we'll only
be using stock plugins. This is version 2. I've broken the course down
into different classes so that it's easy for you
to follow along this class. We're going to be focusing on the foundation stage
of the mixing process. This is rho, be organising, shown you how to
export stereo files, mono files creating
violence or playing panning and leveling so that when we
get to the plugin section, everything looks clean and it's easy to listen to the mix. So if you read it to improve
your mixing or learn how to install plug-ins to
get prosodic mixes. I will see you in
the first lecture.
2. Project Resources: Hey, welcome. Before
we get started, I want to walk you through
the project resources. Here you can see
these hard work files of written the song key for you, which is C minor, and the BPM, which is
100 beats per minute. Double-click, you're going to use wind right to
open this file. And when you're done
extracting the file, here, you have
instrumental stems. These are the steps. Then you have a second folder which has the vocal stems of that is your vault
stems separately. Let's put it this
Volcker's separately because I wanted
to export in mono when I was exporting the vocals
and exported the PID stem separately because I wanted to export them as stereo file. So in the next lecture,
I'm going to show you how to properly export mono stems and stereo stem so that everything is organized. Your modifiers or modifies your stereo files
are stereo wilds. See you in the next lecture.
3. Prepare Stereo, Mono Files: Welcome back. In this lecture, I'm going to show
you how to export stereo and mono stems
in alpha studio, we're going to start
with the beat project. Why are we exploiting waves, dams instead of mixing everything right here
on this big project, we want to save CPU power, so we don't want our system to be handling visual
instruments like purity nexus at the same
time while trying to handle the demand from mixing plugins
makes it, Let's get to it. Hit the select tool over year. Follow my mouse, highlighted. And then from one to
something like 5958. Great, Let's play. Then we have some space. That's perfect. The second
thing we're going to make sure that is on point
E is a warm mix. Right here, as you
can see already maxed out all the
tracks you select out or Command on a Mac if the volume is like this or
the level of like this, just select Alt,
left-click on it. It goes to default,
left-click on it. It goes to default to
mix everything out. We'll make sure there are no plug-ins on the master track. For example, if there
was a plug-in here, this was going to
be on like this. You just click on it to
disable the effects instead of removing everything just
in case the way Effects. Now everything is mixed out
that there are no effects. All the tracks are assigned
to separate mixer tracks. Beautiful. So what we're going to do now, we're gonna go to File, select Export and
select wav file. After selecting wav file, we're going to select a folder, maybe create a new
folder for this bits terms like we
did right here. Instead of hardware,
I'm just going to say H w and hit Save. The minute I hit Save, this is going to
pop up on the mode. You can say song
selection, it's perfect. The team with the cut remainder were already left enough space, right here you're going
to select wav file. You set it to 24 bit, make sure it's stereo
quality re-sampling. We're going to set it to, I'll say 64, which
is high-quality. It's low to export, resampling HQ for all plugins, but I don't have any plugins. That doesn't matter
in this case. I like to save playlist markers, even though I don't have
markers on this project. And this is very important. Enable Split mixer tracks. Enabling this makes
sure that you export to separate trucks as
individual tracks. Save tempo information. I like to enable that also, and we select Stat. Now let's go to the
Volcker projects. So this is the vocal
project loading, loading, loading, loading. So this time what
we're going to do, I'm just going to
say New Folder. Let's do HW again. W and save to new folder with some poor
and then we hit Save. The only thing we're going
to change this time is from stereo right here to mono. Don't say mono left only or mono right only unless that's
what you need to do. But we're going to
select Mono matched. Want to make sure these wave was a printed as mono files so that when you import it to digital audio workstations like your Pro Tools or Logic Array. A pn perform as mono fights, Split mixer tracks
everything as it's perfect. We're going to select Stat. We're done, just like that. Another thing you're
going to see when you export your stems, for example, you want to
notice that there are some files you don't need just to clean up
your Steam folder. Make sure you double-check those terms before
you send them to a mixing engineer or before
you start working with them. For example, if our studio will export the file like current, which is the selected
tracks during that export surgery and
you're gonna delete that. There was also a master year. I deleted that. Let's go to the
instrumental track is huge current also deleted. Carryover sub bass,
piano master. Let's delete that master one. Now it's only stems,
everything is organized. So in the next lecture
we're going to start importing and organizing our projects so that we have
a workflow that goes smooth. I'm super excited to see
you in the next lecture.
4. Navigation: Welcome back. In this lecture, we're
going to start doing housekeeping will be
importing our wave stems, as you have seen in
the resource section, everything is organized
for you, please, before you continue download those files because
I want you to follow along experienced
the process so that you get the best
out of this course. We're going to first set up our efforts to do
the way we prefer. First thing you're going
to see is that there's all ready default
tracks go to file. As you can see over here, when you say New from template, you can see on minimum
that there is an empty with For
saints project to k, That is the project
going to go with, we're going to click
empty with force. And as you can see, there's nothing on the step sequencer. When you open the mixer here, you can see that there is
nothing except these separated 1234 designated empty send tricks so that we don't have to create central x ourselves. So before we go deep, I just want to quickly show
you the navigation of efforts to do just in case you are
brand new to the software. Okay, over here you
can see this is your menu panel on the left top side of
FL Studio, right here. You can see that there's
a file at the zoo where we can export
our WAV files, all that good stuff. And we have imported, this is where we can
import modifiers. Let's say you download
a multi-pack from someone and you want to
use it in FL Studio, you can import that
midi file using input. Here they save, you
can save your project, either the FLP,
which is default, or a zip file, which is the one that
always use because it saves everything
in that one file. Okay, even if you opening alphas Studios in a
different Studio, you can still
access all the wave bars you used in that project. So that is saved for
save your project. And that is the quick save
which is Control S at the top of Save As that's the one you're going to
use while you're working, you just Control S or Command S to quickly say while you're working
through your projects, okay, right here you can see that's new basic airway limiter. That is the default
template you see when you open FL Studio
to change these, we're going to go
to options real quick and we're
gonna go to general. The bottom right here, you can see my cursor here. It says default template. It's basic 808 width limiter. People were always making
beats and efforts to do. I'll say this is fine to
have it as a default, but I like to have the M2 which sends default so that when
I open FOR student exam, I don't have to go through the opening and
changing the template. So I'm going to select M2 with force and as a default template. Alright, startup project,
I can say default project, which is this default template. That is perfect. And now when you select
file, it says Mu. It's empty with false sense
that the default one, right? Yeah, you have revert to backup just in case the
power just went off. For us. For example, here in SA, wherever thing called
load shedding, where the power just
disappears on you. You can open FL Studio and
click revert to last pickup. That way you can
have a chance of recovering your project
right next to file, we have cut and copy, cut and copy it simple. You're just going to use
that to cut and paste patterns and everything
in FL Studio. And here we have Ed, this is where we can
import visual instrument, all that good stuff like
your Nexus, you TDL, as you can see over here, that's where you add
plugins and patterns. This is where you can do
adjustments to your pattern. And here we have view. This is where you
can decide if you want to see the piano roll, select Piano Roll, select P
anaerobe, it's gone. Alright. Select the playlist.
This is the playlist. Ok, now it's gone. We'll only see the
step sequencer, but this is channel rec, which is a step sequencer. Click on it, it's gone, enable it, it's back. And you can also do the
same thing over here. I didn't see this view
playlist, view piano. This is the browser. So right here you can
disable it for more space. Let's say you're
working on a mix, enable it if you're
going to need it, right? And that is how you navigate
around efforts to do. I just want to make sure that
we are on the same page. Okay, in the next lecture, we're really going to
start importing the files. Okay, see you in the next one.
5. Import & Organize Stems, Bus Tracks: Hey, welcome back. In this lecture
we're going to start importing and organizing
our stem files. Let's go and open
the playlist first. Follow my cursor right here. We're going to select
a view playlists. Remember there is
also a hint panel that tells you what's what. So you just hover over it
and you can see that is your view playlist,
click View playlist. So what are we going to do
now? We're going to bring in our browser window
with our stems. So we're going to open
the instrumentals terms. Please follow along with this. Alright, so I'm going to
highlight all of these. Drag and drop to the first
track is going to ask you, do you want to
create audio clips? Are audio tracks, instrument
tracks from these stems, okay, I want to create audio
tracks, select audio tracks. Alright, now let's switch
it from pair tin over here, right next to the Play button
from Patton to song mode. Okay, Let's play the piano
and it's a separate track. On a separate track. So before we even
import the Volcker's, let's color code these beats stems first and then
we add more files. So here you can see there's Keq. Then right next to
kick these a piano. We don't want that to move things left and
right in the mixer, you can just select
the track, hold, Alt or command, use
the keyboard arrow. Push it to the right if you want to move the truck to the right. Okay, great. Here you can see
these huge input, which is the input channel trip. We forgot to delete that one, go back to the playlist, select truck for deleted. It's gone. Now, even from
the mixer, it's gone. Let's select from
0.9 dots sub base. We want to move it to the right. Also, hold out a command on a Mac and push it to the right. Here's another instrument,
helix paired Alt Command. Move it to the right. Okay, you just hold Alt Left, right to move it
across the mixer. Okay. The piano moving to the right, right after this piano. The club snare, move it
right next to the kick. The term right
next to the snare, the high hats, right
next to the term, alright, on the vox affects. It can be right next
to the base is fine. The bells right after the piano. Alright, what I'm
going to do now, I'm going to go to truck 14, which is an empty track. Hold out again. Move it to the left, right, in-between the Vox effects and sub base. It doesn't matter. Maybe it's going to
be shaker or new or whichever arrangement
you prefer. Again, and I'm going to
right-click on this and I'm going to say drum bus, or I can say drums. So let me just so drum
bus rename again. Let's change the
color and make it a darker blue. Hit Enter. Great. So why are we doing
this district is going to be a drum, Orcs bass track. We're going to use it as that one trick that can
influence all the tracks. Let's say we want to do
some cool automation and just drop in each you cut off the top end while
the song is playing, we can use this trick to filter all the drums
at the same time. Okay, We're going to go to the kick track,
select kick track, hold Control, and drag
till the Volcker effects. We've selected all
the drum tracks. And then without
touching anything, Let's go to our
mouse pad and go to this arrow on the new truck
which has created and right-click year route to this Shrek and new route
to this track only. Want the drums to go to this track and this track sends
the signal to the master. So if we select
route to this track, it's going to send a signal to this track and send
signal to the master. So we're going to have
a messed up signal, a double signal in a way. So we're going to select
route to this track only. Route to this track only. A great stuff. Let's rename it. I don't know what happened. The name is gone. Thrombus again, N2. Now let's play the drums. To mute the drowns. I can just mute this track. All the drugs are gone. Alright, let's color code
the drums also hold Control, drag, right-click, change color, color close to that ox track. Now we'll go to the instrument
tracks or sub base pairs, the piano and everything, and we'll do the
same thing to them. We can do this in
reverse because I want you to be open-minded when you're going
through the course. My preference is always
keep an open mind. You can be limited to doing
something only one way. For flexibility. Let's go and select
all these trucks. Control, select
all these tracks. Let's change color faced. Let's make these
instruments pink. And while they are selected, we're going to
right-click this empty truck right next to it. Right-click on the arrow. Don't click on that track. Just right-click on
this arrow right here. Root to this track only. Boom. Alright, now we'll
rename that trip. We say music. Bus. When I say
it's the bus track, everything that's inside the bus is affected by whatever
happens to the bus. So think about it that way. Alright, so we're going to
make it a color close to that, paying less to something like pale violet red to
simplify it visually, what we're gonna do next, we're going to right-click on this track and select separator. There's a clear line
between the instruments and district will go
to the drum bass Also, we select separator,
great stuff. Now let's play. This is how things
are in the playlist. But don't worry about it. Let's focus on the mixer now. Right? So this is a music box, but it's not that
clear in color. Let's switch it up again and
make it maybe a beautiful, beautiful, I like it. Let's separate the thrombus
with the instruments, okay, and create a line here. When I right-click on
the sub bass track right next to that bus. And he just separator
and he just separate to this trip That's right
next to the music bus. One thing you shouldn't
follow in this lecture, don't go through all these
steps without saying, okay, let's select a location
to save this project. We're going to say
Save and we say mixing with stock plug-ins for cross, mixing with stock plug-ins, F, l, cos, that's our project. Let's switch it from
FL Studio song file to zip song file, hit Save. It's loading. Now, I don't want this
lecture to be super Loma. Okay, So the next lecture,
part two of this, where are we importing and
organizing the vocal tracks? See you in the next lecture.
6. Organize Vox Stems: Welcome back. Now it's time to import
the vocal tracks. So we're gonna go
to our playlist, zoom out a little bit. Now we'll go to the vocal stems. Okay, we're just going to drag these and drop to track 14. Do you want to create audio
clips to test your knowledge? Which one are you going to
select and for what reason? Interdigitated edited it. We're going to select
the 4D your tracks, want to create audio
tracks because one to import the files to the playlist at the
very same time, automatically assign those
tracks to single mixer tracks. Now we'll get the
vocals in the mix. We're going to start with
creating a bass track. We're going to say, this is
a vocal boss for the vocals, Let's use a bright color. Because the vocals are
the star of the show. We're going to select yellow. Now, I don't know
color is yellow now. Alright, let's select, let's, let's do all live. I don't like olives, not bright enough for my vocals. Let's select forest green. And he'd us except,
let's hit separator. Right-click, why are
we hitting separator? We click separator here to
create a line, a clear line, but this is a bass track, that track right next to it, separate and now we have
separators in between, as you can see here,
these are tracks. These tracks, it's easy to see. That is the beauty of
organizing your work. Next thing we're going to do, we're going to
select this track, the first track select controls. We hover over this arrow
of the vocal boss, will right-click on it. Route to this track. Only, not a route to this
track because that's going to duplicate the signal is going to send
signal to the master, sends signal to his truck. That's not what we want right? Route to this track only. Boom, beautiful. So here we have the hook, which is the lid track, and
we have the versus the West. How many beautiful. Let's select a gain, control
hold and drag to select. Let's change the color. Let's make it something
lighter than forest green. Again, as soon as the color, I like things to be super
clear when I'm working. Okay, great. These are vocal tracks,
clearly enough. Myself. Let's Control S to save and
save our progress or gain. Now that we're done importing
and organizing our stems, it's a time to do some
balancing because we want to be able to listen to our mix and make some
decent judgments. Take notes and maybe jot down some ideas on how we are
going to approach this mix. In order to do that, clearly, we need to
balance out the mix, pen some of the tracks
left and right, Because right now everything is playing right at the
center of the mixed, so everything's on
top of each other. Okay, So before
adding any plugins or one to adopt this
mindset of mixing. Yes, it seems like a waste
of time because you excited, you just want to
throw in plug-ins, don't fall for that trap. Have a session where you
just organize your project, setup, everything, do balancing, set up your levels, pan things left and right, and make sure that
you can be able to listen to the mix without any effects with Dan
organizing the project. Now, in the next lecture
we're going to start mixing, just playing around
with all feeders. See you in the next lecture.
7. Levels & panning: Hey, welcome back. Now it's time to create
some clarity in the mix. Like I said, we don't
throw in plugins before assessing
the mix and just listening to the
mix well and have an idea and how we're going
to approach this mix. I want to introduce you
to these technique. Let's select this
hook section from nine to 17 real quick, let me show you the tools. This is a snap to grid tool
and that's your Pen tool. That's where you can
throw automation. But let's go back to
the selected tool. We select from nine
to 70 and play. Alright, so from now on
a one-to-two look at pushing down volume and
pushing up volume differently. I'm going to solo
the kick first. We're going to right-click
on it to select it, right-click again to
de-select. Let's Play. When you turn it on the fader, you are pushing that sound back. The more you push it, the less you hear it
because it's far. And then when you
tend the faded up, you are bringing it forward. Again. Let's think about it
while I'm doing this, Okay, Let's play the
kick and push it back, which is turning it down. Push it up. Great. So we're talking about a stereo field right now
in a one-to-two, see, we have two speakers, the left and the right. The distance between
the left and the right is the stereo field to K. When we pan a certain
instrument to the left, we are moving that sound a
bit more to the left speaker. Well, let's say if we
have five instruments playing dead center
without being pained, they are playing in
competent for that space. But when you pan one to the left and pen another
one to the right, now you are creating
space and we are filling up with that theory of fields. Now you have a more
wide designing mix, more interesting mix. Let's introduce this name play. Alright. Alright, I'm not going
to pan this, Ned. Let's introduce the high hats. Alright, As you can see, exported that with
automation for a reason, but I'm going to use
to create an example. Okay, so let's play
and push it to the right. Push it to the left. Now we're moving it. Just with those instruments. The mix is sounding a bit more wide and now
let's reset that. And that is how you utilize pending to create
space in the mix, the mixing process, we are making space for
everyone in the mix. Okay, so we're going to
start with the drum section. Let's turn down everything, select everything tended down. And we're going to introduce
the sounds one-by-one. Let's play. Yes. Alright, great. Minus nine. This is the R&B Hip-Hop trap. So around minus nine
or leave it there. So I'll just mix up these key
play as bringing the snare is bringing more sounds, right? The high heads
around 25 decibels. Sounds good as you
can see over here. Minus 21. Alright, let's
bring other sounds also. Just gonna do this. Okay, this shriek and let's pin it to the left a little bit. The term, Let's put it to
the right a little bit, just 25 per cent as you can see the hint by nearly telling
you why you adjusting. Just 25. Yes. That's bringing the base enable the music bus. Alright, one, depending
the base left to right to the heart of the
track, we don't pay that. Why does this? Let's just turn it
down a little bit. And it downloads bit more. Alright, sounds good to me. Let's pretend the
parents turn them down. Alright. Right there. To know
andy. Sounds good to me. Don't worry about the numbers. Make sure it's just
listening to you again, it's easy to listen to
bring in the pianos. Can it down? Right? Tend to pared down again. Bring in more sounds. No rye, spring, the vocals. You know, you don't
have to be serious about this stage is just telling myself I'm a finance
me write that stuff. Yeah, yeah. We're just
going to turn to the right. Let's do something like 40. Shouting out, I wanted
to compete with my lead vocal shot in college. Myself, almost. Johnny.
Turn it down a little bit. This well, let's
turn it to the left, just 25 shoddy call
actually where I've been working on myself almost. Johnny caught me with myself. So the one way
disabled the loop, shutting down this iPhone. If it's right, that's supposed to be
right next to the drums. Let's move it next to the drums. Change the color. Let's try this one. Alright, great, That's close. Yeah, that's the color. Let's deselect it from it
being sent to this track, we're just going to click
on this arrow selected. Right-click send to
drum bus only route to this track only select
beautiful. Let's play. That. Shoddy colleagues
and myself almost. Johnny caught me
when I made myself a long way with hardly
ever read raster. Band night. Thank you. And never move away
from Baby Abby, I'm the only job. I really don't know
what you got it. Right. But nothing is clipping because there's something we
have to make sure that you watch while you
are mixing will make sure nothing crosses 0 dB, you get 0 dB limit. We don't cross that point when
it comes to digital 0 dB, It's distortionary in the
sound, doesn't sound clear. Attending things down
what we're mixing is very important before
adding any plug-ins, because now we're listening
to a clear tract. Is it to listen to it? Or maybe playing
around minus six dB. Now that's decent. Thus fine. Okay, well now we're
ready to start processing of his sounds and
adding effects. Our project is looking good. Everything is organized. We know where to find things, don't forget to save. We are ready to start doing
the foundation mixing, which is taking care
of the drum section. That's it for this lecture, I will see you in the
foundation building section.
8. Thank You: Hey, I hope you haven't
been following along. Now that we're done with
this section of this class, which is house keeping. We are ready to start applying
effects and everything. So in the next class
will be moving to the foundation mixing phase
is just a made-up term, which is building and mixing
the foundation in this case, that will be the drums making sure that drama hitting right, everything is on point before adding the music and the vocals, I've developed this class in different modules so that
it's easy to digest and follow along because
it can be discouraging sometimes to go through
a full hour course, it feels like it's
just too much work. So in the next section, we're going to
start building and mixing our drum section. I'm excited and I will see
you in the next class.
 Sabelo September, Music Producer, Content, Web Design