Transcripts
1. Introduction: And Hi. My name is Elizabeth, and welcome to my Mixed
Media Space collage class. I'm a professionally trained
artist and art educator, and I've been teaching here
on Skillshare since 2021, sharing a variety of different art techniques and processes, exploring a whole
range of media. I really love working
with mixed media and especially starting
with a collage foundation. So I have several
classes related to this artistic approach that you might
enjoy checking out. You can pop on
over to my profile to see a few of those ones. In this class, we are
going to be making a very fun mixed media collage. So what we're going to
do is we are going to dig through our collage stash, pull out some fantastic papers. I love creating
decorative papers, so I'm going to be using
papers that I have created using various
watercolor and ink techniques. But you are more than welcome
to create new papers for this class project or just use any fun papers that
you want to work with. Then I'm going to lean
into mixed media. So I'm going to work back into my collage with colored pencil, fine liners and really
kind of enhance a lot of what's already going
on with my collage papers. This is a really fun class. It explores some art
processes that maybe we've done together in
some of my other classes, but in a fun, new sort of way. I hope you're going to
join me in class as we explore mixed media
collage, CN class.
2. Class Project: Mm hmm. For our class project, we are going to be creating a mixed media space collage
using decorative papers. And if you want to
make some more papers, you can absolutely
check out the projects and resources section
of class where I've shared some other
classes where I teach you how to create your
own decorative papers. You can absolutely lean into whatever fun collage
papers you have on hand. After we've created our
collage foundation, building up basic shapes, you are going to get out
your drawing materials. You can use color pencils, paint pens, brush pens,
fine liners, crams. I'm going to lean
into color pencils. What other elements could
you add to your collage? So that is the real fun of it. It's just taking the
collage to the next level. With the mixed media
details that you add in. So let's head it over
to the next lesson, and I'll show you the materials that I'm going to be
working with for class. See you there.
3. Materials: Mm. The materials we're going to need for our
mixed media space collage are black paper. This is a card stock, which I highly recommend
using if possible. But otherwise, black construction paper
will work as well. But when we get into the
next lesson and we start working on our start effects
with our splatter paint, you'll find that
construction paper kind of soaks up the
paint a little bit. So you just might need
to do a couple of different layers of
the splattering. But I demonstrate
that in my lesson, too, because I had the
same thing happen. So black card stock paper or construction
paper works great. Then we're going to
want to have some white acrylic paint and a small we are going
to be watering down our acrylic paint so it's a
little looser to work with. If your acrylic paint is
already pretty loose, then maybe do a test run with it to see how much water
you need to add. You could absolutely play
with other colors too and have more splatters of
different other colors. I like to lean into color
in my collage papers and leave the stars
white because I can always go back in with
colored pencil, too. To apply our paint, we're going to be using
an old toothbrush. I teach a lot of classes
in the community, so I love doing splatter effects when it works out
for the project. So I have a lot of just really
inexpensive toothbrushes that I've bought
for art purposes. But you can also just use an
extra toothbrush that you get at the dentist if maybe
you have more than you need. Then you're also going to
want to have a cloth on hand. The splattering effect
gets pretty messy, so this is a way to dab up any larger splatters than
maybe what you want to have, but also to wipe down your
surface when you're done. You can also put a piece of scrap paper underneath it, too. That'll help a little bit, but the cloth is kind of a must have for when you're doing the splatter painting
part of our project. Then you're going
to want to have a bunch of decorative papers. These are all ones
that I've made myself, and this project is a great one to use some
of those smaller scraps that maybe you've hung
onto and you just kind of felt like someday you'll figure
out what to do with them. You can rub a
bigger scraps, too, but we're going to be cutting circles out for our planets. So decorative papers,
whether you make them or you buy them
or you find them, and then you're going to
want to have scissors for cutting out the circles, and then a glue stick
for gluing them down. Now, when I do
projects like this, I like to also have a piece
of copy paper nearby, and that's kind of
my gluing zone, and then I can apply it to my painting without getting
glue all over my art table. If you're getting
really sticky fingers or you just don't want
to get sticky fingers, a second wet cloth
and a dry cloth, help keep those sticky fingers cleaned up and then dried off. Especially when you're
gluing the smaller planets is a really good idea. After we're done collaging, then we're going to work
back in and really add some fun drawn elements
to our mixed media collage. I like to start with
colored pencil, I've got a couple of
different colors here. I'm really going to lean into the colors in the papers that
I end up collaging with. But then I'm also
going to want to have a white colored pencil too. It's really fun to add a dusting
of white to the stars in the galaxy effect that we create with the acrylic
paint once it's dry. Also go back in
with a fine liner with brush pens,
with paint pens. Any drawing materials that you have on hand will
work great for this. But I think I'm going to lean
into the splatter painting, the collaging, and
colored pencils. I have a lot of stuff
already going on. These papers are pretty
loaded with textures. I don't necessarily want to go too crazy in the
drawing elements. I just want the
colored pencil to just beef up some areas and
help unify the piece. That's really a finishing
touch piece for. See what I mean when we get
to our second to last lesson. So these are the materials
we need for class. Go ahead and collect those, and then I'll meet you
in the next lesson where we're going
to start creating our splatter paint Sra
galaxies. See you soon.
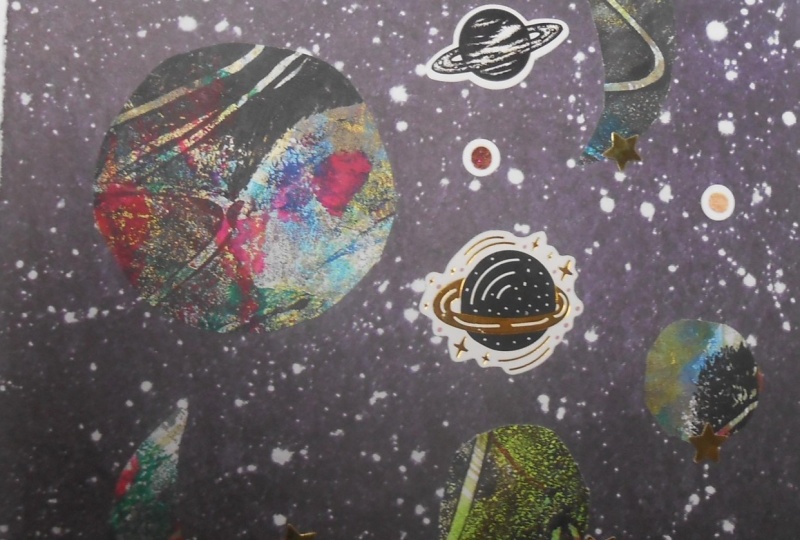
4. Creating Stars: So the first step I
like to do for creating space scenes is to start
speckling my paper. In this video, I'm
showing you how you can do it with water down
white acrylic paint. You can also draw into your
paper with colored pencil, with paint pens, gel pens. There's a lot of
different ways to do it, but it's really an easy approach to water down some acrylic
paint and to get out an old toothbrush and then load that brush up with
the waterdwn paint. And then you just run your
thumb along the edge of it. It does give you more of
a spray paint effect, but you can also occasionally, if there's too much paint on the paint brush or
on the toothbrush, you're going to get
these big kind of globs. And that's when you'll
see me kind of go in with my cloth and just kind
of dab up some of that. But I found that
those little Oss are really fantastic
elements because if we think about how space looks in some of the amazing photography that
we now have of outer space. We know that stars and galaxies and space
goes on and on and on. So when we dab up some of it, it helps create more depth by creating more value
ranges in our splatters. You also want the
different size variation. So you're going to see me in this video kind of
repeatedly going back to the acrylic paint and doing some of
the spray technique, and then I'm going to
go in with my cloth and kind of dab up some
of the accidents, but kind of lean into those and do a little bit of
stamping with some of the dabbed up to create some
sort of galaxy elements. I know that I'm going to be
collaging on top of this. So anything that
becomes a little much for this stage
of the project, I can absolutely cover that with different planets and space
elements as I go along. This is a messy part
of the project. You will get paint
on your hands. You can absolutely use
gloves if you prefer. Every now and then, I kind of wipe up my area to try to keep from getting paint
on the backside of my paper as my
paper might shift. I can also just put a big sheet of scrap paper
down and then throw that away. But this is the first
step in creating our galaxy space collages. Let's head it over to our
next lesson to create our planets. I and
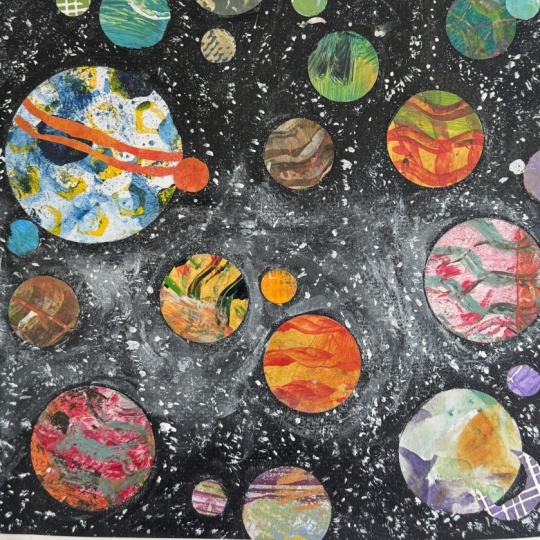
5. Collaging Planets: While we're waiting for
our lettered stars to dry, we're going to dig through
our collage papers. So this box is a mix of
papers that I've painted, mostly using watercolor
ink techniques. Some of them are acrylic paint. I'm really just kind of leaning
into fun bright colors. I'm cutting out a
ton of circles in various sizes because
I want to use the play of different scales of circles to create different
illusions of depth. So knowing that space
goes on and on and on, I really want to play
with size in this way, and it's going to be
a really easy way to create that illusion of
depth with various sizes. But we also know
that there are very, very large planets and there are much smaller planets, too. So I'm playing off the idea of what we know about the
planets in our solar system, as well as what we know about
composition to variety, adding interest, also
changing the scale, adding an illusion of depth through overlap and
size variation. It is a little tedious to
cut out so many circles, but it's a fantastic use of
really small pieces of paper. I have tons of scraps
that I've saved when I've used my collage papers
for bigger projects. So this is kind of
a great project to use up some of
those smaller bits. After you get a bunch
of various circles cut out and you probably
won't use them all, you start to play around with how do you want
to position them. This is a really fun
part of the project. As you really get to kind
of see what works well, you're playing out the idea of what size circles to
put different places, how much of the splattered
black do you let show through. And what colors do
you put next to each other to really add
some visual dynamic. We're going to work back into our planet with different
drying material. It's really easy to
adjust the color, pop up different things, and really play further into
the layering and the depth. Starting off with
colors that kind of go well together or play off each other in
a nice contrast is a really great way
to start this project. So now using my scrap
paper as my gluing area, I'm going to load up each of my circles with lots of glue. I'm working with some
pretty thick papers here, watercolor paper,
mixed media paper. Those are all very thick papers, and they're going to
need a decent amount of glue and some pressure
to get them to stick. Because I've laid
out my circles, I can't really flip my paper over and burnish the backside, like I typically would do with a mixed media collage
at the collaging stage. So I'm really relying on clean fingers to
push these down. To help maintain clean fingers, you can have a damp cloth
off to the side to kind of clean up any sticky fingers that you might develop
along the way, especially when you're gluing
in the smaller planets. And then you always want
to have a dry cloth, too, because you don't really
want to be dealing with collage papers with
sticky fingers. When you get to the point, most of the pieces are glued down, you can absolutely flip it over and give
it a good burnish. You can also take a smaller
scrap of coffee paper and put that over the top of
your collage pieces and burnish it that way, too. That's a great thing to do with your glued up paper
for the next time. So it's a great way
to kind of keep using your papers for a while until they've finished
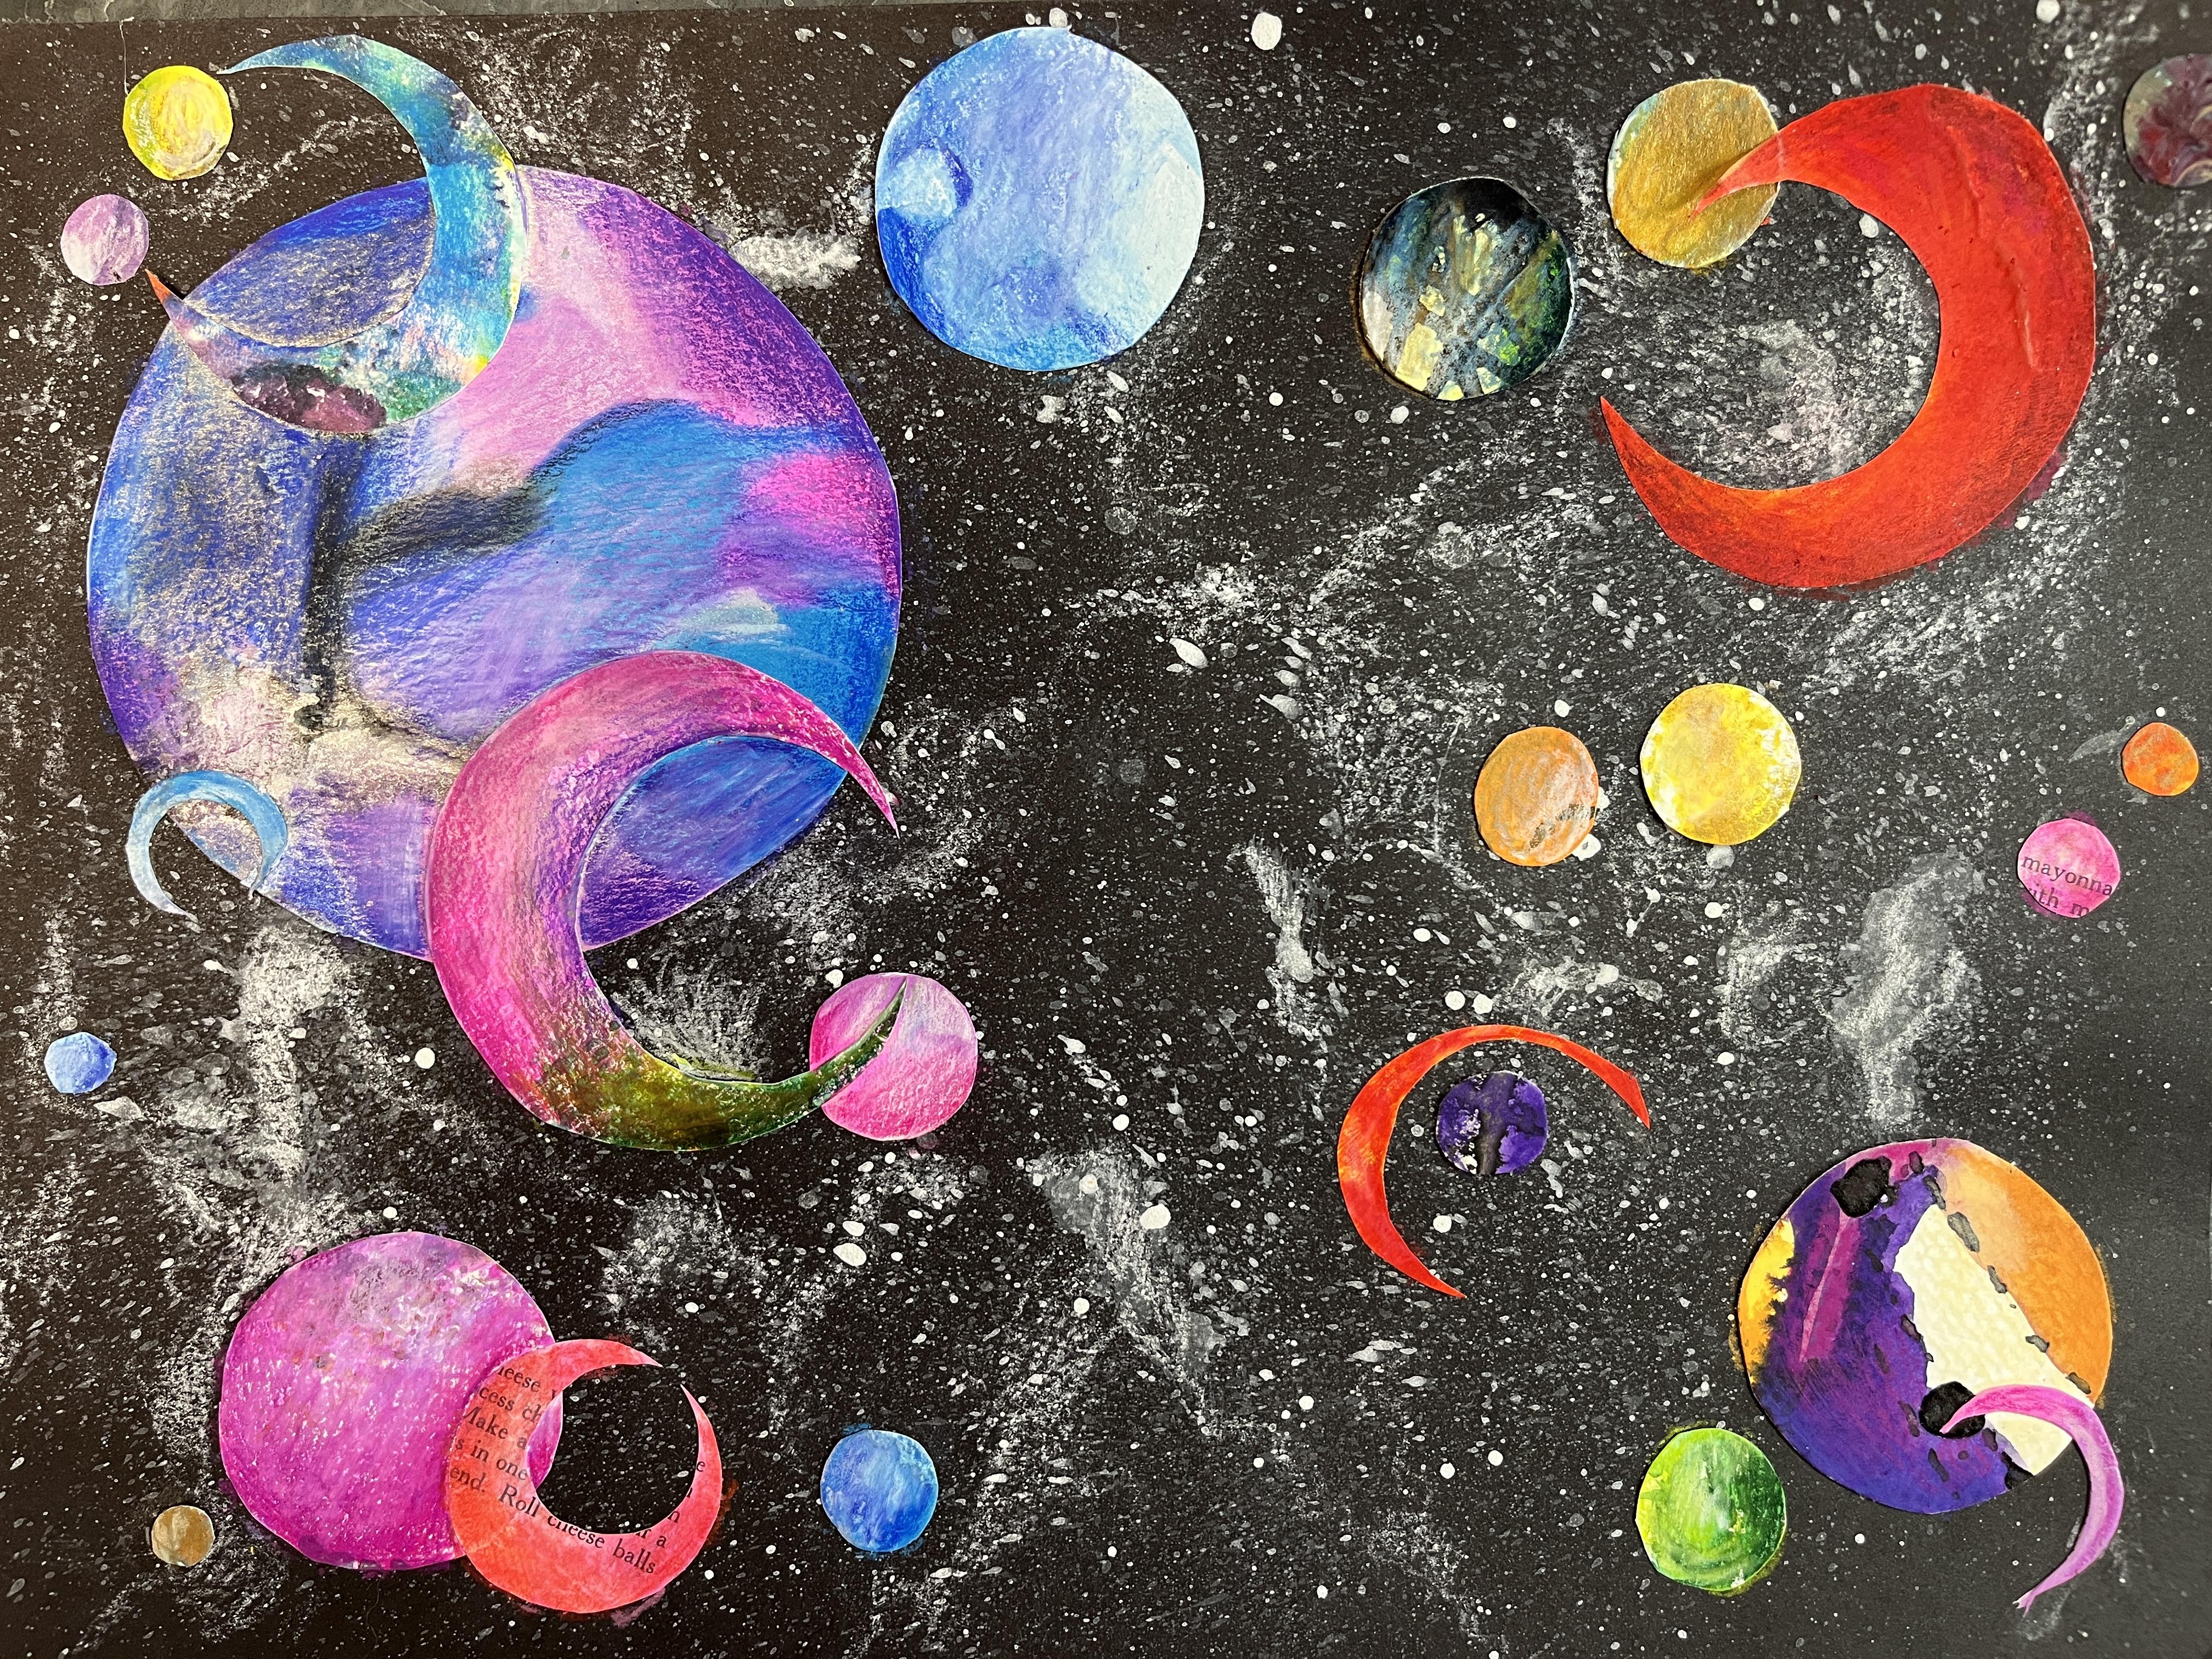
serving their purpose. To get the crescent shapes, I was cutting circles
out of larger circles, and it kind of
happened on accident. I wasn't intending
to go for crescents, but I really love that
play of the roundness, but with the peekaboo hole and just the new aspect of layering that it
allowed in the piece. So then I started playing
with thicker crescents and thinner crescents and intentionally cutting
crescents out. And then also playing
with which way are the crescents facing?
They're not moons. They're just kind of interesting
crescent space stuff. So you can kind of play with more shapes if you want to than
just your circles, and the crescents
are a fantastic way to do it because you
can kind of have the tiny circles through
the peekaboo hole, they can overlap, and you can vary the sizes of
the crescents, as well. You could also play
into this a lot more. I'm leaning into a very
colorful, highly stylized, illustrative vibe that isn't
necessarily realistic, but also isn't cartoon. You could absolutely have
a ton of fun with this and add in some flying saucers, some spaceships, have some
cute little aliens in there. It's really fun project. So now let's head over to
the next lesson to add in some details with our
drawing materials. I'll see you there.
6. Adding Mixed Media Details: Oh. Now that I've done the splatter effect
to kind of start to create the space elements
between my different planets, I'm going to really
start to enhance that. So I wanted to kind of
create sort of that, like, misty quality that you can
sometimes see in photos of space by going back into my piece with
white colored pencil. So anywhere where I
kind of have, like, a collection of splattered
paint to create my stars, I'm kind of adding,
like, a misty fade out a little bit of it. It's pretty quick,
it's pretty sketchy. There's really, you know,
anything can go for this. You could even play with color. I just wanted to have
a little bit more to create a little
bit more sense of depth because I have
the black background. I've got the ladder of paint, I've got all the
overlapping elements of my different planets. I wanted to have somebody
that sort of unified it. I often find in mixed media collage that those drawing elements
are what that is. So once I have this misty
quality to my space, I then wanted to
use colored pencil to add more depth and
dimension to my planets. This is a really subtle effect, and it's absolutely a
step that you can skip. But I find that just putting a little bit of value gradient, a little bit of
darkness fading out really kind of helps give
them just enough subtle pop, especially where there's
overlapping elements, and then we have the
different size variations between the different
scales of the planet. It just gives it a
little something extra. You can play with
whatever colors are already in the paper
that you collage down. It's a great way
to kind of pop in some brighter colors to
intensify some of your darks, and it just really helps
to create some unity. You can also do this as just a really fun
mixed media thing, or you could play with adding some more depth and dimension to your crescents or your spheres, however
you want to do it. I just kind of jump all over the place when I do
this and kind of keep working towards
getting a sense of resolution in the piece
that I'm working on. But this is usually my last step in a mixed media collage
piece like this, regardless of the
subject matter, because it just
tightens everything up, adds a little bit of Christmas, adds some drama to it, especially if I have some
collage papers that are a little bit more
on the muted side or just it needs
some more something. And value is usually it. Value and hue intensity. So a color intensity, and this is where I get that. So then no matter what
variation of papers I've used, I can use value and color boldness as
a unifying factor to kind of bring it all home
for the end of a piece. And you can get really
specific with this or you can just kind
of have a couple spots where you drop it in. I did have a couple other
areas where I wanted to create a little bit more dimension
within the planet itself, especially that really
big one on the top left. So I really kind of the
one I'm working on now, I'm kind of beefing up
some different sections and really trying to give it a little bit more of
the dimension that we would see if we were looking
at planets from space. You can also think of a great
example being looking at photos of the moon and kind
of it's not a smooth surface. It's not a perfect
sphere. It's got valleys, it's got mountains,
there's craters. You know, kind of this gives
a little bit of essence of that to your collage circles. You could also do this with any other medium you wanted to. I've done this before
with brush pens. It's oftentimes brush
pens and colored pencil. I love to use those two
together. Crayon would work too. Whatever color
elements you have, you could even watercolor
back into this. You could use acrylic
paint back into it. But the drawing
element is really nice because it
keeps the piece as a dry artwork and gives me a little bit more flexibility of using different
colors together. And it helps kind of finish
it off pretty quick. So keep adding different details and elements
that you want to. You could also go back in
with some black fine liner or color fine liner to add a little bit more illustrative quality to it if you wanted to. I decided not to do that with this piece
because I wanted to leave it a little
bit more light. And, you know, I
didn't want to lean into, you know, it
being a drawing. I wanted it to feel
a little bit more, like a mixed media
collage representation of what space in some other wild solar
system might look like. So whenever you get to a
point where you are happy and you feel like your picture
feels done, then you're done. This is how my turned out.
I absolutely love it. I think it is just so fun. It's full of lots
of playful color, just like I like my mixed
media pieces to be. So let's head it over
to the final lesson to wrap up the class.
See you there.
7. Final Thoughts: Thank you so much for joining me in our mixed media
collage class, and I cannot wait to
see what you created. So I really hope
you'll hop on over to the Projects and
Resources section of class and upload some photos of what you've created
to the student gallery. If you want to take some time to share
some feedback about the class and share in a review how you think
the class turned out, did you enjoy the process? What sort of different things
did you like about it? What things could be improved? I would love to stay connected
if we aren't already. So don't forget to
give me a follow on Skillshare to get notified
about future classes. You over on YouTube, if you want some little bonus stuff and check out things
on Instagram. I'm sure all things
are over there. Thank you so much
for being in class, and I hope to see you next time.
 Elisabeth Wellfare, Artist, Art Educator