Transcripts
1. Mixed Media Poinsettia Vignette Introduction: Hey there, I'm Cheryl. I'll be running you through this class today. Thank you so much for joining me for this mixed media point set of vignette class. In this class we're going to be making this version of the points that had been yet. But I have also created one with a silver and blue color scheme. We also have one with a cream and gold color scheme. So you can choose which version of this and you're going to meet all of the supplies used for each version is listed in the supply list that's included with the class. The supply list I've linked to where you can find all the supplies that we're going to be using to create our point set of vignettes is going to make it so much easier for you to source your supplies and sometimes see some of the supplies that we're using. To see if you happen to have something that's similar. The class is set up in different segments. So before we actually create the whole vignette, we're going to make all the little bits and pieces. So when we go to assemble the whole thing, where you've got all the components ready, assembled, ready to go, and it's going to make it quick and easy. This vignette is perfect for if you want some holiday decor or to give us a gift to your family and friends. And having said all that, let's go make a point set of vignette.
2. Wood Panel Basecoat: All right, So this is the prototypes for what we will be making in this class. So these are two different versions. We're going to do a bit of a combination between the two. We're gonna do a black base with some gold accents. We're gonna do the gold candles. But we're gonna do some points. That is with the technique that I did, these blue ones and it's a distressed background techniques. So we're going to be creating our card stock in a red color from white card stock will do that further on in the class. For right now, what we need to do first is we need to base coat our wood panel black. So I am doing a eight by 10 wood panel here. And I'm going to base coat it and we need to do both at the back and the front. I like when my projects look complete from the back and the front. So first thing I'm going to do is coat the back and the sides and then I'm going to let it dry and then we'll do the front. So I've just got some black paint here. The black paint that I'm using is quite pigmented, so it really will only need one coat. And as you really quite thick, so I'm just adding some water to it to help it spread a little bit better. I think I'm going to just do the sides wall or before I do the back of it so that those can be drawing while I'm doing the back. And you can paint your base coat whatever color you want. I just like the black background and I think the red points, theta's and gold candles will really be striking. With a black background. I could even do red point says with a silver and silver accents, but I really like reading gold together. And if you do use a different paint than what I'm using, you may need to use a couple of coats just to get it fully covered. Just be prepared for that. But you want all those next and crannies filled in completely. America and the last side. And depending on the type of panel you get, you may need to do some sanding ahead of time. I know one of the ones that I did for my prototype, the panel itself is quite rough. So there's a bit of a texture to it. I liked it because I wanted it to look a little bit, little bit rough and worn. But if you want it to be completely smooth, you're going to want to make sure you send it ahead of time so that you have a nice smooth surface to work with a little bit more black paint here. And go, Oh, just the deck here. Like I said, this paint here is really quite pigmented. It's, and it's really quite thick. So I need to end up adding a lot of water to make it flow a little bit better. So I don't end up having blobs of paint all over my surface here, which is why I keep the water. Alright, so I'm going to let this completely dry. And through the magic of video, I'll see you in a second and we'll paint the front. Alright, so our back is dry. Now is do the front part here is that you push. And this is the part that you're going to see. So this is the part that is much more important to have it done in nicely. So I'm doing that outside first and then I will do the inside. I'm inside, I'm going to do the sides first. Just chopping it into the edges and then spreading. Some of this is going to be covered with the point set and the candles and stuff, but we definitely want to make sure we still get a nice clean look to the background before we add those elements. Black has gotten a little bit too much. So that's helps me make to it or if it gets thinned out too much, then you're going to see a little bit more of the width grain from the web panel. And you may want that, that's totally fine. But then you want to make sure that's consistent throughout your whole project. Because if you see some parts of it and not in others, it's going to look a little bit odd. It's going to look incomplete. If you want to have the wood showing, then maybe use a stain or something so that it is consistent throughout the whole project. I want to have a nice black base to it. I don't want to be seen the width through it. So I want to make sure that my block is opaque enough. All right, so I'm going to let that dry in the next video, we're going to be adding some of the gold accents to the frame. We definitely want to be doing that before we start adding anything else to the inside of it. So I'm going to let this dry completely and I will see you in the next video where we'll start, we'll start adding some gold.
3. Adding Gold Accents to the Wood Panel: All right, So now we're going to add some gold accents to the frame. And this is just a tiny little bit. So what we're gonna do is we're going to dry brush and little tiny bit of gold. And then we're going to use an embossing pad and some embossing powder and just get some of the darker gold accents with embossing powder because it creates a bit of a different texture than just the paint. So it doesn't really matter what type of brush you uses. Use for this as long as it is a flat brush and it has a dry brush. So we want very, very little paint on our brush. We want to be just getting really subtle gold accents. So go with a light hand first. You can always add more. But I mean, I guess technically you could take this away if you've got too much gold on it, you could always go and take some of the black and cover up your gold. But it's always easier to go light handed to begin with and then add more if you decide that you want a little bit of extra and you'll see that I'm not putting on everything. I don't want it to be completely covered in gold. I am adding just subtle little bits, if you prefer and want to have it completely covered with gold. Absolutely, It's your project. You can absolutely do that. I just want it subtle. Gold is not typically my favorite metallic, mainly because often it has a yellow tone to it and yellow is my least favorite color. So I don't mind a little bit at Christmas time, but I want it to be just bits and I want it to be subtle. So this isn't going to take very long for it to dry because I used to very little paint on my brush. But I'm going to let it dry completely and I'm going to go clean up my brush in mind, once you're gold has completely dry. And what I'm doing now is I'm taking a watermark ink pad, putting it on some of the areas where I have the gold, where I want the gold color to be darker. And I'm going to emboss that gold embossing powder, and I just realized that I didn't plug it in. So here we go. So you definitely want to be using a heat gun for this that is going to melt that powder. And you can see that it just has a bit of a different look to it than just the gold paint. It adds some texture to the frame. And again, I'm not putting this everywhere. I'm just putting it in places now if you get something like that where you get gotten too much embossing powder, it seems to like to stick to the word no matter whether it's dry or not. Just take a stiff brush, take the excess off, and tap it off. So here you go. I don't know if you can see that texture, but I just quite like how it adds a bit of extra texture to it that the paint doesn't paint as the gold color, but it doesn't really have any texture to it was pretty flat. Then once your heat gun has warmed up, it's going to take a lot less time embossing. So you can kinda do a couple of sections at a time then. And just remember if there's excess that you don't want on there to take it off before you have OS at once it's in Boston melted. You can't take the excess embossing powder off. With some of this back into our container. Anything that goes onto your scrap for here is not wasted, so don't worry about that. It's going right back into the container. Just a place for us to catch it all. Where did I make that? There's my pen there and then put a little bit there, a little bit on this corner and a little bit there. Just because of the shape of the pad, it tends to have squared edges. So you definitely want to get that rush that part off because I personally like it to have a bit softer edges than that. There we go. Now we're all ready for our next step. If you're the type of person that loves mixed metals, you can always add some different metallics on here as well. That would look, certainly look really, really cool. But I, for this one, I'm just sticking with the gold as the metallic accent to it. Alright, so that is done for right now. We're going to set it aside and I'll see you in the next video. We're going to start making our fake candles.
4. Making Faux Candles: All right, so our next step here is we're going to be making these fake candles. So they're made out of wooden dowels and glue for a hot glue gun. And then just chord that I have painted black. So the very first step is painting your core black. Or if you happen to get some that's black, you can use that as well. For the amount that is needed. I decided to just take some yarn that I had at home and paint it black. I am working on a non porous surface here. This is a great one for when we're doing our distress background for creating the paper for the point set is the other thing. It's nice for his paint because once this, once I'm done with this, it's easy to wipe off if it happens to dry is also still very easy to wipe off. So I'm gonna leave my paintbrush there for a moment, let that dry. Once it's completely dry, it goes nice and stiff. You only need probably about an inch. You need about a half an inch per candle, but it's much easier to do a bunch of it at one time. The next thing I'm going to do is I'm going to take my Dell and I'm going to paint it gold. So I've got some dowels here that are four inches long, and I've got some that are six inches long. There are about a quarter inch in diameter. And then you'll notice that I have my little handles in stages here. They're all pressed into a piece of floral or Oasis. When it comes time to creating our vignette and putting everything in there, I put a little tiny piece of the Oasis because I found that it helped. Give a little bit of dimension to it and give it gave me a surface to glue everything too. So I paint my dels, put them in the Oasis to dry and you may have noticed I didn't paint the bottom. It's going to go behind the flowers anyways, into the oasis. So you're not going to see that it's not painted. I'm going to put this down for now. I'll need it in a second. So the very first step after you've got your surface painted 1 second, I got to fix a dry one here. Wanna make sure that your glucagon is nice and hot. You're gonna go to the top of it. And you're going to put some glue going down the dowel as well as on top of the dough. I need another glue stick here. One second. And triggers not work in us. I can hear airway go. So definitely make sure you're not putting your fingers in the hot glue because it is hot. And also keep in mind that while it cools, it's still going to drizzle down. So put it down, leave the glue a little bit higher than what you want it to go to. Once it's completely dry, we are going to add a second layer of flu. But before we do that, I want to have a little piece of width ready here. All right, so I've got my second one here. You could just do your blue in one layer. But I like the look of having layered drips on mine. So I like to do it in two different layers here. And I'm really quite liberal with the glue because I loved the Oozie wax look. While that is still hot, I'm going to put my wick rate in the top. And it doesn't need to be completely straight. It's fine if it goes a little bit to the side or what not because regular candles do that. So if you wanted, you could leave your glue like that. I want to paint my glue gold. So I'm just taking my brush and I'm not doing it super carefully. If I see a little bit of wax or the glue behind there, I'm totally fine with that. I kinda like the different look of it, as well as the fact that I highly doubt someone is looking at your piece with that critical of an eye that they're going to have an issue with it. Sometimes this one's not too bad. Sometimes I feel that the goal hasn't completely covered my del enough and I typically will go and add a second coat to that gold. Just so that it's more just covered the delve a little bit more. I'm not seeing the wood. And then I'm going to set that in here to dry. And typically you get some golden my fingers, that's totally fine. Once it's completely dry. This is how it looks. So you'll see, I do see some bits of gold are sort of bits of the glue through there. I kinda like the different look of the gold not being completely opaque, of it, being a little bit of wax there because if you notice some metallic Candles, there's clear wax, so you're not going to get a completely gold drip anyways. So I have two candles here. One is the four inches, one is the six inches. So I'm going to be able to have two different heights on my project. If you want, you can have them the same. I just think they look better if there's a couple different heights. I just think it's more visually pleasing. So you're going to put that in your oasis and let them completely dry before we're going to use them. We're going to have this aside and ready for when we are adding them to our project. The next step is we are going to create the red distress background for our pointer. This will see you in the next video.
5. Poinsettia: Creating the Distress Background: All right, so now we're going to create our distress background. And I am using a piece of 8.5 by 11 mixed media card stock. You need to use card stock that can handle some wetness because for this it is going to get wet and if you use regular card stock, it will not react in the same way. By amusing festive barriers, candy apple and age mahogany, mahogany in both the regular distress as well as the oxide. So I'm gonna take each one of them and press them down in a couple of places. Now, the reason I am using both the regular distress as well as the oxide is because I like the look of the two of them together. If you just have one type of ink pad, you can absolutely go ahead and just use what you have. I am using the same map that I used for the well, pretty much the background of all of it. I like it because it's nice and easy to clean up as well as the fact that when I'm doing these distress background, see how all the ink kinda goes into these little dots. I like how it does that. So for the first layer, I'm just going to try to get my entire sheet and hovered with ink. Now, typically for distress backgrounds, you wouldn't put it in this many times without or before using your heat gun. But I am going to 1 second. I've got to get this one plugged in now. So the heat gun that I'm using for this one is just a heat tool. It's much gentler than a regular heat gun for embossing. You'll notice it's a lot quieter as well. So what I'm trying to do is I'm trying to dry my surface. It does not need to be a 100 percent dry. 80 and 90 percent is good. You just want it mostly dry because what I'm going to do after it dries, I'm going to tap it into some of these dots here. And I want to make sure that I'm not going to just create a bigger puddle. So I just tried to move my mat away so that I can dry this off of those. I don't want to be drawing those or playing with those. So you could use just solid red card stock for this if you wanted. I wanted to do a distress background because I like the model look and I think it's going to look a lot more interesting and have a lot more texture than just plain flat red card stock. Alright, so this is mostly dried. This is completely wet here and this is completely wet here for right now, that's okay. If it gets in my way, I will make sure that it's dried. Once this is completely covered, we're going to be doing die cutting anyways. So there's a lot of this that we're not going to see. We're going to be die cutting our point set is out of this piece here. And then we're also going to, once the dicots are completely done, we're just going to ink the centers of the point set is to make sure that their bit of a darker shade. You can see my card stock is curling even though it is meant for moisture and that is totally fine. I find is the ink gets a little bit more concentrated. It takes a little bit longer to draw each time as well. So I typically do this two to three times depending on coverage. If I want it more covered, I'll do it more than that. If I'm liking the spots and the effect that I'm getting and we'll leave it at that. I'm just going to flatten this a little bit. And because this is just a background that's being dicot, I'm not really too worried about it being completely perfect. In any way, shape, or form. I just like the different dots. I like the different colors blending to each other. I think it just looks a little bit more interesting. Now, like I said, I have a heat tool here that's a lot more gentle and it's intensive, it is too dry things. You could use this heat gun for embossing, embossing powder as well. It's just because it's a gentler heat, it's going to take a little bit longer to do that embossing, but it absolutely will work. And for the amount of embossing that we're doing in this particular project. I would definitely just do it with the same heat gun. I don't think you necessarily need separate one. Just do that embossing. Okay. My paper is a little bit curled so it's fighting back a bit, but that's okay. So I'm going to heat this last bit. Before I do that, I'm going to add a little bit more of the dots in that corner there because it kind of missed that area so they look a little bit plane there. So once this is completely dry, I like I said, I'm going to do some dye cutting for the point set is we're going to end up with more points out is that we actually need for our project, but that's okay because then you can pick and choose which ones you prefer, which ones you'd like a little bit better. And I always prefer to have extra dye cuts them, run out. And you could use different colors than the ones that I use, the red that I used. The one thing though, is I'm using distress pads. They are intended to create this look and to have this effect into reacts with water. Other ink pads are not necessarily meant to do that same thing. So you may have other die in cats, but they may not get the same reaction as these. Alright, so this is going to be definitely going to be my last layer. So I'm going to partially dry it. I'm not going to even completely dry it just because it's going to be my last layer, so I'm going to let it air dry. We definitely don't want to be doing any dye cutting wall. It's partially wet, so I'm going to let the rest of that air dry. So this is another version of these that I made and I ended up not using this. I was going to was going to use these for this one here, but they ended up turning out a little bit too Peachy for my liking. Which I think would look really, really pretty with some rose gold accents, but they didn't really suit gold. I thought anyways. So I have those aside. I'm going to use them for a different project. These are the blue ones that I did here and I'll put on the supply list the different colors that I used for this. So if you wanted to create the blue and silver luck, you absolutely could. The process is exactly the same as what I'm showing you here. Just different colors. All right. So this is mostly dry, but I do have some wet drips there. I am going to set this aside so that it comes completely dry. And then the next step to that is I'm going to cut this in half just because this entire sheet won't go into my die cutting machine. And then I'm going to die cut. My point set is out of here. We'll see you in the next video.
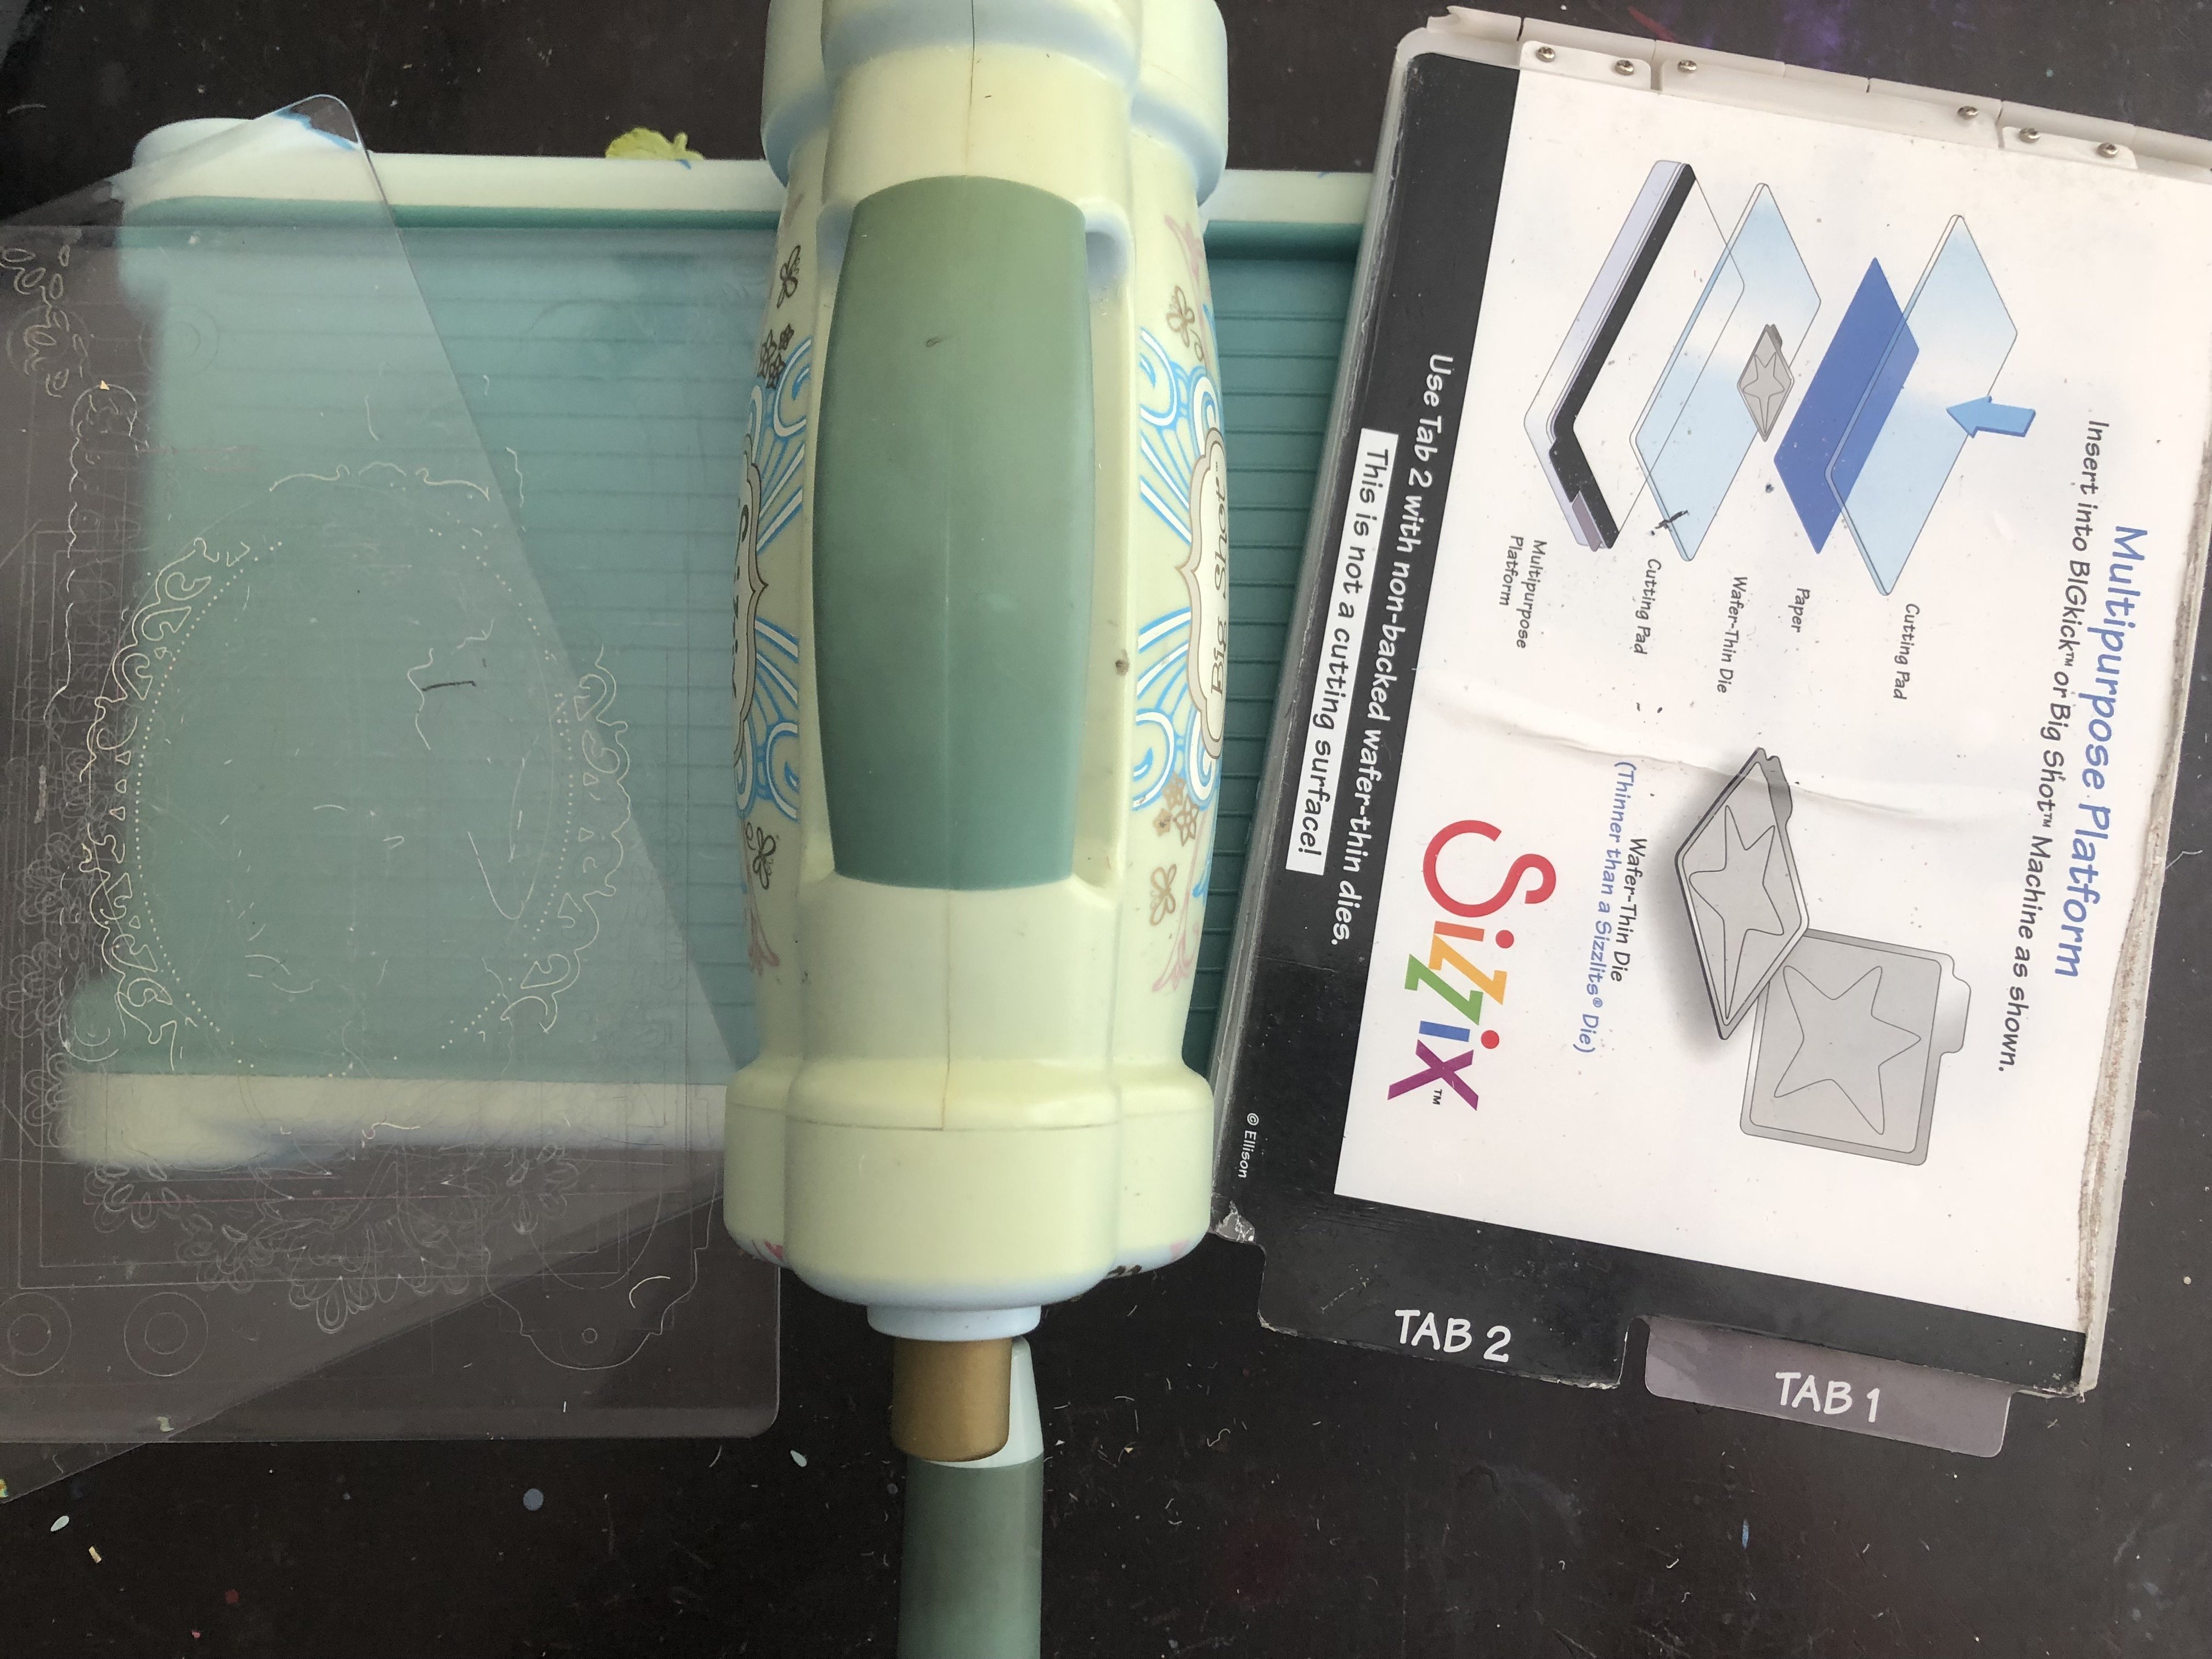
6. Die Cutting the Poinsettias: All right, so I'm ready to do the die casting. This is the particular dataset that I am using. For this one, you could use any point set, a dicot that you have. This particular set comes with two different ones. I'm using the solid point Santa. When it came to that. This one here. This is what it does here. So I did put it on this one. Here, my cream points data. Because when I did it like this particular look, I wanted to do a point, set it in just cream, but I thought it looked a little bit plane. So I added the, the version of the points that are that has the cutouts in it on top just to give it a little bit of extra possess. But for the distress backgrounds, I am going to just use the plain one. So I've already cut my piece of card stock and half mainly because I can't fit the card stock into the dicot machine in this way here. So I am using a big shot machine. You can use whatever die cutting machine you like for your die cutting. If you have a subtle bug or spell binders machine or whatever, you can use, whichever one. You could even use a cricket machine and die cut points that are shapes that with absolutely work for what we're doing. Should have grabbed my diet is right there. Alright, so I am going to duplicate this entire, these both, both of these entire sheets of paper. I'm trying to put them as close to each other as possible to get as many as possible. And like I said before, you're going to end up with more points that a shapes then you actually need. But that's totally fine. I'd rather have more than last. That way if you decide you want to put more points that is in your project than I have in mind. You absolutely can do that. There we go. That's where our shapes look like. We're going to be layering them on top of each other just to give it a little bit more fullness. So I'm gonna go, I'm going to die cut my two sheets of paper here because you don't sit, need to sit here and watch me do that. And I will be back when I am completely done.
7. Poinsettia Die Cut Inking & Assembly: All right, so all of my point set is our die cut. So now I'm going to take age mahogany is the darkest of the reds that I've used. And I'm just taking a blending brush. And I am adding a little bit to the center of each flower just to make it a little bit darker in the center. And this is the perfect time if you happen to have one like this that didn't completely get covered when you did the distress background. Use your blending brush. And that just takes this darkness out of the white. So it's not quite so noticeable. Or if you wanted the difference, you can always leave it there, but I usually take the starkness out of it. The other thing if while you were doing your die cutting, you happen to cut end of a pedal off. Just keep it. This particular one here, there's a pedal cut off there, but once the flowers together, you can't tell tell I showed you, you probably didn't even notice it there. So once you've got all your centers inked, what I like to do next is take my finger, I hope the center of the flower. And I roll the petals around. My fingers, just give it a little bit of curve, peaks the petals a little bit more realistic. To me, this looks much more interesting than a completely flat flower. Especially when you're doing something like this that has a lot of dimension, a lot of curves to it. You want the flowers to look a little bit more natural. And even though we're doing them with paper and it's not exactly perfectly natural. It just looks a little bit nicer when your petals are bent. When you do that to all of these. Now, I've got my and heating a break now and I'm going to use them or the heat gun to glue two flowers together. This I thought founders too much openness right behind the petal. So by gluing two of them together, it's going to make a fuller flower and it's going to close up those holes. So I take my glue gun, just added drop to the back and then see how I have a pedal that's got two joined on each one. I'm kinda put them on opposite sides. And I twist it a little bit just to get some of the openness between the petals, just to close that all of these flowers. Now for both of the final designs that I showed you, I used seven full flowers and I've got 1, 2, 3, 4, 5, 6, 7, 8, 9. I'll have ten here from the just die cutting that one sheet of paper. So I definitely have extras, which is perfect. Again, I love having extras. You could always use your extra bits to make a card or something else. And never find those things go to waste. And that way too, when you're putting together, if you don't particularly like a certain hue of red, you can swap out the ones that you like after those are all glued together. And because I'm using a glue gun, it cools down super, super quick. I have some gold Nouveau drops here, but I'm just putting in the center and I'm doing it kind of I'm not making it completely smooth. I want it to have a little bit of texture and then all of that flower. All right, so they are all done. I am going to set them aside to completely dry so that my centers of my flowers are all dry when I go to put my piece together. That's what they would like their we'll see you in the next video where we make some foliage.
8. Foliage: Creating the Distress Background: All right, So now we're gonna do our green backgrounds for all our foliage. So I again have three different shades of green, both in the distress and the oxide. I've got old paper bundled stage and peel paint exactly the same colors in the two different inks. Old paper, even though this cover looks brown, it's got a green tone to it. So for this, it's just a nice light, green. The only difference between this one and the red background is I only need a half of a 8.5 by 11 sheet. Once again, it is the mixed media paper. You need to make sure that it is a paper that can handle the moisture and the water. And I'm going to smush each one of these in different sections. And again, if you didn't have both the oxides and the regular distress, you could do it with either or. You don't necessarily have to have both. I just liked the look of the two of them together. Alright, so that one covered the background a lot better. Let's dry it off. And once again, this is going to be dicot as well. So it doesn't need to be a perfect background because the piece of paper is smaller though it's going to be a lot easier to completely cover the whole background so that I won't have white spots in it. But if there happens to be any white spots, I'm sure this will be gone by the end of inking this background. But if there's any, we are going to do a little bit of inking because I like the center of my dicots to be a little bit darker, just give it a little bit more dimension. And again, this doesn't have to be a 100 percent dry 80, 90% is good. And again, I'm dipping it into those dots two or three times. If you want to, if you feel it needs more, wanna do it for 56 times, you absolutely can. It's completely your choice because we're using the same colors from the color family. You don't, you're not going to get mud. It's just going to make it more textured looking. The one thing to make sure though, between working from your red and your green, you want to make sure that your surface is completely cleaned. Because if you didn't already know, red and green together make brown. And we don't want our foliage brown, or at least I don't. So dip it in, dry it off. Even though this looks like a hairdryer, It's not a hairdryer. It emits heat, it doesn't blow air. You can't really use a hairdryer for this unless you have a really low setting, because if you use a hairdryer, it would just start blowing these pools of water around. And we want them to stay in the same general area because I'm trying to get this texture to it. I'm not trying to just just create a green background. I want to have the texture with it because I think it looks a lot more interesting for what we're doing. If you end up having a pool like for instance, this here that you don't like, I don't mind it, so I'm just gonna leave it there. You can take paper towel and dab it up just to get some of the excess moisture out of there. I think if this was a background for a card or something, I would probably worry about it or maybe get that other there. But because it is a background that we're going to die cut and we're only going to see bits and pieces. I don't typically worry too much about certain areas because I can always avoid them with a dicot if I really don't like that area. Probably should be a little bit more dry, but that's okay. I'm going to tap it in there. Yeah. See, I got a little bit too much in that one area, but that's okay. Sometimes I get a little bit impatient because I don't want the video to run too long. But once again, this is all being dicots, so it's going to be totally fine. And you're just going to keep this same process. You're going to repeat it until you feel that you're done, until you like the look of it. You could even just do that first layer and leave it at that if you just liked that and you didn't want to add any of these swatches. If that's not your thing, you don't necessarily have to, It's your project. You can do exactly what you want. So I like most of it, but I want a little bit more dots in here. So next, I'm gonna do one more tab in my little paint dots just to get some more texture on that particular area. And then I think I'm done with this section. These backgrounds can get addicting though. If you're new to them, I definitely recommend starting with one color family like greens and reds or whatever, until you get the technique down and then you can start playing around with different color families. If you get to have gotten her with a 100 different colors are a bunch of different colors at once. You're going to end up with brown. So just play around with it, get used to how the technique works and how the inks lead with each other. And then start experimenting with a couple of colors at a time. Go. So now I'm gonna get a little bit of texture there. I think they're a little bit from there. And I mean, you can see on your, on your mat here where the dark sections are and where the light sections are. So you can control a little bit what's going where, but this is much better because it's got more texture to it. So you can use your heat gun to dry it or you can leave it. I'm just going to let it air dry. And once it's please write the next step is we're gonna take it to our deck getting machine and we're going to start coloring, dye, cutting our foliage. Intimate. How cool that looks right above it.
9. Die Cutting the Foliage: And now my green piece is completely dried. I'm going to use this particular die set to cut my greenery. And there's lots of different choices that I could choose in here. I like this one for this particular project, you can choose whatever you want. Again, I am using big shock machine. You can use a different machine if you so choose. There's my piecerate there. And again, you could even use a cricket machine and just dicot whatever greenery is that you like for this particular project. But I like this one. I want it to look a little bit like pine, but I don't want my pieces to be too, too big. I wanted to be able to fit them within this project. If your paper is curved, try to flatten it a little bit. Run it through, make sure that your dye is completely covered. And we are going to die cut this entire piece of paper. And again, you probably have some extras. You could always use them in your project and fill in a little bit more greenery than I did in mind. Or you can save it for a different project. Try to get your pieces as close to each other as possible so that we get as many digits as possible out of issue to be on the go. And always helpful to have a dy picked to help take your pieces out of your dye. There we go. Now, isn't that cool? How each one of these look different from the other? Like no two are going to be alike, which is what I love about this. All right. I don't need to do the rest of this on camera, so I will go cut the rest of these out and I'll see you when I'm done.
10. Foliage Die Cut Inking: All right, So my foliage is all die cut now and I'm going to take peeled paint. And I'm going to use my blending brush. And I'm just going to put some down the center of each one of these pieces here. The kinda want the center and the end part of my foliage to be a little bit darker. This part tends to be behind the points that are behind the candle or whatever. And naturally it would be a little bit darker towards the center of the arrangement. So I'm just putting that in there now because it would be impossible to ink it when it is in our piece. Super simple, you could do it circular motion, but I'm just running it down the center of the dicot here. And that's enough to just give it some shadow in the center here. So super-quick, they're all done and they all look just a little bit different from each other. If I loved them the way they are. But if by chance you didn't like some of the light spots, you can take your income, you could just make it a little bit darker and customize it to what you'd like. But I'm going to leave it exactly like that. It will only take a few more, few moments to dry. And with that, we've got all of our pieces made and we're ready to start assembling our vignette.
11. Vignette Assembly: All right, so we've got all of our pieces here and we are ready to start putting our vignette together. So I've got the flower always says that I was talking about with the candles that I used a portion of to hold my things in place while they were driving. I've got a piece here that is about two inches by inch and a half by about half inch. And I'm going to put it about a third of the way in. You can choose how you want your piece oriented. If you want it horizontal or vertical, your choice. Neither one is right or wrong. It's just personal preference. So I'm not, I don't have excluding quite yet. What I'm gonna do first is I'm going to question where I want one of the candles. Then I'm going to Christian where I want the second one. So before I actually glue anything, blue, that phone down, and we're going to glue a few of the greenery pieces. And so they will go in behind it. And I find the easiest way to do this whole thing has to have everything ready ahead of time. So that when it comes time to putting stuff together, you're simply placing, including everything into place. All right, so now I've got some greenery there. I'm going to glue my little piece of oasis into the frame. Like I said, I've got it about a third of the way, and I don't want it necessarily centered. I find things look a little bit better if they off to the side. Next, I'm going to glue my FIG candle in place. And I'm going to choose which side, what part of the wax I want to see. And I'm going to push it into the civil waste, this one, I'm going to do the same thing with a shorter Campbell. And this one here, I'm not putting in white as far as the other one. When I got these dowels, they were 12 inches long. So the way they were cut was just to make them even for the dowel pieces. Not necessarily for what I hate that I wanted in here. All right, just going to push the oasis Dan, and I'm just going to glue my flowers into place. Now, the one thing that you want to do, you don't want to start in the center and then work your way out. You want to start behind and then work your way forward. So I'm gonna glue one down in here. And once you have one done, you can do the other ones the same as those. This one here. I'm just putting them where I want them. And I'm using a hot glue gun just because it's going to be a lot quicker. Because it'll dry really, really quickly. If you want a piece of that little strings from a glue gun, if you want a piece of greenery smaller, just rip it smaller. You don't necessarily have to keep it in. You don't have to use full pieces if you don't want to put them down. I'm trying to put greenery in their wall. And putting the point set is because I want my greenery to be in amongst my flowers. I don't know. And we want it just behind and just in front. It's purple. Thinking I want a piece of greenery here. So this piece that I just took off, I'm going to build a little piece of blue here and get a new glue stick. And glue. And I'm going to tuck it behind the flower. I'm thinking I want a little piece of greenery in front of here as well. The country. Also want one behind my candles there. Really, I should move my glucagon so it's closer to me here. One more flower in here. Put a final one right here. So I've got seven flowers in here, just like I did for my sample. I still have three flowers left. You could put them in here if you wanted to add them all to your piece. But I'm going to leave that like that. So now my last step here, as I'm going to take some stickler on this one here is listen. So it's got a little bit of gold in it, but it's also a little bit transparent. It's not going to be a harsh cool. So I'm just adding a tiny little bit. Two parts of the edges of the flowers. I'm not putting it on the entire edge of the flowers. I kind of feel like more. And I want it to be, I want the sparkle to be there, but I don't necessarily want all of the flowers completely outlined in political. So stick goals, if you're not familiar with it is a glitter glue, but the glue kinda shrinks as it dries. So you're not necessarily going to see that blue part of it. You're just going to see the glitter. And this one here being a little bit more transparent. It's going to be more subtle. If you'd love glue and want it to be more obvious, you could use something like platinum or gold sickles and it's more opaque, even this particular one here. But like I said before, gold isn't necessarily my favorite color in the metallic, so we want it to be fairly subtle. So I'm going to leave it like that and let that dry. So we'll have some blue edges, but you can see how the stimulus just add just a touch of sparkle to it. I'll wait for that to dry and then show you it once it's dry. All right, so the stimulus is now completely dry it and you can see it's got some sparkle to it. To not too dark. I did take some of the platinum sickles and put it on this little flower here, just so you can see the difference between the two. Not a huge difference, but this one is a little bit more metallic and this one's a little bit more transparent. There we go. The other thing, if you wanted, you could take some wooden letters and add like Merry Christmas, happy holidays or something in there. I'm going to leave it as is because I haven't found something that I would like to put in there, but just something else that you could add in there if you choose.
12. Mixed Media Poinsettia Vignette Thank You: Thank you so much for joining me for the mixed media point set of vignette class is perfect to use as holiday decor or to give as a gift to a family or friend. I hope you enjoyed making it as much as I enjoyed creating the class for you. We'll see you in the next class.
 Artsy. Island Girl, Teacher