Transcripts
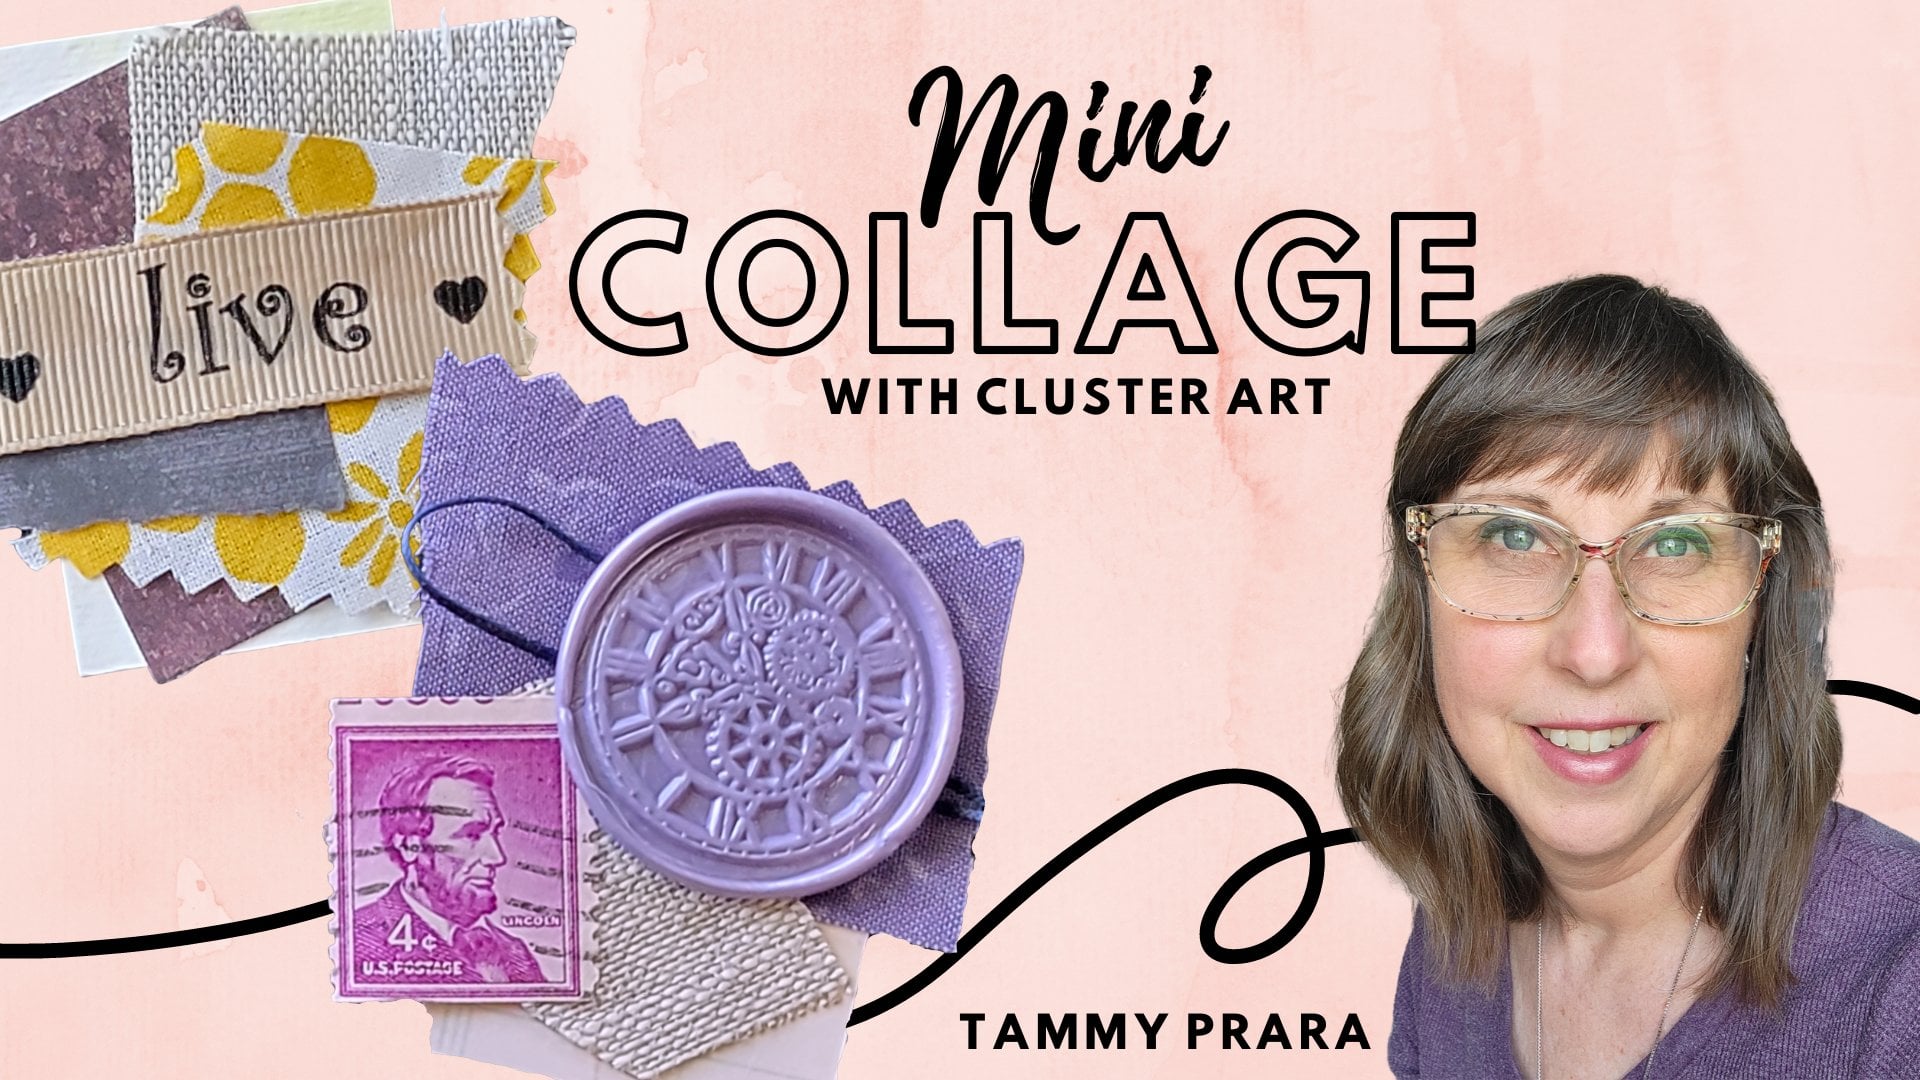
1. Intro to Mixed Media Collage: Hi friends. My name is Tammy. I'm a mixed media
collage artist. This is going to be the first in a series of something
I'm calling, Can I collage on this? We will start transforming ordinary objects into
beautiful pieces of art. Today's Canvas for the class
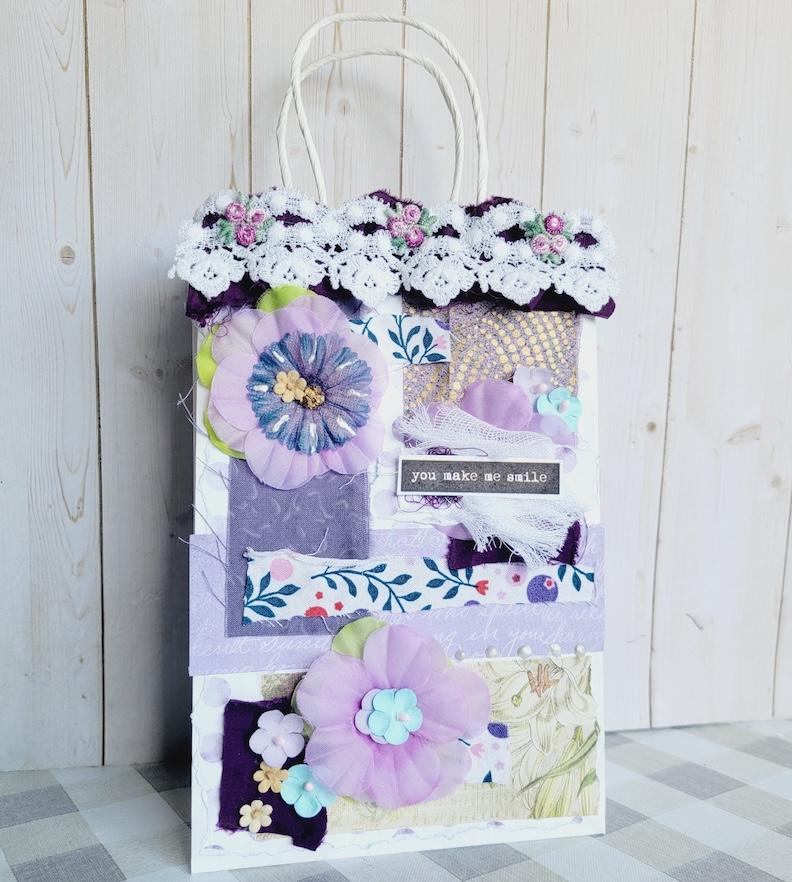
is going to be a gift bag. By the end of this class, you'll create a gift bag that's beautiful enough to
become a gift in itself while learning design
skills that you can apply to almost any
mixed media project. I find functional art creates
a lasting impression. The wrapping becomes
the keepsake. Today we are going to
be covering materials, making decisions, layering, creating a focal point,
and exploring composition. Students will be making their own functional
art project with the basic skills they're
learning in this class. For more inspiration,
you can find me on YouTube or Instagram
and you may even see a sneak peek of the
classes that I have planned I encourage you
to explore your supplies. I'll find some similar items, experiment with them and
try your hand at collage. Share your results in the
project area of this class. You inspire others to grow their skills with every
image that you share. And as always, I would
love to hear from you. Would you review this
class when you're done and let me know
what you've learned, or maybe there's something
that needs to be improved. Let's get started. Oh
2. Class Project: By the end of this
class, you have a one of a kind gift bag that's beautiful enough to become
part of the gift itself. This kind of functional art
actually becomes a keepsake. These techniques
that you're going to learn today, they're
transferable. You can start
collaging on journals, in journals, on greeting cards, postcards, canvases,
scrapbook pages, almost any surface
you can imagine. Take the supplies
that you already own. You probably have
scrapbook paper, music paper or book pages. You probably have
fabric and ribbons, maybe you have lace. What if you had die
cuts or silk flowers? Any of these things
could be added to your collage use what you have. With the design elements
I teach in the class, create your own one of a
kind gift bag to share. Please put that in
the project section. I love to see your results. Nothing is going to
be exactly the same, even if we had the
same supplies, go ahead and experiment
and have fun with this.
3. Suggested Supplies: May be familiar with collage
and the arena of paper, but having mixed media collage, that's a whole other ballgame, and it's great for people
who love to collect. Maybe you have materials, maybe you have lace and ribbons, maybe you have buttons,
die cuts, stickers. The list is really
endless on what you could incorporate
into your collage. The products that I have
guaranteed you will not have the exact same
ones. How do we solve this? I want you to pull out what
you have and then listen to how I describe composition
and rule of three, and you will be able to
take the supplies that you have to create
your own collage. While choosing which gift bag you want to use in your project, consider a few things. You probably notice they're
not all the same, are they? This one has hole punched and
a ribbon handle at the top, but it's a fairly good quality. It's five by seven. This one is slightly larger. It is about 5.5 by seven, these handles are glued
here on the inside. Another choice, it's white. This came from my
local dollar store, and it was a three bag set. Great price. But again, the handles are glued inside. Think about what size
are you going to need? This is five by seven. Is a gift going inside? How big or how
heavy is your gift? Personally, if you're going to embellish all
the way to the top, you'd have to be working
around your ribbon, which isn't a bad idea or
you could start below. But I think for today, I'm sticking with the
white and a smaller size, so I'm not so overwhelmed
while creating. As for papers, I could not list every paper
you could be using. There is card stock,
there's scrapbook paper. There's music sheets,
old vintage papers, maybe you have a vintage book. You could just reuse
these pages inside and if you have some neutrals
or solid pieces of paper, you might want to
grab those as well. We'll talk a little
bit more about papers when we start
getting into our project. Like I said, for
simplicity's sake, I'm not going to show every
kind of glue we could use because I'm going to
focus on the fabric fix. I only have about half a bottle, so I did find this
fabric fusion by Alan's. But if you're not doing any heavy or fabric on
your mixed media, then you should be fine with this neutral pH adhesive
or a glue stick. I really prefer
Elmer's craft bond. It's called extra strength. These are some other choices. Like I said, if I threw out every kind of material
you could choose from, you'd be so overwhelmed. I do know I want
to use some lace. I may use some ribbon. But there's also this beautiful chiffon type
fabrics you could use. Um, some grow grain ribbon. It's all going to depend on
your theme and your project. So let's set that aside. A few more ideas include
flower embellishments. What kind do you have around, or are they die cuts or
have you painted your own? Make sure to collect
a few that you might be interested in and fabrics. Fabric scraps. Littlest pieces will all work depending on what
you have available. You can find these
at thrift stores. You can even take
your old garments and cut off sections of that. Maybe you found a collection
of quilting fabrics. My collection has
been over years. Use what you have on hand. Finally, maybe you have a few
coloring things you need. Do you have some gold
ink or gold paint? Do you have any distressed
oxide or any kind of ink pads? This is a product,
new to me anyway. Are these crystal drops
they remind me of that textured fabric paints
that they are puff paints. That was a fun touch to add in some of my glam
bags, as well. So just a sampling of all the things you
might be able to use, and actually, I'm
keeping it limited. So use what you have,
pull it out now, and let's start exploring.
4. Planning Your Design: Before I get too far, I want to start
thinking through. What's my plan? Well, for this white gift bag, I have a birthday coming up, a friend of mine's
birthday is coming up, and I already know a
few things about her. One, she likes coffee. She likes lilies. She loves purple. And so I want to start
collecting things. I haven't started anything. I'm just collecting to help
narrow down my choices. But it also helps to start
with the end in mind. I need to have a focal point. What's going to be a saying
or that focal element. She loves her family. She loves our friendship. Maybe this tag that
says friendship and family would be good
or you make me smile. Maybe I could write
a handwritten one that says happy birthday. But pull out your found words, maybe a book words
that you like, or you have digitals that
you've collected words, and we're going to save those and start collecting
other papers. Oh, I know she likes purple. This paper pad came from
Michael's, I believe. I also have a few pages
I stuffed in here. These pages are from a stampia Look at these
beautiful purple pages. I might dig into these. This lilac, these soft
colors would look really nice with these
browns, these neutrals. So I think I'm going
to keep those in mind, and that will help me
narrow down what I'm going to put on to my glam bag. I also have some
flower die cuts maybe. Let's see. Is there
some purple in here? These chip board die cuts. I don't see any solid purple. One idea would be just
even cut that out. But I did find these
at Hobby Lobby. That would make a
great focal point. At one point, I had some faux flowers from those Hawaiian lays you might
find at the dollar store. I just cut the thread right out and pulled up
these silk flowers. That might be going
in there as well. So if you have your bag and
you know what size it is, you might start thinking about what size of product
are you going to use? If we went with a
flower this large, it's already about a
third of the back and even these silk flowers could take up quite
a bit of room. These are a little smaller, I think I might be
leaning towards that. Thinking on our focal
point, whatever's on top, whatever is bold, maybe
whatever's biggest, those things we're going to
stand out and catch your eye. These are things
we're thinking about, we're pre planning before
we even glue down. For some really fun contrast, you may not even use everything
that is matchy matchy. You know what looks really nice with purple is some
of this green. You think about the color wheel, we know that this
color combination, it's the secondary colors. Maybe a pop of orange as well. We'll see how this goes with our papers that we
end up choosing, the fabrics we're choosing, which reminds me, I need
to go grab that fabric. Here's a purple scrap. If we went with a big
bold color palette, that might be really fun. Look at this red in here. That could be our pop of color. But I also had
these more neutral. They're really toned down. This one has some gold on it. That might make a
great embellishment. Another gold piece. This is a very faint purple. Right now I'm just collecting. I'm picking a color theme, and I'm picking
some embellishments that I think will work. I like this part of deciding
what I'm going to use. One is because I have so much ephem and different things that it
really can be overwhelming. I want to cut down on that
confusion of all my choices. That blue is pretty.
I like how ideas pop out at you as you're working through
all your projects. Keeping these in mind, and really helps me narrow
down what it is I'm doing. What about the coffee? Will that be my background and all this pop of
color will come out? Are we staying away from
the dark colors and having fun with these
brighter colors? Those seem to work
really well together. I think I'm going to skip
the neutrals then and just go for a fun bright colors. I like the white words, but it also has
some purple words. I think I'm going
to keep those out, and look at that lilac. That would cover
up most of my bag, but that would make a great
fussy cut right there. Some little tags
we could add on. Oh, isn't that pretty? Well, just because
you think it's pretty doesn't mean it's
exactly what my friend needs. So I'm going to put that
aside and keep these out. I think that's really
helped me narrow down what is going to
be going onto my bag. Little bit of this lace. One idea I had was to maybe
run a lace across the top. Make it really
feminine, very sweet. And these little embellishments have that purple touch on them, and I like the white on
the white bag, as well.
5. Background: As you can see, I went
on a bit of a more of a scavenger hunt to
find more things, and I did find another
flower die cut. I found a bit of red fabric, wondering if it would
work with the red here. I did find way more
purple fabrics. Now I have to decide
what sheen or thickness, do I want a more muted
purple, a brighter purple. All of these things are going to get worked out real soon, one of my favorite things for embellishing is the
soft gauzy fabric, and I love putting that
behind my focal points, so we're saving that all the extra flowers,
I saved a few. We're going to be talking
about working in multiples of three or more and why that would work the
best for collage. But right now, we
are going to figure out how to back our paper bag. I'm thinking I want
something light. I'm actually thinking
maybe this poka dot. One reason is it
fits really nicely without having to tear into
these pages, but we'll see. I'm not 100% sure. I like the flowers that would
have been on the bottom, but now my text is upside down. I'm pretty sure I wanted to
do the lace across the top, but that would be
a great choice. Cutting that down to
fit right over that, that would make a
great background. But I think I'm going to
go with this after all. You could use a book page. You could write something like a black and white background and have all your
color on top of that. But I'm pretty settled. I think I'm ready to move
on with this poka dot. Now, I'm picking the side
where the flap is to the back. This will be the front
that I am working on with my scrap paper. Yeah. In fact, I am just
going to eyeball this. Why not tear paper? We're doing a collage, right? Take it right down
the side here. You know, if you
pull toward you, you get the white of the paper. If you tear away
from you or well, here I am tearing towards
me, I don't have that. So it's up to you what
effect you're looking for, or you can go back and forth. A little forward, a little
backwards. Forward. Right? There's no measure bag. That's what we're
doing. In fact, if we're going to
do it, you might as well go all the way around. When they talk about adding
texture in your piece, that's something right there. A rough edge adds a bit
of texture to your bag. Let's glue this down. I am
going with my white glue only because I have a limited
supply of my fabric tack. And guys, I don't want you stressing about your
background paper. It's so easy. Just pick one. If you've seen any of my other collage videos, it's not the most
important thing. It isn't because you're
going to be covering it up and it's just going
to be peeking out. That's fine. If you don't like using your
fingers, I get it. It's not for everybody. So get some gloves
or use a glue stick. I don't mind it not
going to the top because that's where
I want to do my lace. In fact, there's something
else I'm interested in doing and it's called
a bit of rouching. I'm thinking of taking my fabric and doing a scrunchy
ruffle effect. And maybe this right
there on top of it. If this was a flat
piece, I could sew that. But since it's got that
handle and the sides, we're going to have to
do it all with glue.
6. First Layer: After choosing my paper, now I want to do another layer and I'm
doing paper and fabric. But as you can see,
how things show up. The choice I made of a
white or light background, now the darker colors
really pop and stand out, but I can't layer them
all on top of each other. Well, you could, but it's going to need a pop of
something on top of that. So something white again, or these flowers on top again. These things that I'm showing, I want to demonstrate how to think what to look for.
Play around with it. Don't glue anything
down unless you're absolutely in love
with but see how this white with the
print background is the same as this white with
this print foreground, I should say, makes it hard. It doesn't stand out, but a dark and a light, a smidge of dark and
something bright. Those types of combinations
work really well together. I'm thinking one, that this
is probably way too big. Let's go ahead and
give that a tear. How's that? I love rough edges. I love frayed edges. Don't be afraid to just really play with those
types of things. I want to use this
gold so badly. I'm not sure yet. Even that might be too big. Um, Let's see. We're still playing maybe
more of a geometric idea. I like that. I haven't
used my lily yet. Is this yellow really
working for you? I don't know if you
can see this white on top of that darker
fabric where I tore that paper that gives it
that edge that stands out. Actually, I am liking
this pattern right now. We're still playing, we're
still thinking I still really want to see about oching this top and
getting it a roughly edge. But look how dark that is. That is, so dark. I would need to balance
somewhere, some of that dark, maybe a swatch of
fabric under here, on the top and maybe in this corner and maybe
a smidge under here. We're working in
groups of three. It's like a puzzle
and it stretches your brain into new ideas
and What are you seeing? How do you feel about what you see and putting all
of that together. In fact, I think
I'm good with this. I'm going to give this a trim. Let's start gluing down. Remember what I said about
the background paper? If you're going to go dark, then these choices would
be completely different. Whoa. That's the wrong glue. That is not cool.
Let's try this again. Let me get my fabric fix. Well, let's see. Might as well finish what I started. I no. Let's have a what not to do. Listen. Now, fabric
fix, see all that goop. Wow. Gopi fabric fix. I'm always wiping this nozzle. There's a trick I
learned about fabric fix one was to really wait till that glue starts
filling this base, this nozzle part, and before you start
messing with the air. And you have less oozing
out the top and mess. Let's see if that worked. Because usually immediately
after I'm done using it, I'm putting the cap back on right away because
it just starts oozing. What's next? This
bottom ones down here. I don't think I
need the fabric fix yet and it's not oozing,
so I think I'm good. Oh, you know what
else I did recently. I found a slim nozzle bottle
that I filled with glue. Why I don't have
that out right now? Is my text going the right way? Yeah. I'm going to trim off the edge of where that
Paper hangs off my bag. Look at that. The fabric
freaks did not ooze, that trick was really helpful. I just think fabric fix
is such a strong glue. It holds and it dries quickly. When you press it down, you're basically good to go. Who remembers where this was? I think it was a bit like that. There we go. Well,
I think I'm safe. No. Was it oozing? Is that just from the last
I didn't wipe it off. I'm not getting every
single inch of this, and I'm okay with that because I am going to do another layer. We've got all those dimensional
pieces to do still. Time to start getting
that cap back on. Because this is paper going
on paper, where is that glue? Here we are. Look at that. A skinnier nozzle, it doesn't pour out
all over the place. I just brush it with the tip. There we go. I think I'm going to do more here to the right. The only thing about
skinny nozzles is how quickly it gums
up with the glue. All right. I think we
have our base layer down.
7. More Layers: This fabric, I wanted it a little
thinner to do my ruching. Funny thing about this fabric is I found it in a chindy rug. That one's the thick piece.
I want this thin piece. Now, a chindy rug is a woven rug from all kinds of
leftover fabrics. You unravel that. You have so much fabric. If you're looking for a way to increase your fabric
stash, that's all scraps. It's not something
super nice and fancy. You might consider
getting yourself one of those rugs. Here we go. This is me smushing
up the fabric. I'm going to have
to glue that one down a little bit better. I could be mistaken in this
style of fabric design. But that's what I'm going
with. Let's show my age. My fingers are sticky and I
wonder why. This is great. I'm going to tuck this site under not that it's necessary, but I meant too impatient. I want that laying down now. I want it laying down now. And this on top. That's my idea. Do I
glue? I think I will. I'm going to glue the back
of the lace and I'm going to leave the bottom of this
ribbon embellishment free. I think I'll put a big
glob on the flower parts. I believe this ribbon piece came from a store that
we have locally that collects people donate, use craft supplies. So you can buy lace and
fabric remnants and corks and stamps and there's so many
different things you can find at that kind of store. Anything that could possibly
be used in a craft, they'll sell it. In that wild. But it makes a really
great thrift store because that's all it supplies, that kind of product
in their thrift store. I'm working on my layers
of my groups of three, and I'm thinking about balance. I want to see this
fabric in a couple of places maybe
something like that. Of course. Then when we start
laying our flowers out, that's going to look great. I do think I want them there. Yep, yep. In fact, sometimes I will admit, I forget where I
had placed things. And then I go back and watch
the video and it's like, that is not where I had it. I think I'm going
to go up and down. That one was sideways. Let's make sure this lids on. I have dark and lights, different shades of purple.
That's looking great. Let's keep going with
our embellishments. We have all these flowers. I have a bit more fabric. Oh. Thread is always fun. I'm going to save
a lot of thread. This is what I want to
discuss next is these colors. I want you to imagine what you think of with
two blue flowers. One of the things I've recently
learned is when there's only two of something,
we start comparing. But if there's three,
it's interesting. Your eyes traveling. I found that so fascinating. I was experimenting with it. I have two. And
it's just awkward. It's like, no matter
what I'm doing, the twos don't make it. What if I had four? Even if I'm staggering
them, I don't know. It just doesn't speak
to me versus three. It's like your eye travels. It wants to see patterns versus now I just see halves and I'm not happy
with upwn up down. But I can travel.
That says something. We're going to work on placing these flowers in a way that
helps your eye to travel, that helps you to see
balance and why things in odd numbers are more
significant to us than four. Two. 55 says something better. The odd numbers really
make a difference. You could even poke things out, put that flour with that and then something
in the center. You could pull that
centerpiece out if you'd like. You could put a gem in there. You could put a
different color in there and that really
pops, doesn't it? That purple with that
blue absolutely pops. We could take some of
that green and it, reimagine that green as leaves it adds that contrast
between the two purples, the fabric and that purple. It has that pop of
color coming out. We could do the same down here. What do you think? These are some layers
that we're just adding. Maybe they look good with the dark if we stick these flowers over
the dark popping out. But we're leaving a space, we're leaving a place for
us to use our focal point. I think I'm going to go
with you make me smile. This focal point, even though
our flowers are larger, our focal point
is the most bold. It goes to the brightest,
the boldest thing. But I do want to embellish that. I want to make it stand out. Does this help it
stand out? We could. But if we had a bit of
this white under here, that really stands out. We're going to keep
playing with this before we glue and before
we make any decisions, we're going to keep
working this out.
8. Focal Point: I've been sitting
here playing with all the flowers and
all the elements, and I have a few ideas
that I wanted to share. One is, where is the
focal point going? As it stands, I feel like I have three sections and your
eyes moving here to here. We could choose to
have our focal point here on this side
or up at the top. Those are my two
best choices so far. I've been using the flowers
and grouping them and adding some paper I want to add a touch more of that
bright bold fabric. I could easily put that up
here. You make me smile. That's our focal point. We could bring it over here
onto this middle section. But I think I would do
something a little different, make that red stand out more. I had collected that
thread, remember? I thought, doesn't
that look neat? Putting that thread in there. Well, what if the thread
was under my text? That craziness, that chaos
right there. That's fun. I do have that gauze
that we were looking at. It's going to give a nice
big contrast with the words. Maybe a touch of that
color appear above it. That's one way that
catches your eye and then these are just
subtle decorations, maybe a little showing off
of the leaves down there. I do like that. I liked having
three put together. I like these itty bitty flowers making maybe clusters around it. Looks like I'm going
to need one of those. I'm not sure if we
need three blues. That's what's messing with me. I need to find one of those. One or three or five. Let me find another blue. Hopefully I have that and
maybe the leaves outside that. That helps with the
balance, doesn't it? So how are we seeing? Take a
photo before you glue down. Take a photo of that. I'm not sure if I
like that there. Is it too big? I do
like that better there. I'm really happy
with that. I'm going to get a picture and save that. Before we move on, we're going to get a photo. Then we're going to look
at that photo and say, how does that affect you? Does it look center?
Does it look balanced? Ask yourself those questions. Maybe that is a little
heavy down there. If I move that up,
let's try that. Maybe another purple.
A third purple. I'd hate to add a yellow, could do a neutral because
of our neutral paper here, which is exactly what it needs. Because that's giving
it better balance. Is that too bright? It comes in multiple colors.
Let's see here. Do this darker one. I
do like that better. Okay. I think we're good. I'm going to take
one more photo. Because when you
pull this apart, you're not going to
remember how it all went back together. Mm
9. Finishing Touches: Dark here. Oh, there I was. I didn't wait long enough. That was about like that, right? I said it was about like that. Okay. Now the green. It was not exactly under, so we're going to leave that
I'm just gluing the center. I like it when the flower
petals are loose and fluttery. One more. The only thing I'm
going to watch for is that the petals overlap, so they peek out from behind. There we go. There we go. My glue bottle is
getting messy again. We'll clean that off. I think these will
go down first. He was first under there. Putting your flowers that
they really overlap. I think that's a big deal. This flower was down first. I picked the whole
thing up All right. Now. Some time for my gauze. This stuff is so, stringy. You may want to come back and add a little more
to secure that. When you have a wad of string, that can be hard to work with. But we did it. We managed. All right. There.
You make me smile. I like that it comes up. It's one of the higher
things on our collage. Oh, you're not down yet. We'll put you first. That power of three really
makes a difference. I hope you're having a good
time with this process. It is messy. But it's a good messy, right? There's no hard and fast rules. You just keep looking at what
you like, what you think. I'm going to add to
this third flower. Where should we put her?
Here, here, here, here. I think down. Floating away. Yeah, that looks great. Should we open her up? Yeah, not too heavy
and very nice. I do have one touch
I want to do. I think I do want this shimmer. One thing I can do
with that, let's see. These little enamel dots. They're going to dry down. They'll look like flat
beads. Isn't that neat? I love this. Wow.
That's really pretty. If you have any puff paints that you want to try, you
might like that, too. It's already starting to settle. You don't get that lip of lift, maybe it's a frosting
or something. But, yeah. Oh, I'm
really happy with this. Does it need anything else? Do you see something? Oh, Tammy, what good. Does it need more flowers? Do the flowers need some
embellishment on them? It's pretty. They don't call it mixed media
collage for nothing. You get to play and experiment. Fantastic. Well,
remember our photo. I like my photo. I think
I'm going to leave it off and keep that vibrant fun
space there in the middle. So do you feel balanced? Do you feel like you know
where the focal point is? Do you feel like you
see groups of three? Do you feel like there's some playful elements
and fun elements? That's what makes collaging so interesting because
none of us will ever have the same materials, but we have the same starting
point with a background, with some layers, with some
texture, with a focal point? That's what's pulling
this together. The color balance, the balance
of how it moves and flows, and that pop of color, that pretty pretty blue
looks really neat. I hope this was a great experience for you
that you learned something about some new products or how
to at a border at the top, just what tearing paper
can look like for you. I hope you will join
me in the next class. Oh.
10. Variations : I can't wait to see
what you've created. The variations is
going to be huge. In fact, I made a
second example using a craft paper bag with
the ribbon handle and I want you to see the
differences between the two, but I still followed
some of the basic rules, the rules of three and layering and the dimension
and the textures, the smooth and the chaotic and all of those
things come together. To create something
pleasing to the eye. I just want you to think
about those things, break the rules, use the rules. It's up to you. Use what you have and create
as many kinds that you can. The more you practice collage, the easier it gets to
make those decisions. You can do this.
11. Wrap up: Thank you. I am so grateful you
spent your time with me today to learn the basics
of mixed media collage. I know it's a bit
of a deep dive. I hope you had a great time. You've learned a few things. In fact, I'd love
to hear about that. Would you review the class? Let me know what you've learned. Something I need to
cover in other classes. I need that feedback and I appreciate your
time in doing that. Now, as always, please
share your project. I can't wait to see your ideas. I'm inspired by
seeing student art, and I know others will be too. You can follow me on
Instagram, on YouTube. If you want more ideas, I post there regularly, but I spend quality time here on Skillshare developing
and digging deep with you. Thank you for following me, thank you for your projects, and I wish you all a great day.
 Tammy Prara, Making Matters