Transcripts
1. Introduction : Hi everybody and welcome to today's class. This class is entitled boat and cottages, acrylic landscapes. And in this class we're going to be creating an amazing trio of landscapes. Landscapes are going to have boats and cottages and them. And we're going to build a layers through the sketches and really enjoy the process. Taken our time with a limited palette of colors and create something that is unique and is straightforward and also in multiples so that we get the added benefit of having a series of paintings. So come along to the class and let have amazing time creating artwork. I'll be giving examples of the tool so required for the class. And we'll take our time going through it, and we'll end up having three really cute mini paintings at the end. You will also see the painting that I have that shows the inspiration for the class. So we'll work on that and you can go ahead and create your own pieces with confidence and feature after doing this class. So come along and let's have some fun. Wow.
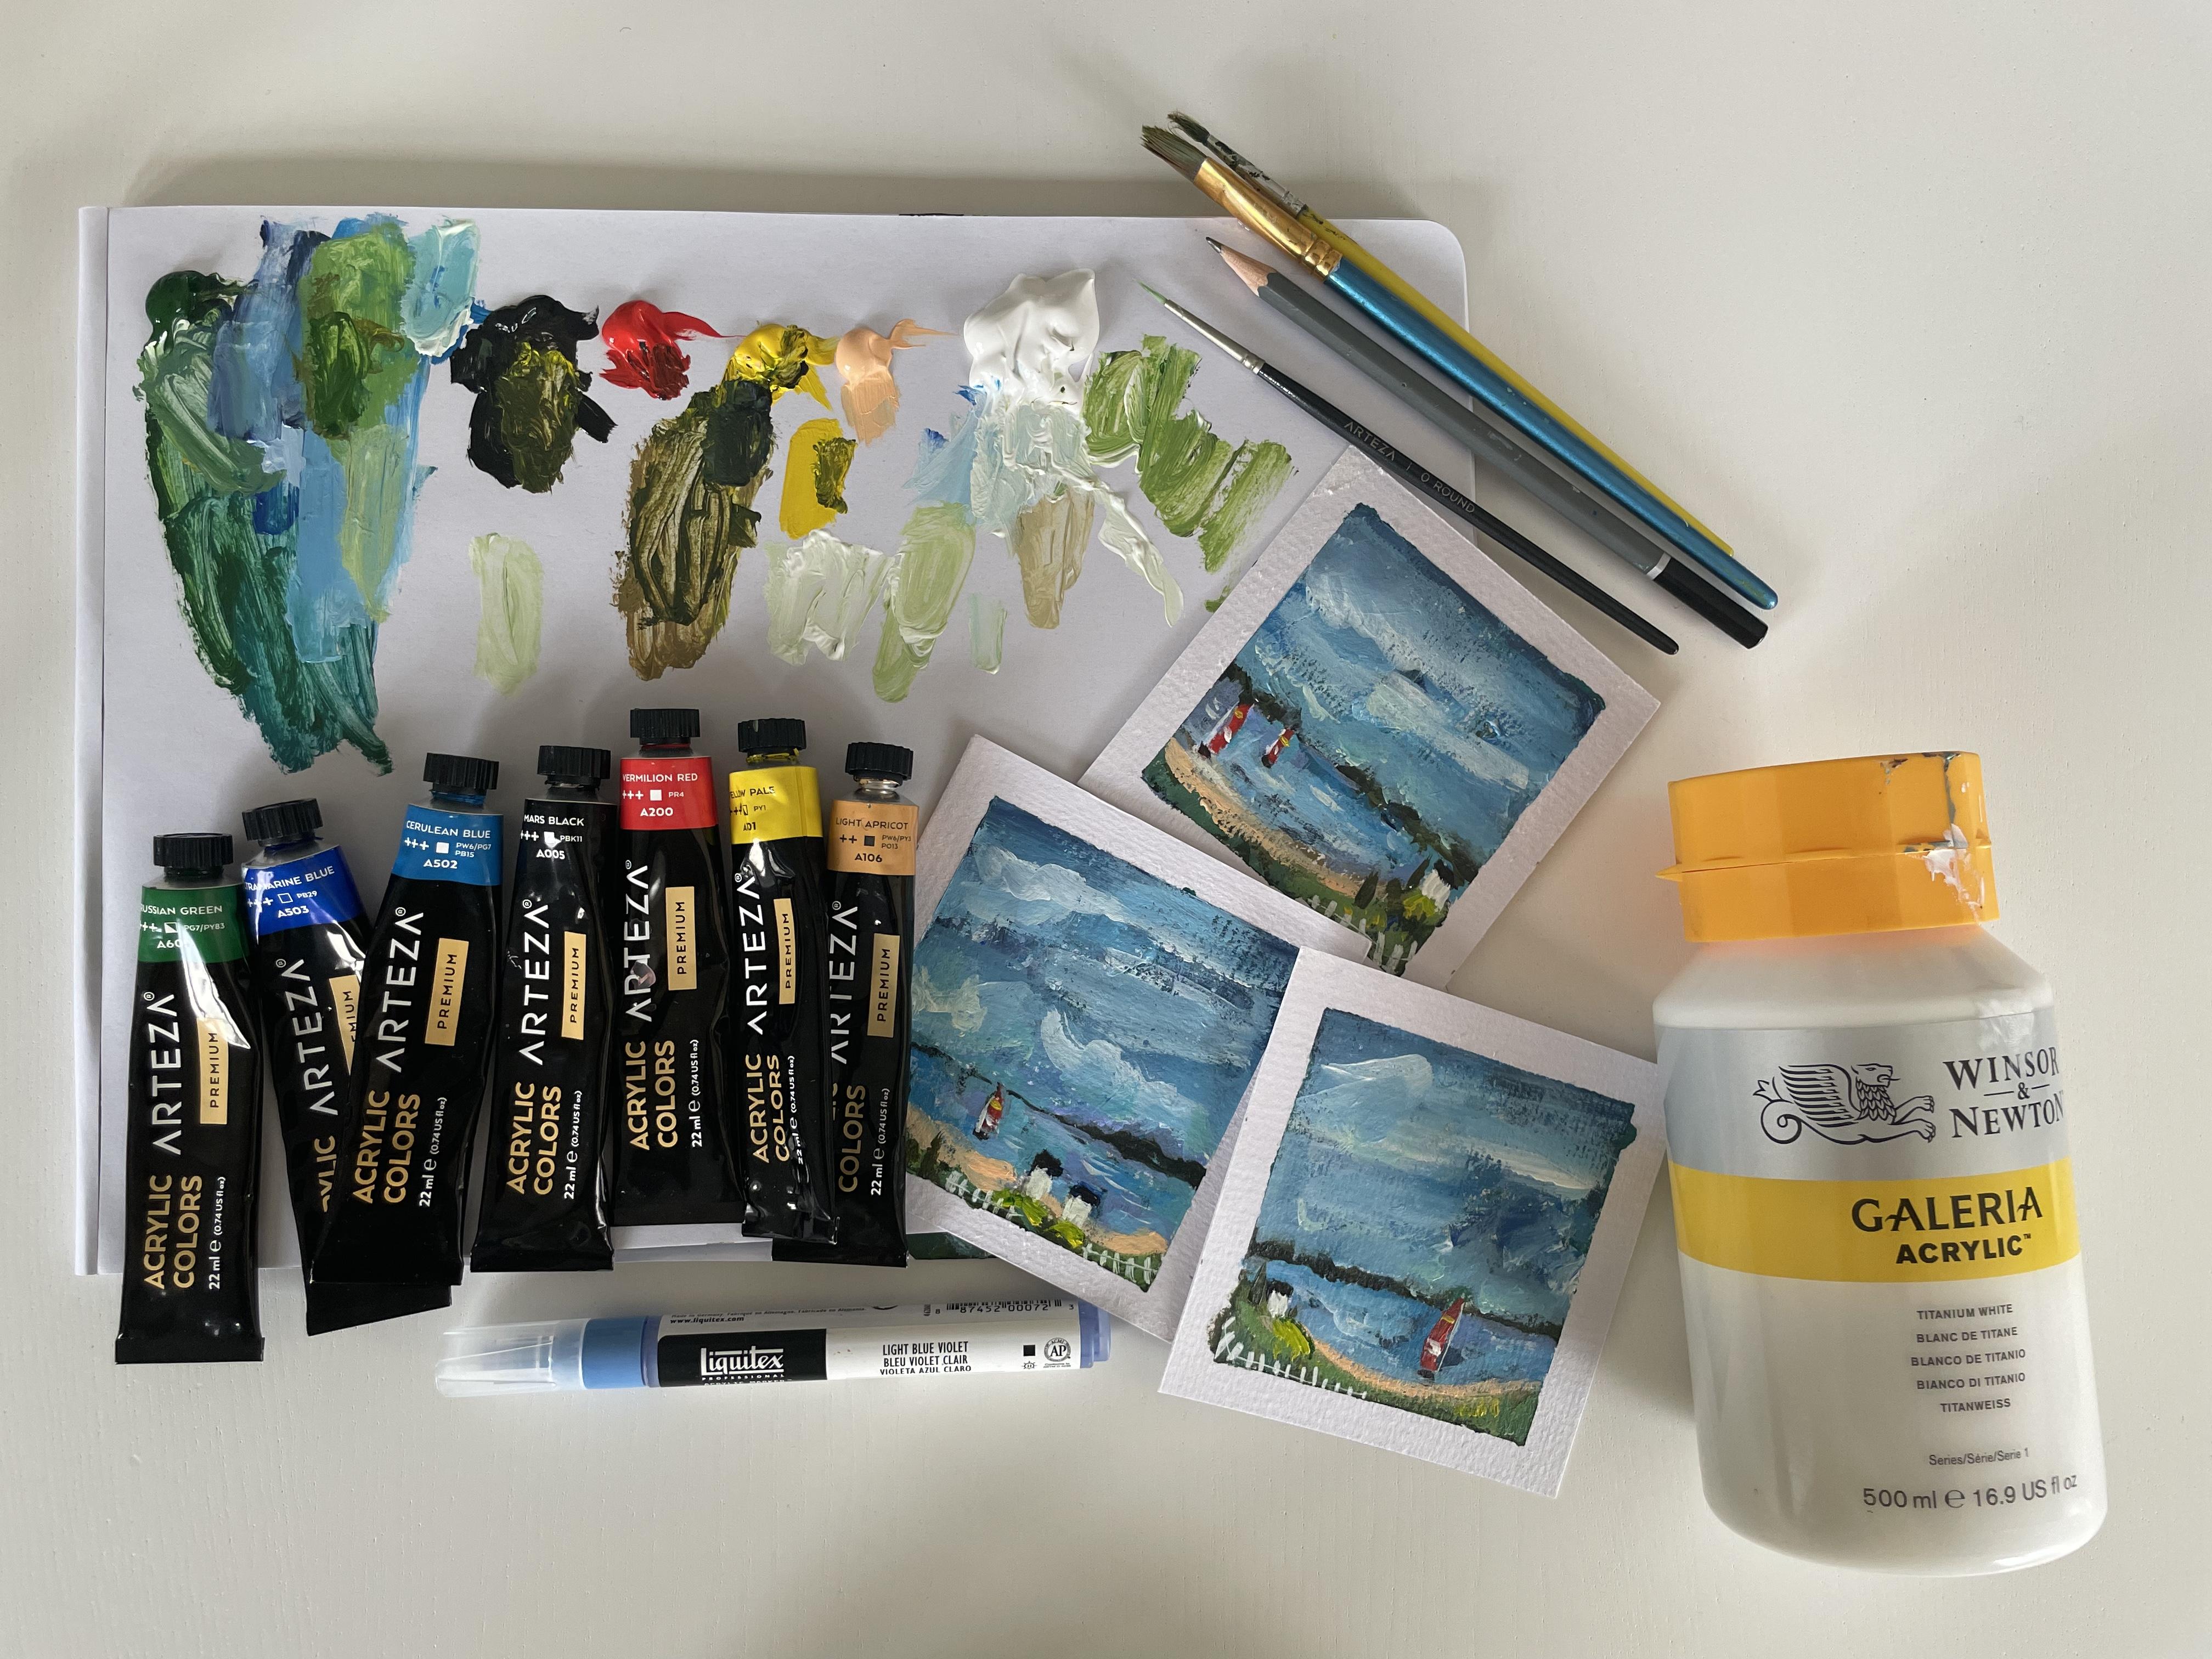
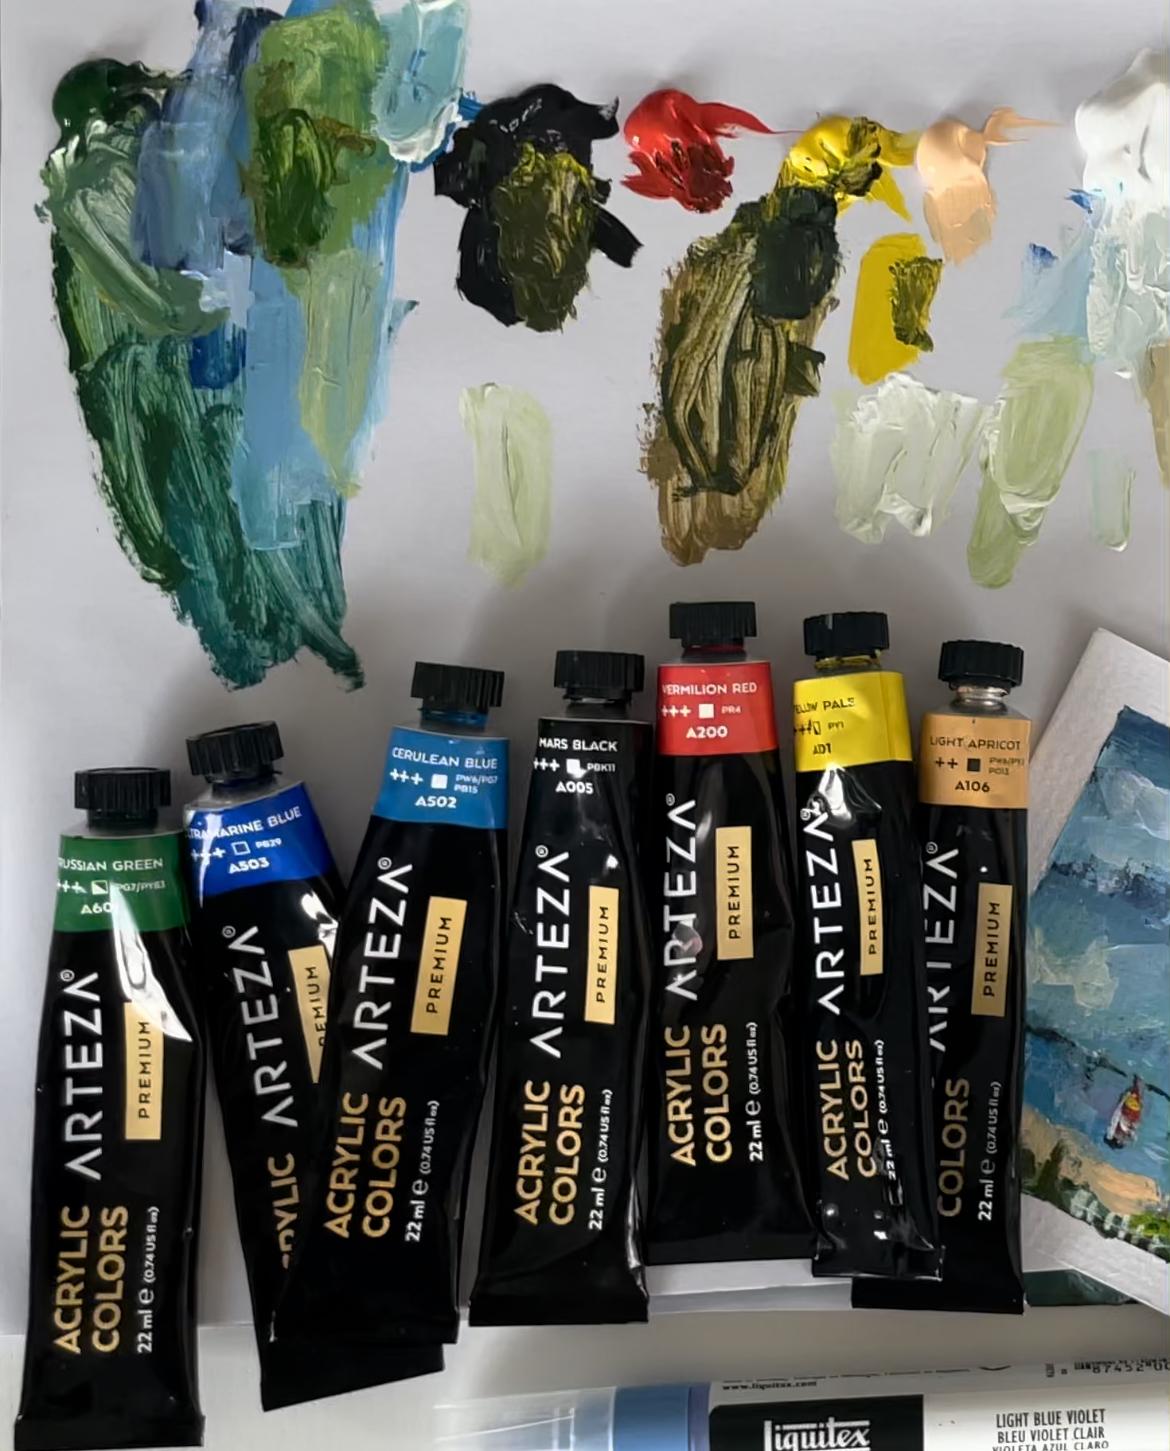
2. Paint preparation : Hi everybody, welcome to today's class. We are going to be painting with these three bits of paper. And we're going to be creating landscapes. And the landscape we are going to be creating is one of a kind of a sea environment and it's going to be with a boat in it. And this book is really big. I was just playing around with that. But basically something similar to this will make a boat a lot smaller. But it's been part of my voltage series that I've been creating with the landscapes. And yeah, I just thought we could have some CPU again. But this time we can also feature some boats in the background and the sky as well. So let's get started on that. So first I'm going to put the paints out. So let's get into putting the paint out. So I have a selection of paint that I've got here that I want to use. And so the first is Persian, persian green. So I'm just going to dot a out here on that palette. And I usually like to use the primary colors, but sometimes those other colors I want to mix with other colors and to get different varieties of greens or blues. So this is ultramarine blue and put them down. I'm not really thinking of what order and putting it down. So I'll put another blue down here, and this is really in blue. Let's do that. And I'm going to put my black down. So you can use gestural for this. So it can be black, just so white gesso if you want a mat finish. But this is black acrylic. I'm also the vermillion, red. And it's really good to mix red with other colors like the green. And then you can add maybe more white or yellow to get different browns. So I'm going to add this yellow, It's a pale yellow, pale, pale yellow. And I'm going to add which was longer than I usually have. I usually try and keep to five colors, but this is apricot. So I wanted to add some of that. Maybe for a BCCI steam. Now that I've done that, I'm also going to put my right here as well. And let's hope I don't make a mess with this white because it's a bigger bottle of acrylic. Just see here. I just took that a bit as much as possible. There we go. So those are the colors we're going to be using. So I'm going to get myself ready. And we're gonna get started on creating something similar to this seascape. You can see.
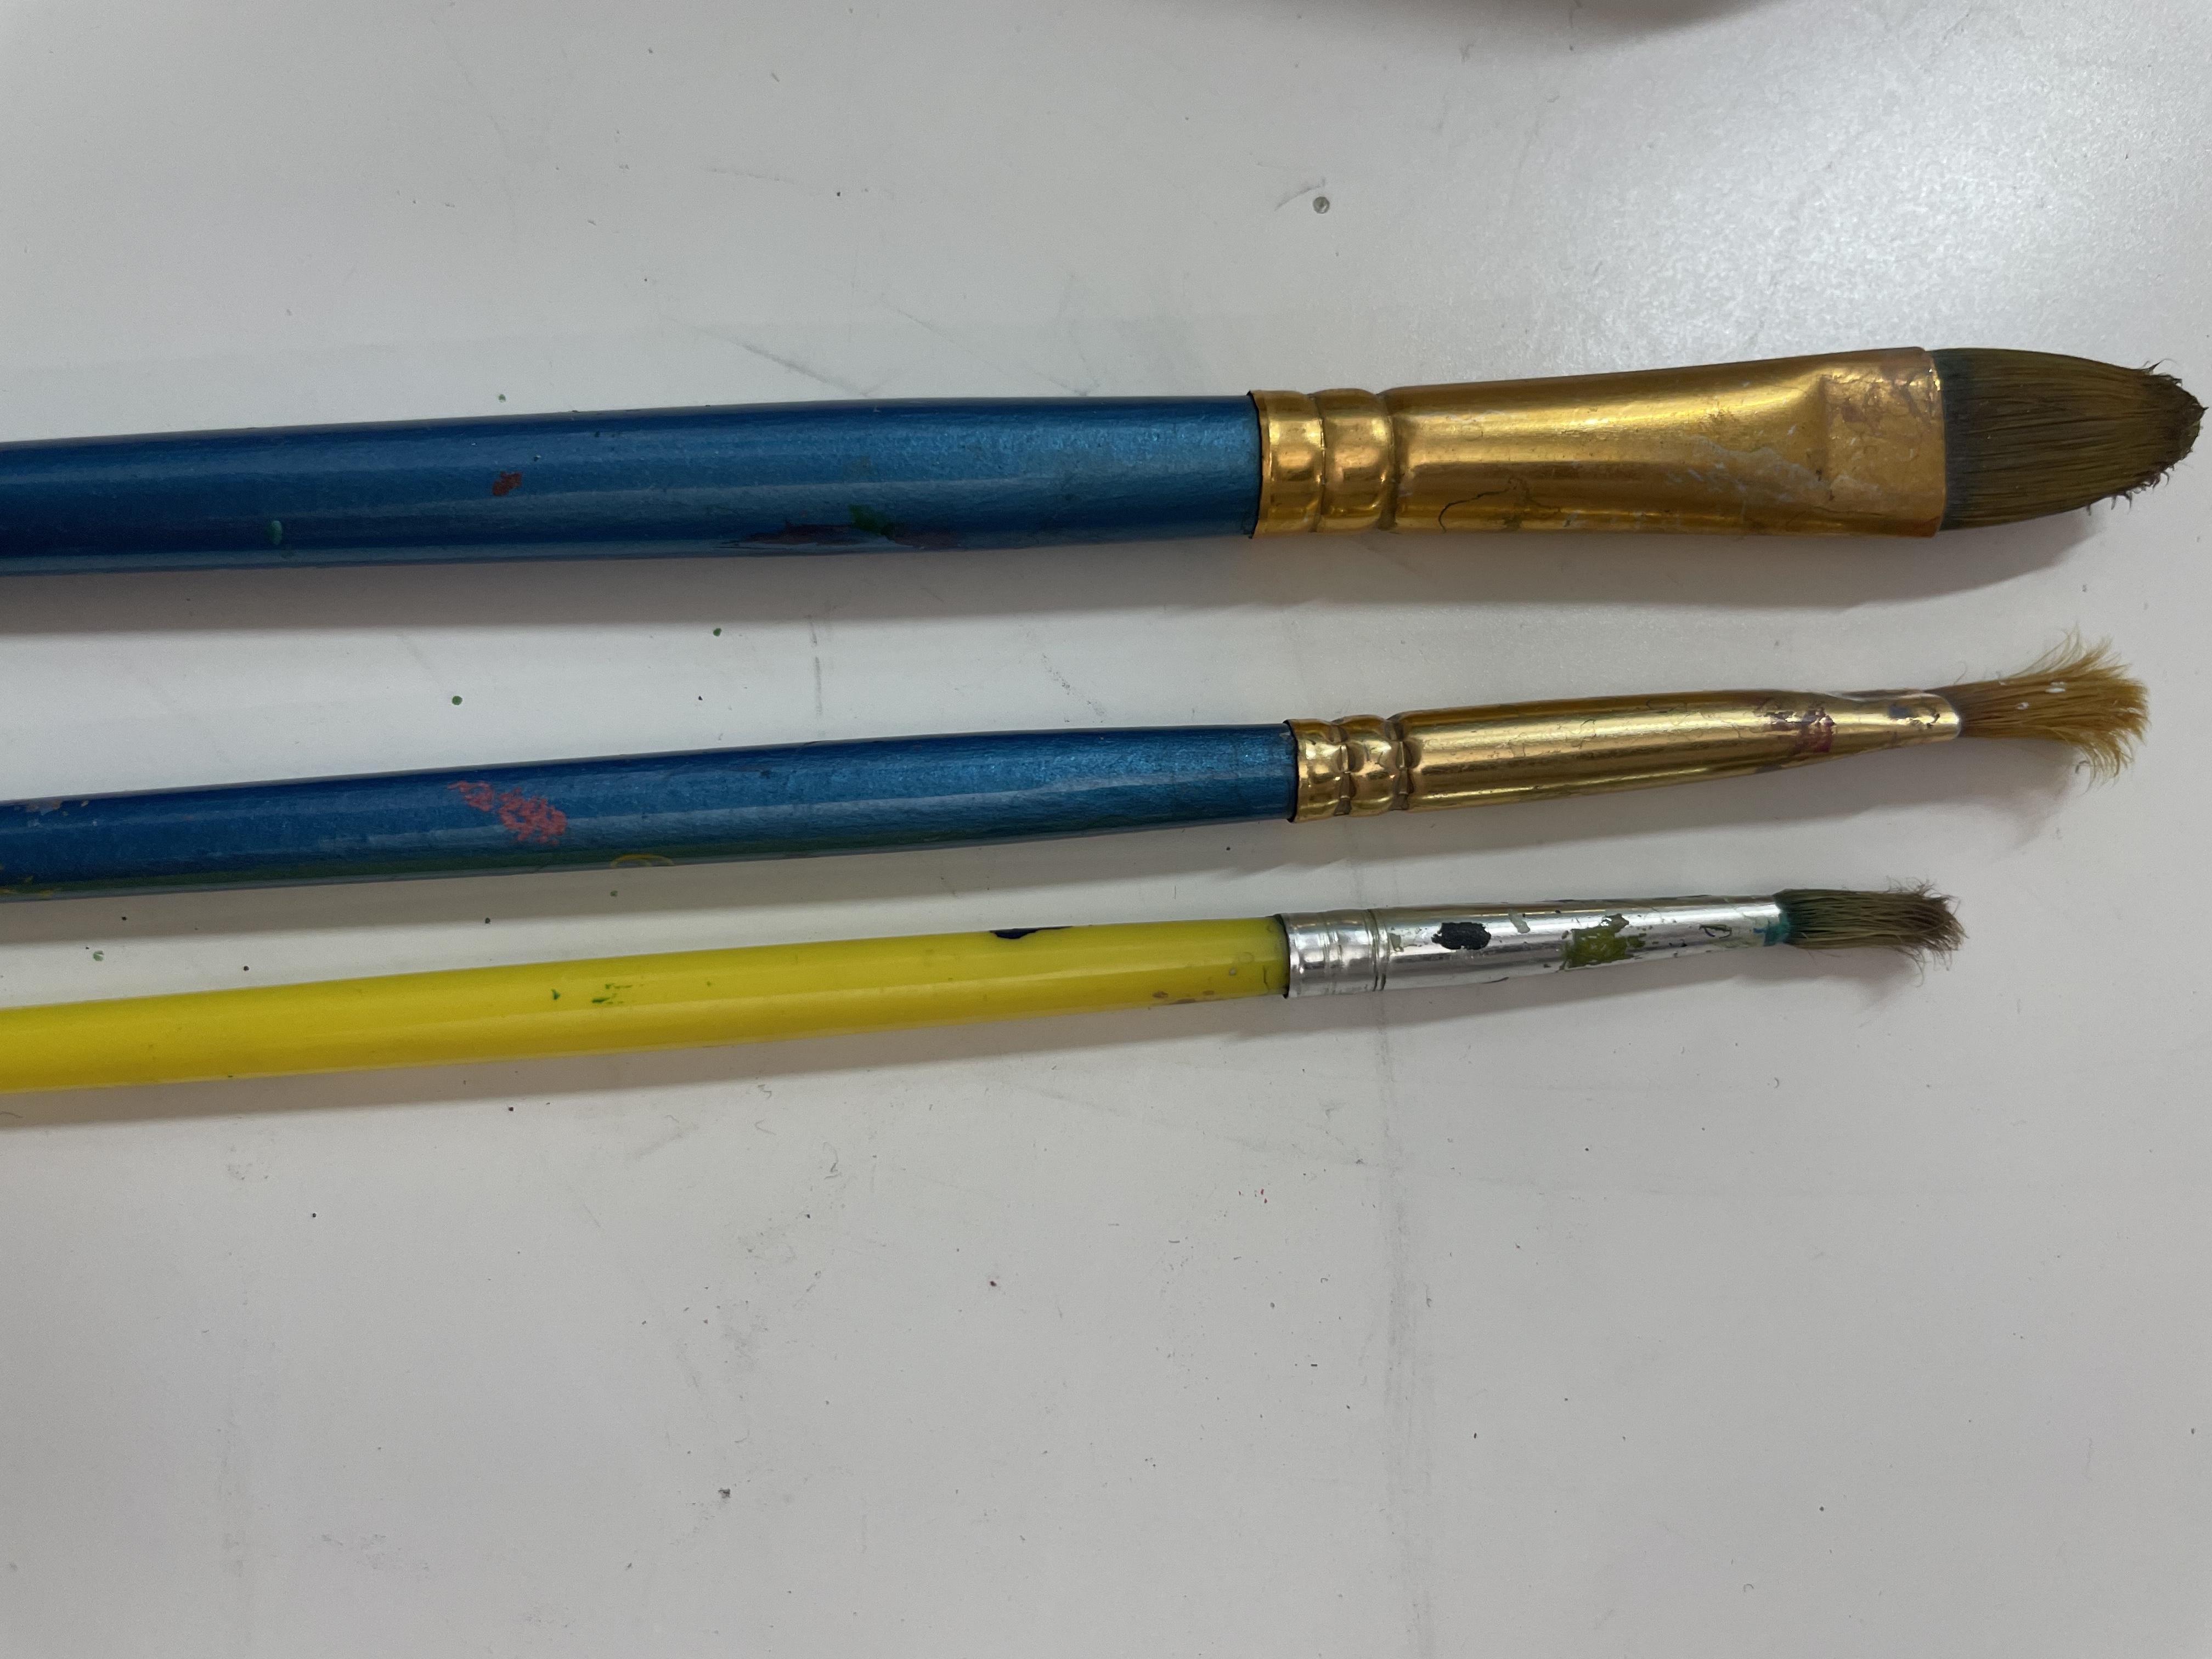
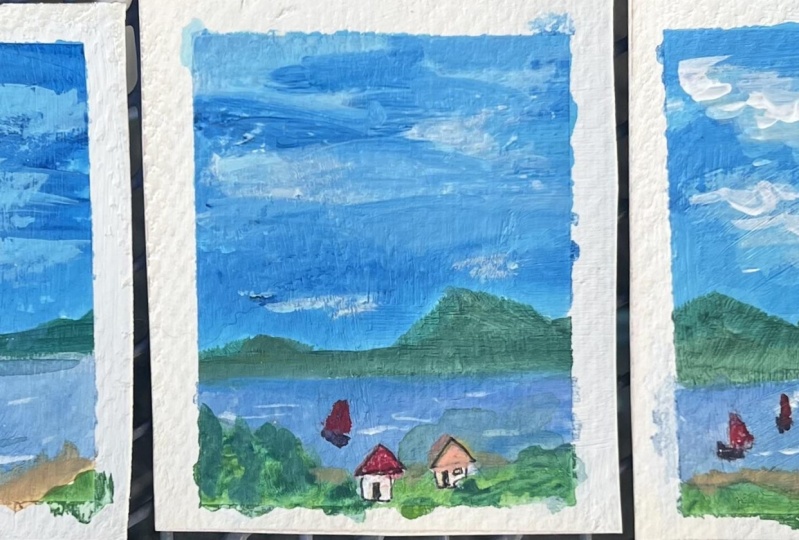
3. Sketch & Plan: So what we're gonna do next is actually I wanted to point out some more things. I also have this pen here which is not used here. It's a Liquitex acrylic marker. So I'd like to probably use that at some point on this red one somewhere as well. But I was given this by a local art shop to use. So I thought I would use that in this piece as well. So it's a light blue violet. So that's going to be interesting to drag that across at some point. In this. Also, I'm going to be using a size eight also another acrylic brush. And yeah, that would be if I wanted to do really big spaces on this. So what we're gonna do next is start painting. I'm sorry if the camera keeps shaking a little bit, I've got all the equipment really close to me, so trying to get a better setup for when we do these classes. So next, I'm going to just sketch out a design for this, for what we're going to be painting. So similar to this piece. I'm just going to put it beside me here so that I can I'm looking at it while I'm painting. I'll put it up on the screen somewhere for you. Probably maybe in this corner if I keep it at that. So if I keep the space physically and basically it's to, first of all, we're going to do the sketch. That's what this section is going to be. We're going to apply an out roughly what we think we are going to be doing for our landscapes. So I, I love this kinda layout of having three pieces because you can just work across, you can use to paint across everything. And so I'm kinda of like roughly line in the background of what the, and landscape in the furthest background area's going to be witches like this part here. So kinda like sketching it out and thinking about what that looks like. And just being free with Why thank my background should look like. And just to remember as well that so we have quite a large part of sky I've got here. So we can take this up much higher. And then our waters down here. I have my little if I look at this one, I have my little cottage here, so we can do that in this one, the compiler, a little cottage here. Sorry, tiny voltage. And it's got a lot of trees around it. So try and remember that l, so we could do something similar here. I like to move my cottages around. So if the cottage in this one is here, you can still put it somewhere and actually you don't have to do only one. While I've been doing this, I've been doing sets of two as well cottages. So it just kinda do a rough squared is no need to even do the actual roof because of that can come in, but one more cottage. And because I've got this here, I could put this one on this edge here. So and then give this one a little hill, kind of come in here. And somewhere around here will be this other content. Then we've got our boat that we want to add, and we can add more than one. You can add two. Doesn't matter. We could do a quite a variety of things. So this one, I could do one because I've got two in there. I might put two bolts and this one just and it's a generic shape. You've got the sale and then the actual deck boat area, and then another one further away there as a hint. Then come in in for this one. Do something similar again. We'll just pick wherever they're at. And these are facing that way, this is facing that way. I think I might face this also come in this way as well, just to show that it's coming in to this is like a hill coming down to this area here. And so the water is going to be as big as this one. And so some of these areas here, we've got like trees here. Maybe that's what these could be actually like, trees and not necessarily a hill. So we'll have this as trees come in here. And then these huts are not hots cut cottages, I didn't see. So this is just to sketch out and plan what it is we're going to be doing. And thus, and so the next stage, what we're gonna do is we're going to go ahead and start adding the first layer for the Payton. So let's do that next.
4. First Layer of Landscapes: For this section, I'm just gonna go straight ahead and start working on the colors that I've got here on my palette. So I'm going to use my brush and just start adding areas. So what I do is even before you are working on this paper, because this paper is quite generic paper, affordable paper. You can use whatever paper you have, you can use old greeting cards if you wanted. Because what I've done here, what I've taped it off, this is a four-by-four size, four inch by four inch. And I can put them in a frame ones There's finished when you have it. But what you can do is put Jess all over it. And you can put multiple layers. And then you can use your masking tape to create this border. And so it's really handy to get that shape just straight onto the size of paper. And you can get nice border with. So, yeah, we'll just go ahead and start using the colors. So I'm going to use some of my ultramarine blue and mix it in with some of the black and also some of the yellow. Just touch a bit of yellow there. And just start putting it on. And this foreground here. And not think too much about it. So just added that color right across. Then I can go into the black and the green. I'm not cleaned off my brush, so still got some of that color in there. And I'm trying to look at this little forest area here and look about this like a forest effect right at the front. Some of this green in here. And what I'm doing is I'm just working across both sides. I mean, all the sides, the three of them consistently basically. Now I want to go into the further background and get some of those hills and bangs and let them start drying. So that's why I'm working on that. So I'm gonna go in with some more black into the sea, yellowy black. And so just moving my hands freely into the background like that. And now I'm going to go back into the blue ultramarine and really, really mixed that in my brush so that I can get the blue. The green is still in there. And then I'm going to go in and start in the ocean area and miss my bowl 0. But I had two bolts in here. I've got to remember that. So I'm technically russian this because I am done. That's for the class, but you can take your time. And I'm going to go in and get some of the yellow Mao and go back into this green. And now I've got a nice green. They're just going to come back and start adding that in the side my cottages. And if you feel that it's too dry, you can add more water. But I like that dryness because it kind of gives you texture, like it misses some areas. So it gives you a kind of a realistic fill feel of grass and things in between. So what I'm gonna do next is add some more yellow to that green that's here. And all the time it's getting lighter and lighter. So then I go back in style than that and you get in different varieties of green. Let's buy the cottage year. But more by the cottage. Cottages here. I'm going to add some of my white now because I want to make it even lighter, still. Be two toughs, two taps and my wife into the right beside my content again, because I'm trying to remind myself of where they are and then put it into the blue with that, since I'm going to be a greeny blue. And we're going to go into this guy with that. So this basically go from one side to the other. And then let's add in some more blues you go. I've now added any of the civilian blue. I'm not washing my brush at all, so I've added some civilian blue into that former blue that was mixing that's like a green. It's mostly like a green in the sky. But these are all going to be the under layers and they're going to come out in the painting. So we add most brilliant blue in there and some more green that was just beside it there. That one add some more blue. Let me go back in and now I'm going to fill in the edges. So this is supposed to be the sky and yes, you can see it's green but not a paint, another layer over this. So this doesn't matter to me because it's going to peek through and it's going to show a really nice textures. And so we're just going to add that and making sure that we're filling in the corners as well. Because the corners are also going to have information for us to absorb. To absorb. So I'm going to let this dry and then we're going to come in with the second layer of paintings. Because I want to be able to really go over this, but some more colors. So let's just let this dry and get onto the second layers.
5. Second layer of Landscapes: So for this next section, I want to use my smaller detail, more detailed brush here which I have, which is their tasers, zeros 500. But also, I'm going to be looking at adding quite a bit of white into some areas because I want to be able to pull back some of this ocean. So right now I'm just going in and claiming some of the areas that I think that I'm going to add some of the civilian blue. I'm going to mix that in to the white. So I'm aware that the boat is somewhere here. Just add him unto them, white men and Cotner. This is the second layer I'm going to do with the bolt is I'm going to make them all red so that I will know where the boats are. Distance one way to make it clearer for myself. And then we'll be able to see that better. So this has two bolts, so let's just put the other one there. And then over here we're going to put this other book, but it's way in the distance here like that. And then I'm going to go in and mix that red. But some of my love I have here. So I've kind of got a brown color, add a bit more white. Again, our colors on my brush. I don't want to add the beach aspect into lists, so I'm just going to put this rustic around them. Is this, it is take your time and build it slowly. You can't Russia. So I'm going to try and just keep on building on this lighter colors around. Also, what I'm gonna do is the houses are gonna need to start showing up a little bit as well. Looks really nice. This is just mixing the colors on this palette. To get this, I'm going to go back into the civilian blue and start adding some more around these other boats here. Around my little cottage here. So what I'm doing as well when I'm doing this is that I am filling in gaps as I'm going along. I am also adding some colors into areas where there hasn't been any paint. So I'm being very aware of in order to make sure that everything is finalized together. And the thing about the huts is when you are actually called them huts. But the cottages is that when you're originally started to paint them and you've got all these darker colors around. You can sometimes use that as part of the definition of a hub. The pickup ever going to slump saner. The cottage. And so now I'm just using some black and just filling in some areas for the landscapes in the background. Just going back and forth with my surrealism blue and is so small and it's not necessarily very clear to see, but it's, it's happening, It's moving. Things are change in on this little boat. You just take your time and you build the layers we're using the light rebellion were used in the ultra marine. And we're just working in the urban areas weren't going to do now is start going into the sky and with the ultra marine. And this really in blue. And just starting to do this. And then I'm going to add some of the white as well. So it's going to pick up on some of these areas. There's going to start building layers over that green, that is fair. Then it's going to carry it through to what's going on in the ocean as well. If I'm Leeman alone for announced that it can dry and we'll come back into. So you move your brush haphazardly around your painting. Very wildly, vary wildly, I should say wild. And what I'm doing is I'm trying to work with a wet and wet very quickly. So some areas I'm adding more white and that would change that area and it just feeds. And I like that kind of a blend and effects it has to some degree, which helps it look like it's fading into itself. If you've got too much white, you just mix in some more blue. And you just keep going. As I said, always been aware of your edges so that you can actually have a really nice finished four-by-four piece that all the corners are filled. So broken and three at a time is not that easy to do because you're looking and you're trying to think of the murder building, you don't want them to be exactly the same. So that is time to make up for that. They're not exactly the same. So just mix some black, some of the black and some of the yellow, the yellow pale. And this is actually Morris black. And then I'm going to go back into those backgrounds that are in the distance and start picking some more on them. And it's just like if you've got some areas that are still wet, I'm going to add some more black there. You can get really nice kinda crossovers and colors, and that's quite an organic green background there. And this is quite thick of the small papers. Well, I'm making the paint quite thick. Sometimes. If you go quite high up, you can come back down once it's dry with your blue in the sky basically. So I can fill in some of these areas closely. You said making sure all the edges are filled and some might look more finished and others, so you remember that and you move back to the other painting like this one here. So I'm going to just fill in some areas to make sure that I'm trying to be careful that I don't get rid of variations and greens dime scene as well. So yeah, we should let this layer dry. And I'm going to come in and start working on my actual natural. I could just do that now. Just add a little bit of color on my cottages. And finally settle on my content is I can make that one's smaller in a minute to too big. And the mixes of colors is not pure white. It's got a little bit a little bit of other colors mixed in it right now. So that was some of the green here that I used. And some of the wide Parisian green. So nice green. So Rich, kinda green. Because we've still got quite a few things to add in these areas. So it's like you just scribble, scribble it, Scrum on. And it kinda gives foliage like wild Plants effect. Undid some of the ultramarine green, blue in there. This has given us a different green. So it's just very rich using different greens and blues and mixing them across. So all down here, it's going to look amazing when we peel these back. So we're going to let this layer dry and we're going to go on to our third layer.
6. Sea & Sky Third Paint Layer: So now that this has dried slightly, see if I can use my little pen here that I said and, and see what kind of effect or create. You don't have to get one of these indices in here. And just because I like my mixed media and I like to add different elements. So some of the areas that are so green, I could go over that. So this is like an acrylic markers. You can use it with this. And I can use it maybe to fine tune some of these areas here, just make them lower. I can paint over again as well, so just pump it a little bit. Filling in some area is introduced. Another to proceed from this as well. With different things like coloring pencils on this. I will go into that too much, but I probably could have done that as well. So this is beside the house here. I'm just going to come in and fill in some detail. We can really take your time. No, just painted over my house. Take your time and build. And here it is a Loveland missing merozoites and coming by Canon, put some in there. Just make this hot stick out a little bit more by this. Okay, I'm ready, I'm summing this. So as I said, I'm always looking to cover areas that are still kind of not covered. So let me just show you some of that screen might be different from mine, so you might not see the detail of what I just did. Concise another issue and that's why it's good just to ease your pain and just to experiment with what you can do. So now I'm going to go back kidney with my ultramarine and some of the white and just start in the sky a little bit more again. And just, and then also in water as well. So you can go in and really just lightly, but quite a dry brush as well. I like to work mostly quiet drying up to liquidity because then it would a lot of the details and things that it can give you with the brush will be missed. So this is a really peaceful looking see, I really like that. Then it come in because with paintings you should really have quiet contrast. I should say the value aspects. So this feels really this doesn't have as much as it kicked in the values. So I'm going to do this. Go ahead and put some of this yellow green into the black and bring about some little island Theta is it looks and his band genital now, so you're trying to stop the tenure details in. So we just take our time and really start playing with that. This is a very busy environment. I really like this scene more. So I'm going to push this one quite far down so that we can a bit more detailed. I'm just gonna go in. And then I'll come back with the blue from the top to make it a lot. And so I really like this one. I'm not going to do too much to that sign there. Why can this mix them with my ultramarine? So it's a very dark black, blue. And just build some of these corners up here and stormy kinda colors up in the corners. I like doing this in the corners because when you take it off and you are looking at your painting, there's just something, it's kind of crown is the actual painting quite a bit. So at least as well, call it a crowns. So I think I'm done. I'll use my bigger brush as well in a minute so that I can add some more, much bigger brush strokes to this. So I've got this brush, like I said, the eight. So I'm gonna just say it's a and it's a filbert brush. This one. So I'm gonna dry as much as possible. I always put it in water and then you dry it. So I've got some of so really I'm Blair there. And then I'm just going to start by going over some areas are that will just kind of bringing back some of the wildness, the center and trying to pull it back a little bit. So you can see I put seven but why and so it kind of like makes those kinda cloud like looking for maintenance when he did that. I really like those kinda clouds sideways cloud thing going on. Just like you said, the peaceful look down here. And then I'm going to go in deeper and try. And if I go too far, I can always come back and use my detail brush to do some more. Correct and under. But this bigger brush, you've got all sorts of other famous going on. And to be adventurous, I mean, just as some wriggly areas like that. If I want some more of the colors going in and to get some of that blue, darker blue. So just fantasy, much to break into. So I said always looking and trying to, I think it's an Einstein actually looking at this now. Less island in the background, isn't it? Then all those details is still behind the add in texture. So we're going to come back in and look at this water a little bit here. This one's really busy. And we're going to drag some of this and this boat is lightening the edges, fair? Some of that here as well. Let's push it down a little bit more ocean, ocean symbol in here and really rub it in. Think it's too much and I've just used some more of the colors and push it back. And I'm going to go back and start trying to do some of the beaches with the apricot here. And this one, isn't it straight? Because I really like that brightness is just brought in there with a big brush. Gosh, that looks so yummy. I will take closer pictures of this so that you can see a lot better, but it's like so good at them and given us. And it can go in with some of the yellow here and make a really nice bright green with a civilian. And just on the edges there with my big brush. And just lightly dust over this. And it just brings you into the picture here. So if we want to go back to detail and the boat, we can do some other things because then you can add some black for the actually brac and read mostly black and this mix to make like a really like a black reddish color and make our low level parts here where it's like, well, it came out our Ha, it's just never going to stop saying that It's on my cultivate is. So I'm going to come into the cottages and actually try and make them a lot more clearer. So yeah, it's just trying to focus there. So what I'm gonna do is the next section we're going to come back and look at the cottages and try and build that so that they're brighter against this background.
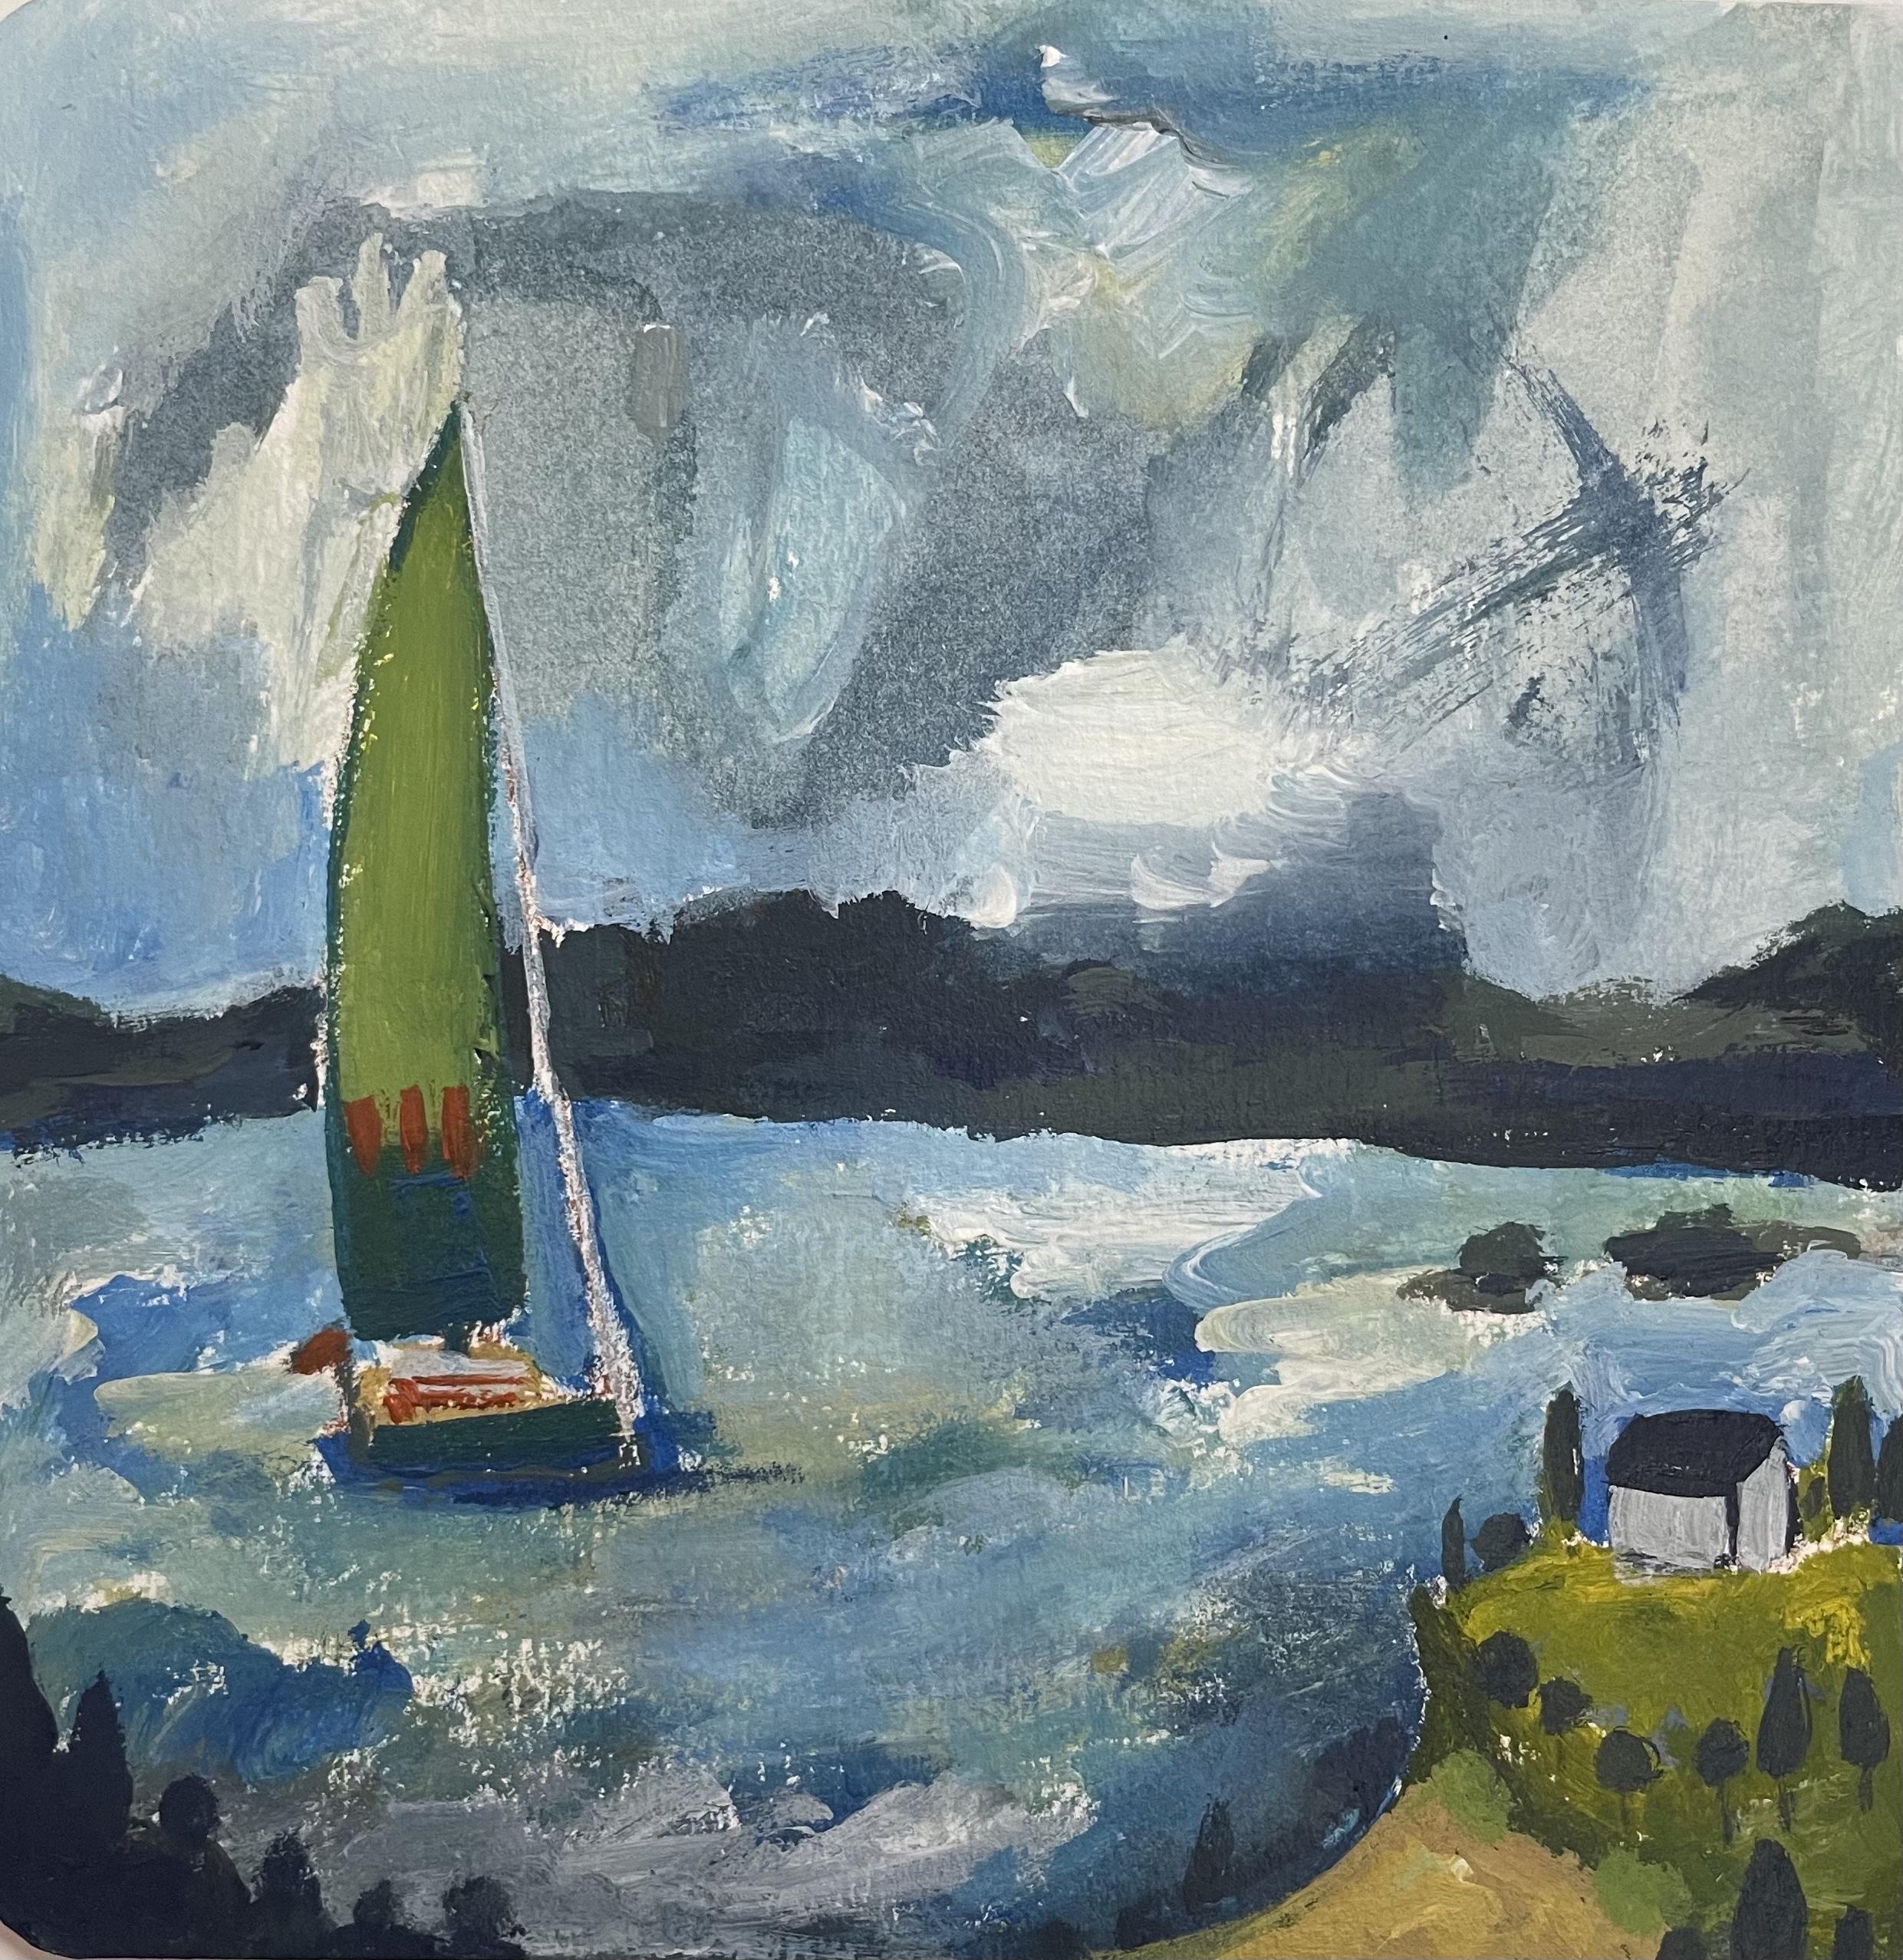
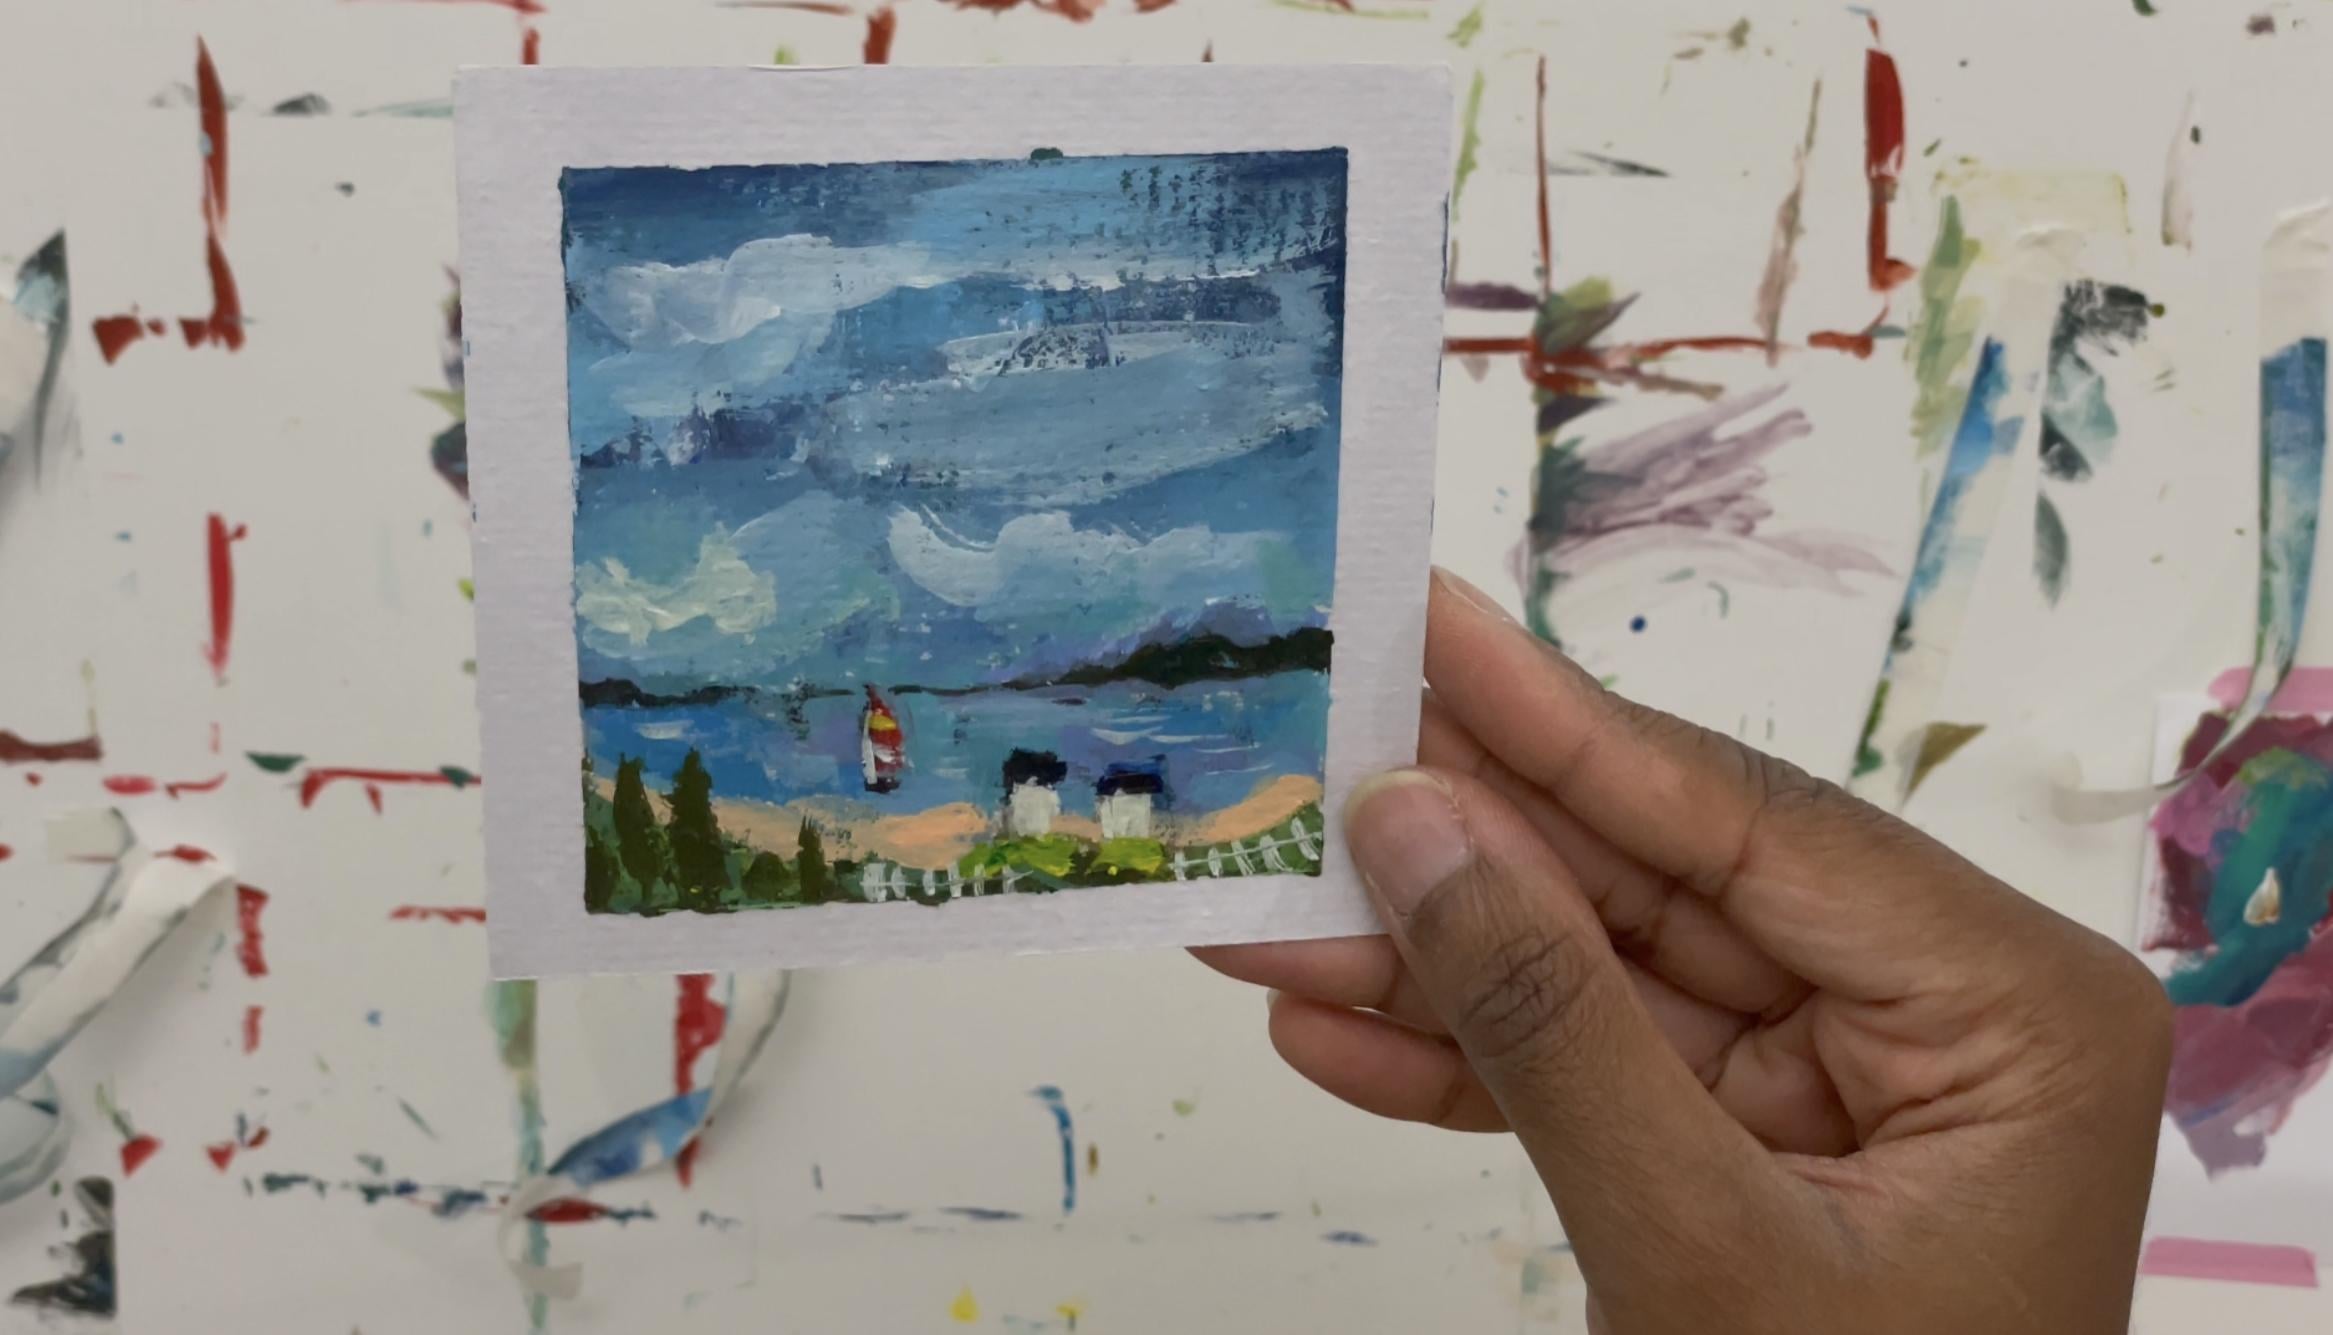
7. Final Art Layer: So this will be the final layer to round everything together and to yeah, to kinda just finish it off. So I mean, this was the inspiration for that. So you can see I have the content is I'm going to highlight in this section. And my little boats, which you can use different colors on these these bulbs. You can use different colors on these boats. I could add a bit of a yellow angle. So I get that. I'd like a yellow striped line. So you can choose what detail you want it to make them stand out a bit. Even nowadays, you can add flowers closer to here, like kinda like a meadow, yellow. And I have not added any other colors into this. I've just left them as little hints of flowers in. I was going to do trees here. It wasn't. I think I can try that now showing usually I have symmetry. So at these paintings. So yeah, this was like a little forests that can, OK. I had like some trees beside my little cottage. Couple of trees here. This one. Right? Here we go. Yes. It's not just brighten up around some of the areas around this. So sad. You can do so many things. I'm going to try and now actually start working on. I caught it is to have COPD huts and also this class that's unacceptable. So yeah, I'm going to put these in and make them a lot brighter so you can see them better. So it's a lot of layers and build in and select for the book as well. I'm going to put a stroke on y, then you can see a bit better. And distance dependent have been your brushes. If you want to add those little lines that you get upvotes. Very thin line, a very thin line. And just to emphasize that aspect of the sale, usually have a waves as well. So you might my brush and just some very thin highlights of waves around them. Look how cute is this and feel like we spend very long on it and it's beautiful. This thing can want to spend this horizon line, I'm thinking I want to add some kinda turquoise to highlight these. Yeah. And that background. There's so many things we can do with this ridiculous. So I love this kind of green and the turquoise of PR on it. And it's like the details you'd see once you close up to it. So I don't want it to match to this guy because I will change too much in it. It's just only a level. Yeah, that's the overall look on it and it's very cute. And I, I think we should worry about this. But you can put so many things, you can put more flowers. And actually another thing I've been doing, Here's my fences with these. Depending on how dry these are. Acrylic is put on fences on them because I love the places I've been doing recently. So I can't do that. So that would be like kinda hint of fans coming up here somewhere. So I would like draw in here with my posca. Marker pen, like little things. So it kinda tip of fence come in in here, which I love, I love those fences. And since adding as much detail as you can. And I was showing you where the defenses, this landscape here. So this one was a sunset one. And you can see the little fence here. So it's this kind of idea. All like beans, which are a lot greener, Louis, different color. And I've got the fences here as well. So that's quite a nice thing to add as well. So I'll just do this here. And just making them breaking that they're bent and they are like old and that whole white picket fence thing. I really always loved that idea. And then I'll just do a couple more. And then what I'll do is it has run my pen quickly through them and kind of make that Lucas Yeah, the list kind of thread that goes through it. And because this is wetter here, I'm just going to do on this side, Let's do a couple of them. Not too much. Sometimes this gaps in between them, so that's fine. So I've just randomly added here and here, and we'll go on to peel those off. Let's see what it looks like. Hopefully will be dry enough because this is me trying to Russia a little bit, but I'll take this one off and I will show you the finished pieces comes off as well. So there's really good fun and actually taping them off and then seeing the result. And that's just really, Let's just show you this one. And this one is leaked a little bit there and there. But that's fine. But you can see how it's like basically very, very detailed and the texture and the boat. And as I said, inspired, it was inspired by this one. So you can create yours and have fun. The beach is just awesome and you can put more detail into this speech. I was just very generic what that you've got your picket fence, you've got your cottage. And how cute is that? I mean, seriously, Let's take the Avalon is off as well and have a look about that, but there's just torn. But what you can do is because you have to always be prepared for everything and have a little bit of gel medium here. I'm just going to put my finger in a little bit of it. So this bit because I was careless, distracted, and I'm just going to put that there and slide that over and that's just call it push that back on. So yeah, it's having your tools and learn how to actually problem-solve. I think sometimes we can panic.
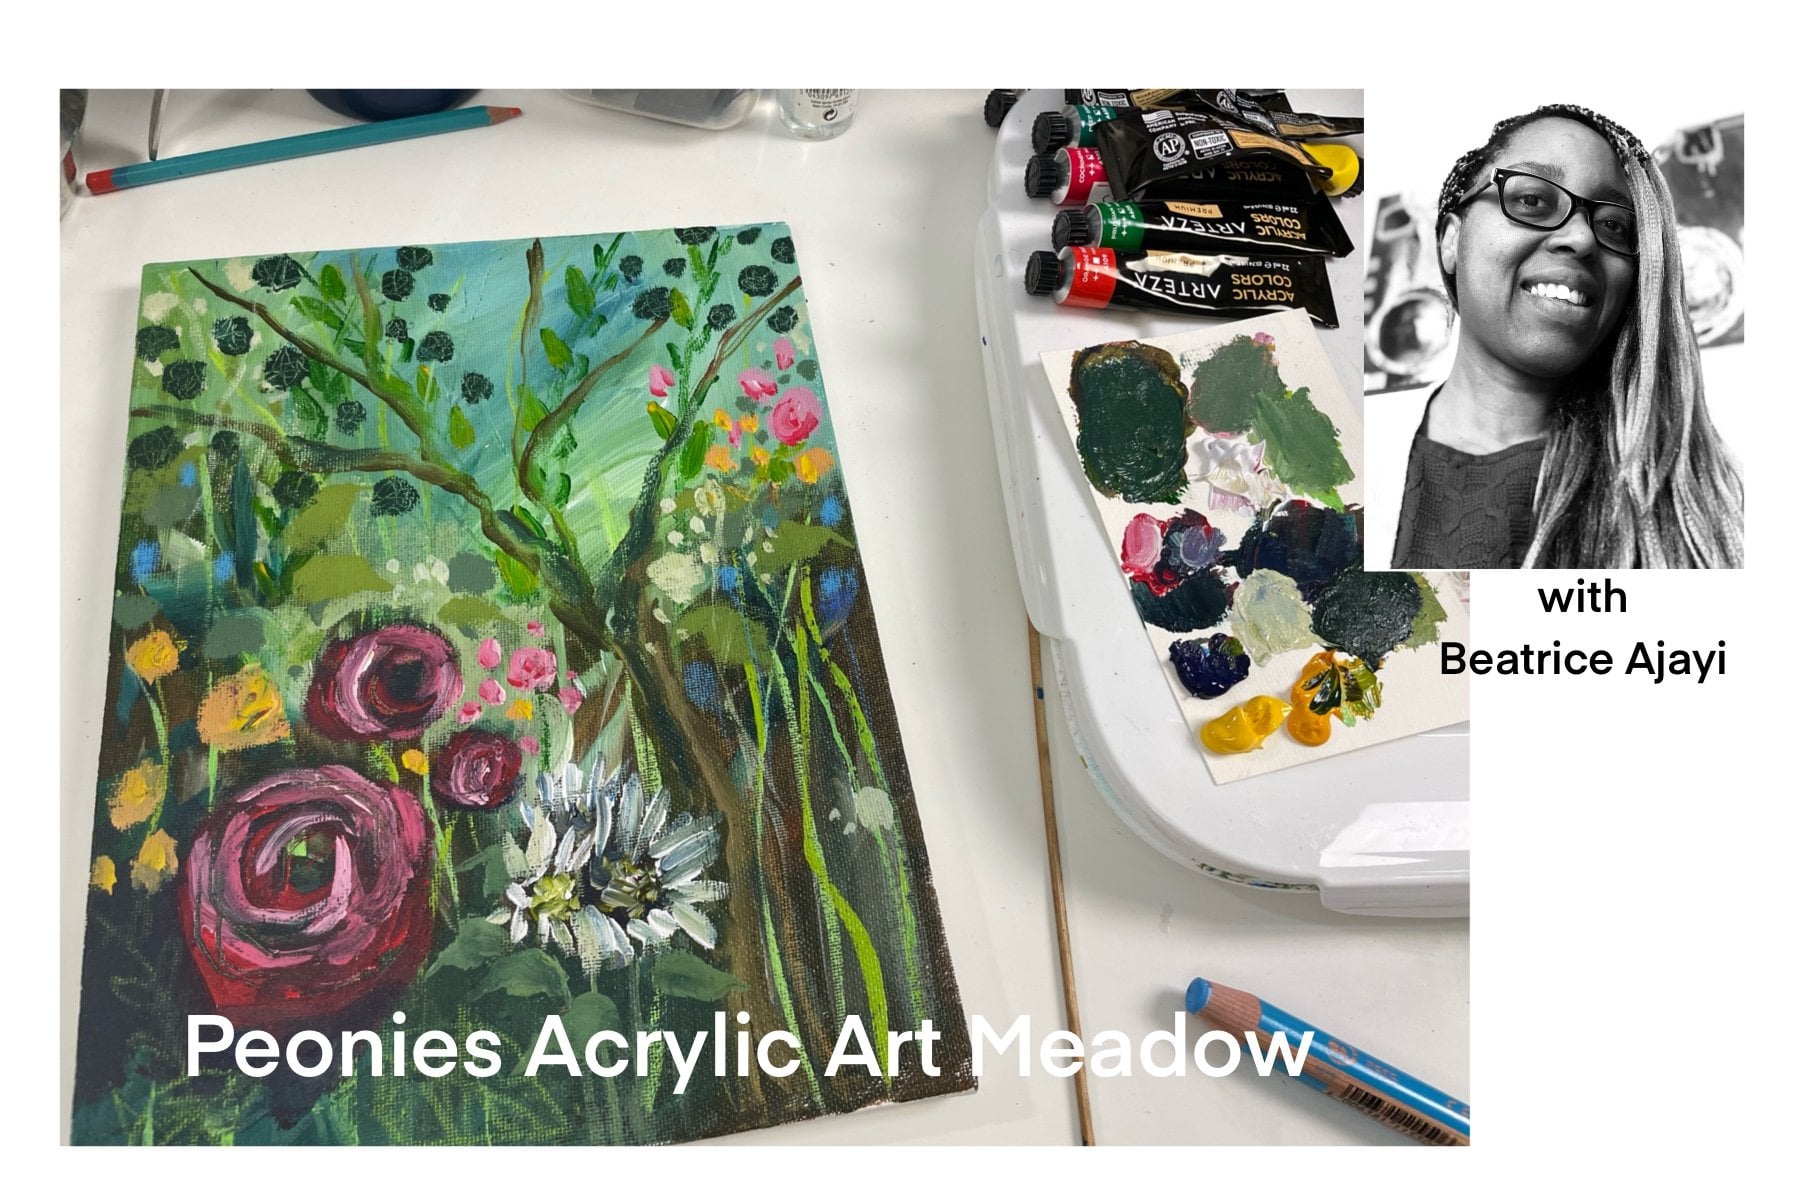
 Beatrice Ajayi, Founder of HyssopArts