Transcripts
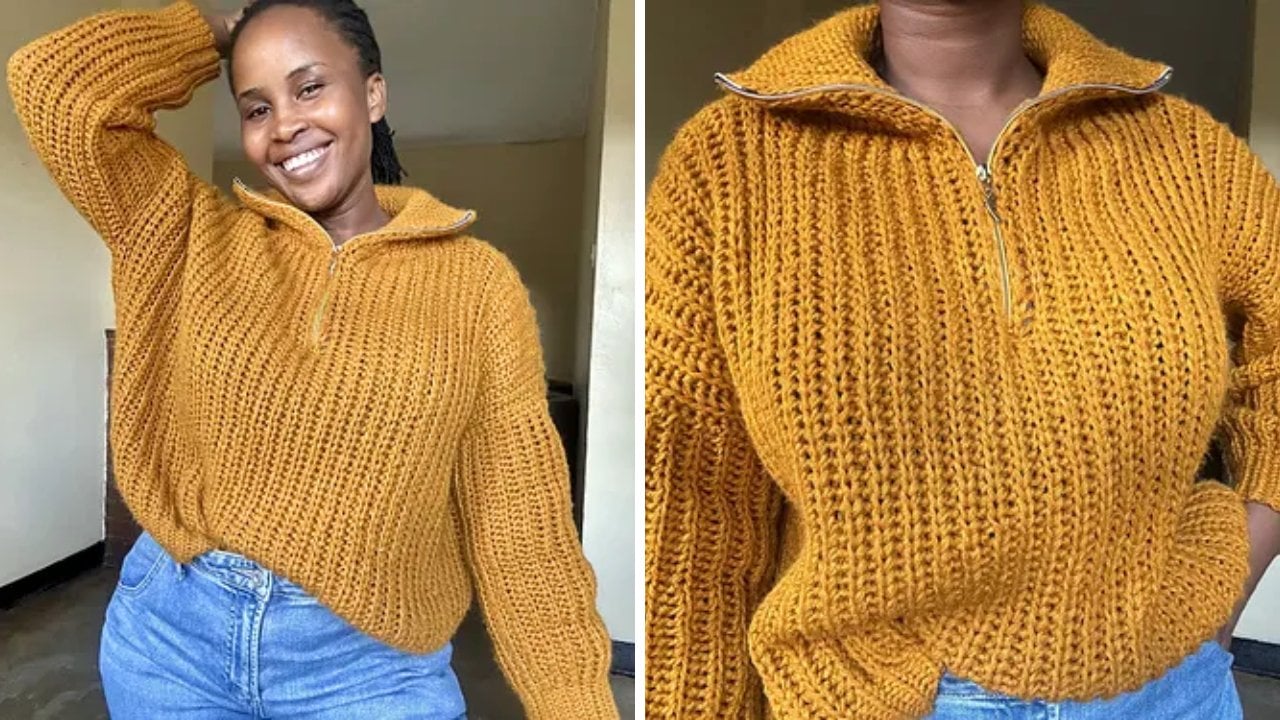
1. Introduction: I believe what we wear should be a reflection of who we are, and that's our style, our
fit, and our creativity. And that's why I designed this measurement based
crochet cardigan. Instead of following rigid
stitch counts or fixed sizes, you're going to learn how to build a crochet cardigan that fits your body and
your vision perfectly. Hi, there. I'm Alena Charity, and I'm the owner of
siting crochet.com. I'm a knitter and a crochet with an absolute obsession for yarn. Over the years, I have
explored countless techniques, and one thing that I've
come to settle with is the absolute freedom of
crocheting without limits. And that means not following
rigid crochet patterns. I'm not here to
tell you what yarn to use or how many
chains to make. That is all going
to be up to you. My job here is to guide you
through the structures, the stitches, and over the
construction of the cardigan. And we're doing this no matter the skill level
in your crochet. Beauty of DIY is that it allows you to make something that's
absolutely truly yours. Alongside the step
by step lessons, you're also going to have
a downloadable PDF pattern that's going to guide you
through every single thing. I know that not all of
us are visual learners. Some of us love to
have something to read on the side,
so don't worry. I've got all of that
covered in this lesson. At the end of everything,
you're not just going to have your own customized
crochet cardigan. You're also going to
have the skills to make other customized
cardigans or sweaters, that would truly fit
you and your look. So let's get started.
2. Supplies: Talk about the supplies
that you're going to need to achieve
this cardigan. First and foremost is the
big boys, which is the yarn. So like I said, you have the
freedom to choose the yarn. I've got three types of
yarn here to show you from. This right here
is a chunky yarn. This here is a three ply yarn, and this is a four ply yarn. These are the yarns that
I have at hand so far. And recently, I made a
cardigan using a chunky yarn. Similar to how we're making
this cardigan right here, it's all measurement based. And the drape with this
is not doesn't flow as much as it would if you used
a three pon or a four plon. But nobody wants to
use the yarns to make a cardigan because it's
going to take a while. So what I did was combine use two strands of the three plon which gave me a
decay weight yarn. If you have a DC urn,
it's easier to do that. I did that because I do
not have a DC we urn. So because I used a
decay weight urn, I had to use a five millimeter
crochet hook for the body, and for the bottom bands or
the sleeves and the collar, I went down to a four
millimeter hook. Assuming you were going
to use a chunkier yarn, I'm going to suggest you
either make a gauge swatch. If you have a tight attention
or a loose attention, it's going to depend on the
size of hook that you need. But for this, I used a six
millimeter hook for the body, and for the rest, I used a five millimeter for the
cuffs and the collar. Besides the yarn, you
are going to be needing a measuring tape because this right here will be your
next love going forward, and I'm using one hand because I am holding the mic
with the other hand, so you're going to have
to forgive me for that. And besides the measuring tape, you need a stitch marker, and, of course, your scissors. And one thing I
forgot to bring onto this set is your needle. You are gonna need this bad boy to weave in all
the funny bits at the end so that we have a seamless and neat
looking cardigan.
3. How to follow the progress chart: So, together with your PDF
pattern or what the PDFs are, you're going to find
this project tracker. Forgive me the words I think
I made them a bit too big. So if yours prints like
this, I apologize. I'm going to try
and edit the PDF before you guys can
get to print it. So you're going to write
your start date here, and this will be the day where you actually start to cast, not the day that you decide
to make this card again. So from the day
that you start to cast on or make your chains, you're going to write
that date here. And the day that you finish
where you're actually blocking you're going to
write that ending date here. Now, let's walk
through everything. The designer, obviously, you can write
yourself because you are designing your own cardigan. I am just directing
you on how to do ABCD. The gauge, you want
to write my gauge. I'm going to write
my pattern gauge. This is especially if
you are going to be using my a supply the
supplies that I'm using. That is, you're going to
use the same yarn as I did, the same hook as I did that you might want to follow
my pattern gauge. And then you might want
to write your gauge. If you're not, that's
absolutely fine, but you just want to write your gauge for the
sake of the future. You never know you might want to remake it and you want to know what gauge you had and then you want to come
to the yarn section. So you're going to
write the brand, fiber, the yards or the
grams that you need, the color you used,
where you purchased it from the cost because you might want to know
this for the future. And then the hook sizes. So I did two lines
because you're going to be needing
two hook sizes. If you happen to need more, that I highly doubt two is the most that
we're going to need, which is the main body
and for the cups. And here will be any added
notes that you need, especially when we
have to do the math. Yes, there's math involved. It's not so complicated. It's just so that you know how many rows you need
to do for the bag. Depending on how many rows
you had for the front. And then here is where
the fun stuff is. You're going to decide
the surge you're making, and after you do that, you're going to be taking the progress. And I loved this part the
most because it helped me work through my cardigan faster without winding,
because, you know, working cardigans with big
projects can be a bit tedious, but this right here
kept me motivated because it showed me that I
was actually making progress. And here, you're going to write your reviews in case there's something that
you did different. And you might need to
know in the future. And then you might as well write the card again and see
how much you loved it. So you don't have to
use this, to be honest. This is just to make it
more interactive and fun. You can always leave
this part out. I just wanted to
make sure I clarify so that you guys understand
what this thing is for.
4. Right Shoulder : We're going to
begin by estimating how long you want
your cardigan to be. So grab a measuring tape, measure it from your shoulder down to where you want
the cardigan to reach. Make sure the measuring
tape is touching moving by your breast and get into
where you want it to reach. And be sure to start from the very center of
your shoulder as I am showing right
here so that you have the exact length
of your cardigan. Now that you know how long
you want your cardigan to be, we're going to start
by making a slip knot, and you will make a chain long equivalent to the lead that you want your
cardigan to be. So to make a chain, you just yan over and put through, yo. Pull through and keep in mind, we're using the
main crochet hook, so that's a five
millimeter crochet hook. So I will make my main chain. Once I have the
inches that I want or the length that I
want my cardigan to be, I'll be right back. So I'm all done with my chain. Now, next up, I want you
guys to get a stitch marker, probably preferably one like
this because we are going to count from the
beginning of the chain, we're going to
count ten stitches, and this is for all sizes. Ten stitches up because we're going to mark the tenth chain. So that we know that after we reach that place or
the bottom area, that's where we're going to
be placing our bottom band. So the chain where the chain is the
stitch marker, I mean, Where the stitch
marker is going to be, that is where we're
going to be switching the four millimeter hook
to work the bottom band. So let's count ten chains. One, two, three,
four, five, six, seven, eight, nine and ten. And I'm just going to
place my stitch marker into that back bump right there. So to begin on the
actual cardigan. So row one is going to be a row one and every odd row is going to be a half
double crochet row. And to start a half
double crochet row, I want you guys to turn your
chain so that you're seeing the back or the back bump as some people like to call it
or the back of the chain. If you prefer working in the front, that's absolutely fine, but I prefer working into the back because it
makes the edging so much neater because we are going
to be ing the edge to pick up stitches for the
sleeves of the cardigan. So you're going to
skip the first chain and then into the second chain, into the back bump,
you're going to yarn over and place your first
half double crochet. Oh, there we go.
Half double crochet. And then into the second one, still working into the bug bum, we're placing our
half double crochet, and we are going to be placing half double crochets
going all the way down. So you keep placing your half double crochets just
like I am doing. Once you reach the
stitch marker, I will meet you
because that's where we're going to switch hook sizes to the four
millimeter hook to work the bottom band. Reaching the stitch marker, I'm just going to take out my five millimeter and
bring in the four. And for now, I would just
remove that stitch marker. And we're still working
into the back bumps. We're now going to switch to the single crochet. So insert. You've got tulops
on your hook anova, and you're going to
put through both. And you're going to single
crochet, all the way down. So ten stitches in total. And remember this is
true for all sizes unless you want to switch it up and you want a
longer bottom band. Remember, we're designing
this card against ourselves to our fit
and to our liking. So if you want more, you are
free to leave a bit more. So that's the last one.
Now off to row two. You chain one and turn. Now, from here on and
the rest of the rows, to get the ribbed effect, we're going to be working
into the back bump. So to work into the back bump, I'm going to bring
this up close to you. This right here, that's the chain that we just
made that stitch. So this V, the first
V that you can see, that's the first stitch. So we're going to
be going in between that V to work into
the back bump. Nona Luka Yan. You've got two
loops on the hook. Yarova. Put both. Let
me do that again. You see that V
right there, you're going to go into the center, loop that ya, pull it through
Yanova, put through both. We have just made two and
the idea is to have ten. Remember? Now I have
one, two, three, four. I need six more to get to ten. One, two, three,
four, five, six, seven, eight, nine and ten. Now we bring back
this stitch marker, and we replace five
millimeter hook. Now, row two and every even row, we're going to be switching
to a slip stitch. And that slip stitch alternating between
the slip stitch and the half double crochet is what's going to give
us the ribbed effect. So to slip stitch, where spillwing into the
backwoods, remember? So it's still going between that pulling through
and pulling through. And you want to make sure that you're making this
stitch as loose, not too loose because you want to maintain a good tension. If it's too tight, then your carb is going to cringe up and you're not
going to like that. So you want to maintain
quite a good tension. So personally, I hold my
hooks this way and this way. And when I'm working the
slip stitch through, I like to switch to this
method because I find that my tension is less when I hold
my crochet hook like this. So we're just inserting
and pulling through. Inserting and pulling
through just like that, and you're going
to continue to do this all the way up to
the top of your work. And once you get there,
I will meet you. I have reached the
top of my work, and I just want to
use this chance to show you the ribbed or the effect because
right now the pattern is about to start forming
or it's starting to form. But what we're looking
at, at the end, or as we're working row two, you will be facing the
wrong side of the work. When you turn it,
you're going to see that there's this ribbed
the rib is starting to show. So start in row three. So this is the right side
and this is the wrong side. Row three is just like row one, and going forward will be repeat in row three and row two. Or row one and row two. So I have chain one and ten, no, just like we did, we're back to a half double
crochet row because there is an odd row and into that
back bump or back loop. No back bump,
sorry. You're going to go in there and place your first half table
crochet, just like so. You'll be placing
these half double crochets in the back loops. Going all the way down up
until the stitch marker. While you're going
to switch back to the four millimeter hook, single crochet down, chain one, single crochet up, up
to the stitch marker, switch back to the
five millimeter and you will slip stitch
go the way up. So all we're doing now is
alternate in between row one, which is the haftable crochet and row two the slip stitch. Up until your card digan reaches the length
that you want. So I was just doing this
for demonstrations sake. I had already done
mine and I needed about 31 rows because
I was trying to get 10 " because that's how long I want my card began to
drop down my shoulder. So there we go.
I've got my 10 ". I don't know if that was a form. But yes, I've got my 10 " because that's how
low I want this to go. And I am making a size more,
as I already mentioned. So if you're trying to
copy what I am doing, and if you're using the
same gun I am using, then go ahead and work 31 rows. After that, then I will meet you so that we can start
working on the back.
5. Back: That we're done with our
front right shoulder. It's just time to come back
to our progress tracker. And I've already ticked off, we decided on the size. I have decided on the size. I have decided on the yarn. I didn't have to order.
I just picked the yarn. My crocery supplies,
gauge watch, I have made all the
necessary measurements, and I have finished
the right shoulder. So go ahead and take
that because that just shows you that
we're making our way. Yes, this is the easier part, and this is going to
take a bit longer, but it's nice to see that
we're making progress. On to the actual cardigan. Next, before we begin the back, it's time to determine how wide you want your
arm opening to be. I have already done that, as you can see my stitch
marker right here. So I wanted my arm
opening to be about 7 ". So I measured 7 ", and that ended up
being 25 stitches. So counting from the
top coming down. I have counted 25 stitches. So you want to get
your measuring tape and determine how long how wide. Some people don't want a
buggy or oversized arm. So if you want yours to be a bit smaller, be sure to do so. But you want to make sure that this however long you leave is not too big
and it's not too small, 'cause you don't want your arms to be so tight on you when the actual cardigan is meant
to be slightly oversized. So I have left 25 stitches. And if you're not sure how
many stitches to leave out, I have written in the I have rated down in
gradien pattern, how many you can leave out. That's if you're using
decay like I am doing, or if your gauge swatch is
similar or close to mine. So now that we have
that out of the way, let's get started
on the actual back. First things first, you want to obviously we ended at
the bottom of our work. So first things first,
you want to work back to your stitch
marker and make your ten single crochets
for the bottom band. I have already done
that, so you might want to post the
video and do that. But otherwise, we're going
back to it's our even row, so it's a slip stitch row. So into the back loops, I
was just getting all set up. Into the back loops, insert your hook and place
your first slip stitch. Let me just replace my marker. That's your first. Now, remember you have placed your marker
on the stitch you want your sleeve to begin. So don't remove that.
Don't lose that. So you're going to be slip stitching all the way up
until that stitch marker. So obviously, you guys already
know how to slip stitch. I'm going to go ahead and
slip stitch off camera, and I'll meet you guys
at the stitch marker. Now we are going to make a chain equivalent to the number of stitches
that we have left. So if you're doing a small or if we're
doing the same work, we're going to be chaining
25 plus one to turn. So 26. If you have left out, let's
say, 30, 30 stitches, then you're going to
be chaining 30 plus one to chain to turn. So 31. As for me, I will
be chaining 25. One, two, three, four, five, six, four, 25, and one more, 26. So turning around back
to an odd number roll. So this would be row
one for the back. We are going to Yarova just
like we did at the beginning. Skip that first chain
into that second one, place your half double crochet. Then you replace
half double crochet all the way down until we're
going to connect the body. So connecting the
body might be a bit tricky if you're not used to this type of crocheting,
the crocheting style. So just continue to half double crochet
up until the last one, and I'll meet you
there so that we can connect to the main
body together. I have reached I've got one
more chain to work into, and to make it easier for you, I like to turn my work to
the wrong side and hold it up to me like that
because that last chain is hiding behind just like so. And if you look closely, you're going to see
that it's that little bump right there that
we need to work into. So after I do so, I like to twist my work
back right way round and that right there is our first stitch for
the rest of the body. There we go. Working
into the back bum, you proceed to work
just as normal. Going forward, you know
how to do the rest. That's our first stitch for the back or first
row for the back. And now all you're doing
is still working into the back loop of that previous slip stitch
row until the stitch marker, where you switch
the formulmeter, and you single crochet
down chain one, single crochet backup, and
slip stitch your way back up. And you'll be alternating
between those rows, which is what we've
been doing for the rest of the work throughout
for the back. As for how many rows
you need to do. Oops. Funk sheet. As for how many rows
you need to do. So I would do the mask
depending on my size. So I'm going to come
to the notes area, and we worked I worked 31
rows for the right shoulder. So remember, the
pattern is going to tell you that you know how many rows you need
to work for the back, you need to do the front. The number of rows for the
front times two. Plus five. So 31 times two is 62 plus
five is going to give you 67. So I know that I need to work
67 rows for the whole back. Now, 67 y, or maybe you're wondering why
do we add the extra five? At the end of the cardigan. Obviously, we're going
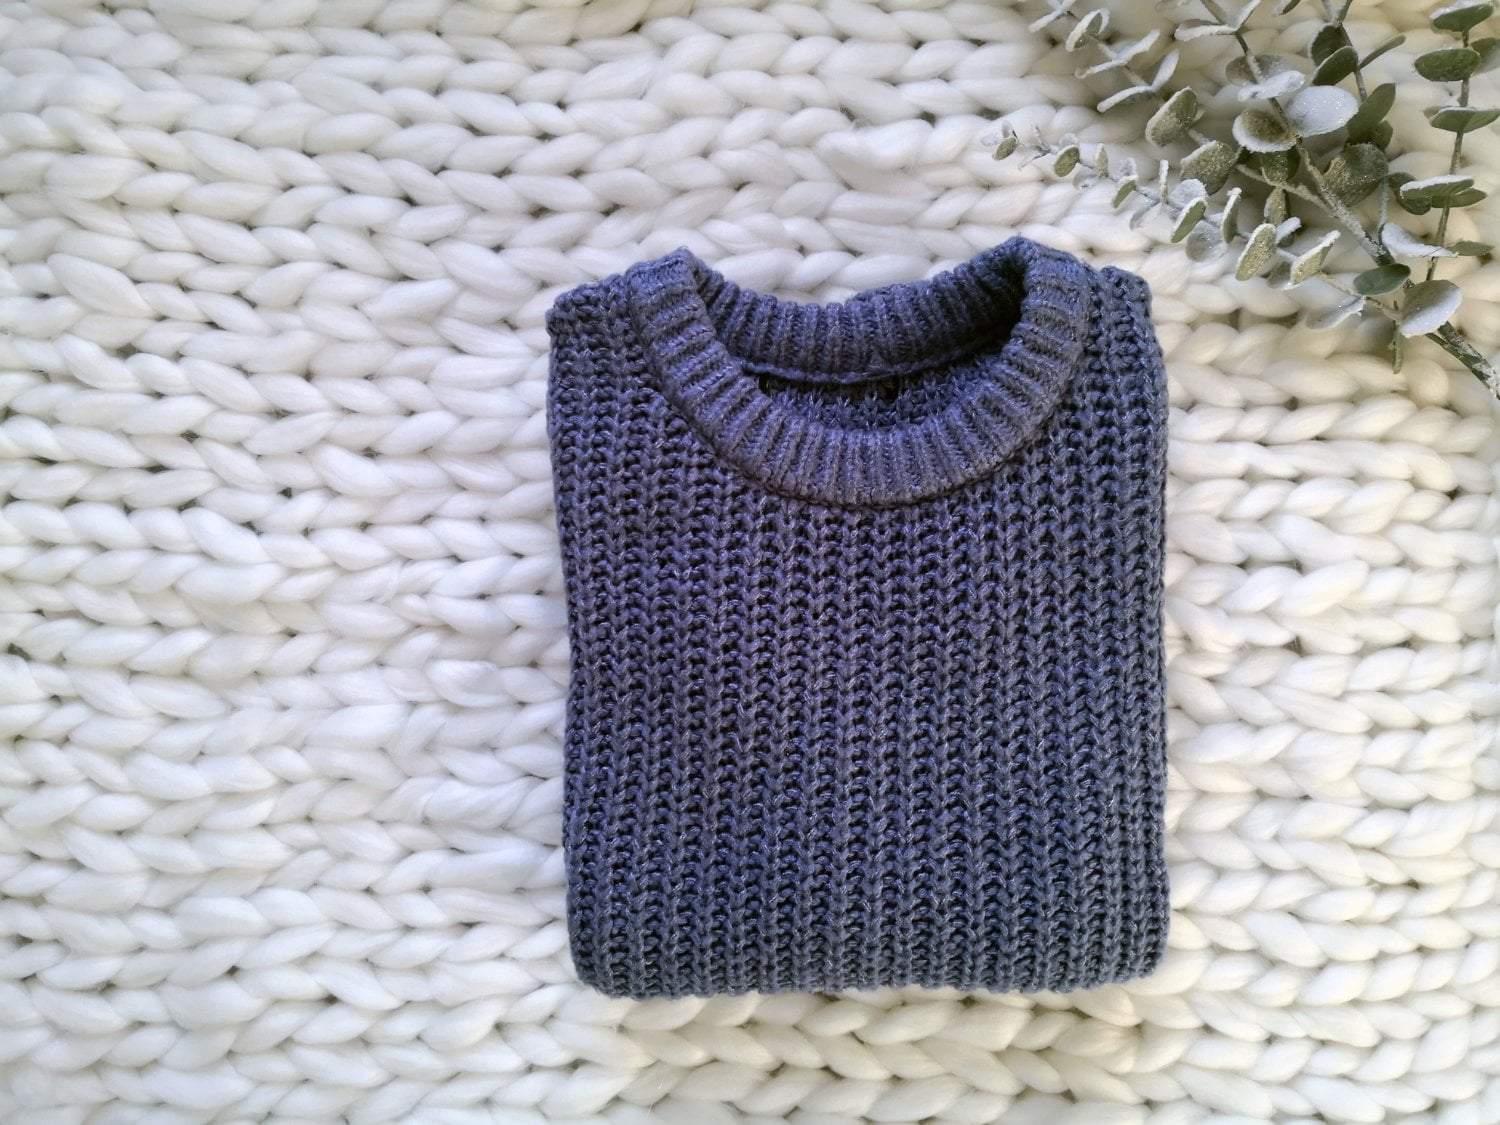
to be adding a color. I recently made a
purple cardigan, and I made the mistake of not adding an extra rose
for the center. So let me show you how
this is going to work. You have the 31 rows
for right shoulder, and you're going to
have another 31 rows. So imagine the other
31 rows are right here for the left shoulder. And for the back, that
means it would be comprising of 62 rows. So if you have 31 31
and the back 62 rows, the neck the sides would
literally just meet right here. So when we would be placing
the color of the cardigan, it would the neck area
would just crunch up. I would have the color would
not have space to rest. So we add the extra five rows to give a little room
between the front, left the right and the
left shoulder panel so that your color
is more relaxed. I believe that makes sense. So continue your half
table crochet slip stitch rolls up into however many
rows you need for your back. I will meet you
back. I will meet you guys after I
have done 67 rows. So right now, I am going to
put on my favorite show, and I am going to
relax and crochet.
6. Left Shoulder : I have completed my 69 rows, 67, sorry, you are looking
at a whole row of 67. I don't think I can
get everything on camera. But so far,
that's what I have. So this right here, where
the stitch marker is. This is 31 rows. And in between these
two stitch markers is it's the five rows all of us are going to have to give
room for the color. And then this is
the other 31 rows. So like the passion says, you should have ended at
the bottom of your work. So we're going to be starting from the
bottom of the work, and you're going to just
start by chaining one. After you've changed
one, we are going to I'm using the four
millimeter hook. We are going to be single crocheting for a total
of ten stitches. One, two, three, nine and ten. Grab your stitch marker and
place it back in there. Just like so. Now, we're going to repeat what we
did for the other corner, so I'm just going to
lay my work, like so, and I'll take you back to the first to the right front,
the right shoulder. Remember, the stitch marker, we left it at the 25th stitch. So I'm just going
to remove that and do the exact same
thing for this side. I'm going to count 25
stitches from the top, and I'll place my stitch
marker because we're going to repeat exactly
what we did this side, but for the left shoulder. So count from the top,
however many stitches, the exact same number
that you left this side, you want to count the
same for this side, so it's going to be 25 for me. One, two, three, four, five, six, and 25. I'll place my stitch marker
in there just like that. So going forward, what we're doing is we're
going to be switching back to the five
millimeter hook or whichever hook you need
for the main body, and we're going to slip stitch up to the stitch
marker followed by a chain equivalent
to the number of stitches that we've left
this side plus one, and then we're
going to be making the left shoulder again. I'm not letting you guys go.
I'm going to be showing you everything. Just a reminder. I will not be slip stitching
with you guys all the way, so I want you guys
to slip stitch from here all the way up
to the stitch marker, then we'll make that
chain together. I've arrived at
my stitch marker. So since I have got 25 stitches, I will be making a
chain of 25 plus one. So that will be a total of 26. One, two, three, four, five, four, 25, and
26, the last one. So the one is that extra
one that we always have from the juice from the
hook, sorry, from the hook. So we're going to be skipping
that one into the bug bump, finding that second one from the second chain from the hook. And the first row going down, it's always a half
double crochet robe. So we're going to
half double crochet, half double crochet
all the way down. And remember,
there's that trick I told you previously of what we do when we get to
the last chain that we're now starting to connect
to the rest of the body. So I want you guys to have
double crochet until you've got one more chain so that
we can do it together. So into that last chain, I'm going to place my
last half double crochet. Now remember, I
say you twist it. So now you've got the
right side facing you. Naturally that chain is
going to lay like this and mostly because we were
working into the back bump. Now you're going to
twist it like so, and you're going to proceed. You're going to find that first stitch of
the rest of the body, and you're going to continue
with that row just like so. So this is row one. For the left front. And you're just going
to continue going back and forth with the
half double crochet, switching to slip stitch row, half double crochet,
slip stitch row, not forgetting to
switch the formimere for the single
crochet bottom band. So you're going
to continue doing the number of rows that you
need for your left front. As for me, I need to do 31. So obviously, what you did for the right front is exact same thing you're going
to do for the left front. So go ahead and do that. And then we're going
to get started to the next part of our cardigan
and reaching this far, you're more than halfway done. So don't worry, your
cardigan is coming to life.
7. Closing the shoulders: That we're done with
the whole body, it's time to close the body. So you're going to bring
the right side facing you, as you can see, I want you to
lay your work the same way. Now, I want you to bring the right shoulder and the left shoulder on top of
your work, just like so. But right now, we're going
to focus on one shoulder, so whichever you want, either
the right or the left. So remember that I have
got 31 rows on here. So I'm going to be counting
31 rows on this side as well. And if you remember, the stitch marked where that row ended. But just to count together, again, this is one, two. So ribbed stitches
represent two rows. So this is one, two,
four, six, eight, ten, 12, 14, 16, 18, 20, 22, 24, 26, 28, 30 and 31, which is where my
stitch marker is right here. So I'm just going to
move that stitch marker. And bring in that if
I was to wear it, this would be my right shoulder. Row one of my right shoulder, which is this one and where
that stitch marker was was, I would just put them on top
of one another so that they are aligned and use
that stitch marker. So I have pinned both
the right shoulder and the back just like so. Let's do that one more time in case I moved
by that too fast. I want you to count 31. If you've done 50 rows, then you want to count
50, if you've done 25, you want to count 25. So I'm going to count 31, and obviously this
is my 31st stitch. So let me just place
a stitch marker. Let me just rest that in there. Now, you want to take
your right shoulder or your left shoulder
and row one, you want to connect that
to your 31st stitch. So this is row one. I'm going
to take my stitch marker, pass it through row one
of that right shoulder, and into row 31 of the
back just like that. Now, this means everything
is nice and aligned. So I want to make sure
that these corners are also aligned just like so. Next, you are going to be closing this part
of your cardigan. So get your do. Here is mine. So to know
how much tear you need, I like to measure this about three or four
times the length. So one, two, three, and about four, and
just a bit more for, like, just in case
you need some more. So I'm going to
start by inserting my yarn needle into the middle where I've
connected everything. So usually, I like to use
my crochet hook to do this, but this is also just fine. Whichever. That's why I said, whichever method you prefer, do it, but I'm going to
show you guys this method. So you've gone through there, and all you're doing
right here is just using the basic sewing techniques. Mine are probably bad. If yours are better
that cared for you. But all I'm doing is going
through and through. And you want to make
sure that you're not going too low into your work. So just stick to about
the first stitches. And you don't want to
just stick to, let's say, this stitch only because that's going to make
everything stretch out a bit. So you want to make sure you just your needle is going through one stitch,
if that makes sense. It's going through one
half double crochet. For the sake for security sake. This is all I'm going to do. Making sure you're
keeping everything aligned so that the back
and the front are aligned. Otherwise, if you go a few stitches forward
and leave a few behind, you're going to
find that you are left with something
like this at the end. So you want to make sure that
your stitches are very much well aligned as you
continue to sew everything. So continue sewing all
the way to the end. And what we did,
you're going to do the same thing for
the other shoulder. You will count in my case, I will count 31 stitches, connect, and sew to close. And in the middle, we will
all have five stitches left. So continue closing
your shoulders, and I will meet you right
now that we're all done, I have just turned my body right way round so
that you can see. So when you lay it down, you can see that the
parts are kind of bulging out. It's not even. Don't worry. After we're done everything after
we finished everything, the sleeves, the color,
we're going to be blocking. So blocking helps the whole
that can get into shape, and all the stitches helps
all the stitches to relax. So so far, this is what
our work is looking like. Now we're going to move on
to working the sleeves.
8. How we will work around the sleeve: To add this sleeve, you
want to make sure that your cardigan is facing
the right way around, and this is what it looks like. Facing down, just like so. So we're going to be
connecting the urn at the under arm right here, which is where your
armpits are going to rest. So when we connect, we're
going to make a long chain, and we'll be working back
and forth and we'll be connecting to the
opening of the sleeve. So we're going to
be going clockwise so that the ribbing
is on the outside. Of our cardigan. We're
going to start from here. We're going to be alternating between our half
double crochet and our slip stitch first,
and we'll be connecting. As we go, I will show
you how don't worry coming all the way
around until here, and then we're going
to close the scene.
9. Length of sleeves: So before we go further, let's just explain the
length of your sleeve. The chain that you
made right here is going to determine how long you want your sleeve to be. So we're going to be
connecting on right here. So I'll show you two methods. You can either just
make a slip knot, just like so, and then
where that hook was. So in the middle, you're
just going to slip through and slip
through just like so. And then this will obviously the tail is going to be on
the inside of your work. We'll weave that in at the end or another method
that I like to use. You insert your hook
into that midsection, bring your yarn, and just
pull it through just like so. The short tail is going to be away from you. Then you're
going to chain one. Then you're going
to hold both ends and just tighten that. But I would suggest the first
method because this means you're going to have
to keep tightening it so that it stays in place. But whichever method you
find more comfortable. So on how long you want
your sleeve to be, that would depend on how many chains
you're going to make. So I would suggest you make
about 50 chains or 55, and then you wear
your card again and see that and see where
your chain is reaching. So the length of your
chain is going to determine how long that
sleeve is going to be. So what I did was
after I made my chain, I did 55, by the way. So after I did 55, the chain was reaching just
here on my wrist. And that was okay
for me because, of course, after
we wear our rolls, when the stitches start to
settle or start to form, the actual sleeve when you wear it might come
up somewhere here. But remember, we are
going to block it. So after you block it,
the stitches are going to come to where your original
chain was if not lower. However, if you are looking
for a longer sleeve, then be sure that chain
the initial chain that you make reaches about
the middle of your palm. After you start working back and forth the slip stitch
in the halt a crochet, it might come up a bit, but after you block it, trust me, it's going to go back down. So make sure you're
careful on this part. I would suggest you make about 55 or 50 depending on
the yarn that you're using. If you're using a
decay like mine, I would say make about 55 or 60 and then wear the cardigan and see where that
chain is reaching. If it's too long, you can always take some off while you're
still wearing the cardigan. It's too short, while you're
still wearing the card, you can continue to make
a bit more chains and see how many you need to
get your desired fit.
10. Progress Check: Just going to come through
and do a progress check with you guys using
a cardigan tracker. So I finished the back. I already take that off, and I have finished
the left shoulder. And we have seamed
everything through. So far, we've got the
right sleeve, left sleeve, collar, weaving the ends, and blocking to do. So the collar will not
even take us that long. The sleeves are maybe
what is going to take us a bit of a long
time, but not too much. So we've really come
to the hard parts, and we only have one, two, three, four, five
more steps to go.
11. How to crochet the sleeve: I have my 55 chains, pause the video and make the number of chains
that you need. So for me, I have 55, so I'm just going to add one more chain for turning
to have a total of 656. And an extra one. So
right now is where I need my four millimeter hook
and my stitch marker. We're going to start
by making the band, the bottom band, the
sleeve band, sorry. And since we did ten
for the whole cardigan, that's for the bottom
of the cardigan. It's going to look neat if we
also do ten for the sleeve. So we did single crochet for
the body of the cardigan. But for the sleeve, since we
need it to be nice and snug, we're going to do slip stitches. Using your formimeter
and remember, we go into the back pumps. Into that second
chain from the hook, you're going to go in
there into the back pump and place your first slip
stitch just like so. Then you're going to slip
stitch for a total of ten, three for me, three, four, five, six, seven, eight, nine and ten. If that was too fast, if I've
moved too fast, remember, you can always pause the video, I'll get my stitch marker
and place it in there. So when we're working
the sleeve now, we are done with
the single crochet until we have to work the color. So for now, we're going to put the single
crochets on the break. So I'm going back to my
five millimeter hook, and the first row going up is going to be the
half double crochet row. So still working
into the back bumps, you are going to do your
half double crochets. The way up until you reach the
first chain that you made. So go ahead and continue making your half
top of crochets. I'll meet you at the top
of our work so that I can show you how we
joined to the sleeve. I have reached the
top of my work, so now we're about to connect. Now, this part, I want
you to pay attention. Remember that I said
at the beginning, I said we should work
into the backbs. I said that because now it's easy for you to
see the stitches. You see these Vs going
around the cardigan. The Vs are what each one of these represent those
rows that sense for me, I skip 25 stitches. So counting from here going up to here or just all around. I should have 25 here, 25 here, a total of 50, meaning that my sleeve is
going to be 50 stitches wide. So each of these V
represent a stitch or represent where I am going to be joined in
each and every robe. So in this case, I just
worked my row one. So to finish off the row, you slip stitch to the sleeve. So that first V that you're seeing right there
is my first stitch. So I'm going to go
into that stitch. Both loops, you're not
going to go into one loop. You're going into both
loops, just like I did. Let me do that again. So that V is my first stitch, so I am going to insert my
hook into both of those loops, just like so and slip stitch to join that row of
half double crochet. So that's going to be one row. To start another row,
we usually chain one, but in this case, we're
going to be slip stitching. Into the next one.
So that slip stitch for us is going to
be like a chain one. Then you would turn. Still
using the five millimeter, we're going to start slips, we're going to start with
the slip stitch row now. So, pay attention. These two Vs that will look like stitches,
are not stitches. These are the slip
stitches that we did. The first one was the
slip stitch we did to connect the half
double crochet row. The second one was
the slip stitch we did to start the
slip stitch rows. So the first two
slip stitches you are always always
going to ignore. This will pose to be
a challenge for you, then be sure you have
a stitch marker so that after you make
your first slip stitch, you place a stitch marker. And then after you make
your second slip stitch, you place another stitch marker, so that when you turn
to start the next row, you will know that you know to skip those first two stitches. So that's clear. You are going to
find that third one, which is going to be the
real stitch of the row, and into the back loop, you are going to
place a slip stitch. Now, another thing,
I like to just place a stitch marker
because sometimes it can be hard it can be easy to lose these stitches
because it kind of twists so it doesn't look as clear as the rest
of the stitches that we're going to
be working because now it's like you're turning. It's a turning stitch. So when you place that stitch marker, it reminds you that
there's another stitch you should not skip. So row two is a slip stitch row. So
that's all you're doing. You're going to be
slip stitching down. After you reach
your stitch marker, you're going to switch
to a formllimeter hook and you're going to
continue to slip stitch. Row three, you chain one, slip stitch up with
the four millimeter, then you switch to
the five millimeter, and you will have double
crochet coming back up. So I will meet you back
up here so that I can show you one more time how
we connect to the sleeve. I'm working back up
and I have got that one stitch marked so
that I don't miss. I'm going to just
work into that one, place my last half
double crochet, just like so now. One more time. That right there, that
stitch that's sticking up. That's where we did
our previous drawing to start the slip stitch roll. Now for this half
doable crochet row, we need to join to that
next available stitch. Into there, we will slip
stitch just like so. And that we've completed
that half double crochet. To start the next
row, we'll find that next available
stitch, not chain, chain like stitch, and
then we will slip stitch in there to begin the next row. So let me just address
this before I go. If it's hard for you
to find which stitch you didn't work into since we're going
to be working down, it kind of does pull
the stitch down, and you might find
yourself working into that same stitch thinking you didn't work
into that before. So after since I have just
slip stitch into the stitch, I can also leave
another stitch marker. Into that next available stitch that I haven't worked
into so that I know when I'm coming back up with my half
double crochet rope, I know to slip stitch
into that one. So make sure you have yourself a handful of stitch markers. You place your stitch
marker into there, and then into the
first stitch that you work on going down so that
you don't lose those two. So with that, you have, I believe you have
understood everything. If it's not making
sense, you can always rewind the
class to where I started to join around the sleeve opening so that you
know how we were doing it. As for now, I am going to continue working on
the whole sleeve, so I will continue joining as I have taught you,
all the way around. Until here. So after
I have finished, I will come back so
that I can show you how we can close
this leaf together.
12. Closing the sleeves: Reaching this far, I have finished I have gone
around my entire sleeve. I'm just going to lay
it flat so you can see. So far, this is what I have. So I have gone around the
entire sleeve opening, and I have come up to the end. And now what's left is joining the two sides to
close the sleeve. So obviously, you don't want
you see on the right side. So right now, I'm
going to need you guys to turn your cardigan, your leave, so it's
the other way around. So we agree to take this and put it through the other way, just like so and bring your
bow of yarn through the hole, if it's still connected
to your work there is. So bring it through the
loop and outwards as well. Okay. Now that's done. Here's my working year.
I'm going to grab my hook. I am going to be closing. I'm going to be seaming my
sleeve using a slip stitch, personally, I like that and
I feel like it's stronger, and I feel like it
looks neat, as well. That's for when it comes to
seaming these areas that is. So to do so, it's just like
you're working a slip stitch. Only this time you're
going to be working into both this side of this leaf and the other
side of this leaf. So you want to make
sure you align if you're going to
use this method. You can always just chain
one, leave a long tail, and take your needle and just weave through like
we did the shoulders. But I'm going to show
you this method. So I'm just going to
chain one. To begin this. And I'm going to find the
first stitch from this side, which is this one right here. And I'll put my hook five
millimeter into the back loop, and then I'll do the very same
thing for the other side, and that's this one right here. So that's the first stitch, and I'll also put my hook into
the back loop of that one. And then I'll slip
through everything. I'll find my second stitch. Now, if you hold
it like this, you might think that's
the stitch you want. But when you actually put
the work right way around, so you're seeing the
actual top of it, you're going to find that
this is the stitch you want. Into the back loop,
the same thing for the other side
into the back loop. Let me do that again, like so, and slip stitch, that's all we're going to
be doing going down. Once you get to
that bottom band, where we're making that cuff, you're going to switch
to a four millimeter or your smaller hook, your ribbing hook, and you're going to finish with
the slip stitches. So this is all I'm going
to keep doing going down. When I reach the stitch marker, the last ten for both sides, I will switch now to
my four millimeter. So let me continue up
into the stitch marker, and I will meet
you so that we can switch and end the
leaves together. I've reached the stitch marker. So now I'm going to
put my five millimeter aside and bring my four and I'll just remove
that stitch marker. And into the back loop of that, and into the back loop
of the slip stitch, find the next stitch, same for the other
side, and slip stitch. Just like it might
feel a bit weird, but with time, eventually you're going to
get the ham of it. Just like so, and you're
going to continue doing this all the way up until
the end of your work. I've only got a few more
slip stitches to make, so I'll finish with
you guys on camera. And one more. Just like so. And this is our seam. It's so neat and so strong. And when we turn
it the right way around, that's what
it looks like. So it looks for me, I feel like it looks
so much neater than using a a needle. Youp a chain one, leave a bit of a tail. Grab your scissors. Cut the iron off and just pull
that through and tighten. So remember, we're going to weave in everything at the end. But you've just
finished one sleeve, and you want to go
ahead and repeat this for the other sleeve. I have already
done both sleeves, so let me just turn my
work right way round. So you go ahead and
repeat what we just did for that one sleeve
for the other sleeve. And just to keep
up with progress, I'm just going to
come through and show you what we
have done so far. I have finished my right sleeve, and I have finished
my left sleeve. This is almost one thing I'm always excited to do when I'm crocheting on the
gigs to just get to my progress sheet and
see how far I am. So right now, it's safe
to say that we're 95% done all now that's left to
do is to finish the color.
13. How to crochet the collar: Now we're going to begin
working our color, which is the final
part of our cardigan. Let's talk about how
we're going to do it. So the very same way we've
been working the sleeve, especially when it comes to joining it to the
rest of the body, that's exactly how we're
going to be doing the color. We're going to be
working the color exactly onto our cardigan, as well, and we are going to be using our smallest
crochet hook. As for me, that would be my
formimeter crochet hook. So if you remember,
I had mentioned that you should work into the
back loops or the bug bumps. That was to achieve
these stitches because that's where we'll
be joining our colors into. And the hard part, if you're a beginner, might
be the center, the color, the five stitches
we all have right here because there's
not exactly stitches that would show as to where you are going to be
working your stitches. So I'm going to ask you to
take five stitch markers. So we can just point out the stitches so that you
know where to work into. So I've got my five stitch
markers right here, one, two, three, four, five. Okay. And I'll just
turn it around. So it's facing the
right way round. And we're going to be
counting of stitches. Obviously, this
is the first one. Sorry about that. I
lost power for a bit. You're going to hold
your work color so that you can see
the five stitches. That's one, two, three, four, five, into every row, you're going to be
placing a stitch marker. That's the first row. That's one. The next row is
this rib row right here, one of the chains
that you can see, on top of that,
another stitch marker. And then the half double
crochet roof is row three. The next ribbed roof
would be row four. Finally, this half double crochet roof, making
it roof five. So I've just left these in there so that we
know this is where we're going to be placing our stitches at the
top of our color. So now to begin on
the actual color. I'm going to begin at
the bottom right side. You can always begin even
this side if you want. It doesn't matter. So grab your working yarn, and you want to make a slip. Now, grabbing the word, finding the very bottle, right there, I'm going to follow where that tail
is coming in from because that's our
initial foundation chain when we began working
the right shoulder. Into that first stitch, join with a slip stitch. Slip your arm through and
just slip it through. Exactly how we did the how
we joined the underarm. After you've joined, this is now where you decide how long
you want your quality be. If you want it to be
slightly a bit longer, you're going to make
it longer chain. However, I want mine to
be five stitches long. One, two, three, four, and five. Plus one, the turning chain. I'm going to change six. What you're seeing here, this is going to be the
length of my collar. So if you want your to
be as long chain five, I recommend the lowest
chain to be five unless you're using a
very chunkier yard, then you can chain
maybe four or three. I'm not sure what
they would look like. But I would say 45
can be the minimum. Don't go above ten or 15. I feel like that's just going to cringe together the color. So five is a good number. Into that bug bump,
turning that chain, you're going to go in
there with single crochet. Into the second chain, one, into the next one,
one single crochet. One single crochet, that's
three single crochets, four single crochets finally.
Five single crochets. We'll be joining into that
very same stitch that we joined into because
that's our first row. We join with a slip stitch just like we did
with the sleeve. Then into the next stitch, following up, we slip stitch into there to begin
the next row. Remember how we're
connecting the collar is exactly how we were connecting
the sleeve as well. We turn it around and remember those two first stitches that look vis are
not the stitches, but rather where
we slipstitch to join and where we slip
stitch to start a new row. To get the ribbed effect, we're going to be working into the back loops, placing
single crochets. That's my first, second, third, fourth, and my fifth, Chain one and ten, and still working
into the back loops, single crochet, one, two, three, four, and five to join, you find that next stitch to
join that row, just like so. Then that's complete in that
row that we just worked. Start in your row and
you slip stitch into the next stitch and you turn, skip those two, four
stitches and single crochet. This is all you will be doing going all the
way around your work. And when you get to the
stitch markers that we left, you place you connect Oh, or we get to the stitch
markers right here, you just insert your
stitches right into there, where your stitch markers are. Make sure you're not
going into one stitch at the very top
because like I said, it's going to stretch
out your work, go down so that you have quite a thickness
where I've placed my stitch marker. Let
me just take this out. As you can see, this was
a half double crochet. This was a half double crochet. You should just go into one
loop like this one for me that would stretch
out my work and would leave my colors
with a bit of hose. So you want to go down a stitch. In my case, I would
go into here to place to connect my row. I believe that makes sense. So since you know how
to join as we go, I'm going to let you guys work
at the rest by yourselves. If it's hard, please be sure to let us know the comments
or the discussion area, and I'll be more we
can discuss together, and I can describe how we do it, but just to show you, one
more time, how we connect. I know this can be
quite challenging for people that maybe it's
a new method too. So one more time, how we connect single crochet, just like so when you reach the color.
So that's my third. Fourth and fifth. When you reach the color
that you're joining, you will find that
next available. Stitch along the corner. You will slip stitch to
join to finalize that row. To start a new row
instead of chaining one, we slip stitch to the
next stitch and turn, and that's all you're
doing all the way around. You skip the first
two, four stitches and you make five single
crochets back and forth, back and forth, and you're going to do this coin all the way around up until you
reach the other end, so the other side of your color.
14. Weaving in all ends: So that finalizes my collar, and I'm just going to
make a chain of one, grab my scissors,
leave a bit of a tail. Snip that off and just gonna pull that
through, just like so. So with the work all done, the final part is to just
weave in all the ends. So I've got some ends
to weave in right here, this part and the other
end of the collar where we begun on the sleeves, both sleeves and somewhere
around the neck, right there. So I'm just going to get
my needle and host up. I'll show you how we
weave in the ends. This is the one
that I like to use. If you've got anything different from mine, that's
absolutely fine. So I already showed you
how to weave in one end. So how we did that one is just how we're going
to do this, as well. So I'm just going to turn my
work upside down like so, and I will just start
weaving in on this side, on the chained end where we had our first row of the color. And I will just go in, weaving in and out like, so until I feel or
believe it's safe to cut. But right now it's
not safe to cut because I only had five
chains right here. So I'm going to go through
this side as well. And if you recall, we already had another chain, but
you can't even see it. It's not this one, not worry. That was just some
that was left over. So going through,
like so, like so. And as we do this, like, the yarn is getting weaved in
into the rest of the work. And as others like to do, I prefer it being the
inside of your work. So this is the
inside of your colu. So others would like to
just go through. I do this. I'm not with others L I
don't do it. I do it too. S. You could just go through the stitches at
the very top just like so. So this way, if it
was to probe out, you can always capture it or cut it off. That's
I'm talking about. The answer is, if it
was to stick out, it's okay because it's not going to be shown to
the rest of the world, and your cardigan will
still be left quite neat. So this far, I think I have
weaved in quite enough. Gonna get my scissors. And like I always say, I
like to pull it out a bit, get my scissors
and cut that off, and then I like to stretch
it out again, just like so. And I have weaved that in. I'll go ahead and repeat that
for this part, this end. So for the sleeves,
I like to just use. So that seam that we used the slipstich that we did
to connect both sides, I like to just weave it into that on the inside of the work, and it won't show. So you do that for
the both sleeves and you do what we just did for
this side of the color, for the other side of the color. And then for the neck area. So the yards that
you had on the neck, you can also just weave in along the neck
while you were single draining this slip stitch to connect the color and
the rest of the body. So go ahead and
weave in your ends, and then we will go on
to that last final part. And this far, you are all
done with you crocheting, all that's left to do is block. So before we go any further, let's just do another
project tracker. So we have finished our color, and we have weaved
in all the ends. This far, all that we're
left to do is block.
15. Pre Blocking: So here I am wearing that
finished card again, and obviously it's
before blocking, so it looks a bit too
cropped or the hand, if you can see, my sleeve is not reaching
where I wanted it to reach because the initial
chain that I made, I wanted the sleeve
to reach right there. So this is what it looks
like before we block, and I'll give you a 360. That's the back. And you can see where my
collar is laying. So after we block, they
will drop a bit more, as well as as the stitches
will relax, it will relax. I will get slightly longer. So after I finish blocking, I will try and wear
the same clothes. So maybe you can
see a difference, and I'll try and move
back so that you can have a proper angle of what
it looks like right now. So let's go and block.
16. How to block the cardigan: You want to find a bucket or whatever you have big enough
to hold your cardigan. Now, you want to put
some soap in there, any soap that you want, and you're going to soak
your cardigan in. And you see me gently
pressing it down, making sure the whole cardigan
is very nice and soaked. And now, after you do that,
you want to leave it in the bucket for about
ten to 15 minutes. After the time has elapsed, now it's time to take it out
and squeeze the water out. Now, you want to do this. You don't want to
twist and squeeze. You want to do just as
I'm doing, squeezing it. And obviously, this is
not going to take out all the water, but not to worry. We're going to press it
to get some water out. So you want to repeat
this a few times. So after you get to the
bottom, like I'm doing, you're going to go
back to the top and squeeze as much
water as you can. Make sure, like I said, you're not twisting because
if you twist, you might pull on the stitches and you
don't want to do that. Now that we're all done, it's time to squeeze it some more. And I'm just gonna find a towel. Find a towel, whatever you have. I recommend a towel and you
want to lay nice and flat on your towel so that you can squeeze out the excess excess
water that we have left. So after you've straightened everything out and
laid it properly, you're gonna fold the
towel with the cardigan inside and just roll it just like I'm doing in this video. And we're doing
this so that we can squeeze any excess
water that's left. So you can use your hands,
but that doesn't do much. So standing on it, putting
all of your weight on it is going to help
take all the excess water. Now, after you're
done, you want to take another towel, a dry one, and lay it flat just like I've done and let it dry for
however long it takes.
17. Post Blocking: In love. I am in love. Like I said, I would wear the same clothes,
and I did just that. And I'm sure you can already see the difference from the sleeves. Look at that.
Already. I remember before when I was holding it up, the sleeve was somewhere up
here, even when it was down. But now, Everything is
where I wanted it to be. The initial idea I
had of the sleeve, it's reaching exactly where
I wanted it to reach. And the card again, it
has now lowered because before it was somewhere
up here, now down there. And this was the initial
chain that I made because I wanted to go from
right here to here, and it's exactly what I have. And the back, this is
what it's looking like. So far, this is how low my
shoulders have dropped. Not too low, and it's
exactly what I wanted. So this is the power of blocking when the
stitches relaxed, and I've noticed
that the and I'm using, as I keep washing it, it might kind of increase
just a bit more, not too much because I have made this for
my sister before, and I decided I'm going
to make myself one. So the one I made for my sister, I noticed that after
she washed it, and she handwashes
it, by the way. So after each and every wash, there's a little
bit of an increase, not too much when she wears it, it still looks
beautiful breathtaking. But this is what we have. I'm in love.
18. Outro: In this f, you have completed your own customized cardigan and you have made this
cardigan to fit you, your body size, your type, and you have made it to a
length that you prefer. Now remember, if there's
anything that was a bit confusing or you need
more clarification with, there's that discussion
area that you can always write something in question
or a concern that you have, and I'll be more than happy to respond and get back to you. I cannot wait to see
pictures of the color, the design, the yard that you used to make
your card digan. I cannot wait to see the different variations
that have come out using this technique that I have taught
you in this class. Until next time, see you later.
 Charity Limbithu, Modern Crochet Designer